
diff options
Diffstat (limited to 'content/blog/2023-06-23-self-hosting-convos.md')
| -rw-r--r-- | content/blog/2023-06-23-self-hosting-convos.md | 161 |
1 files changed, 0 insertions, 161 deletions
diff --git a/content/blog/2023-06-23-self-hosting-convos.md b/content/blog/2023-06-23-self-hosting-convos.md deleted file mode 100644 index 703a598..0000000 --- a/content/blog/2023-06-23-self-hosting-convos.md +++ /dev/null @@ -1,161 +0,0 @@ -+++ -date = 2023-06-23 -title = "Self-Hosting Convos IRC Web Client" -description = "" -draft = false -+++ - -# Convos - -[Convos](https://convos.chat/) is an always-online web client for IRC. It has a -few features that made it attractive to me as a self-hosted option: - -- Extremely simple Docker Compose installation method. -- Runs in the background and monitors chats even while you're not logged in. -- Neatly organized sidebar for conversation and client settings. -- Ability to connect to different hosts and create profiles for hosts. -- By default, registration is closed to the public. You can enable public - registration on the Settings page or generate invitation links on the Users - page. -- Customization of the client theme, organization name and URL, admin email, - and video service. - -# Docker Installation - -To install Convos, simply create a directory and a `docker-compose.yml` file: - -```sh -mkdir ~/convos && cd ~/convos -nano docker-compose.yml -``` - -With the `docker-compose.yml` file open, paste the configuration below into the -file. You can customize the host port to be something unique, such as -`21897:3000`. You can also change the `data` folder to be a docker volume -instead, if you prefer. - -```config -version: '3' - -services: - convos: - image: 'convos/convos:stable' - ports: - - '3000:3000' - volumes: - - './data:/data' - environment: - - CONVOS_REVERSE_PROXY=1 - restart: always -``` - -Save the `docker-compose.yml` file and bring the container up: - -```sh -sudo docker-compose up -d -``` - -At this point, Convos is available at `<server_ip>:3000` but not available to -the public. - -# Nginx Reverse Proxy - -If you're using Nginx, you can create a configuration file for the convos -application. Start by opening the file: - -```sh -nano /etc/nginx/sites-available/convos -``` - -Within the nginx configuration file, paste the following content and be sure to -update `convos.example.com` to match your domain and `127.0.0.1:3000` to match -the port you opened in the `docker-compose.yml` file. - -```config -# Host and port where convos is running -upstream convos_upstream { server 127.0.0.1:3000; } - -server { - if ($host ~ ^[^.]+\.example\.com$) { - return 301 https://$host$request_uri; - } - - listen [::]:80; - listen 80; - server_name convos.example.com; - return 404; -} - -server { - listen [::]:443 ssl http2; - listen 443 ssl http2; - server_name convos.example.com; - access_log /var/log/nginx/convos.access.log; - error_log /var/log/nginx/convos.error.log; - - location / { - proxy_pass http://convos_upstream; - proxy_http_version 1.1; - proxy_set_header Upgrade $http_upgrade; - proxy_set_header Connection "upgrade"; - client_max_body_size 0; - proxy_set_header Host $host; - proxy_set_header X-Forwarded-For $proxy_add_x_forwarded_for; - proxy_set_header X-Request-Base "$scheme://$host/"; - } - - ssl_certificate /etc/letsencrypt/live/example.com/fullchain.pem; - ssl_certificate_key /etc/letsencrypt/live/example.com/privkey.pem; - include /etc/letsencrypt/options-ssl-nginx.conf; - ssl_dhparam /etc/letsencrypt/ssl-dhparams.pem; -} -``` - -Once the file is saved, link it to the `sites-enabled` directory and restart -Nginx. - -```sh -sudo ln -s /etc/nginx/sites-available/convos /etc/nginx/sites-enabled/convos -sudo systemctl restart nginx.service -``` - -# Screenshots - -See the screenshots below for an example of the Convos homepage and an excerpt -of the chat screen. - -There are numerous themes to choose from; the theme shown in the images below is -Dracula. - -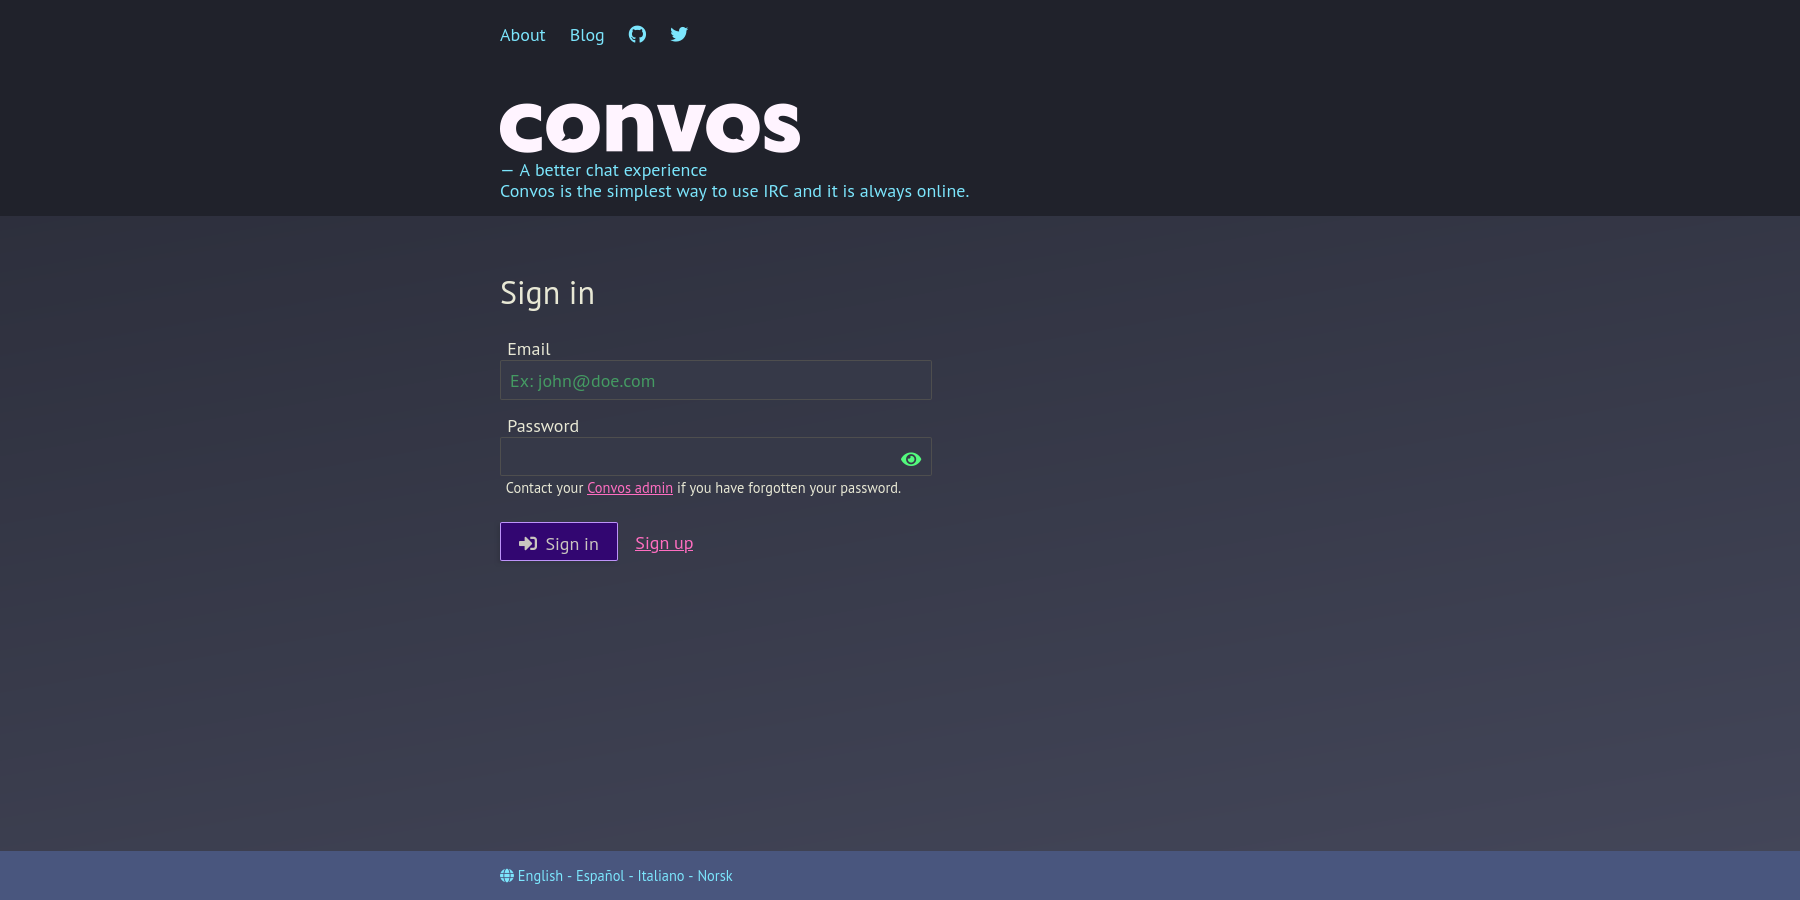 - -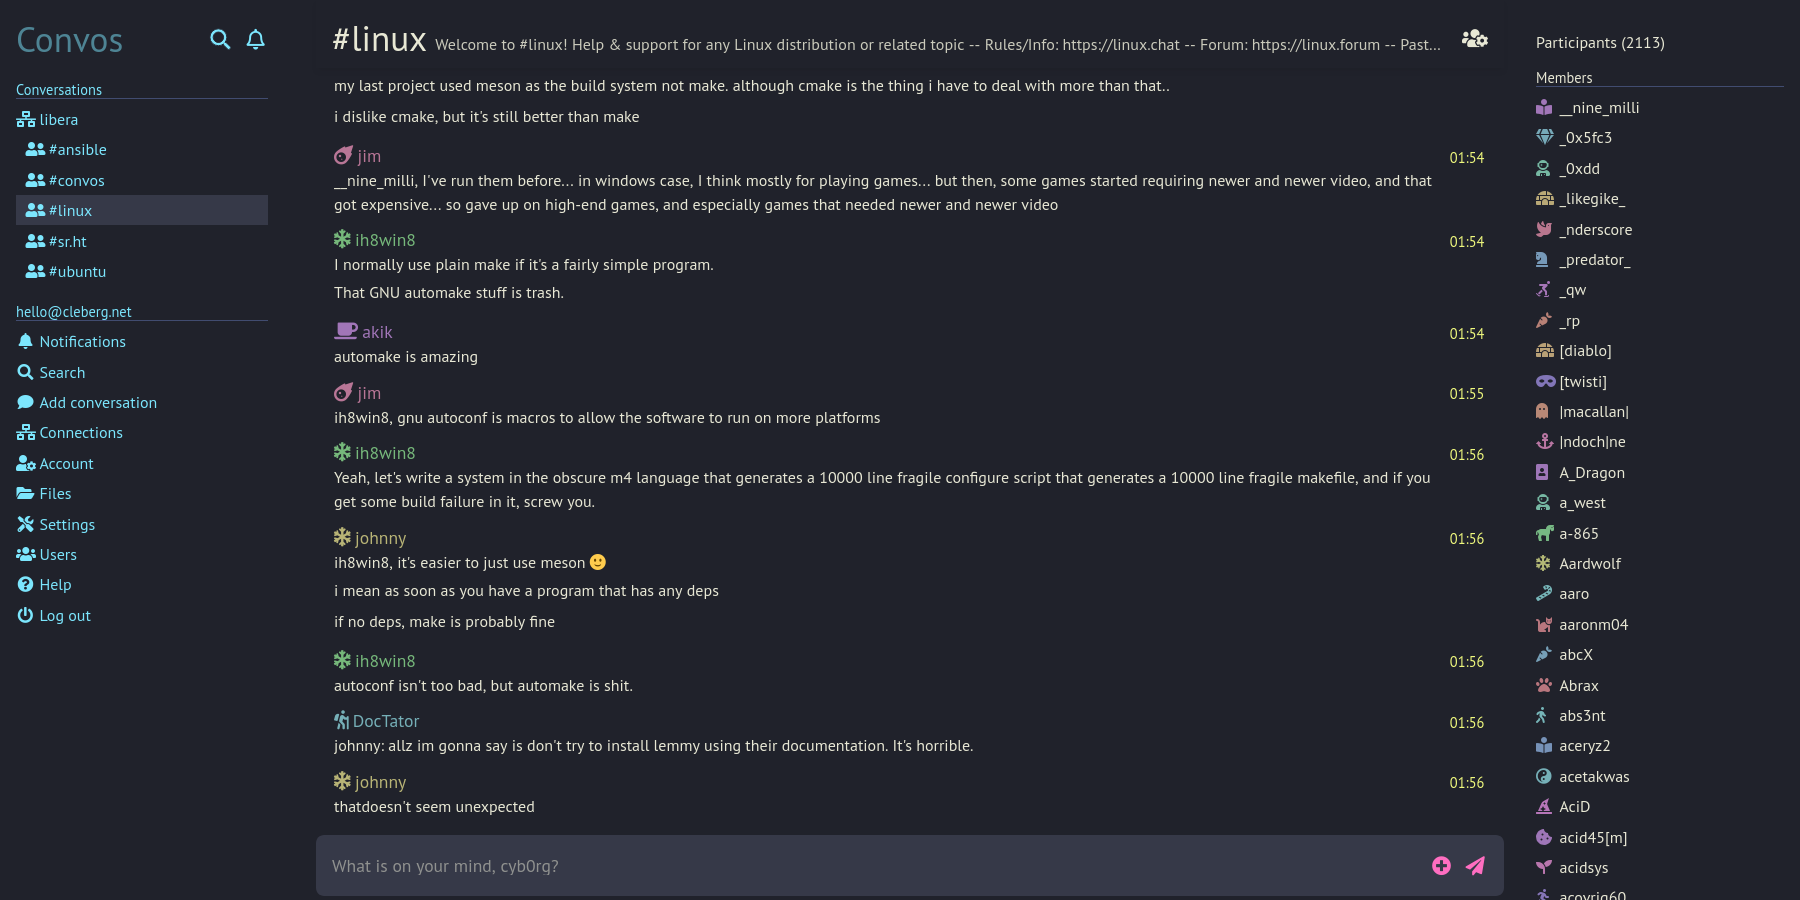 - -# Registering a Nickname - -Hop into the server channel so that you can message NickServ. In the case of -Convos, the default sever is libera.chat. Simply click the `libera` conversation -at the top of the sidebar to open it. Once the chat is open, you can claim a -nickname by typing: - -```txt -/nick <nick> -``` - -If the nickname is available, and you'd like to register the nickname to -yourself, you'll need to type another command: - -```txt -/msg NickServ REGISTER -<password> <email> -``` - -On libera.chat, the server will send a confirmation email with a command that -you must message in IRC to verify registration of the nickname: - -```txt -/msg NickServ VERIFY REGISTER <nick> <verification_code> -``` - -Once entered, the server should confirm registration of the nickname to the -supplied email with the password specified. |