
diff options
Diffstat (limited to 'content')
| -rw-r--r-- | content/blog/2024-01-09-macos-customization.md | 29 | ||||
| -rw-r--r-- | content/blog/2024-01-13-local-llm.md | 13 | ||||
| -rw-r--r-- | content/blog/2024-01-26-audit-dashboard.md | 36 | ||||
| -rw-r--r-- | content/blog/2024-02-21-self-hosting-otter-wiki.md | 16 | ||||
| -rw-r--r-- | content/blog/2024-04-06-convert-onenote-to-markdown.md | 12 | ||||
| -rw-r--r-- | content/blog/2024-04-18-mu4e.md | 12 | ||||
| -rw-r--r-- | content/blog/2024-05-03-ubuntu-on-macos.md | 10 |
7 files changed, 13 insertions, 115 deletions
diff --git a/content/blog/2024-01-09-macos-customization.md b/content/blog/2024-01-09-macos-customization.md index ac2ddfd..e9af8db 100644 --- a/content/blog/2024-01-09-macos-customization.md +++ b/content/blog/2024-01-09-macos-customization.md @@ -42,11 +42,9 @@ I use [iTerm2](https://iterm2.com/), which can be installed with Homebrew: brew install iterm2 ``` -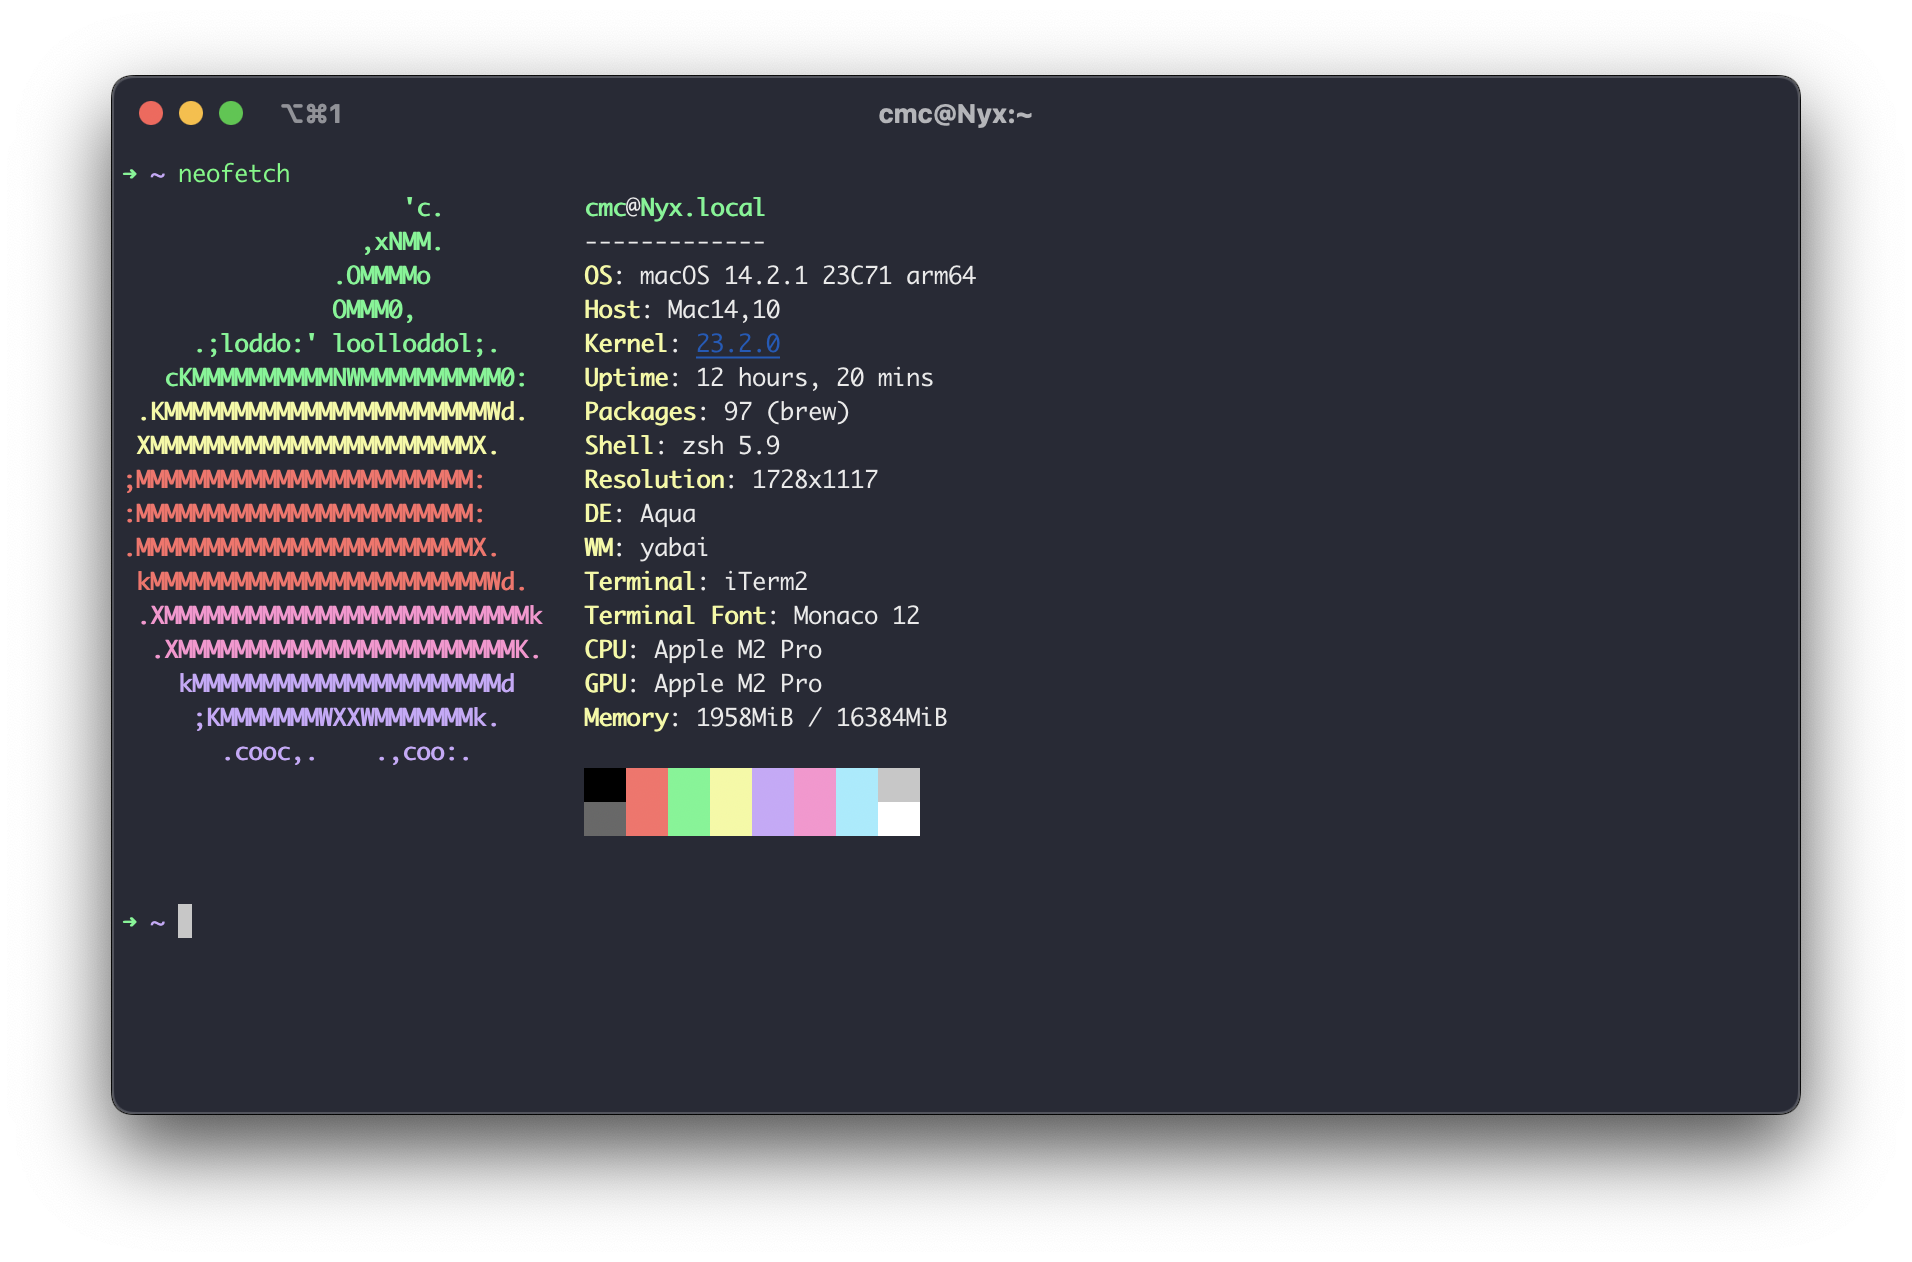 - -To install color schemes, such as the Dracula scheme shown in the screenshot -above, you visit [iTerm Themes](https://iterm2colorschemes.com/) and follow -their installation instructions to install any of the themes. +To install color schemes, such as the Dracula scheme, you visit [iTerm +Themes](https://iterm2colorschemes.com/) and follow their installation +instructions to install any of the themes. # Desktop @@ -65,12 +63,6 @@ wiki](<https://github.com/koekeishiya/yabai/wiki/Installing-yabai-(latest-releas for installation instructions. You will need to ensure that yabai is allowed to access the accessibility and screen recording APIs. -You can see a basic three-pane layout atuomatically configured by yabai for me -as I opened the windows below. - -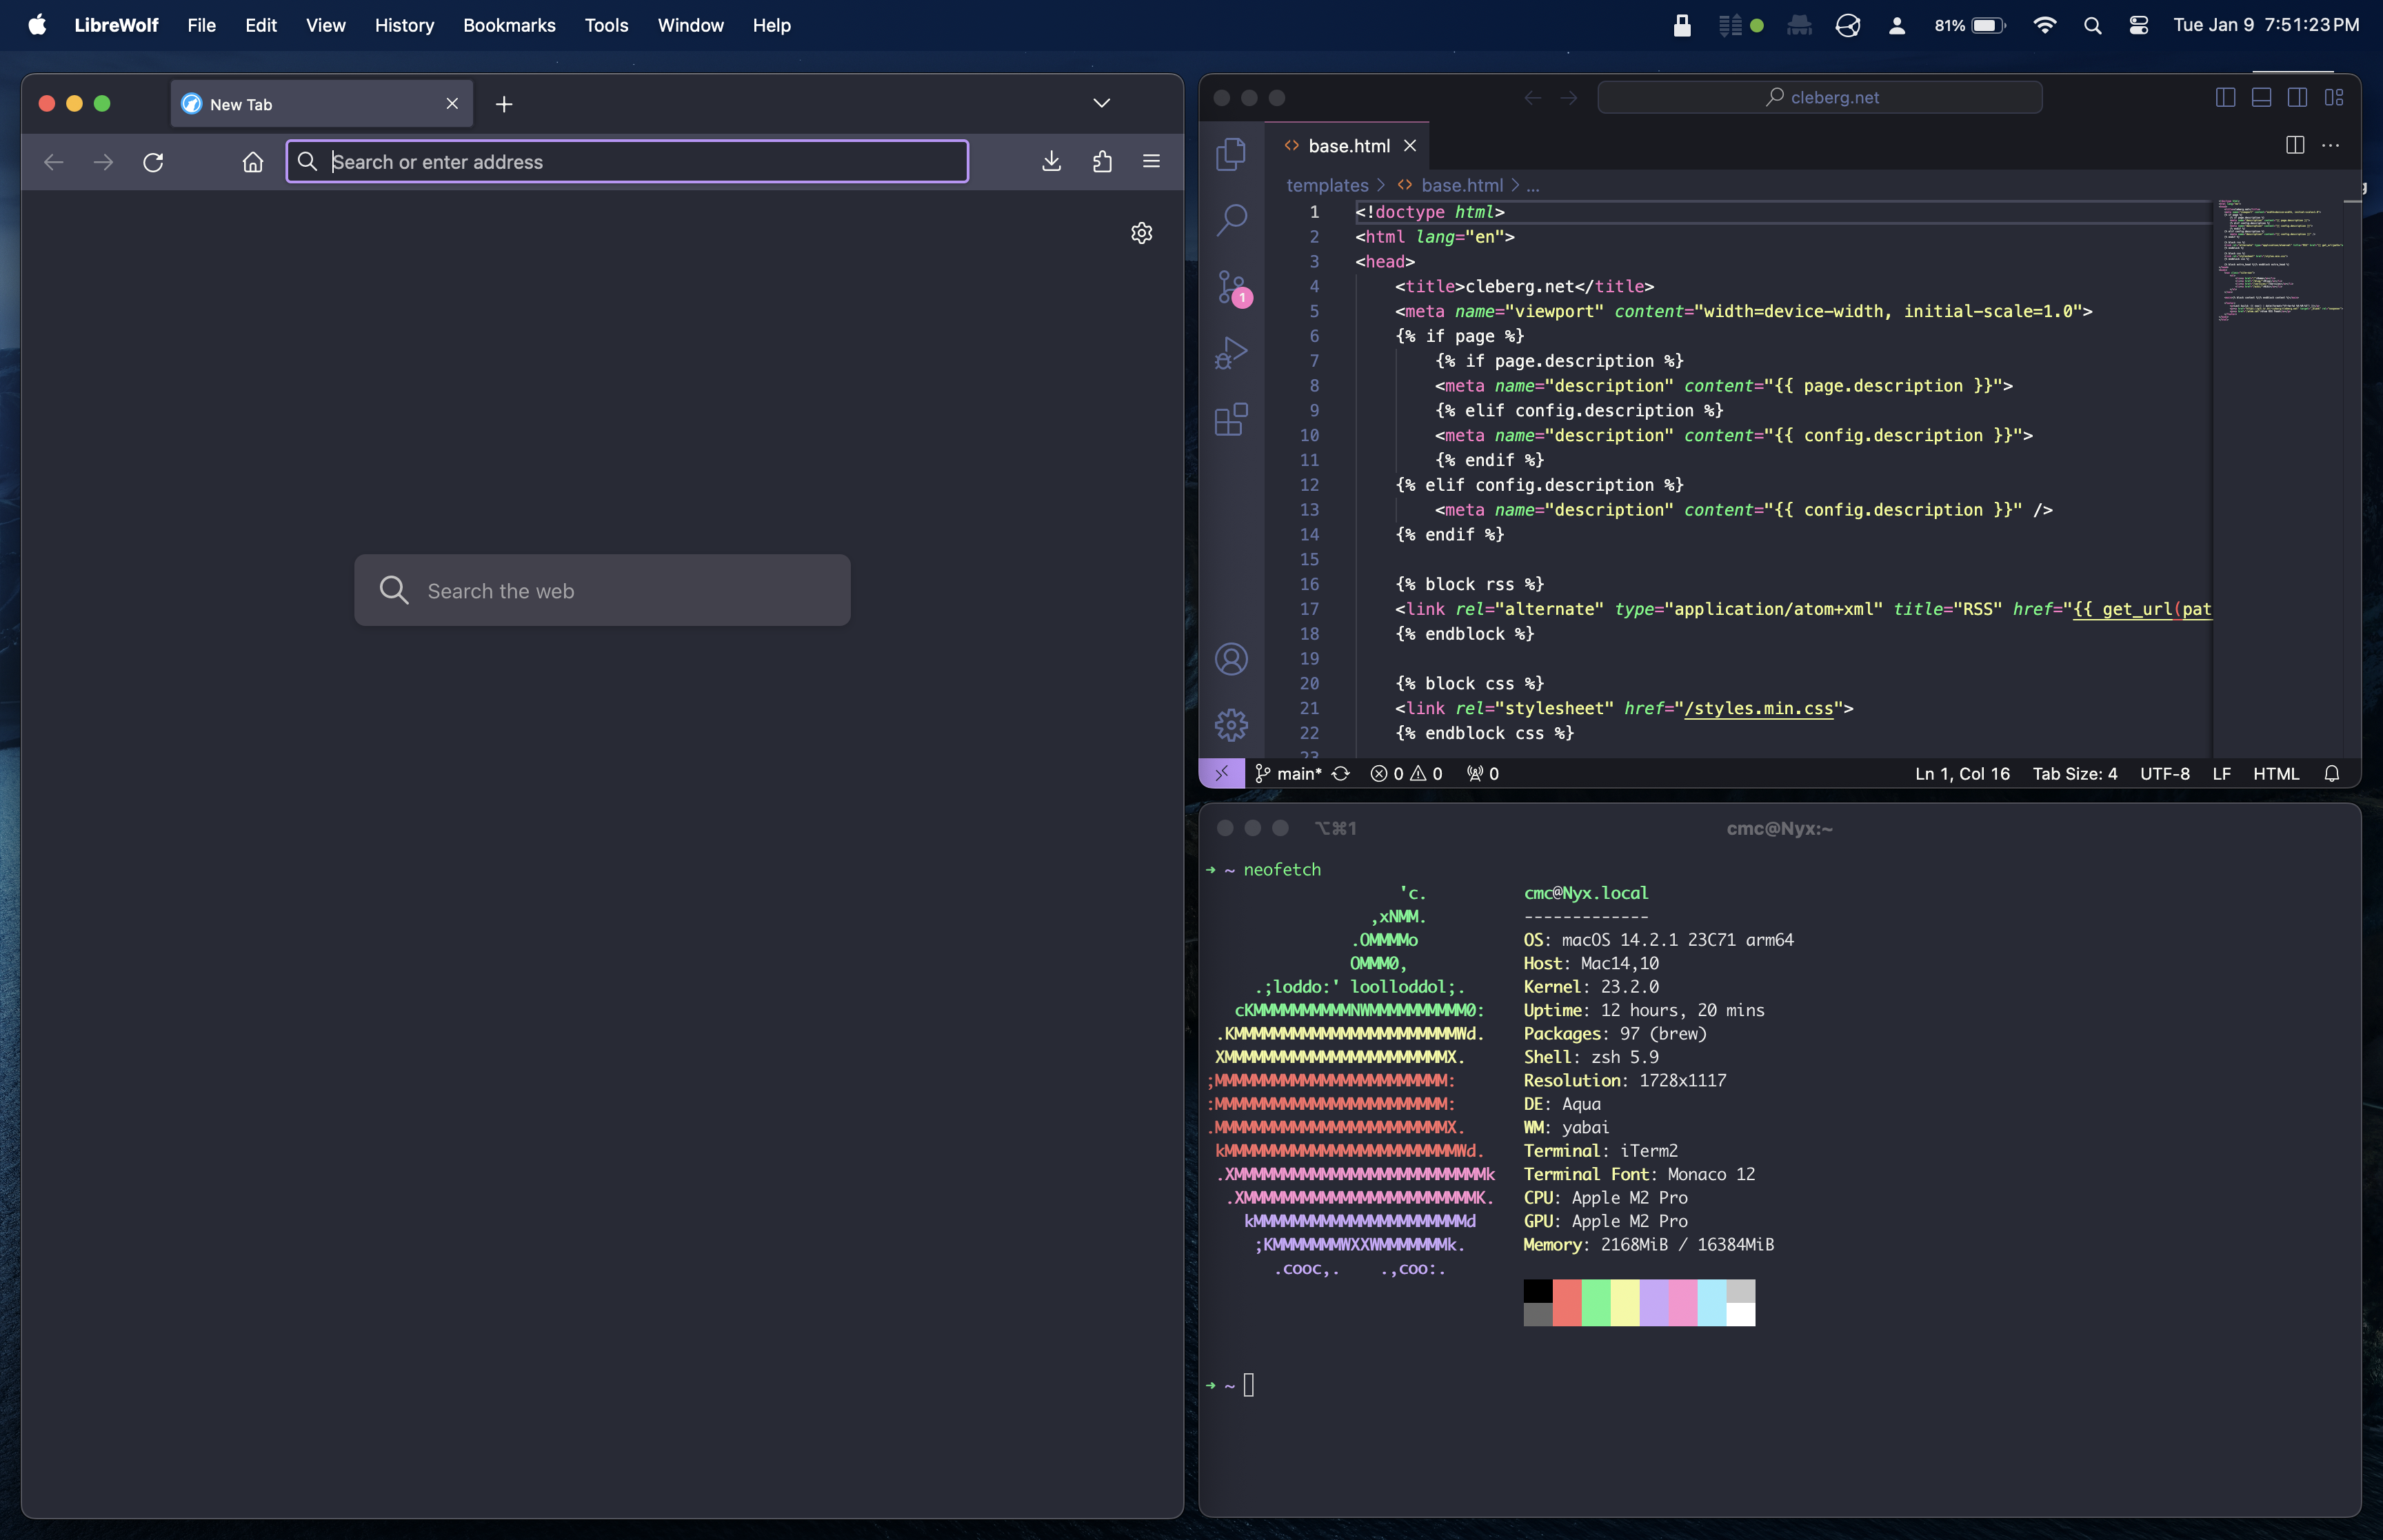 - ## Keyboard Shortcuts [skhd](https://github.com/koekeishiya/skhd) is a simple hotkey daemon that @@ -116,9 +108,6 @@ folder. See below for an example of the [Mond](https://tracesof.net/uebersicht-widgets/#Mond) widget in action. -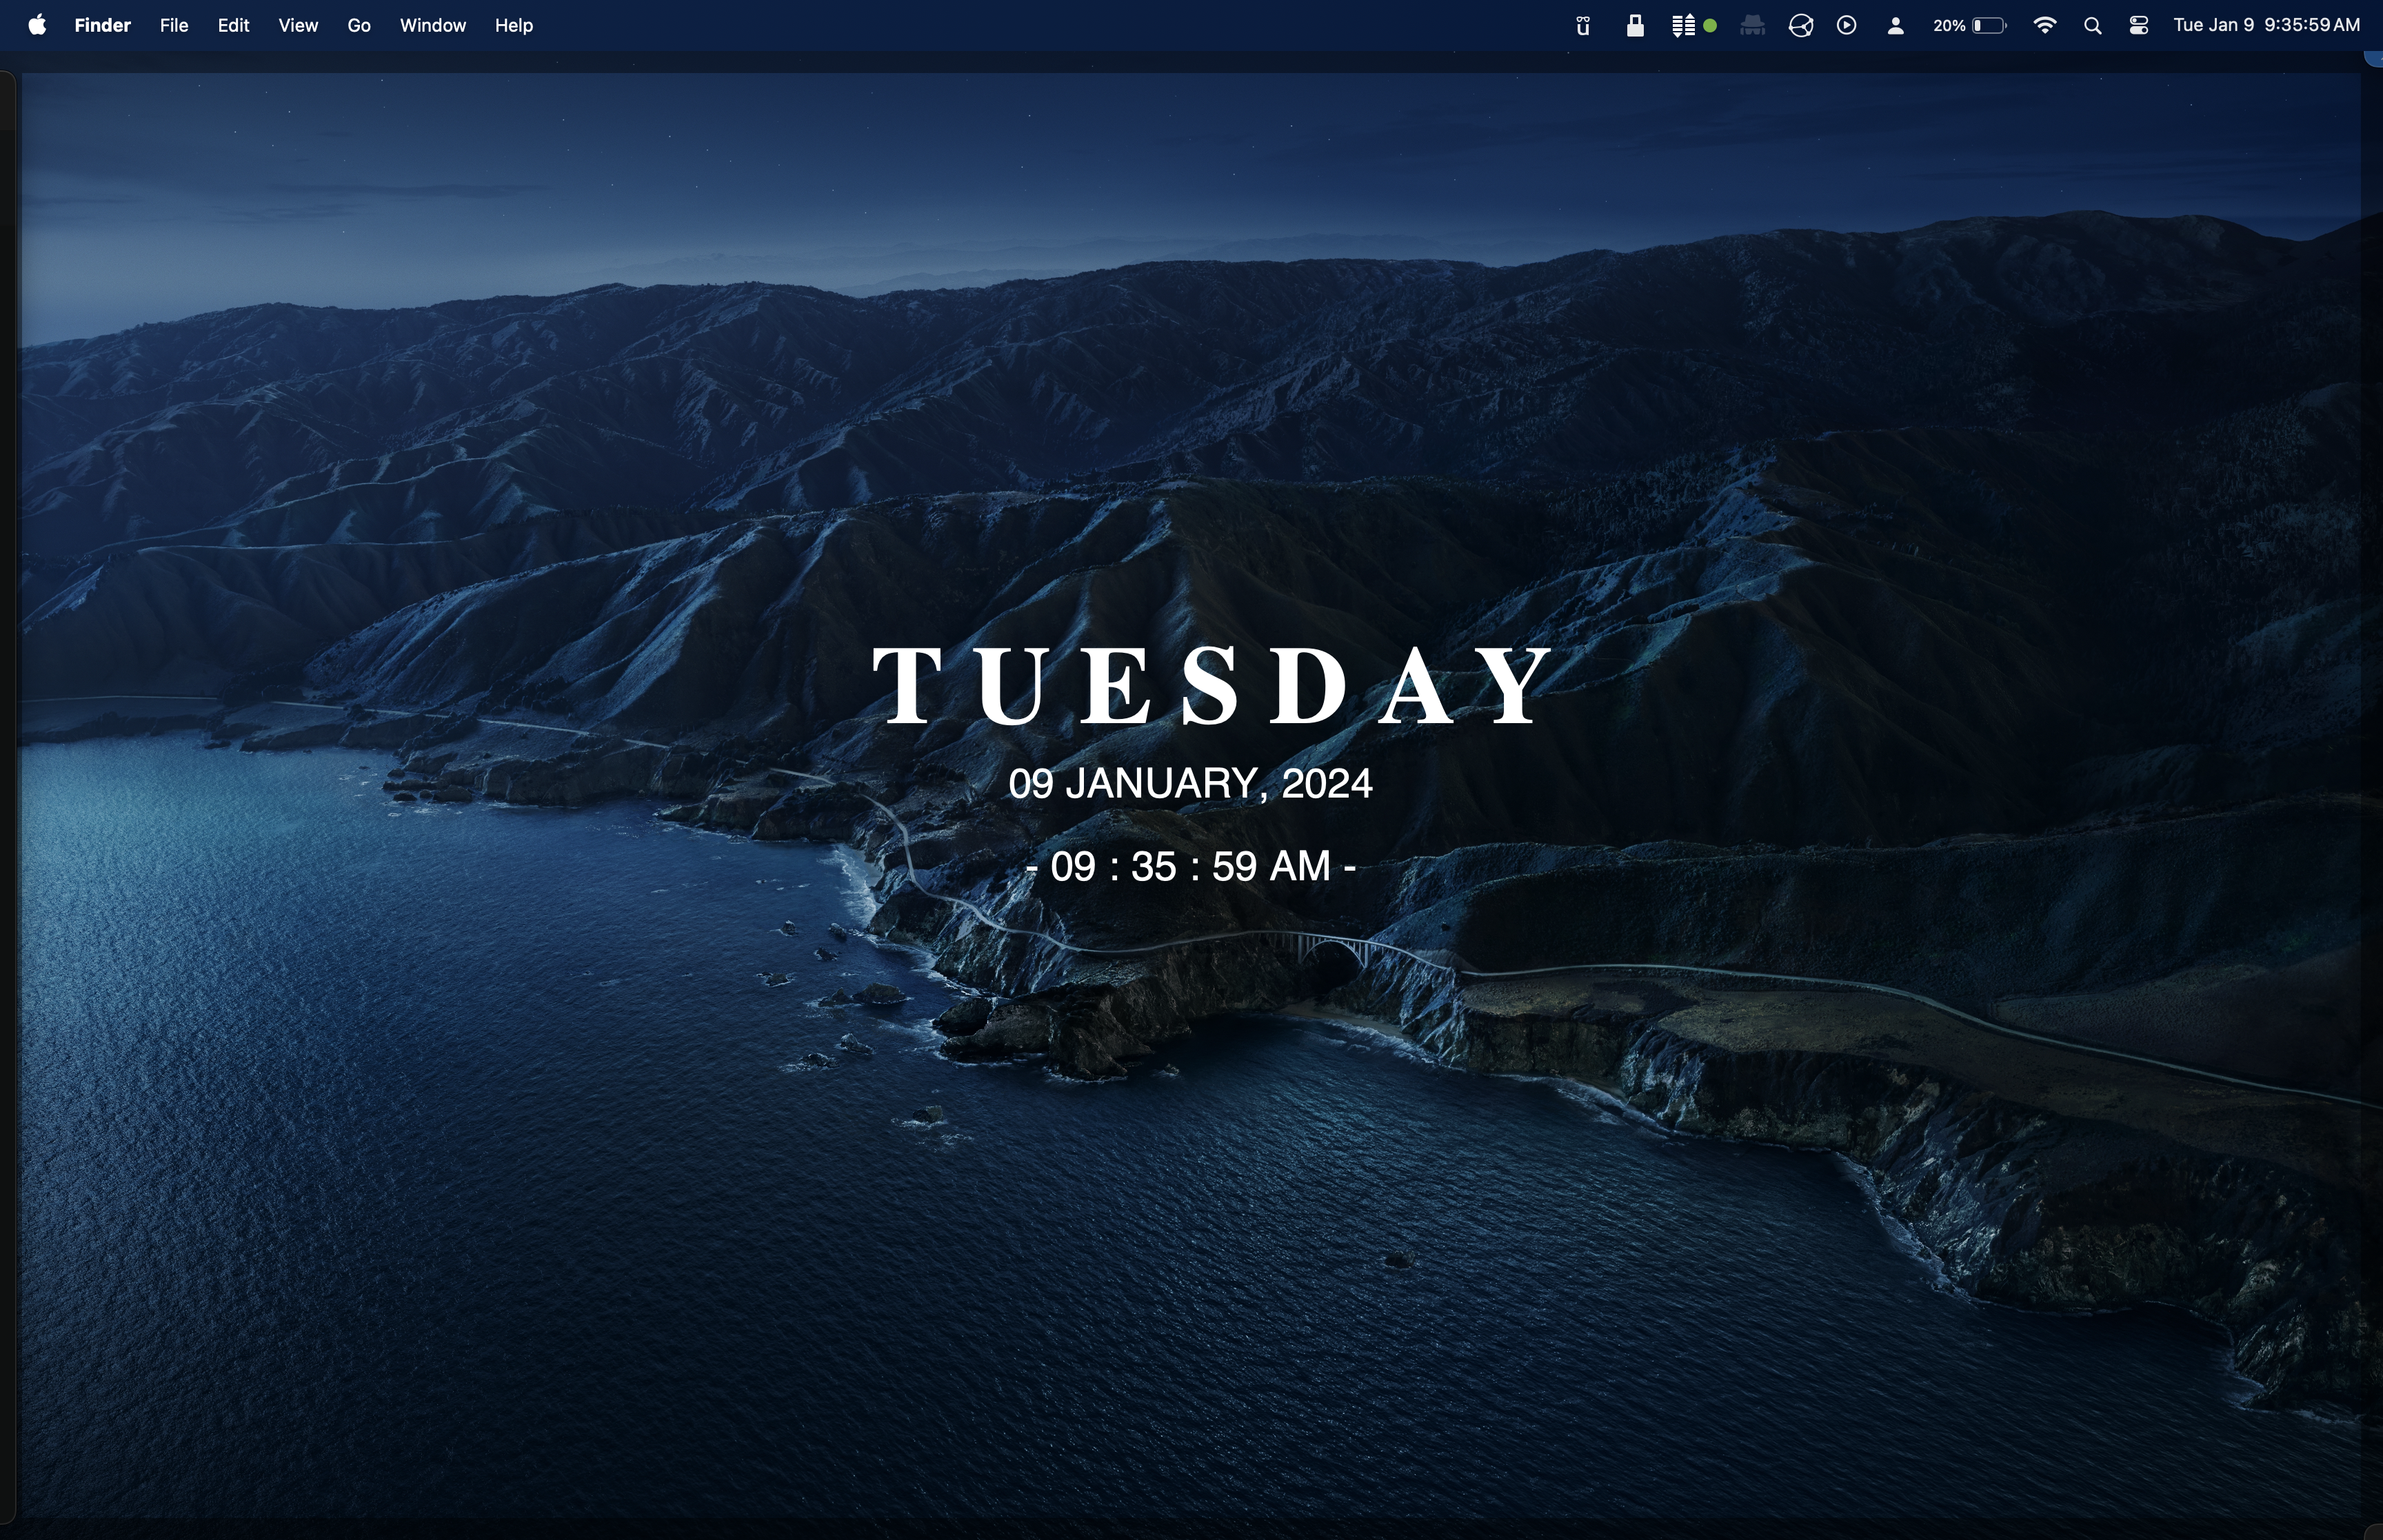 - ## Status Bar [SketchyBar](https://github.com/FelixKratz/SketchyBar) is a customizable @@ -128,11 +117,6 @@ You can browse a discussion where various users shared their [configurations](https://github.com/FelixKratz/SketchyBar/discussions/47?sort=top) for inspiration or to copy their dotfiles. -See below for a quick (& slightly broken) copy of -[zer0yu's](https://github.com/zer0yu/dotfiles) SketchyBar configuration. - - - ## Dock The easiest way to customize the dock is to install @@ -146,8 +130,6 @@ use the built-in dock instead of customizing it with third-party software. Regardless, see below for the default installation style of uBar. - - ## Application Icons You can also customize the icon of any application in macOS, which will show up @@ -163,8 +145,3 @@ them by following this process. over it). 5. Release the new icon on top of the old icon and it will update! -You can see an example of me dragging a new `signal.icns` file onto my -Signal.app information window to update it below: - -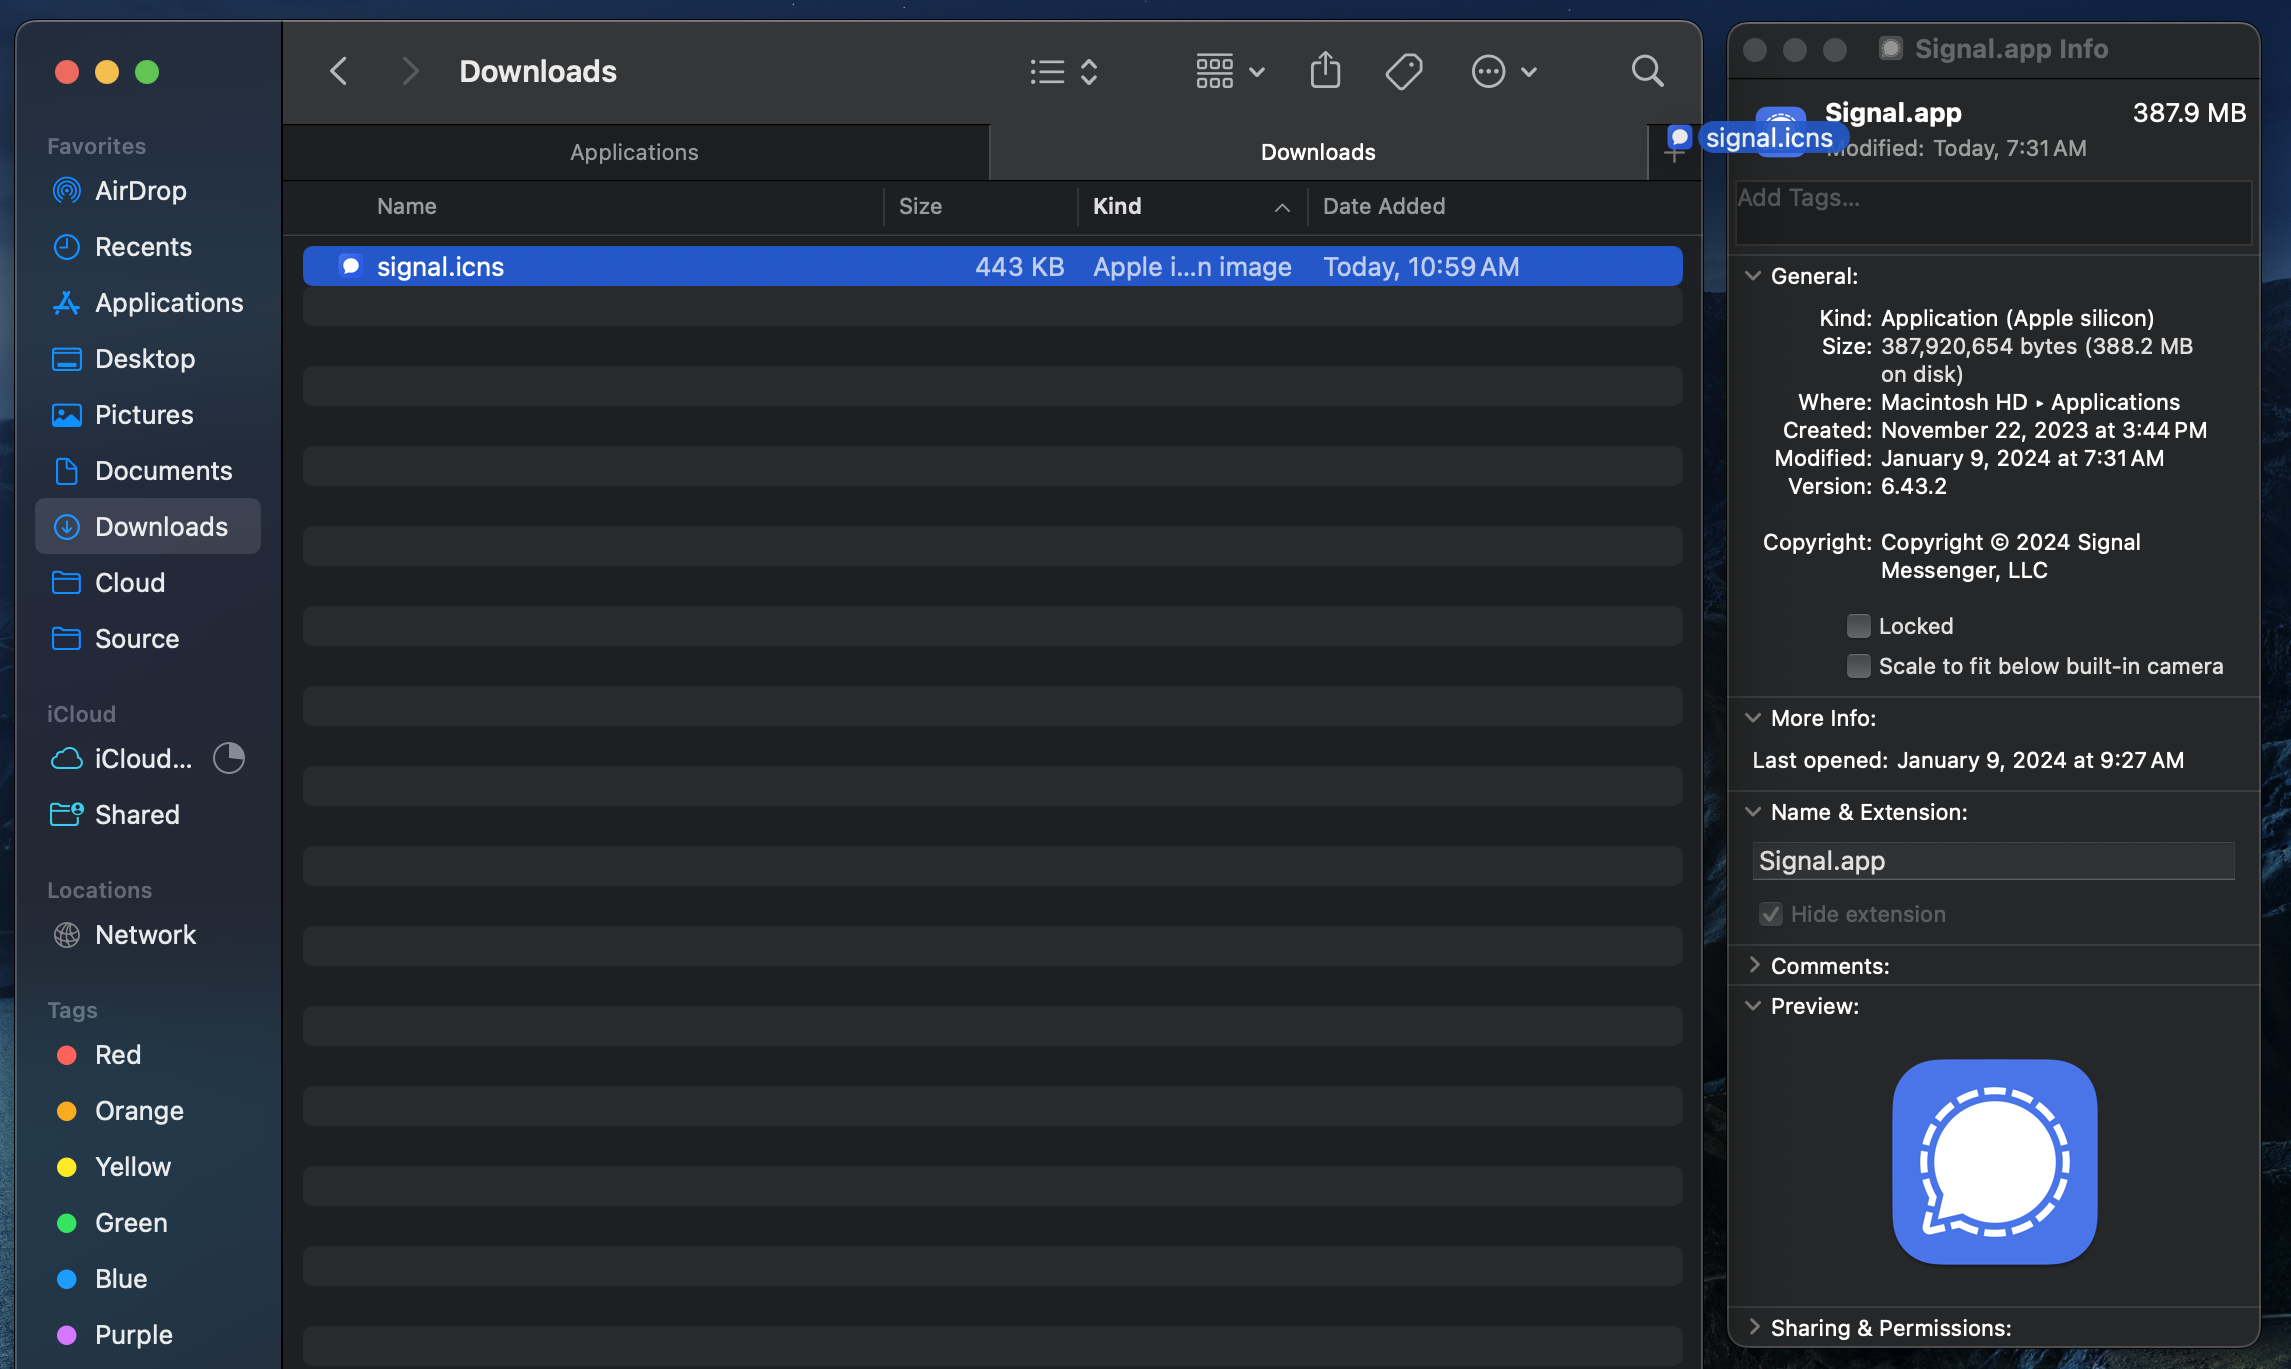 diff --git a/content/blog/2024-01-13-local-llm.md b/content/blog/2024-01-13-local-llm.md index ede130e..b6e1f86 100644 --- a/content/blog/2024-01-13-local-llm.md +++ b/content/blog/2024-01-13-local-llm.md @@ -50,16 +50,12 @@ After running the app, the app will ask you to open a terminal and run the default `llama2` model, which will open an interactive chat session in the terminal. You can startfully using the application at this point. -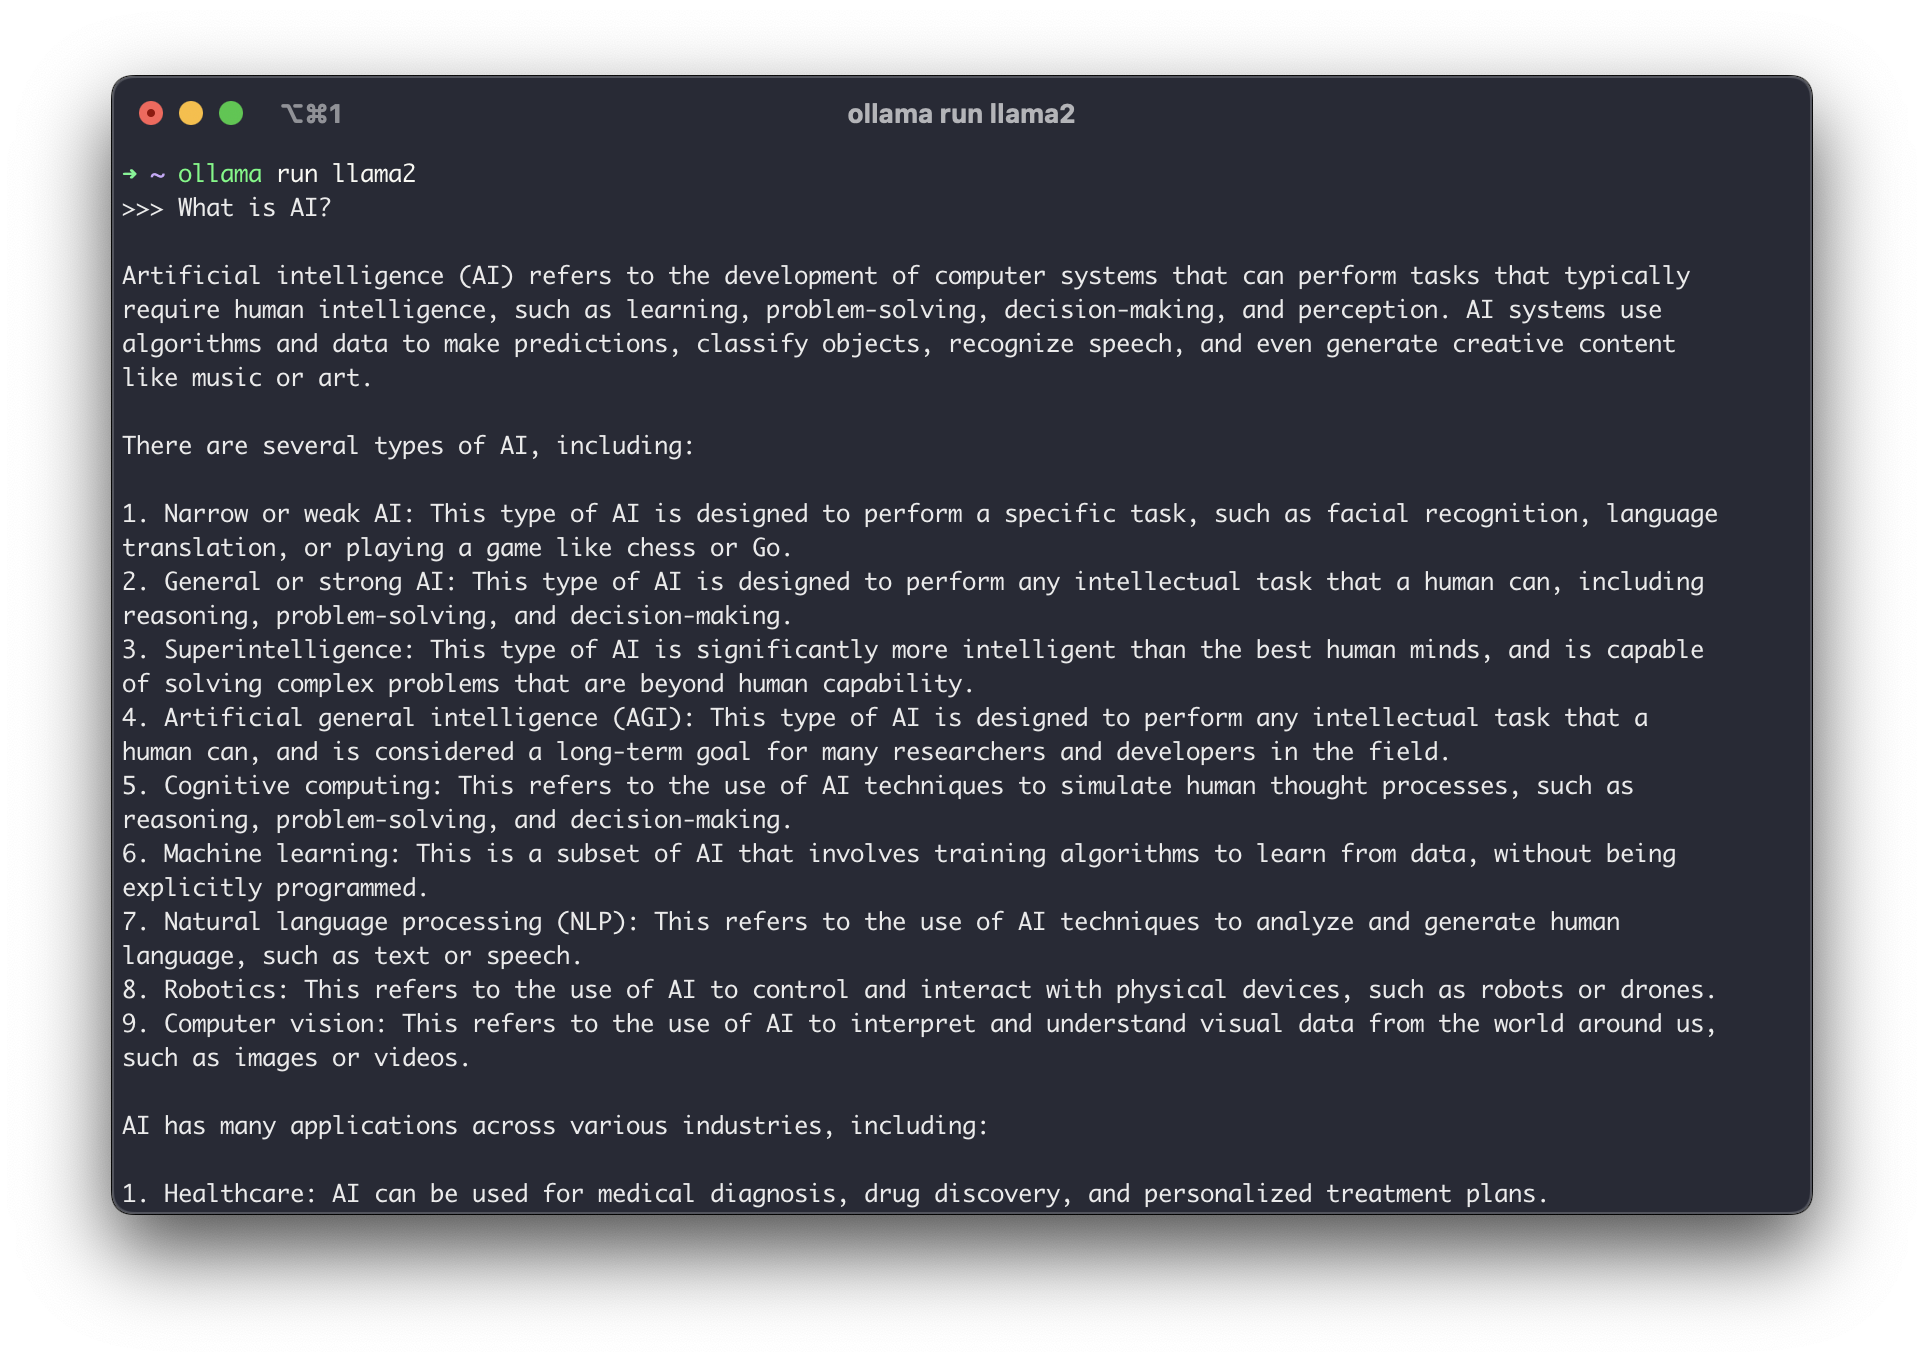 - If you don't want to use the default `llama2` model, you can download and run additional models found on the [Models](https://ollama.ai/library) page. To see the information for the currently-used model, you can run the `/show info` command in the chat. -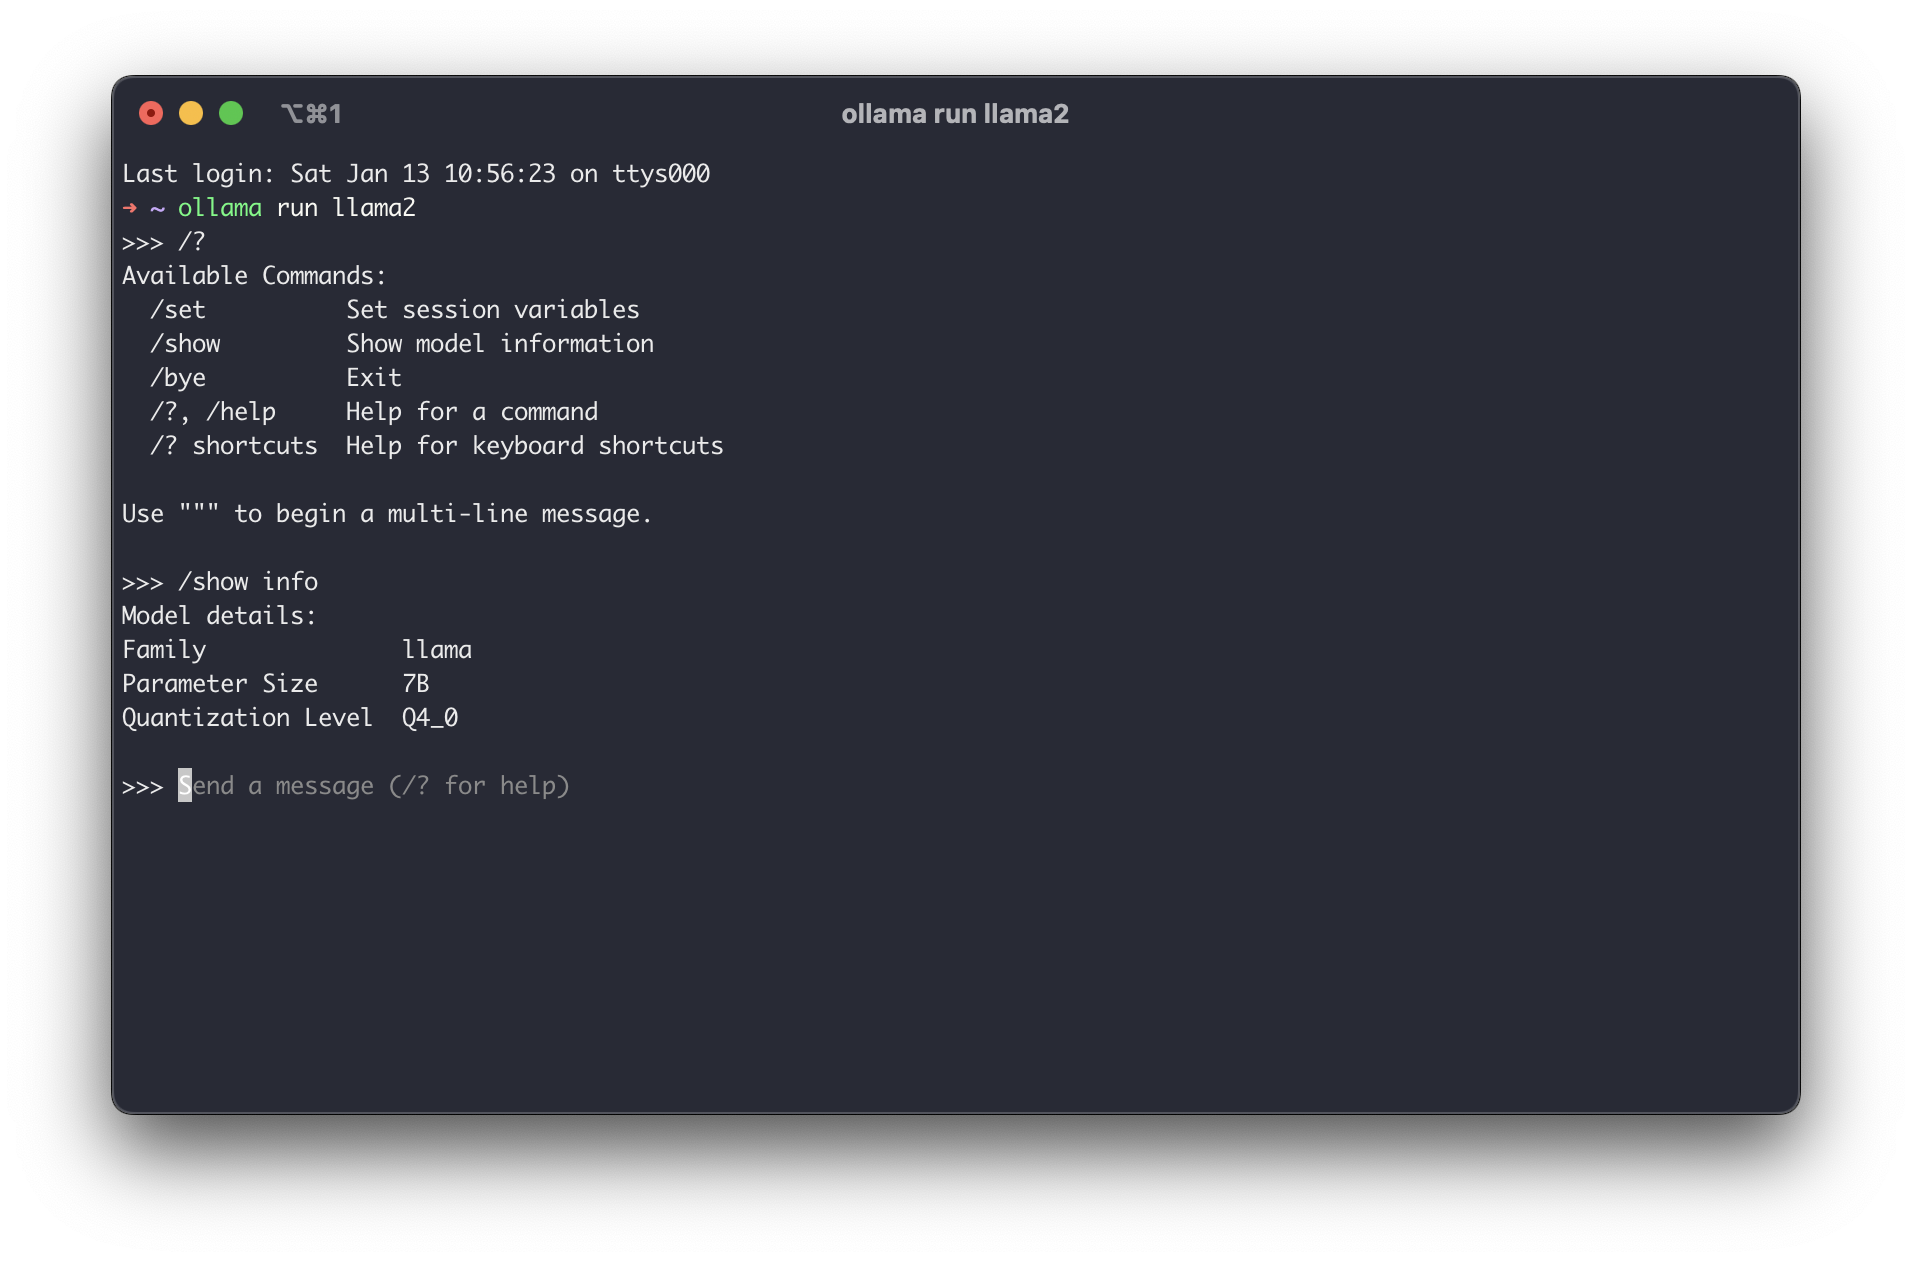 - ## Community Integrations I highly recommend browsing the [Community @@ -68,9 +64,6 @@ section of the project to see how you would prefer to extend Ollama beyond a simple command-line interface. There are options for APIs, browser UIs, advanced terminal configurations, and more. - - # iOS While there are a handful of decent macOS options, it was quite difficult to @@ -93,12 +86,6 @@ Once you have a file downloaded, you simply create a new chat and select the downloaded model file and ensure the inference matches the requirement in the `models.md` file. -See below for a test of the ORCA Mini v3 model: - -| Chat List | Chat | -| ----------------------------------------------------------------------- | ----------------------------------------------------------------- | -| 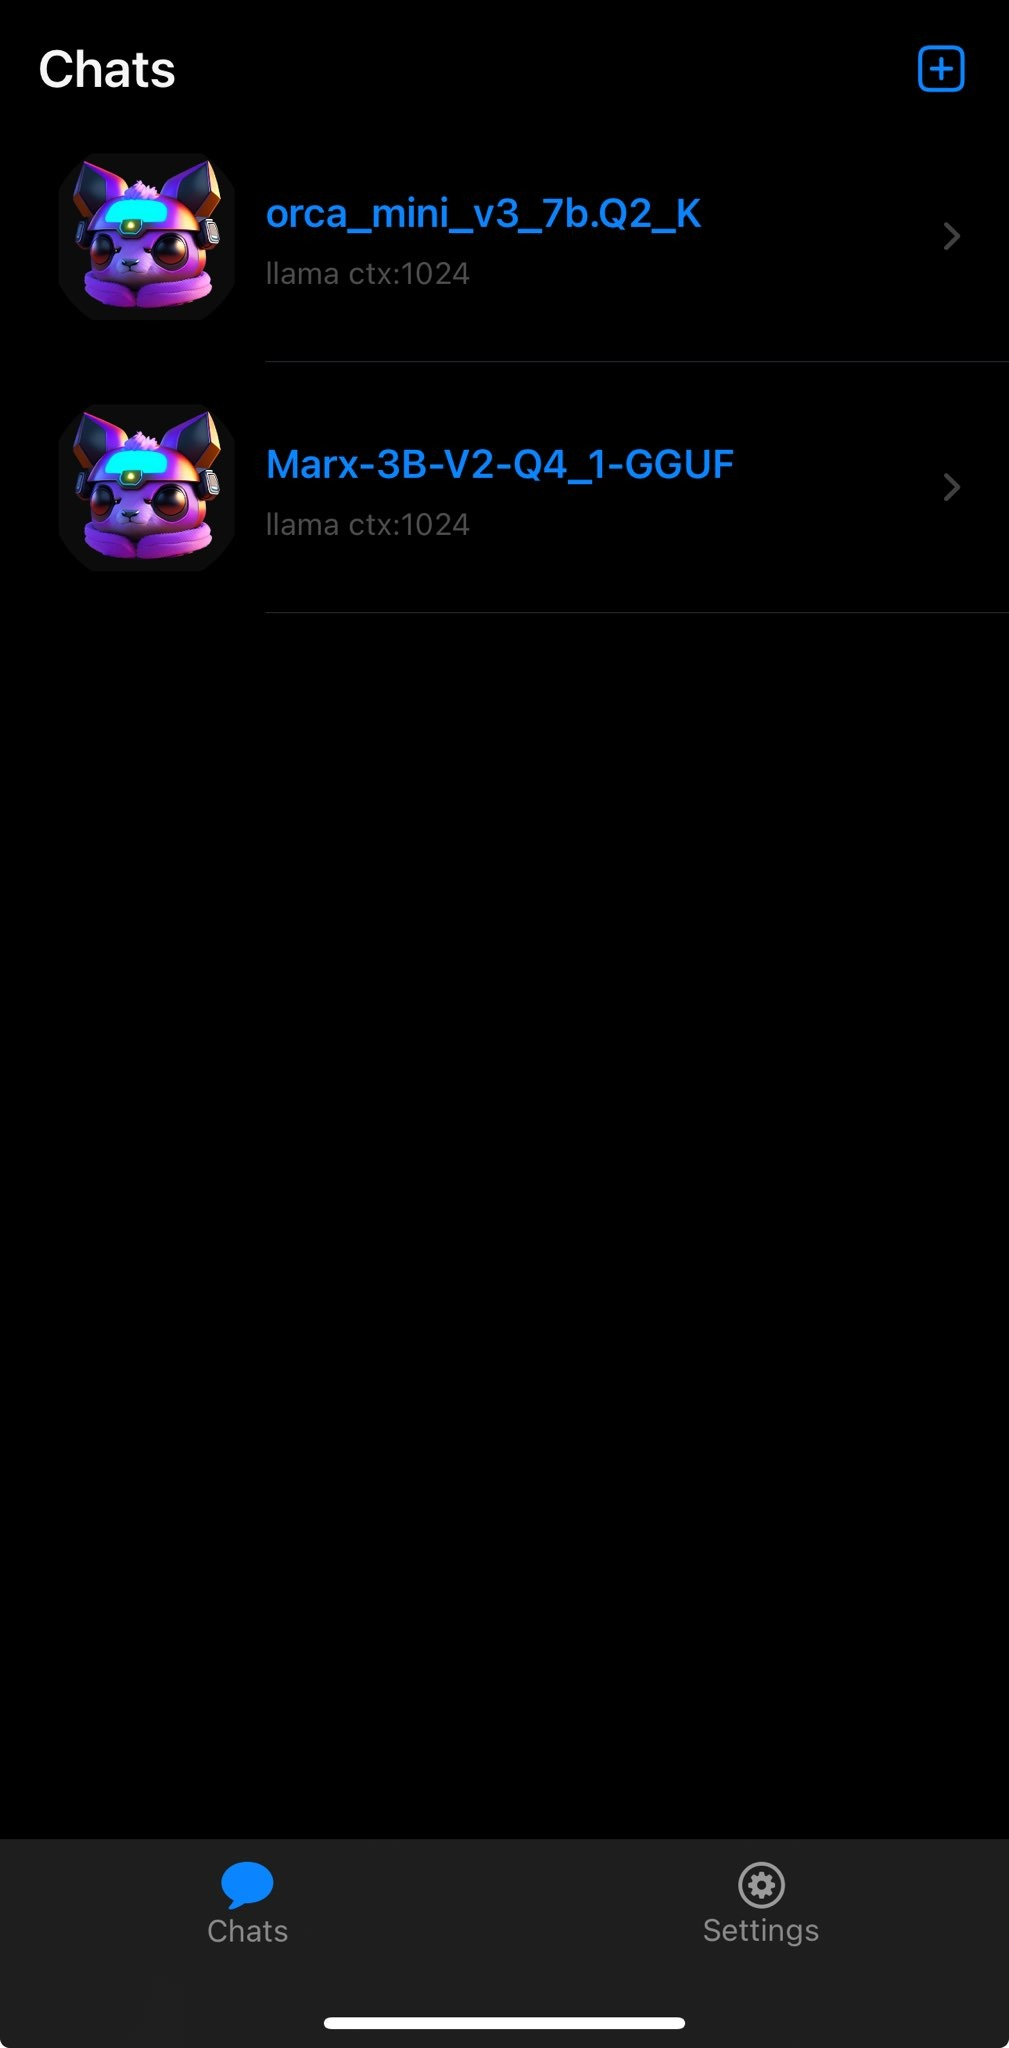 |  | - [Enchanted](https://github.com/AugustDev/enchanted) is also an iOS for private AI models, but it requires a public-facing Ollama API, which did not meet my "on device requirement." Nonetheless, it's an interesting looking app and I will diff --git a/content/blog/2024-01-26-audit-dashboard.md b/content/blog/2024-01-26-audit-dashboard.md index 73cc0a6..fabb0e3 100644 --- a/content/blog/2024-01-26-audit-dashboard.md +++ b/content/blog/2024-01-26-audit-dashboard.md @@ -9,10 +9,8 @@ Alteryx and Power BI are powerful tools that can help turn your old-school audit trackers into interactive tools that provide useful insights and potential action plans. -With these tools, we are going to build the following dashboard: - -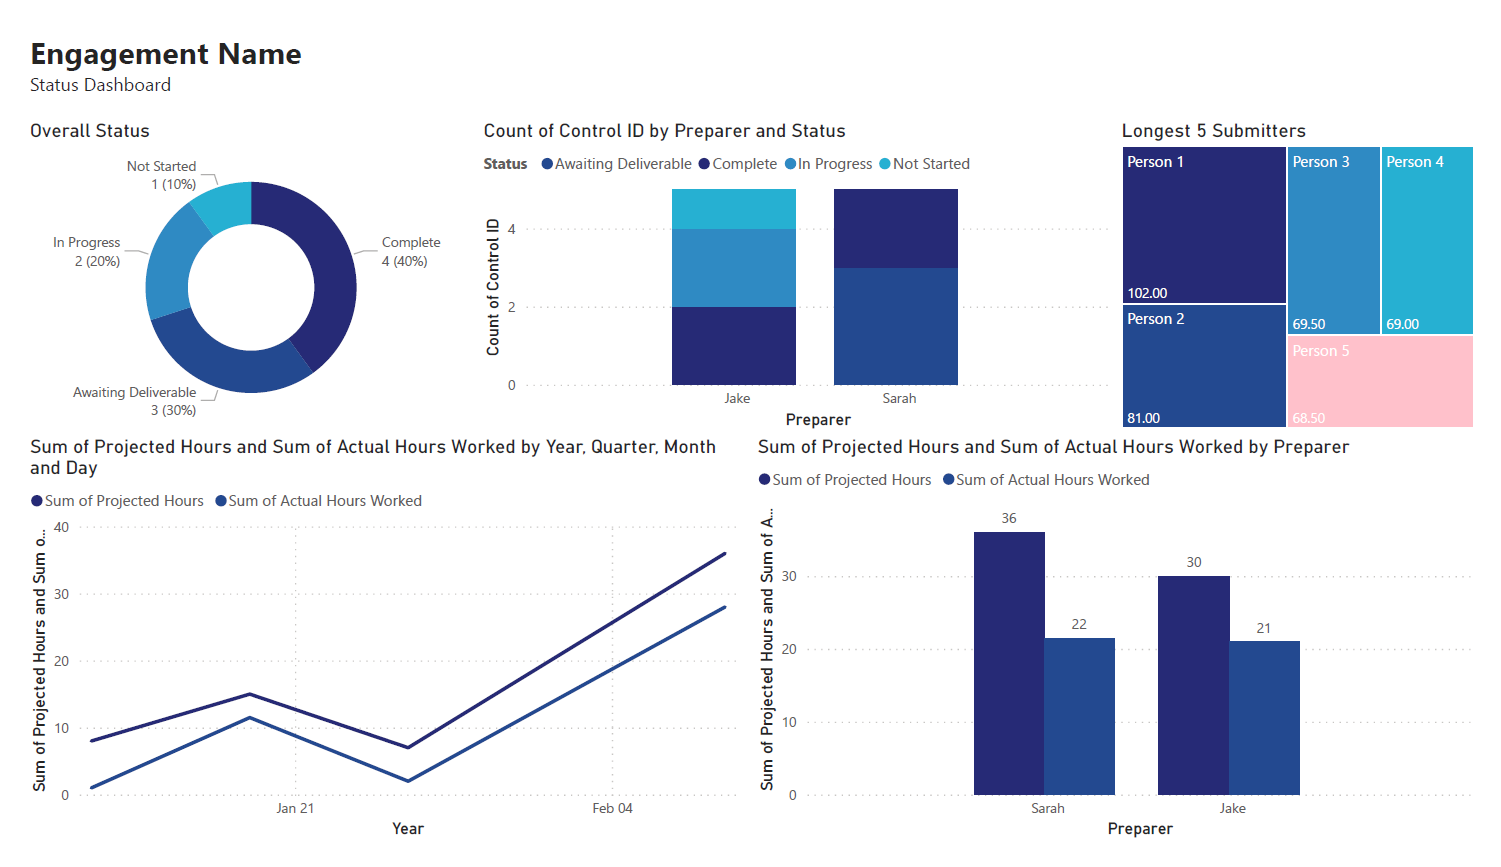 -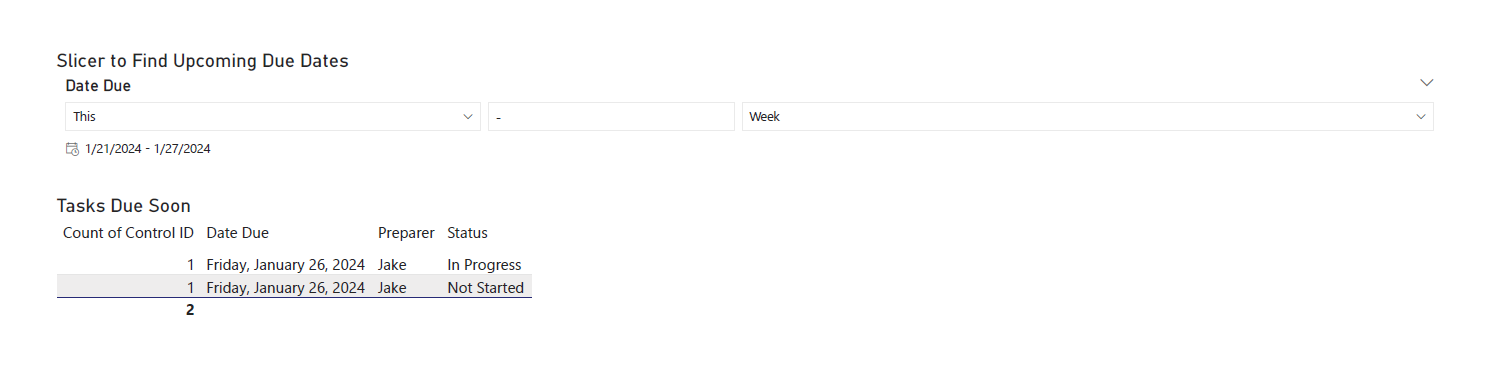 +With these tools, we are going to build a dashboard that can effectively +communicate project status. # Requirements @@ -37,9 +35,6 @@ and let Alteryx determine the format for you. For this example, we will be importing an Excel file and changing the `Start Data Import on Line` variable to `2`. - - ## Transform Data Next, let's replace null data and remove whitespace to clean up our data. We can @@ -53,17 +48,11 @@ Ensure that the following options are enabled: - Remove Unwanted Characters - Leading and Trailing Whitespace -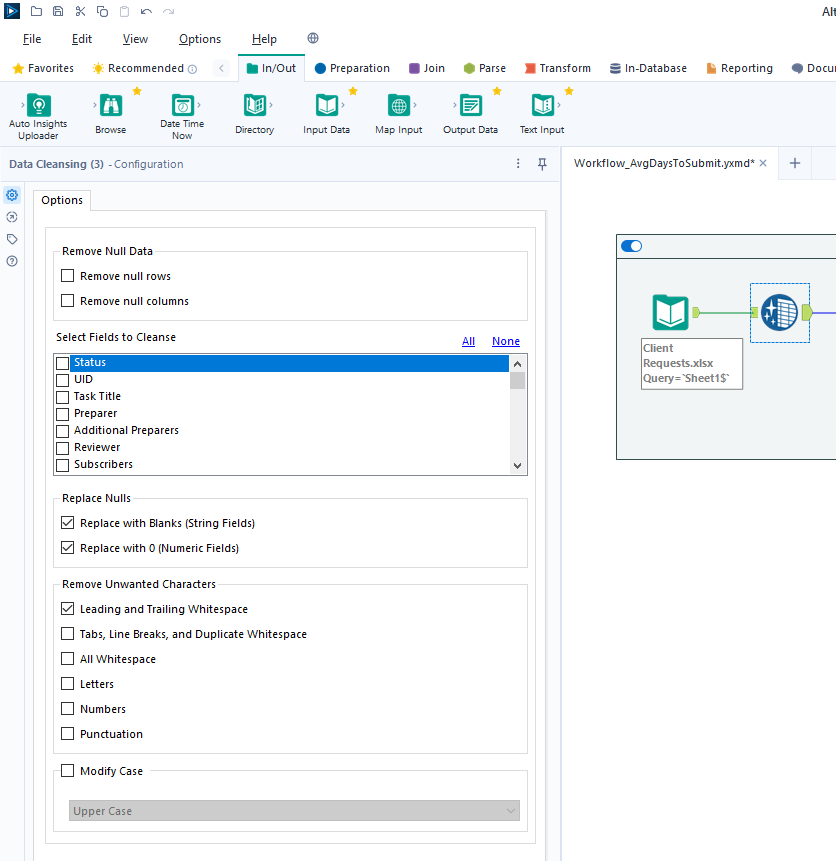 - For our next step, we will transform the date fields from strings to datetime format. Add a `Datetime` tool for each field you want to transform - in the example below, I am using the tool twice for the "Started On" and "Submitted On" fields. -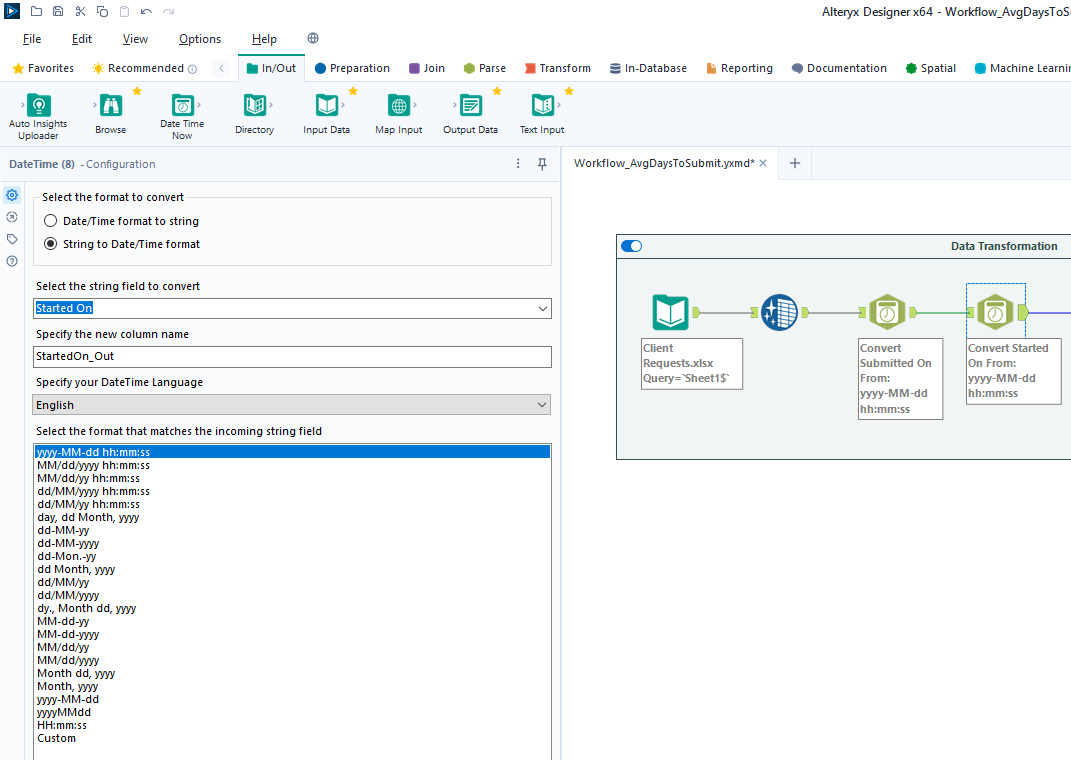 - Now that the dates are in the correct format, let's perform a calculation based on those fields. Start by adding a `Filter` tool, naming a new Output Column, and pasting the formula below into it (the two fields used in this formula must @@ -71,19 +60,13 @@ match the output of the `Datetime` tools above): ```txt DateTimeDiff([SubmittedOn_Out],[StartedOn_Out], "days") -``` - -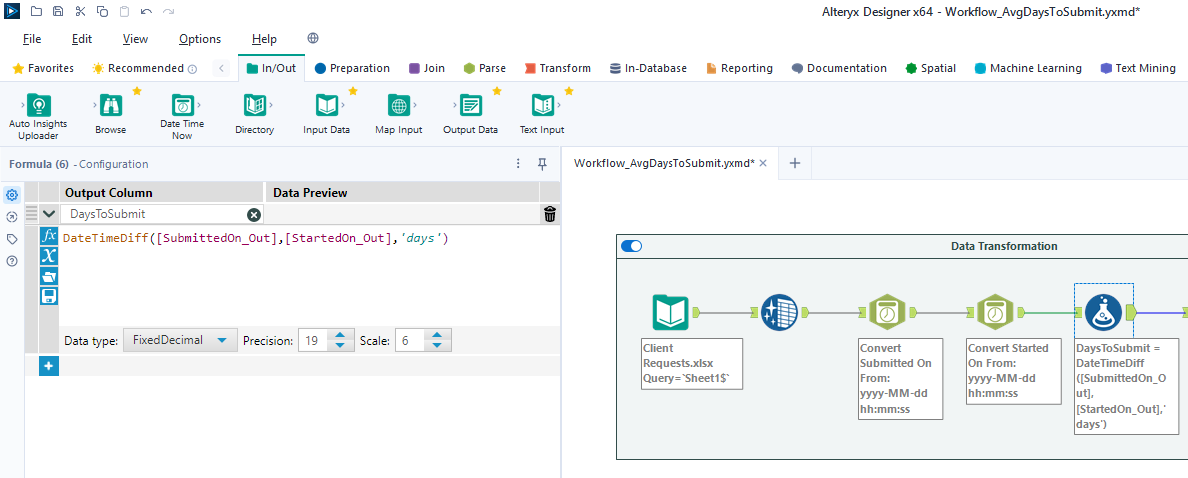 +` ## Export Data Finalize the process by exporting the transformed data set to a new file, for use in the following visualization step. -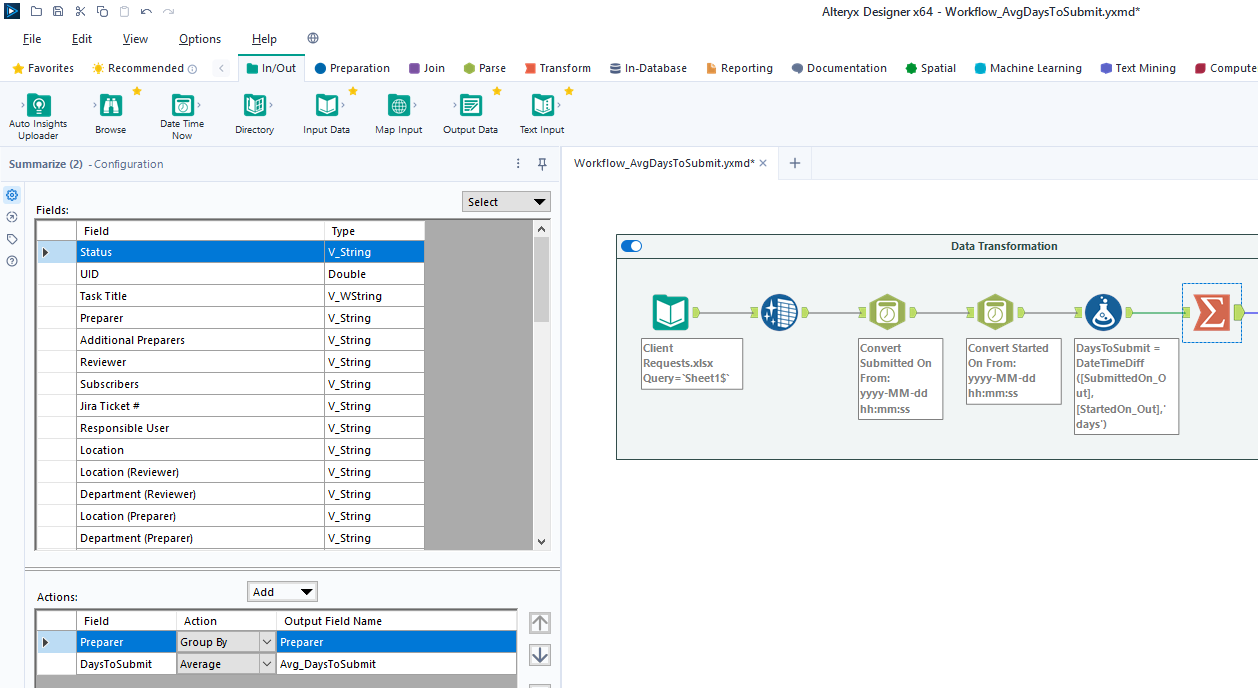 - # Power BI: Data Visualization ## Import Data @@ -98,19 +81,10 @@ for this project. During this process, I also imported the export from the Alteryx workflow above. Therefore, we have two different files available for use in our dashboard. -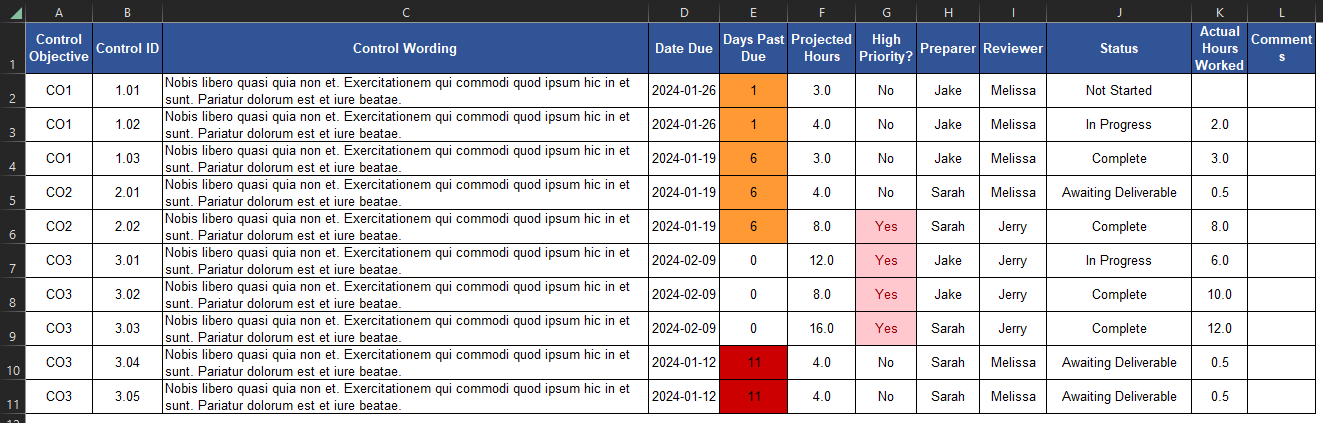 - -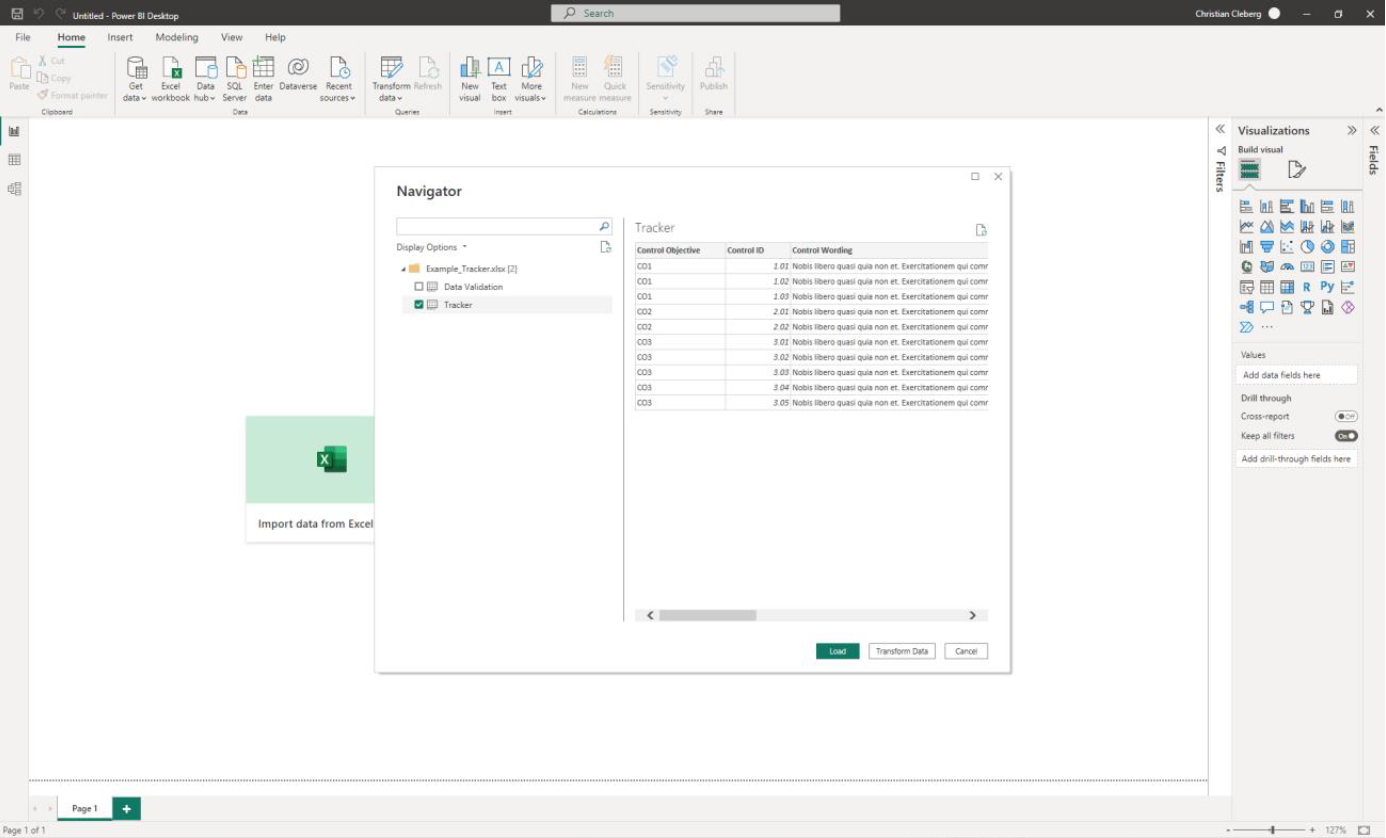 - ## Add Visuals -To create the dashboard below, you will need to follow the list instructions -below and format as needed: - - - +To create the dashboard, you will need to follow the list instructions +below and format as needed. Instructions to create the visuals above: diff --git a/content/blog/2024-02-21-self-hosting-otter-wiki.md b/content/blog/2024-02-21-self-hosting-otter-wiki.md index c087292..8f8116c 100644 --- a/content/blog/2024-02-21-self-hosting-otter-wiki.md +++ b/content/blog/2024-02-21-self-hosting-otter-wiki.md @@ -120,19 +120,3 @@ Once enabled, restart the Nginx server to start serving the app externally. sudo systemctl restart nginx.service ``` -# Screenshots - -In the screenshot below, you can see the initial launch screen for An Otter -Wiki. Start by creating your admin account and configure the app as necessary. - -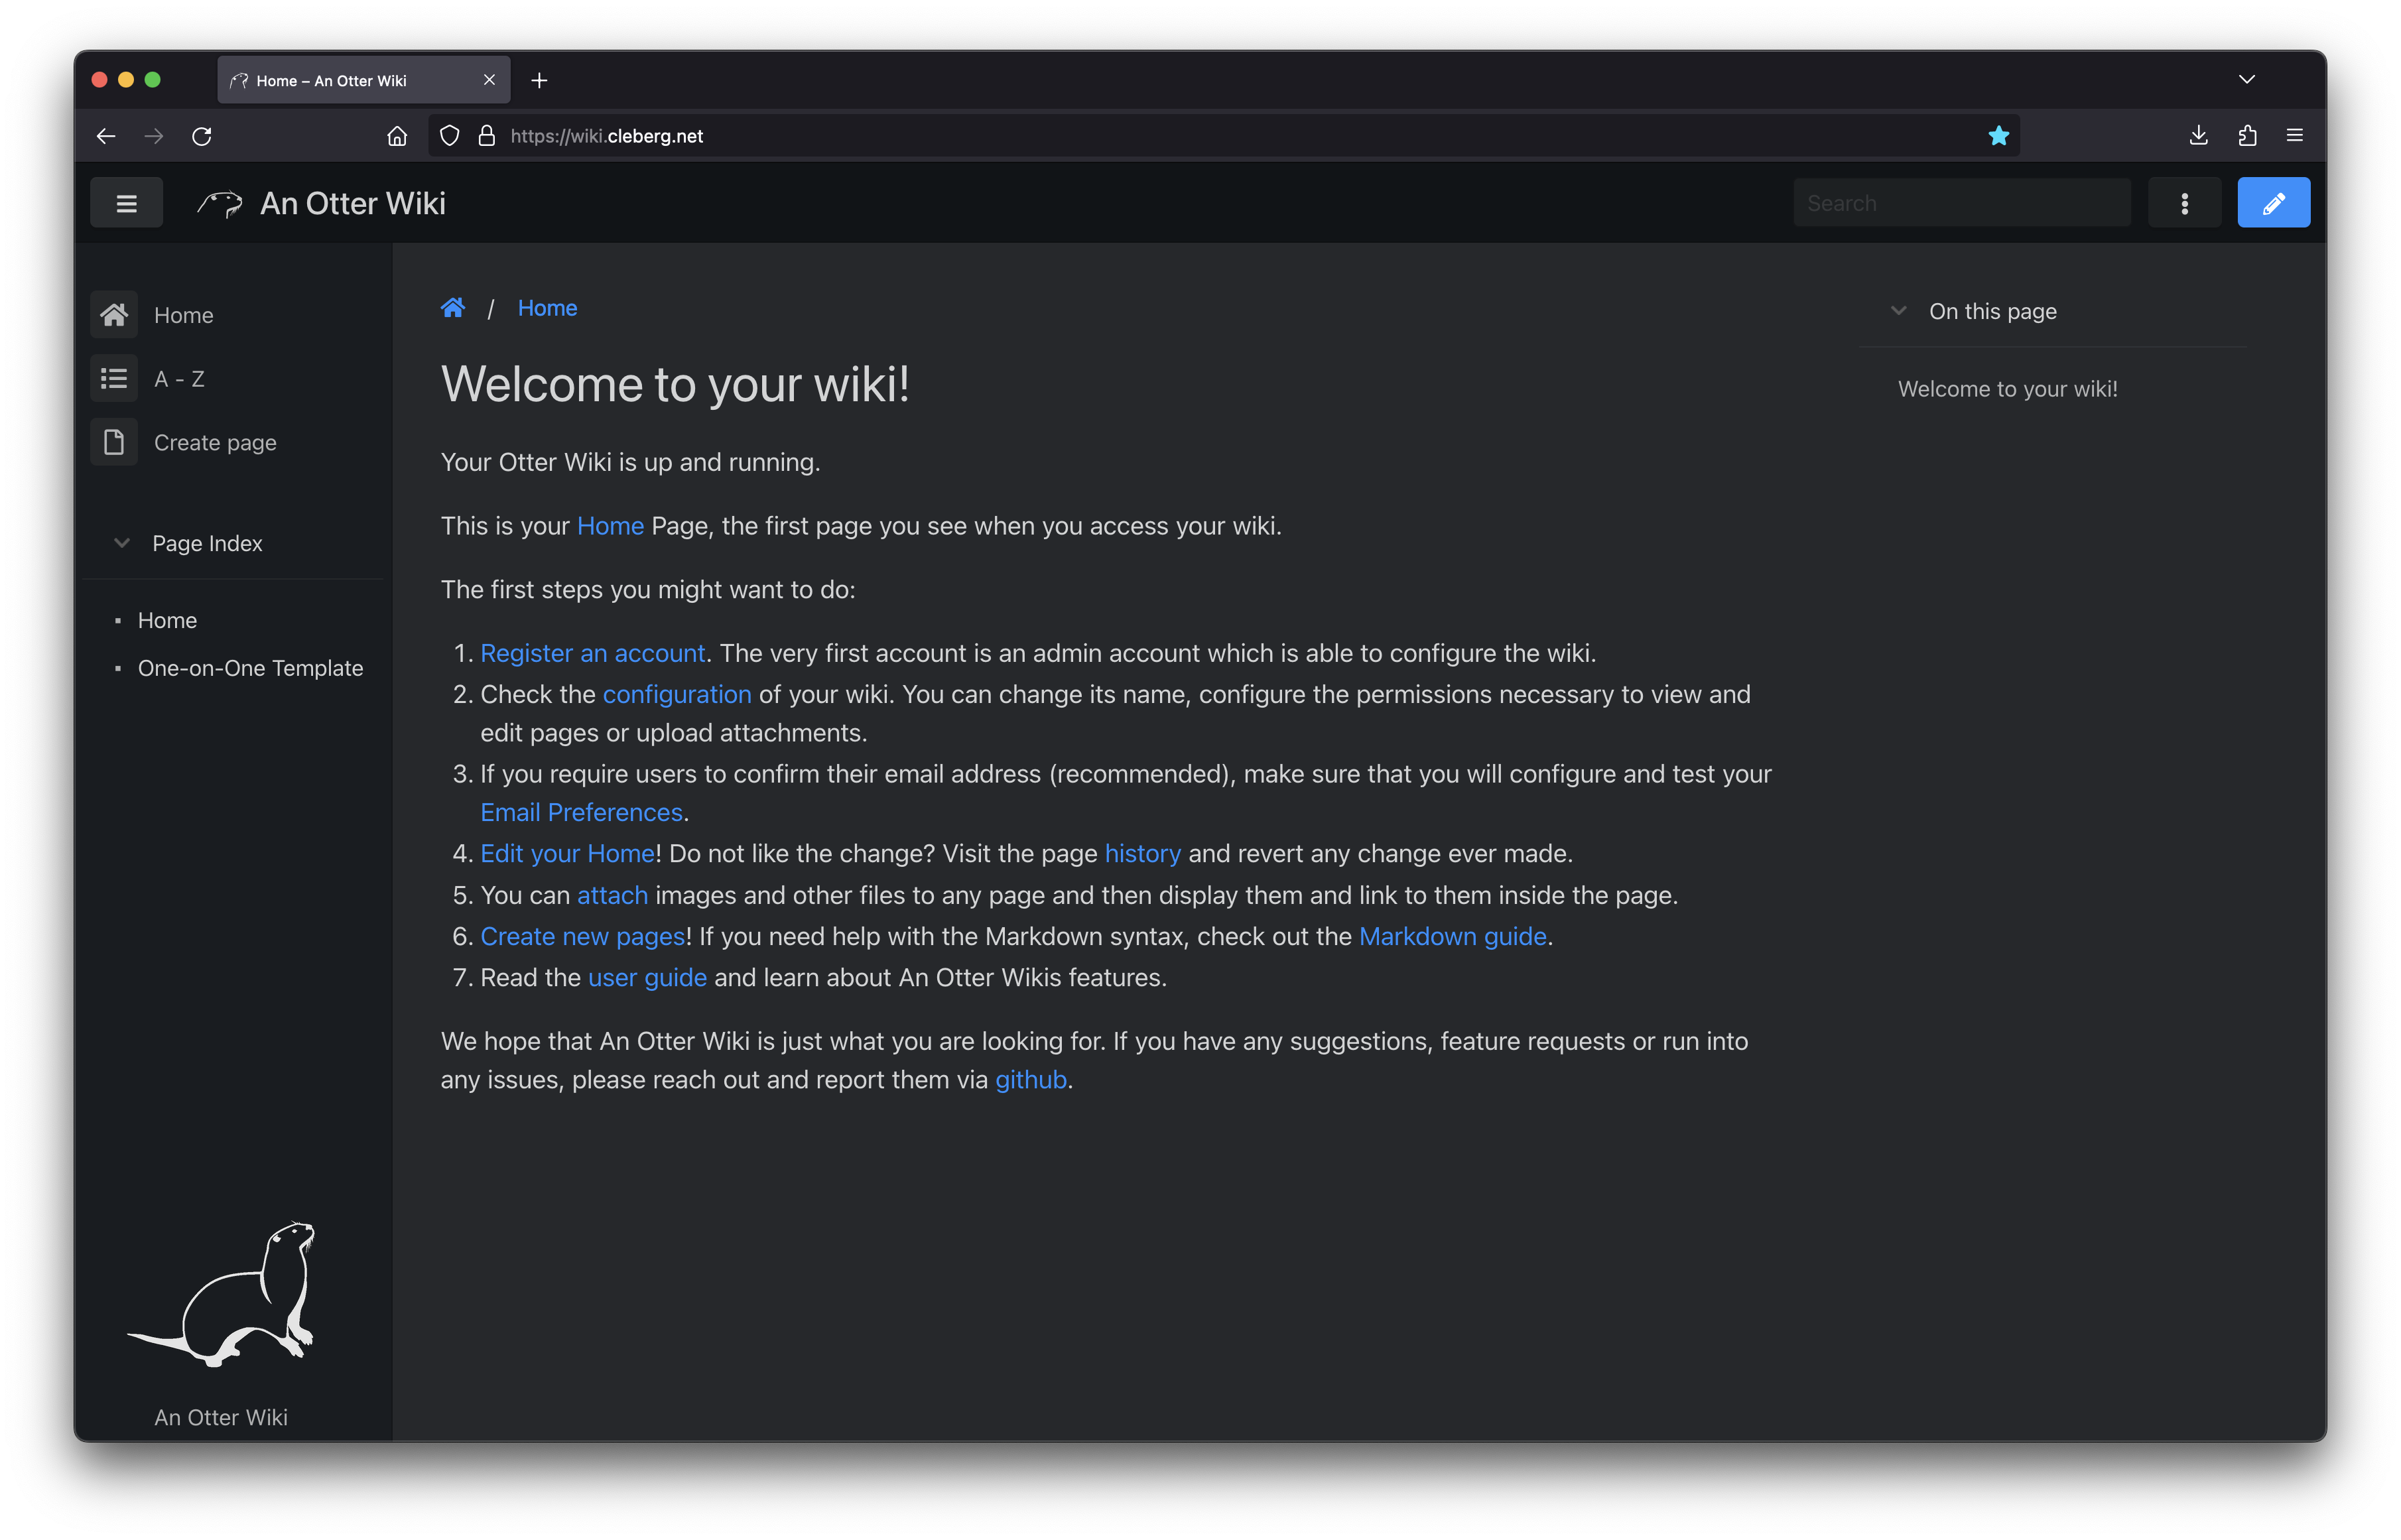 - -You can also see the default editing screen for creating and editing pages. It's -as easy as typing Markdown and hitting the save button. - -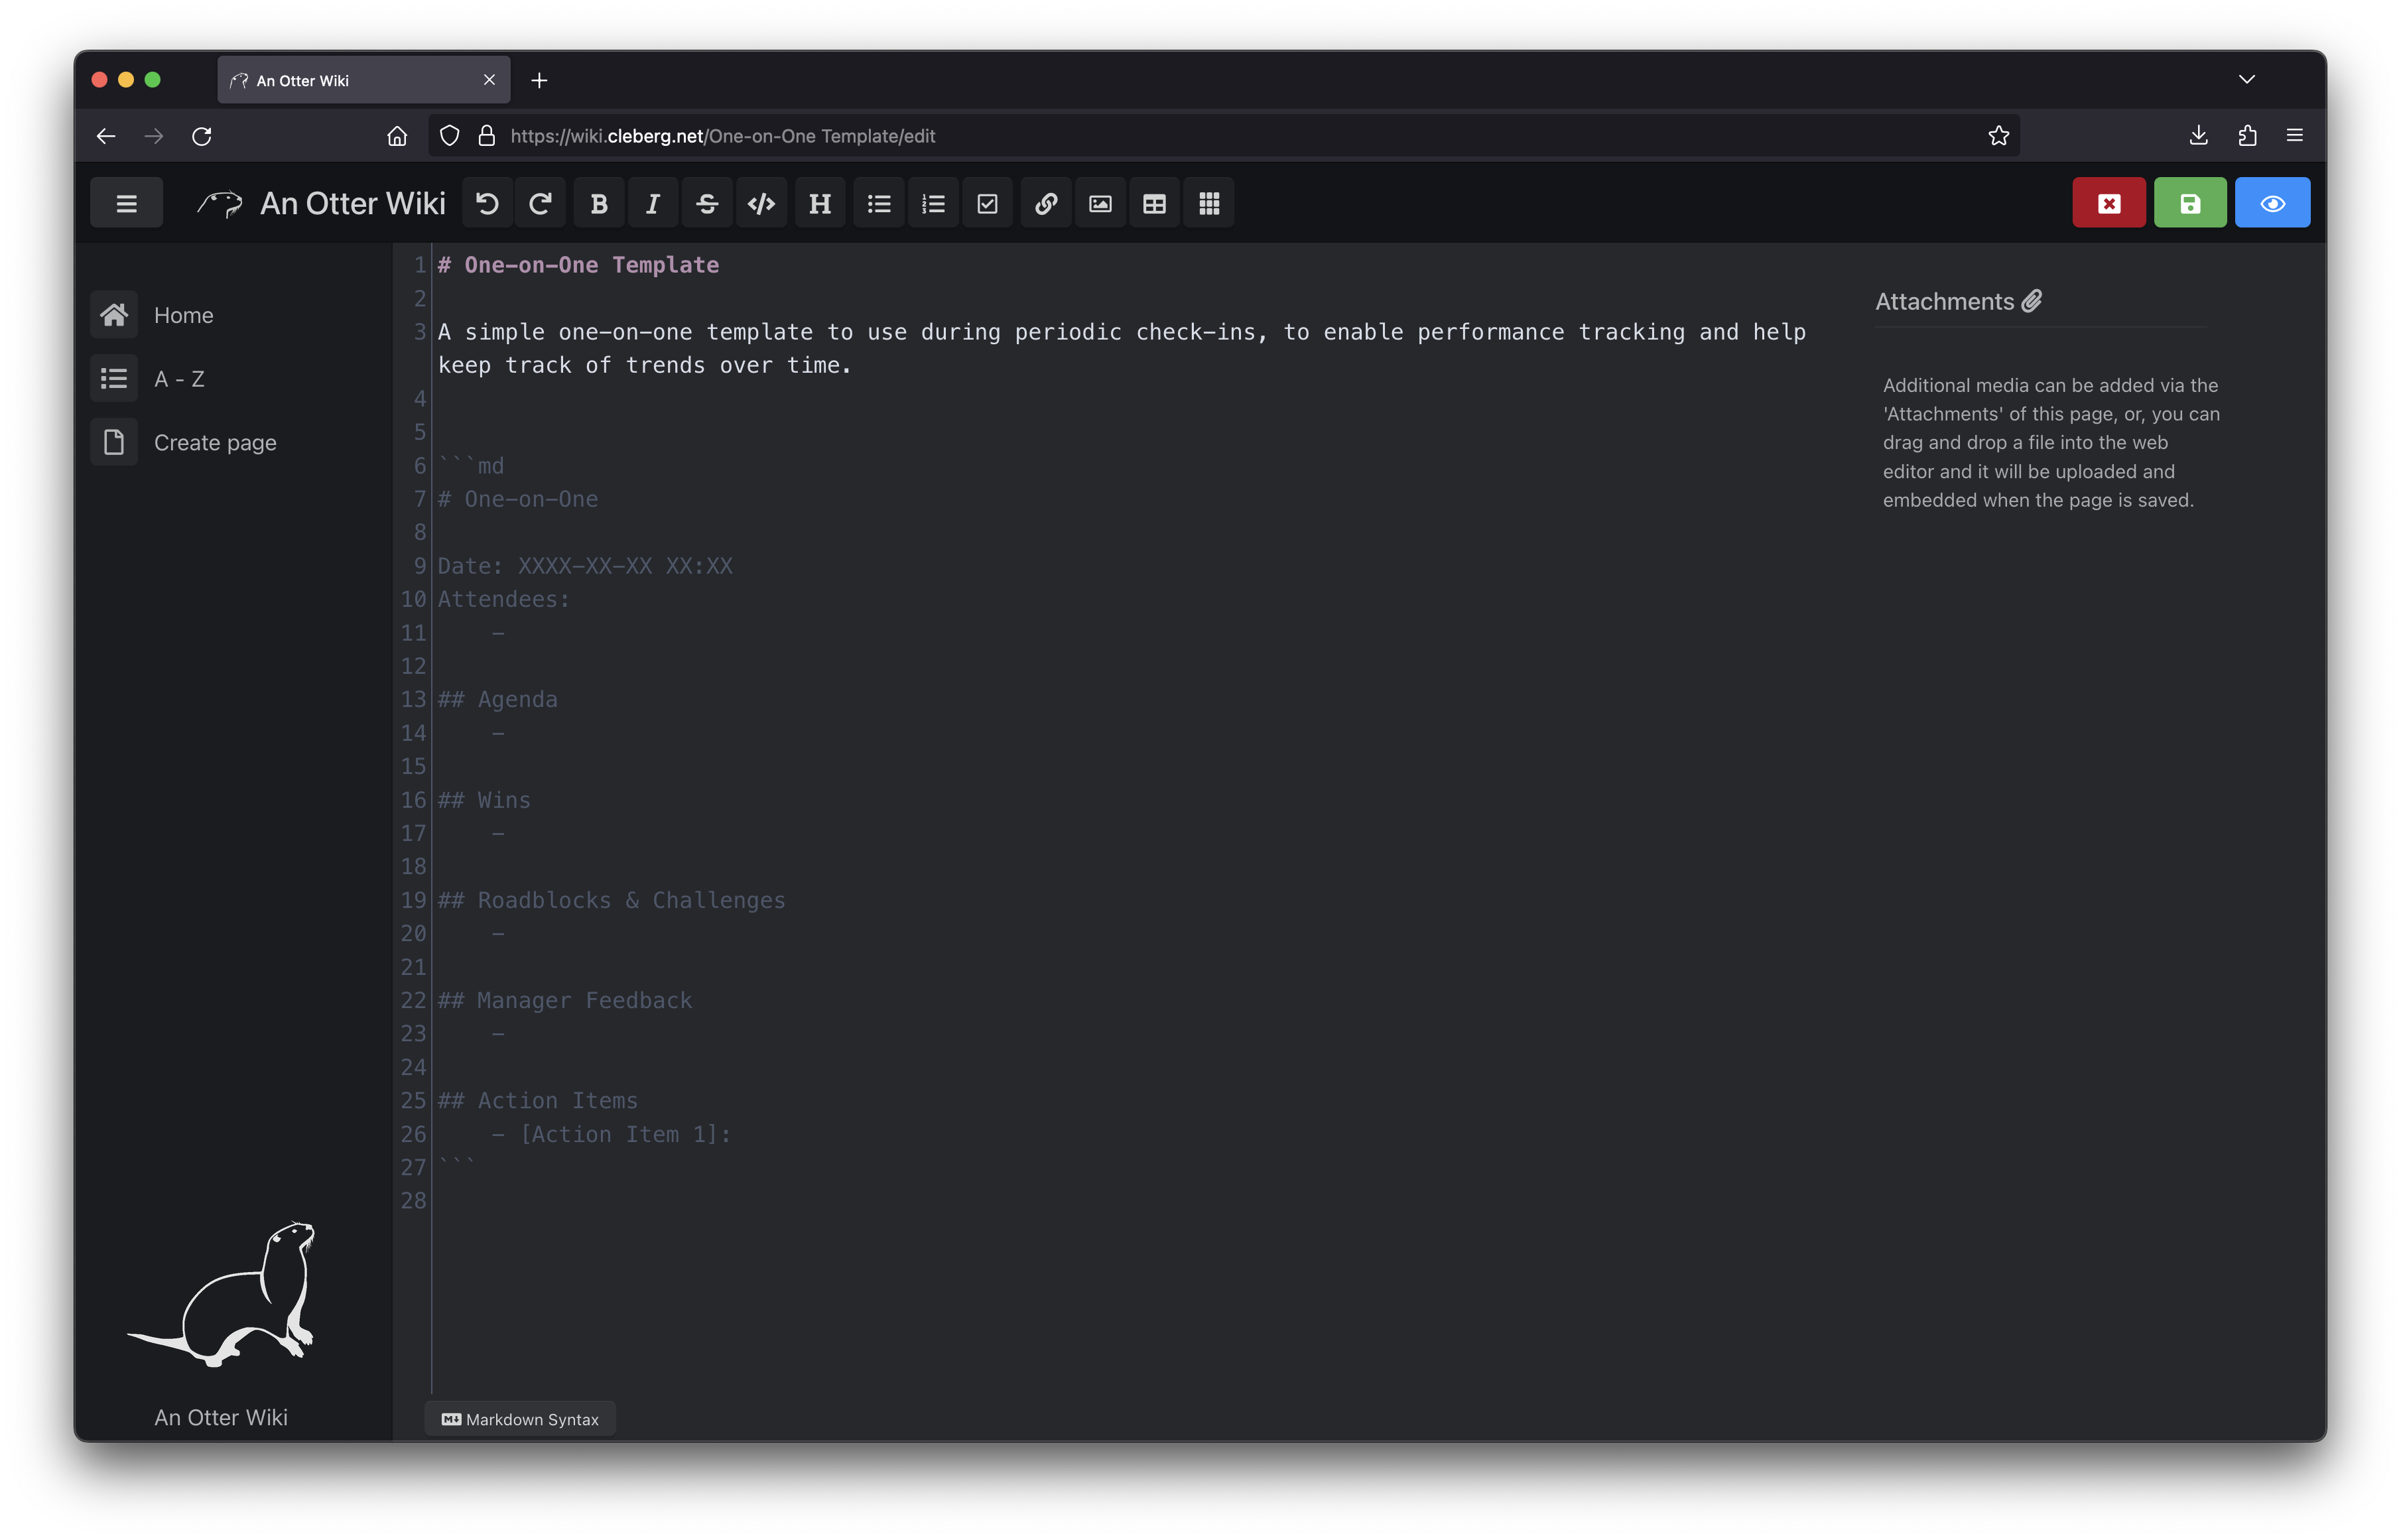 - -Overall, I like An Otter Wiki and will be looking forward to seeing how much use -I get out of it going forward. diff --git a/content/blog/2024-04-06-convert-onenote-to-markdown.md b/content/blog/2024-04-06-convert-onenote-to-markdown.md index 32de921..186cdcc 100644 --- a/content/blog/2024-04-06-convert-onenote-to-markdown.md +++ b/content/blog/2024-04-06-convert-onenote-to-markdown.md @@ -25,15 +25,6 @@ To start, export any pages or tabs from OneNote to the Word format (`.docx`): See below for a visual walkthrough of the export process. -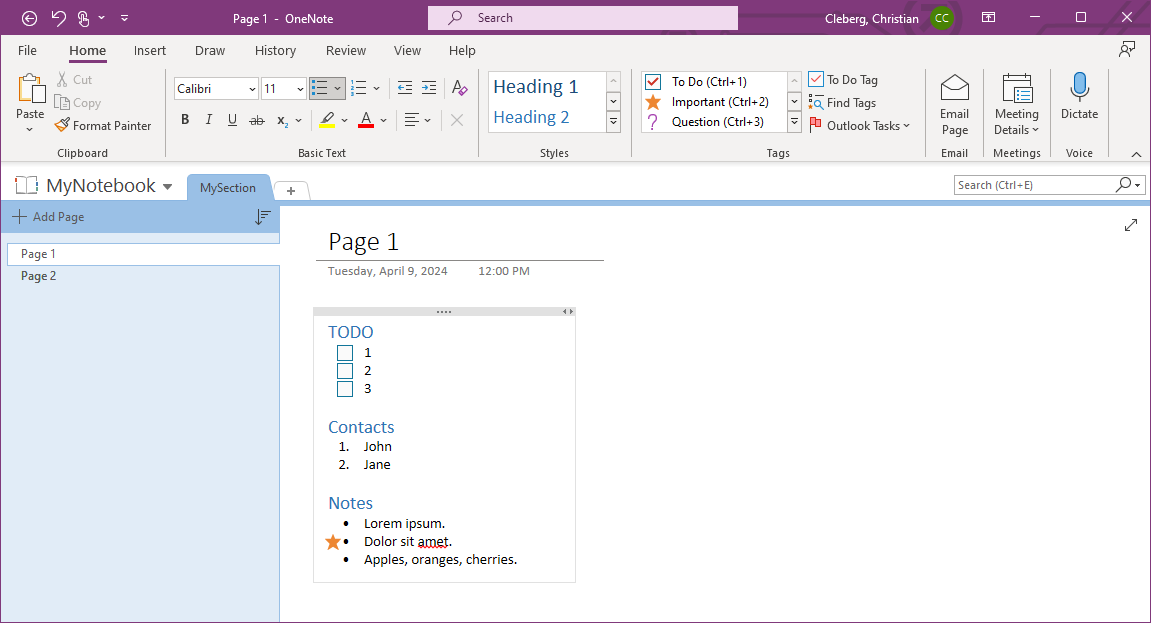 - -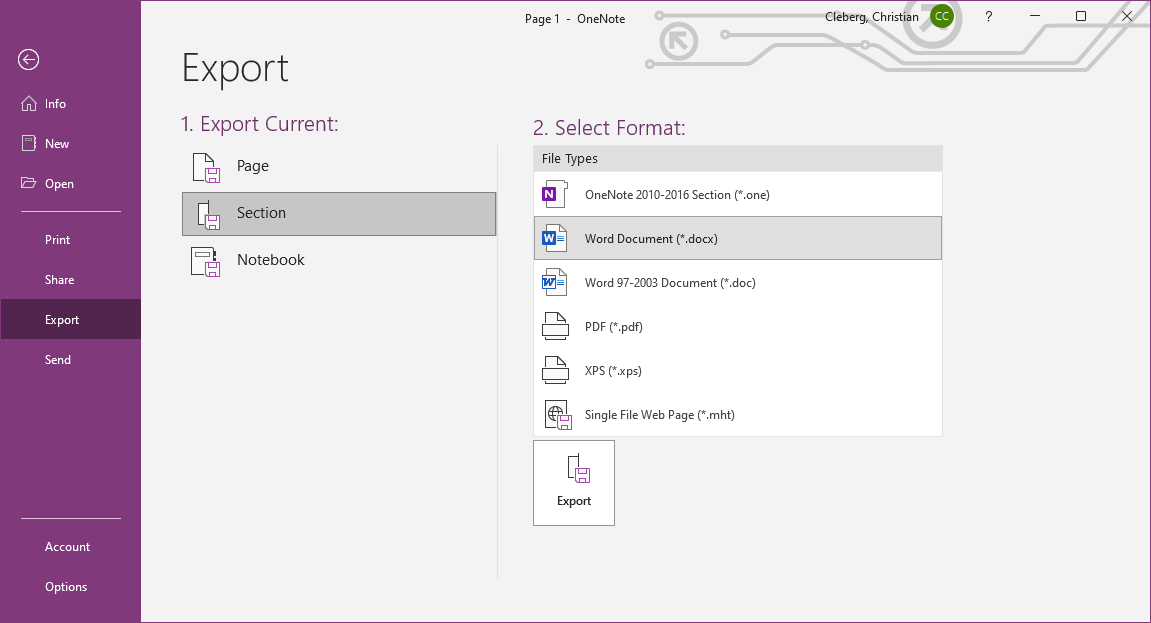 - -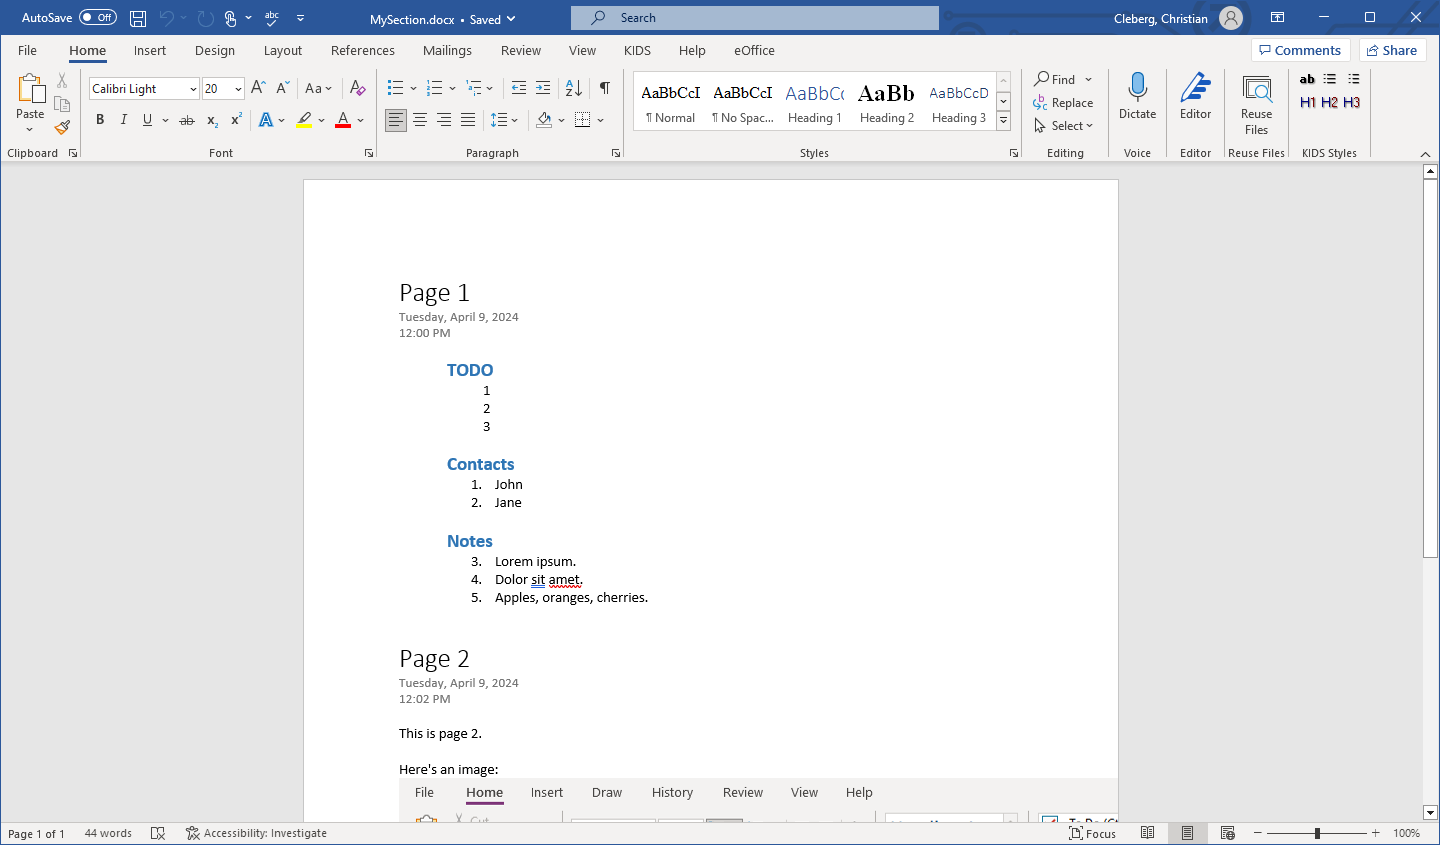 - # Download Pandoc Start by downloading Pandoc from their [GitHub @@ -93,9 +84,6 @@ This loop will perform the following actions: `-o`. This option adds the `.md` file extension to recognize the output files as Markdown files. -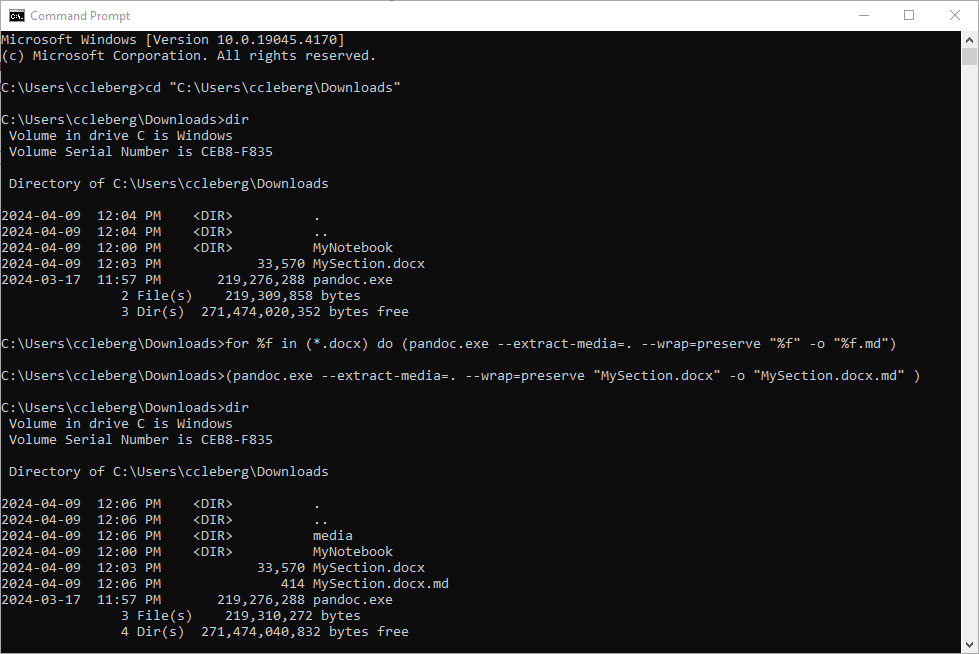 - If you want to export to another format, simply specify the `-f=`/`--from=` and `-t=`/`--to=` options. diff --git a/content/blog/2024-04-18-mu4e.md b/content/blog/2024-04-18-mu4e.md index 0c6a0ed..960e7e3 100644 --- a/content/blog/2024-04-18-mu4e.md +++ b/content/blog/2024-04-18-mu4e.md @@ -279,7 +279,7 @@ If you have Doom open, execute `SPC h r r` to reload the new configurations. # Initial Sync Once you have configured all of the relevant files, you can perform an initial -sync. Note that you can perform syncing within Mu4e itself afer this. +sync. Note that you can perform syncing within Mu4e itself after this. ```sh mbsync -aV @@ -299,15 +299,7 @@ The emails will now to be ready to use! You can now launch Doom and open Mu4e with `SPC o m`. You can also explore the Mu4e options with `SPC : mu4e`. -The home page shows various options and metdata about the account you've opened. +The home page shows various options and metadata about the account you've opened. 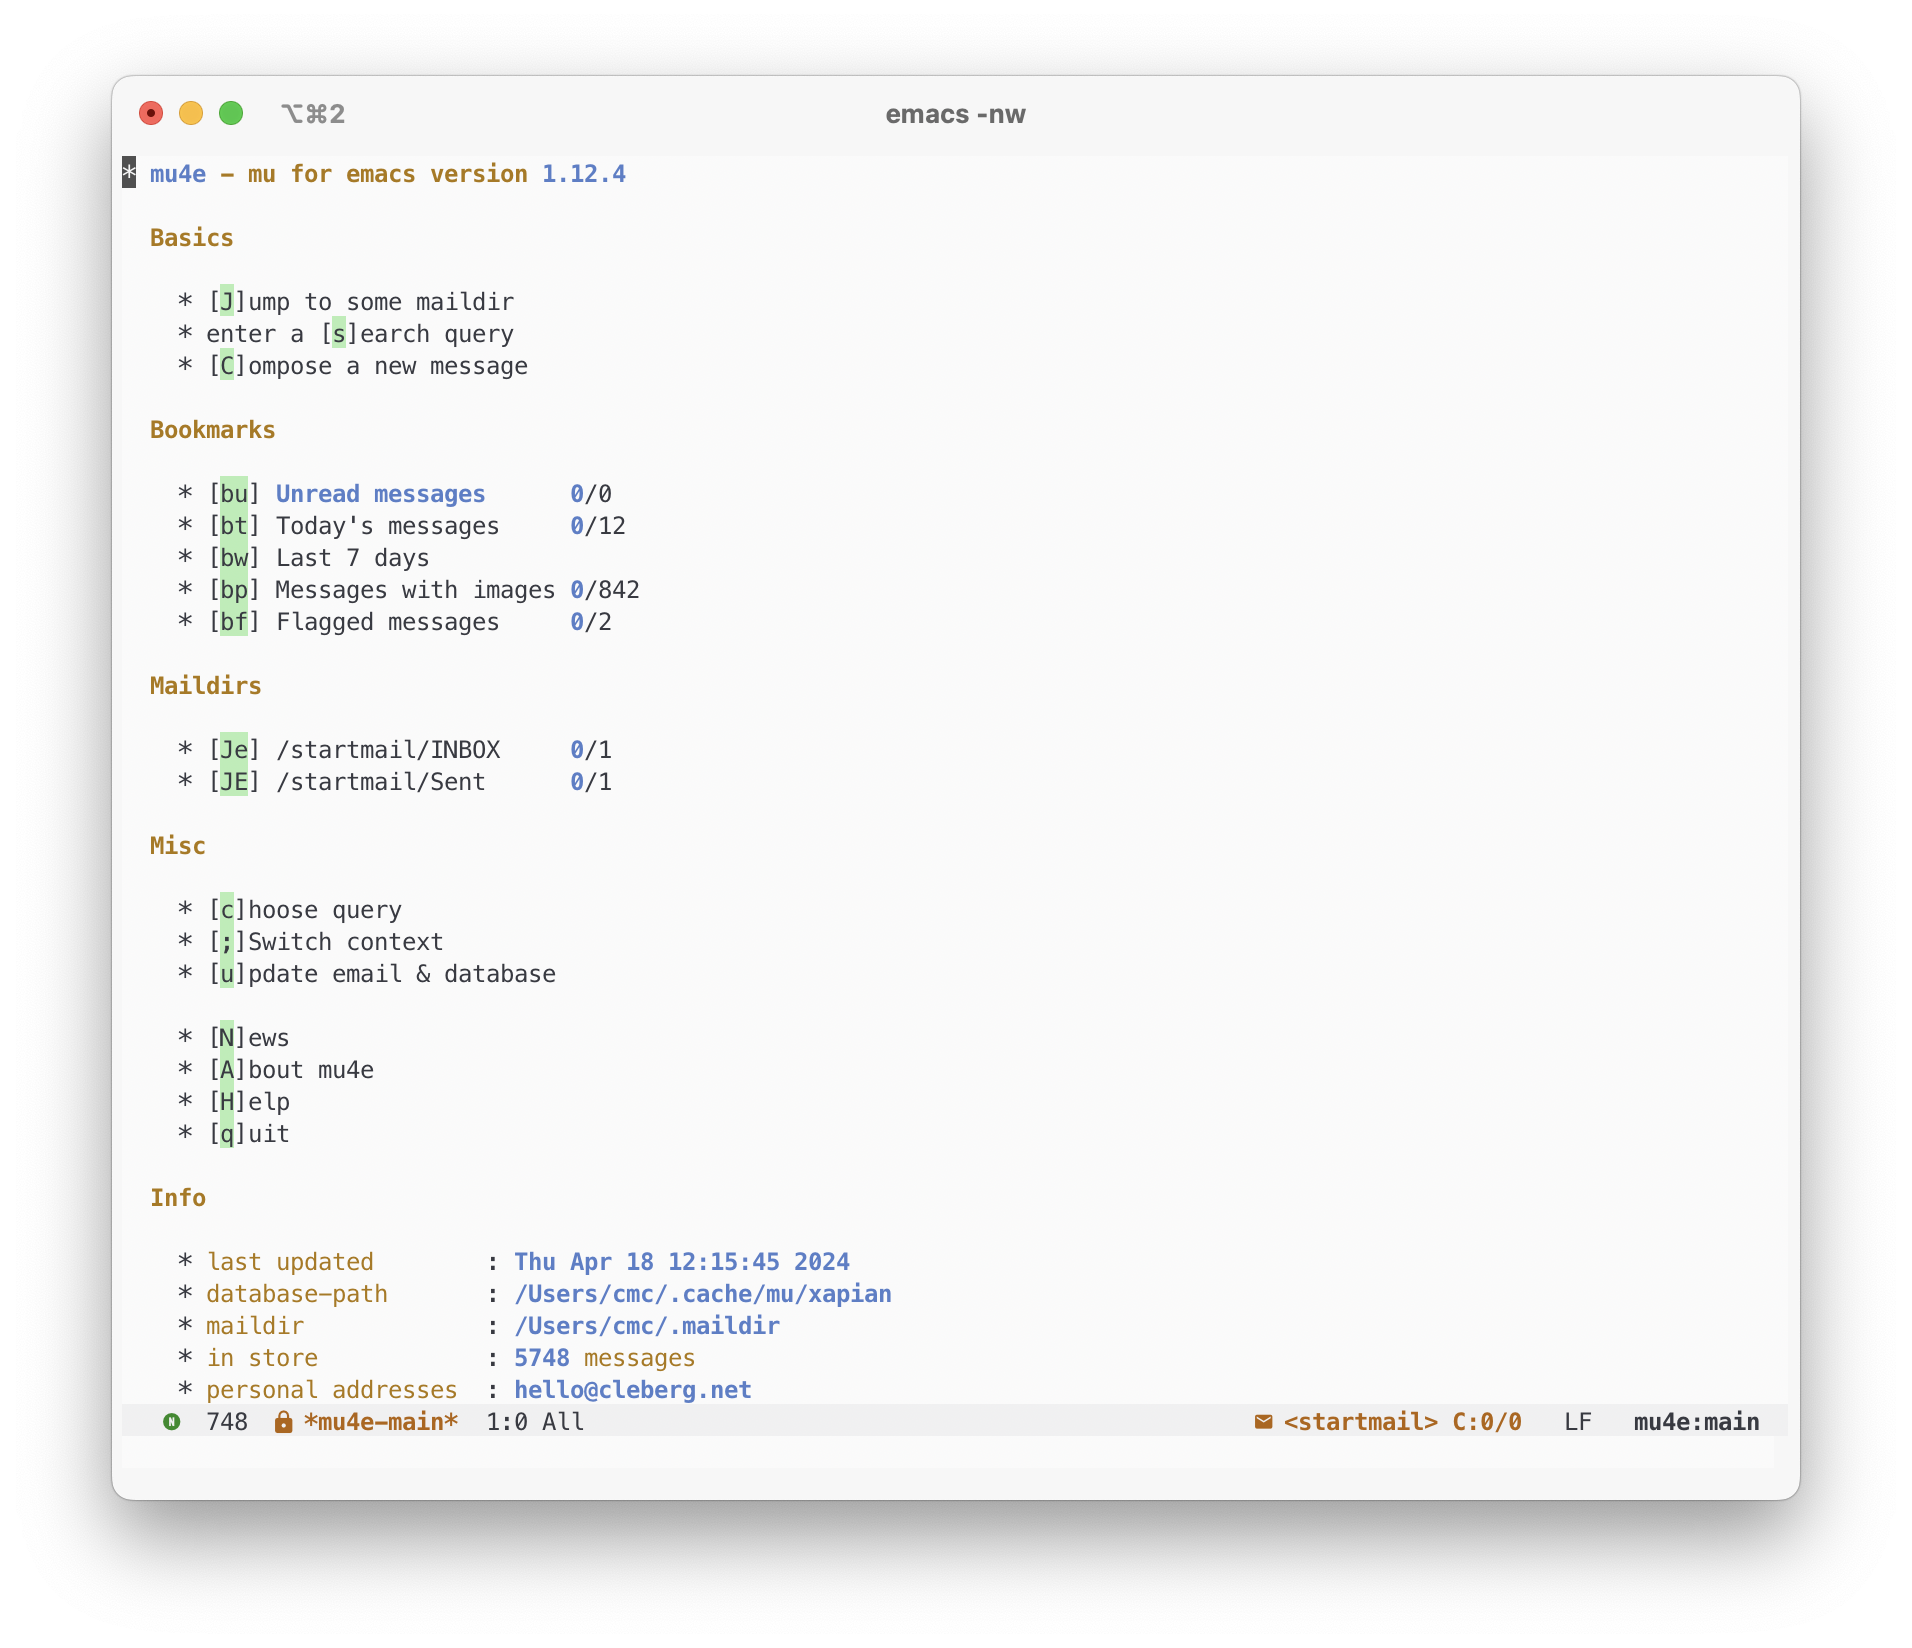 -When composing an email, you can see the metadata fields at the top and compose -the message below the indicator line. - -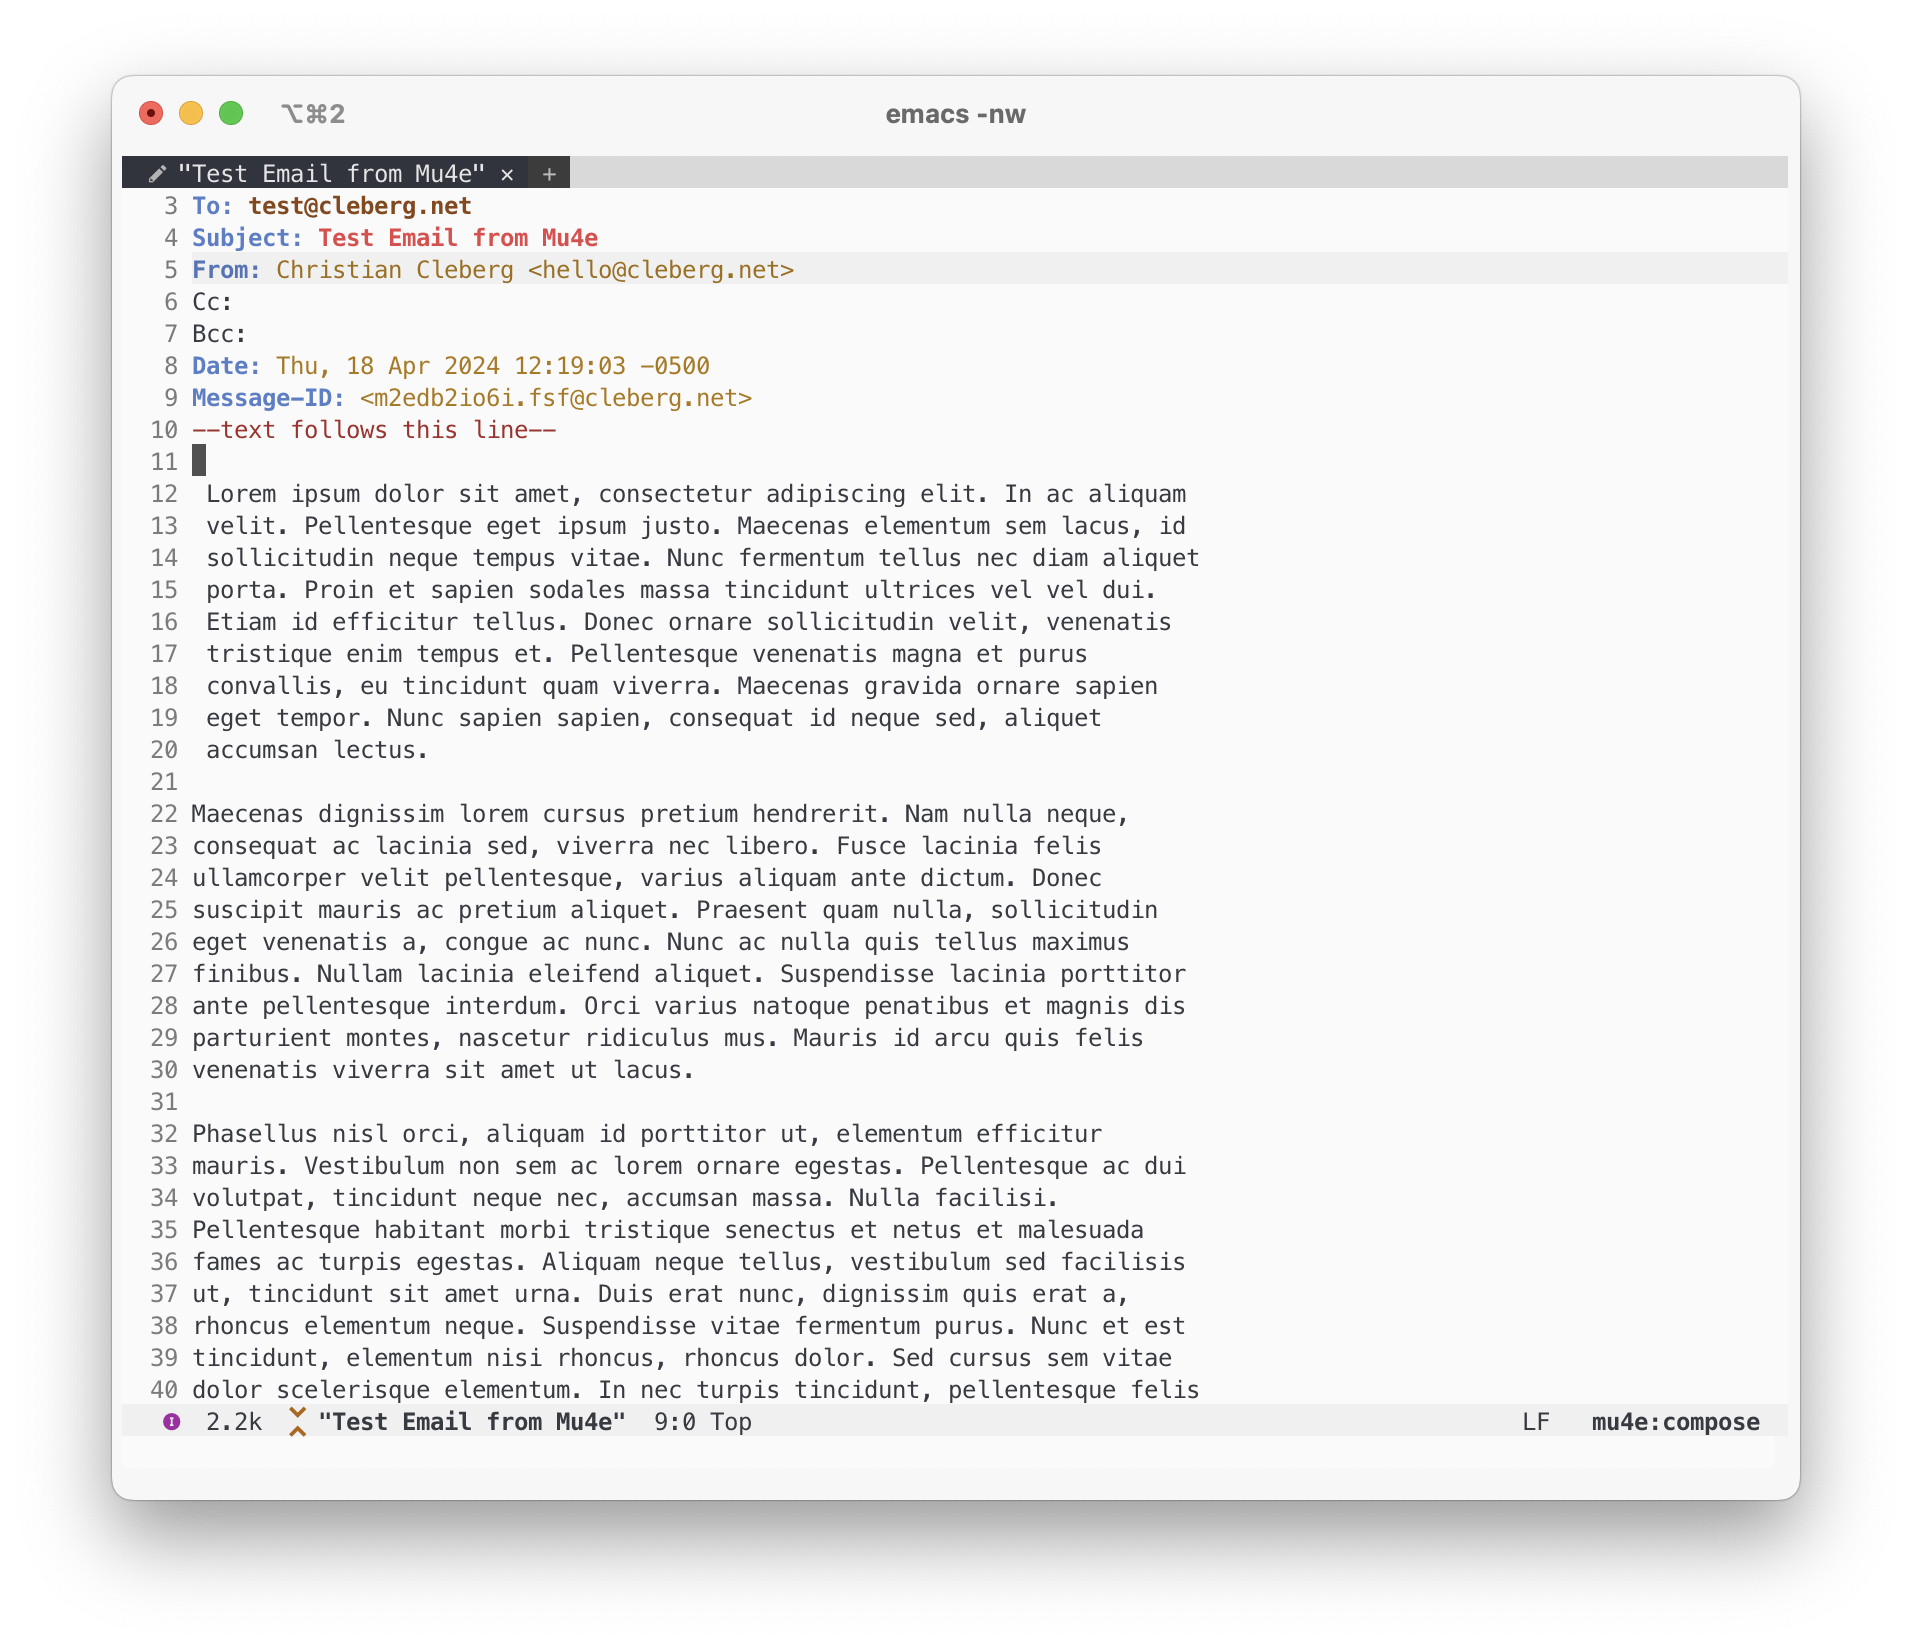 - -When in a folder, you can view emails in a pane and perform actions as needed. - -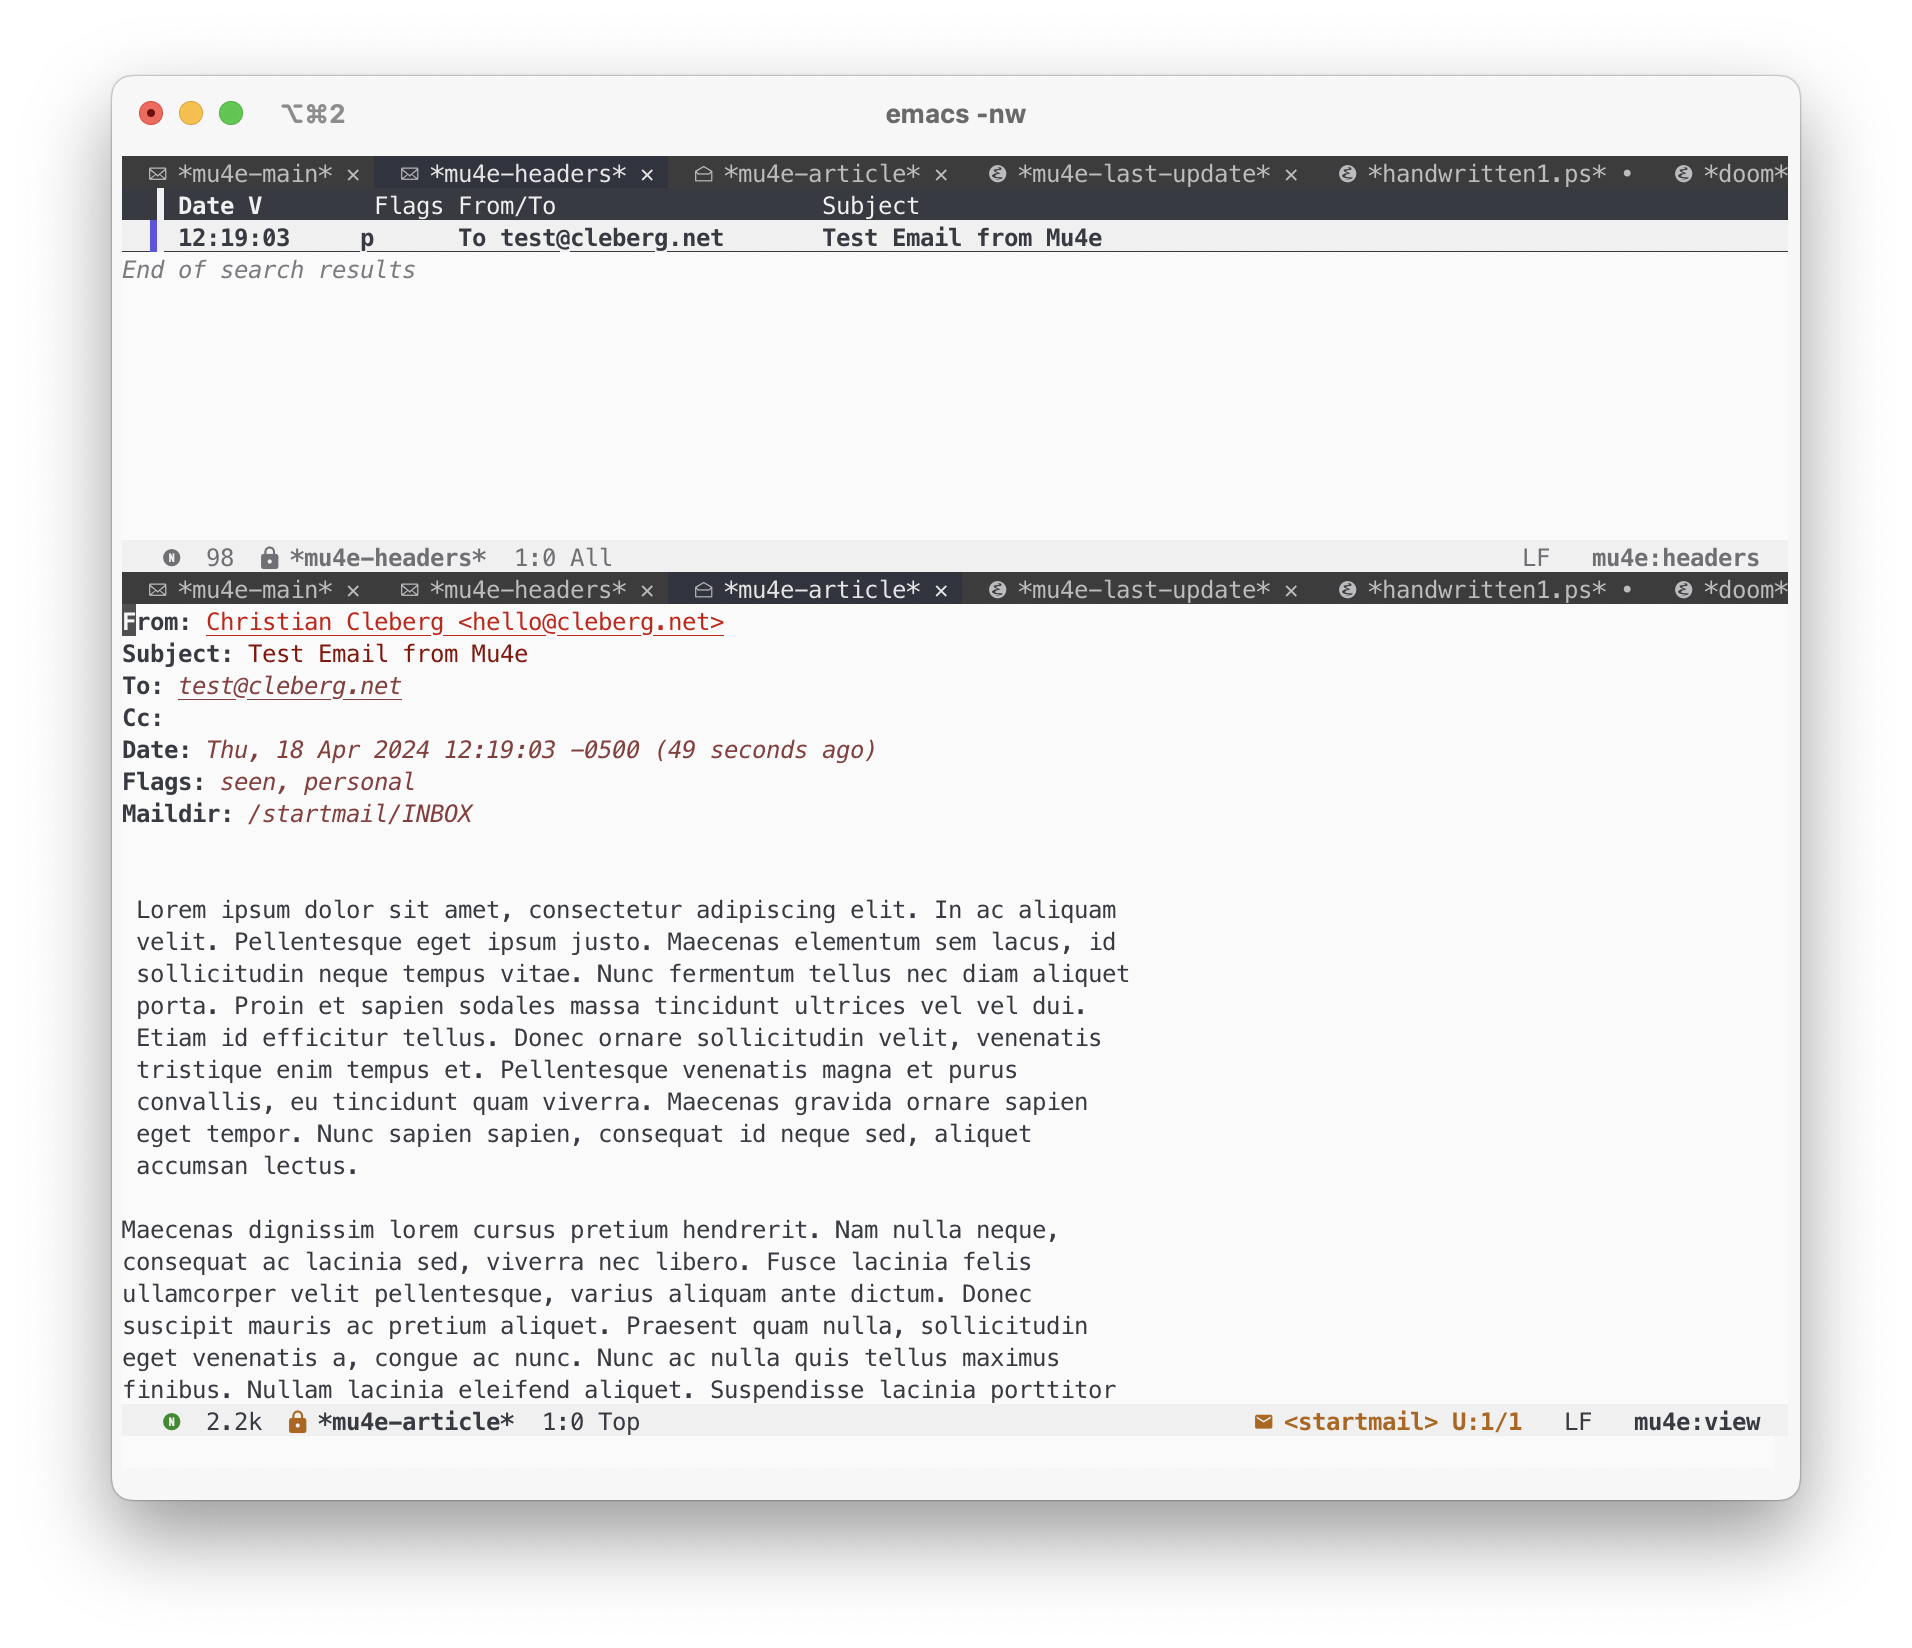 diff --git a/content/blog/2024-05-03-ubuntu-on-macos.md b/content/blog/2024-05-03-ubuntu-on-macos.md index 2cfe2ce..df71eb1 100644 --- a/content/blog/2024-05-03-ubuntu-on-macos.md +++ b/content/blog/2024-05-03-ubuntu-on-macos.md @@ -50,9 +50,6 @@ script via the provided path if you wish. When you're comfortable with the script, you can toggle the `Suppress this message permanently` button and click OK to run the machine. -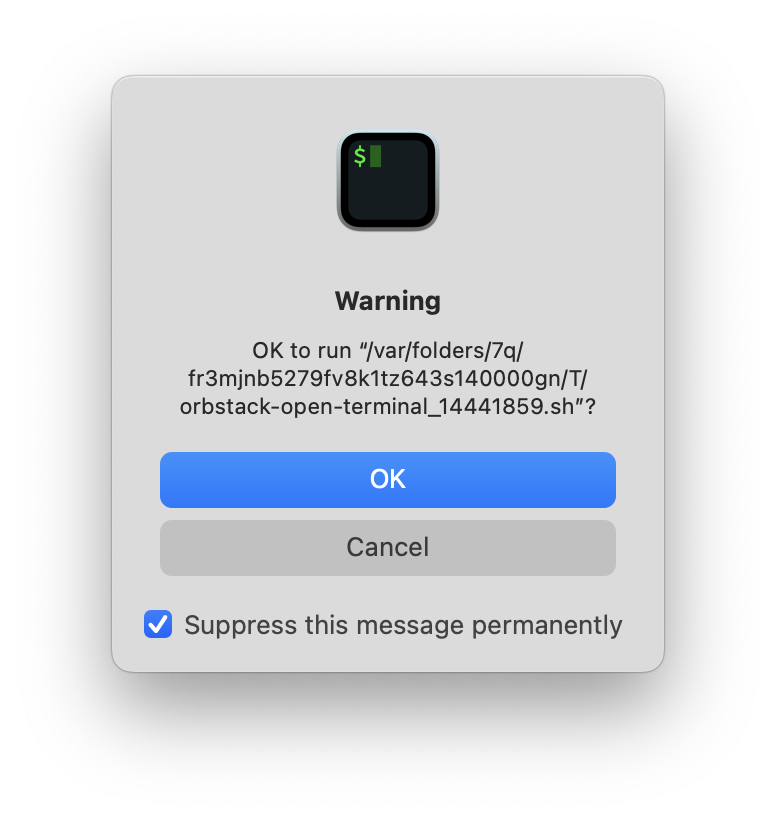 - > **Quick Tip**! > > You will always be able to launch the OrbStack application and @@ -65,7 +62,7 @@ Warning](https://img.cleberg.net/blog/20240503-ubuntu-on-macos/warning.png) Once successful, OrbStack will launch your default terminal and log you into the Linux machine you created above. -In the example below, we can see that the machine is using `Linux ubuntu 6.7.11` +In the example below, we can see that the machine is using `Linux ubuntu 6.9.6` and operates similar to a fresh Ubuntu install on bare metal. 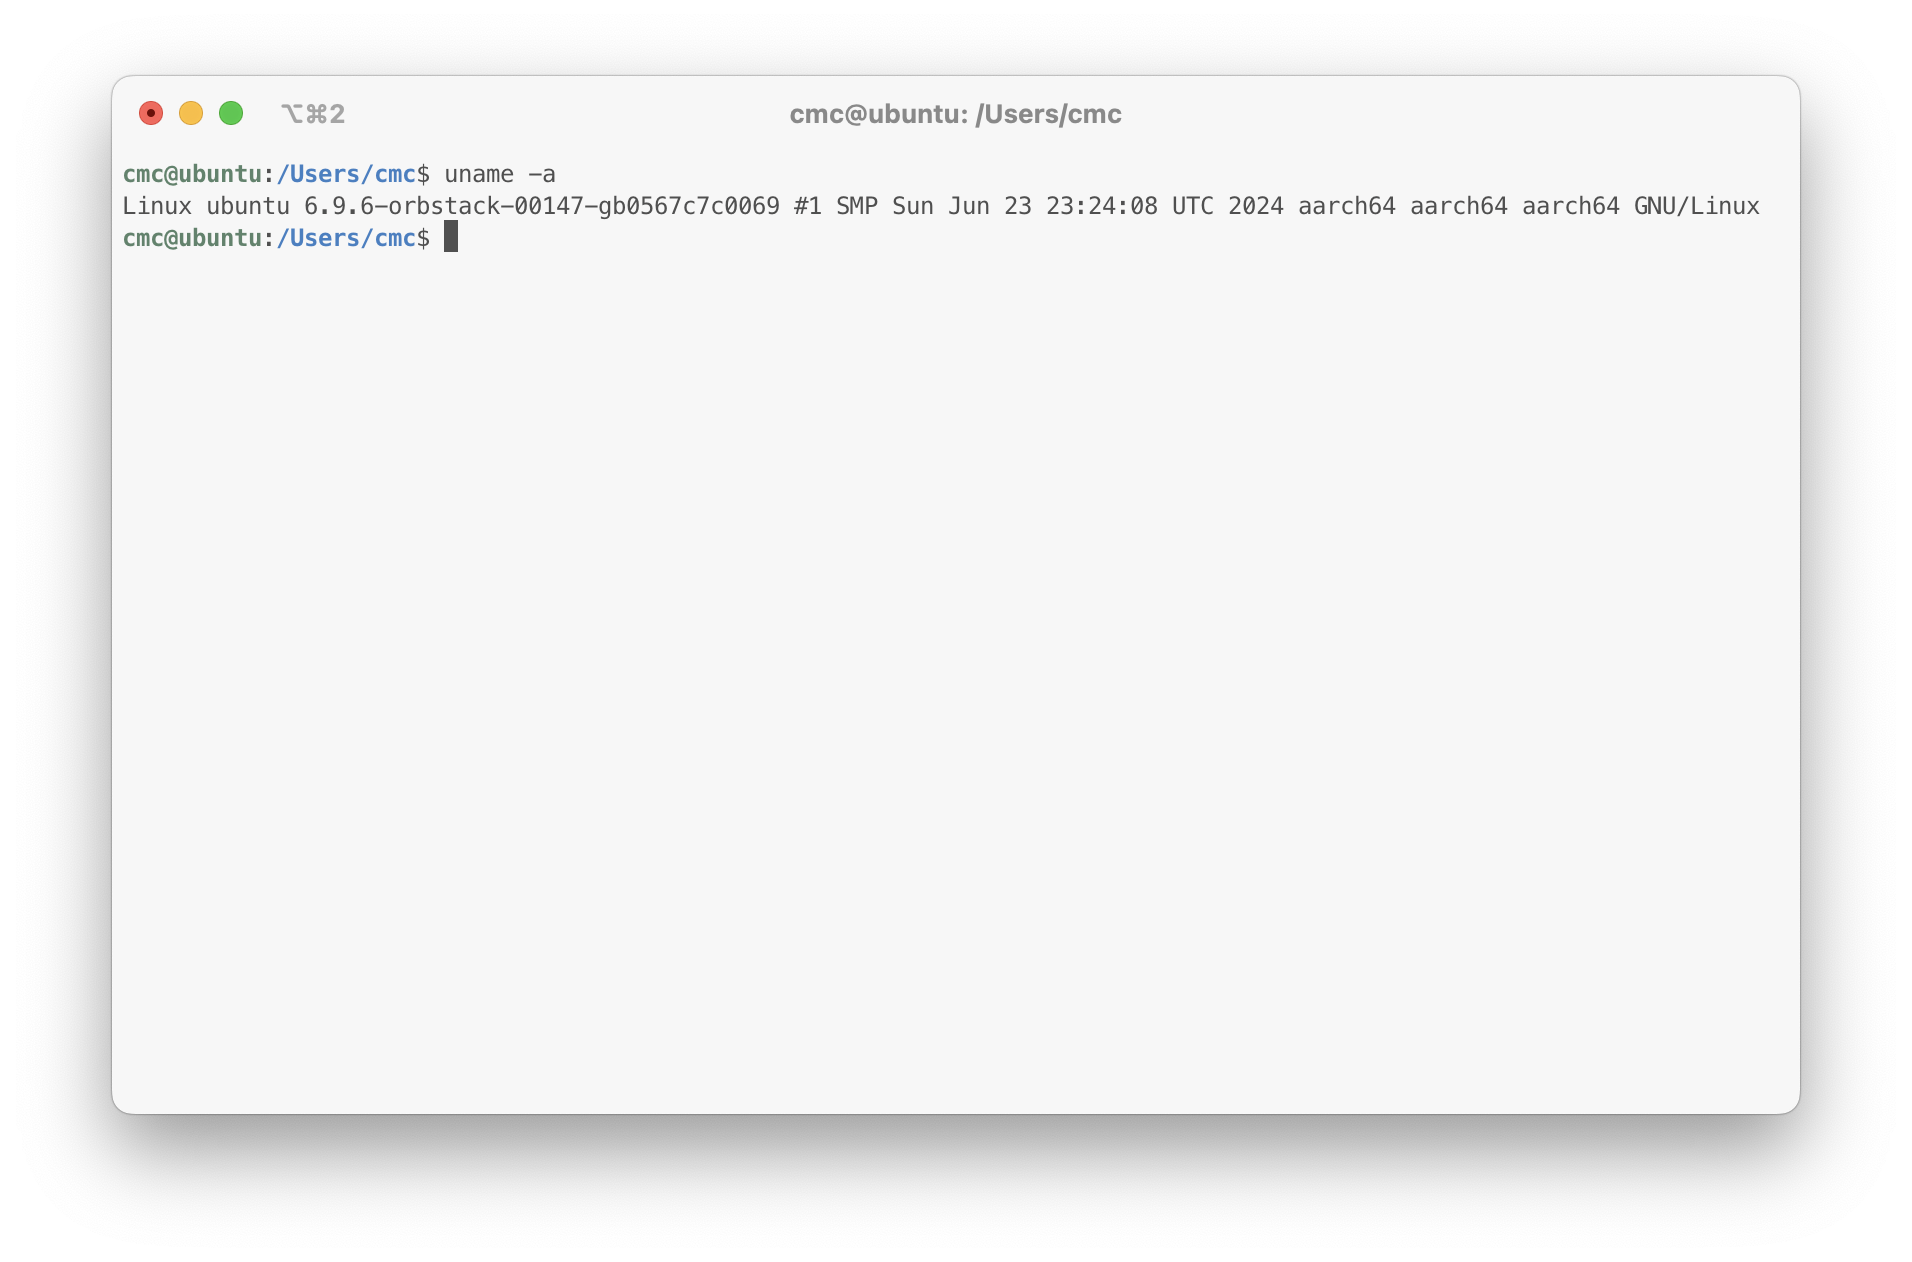 @@ -82,11 +79,10 @@ defaults to opening in Xcode on my system. 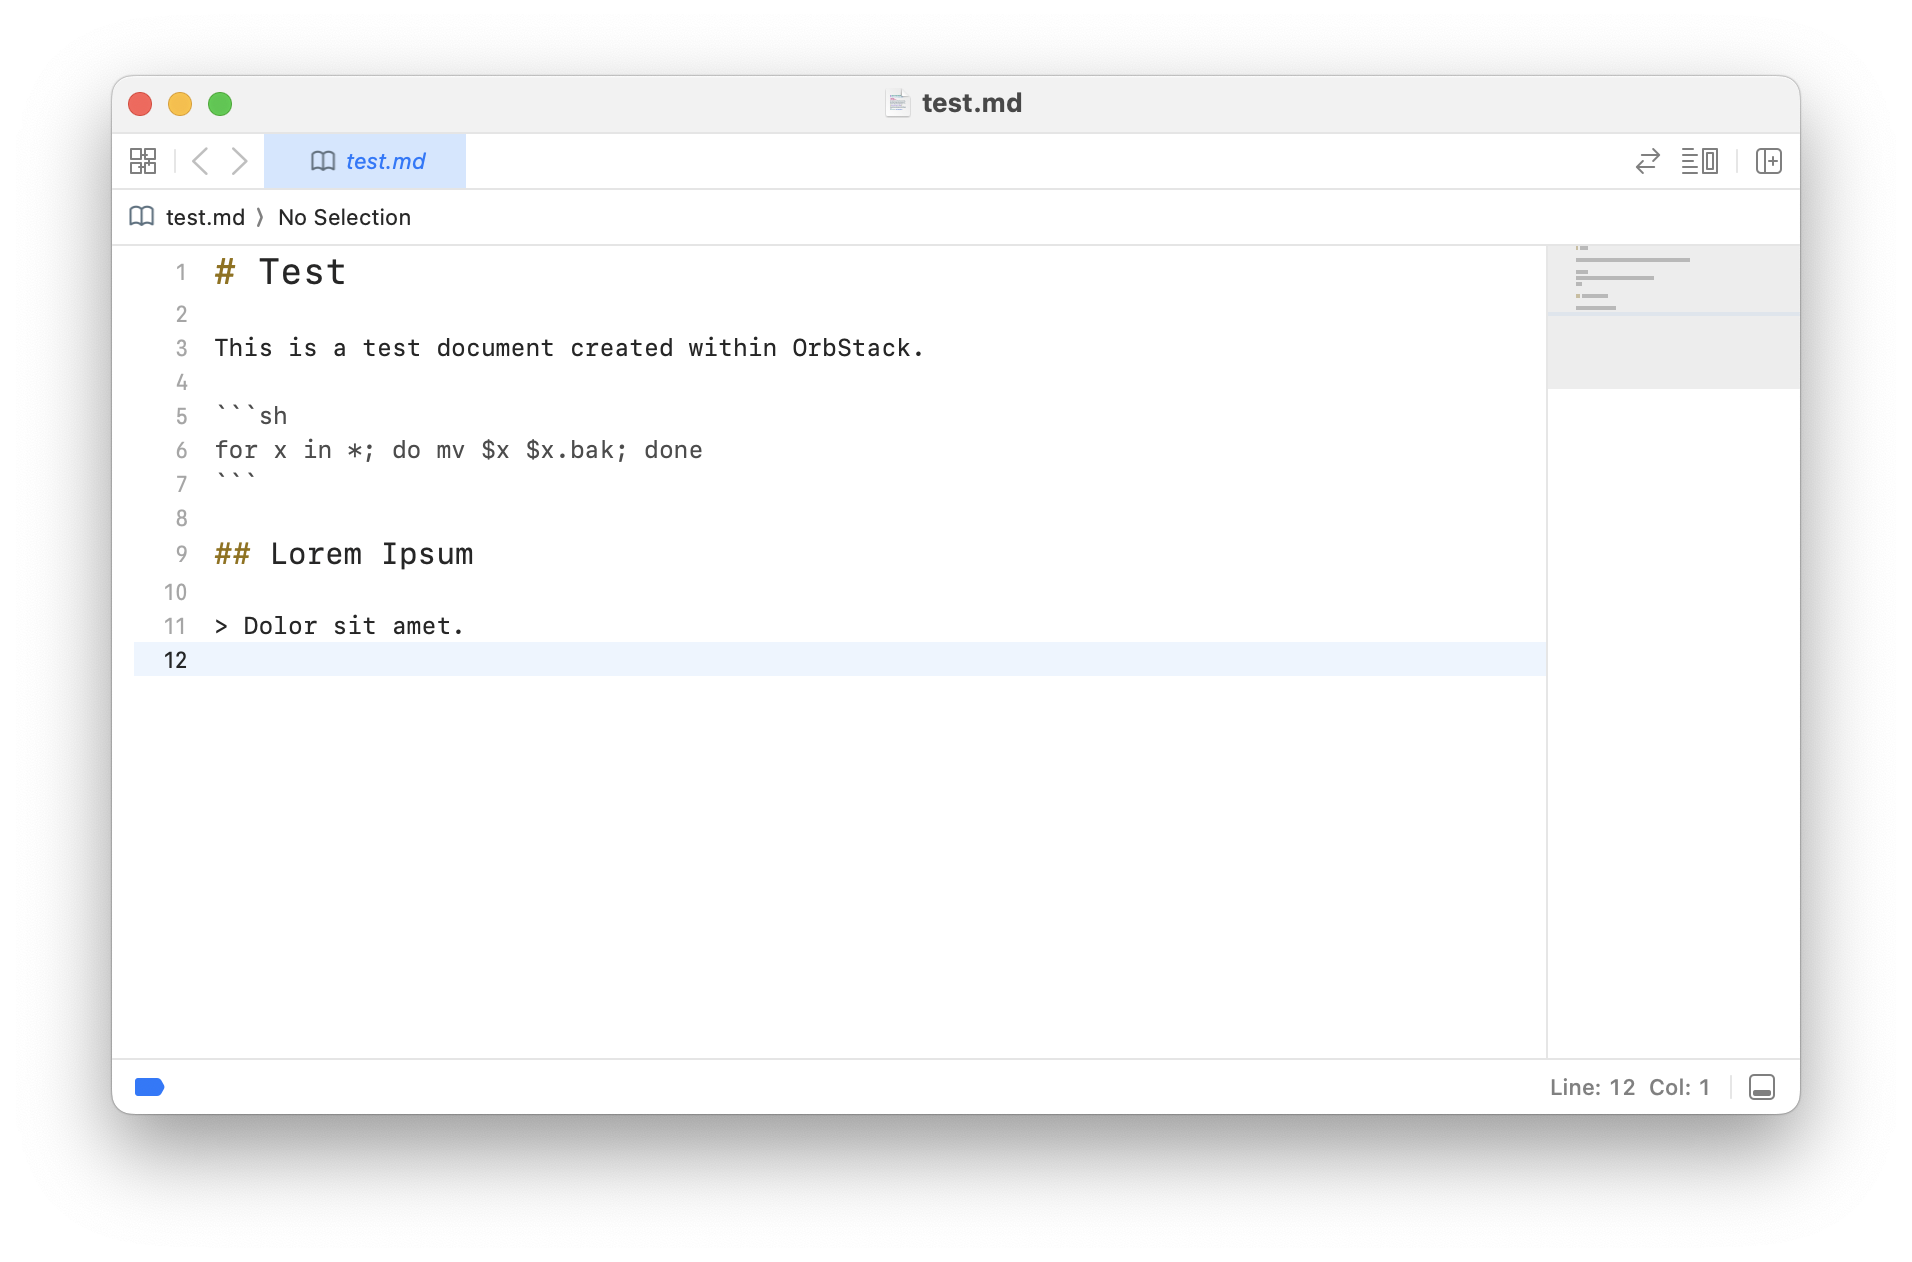 - ### Test Examples -As a quick example of the system, I added a `test` user, installed `neofetch`, -and switched the `test` user's shell to `zsh`: +As a quick example of the system, I installed `neofetch`, switched to the `zsh` +shell, and ran a few common commands. 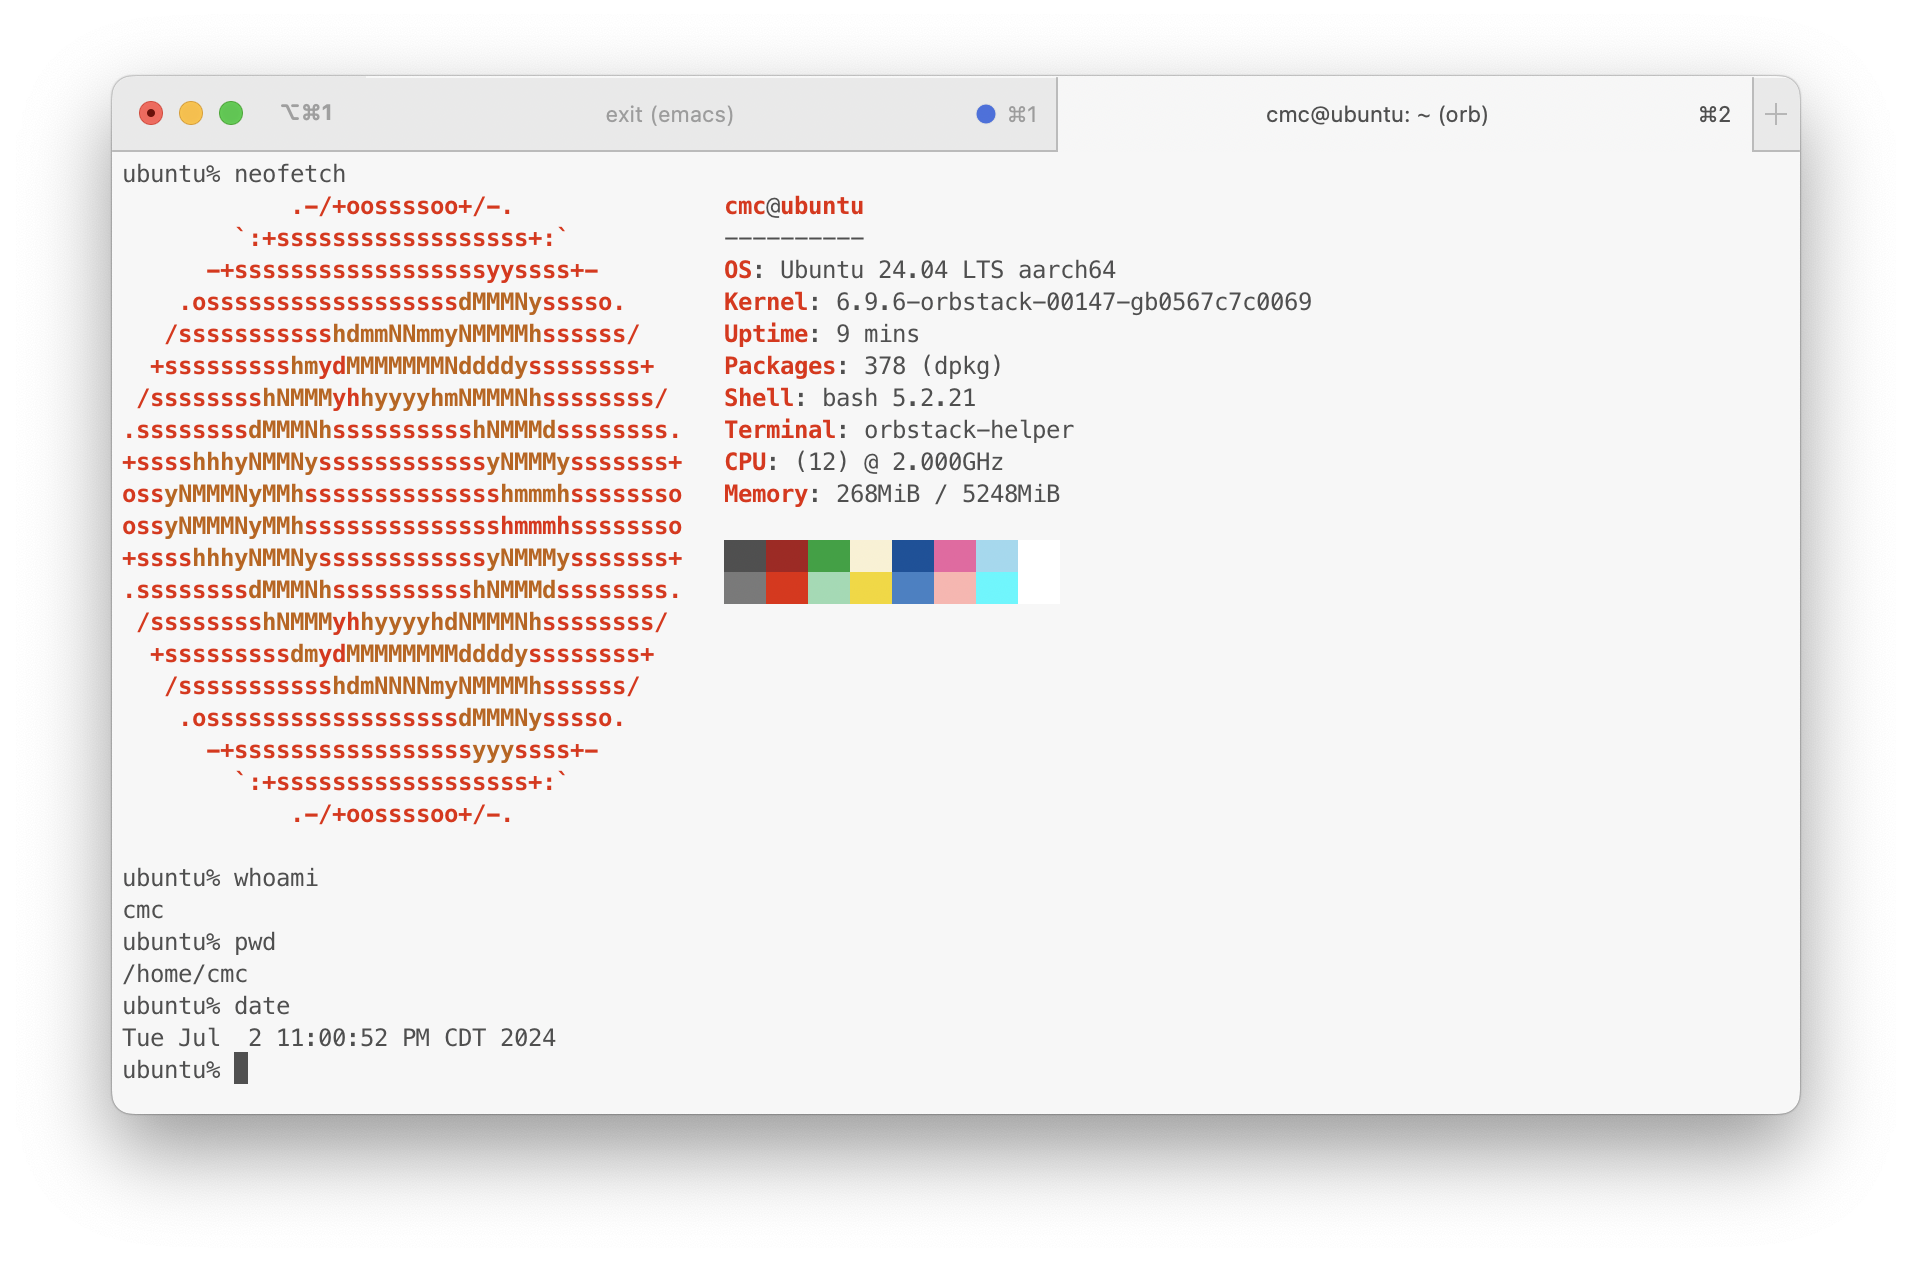 |