
diff options
| author | Christian Cleberg <hello@cleberg.net> | 2024-01-08 20:11:17 -0600 |
|---|---|---|
| committer | Christian Cleberg <hello@cleberg.net> | 2024-01-08 20:11:17 -0600 |
| commit | 25945b8fead989cca09a23983623b63ce36dcc0c (patch) | |
| tree | 0dfc869ce8b028e04ce9da196af08779780915ce /content/blog/2022-03-08-plex-migration.md | |
| parent | 22b526be60bf4257c2a1d58a5fad59cf6b044375 (diff) | |
| download | cleberg.net-25945b8fead989cca09a23983623b63ce36dcc0c.tar.gz cleberg.net-25945b8fead989cca09a23983623b63ce36dcc0c.tar.bz2 cleberg.net-25945b8fead989cca09a23983623b63ce36dcc0c.zip | |
feat: total re-write from Emacs org-mode to Zola markdown
Diffstat (limited to 'content/blog/2022-03-08-plex-migration.md')
| -rw-r--r-- | content/blog/2022-03-08-plex-migration.md | 253 |
1 files changed, 253 insertions, 0 deletions
diff --git a/content/blog/2022-03-08-plex-migration.md b/content/blog/2022-03-08-plex-migration.md new file mode 100644 index 0000000..0b4d900 --- /dev/null +++ b/content/blog/2022-03-08-plex-migration.md @@ -0,0 +1,253 @@ ++++ +date = 2022-03-08 +title = "Migrating Plex to a New Server (& Nvidia Transcoding)" +description = "A retrospective on migrating Plex between servers and enabling Nvidia GPU transcoding." ++++ + +## Migration Phases + +I recently decided to migrate my server from an old OptiPlex desktop +machine to a custom-built tower with better hardware in every category. +In order to do this, I would need to properly migrate a full Plex +installation. + +The second part of this migration is that the new server uses an Nvidia +GPU and does not have any integrated graphics, which requires extra work +for installation, but provides much better hardware transcoding options +for Plex. + +Therefore, I have broken this migration down into three phases: + +1. [Configure the New Server](#phase-1-configure-the-new-server) +2. [Migrate Plex Data & Devices](#phase-2-migrate-plex-data-devices) +3. [Configure GPU Transcoding](#phase-3-configure-gpu-transcoding) + +------------------------------------------------------------------------ + +## Phase 1: Configure the New Server + +### Choosing an OS + +In order to migrate Plex to my new server, I first needed to choose an +appropriate operating system (OS) and install it on the machine. Given +that I have encountered numerous issues installing other Linux +distributions properly with Nvidia graphics, I chose [Ubuntu +Server](https://ubuntu.com/download/server). + +The first step is to create a bootable USB with Ubuntu Server. This is +easy with [Etcher](https://www.balena.io/etcher/), an app that runs on +many different platforms. Just download the Ubuntu Server +`.iso` image, launch Etcher, and install the +`.iso` on the USB. + +Once the USB is created, insert it into my server, reboot, and click +`Esc` (or any of the `F1-12` keys) until the BIOS +menu appears. Finally, launch the USB boot drive. + +### Booting with Nvidia + +In order to install Ubuntu Server with an Nvidia Graphics card (and no +integrated graphics on this device for some reason), you'll have to +configure the boot menu to allow different graphics drivers to be +loaded. + +When booting from the USB, the machine will launch the initial +installation menu. From this menu, type `e` to view the +default command options that come with the device - it's a good idea to +take a photo of this screen, so you can enter these commands on the next +screen (along with adding support for Nvidia). + +Finally, type `Ctrl + C` to enter the command line. From this +command line, enter the commands found on the `e` screen. +\*Remember to add `nomodeset` to the `linux ...` +line so that your Nvidia device will display the installation screens +properly!\* + +Here's an example of the commands I pulled from the `e` +screen and entered on the command line. + +```sh +setparams 'Install Ubuntu Server' +setgfxpayload=keep +linux /casper/vmlinuz quiet nomodeset --- +initrd /casper/initrd +boot +``` + +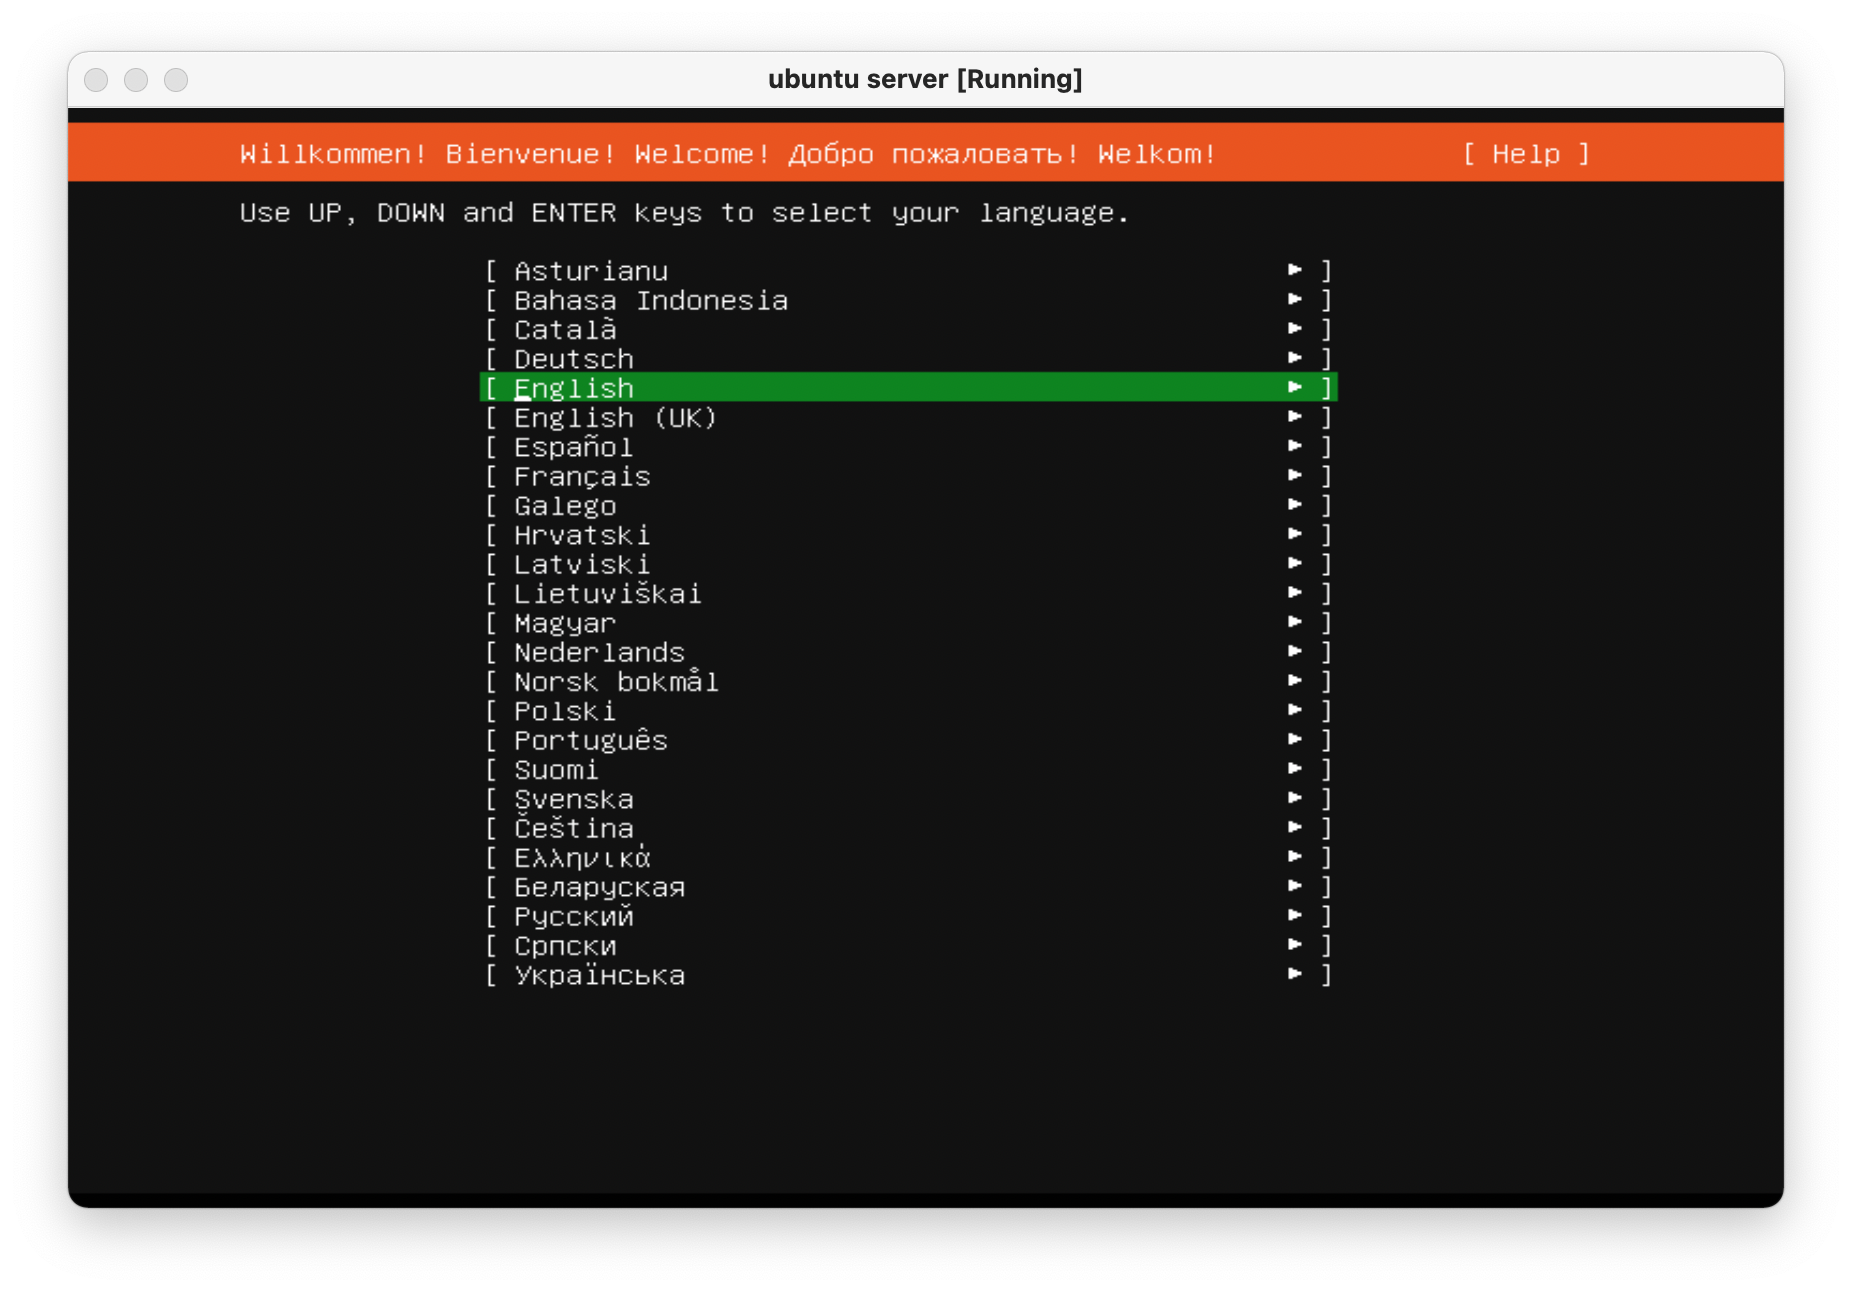 + +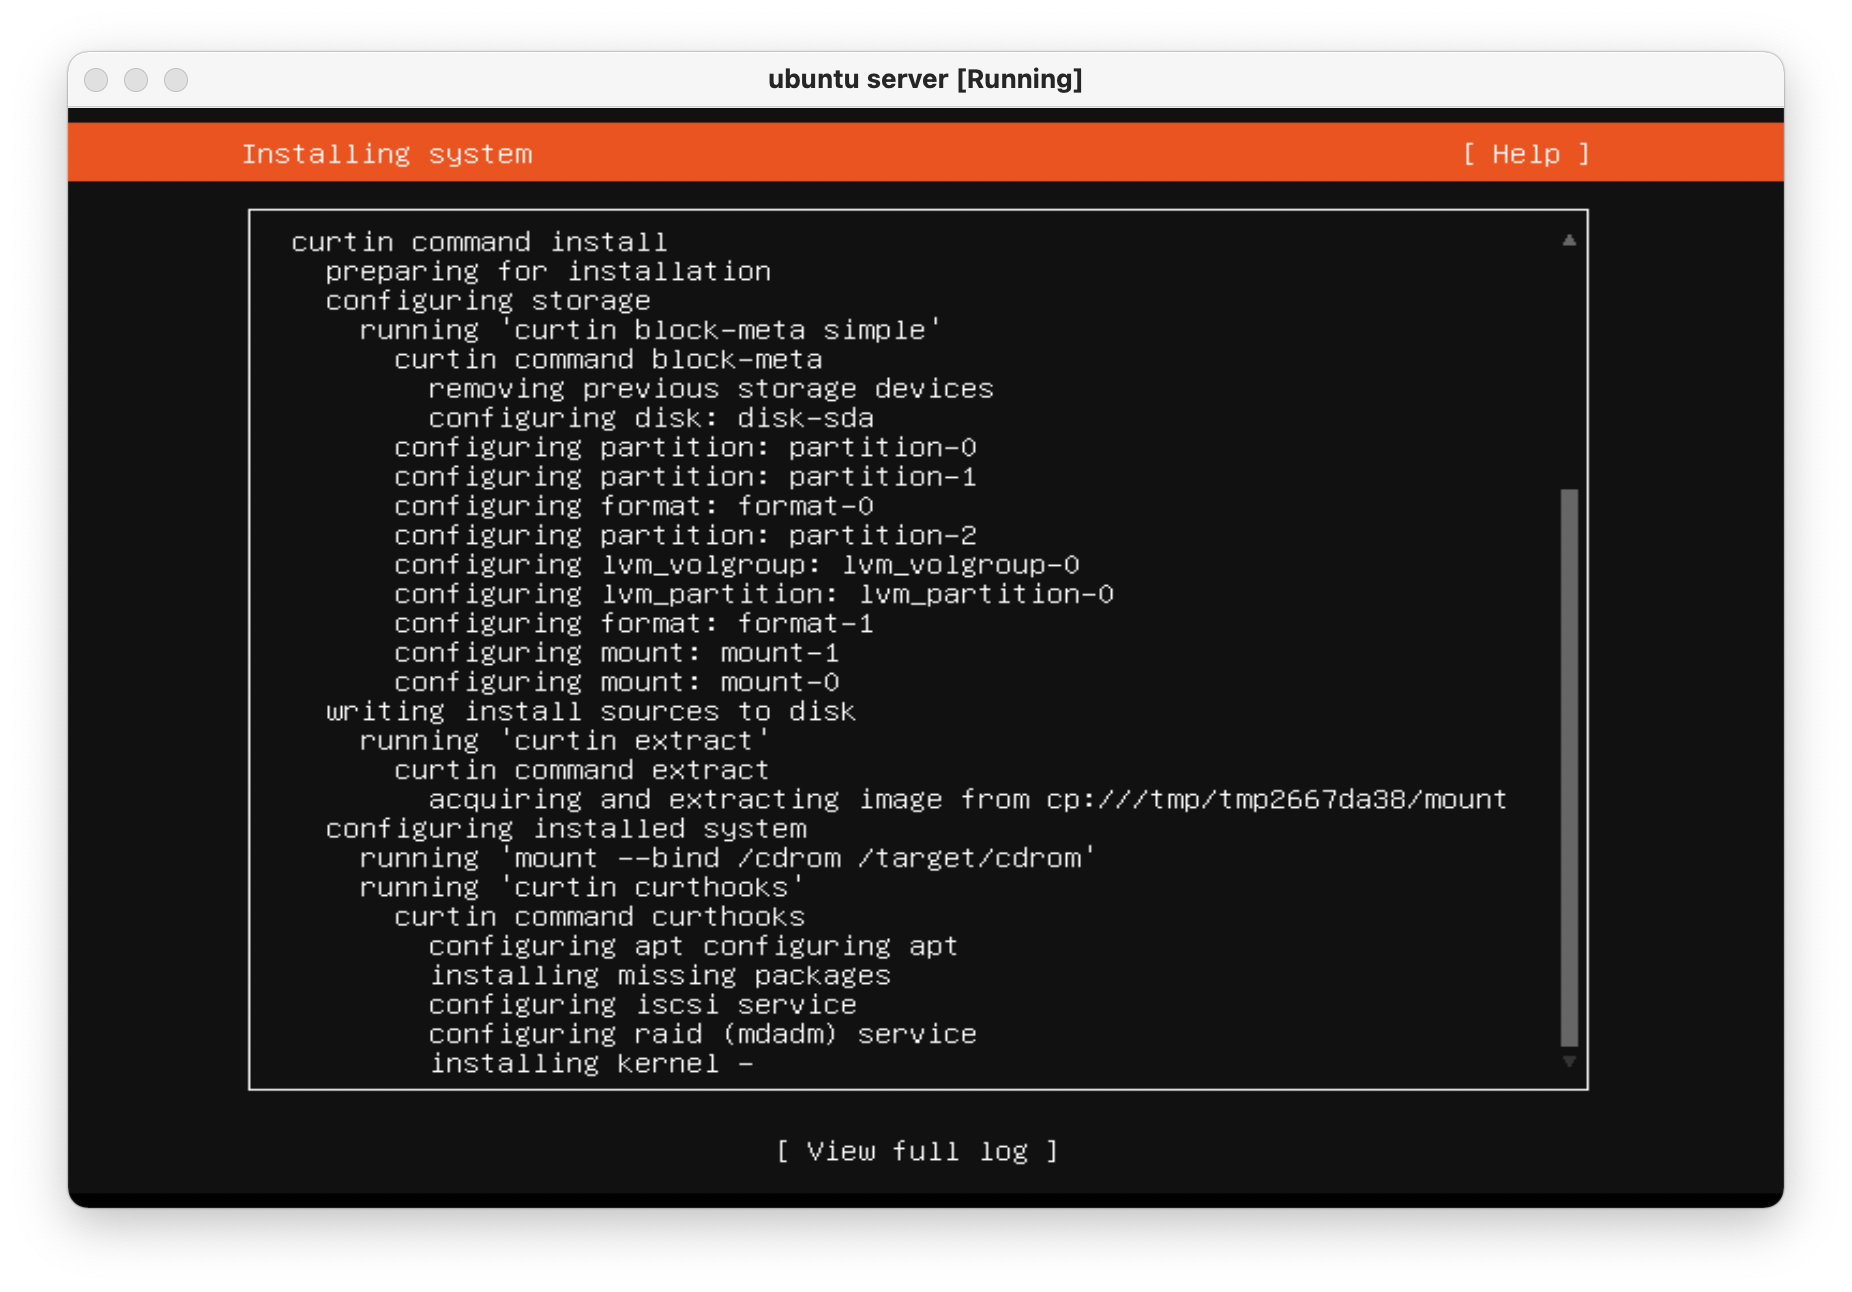 + +Once the machine is rebooted, enter the `e` screen again and +add `nomodeset` to the `linux ...` line again and +press `Ctrl + X` to save the boot options. + +The machine is now fully installed and can properly display on an +external display using the Nvidia GPU. + +Always remember to update and upgrade on a new installation: + +```sh +sudo apt update; sudo apt upgrade -y; sudo apt autoremove -y +``` + +------------------------------------------------------------------------ + +## Phase 2: Migrate Plex Data & Devices + +This phase uses the great Plex article on migrations ([Move an +Installation to Another +System](https://support.plex.tv/articles/201370363-move-an-install-to-another-system/)) +and adds a bit more information to help with commands and context. + +### Terminology + +**Source:** The original server that is being replaced.\ +**Destination:** The new server.\ +**Client:** Any application that can be used to modify settings for both +source/destination. + +### Step 01: [Client] Update Settings + +Open up a Plex app and *disable* the `Account` \> +`Library` \> +`Empty trash automatically after every scan` preference for +the source server. + +### Step 02: [Destination] Install Plex + +Open up the [Plex Media Server download +page](https://www.plex.tv/media-server-downloads/) and copy the link for +the appropriate platform. + +Execute the following commands on the destination server to install +Plex: + +```sh +wget <url> +sudo dpkg -i <filename> +sudo systemctl stop plexmediaserver.service +``` + +### Step 03: [Source] Stop Plex & Migrate Data + +First, stop the Plex service so that no data is created or modified +during the migration. + +```sh +sudo systemctl stop plexmediaserver.service +``` + +Next, copy the data to the new server. To find where the Plex data +directory is located, Plex has another excellent article available: +[Where is the Plex Media Server data directory +located?](https://support.plex.tv/articles/202915258-where-is-the-plex-media-server-data-directory-located/). + +There are many ways to copy the data to the new server and will largely +depend on the size of the folder being copied. Personally, my data +folder was \~23GB and I opted to simply use the `scp` command +to copy the files over SSH. + +This process was throttled by the old server's slow HDD and ports and +took approximately 90 minutes to complete. In comparison, moving the +data from the new server's `home/user/` directory to the +`/var/.../Plex Media Server` directory took 2-3 minutes. + +```sh +scp -r "/var/lib/plexmediaserver/Library/Application Support/Plex Media Server" your_user@xxx.xxx.xxx.xxx:"'/path/to/destination/'" +``` + +### Step 04: [Destination] Update File Permissions + +In case you move the data directory to a common area on the new server, +it will have to be moved to the proper location before Plex can function +properly: + +```sh +mv "Plex Media Server" /var/lib/plexmediaserver/Library/Application Support/ +``` + +To ensure permissions were retained properly, the server will need to +show that all files and folders in the data directory are owned by +`plex:plex` (or whichever user is running the Plex +application). + +```sh +sudo chown -R plex:plex "/var/lib/plexmediaserver/Library/Application Support/Plex Media Server" +``` + +Finally, start the service and check the status. + +```sh +sudo systemctl start plexmediaserver.service +sudo systemctl status plexmediaserver.service +``` + +### Step 05: [Client] Update Libraries & Metadata + +The first step - now that the new server is up and running - is to sign +out of the client and sign back in. Once this is done, update any +library locations, if necessary. This was unnecessary in my case since I +simply moved my storage drives from the source server to the destination +server. + +Next, perform the following actions in the client: + +1. On the left sidebar, click `More` \> Three-Dot Menu \> + `Scan Library Files` +2. *Enable* the `Account` \> `Library` \> + `Empty trash automatically after every scan` preference + for the source server. +3. On the left sidebar, click `More` \> Three-Dot Menu \> + `Manage Server` \> `Empty Trash` +4. On the left sidebar, click `More` \> Three-Dot Menu \> + `Manage Server` \> `Clean Bundles` +5. On the left sidebar, click `More` \> Three-Dot Menu \> + `Manage Server` \> `Optimize Database` + +Finally, double-check the Remote Access settings to make sure no changes +have caused issues with accessing the server from outside the network. + +In my case, I use a single port forwarding rule in my router and needed +to update the Local LAN IP Address to the new server IP address. + +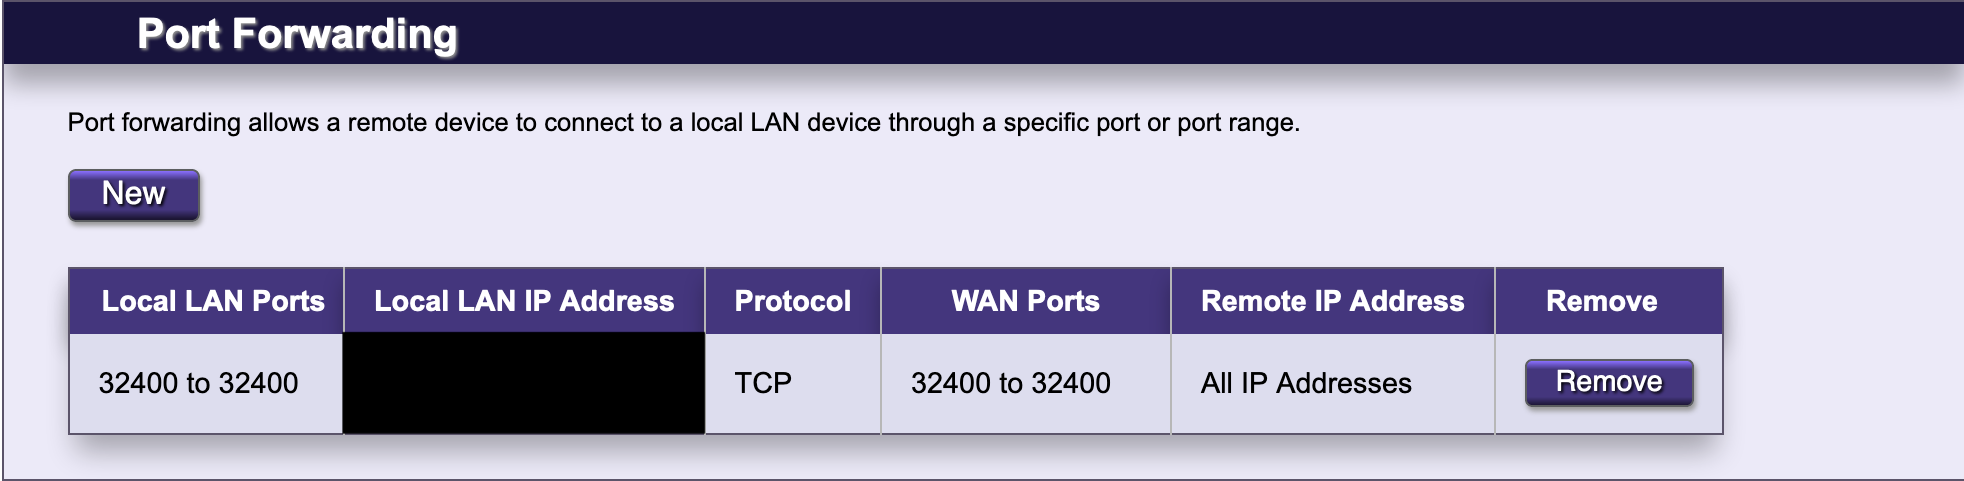 + +------------------------------------------------------------------------ + +## Phase 3: Configure GPU Transcoding + +The final piece to the migration is enabling hardware transcoding so +that Plex can fully utilize the new Nvidia GPU available in the server. +The first step is to install Nvidia graphics drivers. This process may +take a few minutes, but the commands are pretty simple: + +```sh +sudo add-apt-repository ppa:graphics-drivers/ppa +sudo apt update +sudo apt-get install ubuntu-drivers-common +sudo ubuntu-drivers autoinstall +``` + +Finally, reboot so that the changes are loaded: + +```sh +sudo reboot now +``` + +To ensure that the Nvidia graphics drivers are working properly, run the +following command to view the available GPUs, statistics, and processes: + +```sh +sudo nvidia-smi +``` + +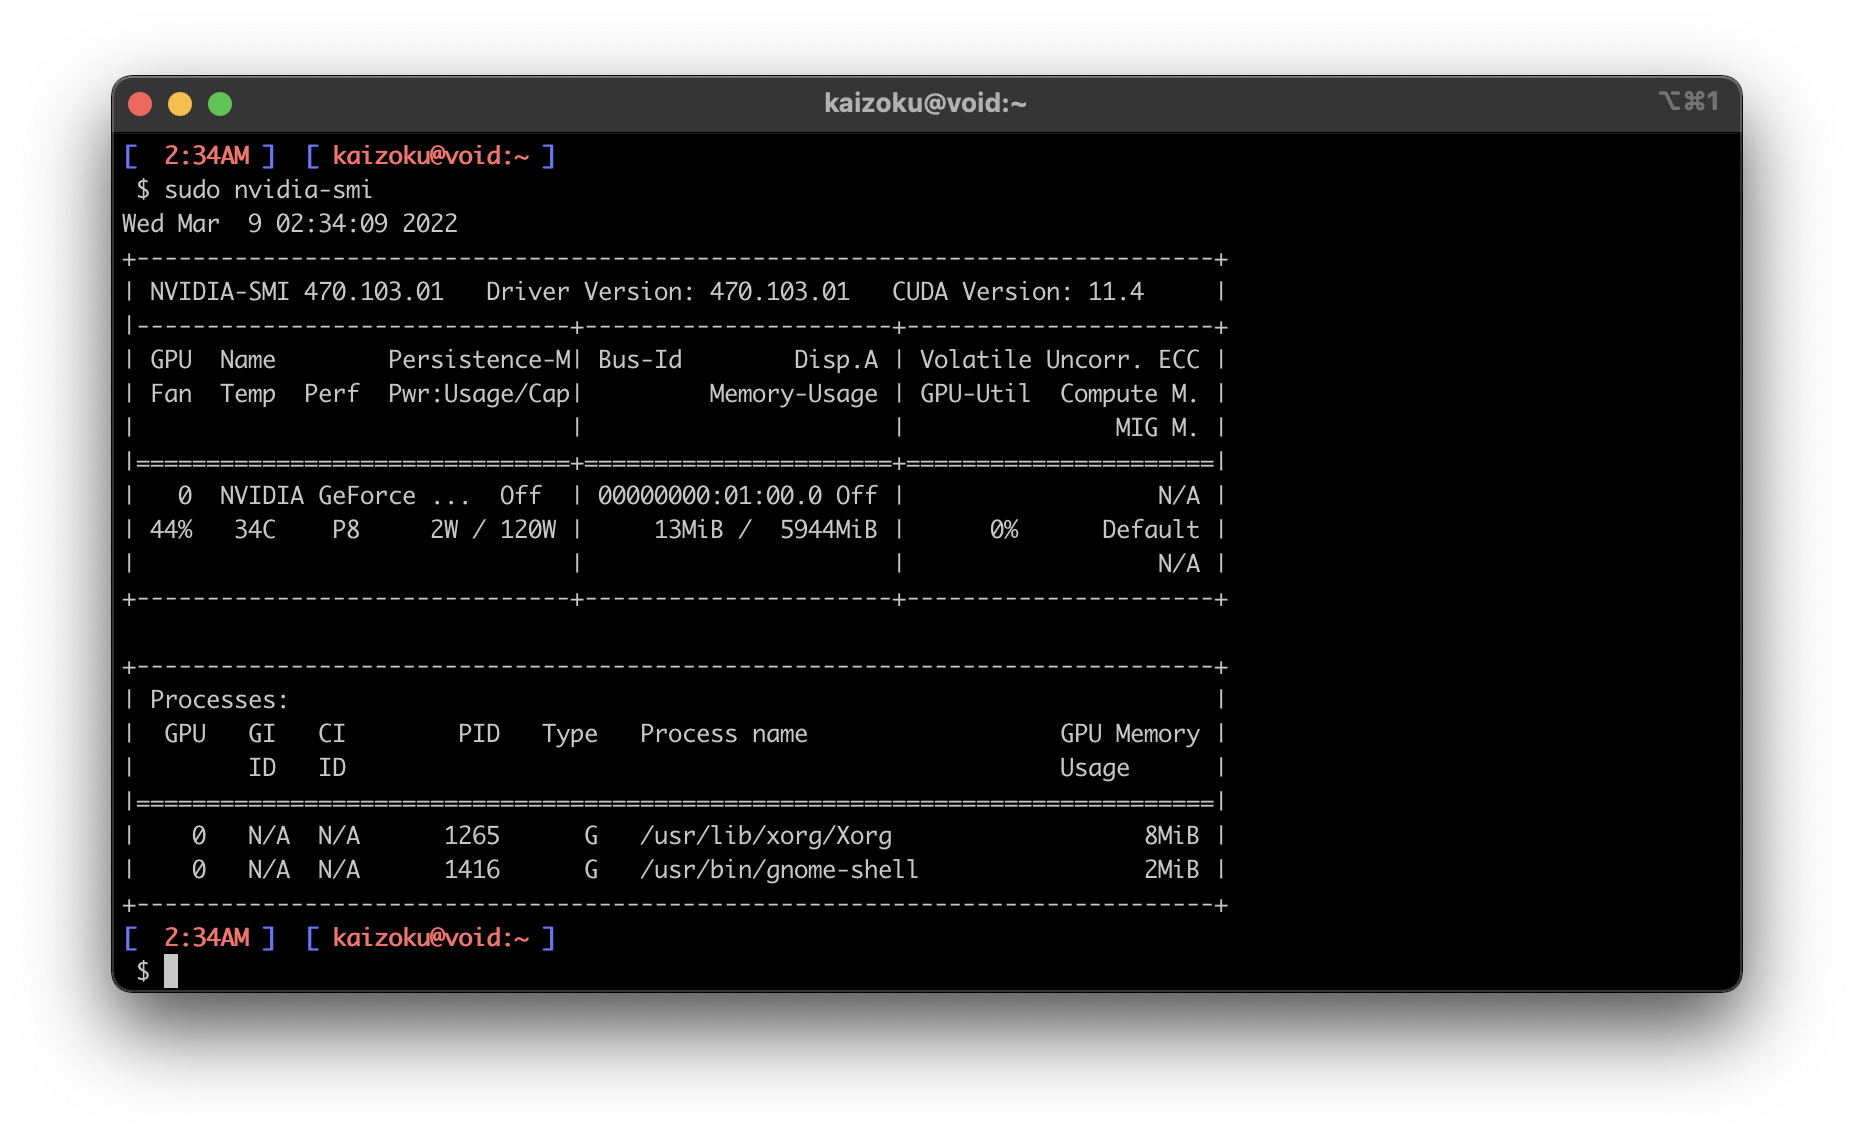 + +Finally, enable hardware transcoding settings in the Plex application: + +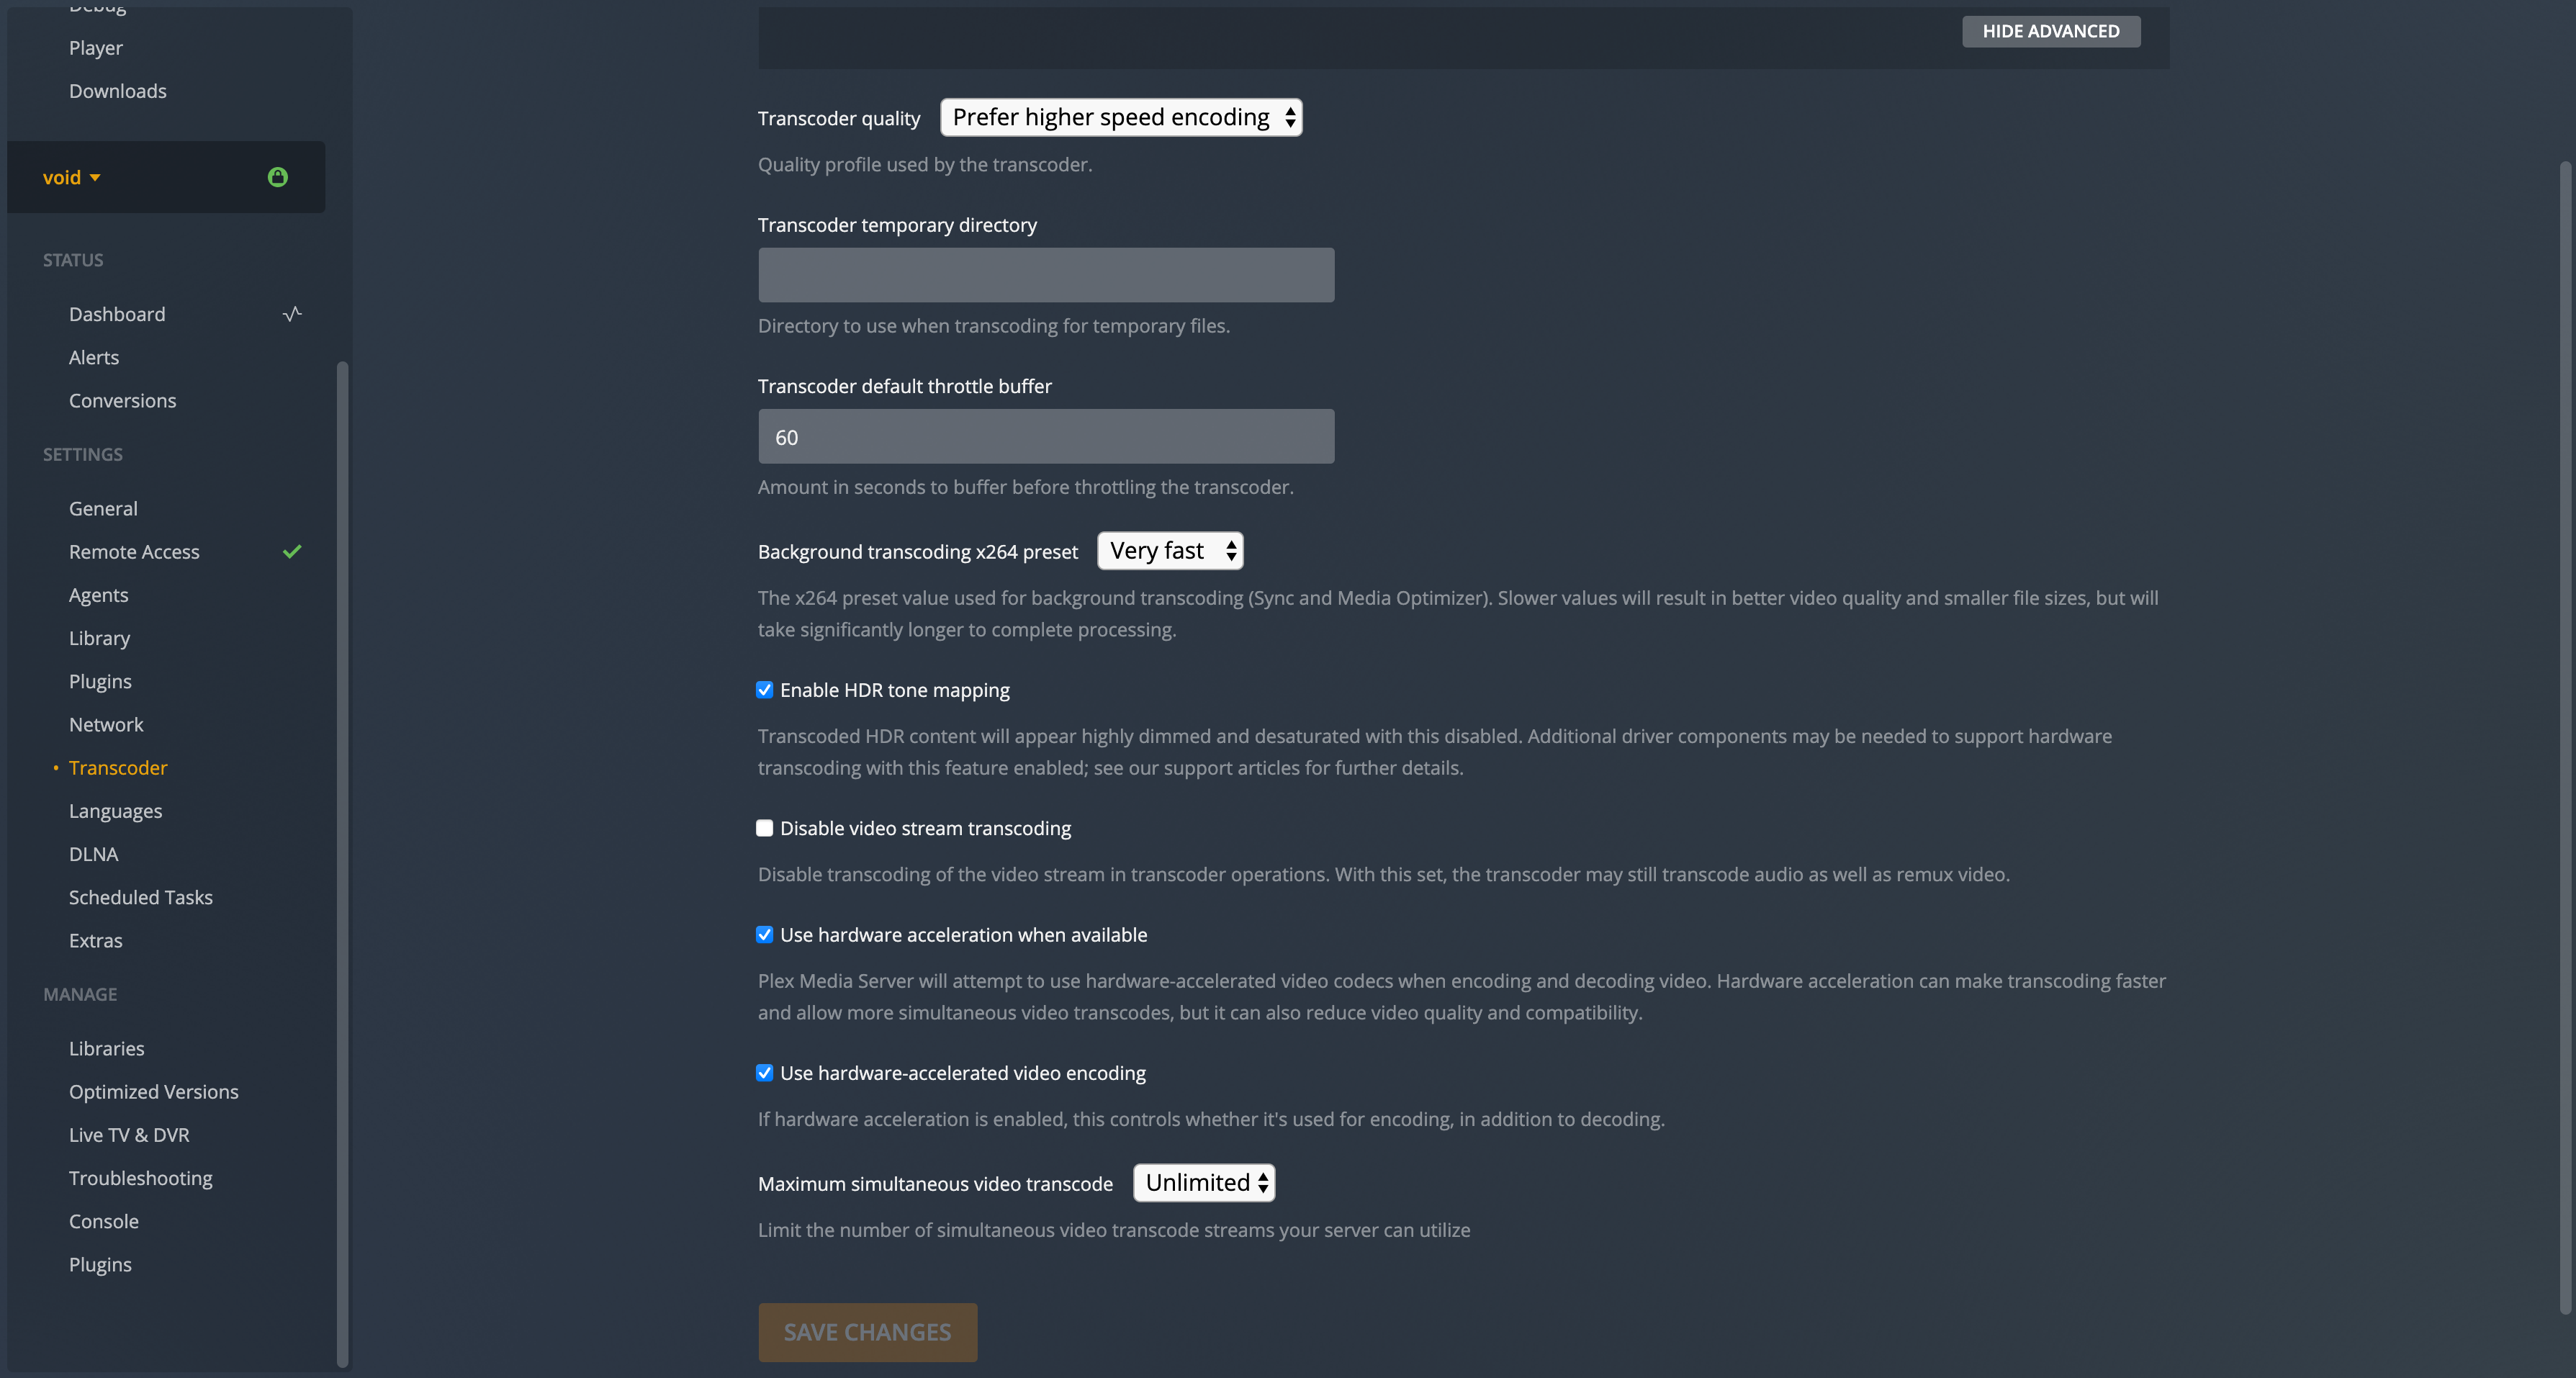 |