
diff options
| author | Christian Cleberg <hello@cleberg.net> | 2024-04-29 14:18:55 -0500 |
|---|---|---|
| committer | Christian Cleberg <hello@cleberg.net> | 2024-04-29 14:18:55 -0500 |
| commit | fdd80eadcc2f147d0198d94b7b908764778184a2 (patch) | |
| tree | fbec9522ea9aa13e8105efc413d2498c3c5b4cd6 /content/blog/2023-10-11-self-hosting-authelia.md | |
| parent | d6c80fdc1dea9ff242a4d3c7d3939d2727a8da56 (diff) | |
| download | cleberg.net-fdd80eadcc2f147d0198d94b7b908764778184a2.tar.gz cleberg.net-fdd80eadcc2f147d0198d94b7b908764778184a2.tar.bz2 cleberg.net-fdd80eadcc2f147d0198d94b7b908764778184a2.zip | |
format line wrapping and fix escaped characters
Diffstat (limited to 'content/blog/2023-10-11-self-hosting-authelia.md')
| -rw-r--r-- | content/blog/2023-10-11-self-hosting-authelia.md | 129 |
1 files changed, 60 insertions, 69 deletions
diff --git a/content/blog/2023-10-11-self-hosting-authelia.md b/content/blog/2023-10-11-self-hosting-authelia.md index 34da792..46773dd 100644 --- a/content/blog/2023-10-11-self-hosting-authelia.md +++ b/content/blog/2023-10-11-self-hosting-authelia.md @@ -7,49 +7,47 @@ draft = false # Overview -[Authelia](https://www.authelia.com/) is an open-source authentication -service that allows you to place a portal between end users on the -internet and self-hosted services on your server. +[Authelia](https://www.authelia.com/) is an open-source authentication service +that allows you to place a portal between end users on the internet and +self-hosted services on your server. -You can require one factor (username+password) or two factor -authentication for any such user before allowing them to access a -specific service on your domain. +You can require one factor (username+password) or two factor authentication for +any such user before allowing them to access a specific service on your domain. This guide will walk through a standard installation of Authelia for -`example.com`, using `auth.example.com` as -Authelia\'s authentication domain and `teddit.example.com` as -the website we want to protect behind the authentication portal. +`example.com`, using `auth.example.com` as Authelia's authentication domain and +`teddit.example.com` as the website we want to protect behind the authentication +portal. # Prerequisites This guide assumes you have the following already set-up: -- A registered domain with DNS pointing to your server. -- A subdomain for Authelia (`auth.example.com`) and a - subdomain to protect via Authelia (`app.example.com`). -- A working Nginx web server. -- Docker and docker-compose installed. +- A registered domain with DNS pointing to your server. +- A subdomain for Authelia (`auth.example.com`) and a subdomain to protect via + Authelia (`app.example.com`). +- A working Nginx web server. +- Docker and docker-compose installed. # Installation -This guide will walk through each installation step one-by-one, starting -with the container and finishing by cleaning up external access via an -Nginx reverse proxy. +This guide will walk through each installation step one-by-one, starting with +the container and finishing by cleaning up external access via an Nginx reverse +proxy. ## Docker-Compose -To start, create a directory for Authelia and create a -`docker-compose.yml` file. +To start, create a directory for Authelia and create a `docker-compose.yml` +file. ```sh mkdir ~/authelia nano ~/authelia/docker-compose.yml ``` -Within this file, paste the following content. If you prefer a different -local port, modify the port on the left side of the colon on the -`9091:9091` line. Be sure to modify the `TZ` -variable to your timezone. +Within this file, paste the following content. If you prefer a different local +port, modify the port on the left side of the colon on the `9091:9091` line. Be +sure to modify the `TZ` variable to your timezone. ``` yml version: '3.3' @@ -72,45 +70,40 @@ Start the container with docker-compose: sudo docker-compose up -d ``` -After the first start, the container will automatically exit and require -you to modify the app\'s configuration files before continuing. Read on -to learn more. +After the first start, the container will automatically exit and require you to +modify the app's configuration files before continuing. Read on to learn more. ## Authelia Configuration -To configure Authelia before we restart the container, we need to open -the `config` directory and modify the files. Start by editing -the `configuration.yml` file, where all of Authelia\'s -settings are stored. +To configure Authelia before we restart the container, we need to open the +`config` directory and modify the files. Start by editing the +`configuration.yml` file, where all of Authelia's settings are stored. -My personal preference is to copy the original configuration file to a -backup file and edit a fresh copy. +My personal preference is to copy the original configuration file to a backup +file and edit a fresh copy. ```sh sudo cp ~/authelia/config/configuration.yml ~/authelia/config/configuration.yml.bk sudo nano ~/authelia/config/configuration.yml ``` -Within the blank `configuration.yml` file, paste the -following information. You will need to make quite a few updates, so be -sure to read each line carefully and modify as necessary. +Within the blank `configuration.yml` file, paste the following information. You +will need to make quite a few updates, so be sure to read each line carefully +and modify as necessary. The major required changes are: -- Any instances of `example.com` should be replaced by your - domain. -- `jwt_secret` - Use the `pwgen 40 1` command to - generate a secret for yourself. -- `access_control` - Set the Authelia domain to bypass - here, as well as any subdomains you want to protect. -- `session` \> `secret` - Use the - `pwgen 40 1` command to generate a secret for yourself. -- `regulation` - Set the variables here to restrict login - attempts and bans. -- `storage` \> `encryption_key` - Use the - `pwgen 40 1` command to generate a secret for yourself. -- `smtp` - If you have access to an SMTP service, set up - the information here to active outgoing emails. +- Any instances of `example.com` should be replaced by your domain. +- `jwt_secret` - Use the `pwgen 40 1` command to generate a secret for yourself. +- `access_control` - Set the Authelia domain to bypass here, as well as any + subdomains you want to protect. +- `session` > `secret` - Use the `pwgen 40 1` command to generate a secret for + yourself. +- `regulation` - Set the variables here to restrict login attempts and bans. +- `storage` > `encryption_key` - Use the `pwgen 40 1` command to generate a + secret for yourself. +- `smtp` - If you have access to an SMTP service, set up the information here to + active outgoing emails. ``` yml # yamllint disable rule:comments-indentation @@ -211,14 +204,13 @@ Next, create the users file for authentication. sudo nano ~/authelia/config/users_database.yml ``` -Within the file, you will need to create an entry for each user that -needs access to Authelia. The `my_username` entry will be the -username used on the login page. +Within the file, you will need to create an entry for each user that needs +access to Authelia. The `my_username` entry will be the username used on the +login page. -To generate the password, go to [Argon2 Hash -Generator](https://argon2.online), generate a random salt, and make sure -the rest of the settings match the `authentication_backend` -section of `configuration.yml` file. +To generate the password, go to [Argon2 Hash Generator](https://argon2.online), +generate a random salt, and make sure the rest of the settings match the +`authentication_backend` section of `configuration.yml` file. ``` yaml users: @@ -242,8 +234,8 @@ sudo docker-compose down && sudo docker-compose up -d ## Nginx: Authelia Domain -Once the container is running and configured, the final step is to -configure external access to the server via Nginx reverse proxy. +Once the container is running and configured, the final step is to configure +external access to the server via Nginx reverse proxy. Start by creating the Authelia domain. @@ -252,9 +244,8 @@ sudo nano /etc/nginx/sites-available/auth ``` Within this file, paste the following information and be sure to update -`example.com` to your domain. Make sure the -`$upstream_authelia` variable matches the location of your -Authelia container. +`example.com` to your domain. Make sure the `$upstream_authelia` variable +matches the location of your Authelia container. ``` conf server { @@ -310,8 +301,8 @@ server { } ``` -Next, symlink the file and restart Nginx. If there are errors, be sure -to resolve those before moving on. +Next, symlink the file and restart Nginx. If there are errors, be sure to +resolve those before moving on. ```sh sudo ln -s /etc/nginx/sites-available/auth /etc/nginx/sites-enabled/auth @@ -320,9 +311,9 @@ sudo systemctl restart nginx.service ## Nginx: Protected Domain(s) -Now that Authelia is accessible externally, you need to configure the -domain you intend to protect with Authelia. In this example, I\'m -protecting `teddit.example.com`. +Now that Authelia is accessible externally, you need to configure the domain you +intend to protect with Authelia. In this example, I'm protecting +`teddit.example.com`. Similar to the process above, paste the content and update the relevant variables. @@ -450,9 +441,9 @@ authentication domain and presented with the Authelia login portal. 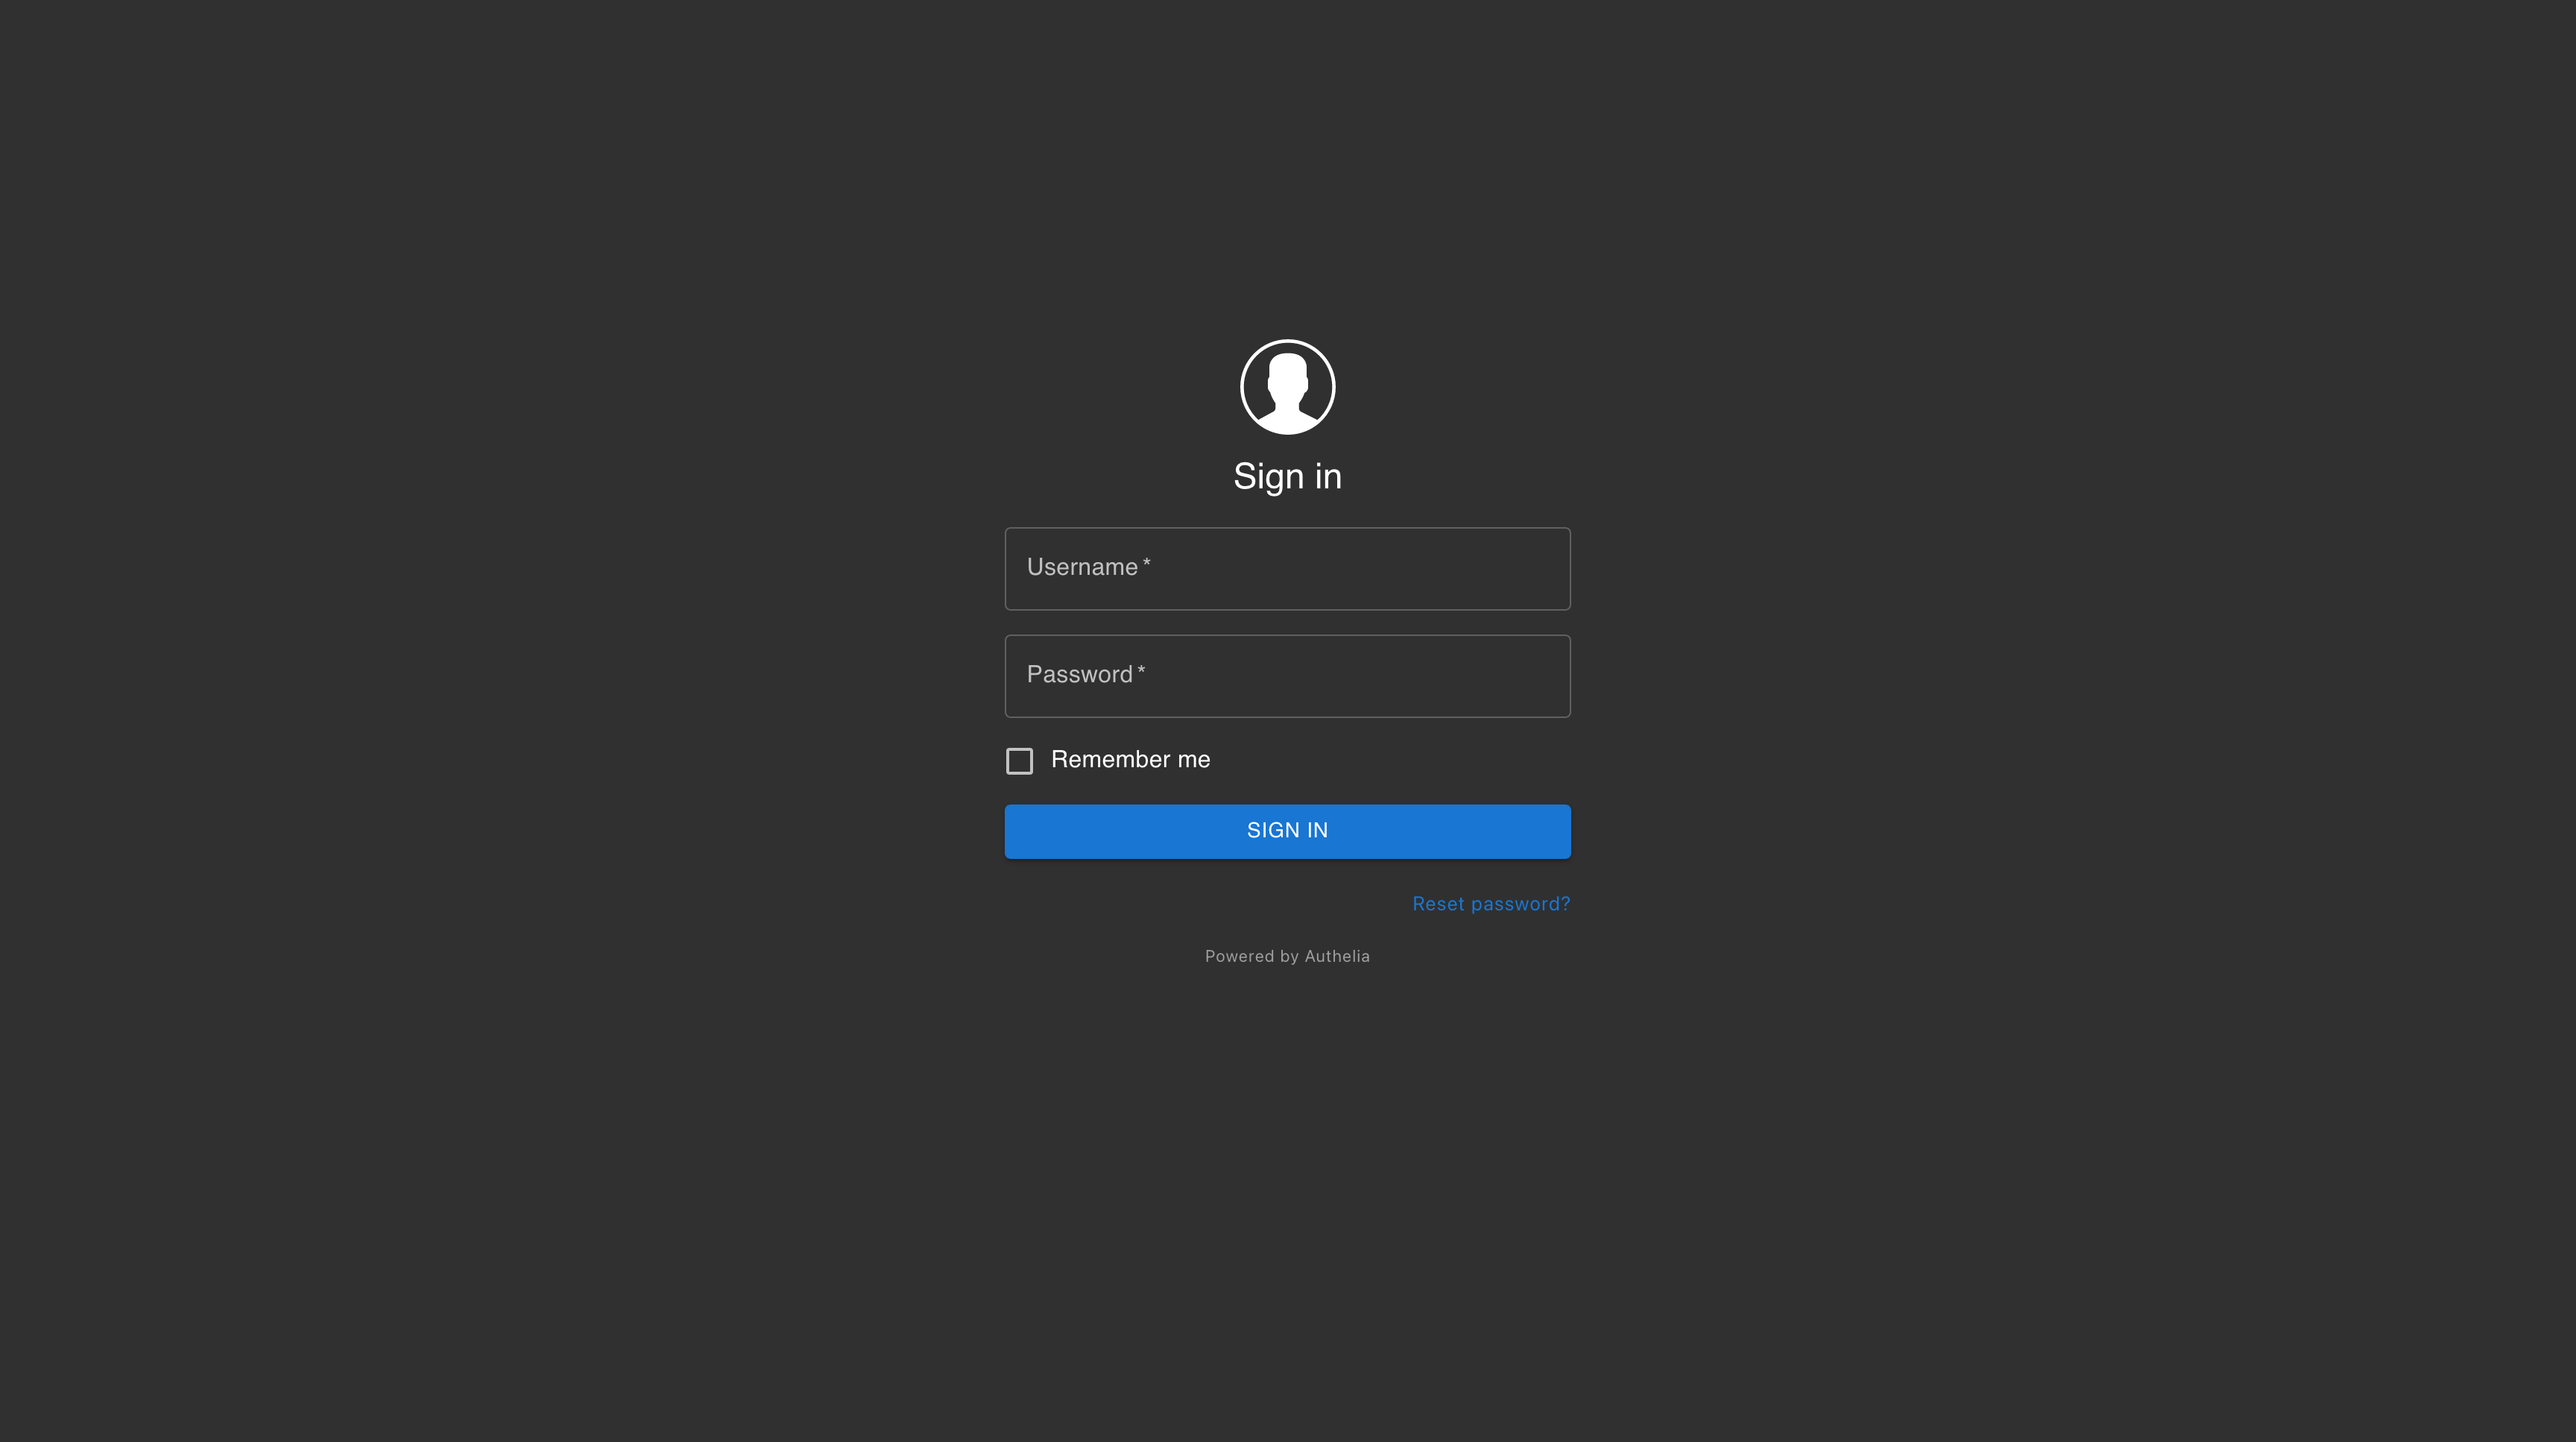 -Once you\'ve successfully authenticated, you can visit your -authentication domain directly and see that you\'re currently -authenticated to any domain protected by Authelia. +Once you've successfully authenticated, you can visit your authentication +domain directly and see that you're currently authenticated to any domain +protected by Authelia. 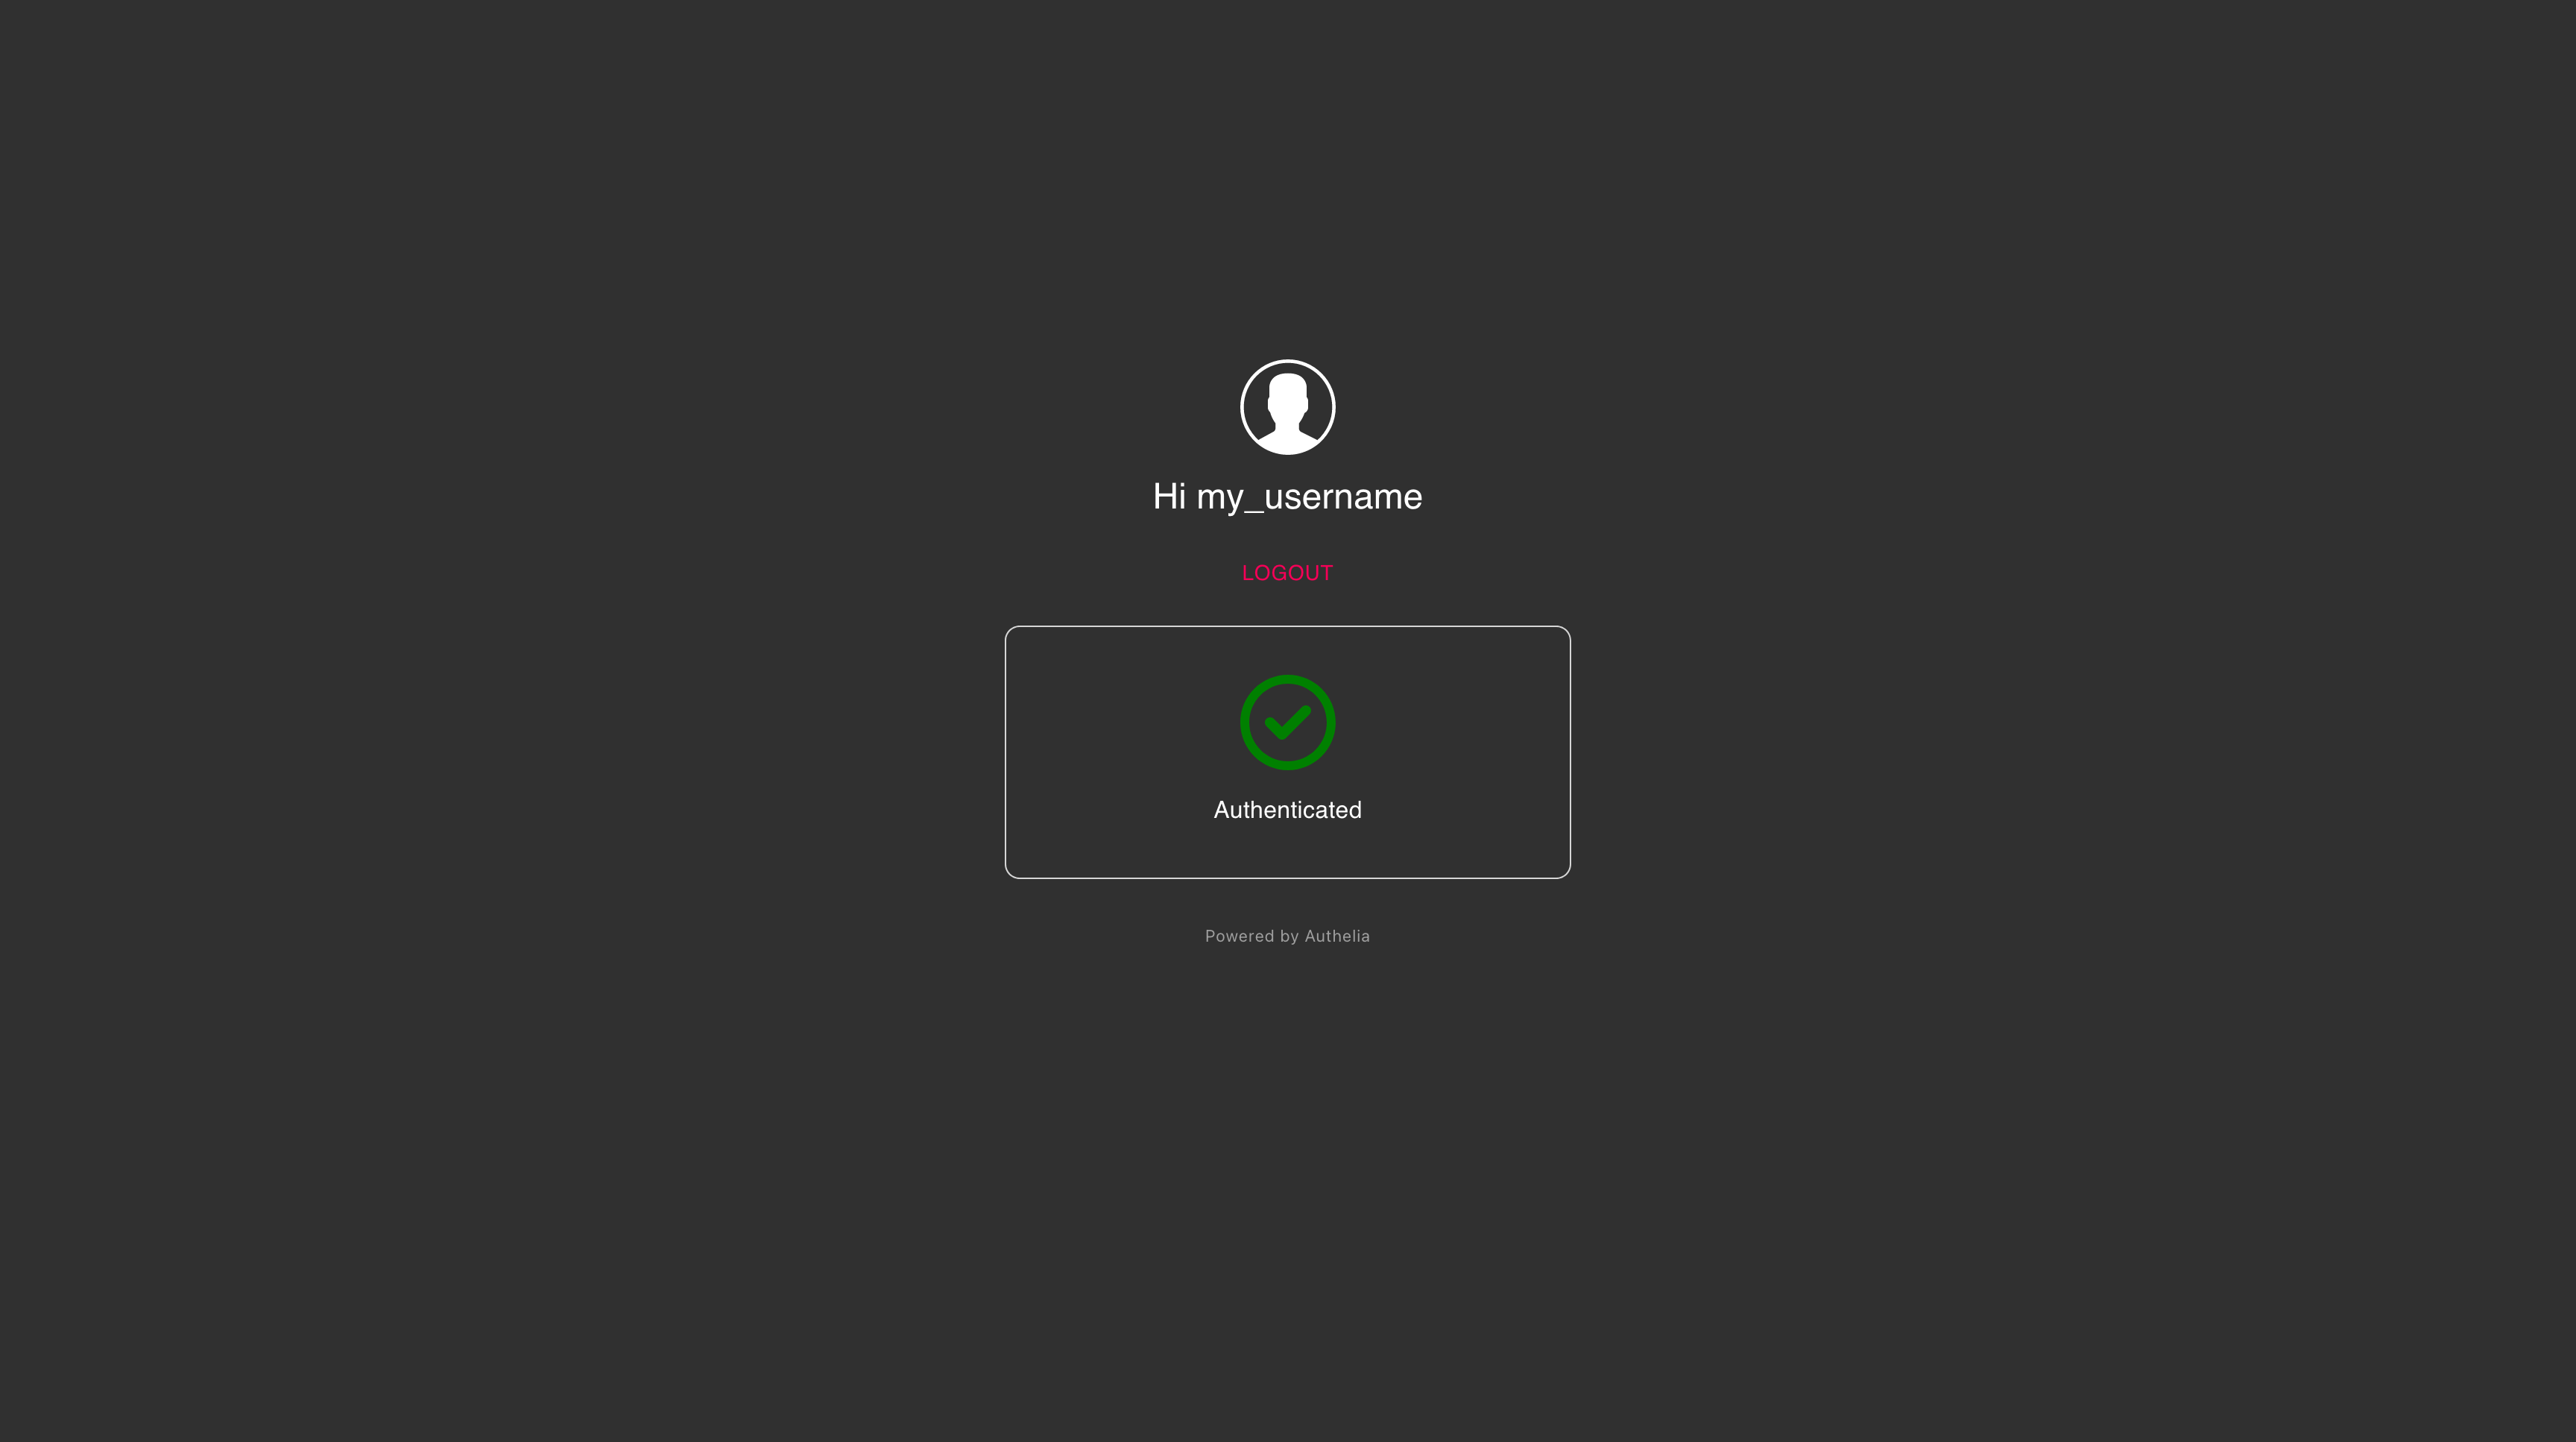 |