1
2
3
4
5
6
7
8
9
10
11
12
13
14
15
16
17
18
19
20
21
22
23
24
25
26
27
28
29
30
31
32
33
34
35
36
37
38
39
40
41
42
43
44
45
46
47
48
49
50
51
52
53
54
55
56
57
58
59
60
61
62
63
64
65
66
67
68
69
70
71
72
73
74
75
76
77
78
79
80
81
82
83
84
85
86
87
88
89
90
91
92
93
94
95
96
97
98
99
100
101
102
103
104
105
106
107
108
109
110
111
112
113
114
115
116
117
118
119
120
121
122
123
124
125
126
127
128
129
130
131
132
133
134
135
136
137
138
139
140
141
142
143
144
145
146
147
148
149
150
151
152
153
154
155
156
157
158
159
160
161
162
163
164
165
166
167
168
169
170
171
172
173
174
175
176
177
178
179
180
181
182
183
184
185
186
187
188
189
190
191
192
193
194
195
196
197
198
199
200
201
202
203
204
205
206
207
208
209
210
211
|
+++
date = 2020-05-19
title = "A Beginner's Guide: Customizing Ubuntu"
description = ""
draft = false
+++
# More Information
For inspiration on designing your \*nix computer, check out the
[r/unixporn](https://libredd.it/r/unixporn) subreddit!
# Customizing Ubuntu
New to Linux and want to add a personal touch to your machine? One of
the best perks of Linux is that it is **extremely\*** customizable. You
can change the styles of the windows, shell (status bars/docks), icons,
fonts, terminals, and more.
In this post, I\'m going to go through customization on Ubuntu 20.04
(GNOME) since most new users tend to choose Ubuntu-based distros. If
you\'ve found a way to install Arch with i3-gaps, I\'m assuming you know
how to find more advanced tutorials out there on customizations.
## Required Tools
Ubuntu 20.04 ships with the default desktop environment
[Gnome](https://www.gnome.org/), which includes the handy
`gnome-tweaks` tool to quickly change designs. To install
this, just open your terminal and enter the following command:
```sh
sudo apt install gnome-tweaks
```
After you\'ve finished installing the tool, simply launch the Tweaks
application, and you\'ll be able to access the various customization
options available by default on Ubuntu. You might even like some of the
pre-installed options.
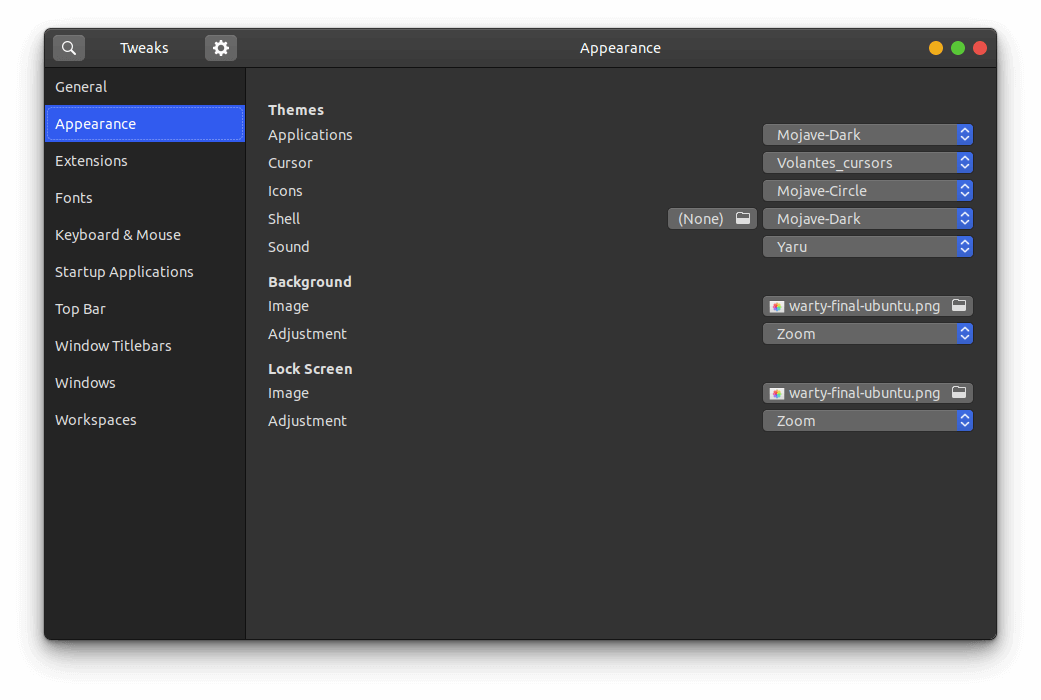
## GNOME Application Themes
To change the themes applied to applications in GNOME, you will need to
change the Applications dropdown in the Appearance section of Tweaks. To
add more themes, you will have to find your preferred theme online and
follow the steps below to have it show up in the Tweaks tool. While you
may find themes anywhere, one of the most popular sites for GNOME themes
is [gnome-look.org](https://www.gnome-look.org/). This website contains
themes for applications, shells, icons, and cursors.
Steps to import themes into Tweaks:
1. Download the theme.
2. These files are usually compressed (.zip, .tar.gz, .tar.xz), so you
will need to extract the contents. This is easiest when opening the
file explorer, right-clicking the compressed file, and choosing
\"Extract here.\"
3. Move the theme folder to `/usr/share/themes/`. You can do
so with the following command:
`sudo mv theme-folder/ /usr/share/themes/`.
- Icons and cursors will be moved to the
`/usr/share/icons/` folder.
- Fonts will be moved to the `/usr/share/fonts/` folder
Alternatively, you can move them to the
`/usr/share/fonts/opentype/` or
`/usr/share/fonts/opentype/` folders, if you have a
specific font type.
4. Close tweaks if it is open. Re-open Tweaks and your new theme will
be available in the Applications dropdown in the Appearance section
of Tweaks.
If the theme is not showing up after you\'ve moved it into the themes
folder, you may have uncompressed the folder into a sub-folder. You can
check this by entering the theme folder and listing the contents:
```sh
cd /usr/share/themes/Mojave-Dark && ls -la
```
This is an example of what the contents of your theme folder should look
like. If you just see another folder there, you should move that folder
up into the `/usr/share/themes/` folder.
```sh
cinnamon COPYING gnome-shell gtk-2.0 gtk-3.0 index.theme metacity-1 plank xfwm4
```
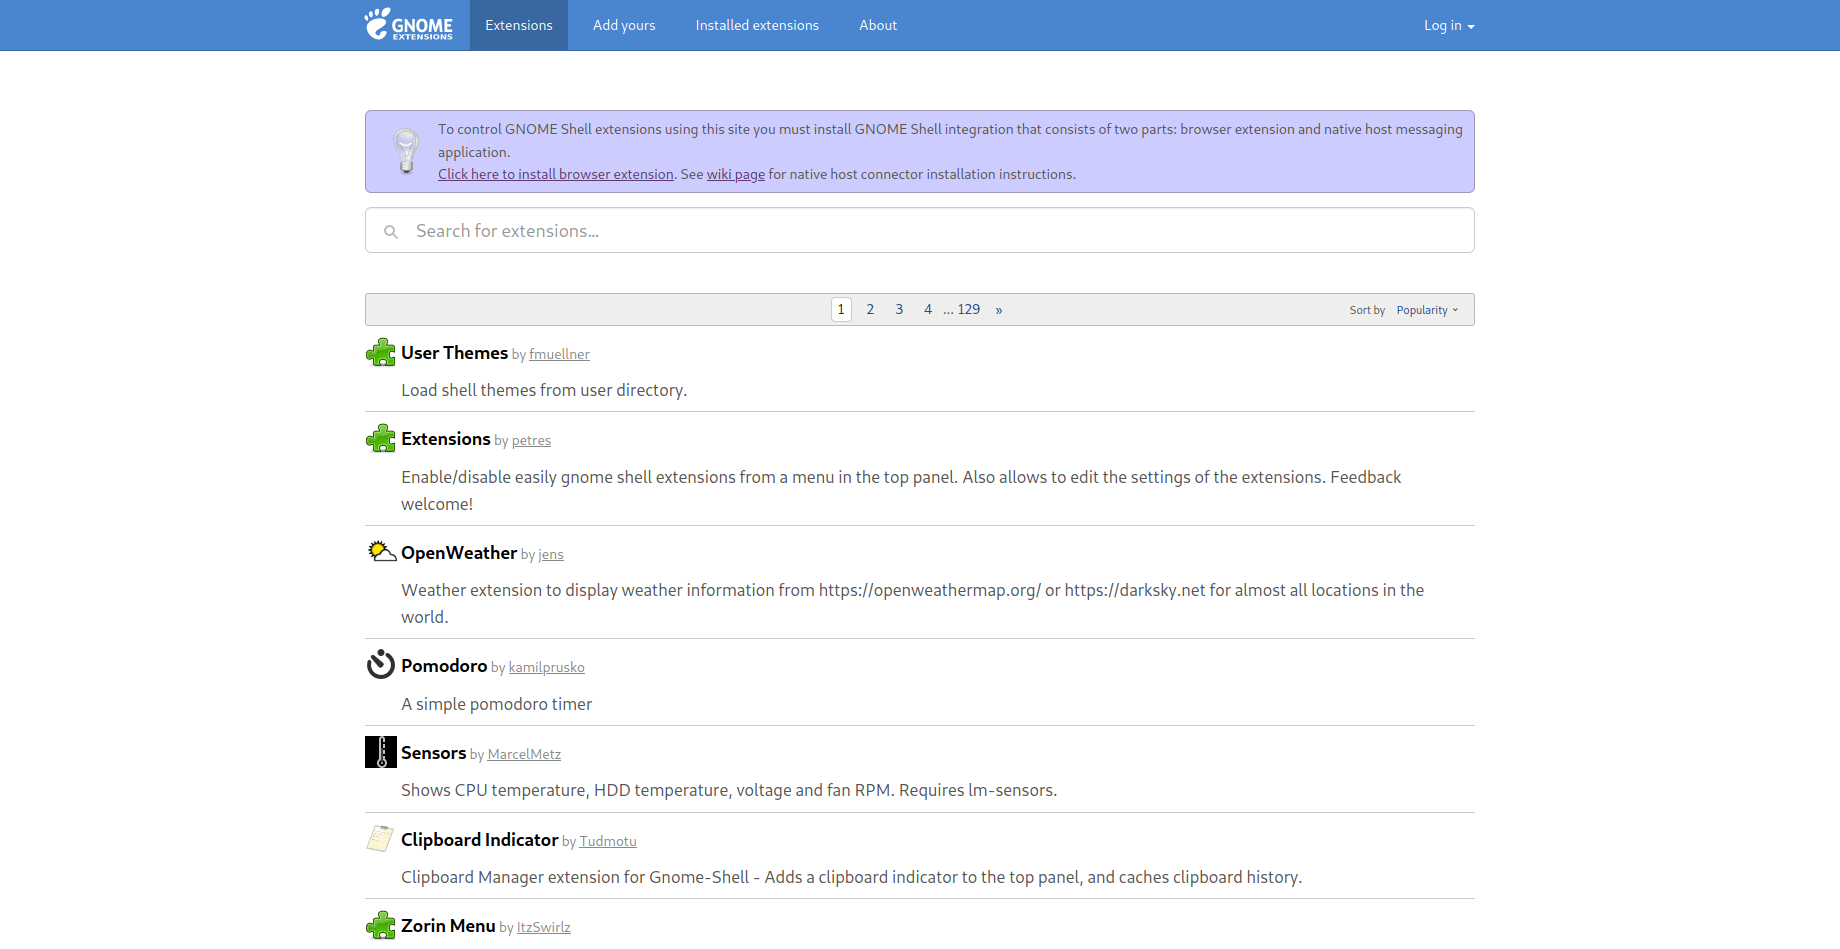
## GNOME Shell Themes
To change the appearance of the title bar, default dock, app menu, and
other parts of the GNOME shell, you\'ll need to install the [user
themes](https://extensions.gnome.org/extension/19/user-themes/)
extension on [Gnome Extensions](https://extensions.gnome.org/). To be
able to install extensions, you will first need to install the browser
extension that the website instructs you to. See this screenshot for the
blue box with a link to the extension.
After the browser extension is installed, you will need to install the
native host connector:
```sh
sudo apt install chrome-gnome-shell
```
Finally, you can go the [user
themes](https://extensions.gnome.org/extension/19/user-themes/)
extension page and click the installation button. This will enable the
Shell option in Tweaks. Now you can move shell themes to the
`/usr/share/themes` directory, using the same steps mentioned
in the previous section, and enable the new theme in Tweaks.
## Icons & Cursors
Icons and cursors are installed exactly the same way, so I\'m grouping
these together in this post. Both of these items will need to follow the
same process as installing themes, except you will want to move your
font folders to the `/usr/share/icons/` directory instead.
## Fonts
Fonts are one of the overlooked parts of customization, but a good font
can make the whole screen look different. For example, I have installed
the [IBM Plex](https://github.com/IBM/plex/releases) fonts on my system.
This follows the same process as installing themes, except you will want
to move your font folders to the `/usr/share/fonts/`
directory instead.
## Terminal
If you spend a lot of time typing commands, you know how important the
style and functionality of the terminal is. After spending a lot of time
using the default GNOME terminal with [unix
shell](https://en.wikipedia.org/wiki/Bash_(Unix_shell)), I decided to
try some different options. I ended up choosing
[Terminator](https://terminator-gtk3.readthedocs.io/en/latest/) with
[zsh](https://en.wikipedia.org/wiki/Z_shell).
Terminator is great if you need to open multiple terminals at one time
by simply right-clicking and splitting the screen into as many terminals
as you want. While this project hasn\'t been updated in a while, [it is
coming under new
development](https://github.com/gnome-terminator/terminator/issues/1).
However, this terminal is great and I haven\'t experienced any errors
yet.
For the shell choice, I decided to choose zsh after trying it out on a
fresh Manjaro installation. Zsh is great if you like to change the
themes of your terminal, include icons, or add plugins.
The desktop uses the
[zsh-autosuggestions](https://github.com/zsh-users/zsh-autosuggestions)
to suggest past commands as you type. In addition, it suggests
corrections if you misspell a command. Lastly, it uses the
`af-magic` theme, which adds dashed lines between commands,
moving the user@host tag to the right side of the terminal, and changes
the colors. There are plenty of plugins and themes to choose from. Just
figure out what you like and add it to your `~/.zshrc` file!
### Steps to Replicate My Terminal
To install zsh on Ubuntu, enter the following command into a terminal:
```sh
sudo apt install zsh
```
Then, enter the next command to activate zsh:
```sh
sudo chsh -s $(which zsh) $(whoami)
```
To install Terminator on Ubuntu:
```sh
sudo apt install terminator
```
To install Oh My Zsh on Ubuntu:
```sh
sh -c "$(curl -fsSL https://raw.github.com/ohmyzsh/ohmyzsh/master/tools/install.sh)"
```
To install zsh-autosuggestions via Oh My Zsh:
```sh
git clone https://github.com/zsh-users/zsh-autosuggestions ${ZSH_CUSTOM:-~/.oh-my-zsh/custom}/plugins/zsh-autosuggestions
```
Then, add the following plugin wording to your `~/.zshrc`
file (the default config usually has the `git` plugin
activated, so just add any other plugins to the parentheses separated by
a space):
```sh
nano ~/.zshrc
```
```sh
plugins=(git zsh-autosuggestions)
```
Finally, you need to log out of your computer and log back in so your
user shell can refresh.
|
