
diff options
Diffstat (limited to 'content/blog/2024-03-15-self-hosting-ddns-updater.md')
| -rw-r--r-- | content/blog/2024-03-15-self-hosting-ddns-updater.md | 114 |
1 files changed, 51 insertions, 63 deletions
diff --git a/content/blog/2024-03-15-self-hosting-ddns-updater.md b/content/blog/2024-03-15-self-hosting-ddns-updater.md index c81af56..8517151 100644 --- a/content/blog/2024-03-15-self-hosting-ddns-updater.md +++ b/content/blog/2024-03-15-self-hosting-ddns-updater.md @@ -8,25 +8,22 @@ draft = false 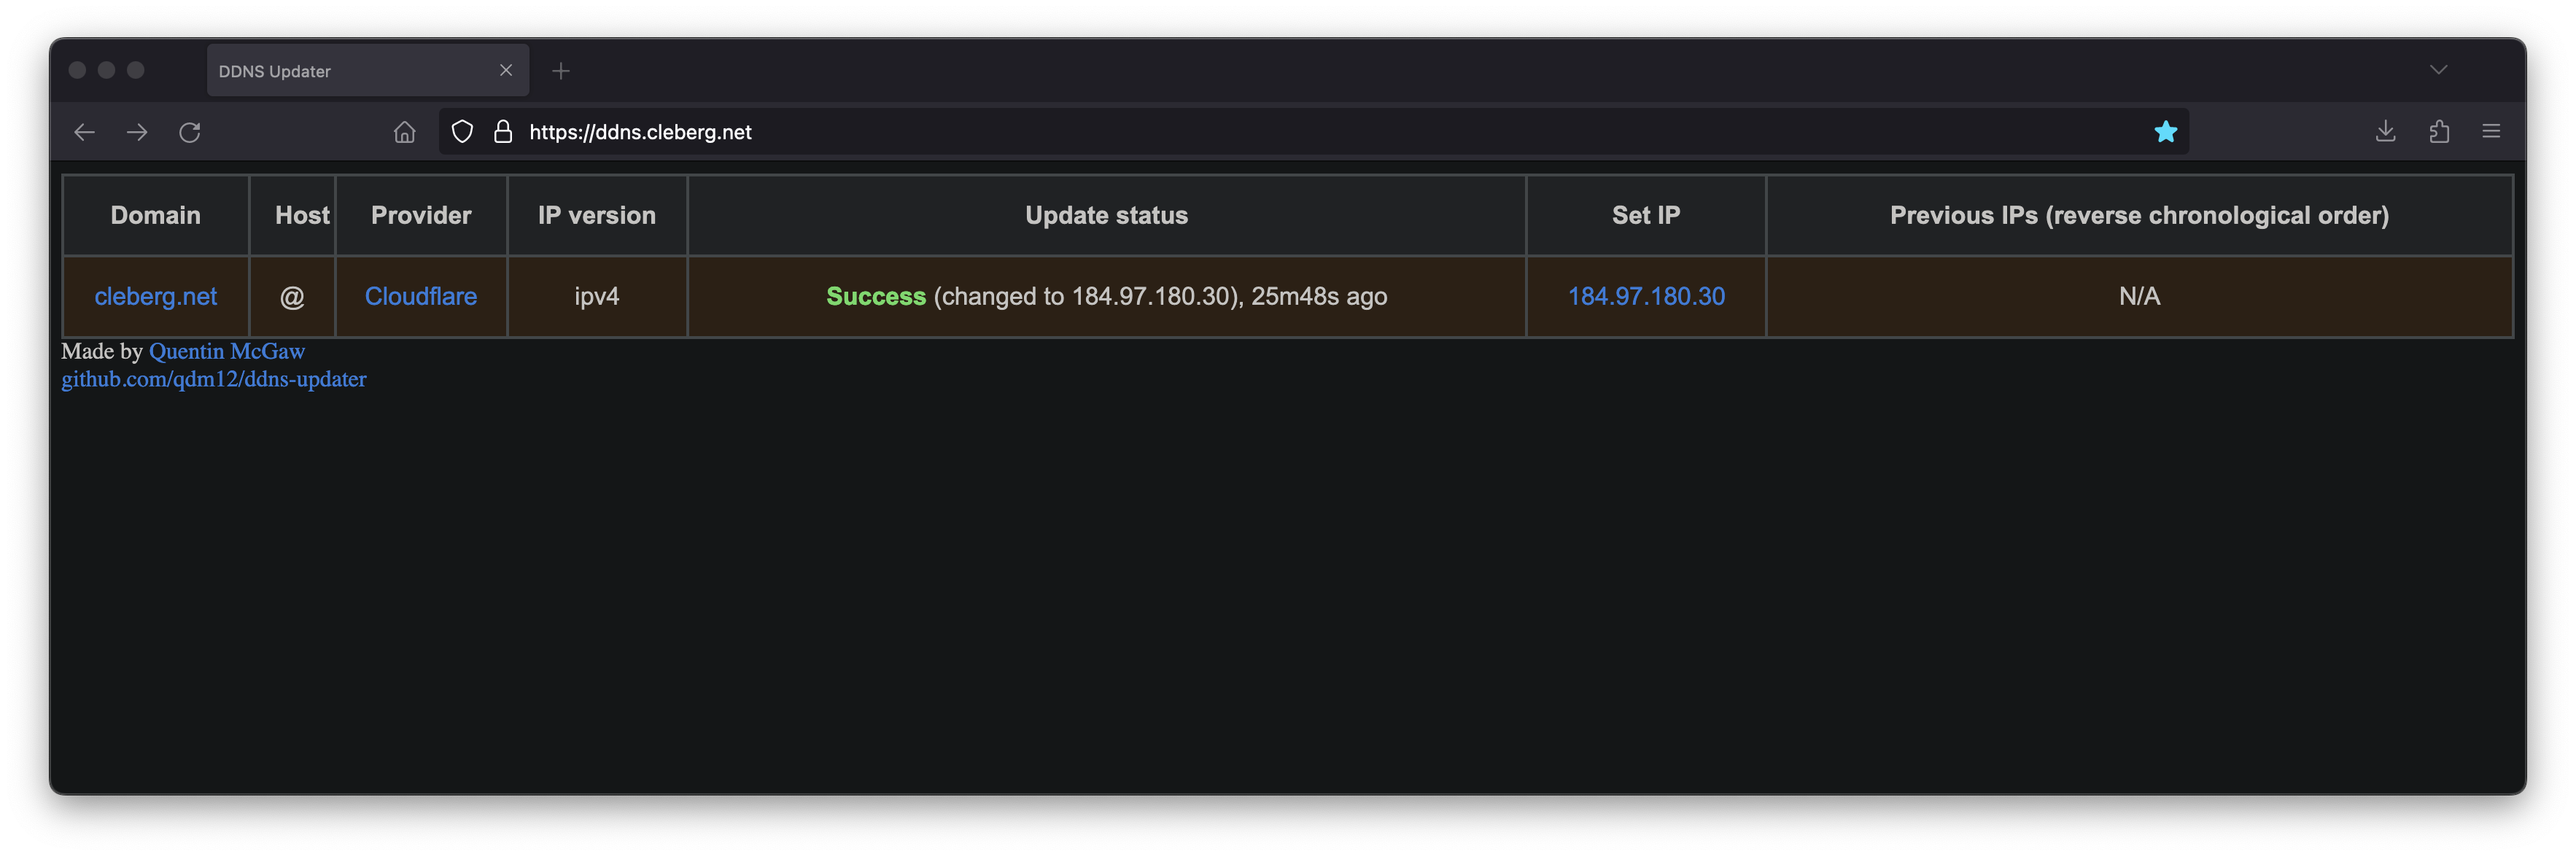 -[DDNS Updater](https://github.com/qdm12/ddns-updater) is a program to -keep DNS A and/or AAAA records updated for multiple DNS providers. +[DDNS Updater](https://github.com/qdm12/ddns-updater) is a program to keep DNS A +and/or AAAA records updated for multiple DNS providers. -If you\'ve read any of my other posts, you\'ll notice that I have been -searching for and using a few different DDNS updating solutions for -years. You\'ll also notice that I love any projects that offer a Docker -Compose solution. +If you've read any of my other posts, you'll notice that I have been searching +for and using a few different DDNS updating solutions for years. You'll also +notice that I love any projects that offer a Docker Compose solution. Luckily, DDNS Upater fits both of these preferences. ## Installation -To get started, always make sure to review the project\'s -[README](https://github.com/qdm12/ddns-updater/blob/master/README.md). -I\'ll be documenting my steps below, but they may have changed by the -time you read this. +To get started, always make sure to review the project's +[README](https://github.com/qdm12/ddns-updater/blob/master/README.md). I'll be +documenting my steps below, but they may have changed by the time you read this. -The first step is to set up the directories and files required for the -project. +The first step is to set up the directories and files required for the project. ```sh mkdir ~/ddns-updater @@ -36,46 +33,38 @@ touch ~/ddns-updater/data/config.json ### Configuration -The main configuration you need to update is the -`data/config.json` file. There is a large list of supported -providers in the README, but I\'m going to use Cloudflare in this -example. +The main configuration you need to update is the `data/config.json` file. There +is a large list of supported providers in the README, but I'm going to use +Cloudflare in this example. ```sh nano ~/ddns-updater/data/config.json ``` -When setting up the configuration for Cloudflare, you\'ll need the -following: - -- Required Parameters - - `"zone_identifier"` is the Zone ID of your site from - the domain overview page - - `"host"` is your host and can be `"@"`, a - subdomain or the wildcard `"*"`. See [this issue - comment for - context](https://github.com/qdm12/ddns-updater/issues/243#issuecomment-928313949). - - `"ttl"` integer value for record TTL in seconds - (specify 1 for automatic) - - One of the following ([how to find API - keys](https://developers.cloudflare.com/fundamentals/api/get-started/)): - - Email `"email"` and Global API Key - `"key"` - - User service key `"user_service_key"` - - API Token `"token"`, configured with DNS edit - permissions for your DNS name\'s zone -- Optional Parameters - - `"proxied"` can be set to `true` to use - the proxy services of Cloudflare - - `"ip_version"` can be `ipv4` (A records), - or `ipv6` (AAAA records) or - `ipv4 or ipv6` (update one of the two, depending on - the public ip found). It defaults to `ipv4 or ipv6`. - - `"ipv6_suffix"` is the IPv6 interface identifier - suffix to use. It can be for example - `0:0:0:0:72ad:8fbb:a54e:bedd/64`. If left empty, it - defaults to no suffix and the raw public IPv6 address obtained - is used in the record updating. +When setting up the configuration for Cloudflare, you'll need the following: + +- Required Parameters + - `"zone_identifier"` is the Zone ID of your site from the domain overview + page + - `"host"` is your host and can be `"@"`, a subdomain or the wildcard `"*"`. + See [this issue comment for + context](https://github.com/qdm12/ddns-updater/issues/243#issuecomment-928313949). + - `"ttl"` integer value for record TTL in seconds (specify 1 for automatic) + - One of the following ([how to find API + keys](https://developers.cloudflare.com/fundamentals/api/get-started/)): + - Email `"email"` and Global API Key `"key"` + - User service key `"user_service_key"` + - API Token `"token"`, configured with DNS edit permissions for your DNS + name's zone +- Optional Parameters + - `"proxied"` can be set to `true` to use the proxy services of Cloudflare + - `"ip_version"` can be `ipv4` (A records), or `ipv6` (AAAA records) or + `ipv4 or ipv6` (update one of the two, depending on the public ip + found). It defaults to `ipv4 or ipv6`. + - `"ipv6_suffix"` is the IPv6 interface identifier suffix to use. It can be + for example `0:0:0:0:72ad:8fbb:a54e:bedd/64`. If left empty, it defaults + to no suffix and the raw public IPv6 address obtained is used in the + record updating. ``` conf { @@ -95,8 +84,8 @@ following: } ``` -Once you have configured the provider of your choice, correct the file -and directory permissions and ownership. +Once you have configured the provider of your choice, correct the file and +directory permissions and ownership. ```sh cd ~/ddns_updater @@ -110,8 +99,8 @@ chmod 400 data/config.json ### Docker Compose -After creating the project structure, let\'s create the -`docker-compose.yml` file. +After creating the project structure, let's create the `docker-compose.yml` +file. ```sh nano ~/ddns_-pdater/docker-compose.yml @@ -155,22 +144,22 @@ services: restart: always ``` -After configuring your preferences in the -`docker-compose.yml`, launch the container. +After configuring your preferences in the `docker-compose.yml`, launch the +container. ```sh cd ~/ddns-updater sudo docker-compose up -d ``` -If you\'ve launched this on your local machine, you can launch -`localhost:8097` in your browser to see the results. +If you've launched this on your local machine, you can launch `localhost:8097` +in your browser to see the results. ### Nginx Reverse Proxy -If you launched this service on a server, other machine, or just want to -access it remotely via a domain name, you can use Nginx as a reverse -proxy to expose the service publicly. +If you launched this service on a server, other machine, or just want to access +it remotely via a domain name, you can use Nginx as a reverse proxy to expose +the service publicly. Start by creating the Nginx configuration file. @@ -178,7 +167,7 @@ Start by creating the Nginx configuration file. sudo nano /etc/nginx/sites-available/ddns ``` -Here\'s a basic example that should work properly. +Here's a basic example that should work properly. ``` conf server { @@ -198,8 +187,8 @@ server { } ``` -Here\'s a full example that uses my Authelia authentication service to -require authentication before someone can access the web page. +Here's a full example that uses my Authelia authentication service to require +authentication before someone can access the web page. ``` conf server { @@ -317,5 +306,4 @@ sudo ln -s /etc/nginx/sites-available/ddns /etc/nginx/sites-enabled/ddns sudo systemctl restart nginx.service ``` -Your ddns-updater service will now be available via -`ddns.example.com`! +Your ddns-updater service will now be available via `ddns.example.com`! |