
diff options
Diffstat (limited to 'content/blog')
120 files changed, 7082 insertions, 7979 deletions
diff --git a/content/blog/2018-11-28-aes-encryption.md b/content/blog/2018-11-28-aes-encryption.md index 8d39b1d..5da599e 100644 --- a/content/blog/2018-11-28-aes-encryption.md +++ b/content/blog/2018-11-28-aes-encryption.md @@ -7,119 +7,113 @@ draft = false # Basic AES -If you\'re not familiar with encryption techniques, +If you're not familiar with encryption techniques, [AES](https://en.wikipedia.org/wiki/Advanced_Encryption_Standard) is the -**Advanced Encryption Standard**. This specification was established by -the National Institute of Standards and Technology, sub-selected from -the Rijndael family of ciphers (128, 192, and 256 bits) in 2001. -Furthering its popularity and status, the US government chose AES as -their default encryption method for top-secret data, removing the -previous standard which had been in place since 1977. - -AES has proven to be an extremely safe encryption method, with 7-round -and 8-round attacks making no material improvements since the release of -this encryption standard almost two decades ago. - -> Though many papers have been published on the cryptanalysis of AES, -> the fastest single-key attacks on round-reduced AES variants \[20, -> 33\] so far are only slightly more powerful than those proposed 10 -> years ago \[23,24\]. +**Advanced Encryption Standard**. This specification was established by the +National Institute of Standards and Technology, sub-selected from the Rijndael +family of ciphers (128, 192, and 256 bits) in 2001. Furthering its popularity +and status, the US government chose AES as their default encryption method for +top-secret data, removing the previous standard which had been in place since +1977. + +AES has proven to be an extremely safe encryption method, with 7-round and +8-round attacks making no material improvements since the release of this +encryption standard almost two decades ago. + +> Though many papers have been published on the cryptanalysis of AES, the +> fastest single-key attacks on round-reduced AES variants [20, 33] so far are +> only slightly more powerful than those proposed 10 years ago [23,24]. > -> - [Bogdonav, et -> al.](http://research.microsoft.com/en-us/projects/cryptanalysis/aesbc.pdf) +> - [Bogdonav, et +> al.](http://research.microsoft.com/en-us/projects/cryptanalysis/aesbc.pdf) # How Secure is AES? -In theory, AES-256 is non-crackable due to the massive number of -combinations that can be produced. However, AES-128 is no longer -recommended as a viable implementation to protect important data. +In theory, AES-256 is non-crackable due to the massive number of combinations +that can be produced. However, AES-128 is no longer recommended as a viable +implementation to protect important data. A semi-short [comic strip](http://www.moserware.com/2009/09/stick-figure-guide-to-advanced.html) -from Moserware quickly explains AES for the public to understand. -Basically AES encrypts the data by obscuring the relationship between -the data and the encrypted data. Additionally, this method spreads the -message out. Lastly, the key produced by AES is the secret to decrypting -it. Someone may know the method of AES, but without the key, they are -powerless. - -To obscure and spread the data out, AES creates a -substitution-permutation network. Wikipedia has a wonderful [example of -an SP +from Moserware quickly explains AES for the public to understand. Basically AES +encrypts the data by obscuring the relationship between the data and the +encrypted data. Additionally, this method spreads the message out. Lastly, the +key produced by AES is the secret to decrypting it. Someone may know the method +of AES, but without the key, they are powerless. + +To obscure and spread the data out, AES creates a substitution-permutation +network. Wikipedia has a wonderful [example of an SP network](https://upload.wikimedia.org/wikipedia/commons/thumb/c/cd/SubstitutionPermutationNetwork2.png/468px-SubstitutionPermutationNetwork2.png) -available. This network sends the data through a set of S boxes (using -the unique key) to substitute the bits with another block of bits. Then, -a P box will permutate, or rearrange, the bits. This is done over and -over, with the key being derived from the last round. For AES, the key -size specifies the number of transformation rounds: 10, 12, and 14 -rounds for 128-bit, 192-bit, and 256-bit keys, respectively. +available. This network sends the data through a set of S boxes (using the +unique key) to substitute the bits with another block of bits. Then, a P box +will permutate, or rearrange, the bits. This is done over and over, with the key +being derived from the last round. For AES, the key size specifies the number of +transformation rounds: 10, 12, and 14 rounds for 128-bit, 192-bit, and 256-bit +keys, respectively. # The Process -1. \*KeyExpansion=: Using [Rijndael\'s key - schedule](https://en.m.wikipedia.org/wiki/Advanced_Encryption_Standard), - the keys are dynamically generated. -2. **AddRoundKey**: Each byte of the data is combined with this key - using bitwise xor. -3. **SubBytes**: This is followed by the substitution of each byte of - data. -4. **ShiftRows**: Then, the final three rows are shifted a certain - number of steps, dictated by the cipher. -5. **MixColumns**: After the rows have been shifted, the columns are - mixed and combined. - -This process does not necessarily stop after one full round. Steps 2 -through 5 will repeat for the number of rounds specified by the key. -However, the final round excludes the MixColumns step. As you can see, -this is a fairly complex process. One must have a solid understanding of -general mathematic principles to fully understand how the sequence works -(and to even attempt to find a weakness). - -According to research done by Bogdanov et al., it would take billions of -years to brute force a 126-bit key with current hardware. Additionally, -this brute force attack would require storing 2^88^ bits of data! -However, there are a few different attacks that have been used to show -vulnerabilities with the use of this technology. Side-channel attacks -use inadvertent leaks of data from the hardware or software, which can -allow attackers to obtain the key or run programs on a user\'s hardware. - -Please note that this is not something you should run out and try to -implement in your `Hello, World!` app after only a few hours -of research. While AES (basically all encryption methods) is extremely -efficient in what it does, it takes a lot of time and patience to -understand. If you\'re looking for something which currently implements -AES, check out the [Legion of the Bouncy +1. **KeyExpansion**: Using [Rijndael's key + schedule](https://en.m.wikipedia.org/wiki/Advanced_Encryption_Standard), the + keys are dynamically generated. +2. **AddRoundKey**: Each byte of the data is combined with this key using + bitwise xor. +3. **SubBytes**: This is followed by the substitution of each byte of data. +4. **ShiftRows**: Then, the final three rows are shifted a certain number of + steps, dictated by the cipher. +5. **MixColumns**: After the rows have been shifted, the columns are mixed and + combined. + +This process does not necessarily stop after one full round. Steps 2 through 5 +will repeat for the number of rounds specified by the key. However, the final +round excludes the MixColumns step. As you can see, this is a fairly complex +process. One must have a solid understanding of general mathematic principles to +fully understand how the sequence works (and to even attempt to find a +weakness). + +According to research done by Bogdanov et al., it would take billions of years +to brute force a 126-bit key with current hardware. Additionally, this brute +force attack would require storing 2^88^ bits of data! However, there are a few +different attacks that have been used to show vulnerabilities with the use of +this technology. Side-channel attacks use inadvertent leaks of data from the +hardware or software, which can allow attackers to obtain the key or run +programs on a user's hardware. + +Please note that this is not something you should run out and try to implement +in your `Hello, World!` app after only a few hours of research. While AES +(basically all encryption methods) is extremely efficient in what it does, it +takes a lot of time and patience to understand. If you're looking for something +which currently implements AES, check out the [Legion of the Bouncy Castle](https://www.bouncycastle.org/documentation.html) for Java implementations of cryptographic algorithms. # Why Does Encryption Matter? -There are limitless reasons to enable encryption at-rest or in-transit -for various aspects of your digital life. You can research specific -examples, such as [Australia passes new law to thwart strong +There are limitless reasons to enable encryption at-rest or in-transit for +various aspects of your digital life. You can research specific examples, such +as [Australia passes new law to thwart strong encryption](https://arstechnica.com/tech-policy/2018/12/australia-passes-new-law-to-thwart-strong-encryption/). -However, I will simply list a few basic reasons to always enable -encryption, where feasible: - -1. Privacy is a human right and is recognized as a national right in - some countries (e.g., [US Fourth - Amendment](https://www.law.cornell.edu/wex/fourth_amendment)). -2. \"Why not?\" Encryption rarely affects performance or speed, so - there\'s usually not a reason to avoid it in the first place. -3. Your digital identity and activity (texts, emails, phone calls, - online accounts, etc.) are extremely valuable and can result in - terrible consequences, such as identity theft, if leaked to other - parties. Encrypting this data prevents such leaks from ruining - lives. -4. Wiping or factory-resetting does not actually wipe all data from the - storage device. There are methods to read data from the physical - disks/boards inside devices. -5. Corporations, governments, and other nefarious groups/individuals - are actively looking for ways to collect personal information about - anyone they can. If someone\'s data is unencrypted, that person may - become a target due to the ease of data collection. +However, I will simply list a few basic reasons to always enable encryption, +where feasible: + +1. Privacy is a human right and is recognized as a national right in some + countries (e.g., [US Fourth + Amendment](https://www.law.cornell.edu/wex/fourth_amendment)). +2. "Why not?" Encryption rarely affects performance or speed, so there's + usually not a reason to avoid it in the first place. +3. Your digital identity and activity (texts, emails, phone calls, online + accounts, etc.) are extremely valuable and can result in terrible + consequences, such as identity theft, if leaked to other parties. Encrypting + this data prevents such leaks from ruining lives. +4. Wiping or factory-resetting does not actually wipe all data from the storage + device. There are methods to read data from the physical disks/boards inside + devices. +5. Corporations, governments, and other nefarious groups/individuals are + actively looking for ways to collect personal information about anyone they + can. If someone's data is unencrypted, that person may become a target due + to the ease of data collection. **Read More:** -- [Federal Information Processing Standards Publication - 197](http://nvlpubs.nist.gov/nistpubs/FIPS/NIST.FIPS.197.pdf) +- [Federal Information Processing Standards Publication + 197](http://nvlpubs.nist.gov/nistpubs/FIPS/NIST.FIPS.197.pdf) diff --git a/content/blog/2018-11-28-cpp-compiler.md b/content/blog/2018-11-28-cpp-compiler.md index abad6a5..c0ce0b3 100644 --- a/content/blog/2018-11-28-cpp-compiler.md +++ b/content/blog/2018-11-28-cpp-compiler.md @@ -7,14 +7,14 @@ draft = false # A Brief Introduction -[C++](https://en.wikipedia.org/wiki/C%2B%2B) is a general-purpose -programming language with object-oriented, generic, and functional -features in addition to facilities for low-level memory manipulation. +[C++](https://en.wikipedia.org/wiki/C%2B%2B) is a general-purpose programming +language with object-oriented, generic, and functional features in addition to +facilities for low-level memory manipulation. -The source code, shown in the snippet below, must be compiled before it -can be executed. There are many steps and intricacies to the compilation -process, and this post was a personal exercise to learn and remember as -much information as I can. +The source code, shown in the snippet below, must be compiled before it can be +executed. There are many steps and intricacies to the compilation process, and +this post was a personal exercise to learn and remember as much information as I +can. ``` cpp #include <iostream> @@ -29,56 +29,52 @@ int main() ### An Overview -Compiling C++ projects is a frustrating task most days. Seemingly -nonexistent errors keeping your program from successfully compiling can -be annoying (especially since you know you wrote it perfectly the first -time, right?). +Compiling C++ projects is a frustrating task most days. Seemingly nonexistent +errors keeping your program from successfully compiling can be annoying +(especially since you know you wrote it perfectly the first time, right?). -I\'m learning more and more about C++ these days and decided to write -this concept down so that I can cement it even further in my own head. -However, C++ is not the only compiled language. Check out [the Wikipedia -entry for compiled -languages](https://en.wikipedia.org/wiki/Compiled_language) for more -examples of compiled languages. +I'm learning more and more about C++ these days and decided to write this +concept down so that I can cement it even further in my own head. However, C++ +is not the only compiled language. Check out [the Wikipedia entry for compiled +languages](https://en.wikipedia.org/wiki/Compiled_language) for more examples of +compiled languages. -I\'ll start with a wonderful, graphical way to conceptualize the C++ -compiler. View [The C++ Compilation +I'll start with a wonderful, graphical way to conceptualize the C++ compiler. +View [The C++ Compilation Process](https://web.archive.org/web/20190419035048/http://faculty.cs.niu.edu/~mcmahon/CS241/Notes/compile.html) -by Kurt MacMahon, an NIU professor, to see the graphic and an -explanation. The goal of the compilation process is to take the C++ code -and produce a shared library, dynamic library, or an executable file. +by Kurt MacMahon, an NIU professor, to see the graphic and an explanation. The +goal of the compilation process is to take the C++ code and produce a shared +library, dynamic library, or an executable file. ## Compilation Phases -Let\'s break down the compilation process. There are four major steps to +Let's break down the compilation process. There are four major steps to compiling C++ code. ### Step 1 -The first step is to expand the source code file to meet all -dependencies. The C++ preprocessor includes the code from all the header -files, such as `#include -<iostream>`. Now, what does that mean? The previous example -includes the `iostream` header. This tells the computer that -you want to use the `iostream` standard library, which -contains classes and functions written in the core language. This -specific header allows you to manipulate input/output streams. After all -this, you\'ll end up which a temporary file that contains the expanded +The first step is to expand the source code file to meet all dependencies. The +C++ preprocessor includes the code from all the header files, such as `#include +<iostream>`. Now, what does that mean? The previous example includes the +`iostream` header. This tells the computer that you want to use the `iostream` +standard library, which contains classes and functions written in the core +language. This specific header allows you to manipulate input/output streams. +After all this, you'll end up which a temporary file that contains the expanded source code. -In the example of the C++ code above, the `iostream` class -would be included in the expanded code. +In the example of the C++ code above, the `iostream` class would be included in +the expanded code. ### Step 2 -After the code is expanded, the compiler comes into play. The compiler -takes the C++ code and converts this code into the assembly language, -understood by the platform. You can see this in action if you head over -to the [GodBolt Compiler Explorer](https://godbolt.org), which shows C++ -being converted into assembly dynamically. +After the code is expanded, the compiler comes into play. The compiler takes the +C++ code and converts this code into the assembly language, understood by the +platform. You can see this in action if you head over to the [GodBolt Compiler +Explorer](https://godbolt.org), which shows C++ being converted into assembly +dynamically. -For example, the `Hello, world!` code snippet above compiles -into the following assembly code: +For example, the `Hello, world!` code snippet above compiles into the following +assembly code: ``` asm .LC0: @@ -124,17 +120,17 @@ _GLOBAL__sub_I_main: ### Step 3 -Third, the assembly code generated by the compiler is assembled into the -object code for the platform. Essentially, this is when the compiler -takes the assembly code and assembles it into machine code in a binary -format. After researching this online, I figured out that a lot of -compilers will allow you to stop compilation at this step. This would be -useful for compiling each source code file separately. This saves time -later if a single file changes; only that file needs to be recompiled. +Third, the assembly code generated by the compiler is assembled into the object +code for the platform. Essentially, this is when the compiler takes the assembly +code and assembles it into machine code in a binary format. After researching +this online, I figured out that a lot of compilers will allow you to stop +compilation at this step. This would be useful for compiling each source code +file separately. This saves time later if a single file changes; only that file +needs to be recompiled. ### Step 4 -Finally, the object code file generated by the assembler is linked -together with the object code files for any library functions used to -produce a shared library, dynamic library, or an executable file. It -replaces all references to undefined symbols with the correct addresses. +Finally, the object code file generated by the assembler is linked together with +the object code files for any library functions used to produce a shared +library, dynamic library, or an executable file. It replaces all references to +undefined symbols with the correct addresses. diff --git a/content/blog/2019-01-07-useful-css.md b/content/blog/2019-01-07-useful-css.md index 687be03..bdabd94 100644 --- a/content/blog/2019-01-07-useful-css.md +++ b/content/blog/2019-01-07-useful-css.md @@ -7,36 +7,32 @@ draft = false # Introduction to CSS -[CSS](https://en.wikipedia.org/wiki/CSS), the language used to markup -HTML code and make it \"pretty\", is one of the most effective ways to -increase the attractiveness of a website. It can also lead to increased -user engagement, retention, and satisfaction. In fact, there are whole -career fields are dedicated to the improvement of user experiences, -known as UI design and UX design. - -Some web developers are used to the common CSS properties, such as -element sizing, fonts, colors, etc., but are not as well versed in -less-used properties and values such as `flexbox`, -`clip-path`, and `transform`. This article will +[CSS](https://en.wikipedia.org/wiki/CSS), the language used to markup HTML code +and make it "pretty", is one of the most effective ways to increase the +attractiveness of a website. It can also lead to increased user engagement, +retention, and satisfaction. In fact, there are whole career fields are +dedicated to the improvement of user experiences, known as UI design and UX +design. + +Some web developers are used to the common CSS properties, such as element +sizing, fonts, colors, etc., but are not as well versed in less-used properties +and values such as `flexbox`, `clip-path`, and `transform`. This article will provide some insight into the less-used and unique CSS properties. # CSS Variables -The first topic today is CSS variables. Variables are not often used by -smaller developers. CSS variables allow you to give your website a -well-defined structure, where you can easily reuse CSS properties -throughout the project. +The first topic today is CSS variables. Variables are not often used by smaller +developers. CSS variables allow you to give your website a well-defined +structure, where you can easily reuse CSS properties throughout the project. -You can use variables to define things, such as color palettes. Then, -you can use these colors for backgrounds anywhere else in the HTML. This -could be extended, where extra variables could be defined for -`primary-text`, `quoted-text`, etc. Variables can -also be used to define spacing (e.g. `32px` or -`2rem`), which can then be applied to margins, padding, font -sizes, and more. +You can use variables to define things, such as color palettes. Then, you can +use these colors for backgrounds anywhere else in the HTML. This could be +extended, where extra variables could be defined for `primary-text`, +`quoted-text`, etc. Variables can also be used to define spacing (e.g. `32px` or +`2rem`), which can then be applied to margins, padding, font sizes, and more. -For example, here are some variables defined at the root of the website, -which allows for any subsequent CSS rules to use those variables: +For example, here are some variables defined at the root of the website, which +allows for any subsequent CSS rules to use those variables: ``` css :root { @@ -52,23 +48,22 @@ body { # CSS Box Shadows -Box shadows were once my mortal enemy. No matter how hard I tried, I -just couldn\'t get them to work how I wanted. Because of this, my -favorite discovery has been CSSMatic\'s [box shadow -generator](https://www.cssmatic.com/box-shadow). It provides an -excellent tool to generate box shadows using their simple sliders. -Surprisingly, this is the reason I learned how box shadows work! You can -use the sliders and watch how the CSS code changes in the image that is -displayed. Through this, you should understand that the basic structure -for box shadows is: +Box shadows were once my mortal enemy. No matter how hard I tried, I just +couldn't get them to work how I wanted. Because of this, my favorite discovery +has been CSSMatic's [box shadow +generator](https://www.cssmatic.com/box-shadow). It provides an excellent tool +to generate box shadows using their simple sliders. Surprisingly, this is the +reason I learned how box shadows work! You can use the sliders and watch how the +CSS code changes in the image that is displayed. Through this, you should +understand that the basic structure for box shadows is: ``` css box-shadow: inset horizontal vertical blur spread color; ``` -Now, let\'s look at some basic examples! You can copy and paste the -following code into a site like CodePen or your own HTML files. Feel -free to play around with the code, experiment, and learn. +Now, let's look at some basic examples! You can copy and paste the following +code into a site like CodePen or your own HTML files. Feel free to play around +with the code, experiment, and learn. **Box Shadow #1** @@ -124,22 +119,20 @@ free to play around with the code, experiment, and learn. } ``` -Try these box shadows out on your own and see how changing each shadow -value works. +Try these box shadows out on your own and see how changing each shadow value +works. # CSS Flexbox -Now, let\'s move on to the best part of this article: flexbox. The -flexbox is by far my favorite new toy. I originally stumbled across this -solution after looking for more efficient ways of centering content -horizontally AND vertically. I had used a few hack-ish methods before, -but flexbox throws those out the window. The best part of it all is that -flexbox is *dead simple*. +Now, let's move on to the best part of this article: flexbox. The flexbox is by +far my favorite new toy. I originally stumbled across this solution after +looking for more efficient ways of centering content horizontally AND +vertically. I had used a few hack-ish methods before, but flexbox throws those +out the window. The best part of it all is that flexbox is *dead simple*. -Flexbox pertains to the parent div of any element. You want the parent -to be the flexbox in which items are arranged to use the flex methods. -It\'s easier to see this in action that explained, so let\'s see an -example. +Flexbox pertains to the parent div of any element. You want the parent to be the +flexbox in which items are arranged to use the flex methods. It's easier to see +this in action that explained, so let's see an example. **Flexbox** @@ -174,27 +167,24 @@ example. } ``` -You may notice that we no longer need to use the `top` -property for the `h3` elements in our code. This is because -we set the display box to be a flex container for the small boxes, AND -we made the small boxes flex containers for their elements (the h3 -tags). Flex boxes can be nested like this to center content that is -inside centered content. +You may notice that we no longer need to use the `top` property for the `h3` +elements in our code. This is because we set the display box to be a flex +container for the small boxes, AND we made the small boxes flex containers for +their elements (the h3 tags). Flex boxes can be nested like this to center +content that is inside centered content. -For the example above, we designated the `justify-content` -property to be `flex-start` so that the boxes stack from the -left side of the screen. This property can be changed to -`center` to make the boxes appear in the center of the -screen. +For the example above, we designated the `justify-content` property to be +`flex-start` so that the boxes stack from the left side of the screen. This +property can be changed to `center` to make the boxes appear in the center of +the screen. For an interactive example, [check out this CodePen](https://codepen.io/LandonSchropp/pen/KpzzGo) from -[LandonScropp](https://codepen.io/LandonSchropp/). Resize the window -with dice to see how they collapse and re-align. +[LandonScropp](https://codepen.io/LandonSchropp/). Resize the window with dice +to see how they collapse and re-align. # Even More CSS For more inspiration, you can visit [CodePen](https://www.codepen.io), -[Dribbble](https://dribbble.com), or [UI -Movement](https://uimovement.com) to browse the collections of many -amazing web designers. +[Dribbble](https://dribbble.com), or [UI Movement](https://uimovement.com) to +browse the collections of many amazing web designers. diff --git a/content/blog/2019-09-09-audit-analytics.md b/content/blog/2019-09-09-audit-analytics.md index 80a1ffb..d2d0d46 100644 --- a/content/blog/2019-09-09-audit-analytics.md +++ b/content/blog/2019-09-09-audit-analytics.md @@ -7,150 +7,139 @@ draft = false # What Are Data Analytics? -A quick aside before I dive into this post: `data analytics` -is a vague term that has become popular in recent years. Think of a -`data analytic` as the output of any data analysis you -perform. For example, a pivot table or a pie chart could be a data -analytic. - -[Data analysis](https://en.wikipedia.org/wiki/Data_analysis) is a -process that utilizes statistics and other mathematical methods to -discover useful information within datasets. This involves examining, -cleaning, transforming, and modeling data so that you can use the data -to support an opinion, create more useful viewpoints, and gain knowledge -to implement into audit planning or risk assessments. - -One of the common mistakes that managers (and anyone new to the process) -make is assuming that everything involved with this process is \"data -analytics\". In fact, data analytics are only a small part of the -process. - -See **Figure 1\*** for a more accurate representation of where data -analysis sits within the full process. This means that data analysis -does not include querying or extracting data, selecting samples, or -performing audit tests. These steps can be necessary for an audit (and -may even be performed by the same associates), but they are not data -analytics. +A quick aside before I dive into this post: `data analytics` is a vague term +that has become popular in recent years. Think of a `data analytic` as the +output of any data analysis you perform. For example, a pivot table or a pie +chart could be a data analytic. + +[Data analysis](https://en.wikipedia.org/wiki/Data_analysis) is a process that +utilizes statistics and other mathematical methods to discover useful +information within datasets. This involves examining, cleaning, transforming, +and modeling data so that you can use the data to support an opinion, create +more useful viewpoints, and gain knowledge to implement into audit planning or +risk assessments. + +One of the common mistakes that managers (and anyone new to the process) make is +assuming that everything involved with this process is "data analytics". In +fact, data analytics are only a small part of the process. + +See **Figure 1** for a more accurate representation of where data analysis +sits within the full process. This means that data analysis does not include +querying or extracting data, selecting samples, or performing audit tests. These +steps can be necessary for an audit (and may even be performed by the same +associates), but they are not data analytics. 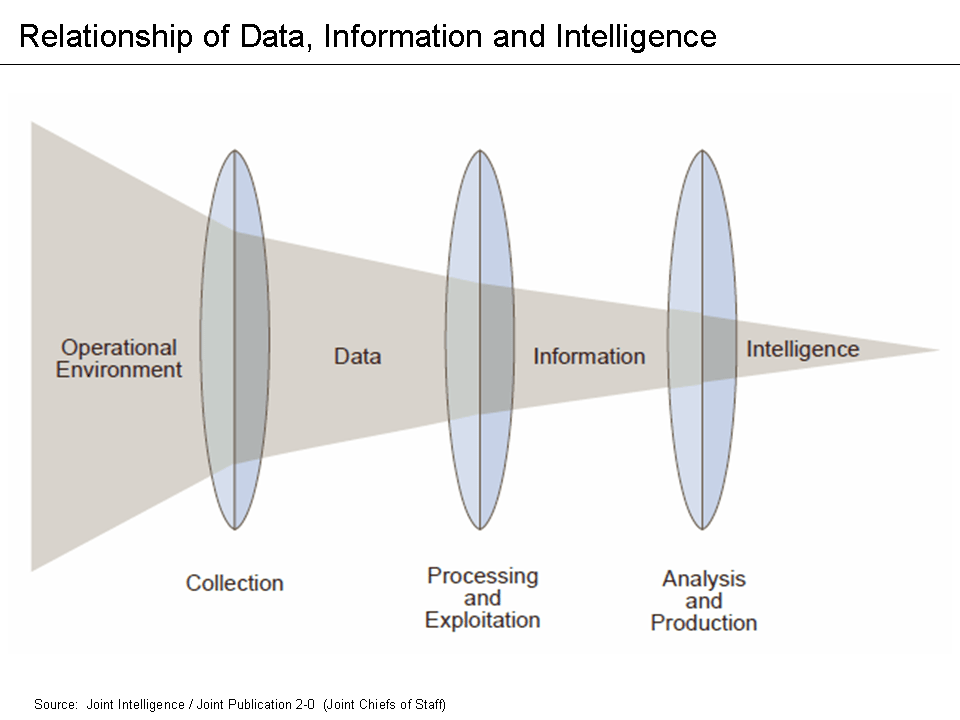 # Current Use of Analytics in Auditing -While data analysis has been an integral part of most businesses and -departments for the better part of the last century, only recently have -internal audit functions been adopting this practice. The internal audit -function works exclusively to provide assurance and consulting services -to the business areas within the firm (except for internal auditing -firms who are hired by different companies to perform their roles). - -> Internal Auditing helps an organization accomplish its objectives by -> bringing a systematic, disciplined approach to evaluate and improve -> the effectiveness of risk management, control and governance -> processes. +While data analysis has been an integral part of most businesses and departments +for the better part of the last century, only recently have internal audit +functions been adopting this practice. The internal audit function works +exclusively to provide assurance and consulting services to the business areas +within the firm (except for internal auditing firms who are hired by different +companies to perform their roles). + +> Internal Auditing helps an organization accomplish its objectives by bringing +> a systematic, disciplined approach to evaluate and improve the effectiveness +> of risk management, control and governance processes. > -> - The IIA\'s Definition of Internal Audit - -Part of the blame for the slow adoption of data analysis can be -attributed to the fact that internal auditing is strongly based on -tradition and following the precedents set by previous auditors. -However, there can be no progress without auditors who are willing to -break the mold and test new audit techniques. In fact, as of 2018, [only -63% of internal audit departments currently utilize data +> - The IIA's Definition of Internal Audit + +Part of the blame for the slow adoption of data analysis can be attributed to +the fact that internal auditing is strongly based on tradition and following the +precedents set by previous auditors. However, there can be no progress without +auditors who are willing to break the mold and test new audit techniques. In +fact, as of 2018, [only 63% of internal audit departments currently utilize data analytics](https://www.cpapracticeadvisor.com/accounting-audit/news/12404086/internal-audit-groups-are-lagging-in-data-analytics) -in North America. This number should be as close as possible to 100%. I -have never been part of an audit that would not have benefited from data -analytics. +in North America. This number should be as close as possible to 100%. I have +never been part of an audit that would not have benefited from data analytics. -So, how do internal audit functions remedy this situation? It\'s -definitely not as easy as walking into work on Monday and telling your -Chief Audit Executive that you\'re going to start implementing analytics -in the next audit. You need a plan and a system to make the analysis -process as effective as possible. +So, how do internal audit functions remedy this situation? It's definitely not +as easy as walking into work on Monday and telling your Chief Audit Executive +that you're going to start implementing analytics in the next audit. You need a +plan and a system to make the analysis process as effective as possible. # The DELTA Model One of the easiest ways to experiment with data analytics and gain an -understanding of the processes is to implement them within your own -department. But how do we do this if we\'ve never worked with analysis -before? One of the most common places to start is to research some data -analysis models currently available. For this post, we\'ll take a look -at the DELTA model. You can take a look at **\*\*\*Figure 2\*\*\*\*** -for a quick overview of the model. - -The DELTA model sets a few guidelines for areas wanting to implement -data analytics so that the results can be as comprehensive as possible: - -- **Data**: Must be clean, accessible, and (usually) unique. -- **Enterprise-Wide Focus**: Key data systems and analytical resources - must be available for use (by the Internal Audit Function). -- **Leaders**: Must promote a data analytics approach and show the - value of analytical results. -- **Targets**: Must be set for key areas and risks that the analytics - can be compared against (KPIs). -- **Analysts**: There must be auditors willing and able to perform - data analytics or else the system cannot be sustained. +understanding of the processes is to implement them within your own department. +But how do we do this if we've never worked with analysis before? One of the +most common places to start is to research some data analysis models currently +available. For this post, we'll take a look at the DELTA model. You can take a +look at **Figure 2** for a quick overview of the model. + +The DELTA model sets a few guidelines for areas wanting to implement data +analytics so that the results can be as comprehensive as possible: + +- **Data**: Must be clean, accessible, and (usually) unique. +- **Enterprise-Wide Focus**: Key data systems and analytical resources must be + available for use (by the Internal Audit Function). +- **Leaders**: Must promote a data analytics approach and show the value of + analytical results. +- **Targets**: Must be set for key areas and risks that the analytics can be + compared against (KPIs). +- **Analysts**: There must be auditors willing and able to perform data + analytics or else the system cannot be sustained.  # Finding the Proper KPIs -Once the Internal Audit Function has decided that they want to start -using data analytics internally and have ensured they\'re properly set -up to do so, they need to figure out what they will be testing against. -Key Performance Indicators (KPIs) are qualitative or quantitative -factors that can be evaluated and assessed to determine if the -department is performing well, usually compared to historical or -industry benchmarks. Once KPIs have been agreed upon and set, auditors -can use data analytics to assess and report on these KPIs. This allows -the person performing the analytics the freedom to express opinions on -the results, whereas the results are ambiguous if no KPIs exist. - -It should be noted that tracking KPIs in the department can help ensure -you have a rigorous Quality Assurance and Improvement Program (QAIP) in -accordance with some applicable standards, such as IPPF Standard 1300. - -> The chief audit executive must develop and maintain a quality -> assurance and improvement program that covers all aspects of the -> internal audit activity. +Once the Internal Audit Function has decided that they want to start using data +analytics internally and have ensured they're properly set up to do so, they +need to figure out what they will be testing against. Key Performance Indicators +(KPIs) are qualitative or quantitative factors that can be evaluated and +assessed to determine if the department is performing well, usually compared to +historical or industry benchmarks. Once KPIs have been agreed upon and set, +auditors can use data analytics to assess and report on these KPIs. This allows +the person performing the analytics the freedom to express opinions on the +results, whereas the results are ambiguous if no KPIs exist. + +It should be noted that tracking KPIs in the department can help ensure you have +a rigorous Quality Assurance and Improvement Program (QAIP) in accordance with +some applicable standards, such as IPPF Standard 1300. + +> The chief audit executive must develop and maintain a quality assurance and +> improvement program that covers all aspects of the internal audit activity. > > - IPPF Standard 1300 Additionally, IPPF Standard 2060 discusses reporting: -> The chief audit executive must report periodically to senior -> management and the board on the internal audit activity\'s purpose, -> authority, responsibility, and performance relative to its plan and on -> its conformance with the Code of Ethics and the Standards. Reporting -> must also include significant risk and control issues, including fraud -> risks, governance issues, and other matters that require the attention -> of senior management and/or the board. +> The chief audit executive must report periodically to senior management and +> the board on the internal audit activity's purpose, authority, +> responsibility, and performance relative to its plan and on its conformance +> with the Code of Ethics and the Standards. Reporting must also include +> significant risk and control issues, including fraud risks, governance issues, +> and other matters that require the attention of senior management and/or the +> board. > > - IPPF Standard 2060 -The hardest part of finding KPIs is to determine which KPIs are -appropriate for your department. Since every department is different and -has different goals, KPIs will vary drastically between companies. To -give you an idea of where to look, here are some ideas I came up with -when discussing the topic with a few colleagues. +The hardest part of finding KPIs is to determine which KPIs are appropriate for +your department. Since every department is different and has different goals, +KPIs will vary drastically between companies. To give you an idea of where to +look, here are some ideas I came up with when discussing the topic with a few +colleagues. - Efficiency/Budgeting: - - Audit hours to staff utilization ratio (annual hours divided by - total annual work hours). + - Audit hours to staff utilization ratio (annual hours divided by total + annual work hours). - Audit hours compared to the number of audits completed. - - Time between audit steps or to complete the whole audit. E.g., - time from fieldwork completion to audit report issuance. + - Time between audit steps or to complete the whole audit. E.g., time from + fieldwork completion to audit report issuance. - Reputation: - - The frequency that management has requested the services of the - IAF. - - Management, audit committee, or external audit satisfaction - survey results. - - Education, experience, certifications, tenure, and training of - the auditors on staff. + - The frequency that management has requested the services of the IAF. + - Management, audit committee, or external audit satisfaction survey + results. + - Education, experience, certifications, tenure, and training of the + auditors on staff. - Quality: - - Number and frequency of audit findings. Assign monetary or - numerical values, if possible. + - Number and frequency of audit findings. Assign monetary or numerical + values, if possible. - Percentage of recommendations issued and implemented. - Planning: - Percentage or number of key risks audited per year or per audit. @@ -158,65 +147,59 @@ when discussing the topic with a few colleagues. # Data Analysis Tools -Finally, to be able to analyze and report on the data analysis, auditors -need to evaluate the tools at their disposal. There are many options -available, but a few of the most common ones can easily get the job -done. For example, almost every auditor already has access to Microsoft -Excel. Excel is more powerful than most people give it credit for and -can accomplish a lot of basic statistics without much work. If you -don\'t know a lot about statistics but still want to see some of the -more basic results, Excel is a great option. - -To perform more in-depth statistical analysis or to explore large -datasets that Excel cannot handle, auditors will need to explore other -options. The big three that have had a lot of success in recent years -are Python, R, and ACL. ACL can be used as either a graphical tool -(point and click) or as a scripting tool, where the auditor must write -the scripts manually. Python and the R-language are solely scripting -languages. - -The general trend in the data analytics environment is that if the tool -allows you to do everything by clicking buttons or dragging elements, -you won\'t be able to fully utilize the analytics you need. The most -robust solutions are created by those who understand how to write the -scripts manually. It should be noted that as the utility of a tool -increases, it usually means that the learning curve for that tool will -also be higher. It will take auditors longer to learn how to utilize -Python, R, or ACL versus learning how to utilize Excel. +Finally, to be able to analyze and report on the data analysis, auditors need to +evaluate the tools at their disposal. There are many options available, but a +few of the most common ones can easily get the job done. For example, almost +every auditor already has access to Microsoft Excel. Excel is more powerful than +most people give it credit for and can accomplish a lot of basic statistics +without much work. If you don't know a lot about statistics but still want to +see some of the more basic results, Excel is a great option. + +To perform more in-depth statistical analysis or to explore large datasets that +Excel cannot handle, auditors will need to explore other options. The big three +that have had a lot of success in recent years are Python, R, and ACL. ACL can +be used as either a graphical tool (point and click) or as a scripting tool, +where the auditor must write the scripts manually. Python and the R-language are +solely scripting languages. + +The general trend in the data analytics environment is that if the tool allows +you to do everything by clicking buttons or dragging elements, you won't be +able to fully utilize the analytics you need. The most robust solutions are +created by those who understand how to write the scripts manually. It should be +noted that as the utility of a tool increases, it usually means that the +learning curve for that tool will also be higher. It will take auditors longer +to learn how to utilize Python, R, or ACL versus learning how to utilize Excel. # Visualization -Once an auditor has finally found the right data, KPIs, and tools, they -must report these results so that actions can be taken. Performing -in-depth data analysis is only useful if the results are understood by -the audiences of the data. The best way to create this understanding is -to visualize the results of the data. Let\'s take a look at some of the -best options to visualize and report the results you\'ve found. - -Some of the most popular commercial tools for visualization are -Microsoft PowerBI and Tableau Desktop. However, other tools exist such -as JMP, Plotly, Qlikview, Alteryx, or D3. Some require commercial -licenses while others are simply free to use. For corporate data, you -may want to make sure that the tool does not communicate any of the data -outside the company (such as cloud storage). I won\'t be going into -depth on any of these tools since visualization is largely a subjective -and creative experience, but remember to constantly explore new options -as you repeat the process. - -Lastly, let\'s take a look at an example of data visualization. This -example comes from a [blog post written by Kushal +Once an auditor has finally found the right data, KPIs, and tools, they must +report these results so that actions can be taken. Performing in-depth data +analysis is only useful if the results are understood by the audiences of the +data. The best way to create this understanding is to visualize the results of +the data. Let's take a look at some of the best options to visualize and report +the results you've found. + +Some of the most popular commercial tools for visualization are Microsoft +PowerBI and Tableau Desktop. However, other tools exist such as JMP, Plotly, +Qlikview, Alteryx, or D3. Some require commercial licenses while others are +simply free to use. For corporate data, you may want to make sure that the tool +does not communicate any of the data outside the company (such as cloud +storage). I won't be going into depth on any of these tools since visualization +is largely a subjective and creative experience, but remember to constantly +explore new options as you repeat the process. + +Lastly, let's take a look at an example of data visualization. This example +comes from a [blog post written by Kushal Chakrabarti](https://talent.works/2018/03/28/the-science-of-the-job-search-part-iii-61-of-entry-level-jobs-require-3-years-of-experience/) -in 2018 about the percent of entry-level US jobs that require -experience. **Figure 3\*** shows us an easy-to-digest picture of the -data. We can quickly tell that only about 12.5% of entry-level jobs -don\'t require experience. - -This is the kind of result that easily describes the data for you. -However, make sure to include an explanation of what the results mean. -Don\'t let the reader assume what the data means, especially if it -relates to a complex subject. *Tell a story* about the data and why the -results matter. For example, **Figure 4\*** shows a part of the -explanation the author gives to illustrate his point. +in 2018 about the percent of entry-level US jobs that require experience. +**Figure 3** shows us an easy-to-digest picture of the data. We can quickly +tell that only about 12.5% of entry-level jobs don't require experience. + +This is the kind of result that easily describes the data for you. However, make +sure to include an explanation of what the results mean. Don't let the reader +assume what the data means, especially if it relates to a complex subject. *Tell +a story* about the data and why the results matter. For example, **Figure 4** +shows a part of the explanation the author gives to illustrate his point.  @@ -226,8 +209,7 @@ Explanation](https://img.cleberg.net/blog/20190909-data-analysis-in-auditing/vis # Wrap-Up -While this is not an all-encompassing program that you can just adopt -into your department, it should be enough to get anyone started on the -process of understanding and implementing data analytics. Always -remember to continue learning and exploring new options as your -processes grow and evolve. +While this is not an all-encompassing program that you can just adopt into your +department, it should be enough to get anyone started on the process of +understanding and implementing data analytics. Always remember to continue +learning and exploring new options as your processes grow and evolve. diff --git a/content/blog/2019-12-03-the-ansoff-matrix.md b/content/blog/2019-12-03-the-ansoff-matrix.md index da3fa11..0f72e97 100644 --- a/content/blog/2019-12-03-the-ansoff-matrix.md +++ b/content/blog/2019-12-03-the-ansoff-matrix.md @@ -7,38 +7,35 @@ draft = false # Overview -As the world of business evolves, managers must approach business -planning and strategy with a contemporary mindset. According to Dess, -McNamara, Eisner, and Lee, managers must be willing to adapt to the -modern business environment by going beyond \"\'incremental -management\', whereby they view their job as making a series of small, -minor changes to improve the efficiency of the firm\'s -operations\"(2019). - -One reason that strategic management is crucial is because most -businesses that fail in the United States each year fail due to a lack -of strategic focus or direction(2019). The rate of failure for -businesses with poor strategies shows that strategic planning and -management are crucial to a business\'s strength and longevity, -injecting the critical factors of growth and direction into a company\'s -business plan. - -One of the most significant strategic planning and management frameworks -that companies can use is the [Ansoff -Matrix](https://en.wikipedia.org/wiki/Ansoff_matrix). While this -framework has unique purposes and use-cases, it can effectively help an -organization grow and compete. Specifically, the Ansoff matrix is one of -the most effective frameworks for companies who want to focus on -increasing sales revenue or profitability(2019). - -This framework uses a two-by-two figure to show the four strategic -options for companies to use in this framework: market penetration, -market development, product development, and diversification (see -**Figure 1**). The x-axis of the matrix focuses on the firm\'s markets -and also determines if the firm is looking to enter new markets or -innovate in its current markets. The y-axis of the matrix focuses on the -firm\'s products and determines if the firm wants to pursue strategies -around their existing products or explore new products. +As the world of business evolves, managers must approach business planning and +strategy with a contemporary mindset. According to Dess, McNamara, Eisner, and +Lee, managers must be willing to adapt to the modern business environment by +going beyond "'incremental management', whereby they view their job as making +a series of small, minor changes to improve the efficiency of the firm's +operations"(2019). + +One reason that strategic management is crucial is because most businesses that +fail in the United States each year fail due to a lack of strategic focus or +direction(2019). The rate of failure for businesses with poor strategies shows +that strategic planning and management are crucial to a business's strength and +longevity, injecting the critical factors of growth and direction into a +company's business plan. + +One of the most significant strategic planning and management frameworks that +companies can use is the [Ansoff +Matrix](https://en.wikipedia.org/wiki/Ansoff_matrix). While this framework has +unique purposes and use-cases, it can effectively help an organization grow and +compete. Specifically, the Ansoff matrix is one of the most effective frameworks +for companies who want to focus on increasing sales revenue or +profitability(2019). + +This framework uses a two-by-two figure to show the four strategic options for +companies to use in this framework: market penetration, market development, +product development, and diversification (see **Figure 1**). The x-axis of the +matrix focuses on the firm's markets and also determines if the firm is looking +to enter new markets or innovate in its current markets. The y-axis of the +matrix focuses on the firm's products and determines if the firm wants to +pursue strategies around their existing products or explore new products. 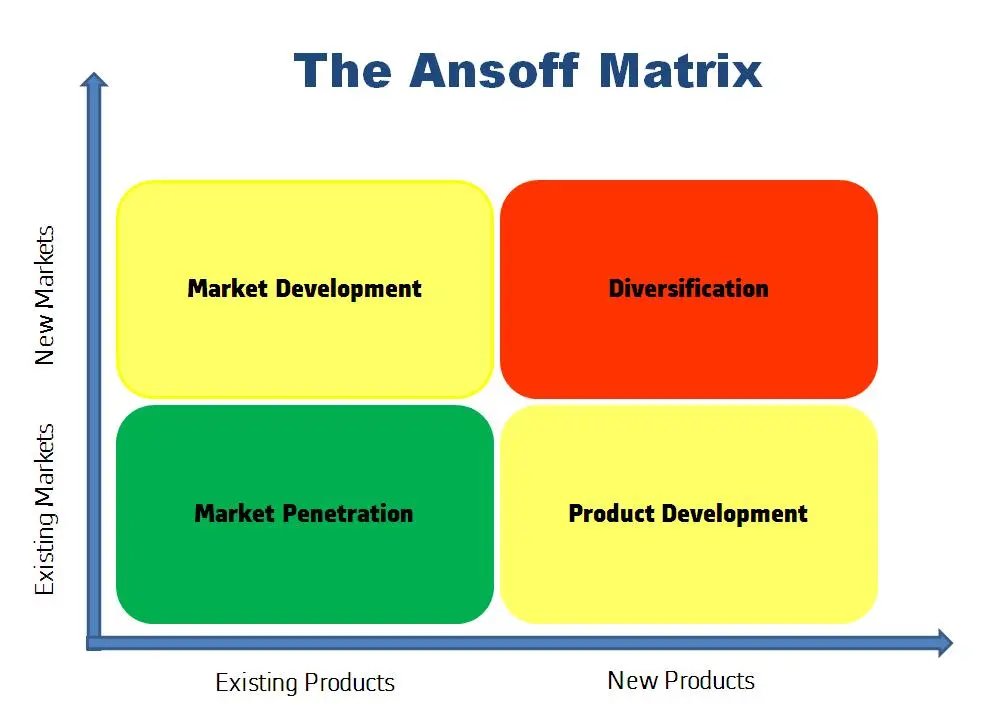 @@ -47,82 +44,76 @@ around their existing products or explore new products. ## Market Penetration -The most straightforward strategy in the Ansoff matrix is to focus on -existing products in existing markets, also known as market -penetration(2019). Companies such as Coca-Cola have used market -penetration successfully by investing a lot of money to get further -value out of their current markets. Coca-Cola does this by introducing -new features such as Christmas-themed bottles, personal names on the -bottles, and other marketing schemes. +The most straightforward strategy in the Ansoff matrix is to focus on existing +products in existing markets, also known as market penetration(2019). Companies +such as Coca-Cola have used market penetration successfully by investing a lot +of money to get further value out of their current markets. Coca-Cola does this +by introducing new features such as Christmas-themed bottles, personal names on +the bottles, and other marketing schemes. ## Market Development -Market development extends existing products into new markets in an -attempt to increase the number of buyers. One interesting way that -Coca-Cola used this strategy comes from the stigma that Diet Coke is a -woman\'s drink(2019). Coca-Cola introduced Coca-Cola Zero, which -contained the same nutritional content as Diet Coke, but was packaged in -a dark black can to appear more \"manly\"(2019). +Market development extends existing products into new markets in an attempt to +increase the number of buyers. One interesting way that Coca-Cola used this +strategy comes from the stigma that Diet Coke is a woman's drink(2019). +Coca-Cola introduced Coca-Cola Zero, which contained the same nutritional +content as Diet Coke, but was packaged in a dark black can to appear more +"manly"(2019). ## Product Development -Product development uses existing markets to introduce new products so -that the firm can better meet customer needs(2019). The extreme end of -diversification is home to companies such as Johnson & Johnson, a -healthcare company that has developed a business portfolio of more than -60,000 different products(2019). Johnson & Johnson\'s dedication to -continuous diversification has led them to a balance sheet rating of -\"AAA\", industry recognition for diversification, and increases in -their investor dividends for 57 consecutive years(2019). +Product development uses existing markets to introduce new products so that the +firm can better meet customer needs(2019). The extreme end of diversification is +home to companies such as Johnson & Johnson, a healthcare company that has +developed a business portfolio of more than 60,000 different products(2019). +Johnson & Johnson's dedication to continuous diversification has led them to a +balance sheet rating of "AAA", industry recognition for diversification, and +increases in their investor dividends for 57 consecutive years(2019). ## Related Diversification -Diversification, the final strategy of the Ansoff Matrix, is more -difficult than the others since it involves exploring both new markets -and new products. Related diversification is a diversification strategy -that closely relates to the firm\'s core business. Coca-Cola\'s best -example of related diversification is its acquisition of Glaceau and -Vitamin Water, which expanded their drinking lines of business(2019). +Diversification, the final strategy of the Ansoff Matrix, is more difficult than +the others since it involves exploring both new markets and new products. +Related diversification is a diversification strategy that closely relates to +the firm's core business. Coca-Cola's best example of related diversification +is its acquisition of Glaceau and Vitamin Water, which expanded their drinking +lines of business(2019). ## Unrelated Diversification -Unrelated diversification is a diversification strategy that does not -really relate to the firm\'s core business but still diversifies their -business portfolio. A good example of this would be a coffee company who -has decided to enter the market for bicycle sales. The main purpose of -this strategy is to an extremely diverse company that will not go -bankrupt if one market goes through difficult times. However, this -requires a lot of independent skills and heavy investments since the -company most likely cannot easily transfer knowledge between the markets -they compete in. +Unrelated diversification is a diversification strategy that does not really +relate to the firm's core business but still diversifies their business +portfolio. A good example of this would be a coffee company who has decided to +enter the market for bicycle sales. The main purpose of this strategy is to an +extremely diverse company that will not go bankrupt if one market goes through +difficult times. However, this requires a lot of independent skills and heavy +investments since the company most likely cannot easily transfer knowledge +between the markets they compete in. # Requirements for Success -To use the Ansoff Matrix framework, managers need to formulate corporate -goals and objectives. Without goals and direction, management frameworks -do not present much practical utility. Further, the Ansoff Matrix -requires the managers involved to make tactical decisions and create a -path for the company to take toward their goals. Lastly, both the Ansoff -Matrix needs to consider both internal and external perspectives -throughout the strategy formulation process. - -One interesting probability is that companies will be using multiple -strategic planning and management frameworks at the same time. While -this may sound like it could crowd the management process, there are -numerous reasons to do so. For example, the Ansoff Matrix and the -Balanced Scorecard are relatively popular, and they cover entirely -different parts of a company\'s strategy. Using the results from the -Balanced Scorecard could inform a company of the potential product and -market demands, such as from customer or supplier survey results, to -help the company determine which Ansoff Matrix strategy to pursue. -However, a combined approach at this level would require mature -frameworks and focused managers who are able to strategize at a high -level. - -Lastly, it should be noted that the author of the Ansoff matrix, Igor -Ansoff, often used the term [paralysis by -analysis](https://en.wikipedia.org/wiki/Analysis_paralysis) to explain -the mistake of companies who overuse analysis and spend too much time -planning. Companies need to understand the utility of a strategic -management framework while ensuring that the company is poised to -execute as efficiently as they have planned. +To use the Ansoff Matrix framework, managers need to formulate corporate goals +and objectives. Without goals and direction, management frameworks do not +present much practical utility. Further, the Ansoff Matrix requires the managers +involved to make tactical decisions and create a path for the company to take +toward their goals. Lastly, both the Ansoff Matrix needs to consider both +internal and external perspectives throughout the strategy formulation process. + +One interesting probability is that companies will be using multiple strategic +planning and management frameworks at the same time. While this may sound like +it could crowd the management process, there are numerous reasons to do so. For +example, the Ansoff Matrix and the Balanced Scorecard are relatively popular, +and they cover entirely different parts of a company's strategy. Using the +results from the Balanced Scorecard could inform a company of the potential +product and market demands, such as from customer or supplier survey results, to +help the company determine which Ansoff Matrix strategy to pursue. However, a +combined approach at this level would require mature frameworks and focused +managers who are able to strategize at a high level. + +Lastly, it should be noted that the author of the Ansoff matrix, Igor Ansoff, +often used the term [paralysis by +analysis](https://en.wikipedia.org/wiki/Analysis_paralysis) to explain the +mistake of companies who overuse analysis and spend too much time planning. +Companies need to understand the utility of a strategic management framework +while ensuring that the company is poised to execute as efficiently as they have +planned. diff --git a/content/blog/2019-12-16-password-security.md b/content/blog/2019-12-16-password-security.md index bb4ab1d..aae3109 100644 --- a/content/blog/2019-12-16-password-security.md +++ b/content/blog/2019-12-16-password-security.md @@ -9,119 +9,109 @@ draft = false ## Why Does It Matter? -Information security, including passwords and identities, has become one -of the most important digital highlights of the last decade. With -[billions of people affected by data breaches each +Information security, including passwords and identities, has become one of the +most important digital highlights of the last decade. With [billions of people +affected by data breaches each year](https://www.usatoday.com/story/money/2018/12/28/data-breaches-2018-billions-hit-growing-number-cyberattacks/2413411002/), -there\'s a greater need to introduce strong information security -systems. If you think you\'ve been part of a breach, or you want to -check and see, you can use [Have I Been -Pwned](https://haveibeenpwned.com/) to see if your email has been -involved in any public breaches. Remember that there\'s a possibility -that a company experienced a breach and did not report it to anyone. +there's a greater need to introduce strong information security systems. If you +think you've been part of a breach, or you want to check and see, you can use +[Have I Been Pwned](https://haveibeenpwned.com/) to see if your email has been +involved in any public breaches. Remember that there's a possibility that a +company experienced a breach and did not report it to anyone. ## How Do I Protect Myself? -The first place to start with any personal security check-up is to -gather a list of all the different websites, apps, or programs that -require you to have login credentials. Optionally, once you know where -your information is being stored, you can sort the list from the -most-important items such as banks or government logins to less -important items such as your favorite meme site. You will want to ensure -that your critical logins are secure before getting to the others. +The first place to start with any personal security check-up is to gather a list +of all the different websites, apps, or programs that require you to have login +credentials. Optionally, once you know where your information is being stored, +you can sort the list from the most-important items such as banks or government +logins to less important items such as your favorite meme site. You will want to +ensure that your critical logins are secure before getting to the others. Once you think you have a good idea of all your different authentication methods, I recommend using a password manager such as -[Bitwarden](https://bitwarden.com/). Using a password manager allows you -to automatically save your logins, create randomized passwords, and -transfer passwords across devices. However, you\'ll need to memorize -your \"vault password\" that allows you to open the password manager. -It\'s important to make this something hard to guess since it would -allow anyone who has it to access every password you\'ve stored in -there. +[Bitwarden](https://bitwarden.com/). Using a password manager allows you to +automatically save your logins, create randomized passwords, and transfer +passwords across devices. However, you'll need to memorize your "vault +password" that allows you to open the password manager. It's important to make +this something hard to guess since it would allow anyone who has it to access +every password you've stored in there. Personally, I recommend using a [passphrase](https://en.wikipedia.org/wiki/Passphrase) instead of a -[password](https://en.wikipedia.org/wiki/Password) for your vault -password. Instead of using a string of characters (whether random or -simple), use a phrase and add in symbols and a number. For example, your -vault password could be `Racing-Alphabet-Gourd-Parrot3`. Swap -the symbols out for whichever symbol you want, move the number around, -and fine-tune the passphrase until you are confident that you can -remember it whenever necessary. - -Once you\'ve stored your passwords, make sure you continually check up -on your account and make sure you aren\'t following bad password -practices. Krebs on Security has a great [blog post on password -recommendations](https://krebsonsecurity.com/password-dos-and-donts/). -Any time that a data breach happens, make sure you check to see if you -were included, and if you need to reset any account passwords. +[password](https://en.wikipedia.org/wiki/Password) for your vault password. +Instead of using a string of characters (whether random or simple), use a phrase +and add in symbols and a number. For example, your vault password could be +`Racing-Alphabet-Gourd-Parrot3`. Swap the symbols out for whichever symbol you +want, move the number around, and fine-tune the passphrase until you are +confident that you can remember it whenever necessary. + +Once you've stored your passwords, make sure you continually check up on your +account and make sure you aren't following bad password practices. Krebs on +Security has a great [blog post on password +recommendations](https://krebsonsecurity.com/password-dos-and-donts/). Any time +that a data breach happens, make sure you check to see if you were included, and +if you need to reset any account passwords. # Developers ## What Are the Basic Requirements? -When developing any password-protected application, there are a few -basic rules that anyone should follow even if they do not follow any -official guidelines such as NIST. The foremost practice is to require -users to use passwords that are at least 8 characters and cannot easily -be guessed. This sounds extremely simple, but it requires quite a few -different strategies. First, the application should check the potential -passwords against a dictionary of insecure passwords such -`password`, `1234abc`, or -`application_name`. - -Next, the application should offer guidance on the strength of passwords -being entered during enrollment. Further, NIST officially recommends -**not\*** implementing any composition rules that make passwords hard to -remember (e.g. passwords with letters, numbers, and special characters) -and instead encouraging the use of long pass phrases which can include -spaces. It should be noted that to be able to keep spaces within -passwords, all unicode characters should be supported, and passwords -should not be truncated. +When developing any password-protected application, there are a few basic rules +that anyone should follow even if they do not follow any official guidelines +such as NIST. The foremost practice is to require users to use passwords that +are at least 8 characters and cannot easily be guessed. This sounds extremely +simple, but it requires quite a few different strategies. First, the application +should check the potential passwords against a dictionary of insecure passwords +such `password`, `1234abc`, or `application_name`. + +Next, the application should offer guidance on the strength of passwords being +entered during enrollment. Further, NIST officially recommends **not** +implementing any composition rules that make passwords hard to remember (e.g. +passwords with letters, numbers, and special characters) and instead encouraging +the use of long pass phrases which can include spaces. It should be noted that +to be able to keep spaces within passwords, all unicode characters should be +supported, and passwords should not be truncated. ## What Does NIST Recommend? The National Institute of Standards and Technology -([NIST](https://www.nist.gov)) in the US Department of Commerce -regularly publishes information around information security and digital -identity guidelines. Recently, NIST published [Special Publication -800-63b](https://pages.nist.gov/800-63-3/sp800-63b.html): Digital -Identity Guidelines and Authentication and Lifecycle Management. - -> A Memorized Secret authenticator - commonly referred to as a password -> or, if numeric, a PIN - is a secret value intended to be chosen and -> memorized by the user. Memorized secrets need to be of sufficient -> complexity and secrecy that it would be impractical for an attacker to -> guess or otherwise discover the correct secret value. A memorized -> secret is something you know. +([NIST](https://www.nist.gov)) in the US Department of Commerce regularly +publishes information around information security and digital identity +guidelines. Recently, NIST published [Special Publication +800-63b](https://pages.nist.gov/800-63-3/sp800-63b.html): Digital Identity +Guidelines and Authentication and Lifecycle Management. + +> A Memorized Secret authenticator - commonly referred to as a password or, if +> numeric, a PIN - is a secret value intended to be chosen and memorized by the +> user. Memorized secrets need to be of sufficient complexity and secrecy that +> it would be impractical for an attacker to guess or otherwise discover the +> correct secret value. A memorized secret is something you know. > -> - NIST Special Publication 800-63B - -NIST offers a lot of guidance on passwords, but I\'m going to highlight -just a few of the important factors: - -- Require passwords to be a minimum of 8 characters (6 characters if - randomly generated and be generated using an approved random bit - generator). -- Compare potential passwords against a list that contains values - known to be commonly-used, expected, or compromised. -- Offer guidance on password strength, such as a strength meter. -- Implement a rate-limiting mechanism to limit the number of failed - authentication attempts for each user account. -- Do not require composition rules for passwords and do not require - passwords to be changed periodically (unless compromised). -- Allow pasting of user identification and passwords to facilitate the - use of password managers. -- Allow users to view the password as it is being entered. -- Use secure forms of communication and storage, including salting and - hashing passwords using a one-way key derivation function. - -NIST offers further guidance on other devices that require specific -security policies, querying for passwords, and more. All the information -discussed so far comes from [NIST -SP800-63b](https://pages.nist.gov/800-63-3/sp800-63b.html) but NIST -offers a lot of information on digital identities, enrollment, identity -proofing, authentication, lifecycle management, federation, and -assertions in the total [NIST SP800-63 Digital Identity +> - NIST Special Publication 800-63B + +NIST offers a lot of guidance on passwords, but I'm going to highlight just a +few of the important factors: + +- Require passwords to be a minimum of 8 characters (6 characters if randomly + generated and be generated using an approved random bit generator). +- Compare potential passwords against a list that contains values known to be + commonly-used, expected, or compromised. +- Offer guidance on password strength, such as a strength meter. +- Implement a rate-limiting mechanism to limit the number of failed + authentication attempts for each user account. +- Do not require composition rules for passwords and do not require passwords to + be changed periodically (unless compromised). +- Allow pasting of user identification and passwords to facilitate the use of + password managers. +- Allow users to view the password as it is being entered. +- Use secure forms of communication and storage, including salting and hashing + passwords using a one-way key derivation function. + +NIST offers further guidance on other devices that require specific security +policies, querying for passwords, and more. All the information discussed so far +comes from [NIST SP800-63b](https://pages.nist.gov/800-63-3/sp800-63b.html) but +NIST offers a lot of information on digital identities, enrollment, identity +proofing, authentication, lifecycle management, federation, and assertions in +the total [NIST SP800-63 Digital Identity Guidelines](https://pages.nist.gov/800-63-3/). diff --git a/content/blog/2020-01-25-linux-software.md b/content/blog/2020-01-25-linux-software.md index a240731..c3624de 100644 --- a/content/blog/2020-01-25-linux-software.md +++ b/content/blog/2020-01-25-linux-software.md @@ -12,32 +12,31 @@ draft = false 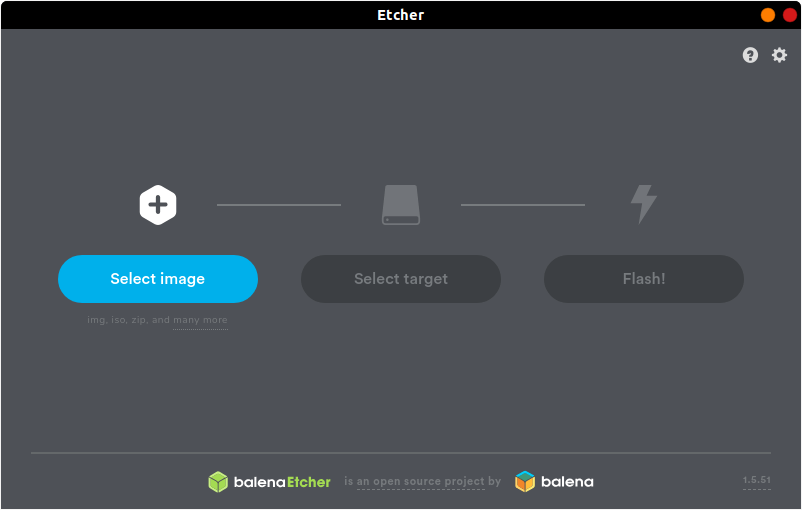 -[Etcher](https://www.balena.io/etcher/) is a quick and easy way to burn -ISO images to CDs and USB devices. There are two different ways you can -install this program. First, you can navigate to the [official -website](https://www.balena.io/etcher/) and download the AppImage file, -which can run without installation. +[Etcher](https://www.balena.io/etcher/) is a quick and easy way to burn ISO +images to CDs and USB devices. There are two different ways you can install this +program. First, you can navigate to the [official +website](https://www.balena.io/etcher/) and download the AppImage file, which +can run without installation. -However, AppImage files are not executable by default, so you\'ll either -need to right-click to open the properties of the file and click the -\"Allow executing file as program\" box in the Permissions tab or use -the following command: +However, AppImage files are not executable by default, so you'll either need to +right-click to open the properties of the file and click the "Allow executing +file as program" box in the Permissions tab or use the following command: ```sh chmod u+x FILE_NAME ``` -If you don\'t like AppImage files or just prefer repositories, you can -use the following commands to add the author\'s repository and install -it through the command-line only. +If you don't like AppImage files or just prefer repositories, you can use the +following commands to add the author's repository and install it through the +command-line only. -First, you\'ll have to echo the repo and write it to a list file: +First, you'll have to echo the repo and write it to a list file: ```sh echo "deb https://deb.etcher.io stable etcher" | sudo tee /etc/apt/sources.list.d/balena-etcher.list ``` -Next, add the application keys to Ubuntu\'s keyring: +Next, add the application keys to Ubuntu's keyring: ```sh sudo apt-key adv --keyserver keyserver.ubuntu.com --recv-keys 379CE192D401AB61 @@ -49,8 +48,7 @@ Finally, update the repositories and install the app. sudo apt update && sudo apt install balena-etcher-electron ``` -Using Arch, Manjaro, or another distro using the AUR? Use this command -instead: +Using Arch, Manjaro, or another distro using the AUR? Use this command instead: ```sh sudo pacman -S etcher @@ -61,12 +59,11 @@ sudo pacman -S etcher  -[Atom](https://atom.io) is the self-proclaimed \"hackable text editor -for the 21st century\". This text editor is made by GitHub, [now owned -by +[Atom](https://atom.io) is the self-proclaimed "hackable text editor for the +21st century". This text editor is made by GitHub, [now owned by Microsoft](https://news.microsoft.com/2018/06/04/microsoft-to-acquire-github-for-7-5-billion/), -and has some of the best add-ons available to customize the layout and -abilities of the app. +and has some of the best add-ons available to customize the layout and abilities +of the app. First, add the Atom repository to your sources. @@ -80,25 +77,24 @@ Next, update your package listings and install atom. sudo apt update && sudo apt install atom ``` -If you have issues updating your packages with the Atom repository, -you\'ll need to use the snap package described below instead of the -repository. To remove the repository we just added, use this command: +If you have issues updating your packages with the Atom repository, you'll need +to use the snap package described below instead of the repository. To remove the +repository we just added, use this command: ```sh sudo add-apt-repository -r ppa:webupd8team/atom ``` -You can also install Atom as a snap package, but it must be installed -with the `--classic` flag. A [full explanation is +You can also install Atom as a snap package, but it must be installed with the +`--classic` flag. A [full explanation is available](https://language-bash.com/blog/how-to-snap-introducing-classic-confinement) -if you\'d like to read more about why you need the classic flag. +if you'd like to read more about why you need the classic flag. ```sh snap install atom --classic ``` -Using Arch, Manjaro, or another distro using the AUR? Use this command -instead: +Using Arch, Manjaro, or another distro using the AUR? Use this command instead: ```sh sudo pacman -S atom @@ -109,28 +105,25 @@ sudo pacman -S atom  -[Visual Studio Code](https://code.visualstudio.com) is yet another -fantastic choice for programming on Linux, especially if you need those -extra add-ons to spice up your late-night coding sessions. The theme -used in the screenshot is -[Mars](https://marketplace.visualstudio.com/items?itemName=EliverLara.mars) -by theme creator [Eliver Lara](https://github.com/EliverLara), who makes -a ton of great themes for VS Code, Atom, and various Linux desktop -environments. - -To install VS Code, you\'ll need to download the `.deb` file -from the official website. Once you\'ve downloaded the file, either -double-click it to install through the Software Center or run the -following command: +[Visual Studio Code](https://code.visualstudio.com) is yet another fantastic +choice for programming on Linux, especially if you need those extra add-ons to +spice up your late-night coding sessions. The theme used in the screenshot is +[Mars](https://marketplace.visualstudio.com/items?itemName=EliverLara.mars) by +theme creator [Eliver Lara](https://github.com/EliverLara), who makes a ton of +great themes for VS Code, Atom, and various Linux desktop environments. + +To install VS Code, you'll need to download the `.deb` file from the official +website. Once you've downloaded the file, either double-click it to install +through the Software Center or run the following command: ```sh sudo dpkg -i FILE_NAME.deb ``` -You can also install VS Code as a snap package, but it must be installed -with the `--classic` flag. A [full explanation is +You can also install VS Code as a snap package, but it must be installed with +the `--classic` flag. A [full explanation is available](https://language-bash.com/blog/how-to-snap-introducing-classic-confinement) -if you\'d like to read more about why you need the classic flag. +if you'd like to read more about why you need the classic flag. ```sh snap install code --classic @@ -148,19 +141,18 @@ sudo pacman -S yay binutils make gcc pkg-config fakeroot yay -S visual-studio-co 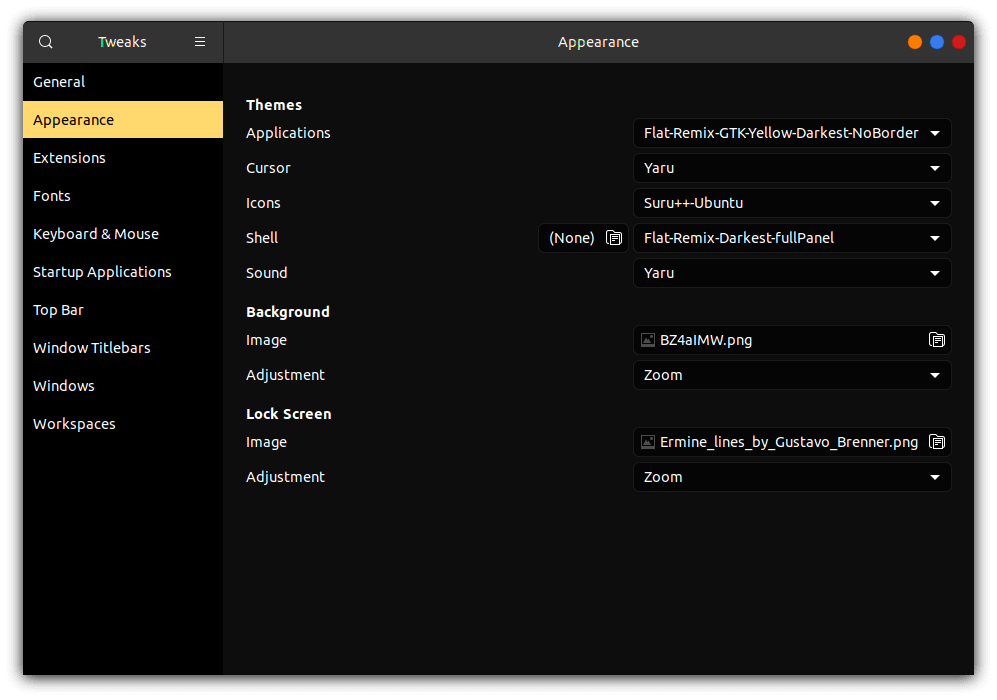 -[Gnome Tweaks](https://gitlab.gnome.org/GNOME/gnome-tweaks) is the -ultimate tool to use if you want to customize your GNOME desktop -environment. This is how you can switch application themes (GTK), shell -themes, icons, fonts, and more. To install GNOME Tweaks on Ubuntu, you -just need to install the official package. +[Gnome Tweaks](https://gitlab.gnome.org/GNOME/gnome-tweaks) is the ultimate tool +to use if you want to customize your GNOME desktop environment. This is how you +can switch application themes (GTK), shell themes, icons, fonts, and more. To +install GNOME Tweaks on Ubuntu, you just need to install the official package. ```sh sudo apt install gnome-tweaks ``` -If you\'ve installed Manjaro or Arch with Gnome, you should have the -tweak tool pre-installed. If you\'re on Fedora, this tool is available -as an official package: +If you've installed Manjaro or Arch with Gnome, you should have the tweak tool +pre-installed. If you're on Fedora, this tool is available as an official +package: ```sh sudo dnf install gnome-tweaks @@ -171,22 +163,20 @@ sudo dnf install gnome-tweaks  -[Steam](https://steampowered.com) is one of the most popular gaming -libraries for computers and is one of the main reasons that many people -have been able to switch to Linux in recent years, thanks to Steam -Proton, which makes it easier to play games not officially created for -Linux platforms. +[Steam](https://steampowered.com) is one of the most popular gaming libraries +for computers and is one of the main reasons that many people have been able to +switch to Linux in recent years, thanks to Steam Proton, which makes it easier +to play games not officially created for Linux platforms. -To install Steam on Ubuntu, you just need to install the official -package. +To install Steam on Ubuntu, you just need to install the official package. ```sh sudo apt install steam-installer ``` -For Arch-based systems, you\'ll simply need to install the -`steam` package. However, this requires that you enable the -`multilib` source. To do so, use the following command: +For Arch-based systems, you'll simply need to install the `steam` package. +However, this requires that you enable the `multilib` source. To do so, use the +following command: ```sh sudo nano /etc/pacman.conf @@ -220,27 +210,26 @@ Here.](./2020-01-26-steam-on-ntfs-drives.html)  -[Neofetch](https://github.com/dylanaraps/neofetch) is a customizable -tool used in the command-line to show system information. This is -exceptionally useful if you want to see your system\'s information -quickly without the clutter of some resource-heavy GUI apps. +[Neofetch](https://github.com/dylanaraps/neofetch) is a customizable tool used +in the command-line to show system information. This is exceptionally useful if +you want to see your system's information quickly without the clutter of some +resource-heavy GUI apps. -This is an official package if you\'re running Ubuntu 17.04 or later, so -simply use the following command: +This is an official package if you're running Ubuntu 17.04 or later, so simply +use the following command: ```sh sudo apt install neofetch ``` -If you\'re running Ubuntu 16.10 or earlier, you\'ll have to use a series -of commands: +If you're running Ubuntu 16.10 or earlier, you'll have to use a series of +commands: ```sh sudo add-apt-repository ppa:dawidd0811/neofetch; sudo apt update; sudo apt install neofetch ``` -Using Arch, Manjaro, or another distro using the AUR? Use this command -instead: +Using Arch, Manjaro, or another distro using the AUR? Use this command instead: ```sh sudo pacman -S neofetch @@ -251,31 +240,27 @@ sudo pacman -S neofetch  -[yt-dlp](https://github.com/yt-dlp/yt-dlp) is an extremely handy -command-line tool that allows you to download video or audio files from -various websites, such as YouTube. There are a ton of different options -when running this package, so be sure to run `yt-dlp --help` -first to look through everything you can do (or give up and search for -the best config online). +[yt-dlp](https://github.com/yt-dlp/yt-dlp) is an extremely handy command-line +tool that allows you to download video or audio files from various websites, +such as YouTube. There are a ton of different options when running this package, +so be sure to run `yt-dlp --help` first to look through everything you can do +(or give up and search for the best config online). -While this shouldn\'t be a problem for most users, yt-dlp requires -Python 2.6, 2.7, or 3.2+ to work correctly, so install Python if you -don\'t have it already. You can check to see if you have Python -installed by running: +While this shouldn't be a problem for most users, yt-dlp requires Python 2.6, +2.7, or 3.2+ to work correctly, so install Python if you don't have it already. +You can check to see if you have Python installed by running: ```sh python -V ``` -To get the youtube-dl package, simply curl the URL and output the -results. +To get the youtube-dl package, simply curl the URL and output the results. ```sh sudo curl -L https://github.com/yt-dlp/yt-dlp/releases/latest/download/yt-dlp -o /usr/local/bin/yt-dlp ``` -Finally, make the file executable so that it can be run from the -command-line. +Finally, make the file executable so that it can be run from the command-line. ```sh sudo chmod a+rx /usr/local/bin/yt-dlp diff --git a/content/blog/2020-01-26-steam-on-ntfs.md b/content/blog/2020-01-26-steam-on-ntfs.md index dbc6060..74d1e71 100644 --- a/content/blog/2020-01-26-steam-on-ntfs.md +++ b/content/blog/2020-01-26-steam-on-ntfs.md @@ -10,29 +10,28 @@ draft = false  -If you want to see how to install Steam on Linux, see my other post: -[Linux Software](../linux-software/). +If you want to see how to install Steam on Linux, see my other post: [Linux +Software](../linux-software/). -Are you having trouble launching games, even though they\'ve installed -correctly? This may happen if you\'re storing your games on an -NTFS-formatted drive. This shouldn\'t be an issue if you\'re storing -your games on the same drive that Steam is on, but some gamers prefer to -put Steam on their main drive and game files on another SSD or HDD. +Are you having trouble launching games, even though they've installed +correctly? This may happen if you're storing your games on an NTFS-formatted +drive. This shouldn't be an issue if you're storing your games on the same +drive that Steam is on, but some gamers prefer to put Steam on their main drive +and game files on another SSD or HDD. -To fix this problem, you\'ll need to try a few things. First, you\'ll -need to install the `ntfs-3g` package, which is meant for -better interoperability with Linux. +To fix this problem, you'll need to try a few things. First, you'll need to +install the `ntfs-3g` package, which is meant for better interoperability with +Linux. ```sh sudo apt install ntfs-3g ``` -Next, you should set up the `/etc/fstab` file to -automatically mount your drives on boot. To automatically mount your -drives when the computer boots up, you\'ll have to create the folders -you want to mount your drive to first. I store mine in the -`/mnt` folder using names that I\'ll recognize, but you can -create your folders wherever you want. +Next, you should set up the `/etc/fstab` file to automatically mount your drives +on boot. To automatically mount your drives when the computer boots up, you'll +have to create the folders you want to mount your drive to first. I store mine +in the `/mnt` folder using names that I'll recognize, but you can create your +folders wherever you want. ```sh mkdir /path/to/folder @@ -44,28 +43,27 @@ For example: mkdir /mnt/steam_library ``` -To automatically mount drives upon system boot, you will need to collect -a few items. The UUID is the identification number connected to -whichever drive you\'re using to store Steam games. +To automatically mount drives upon system boot, you will need to collect a few +items. The UUID is the identification number connected to whichever drive +you're using to store Steam games. -Drives are usually labeled similar to `/dev/nvme0n1p1` or -`/dev/sda1`, so you\'ll need to find the line in the output -of the command below that correlates to your drive and copy the UUID -over to the `/etc/fstab` file. +Drives are usually labeled similar to `/dev/nvme0n1p1` or `/dev/sda1`, so +you'll need to find the line in the output of the command below that correlates +to your drive and copy the UUID over to the `/etc/fstab` file. ```sh sudo blkid | grep UUID= ``` -Next, you\'ll need your `uid` and `gid`. To find -these, run the following command: +Next, you'll need your `uid` and `gid`. To find these, run the following +command: ```sh id -u && id -g ``` -Now that you have collected the necessary information, open the -`/etc/fstab` file: +Now that you have collected the necessary information, open the `/etc/fstab` +file: ```sh sudo nano /etc/fstab @@ -78,9 +76,8 @@ Each drive you want to mount on boot should have its own line in the UUID=B64E53824E5339F7 /mnt/steam_library ntfs-3g uid=1000,gid=1000 0 0 ``` -Now all you need to do is unmount your drive and re-mount it. You can -unmount the drive by doing this (be sure to use the correct drive name -here): +Now all you need to do is unmount your drive and re-mount it. You can unmount +the drive by doing this (be sure to use the correct drive name here): ```sh sudo umount /dev/sdxX @@ -92,6 +89,6 @@ You can re-mount all your drives by executing the following: sudo mount -a ``` -If you don\'t know what your drive name is, or you\'re nervous about -unmounting and re-mounting, simply reboot your computer, and it will be -done for you automatically. +If you don't know what your drive name is, or you're nervous about unmounting +and re-mounting, simply reboot your computer, and it will be done for you +automatically. diff --git a/content/blog/2020-02-09-cryptography-basics.md b/content/blog/2020-02-09-cryptography-basics.md index dee2174..9df1549 100644 --- a/content/blog/2020-02-09-cryptography-basics.md +++ b/content/blog/2020-02-09-cryptography-basics.md @@ -7,174 +7,161 @@ draft = false # Similar Article Available -If you haven\'t already, feel free to read my post on [AES +If you haven't already, feel free to read my post on [AES Encryption](../aes-encryption/). # What is Cryptography? -In layman\'s terms, cryptography is a process that can change data from -a readable format into an unreadable format (and vice-versa) through a -series of processes and secrets. More technically, this is the Internet -Security Glossary\'s definition: - -> \[Cryptography is\] the mathematical science that deals with -> transforming data to render its meaning unintelligible (i.e., to hide -> its semantic content), prevent its undetected alteration, or prevent -> its unauthorized use. If the transformation is reversible, -> cryptography also deals with restoring encrypted data to an -> intelligible form. +In layman's terms, cryptography is a process that can change data from a +readable format into an unreadable format (and vice-versa) through a series of +processes and secrets. More technically, this is the Internet Security +Glossary's definition: + +> [Cryptography is] the mathematical science that deals with transforming data +> to render its meaning unintelligible (i.e., to hide its semantic content), +> prevent its undetected alteration, or prevent its unauthorized use. If the +> transformation is reversible, cryptography also deals with restoring encrypted +> data to an intelligible form. > -> - [Internet Security Glossary -> (2000)](https://tools.ietf.org/html/rfc2828) +> - [Internet Security Glossary (2000)](https://tools.ietf.org/html/rfc2828) -Cryptography cannot offer protection against the loss of data; it simply -offers encryption methods to protect data at-rest and data in-traffic. -At a high-level, encrypted is when plaintext data is encrypted to -ciphertext (a secure form of text that cannot be understood unless -decrypted back to plaintext). The encryption process is completed -through the use of a mathematical function that utilizes one or more -values called keys to encrypt or decrypt the data. +Cryptography cannot offer protection against the loss of data; it simply offers +encryption methods to protect data at-rest and data in-traffic. At a high-level, +encrypted is when plaintext data is encrypted to ciphertext (a secure form of +text that cannot be understood unless decrypted back to plaintext). The +encryption process is completed through the use of a mathematical function that +utilizes one or more values called keys to encrypt or decrypt the data. # Key Elements of Cryptographic Systems -To create or evaluate a cryptographic system, you need to know the -essential pieces to the system: - -- **Encryption Algorithm (Primitive):\*** A mathematical process that - encrypts and decrypts data. -- **Encryption Key:\*** A string of bits used within the encryption - algorithm as the secret that allows successful encryption or - decryption of data. -- **Key Length (Size):\*** The maximum number of bits within the - encryption key. It\'s important to remember that key size is - regulated in many countries. -- **Message Digest:\*** A smaller, fixed-size bit string version of - the original message. This is practically infeasible to reverse, - which is why it\'s commonly used to verify integrity. +To create or evaluate a cryptographic system, you need to know the essential +pieces to the system: + +- **Encryption Algorithm (Primitive):** A mathematical process that encrypts + and decrypts data. +- **Encryption Key:** A string of bits used within the encryption algorithm as + the secret that allows successful encryption or decryption of data. +- **Key Length (Size):** The maximum number of bits within the encryption key. + It's important to remember that key size is regulated in many countries. +- **Message Digest:** A smaller, fixed-size bit string version of the original + message. This is practically infeasible to reverse, which is why it's + commonly used to verify integrity. # Symmetric Systems (Secret Key Cryptography) -Symmetric cryptography utilizes a secret, bidirectional key to perform -both encryption and decryption of the data. The most common -implementation of symmetric cryptography is the Advanced Encryption -Standard, which uses keys that are 128 bits to 256 bits in size. This -standard came after the National Institute of Standards and Technology -(NIST) decided to retire the Data Encryption Standard (DES) in 2001. - -Since brute force attacks strongly correlate with key length, the 56-bit -key length of DES was considered insecure after it was publicly broken -in under 24 hours. However, there is a modern implementation of DES -called Triple DES where the DES method is applied three times to each -data block. - -The main advantages to symmetric systems are the ease of use, since only -one key is required for both encryption and decryption, and the -simplicity of the algorithms. This helps with bulk data encryption that -may unnecessarily waste time and power using asymmetric systems. - -However, symmetric systems have disadvantages to keep in mind. Since the -key is private, it can be difficult to safely distribute keys to -communication partners. Additionally, the key cannot be used to sign -messages since it\'s necessary to keep the key private. +Symmetric cryptography utilizes a secret, bidirectional key to perform both +encryption and decryption of the data. The most common implementation of +symmetric cryptography is the Advanced Encryption Standard, which uses keys that +are 128 bits to 256 bits in size. This standard came after the National +Institute of Standards and Technology (NIST) decided to retire the Data +Encryption Standard (DES) in 2001. + +Since brute force attacks strongly correlate with key length, the 56-bit key +length of DES was considered insecure after it was publicly broken in under 24 +hours. However, there is a modern implementation of DES called Triple DES where +the DES method is applied three times to each data block. + +The main advantages to symmetric systems are the ease of use, since only one key +is required for both encryption and decryption, and the simplicity of the +algorithms. This helps with bulk data encryption that may unnecessarily waste +time and power using asymmetric systems. + +However, symmetric systems have disadvantages to keep in mind. Since the key is +private, it can be difficult to safely distribute keys to communication +partners. Additionally, the key cannot be used to sign messages since it's +necessary to keep the key private. # Asymmetric Systems (Public Key Cryptography) -Asymmetric cryptography utilizes two keys within the system: a secret -key that is privately-held and a public key that can be distributed -freely. The interesting aspect of asymmetric cryptography is that either -key can be used to encrypt the data, there\'s no rule that dictates -which key must be used for encryption. Once one key is used to encrypt -the data, only the other key can be used to decrypt the data. This means -that if the private key encrypts the data, only the public key can -decrypt the data. - -An advantage of this system is that if you successfully decrypt data -using one of the keys, you can be sure of the sender since only the -other key could have encrypted the data. - -One of the major implementations of an asymmetric system is a digital -signature. A digital signature can be generated using the sender\'s -private key, or a one-way hash function and is used to provide assurance -for the integrity and authenticity of the message. A couple common -message digest algorithms are SHA-256 and SHA-512, which securely -compress data and produce a 128-bit message digest. - -It should be noted that man-in-the-middle attacks are one of the risks -with digital signatures and public keys. To combat this, applications -often use a public key infrastructure (PKI) to independently -authenticate the validity of signatures and keys. +Asymmetric cryptography utilizes two keys within the system: a secret key that +is privately-held and a public key that can be distributed freely. The +interesting aspect of asymmetric cryptography is that either key can be used to +encrypt the data, there's no rule that dictates which key must be used for +encryption. Once one key is used to encrypt the data, only the other key can be +used to decrypt the data. This means that if the private key encrypts the data, +only the public key can decrypt the data. + +An advantage of this system is that if you successfully decrypt data using one +of the keys, you can be sure of the sender since only the other key could have +encrypted the data. + +One of the major implementations of an asymmetric system is a digital signature. +A digital signature can be generated using the sender's private key, or a +one-way hash function and is used to provide assurance for the integrity and +authenticity of the message. A couple common message digest algorithms are +SHA-256 and SHA-512, which securely compress data and produce a 128-bit message +digest. + +It should be noted that man-in-the-middle attacks are one of the risks with +digital signatures and public keys. To combat this, applications often use a +public key infrastructure (PKI) to independently authenticate the validity of +signatures and keys. Due to the large key size and [inefficient mathematical -functions](https://crypto.stackexchange.com/a/591) of asymmetric -encryption, elliptical curve cryptography (ECC) is often used to -increase security while using fewer resources. +functions](https://crypto.stackexchange.com/a/591) of asymmetric encryption, +elliptical curve cryptography (ECC) is often used to increase security while +using fewer resources. # Applications of Cryptographic Systems -There are quite a few implementations of cryptographic systems around -the world. Here are a few popular examples: - -**Transport Layer Security (TLS):\*** One of the most famous -cryptographic solutions created is TLS, a session-layered or -connection-layered internet protocol that allows for secure -communications between browsers and servers. Using handshakes, peer -negotiation, and authentication allows TLS to prevent eavesdropping and -malicious transformation of data. The major reason for TLS popularity is -that a major vulnerability was found in the SSL protocol in 2014. -Instead of SSL, TLS can be used with HTTP to form HTTPS and is the -preferred method for modern web development due to its increased -security. - -**Secure Hypertext Transfer Protocol (HTTPS):\*** An application layer -protocol that allows for secure transport of data between servers and -web clients. One of the unique parts of HTTPS is that it uses a secured -port number instead of the default web port address. - -**Virtual Private Network (VPN):\*** VPNs are made to securely extend a -private network across public networks by utilizing an encrypted layered -tunneling protocol paired with an authentication method, such as -usernames and passwords. This technology originally allowed remote -employees to access their company\'s data but have evolved into one of -the top choices for anyone who wishes to mask their sensitive personal -data. - -**Internet Protocol Security (IPSec):\*** This protocol suite -facilitates communication between two or more hosts or subnets by -authenticating and encrypting the data packets. IPSec is used in a lot -of VPNs to establish the VPN connection through the transport and tunnel -mode encryption methods. IPSec encrypts just the data portion of packets -in the transport methods, but it encrypts both the data and headers in -the tunnel method (introducing an additional header for authentication). - -**Secure Shell (SSH):\*** SSH is another network protocol used to -protect network services by authenticating users through a secure -channel. This protocol is often used for command-line (shell) functions -such as remote shell commands, logins, and file transfers. - -**Kerberos:\*** Developed by MIT, Kerberos is a computer-network -authentication protocol that works on the basis of tickets to allow -nodes communicating over a non-secure network to prove their identity to -one another securely. This is most commonly used in business -environments when used as the authentication and encryption method for -Windows Active Directory (AD). +There are quite a few implementations of cryptographic systems around the world. +Here are a few popular examples: + +**Transport Layer Security (TLS):** One of the most famous cryptographic +solutions created is TLS, a session-layered or connection-layered internet +protocol that allows for secure communications between browsers and servers. +Using handshakes, peer negotiation, and authentication allows TLS to prevent +eavesdropping and malicious transformation of data. The major reason for TLS +popularity is that a major vulnerability was found in the SSL protocol in 2014. +Instead of SSL, TLS can be used with HTTP to form HTTPS and is the preferred +method for modern web development due to its increased security. + +**Secure Hypertext Transfer Protocol (HTTPS):** An application layer protocol +that allows for secure transport of data between servers and web clients. One of +the unique parts of HTTPS is that it uses a secured port number instead of the +default web port address. + +**Virtual Private Network (VPN):** VPNs are made to securely extend a private +network across public networks by utilizing an encrypted layered tunneling +protocol paired with an authentication method, such as usernames and passwords. +This technology originally allowed remote employees to access their company's +data but have evolved into one of the top choices for anyone who wishes to mask +their sensitive personal data. + +**Internet Protocol Security (IPSec):** This protocol suite facilitates +communication between two or more hosts or subnets by authenticating and +encrypting the data packets. IPSec is used in a lot of VPNs to establish the VPN +connection through the transport and tunnel mode encryption methods. IPSec +encrypts just the data portion of packets in the transport methods, but it +encrypts both the data and headers in the tunnel method (introducing an +additional header for authentication). + +**Secure Shell (SSH):** SSH is another network protocol used to protect +network services by authenticating users through a secure channel. This protocol +is often used for command-line (shell) functions such as remote shell commands, +logins, and file transfers. + +**Kerberos:** Developed by MIT, Kerberos is a computer-network authentication +protocol that works on the basis of tickets to allow nodes communicating over a +non-secure network to prove their identity to one another securely. This is most +commonly used in business environments when used as the authentication and +encryption method for Windows Active Directory (AD). # Cybersecurity Controls -If you\'re someone who needs solutions on how to control risks -associated with utilizing a crytograhpic system, start with a few basic -controls: - -- **Policies:\*** A policy on the use of cryptographic controls for - protection of information is implemented and is in accordance with - organizational objectives. -- **Key management:\*** A policy on the use, protection and lifetime - of cryptographic keys is implemented through the entire application - lifecycle. -- **Key size:\*** The organization has researched the optimal key size - for their purposes, considering national laws, required processing - power, and longevity of the solution. -- **Algorithm selection:\*** Implemented algorithms are sufficiently - appropriate for the business of the organization, robust, and align - with recommended guidelines. -- **Protocol configuration:\*** Protocols have been reviewed and - configured suitable to the purpose of the business. +If you're someone who needs solutions on how to control risks associated with +utilizing a crytograhpic system, start with a few basic controls: + +- **Policies:** A policy on the use of cryptographic controls for protection + of information is implemented and is in accordance with organizational + objectives. +- **Key management:** A policy on the use, protection and lifetime of + cryptographic keys is implemented through the entire application lifecycle. +- **Key size:** The organization has researched the optimal key size for their + purposes, considering national laws, required processing power, and longevity + of the solution. +- **Algorithm selection:** Implemented algorithms are sufficiently appropriate + for the business of the organization, robust, and align with recommended + guidelines. +- **Protocol configuration:** Protocols have been reviewed and configured + suitable to the purpose of the business. diff --git a/content/blog/2020-03-25-session-messenger.md b/content/blog/2020-03-25-session-messenger.md index 805cbd8..c5e75c9 100644 --- a/content/blog/2020-03-25-session-messenger.md +++ b/content/blog/2020-03-25-session-messenger.md @@ -7,67 +7,65 @@ draft = false # Privacy Warning -The company behind Session (Loki Foundation) is from Australia. If you -didn\'t know, Australia has introduced +The company behind Session (Loki Foundation) is from Australia. If you didn't +know, Australia has introduced [legislation](https://parlinfo.aph.gov.au/parlInfo/download/legislation/bills/r6195_aspassed/toc_pdf/18204b01.pdf) -mandating companies comply with government requests to build backdoor -access into applications. For more information, read my article on [AES +mandating companies comply with government requests to build backdoor access +into applications. For more information, read my article on [AES Encryption](./2020-01-25-aes-encryption.html). # About Session -[Session](https://getsession.org) is a private, cross-platform messaging -app from the [Loki Foundation](https://loki.foundation). As someone who -has spent years looking for quality alternatives to major messaging -apps, I was excited when I first heard about Session. Reading through -[Session\'s white paper](https://arxiv.org/pdf/2002.04609.pdf), you can -learn the technologies behind the Session app. Part of the security of -Session comes from the Signal protocol, which was forked as the origin -of Session. +[Session](https://getsession.org) is a private, cross-platform messaging app +from the [Loki Foundation](https://loki.foundation). As someone who has spent +years looking for quality alternatives to major messaging apps, I was excited +when I first heard about Session. Reading through [Session's white +paper](https://arxiv.org/pdf/2002.04609.pdf), you can learn the technologies +behind the Session app. Part of the security of Session comes from the Signal +protocol, which was forked as the origin of Session. -> Session is an end-to-end encrypted messenger that removes sensitive -> metadata collection, and is designed for people who want privacy and -> freedom from any forms of surveillance. +> Session is an end-to-end encrypted messenger that removes sensitive metadata +> collection, and is designed for people who want privacy and freedom from any +> forms of surveillance. In general, this app promises security through end-to-end encryption, -decentralized onion routing, and private identities. The biggest change -that the Loki Foundation has made to the Signal protocol is removing the -need for a phone number. Instead, a random identification string is -generated for any session you create. This means you can create a new -session for each device if you want to, or link new devices with your -ID. +decentralized onion routing, and private identities. The biggest change that the +Loki Foundation has made to the Signal protocol is removing the need for a phone +number. Instead, a random identification string is generated for any session you +create. This means you can create a new session for each device if you want to, +or link new devices with your ID. -Since Session\'s website and white paper describe the details of -Session\'s security, I\'m going to focus on using the app in this post. +Since Session's website and white paper describe the details of Session's +security, I'm going to focus on using the app in this post. # Features -Since most people are looking for an alternative to a popular chat app, -I am going to list out the features that Session has so that you are -able to determine if the app would suit your needs: - -- Multiple device linking (via QR code or ID) -- App locking via device screen lock, password, or fingerprint -- Screenshot blocking -- Incognito keyboard -- Read receipts and typing indicators -- Mobile notification customization -- Old message deletion and conversation limit -- Backups -- Recovery phrase -- Account deletion, including ID, messages, sessions, and contacts +Since most people are looking for an alternative to a popular chat app, I am +going to list out the features that Session has so that you are able to +determine if the app would suit your needs: + +- Multiple device linking (via QR code or ID) +- App locking via device screen lock, password, or fingerprint +- Screenshot blocking +- Incognito keyboard +- Read receipts and typing indicators +- Mobile notification customization +- Old message deletion and conversation limit +- Backups +- Recovery phrase +- Account deletion, including ID, messages, sessions, and contacts # Downloads -I have tested this app on Ubuntu 19.10, Android 10, macOS Monterey, and -iOS 15. All apps have worked well without many issues. +I have tested this app on Ubuntu 19.10, Android 10, macOS Monterey, and iOS 15. +All apps have worked well without many issues. -Below is a brief overview of the Session app on Linux. To get this app, -you\'ll need to go to the [Downloads](https://getsession.org/download/) -page and click to link to the operating system you\'re using. +Below is a brief overview of the Session app on Linux. To get this app, you'll +need to go to the [Downloads](https://getsession.org/download/) page and click +to link to the operating system you're using. -For Linux, it will download an AppImage that you\'ll need to enable with -the following command: +For Linux, it will download an AppImage that you'll need to enable with the +following command: ```sh sudo chmod u+x session-messenger-desktop-linux-x86_64-1.0.5.AppImage @@ -78,12 +76,12 @@ Options](https://img.cleberg.net/blog/20200325-session-private-messenger/session # Creating an Account -Once you\'ve installed the app, simply run the app and create your -unique Session ID. It will look something like this: +Once you've installed the app, simply run the app and create your unique +Session ID. It will look something like this: `05af1835afdd63c947b47705867501d6373f486aa1ae05b1f2f3fcd24570eba608`. -You\'ll need to set a display name and, optionally, a password. If you -set a password, you will need to enter it every time you open the app. +You'll need to set a display name and, optionally, a password. If you set a +password, you will need to enter it every time you open the app.  @@ -96,42 +94,39 @@ Authentication](https://img.cleberg.net/blog/20200325-session-private-messenger/ # Start Messaging -Once you\'ve created your account and set up your profile details, the -next step is to start messaging other people. To do so, you\'ll need to -share your Session ID with other people. From this point, it\'s fairly -straightforward and acts like any other messaging app, so I won\'t dive -into much detail here. +Once you've created your account and set up your profile details, the next step +is to start messaging other people. To do so, you'll need to share your Session +ID with other people. From this point, it's fairly straightforward and acts +like any other messaging app, so I won't dive into much detail here. ## macOS 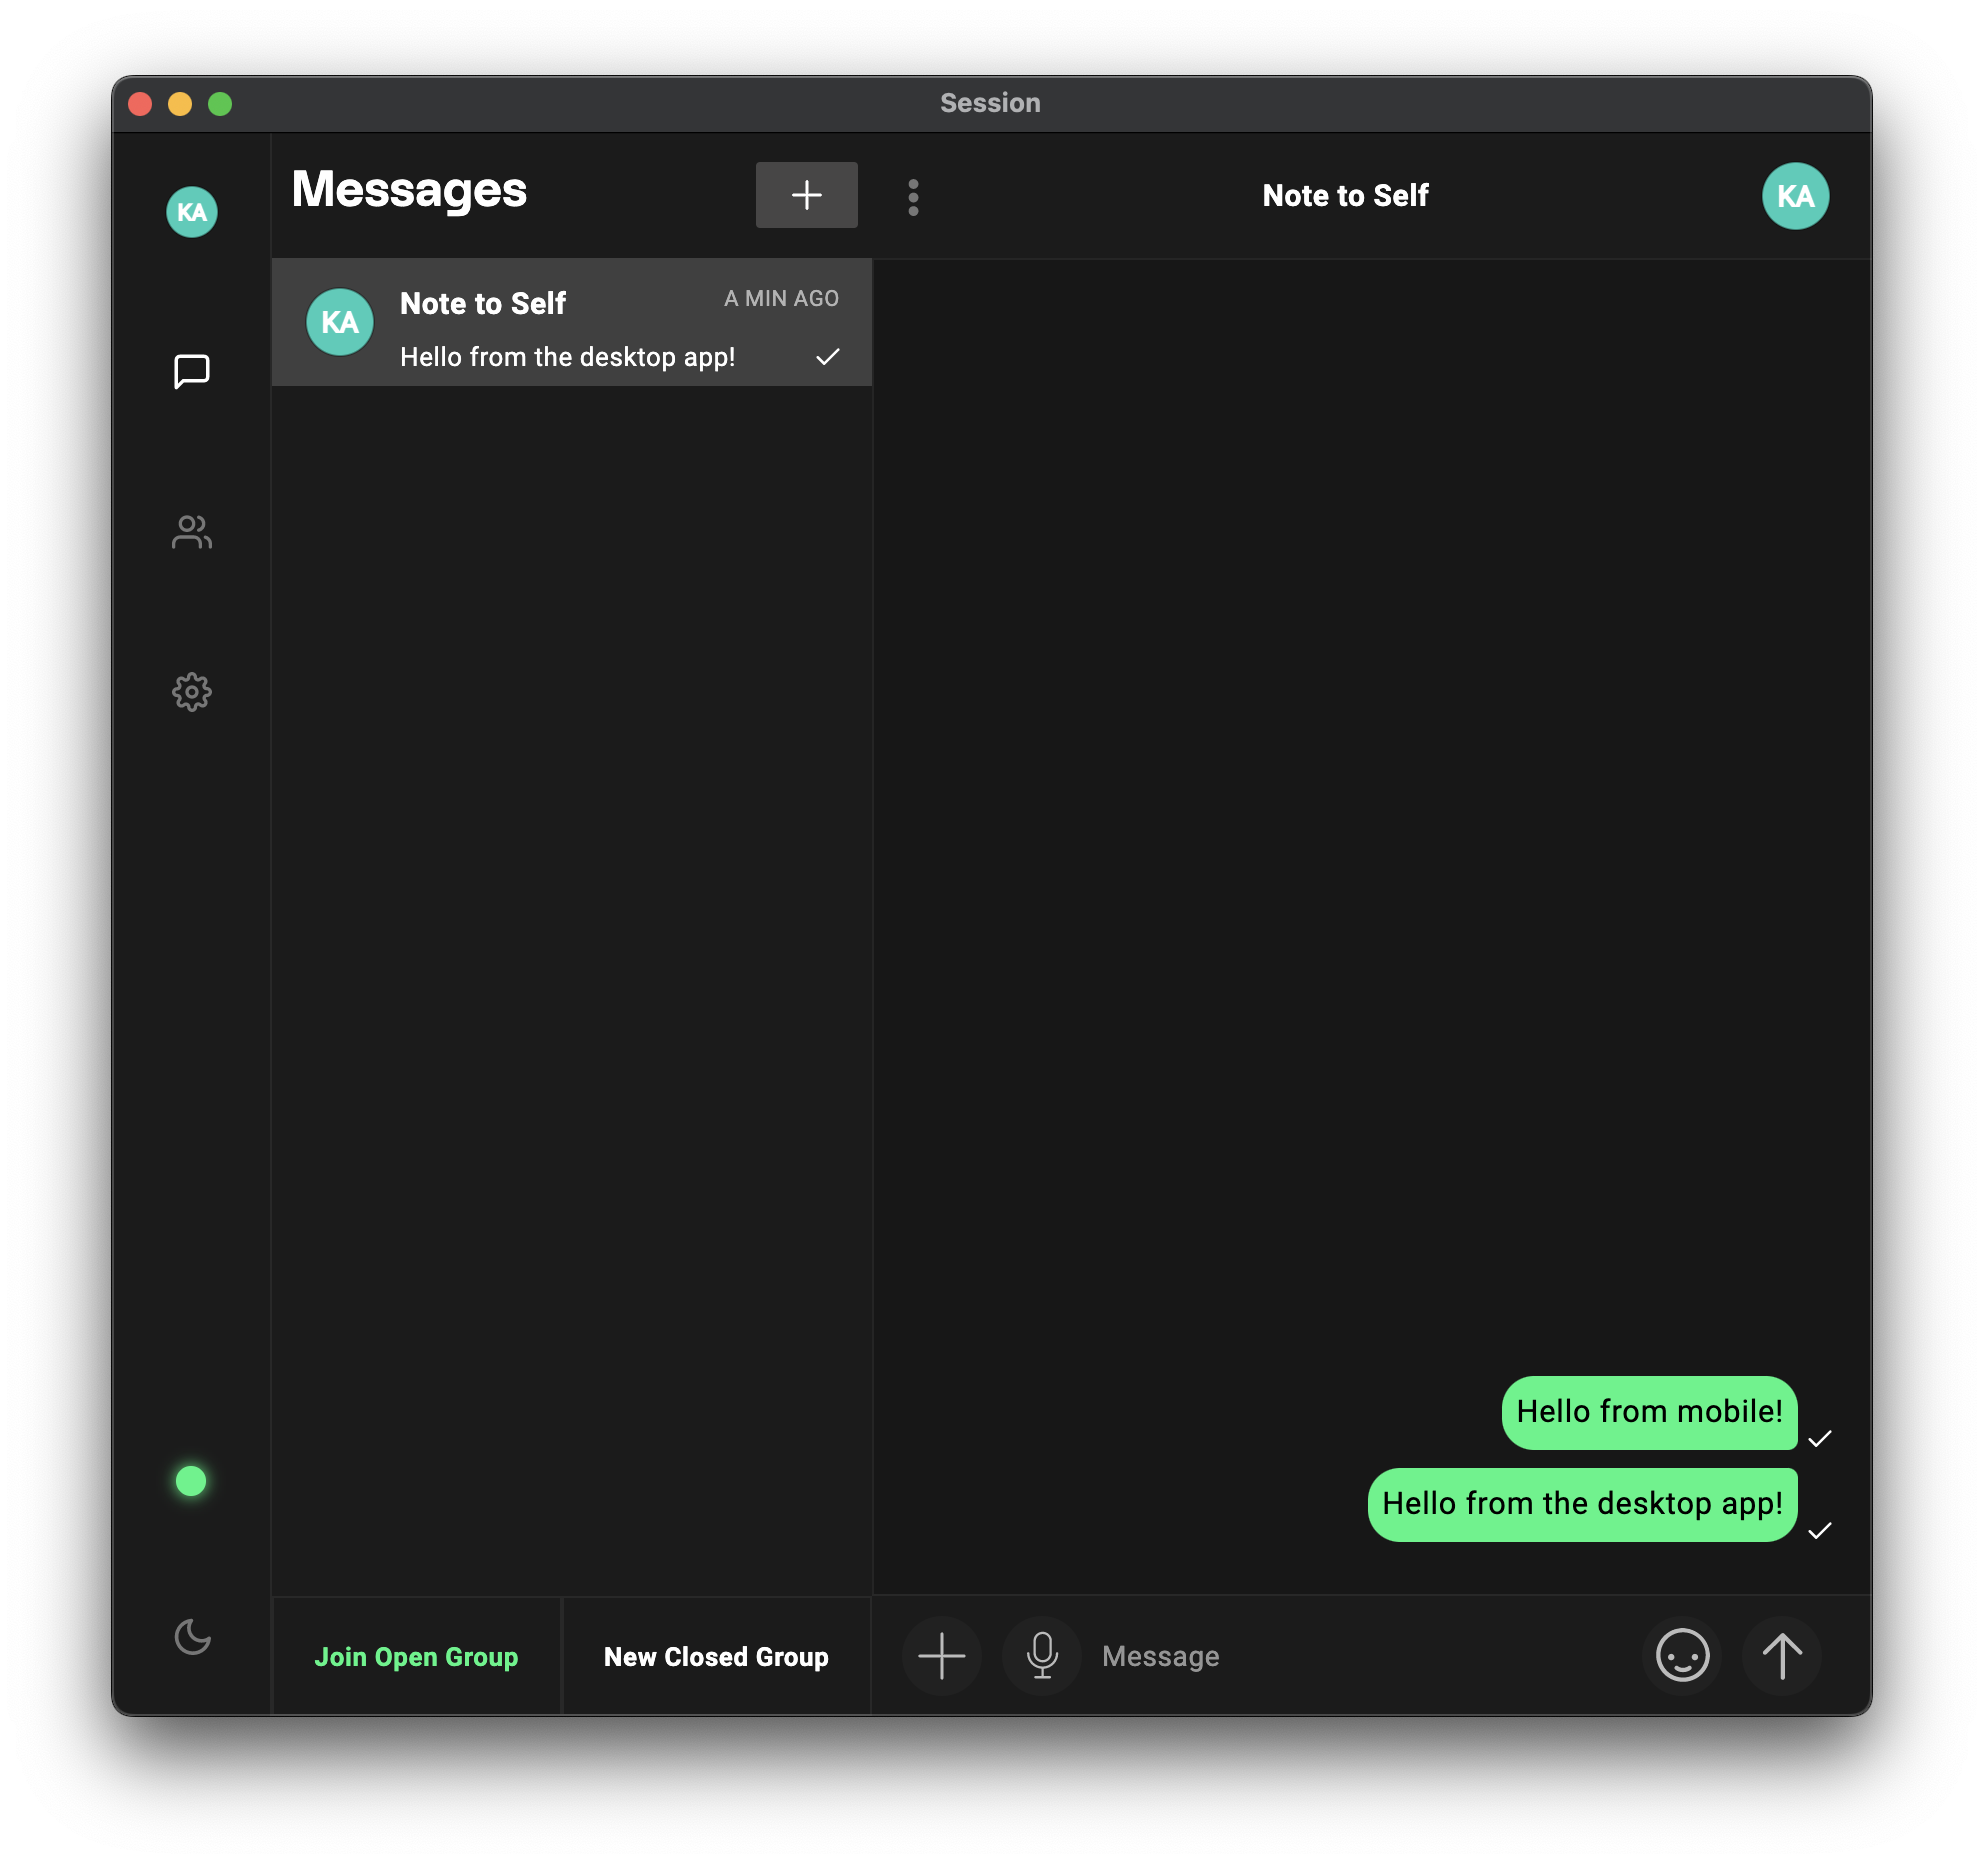 -One key feature to note is that the desktop application now provides a -helpful pop-up box explaining the process that Session uses to hide your -IP address: +One key feature to note is that the desktop application now provides a helpful +pop-up box explaining the process that Session uses to hide your IP address: 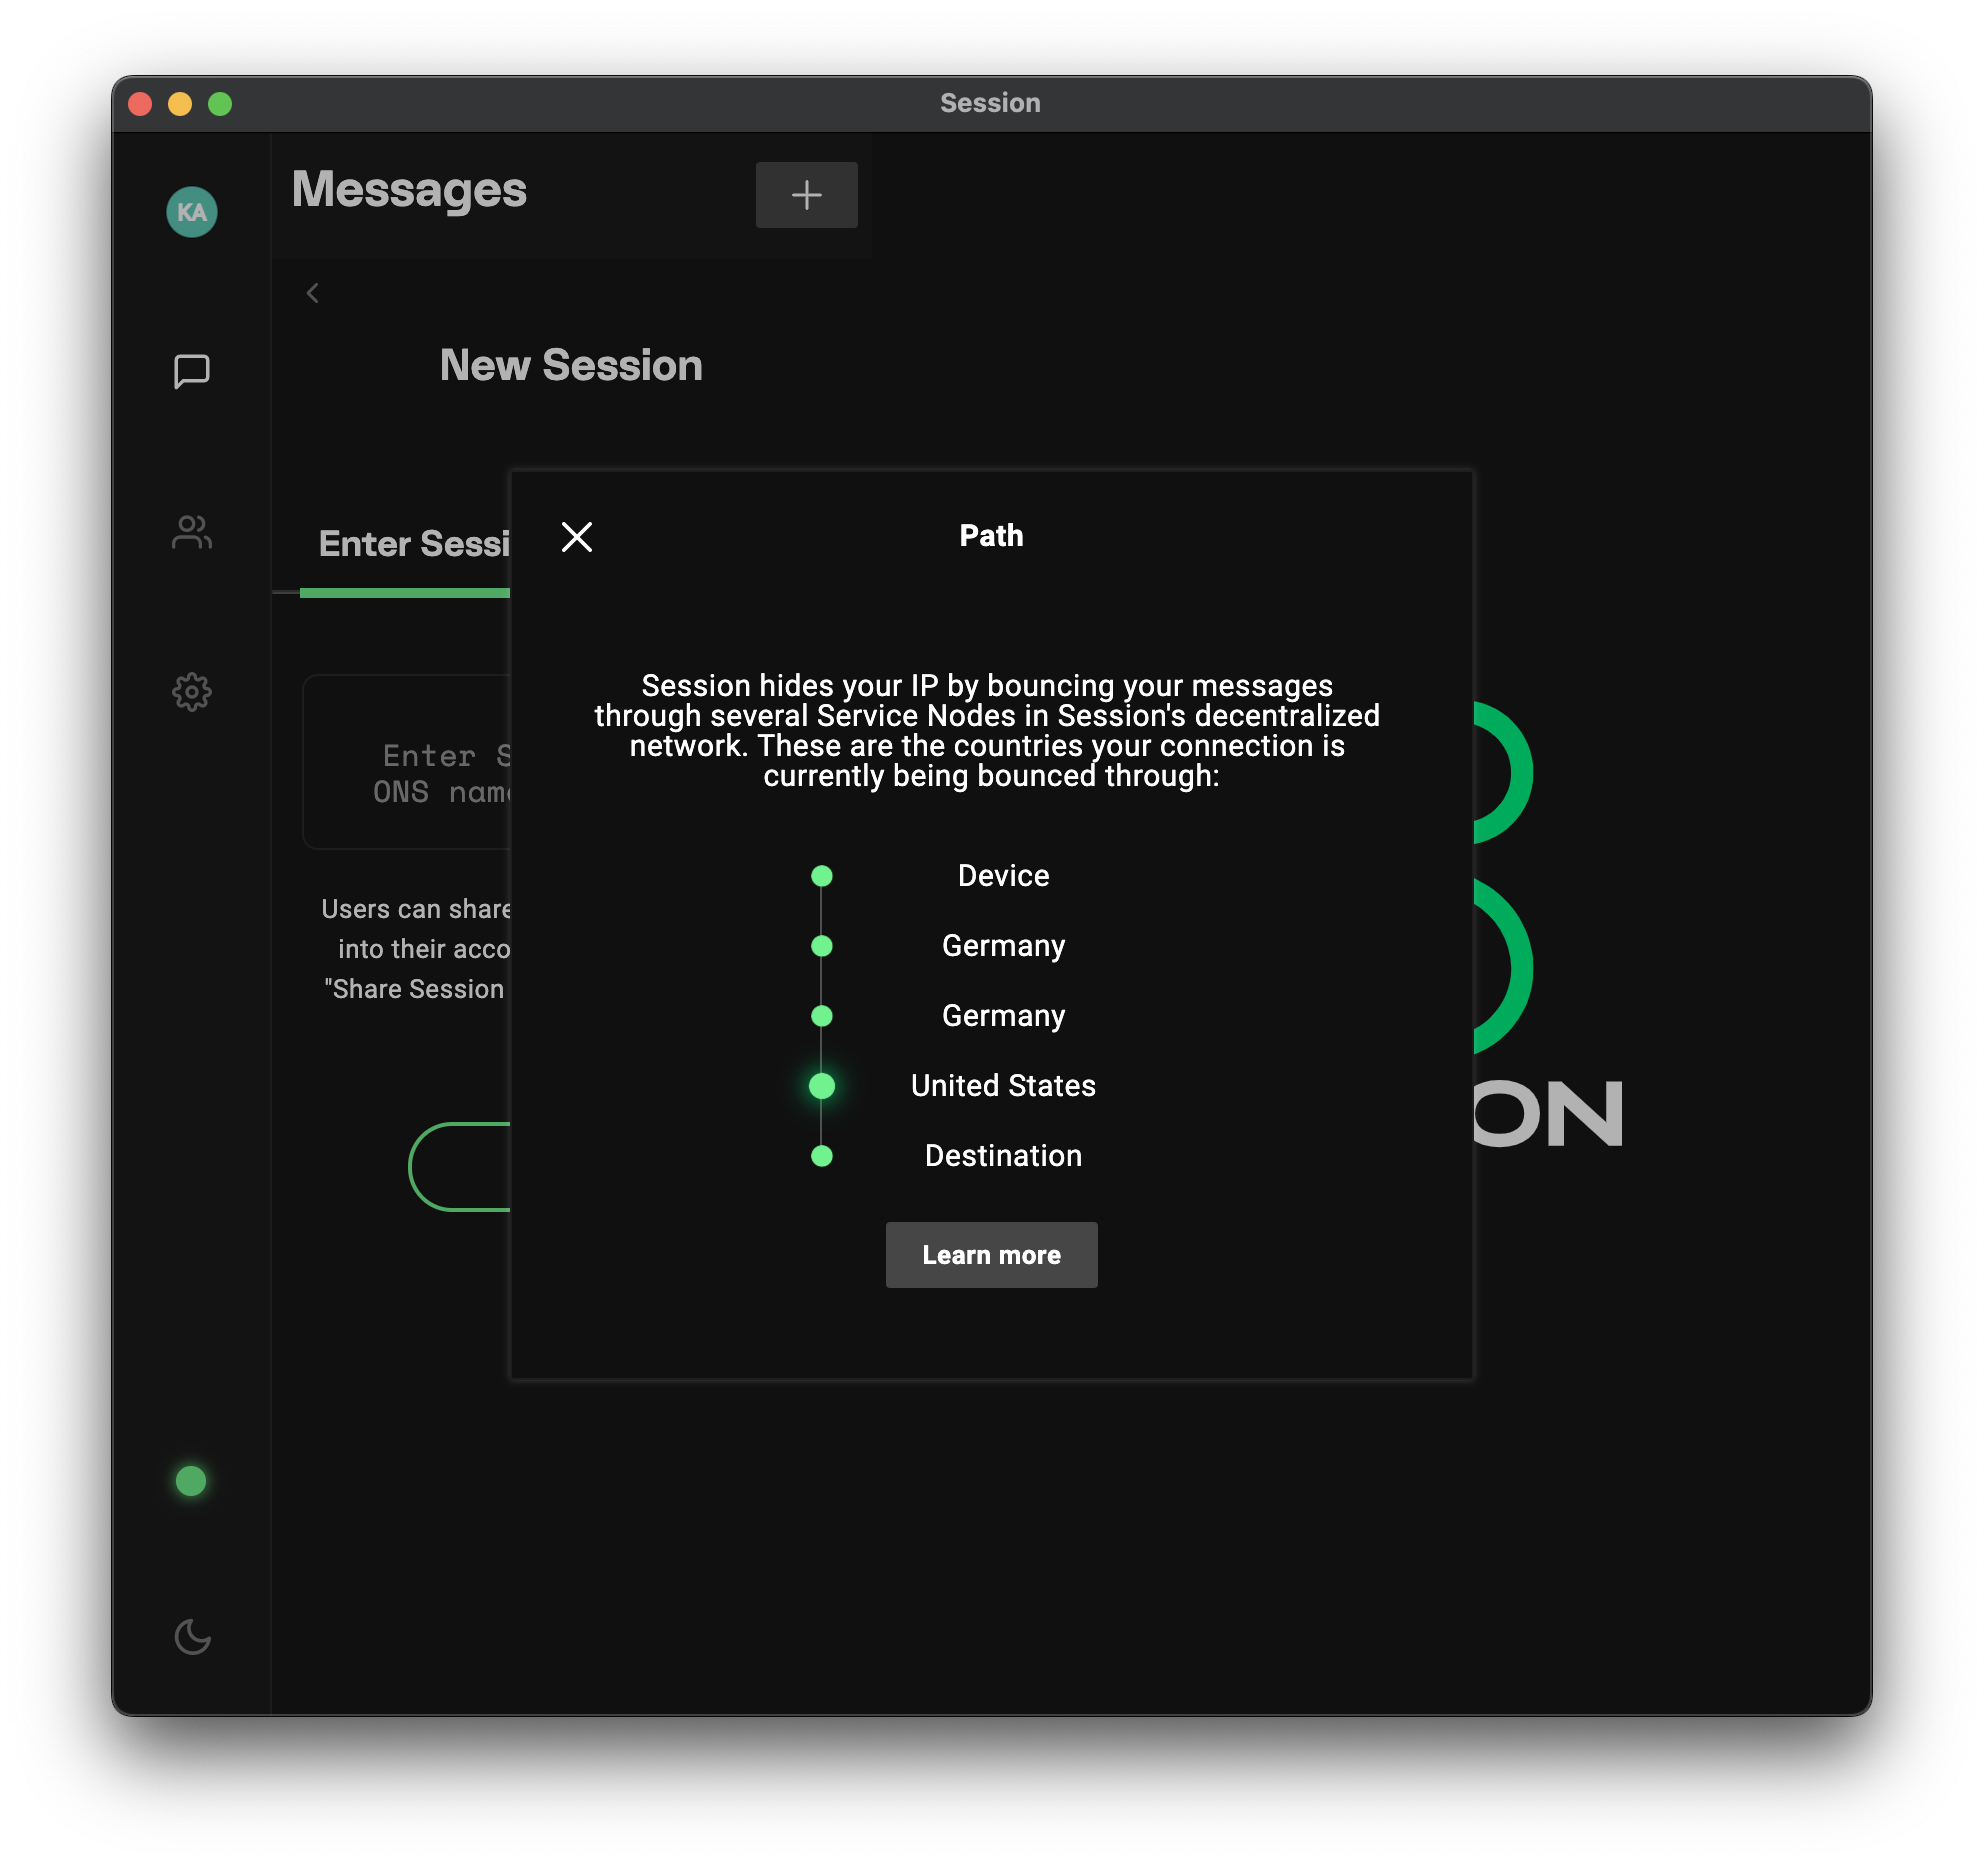 ## iOS -The mobile app is quite simple and effective, giving you all the -standard mobile messaging options you\'d expect. +The mobile app is quite simple and effective, giving you all the standard mobile +messaging options you'd expect. 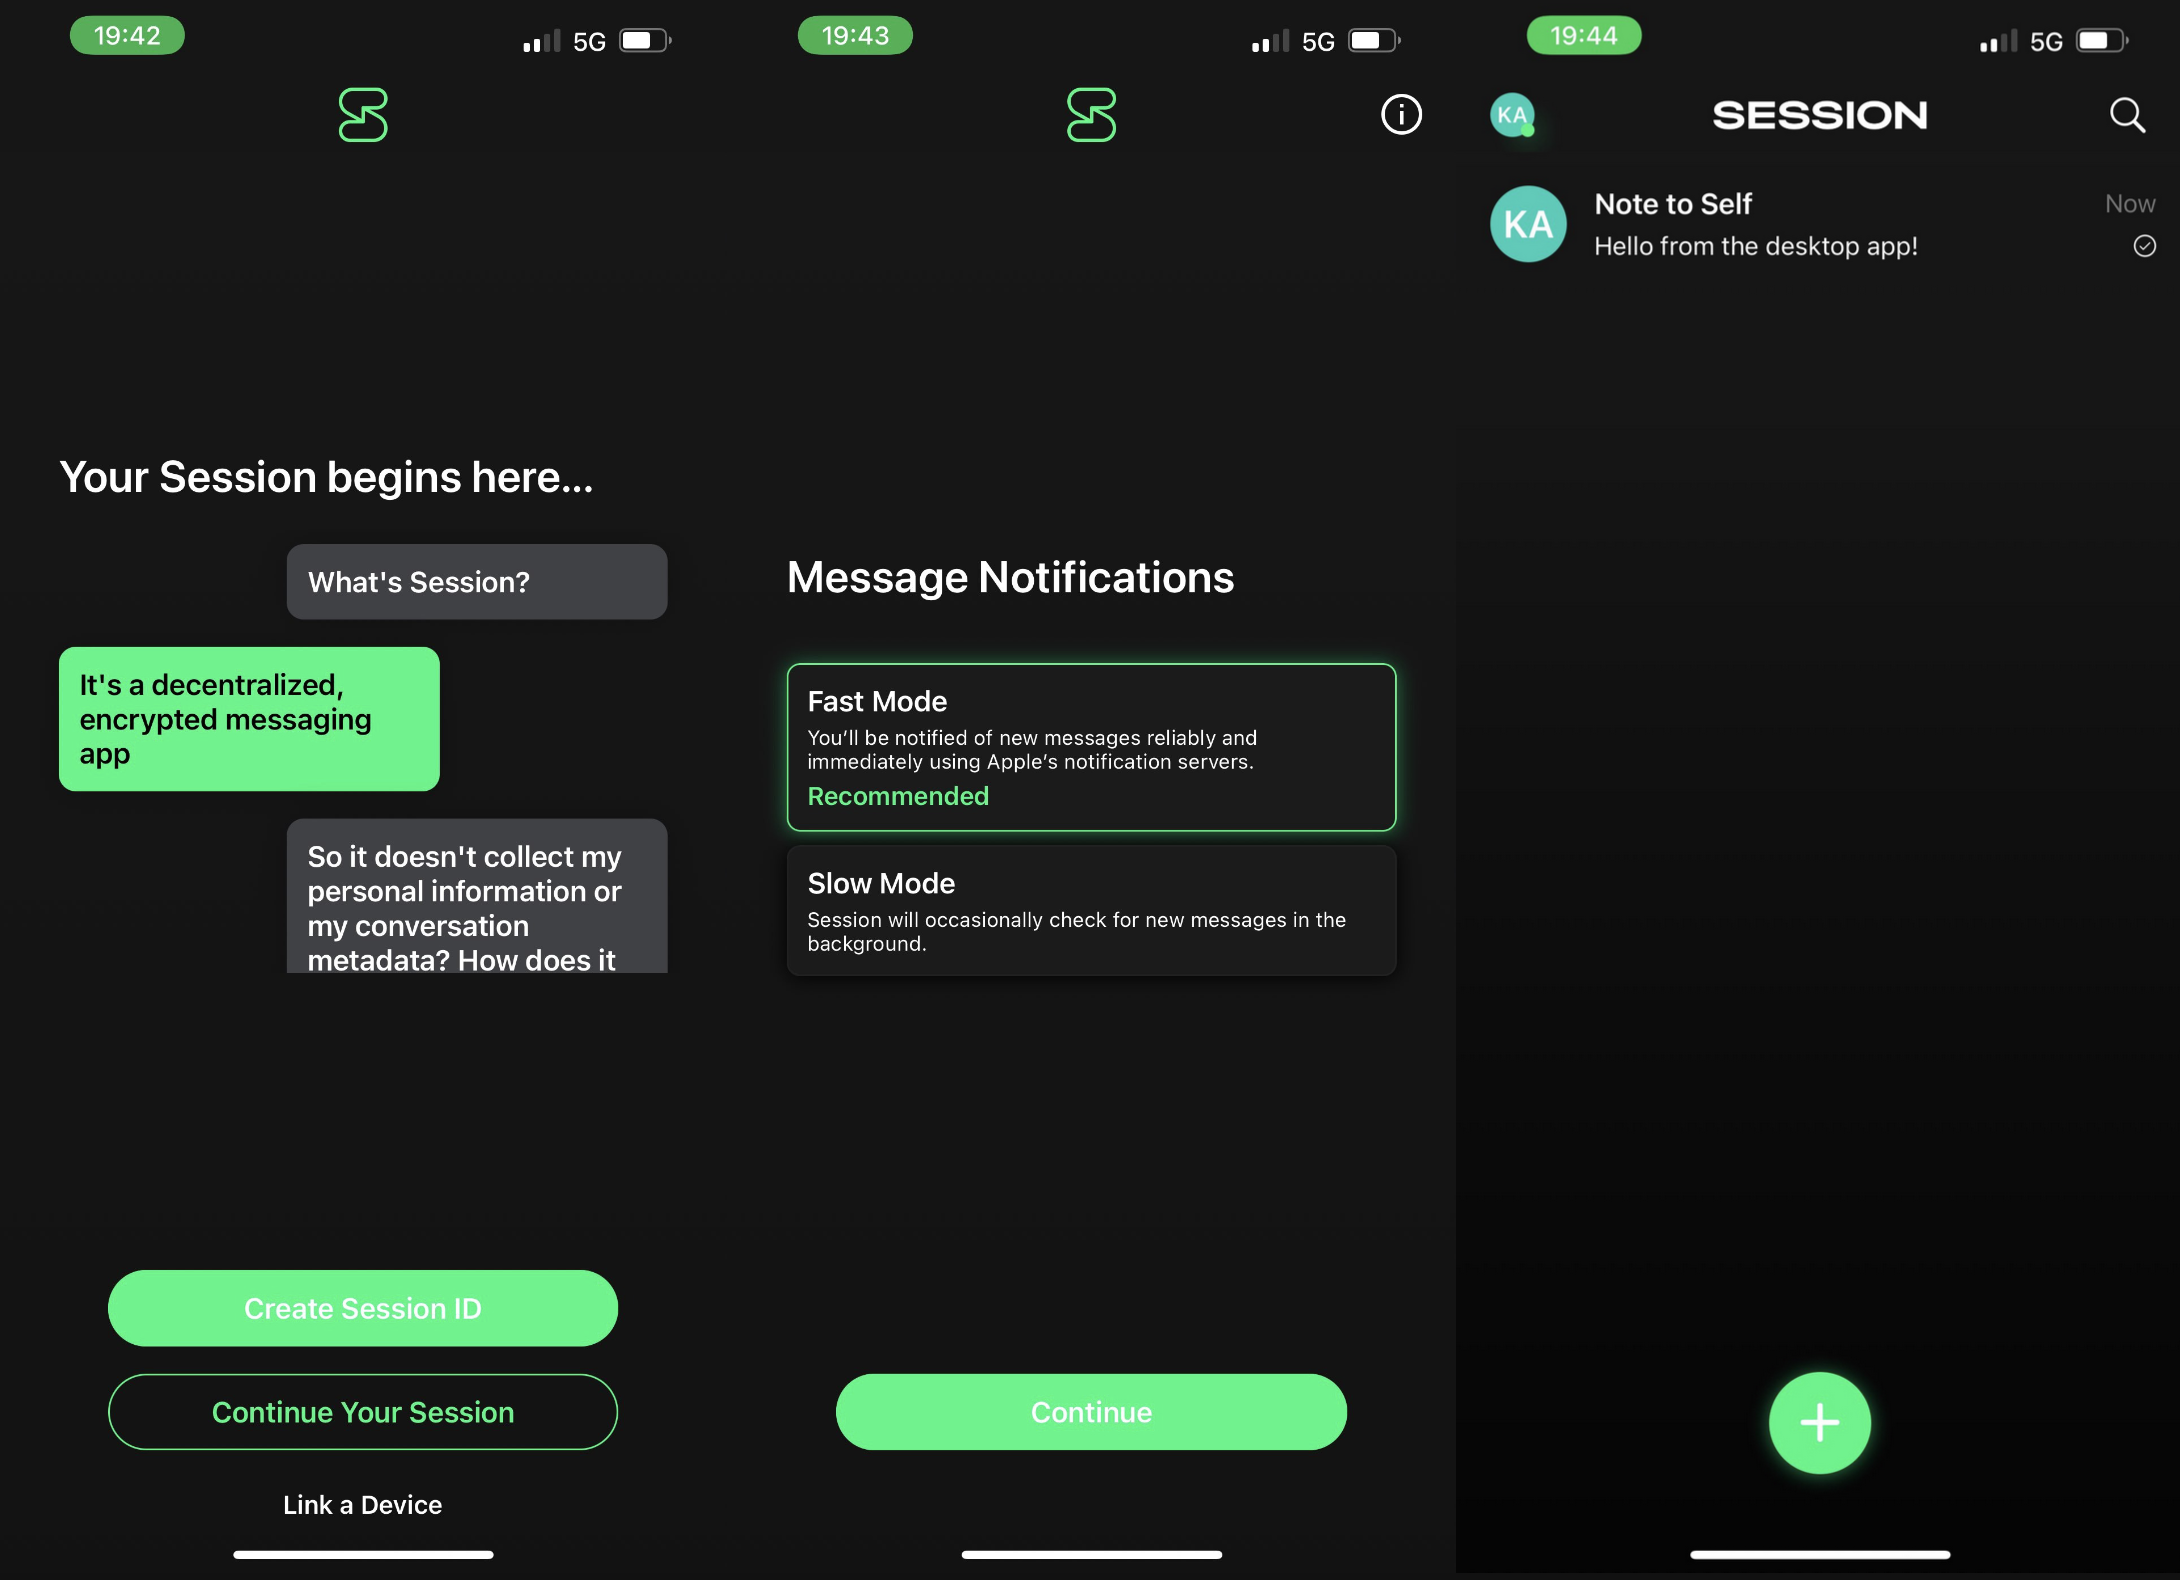 # Potential Issues -I\'ve discovered one annoying issue that would prevent from using this -app regularly. On a mobile device, there have been issues with receiving -messages on time. Even with battery optimization disabled and no network -restrictions, Session notifications sometimes do not display until I -open the app or the conversation itself and wait a few moments. This is -actually one of the reasons I stopped using Signal (this seems fixed as -of my updates in 2021/2022, so I wouldn\'t worry about this issue -anymore). - -Looking for another messenger instead of Session? I recommend Signal, -Matrix, and IRC. +I've discovered one annoying issue that would prevent from using this app +regularly. On a mobile device, there have been issues with receiving messages on +time. Even with battery optimization disabled and no network restrictions, +Session notifications sometimes do not display until I open the app or the +conversation itself and wait a few moments. This is actually one of the reasons +I stopped using Signal (this seems fixed as of my updates in 2021/2022, so I +wouldn't worry about this issue anymore). + +Looking for another messenger instead of Session? I recommend Signal, Matrix, +and IRC. diff --git a/content/blog/2020-05-03-homelab.md b/content/blog/2020-05-03-homelab.md index d02e9e8..8f5d57a 100644 --- a/content/blog/2020-05-03-homelab.md +++ b/content/blog/2020-05-03-homelab.md @@ -7,16 +7,15 @@ draft = false # What is a Homelab? -Starting as a developer, I have largely stayed away from hardware-based -hobbies (other than building a gaming desktop). However, as the -quarantine for COVID-19 stretches out further and further, I found -myself bored and in search of new hobbies. After spending the last few -months browsing the [r/homelab](https://www.reddit.com/r/homelab/) -subreddit, I decided it was time to jump in and try things out for -myself. +Starting as a developer, I have largely stayed away from hardware-based hobbies +(other than building a gaming desktop). However, as the quarantine for COVID-19 +stretches out further and further, I found myself bored and in search of new +hobbies. After spending the last few months browsing the +[r/homelab](https://www.reddit.com/r/homelab/) subreddit, I decided it was time +to jump in and try things out for myself. -Since I am a beginner and just recently graduated from college, -everything I\'ve done so far in my homelab is fairly low-budget. +Since I am a beginner and just recently graduated from college, everything I've +done so far in my homelab is fairly low-budget. # Hardware @@ -26,141 +25,131 @@ Diagram](https://img.cleberg.net/blog/20200503-homelab/homelab-min.png) ### Raspberry Pi 4 Luckily, I had actually purchased a [Raspberry Pi -4](https://www.raspberrypi.org/products/raspberry-pi-4-model-b/) before -the quarantine started so that I could try to keep Plex Media Center -running, even while my desktop computer was turned off. I started here, -using the Pi to hold Plex and Pi-hole until I grew tired with the slow -performance. +4](https://www.raspberrypi.org/products/raspberry-pi-4-model-b/) before the +quarantine started so that I could try to keep Plex Media Center running, even +while my desktop computer was turned off. I started here, using the Pi to hold +Plex and Pi-hole until I grew tired with the slow performance. Here are the specifications for the Pi 4: -- Broadcom BCM2711, Quad core Cortex-A72 (ARM v8) 64-bit SoC @ 1.5GHz -- 4GB LPDDR4-3200 SDRAM -- Gigabit Ethernet -- H.265 (4kp60 decode), H264 (1080p60 decode, 1080p30 encode) -- 64 GB MicroSD Card +- Broadcom BCM2711, Quad core Cortex-A72 (ARM v8) 64-bit SoC @ 1.5GHz +- 4GB LPDDR4-3200 SDRAM +- Gigabit Ethernet +- H.265 (4kp60 decode), H264 (1080p60 decode, 1080p30 encode) +- 64 GB MicroSD Card ## Dell Optiplex 5040 -Since I wasn\'t happy with the Pi as my main server, I turned to -Craigslist. I know a lot of other homelabbers use Ebay, but I can\'t -seem to ever trust it enough to purchase items on there. So I used -Craigslist and found a Dell Optiplex 5040 desktop computer on sale for -\$90. While this computer might be underpowered, it was one of the few -computers under \$100 that was available during quarantine. +Since I wasn't happy with the Pi as my main server, I turned to Craigslist. I +know a lot of other homelabbers use Ebay, but I can't seem to ever trust it +enough to purchase items on there. So I used Craigslist and found a Dell +Optiplex 5040 desktop computer on sale for $90. While this computer might be +underpowered, it was one of the few computers under $100 that was available +during quarantine. Here are the specifications for the Dell Optiplex 5040: -- Intel Core i3 6100 -- 8GB RAM DDR3 -- Intel HD Graphics -- Gigabit Ethernet -- 500GB Hard Drive +- Intel Core i3 6100 +- 8GB RAM DDR3 +- Intel HD Graphics +- Gigabit Ethernet +- 500GB Hard Drive -While this hardware would be awful for a work computer or a gaming rig, -it turned out to be wonderful for my server purposes. The only -limitation I have found so far is the CPU. The i3-6100 only has enough -power for a single 4k video transcode at a time. I haven\'t tested more -than three 1080p streams at a time, but the maximum amount of streams -I\'ve ever actually used is two. +While this hardware would be awful for a work computer or a gaming rig, it +turned out to be wonderful for my server purposes. The only limitation I have +found so far is the CPU. The i3-6100 only has enough power for a single 4k video +transcode at a time. I haven't tested more than three 1080p streams at a time, +but the maximum amount of streams I've ever actually used is two. ## WD easystore 10TB & 8TB -Application storage and temporary files are stored on the internal hard -drive of the server, but all media files (movies, tv, games, books, etc) -are stored externally on my WD easystore hard drive. Creating auto-boot -configurations in the `/etc/fstab` file on my server allows -the hard drives to automatically mount whenever I need to restart my -server. +Application storage and temporary files are stored on the internal hard drive of +the server, but all media files (movies, tv, games, books, etc) are stored +externally on my WD easystore hard drive. Creating auto-boot configurations in +the `/etc/fstab` file on my server allows the hard drives to automatically mount +whenever I need to restart my server. -> Update: In March 2022, I shucked the hard drives out of their external -> cases, put some Kapton tape on the third power pin to prevent power -> shutdowns, and stuck them inside my server tower using internal SATA -> cables. +> Update: In March 2022, I shucked the hard drives out of their external cases, +> put some Kapton tape on the third power pin to prevent power shutdowns, and +> stuck them inside my server tower using internal SATA cables. ## Netgear Unmanaged Switch -To manage all the ethernet cords used by my homelab, my desktop, and my -living room media center, I purchased an 8-port gigabit ethernet switch -for \$50 at my local computer store. This is probably much more than I -should have spent on an unmanaged switch, but I am comfortable with the -choice. +To manage all the ethernet cords used by my homelab, my desktop, and my living +room media center, I purchased an 8-port gigabit ethernet switch for $50 at my +local computer store. This is probably much more than I should have spent on an +unmanaged switch, but I am comfortable with the choice. ## TP-Link Managed Switch -Since I use the unmanaged switch to group all living room devices -together, I use the managed switch to configure VLANs and secure my -network. +Since I use the unmanaged switch to group all living room devices together, I +use the managed switch to configure VLANs and secure my network. ## Arris TM1602A Modem & Sagecom Fast 5280 Router -My default modem and router, provided by my ISP, are fairly standard. -The Arris modem supports DOCSIS 3.0, which is something that I -definitely wanted as a minimum. The Sagecom router is also standard, no -fancy bells or whistles. However, it does support DHCP and DHCPv6, which -is something you can use to route all household traffic through a -pi-hole or firewall. +My default modem and router, provided by my ISP, are fairly standard. The Arris +modem supports DOCSIS 3.0, which is something that I definitely wanted as a +minimum. The Sagecom router is also standard, no fancy bells or whistles. +However, it does support DHCP and DHCPv6, which is something you can use to +route all household traffic through a pi-hole or firewall. ## TP-Link EAP -In order to gain better control over the network, I use my own wireless -access point instead of the one included in the Sagecom router above. -Now I can control and organize all of my ethernet connections through -the VLANs on the managed switch and wireless connections through the -VLANS on the EAP. +In order to gain better control over the network, I use my own wireless access +point instead of the one included in the Sagecom router above. Now I can control +and organize all of my ethernet connections through the VLANs on the managed +switch and wireless connections through the VLANS on the EAP. ## Generic Printer -The last piece to my homelab is a standard wireless printer. Nothing -special here. +The last piece to my homelab is a standard wireless printer. Nothing special +here. # Software ## Ubuntu Server 20.04 -While the 20.04 version of Ubuntu was just released, I always like to -experiment with new features (and I don\'t mind breaking my system - it -just gives me more experience learning how to fix things). So, I have -Ubuntu Server 20.04 installed on the Dell Optiplex server and Ubuntu -Server 19.10 installed on the Raspberry Pi. Once I find an acceptable -use for the Pi, I will most likely switch the operating system. +While the 20.04 version of Ubuntu was just released, I always like to experiment +with new features (and I don't mind breaking my system - it just gives me more +experience learning how to fix things). So, I have Ubuntu Server 20.04 installed +on the Dell Optiplex server and Ubuntu Server 19.10 installed on the Raspberry +Pi. Once I find an acceptable use for the Pi, I will most likely switch the +operating system. ## Docker -I am *very* new to Docker, but I have had a lot of fun playing with it -so far. Docker is used to create containers that can hold all the -contents of a system without interfering with other software on the same -system. So far, I have successfully installed pi-hole, GitLab, Gogs, and -Nextcloud in containers. However, I opted to delete all of those so that -I can reconfigure them more professionally at a later time. +I am *very* new to Docker, but I have had a lot of fun playing with it so far. +Docker is used to create containers that can hold all the contents of a system +without interfering with other software on the same system. So far, I have +successfully installed pi-hole, GitLab, Gogs, and Nextcloud in containers. +However, I opted to delete all of those so that I can reconfigure them more +professionally at a later time. ## Plex Media Server -Plex is a media center software that allows you to organize your movies, -TV shows, music, photos, and videos automatically. It will even download -metadata for you so that you can easily browse these collections. +Plex is a media center software that allows you to organize your movies, TV +shows, music, photos, and videos automatically. It will even download metadata +for you so that you can easily browse these collections. ## Pi-hole -Pi-hole is an alternative ad-blocker that runs at the DNS level, -allowing you to block traffic when it hits your network, so that you can -reject any traffic you deem to be bad. Pi-hole uses blacklists and -whitelists to decide which traffic block and, luckily, there are a lot -of pre-made lists out there on Reddit, GitHub, etc. +Pi-hole is an alternative ad-blocker that runs at the DNS level, allowing you to +block traffic when it hits your network, so that you can reject any traffic you +deem to be bad. Pi-hole uses blacklists and whitelists to decide which traffic +block and, luckily, there are a lot of pre-made lists out there on Reddit, +GitHub, etc. ## Nextcloud -While I had trouble with the Docker version of Nextcloud, I was very -successful when setting up the snap version. Using this, I was able to -map Nextcloud to a subdomain of a domain I own in Namecheap. -Additionally, Nextcloud has an integration with Let\'s Encrypt that -allows me to issue certificates automatically to any new domain I -authorize. +While I had trouble with the Docker version of Nextcloud, I was very successful +when setting up the snap version. Using this, I was able to map Nextcloud to a +subdomain of a domain I own in Namecheap. Additionally, Nextcloud has an +integration with Let's Encrypt that allows me to issue certificates +automatically to any new domain I authorize. ## Webmin -To monitor my servers, and the processes running on them, I use the -Webmin dashboard. This was fairly painless to set up, and I currently -access it straight through the server\'s IP address. In the future, I -will be looking to configure Webmin to use a custom domain just like -Nextcloud. +To monitor my servers, and the processes running on them, I use the Webmin +dashboard. This was fairly painless to set up, and I currently access it +straight through the server's IP address. In the future, I will be looking to +configure Webmin to use a custom domain just like Nextcloud. diff --git a/content/blog/2020-05-19-customizing-ubuntu.md b/content/blog/2020-05-19-customizing-ubuntu.md index 6137467..8c23128 100644 --- a/content/blog/2020-05-19-customizing-ubuntu.md +++ b/content/blog/2020-05-19-customizing-ubuntu.md @@ -7,20 +7,20 @@ draft = false # More Information -For inspiration on designing your \*nix computer, check out the +For inspiration on designing your *nix computer, check out the [r/unixporn](https://libredd.it/r/unixporn) subreddit! # Customizing Ubuntu -New to Linux and want to add a personal touch to your machine? One of -the best perks of Linux is that it is **extremely\*** customizable. You -can change the styles of the windows, shell (status bars/docks), icons, -fonts, terminals, and more. +New to Linux and want to add a personal touch to your machine? One of the best +perks of Linux is that it is **extremely** customizable. You can change the +styles of the windows, shell (status bars/docks), icons, fonts, terminals, and +more. -In this post, I\'m going to go through customization on Ubuntu 20.04 -(GNOME) since most new users tend to choose Ubuntu-based distros. If -you\'ve found a way to install Arch with i3-gaps, I\'m assuming you know -how to find more advanced tutorials out there on customizations. +In this post, I'm going to go through customization on Ubuntu 20.04 (GNOME) +since most new users tend to choose Ubuntu-based distros. If you've found a way +to install Arch with i3-gaps, I'm assuming you know how to find more advanced +tutorials out there on customizations. ## Required Tools @@ -28,61 +28,55 @@ how to find more advanced tutorials out there on customizations. Tweaks](https://img.cleberg.net/blog/20200519-customizing-ubuntu/gnome-tweaks-min.png) Ubuntu 20.04 ships with the default desktop environment -[Gnome](https://www.gnome.org/), which includes the handy -`gnome-tweaks` tool to quickly change designs. To install -this, just open your terminal and enter the following command: +[Gnome](https://www.gnome.org/), which includes the handy `gnome-tweaks` tool to +quickly change designs. To install this, just open your terminal and enter the +following command: ```sh sudo apt install gnome-tweaks ``` -After you\'ve finished installing the tool, simply launch the Tweaks -application, and you\'ll be able to access the various customization -options available by default on Ubuntu. You might even like some of the -pre-installed options. +After you've finished installing the tool, simply launch the Tweaks +application, and you'll be able to access the various customization options +available by default on Ubuntu. You might even like some of the pre-installed +options. ## GNOME Application Themes -To change the themes applied to applications in GNOME, you will need to -change the Applications dropdown in the Appearance section of Tweaks. To -add more themes, you will have to find your preferred theme online and -follow the steps below to have it show up in the Tweaks tool. While you -may find themes anywhere, one of the most popular sites for GNOME themes -is [gnome-look.org](https://www.gnome-look.org/). This website contains -themes for applications, shells, icons, and cursors. +To change the themes applied to applications in GNOME, you will need to change +the Applications dropdown in the Appearance section of Tweaks. To add more +themes, you will have to find your preferred theme online and follow the steps +below to have it show up in the Tweaks tool. While you may find themes anywhere, +one of the most popular sites for GNOME themes is +[gnome-look.org](https://www.gnome-look.org/). This website contains themes for +applications, shells, icons, and cursors. Steps to import themes into Tweaks: -1. Download the theme. -2. These files are usually compressed (.zip, .tar.gz, .tar.xz), so you - will need to extract the contents. This is easiest when opening the - file explorer, right-clicking the compressed file, and choosing - \"Extract here.\" -3. Move the theme folder to `/usr/share/themes/`. You can do - so with the following command: - `sudo mv theme-folder/ /usr/share/themes/`. - - Icons and cursors will be moved to the - `/usr/share/icons/` folder. - - Fonts will be moved to the `/usr/share/fonts/` folder - Alternatively, you can move them to the - `/usr/share/fonts/opentype/` or - `/usr/share/fonts/opentype/` folders, if you have a - specific font type. -4. Close tweaks if it is open. Re-open Tweaks and your new theme will - be available in the Applications dropdown in the Appearance section - of Tweaks. - -If the theme is not showing up after you\'ve moved it into the themes -folder, you may have uncompressed the folder into a sub-folder. You can -check this by entering the theme folder and listing the contents: +1. Download the theme. +2. These files are usually compressed (.zip, .tar.gz, .tar.xz), so you will need + to extract the contents. This is easiest when opening the file explorer, + right-clicking the compressed file, and choosing "Extract here." +3. Move the theme folder to `/usr/share/themes/`. You can do so with the + following command: `sudo mv theme-folder/ /usr/share/themes/`. + - Icons and cursors will be moved to the `/usr/share/icons/` folder. + - Fonts will be moved to the `/usr/share/fonts/` folder Alternatively, you + can move them to the `/usr/share/fonts/opentype/` or + `/usr/share/fonts/opentype/` folders, if you have a specific font type. +4. Close tweaks if it is open. Re-open Tweaks and your new theme will be + available in the Applications dropdown in the Appearance section of Tweaks. + +If the theme is not showing up after you've moved it into the themes folder, +you may have uncompressed the folder into a sub-folder. You can check this by +entering the theme folder and listing the contents: ```sh cd /usr/share/themes/Mojave-Dark && ls -la ``` -This is an example of what the contents of your theme folder should look -like. If you just see another folder there, you should move that folder -up into the `/usr/share/themes/` folder. +This is an example of what the contents of your theme folder should look like. +If you just see another folder there, you should move that folder up into the +`/usr/share/themes/` folder. ```sh cinnamon COPYING gnome-shell gtk-2.0 gtk-3.0 index.theme metacity-1 plank xfwm4 @@ -90,77 +84,73 @@ cinnamon COPYING gnome-shell gtk-2.0 gtk-3.0 index.theme metacity-1 plank ## GNOME Shell Themes -To change the appearance of the title bar, default dock, app menu, and -other parts of the GNOME shell, you\'ll need to install the [user -themes](https://extensions.gnome.org/extension/19/user-themes/) -extension on [Gnome Extensions](https://extensions.gnome.org/). To be -able to install extensions, you will first need to install the browser -extension that the website instructs you to. See this screenshot for the -blue box with a link to the extension. +To change the appearance of the title bar, default dock, app menu, and other +parts of the GNOME shell, you'll need to install the [user +themes](https://extensions.gnome.org/extension/19/user-themes/) extension on +[Gnome Extensions](https://extensions.gnome.org/). To be able to install +extensions, you will first need to install the browser extension that the +website instructs you to. See this screenshot for the blue box with a link to +the extension.  -After the browser extension is installed, you will need to install the -native host connector: +After the browser extension is installed, you will need to install the native +host connector: ```sh sudo apt install chrome-gnome-shell ``` Finally, you can go the [user -themes](https://extensions.gnome.org/extension/19/user-themes/) -extension page and click the installation button. This will enable the -Shell option in Tweaks. Now you can move shell themes to the -`/usr/share/themes` directory, using the same steps mentioned -in the previous section, and enable the new theme in Tweaks. +themes](https://extensions.gnome.org/extension/19/user-themes/) extension page +and click the installation button. This will enable the Shell option in Tweaks. +Now you can move shell themes to the `/usr/share/themes` directory, using the +same steps mentioned in the previous section, and enable the new theme in +Tweaks. ## Icons & Cursors -Icons and cursors are installed exactly the same way, so I\'m grouping -these together in this post. Both of these items will need to follow the -same process as installing themes, except you will want to move your -font folders to the `/usr/share/icons/` directory instead. +Icons and cursors are installed exactly the same way, so I'm grouping these +together in this post. Both of these items will need to follow the same process +as installing themes, except you will want to move your font folders to the +`/usr/share/icons/` directory instead. ## Fonts -Fonts are one of the overlooked parts of customization, but a good font -can make the whole screen look different. For example, I have installed -the [IBM Plex](https://github.com/IBM/plex/releases) fonts on my system. -This follows the same process as installing themes, except you will want -to move your font folders to the `/usr/share/fonts/` -directory instead. +Fonts are one of the overlooked parts of customization, but a good font can make +the whole screen look different. For example, I have installed the [IBM +Plex](https://github.com/IBM/plex/releases) fonts on my system. This follows the +same process as installing themes, except you will want to move your font +folders to the `/usr/share/fonts/` directory instead. ## Terminal -If you spend a lot of time typing commands, you know how important the -style and functionality of the terminal is. After spending a lot of time -using the default GNOME terminal with [unix -shell](https://en.wikipedia.org/wiki/Bash_(Unix_shell)), I decided to -try some different options. I ended up choosing +If you spend a lot of time typing commands, you know how important the style and +functionality of the terminal is. After spending a lot of time using the default +GNOME terminal with [unix +shell](https://en.wikipedia.org/wiki/Bash_(Unix_shell)), I decided to try some +different options. I ended up choosing [Terminator](https://terminator-gtk3.readthedocs.io/en/latest/) with [zsh](https://en.wikipedia.org/wiki/Z_shell). -Terminator is great if you need to open multiple terminals at one time -by simply right-clicking and splitting the screen into as many terminals -as you want. While this project hasn\'t been updated in a while, [it is -coming under new -development](https://github.com/gnome-terminator/terminator/issues/1). -However, this terminal is great and I haven\'t experienced any errors -yet. +Terminator is great if you need to open multiple terminals at one time by simply +right-clicking and splitting the screen into as many terminals as you want. +While this project hasn't been updated in a while, [it is coming under new +development](https://github.com/gnome-terminator/terminator/issues/1). However, +this terminal is great and I haven't experienced any errors yet. -For the shell choice, I decided to choose zsh after trying it out on a -fresh Manjaro installation. Zsh is great if you like to change the -themes of your terminal, include icons, or add plugins. +For the shell choice, I decided to choose zsh after trying it out on a fresh +Manjaro installation. Zsh is great if you like to change the themes of your +terminal, include icons, or add plugins. The desktop uses the -[zsh-autosuggestions](https://github.com/zsh-users/zsh-autosuggestions) -to suggest past commands as you type. In addition, it suggests -corrections if you misspell a command. Lastly, it uses the -`af-magic` theme, which adds dashed lines between commands, -moving the user@host tag to the right side of the terminal, and changes -the colors. There are plenty of plugins and themes to choose from. Just -figure out what you like and add it to your `~/.zshrc` file! +[zsh-autosuggestions](https://github.com/zsh-users/zsh-autosuggestions) to +suggest past commands as you type. In addition, it suggests corrections if you +misspell a command. Lastly, it uses the `af-magic` theme, which adds dashed +lines between commands, moving the user@host tag to the right side of the +terminal, and changes the colors. There are plenty of plugins and themes to +choose from. Just figure out what you like and add it to your `~/.zshrc` file! ### Steps to Replicate My Terminal @@ -194,10 +184,9 @@ To install zsh-autosuggestions via Oh My Zsh: git clone https://github.com/zsh-users/zsh-autosuggestions ${ZSH_CUSTOM:-~/.oh-my-zsh/custom}/plugins/zsh-autosuggestions ``` -Then, add the following plugin wording to your `~/.zshrc` -file (the default config usually has the `git` plugin -activated, so just add any other plugins to the parentheses separated by -a space): +Then, add the following plugin wording to your `~/.zshrc` file (the default +config usually has the `git` plugin activated, so just add any other plugins to +the parentheses separated by a space): ```sh nano ~/.zshrc @@ -207,5 +196,5 @@ nano ~/.zshrc plugins=(git zsh-autosuggestions) ``` -Finally, you need to log out of your computer and log back in so your -user shell can refresh. +Finally, you need to log out of your computer and log back in so your user shell +can refresh. diff --git a/content/blog/2020-07-20-video-game-sales.md b/content/blog/2020-07-20-video-game-sales.md index 24ca14b..749bad8 100644 --- a/content/blog/2020-07-20-video-game-sales.md +++ b/content/blog/2020-07-20-video-game-sales.md @@ -8,26 +8,25 @@ draft = false # Background Information This dataset (obtained from -[Kaggle](https://www.kaggle.com/gregorut/videogamesales/data)) contains -a list of video games with sales greater than 100,000 copies. It was -generated by a scrape of vgchartz.com. +[Kaggle](https://www.kaggle.com/gregorut/videogamesales/data)) contains a list +of video games with sales greater than 100,000 copies. It was generated by a +scrape of vgchartz.com. Fields include: -- Rank: Ranking of overall sales -- Name: The game name -- Platform: Platform of the game release (i.e. PC,PS4, etc.) -- Year: Year of the game\'s release -- Genre: Genre of the game -- Publisher: Publisher of the game -- NA~Sales~: Sales in North America (in millions) -- EU~Sales~: Sales in Europe (in millions) -- JP~Sales~: Sales in Japan (in millions) -- Other~Sales~: Sales in the rest of the world (in millions) -- Global~Sales~: Total worldwide sales. - -There are 16,598 records. 2 records were dropped due to incomplete -information. +- Rank: Ranking of overall sales +- Name: The game name +- Platform: Platform of the game release (i.e. PC,PS4, etc.) +- Year: Year of the game's release +- Genre: Genre of the game +- Publisher: Publisher of the game +- NA~Sales~: Sales in North America (in millions) +- EU~Sales~: Sales in Europe (in millions) +- JP~Sales~: Sales in Japan (in millions) +- Other~Sales~: Sales in the rest of the world (in millions) +- Global~Sales~: Total worldwide sales. + +There are 16,598 records. 2 records were dropped due to incomplete information. # Import the Data @@ -166,18 +165,18 @@ Sales](https://img.cleberg.net/blog/20200720-data-exploration-video-game-sales/0 # Discussion -The purpose of exploring datasets is to ask questions, answer questions, -and discover intelligence that can be used to inform decision-making. -So, what have we found in this dataset? - -Today we simply explored a publicly-available dataset to see what kind -of information it contained. During that exploration, we found that -video game sales peaked in 2006. That peak was largely due to Nintendo, -who sold the top 5 games in 2006 and has a number of games in the top-10 -list for the years 1980-2020. Additionally, the top four platforms by -global sales (Wii, NES, GB, DS) are owned by Nintendo. - -We didn\'t explore everything this dataset has to offer, but we can tell -from a brief analysis that Nintendo seems to rule sales in the video -gaming world. Further analysis could provide insight into which genres, -regions, publishers, or world events are correlated with sales. +The purpose of exploring datasets is to ask questions, answer questions, and +discover intelligence that can be used to inform decision-making. So, what have +we found in this dataset? + +Today we simply explored a publicly-available dataset to see what kind of +information it contained. During that exploration, we found that video game +sales peaked in 2006. That peak was largely due to Nintendo, who sold the top 5 +games in 2006 and has a number of games in the top-10 list for the years +1980-2020. Additionally, the top four platforms by global sales (Wii, NES, GB, +DS) are owned by Nintendo. + +We didn't explore everything this dataset has to offer, but we can tell from a +brief analysis that Nintendo seems to rule sales in the video gaming world. +Further analysis could provide insight into which genres, regions, publishers, +or world events are correlated with sales. diff --git a/content/blog/2020-07-26-business-analysis.md b/content/blog/2020-07-26-business-analysis.md index 7f96ac1..4105d04 100644 --- a/content/blog/2020-07-26-business-analysis.md +++ b/content/blog/2020-07-26-business-analysis.md @@ -7,24 +7,24 @@ draft = false # Background Information -This project aims to help investors learn more about a random city in -order to determine optimal locations for business investments. The data -used in this project was obtained using Foursquare\'s developer API. +This project aims to help investors learn more about a random city in order to +determine optimal locations for business investments. The data used in this +project was obtained using Foursquare's developer API. Fields include: -- Venue Name -- Venue Category -- Venue Latitude -- Venue Longitude +- Venue Name +- Venue Category +- Venue Latitude +- Venue Longitude -There are 232 records found using the center of Lincoln as the area of -interest with a radius of 10,000. +There are 232 records found using the center of Lincoln as the area of interest +with a radius of 10,000. # Import the Data -The first step is the simplest: import the applicable libraries. We will -be using the libraries below for this project. +The first step is the simplest: import the applicable libraries. We will be +using the libraries below for this project. ``` python # Import the Python libraries we will be using @@ -37,10 +37,10 @@ from pandas.io.json import json_normalize from sklearn.cluster import KMeans ``` -To begin our analysis, we need to import the data for this project. The -data we are using in this project comes directly from the Foursquare -API. The first step is to get the latitude and longitude of the city -being studied (Lincoln, NE) and setting up the folium map. +To begin our analysis, we need to import the data for this project. The data we +are using in this project comes directly from the Foursquare API. The first step +is to get the latitude and longitude of the city being studied (Lincoln, NE) and +setting up the folium map. ``` python # Define the latitude and longitude, then map the results @@ -54,11 +54,11 @@ map_LNK  -Now that we have defined our city and created the map, we need to go get -the business data. The Foursquare API will limit the results to 100 per -API call, so we use our first API call below to determine the total -results that Foursquare has found. Since the total results are 232, we -perform the API fetching process three times (100 + 100 + 32 = 232). +Now that we have defined our city and created the map, we need to go get the +business data. The Foursquare API will limit the results to 100 per API call, so +we use our first API call below to determine the total results that Foursquare +has found. Since the total results are 232, we perform the API fetching process +three times (100 + 100 + 32 = 232). ``` python # Foursquare API credentials @@ -122,13 +122,12 @@ results3 = requests.get(url3).json() # Clean the Data -Now that we have our data in three separate dataframes, we need to -combine them into a single dataframe and make sure to reset the index so -that we have a unique ID for each business. The -`get~categorytype~` function below will pull the categories -and name from each business\'s entry in the Foursquare data -automatically. Once all the data has been labeled and combined, the -results are stored in the `nearby_venues` dataframe. +Now that we have our data in three separate dataframes, we need to combine them +into a single dataframe and make sure to reset the index so that we have a +unique ID for each business. The `get~categorytype~` function below will pull +the categories and name from each business's entry in the Foursquare data +automatically. Once all the data has been labeled and combined, the results are +stored in the `nearby_venues` dataframe. ``` python # This function will extract the category of the venue from the API dictionary @@ -200,9 +199,9 @@ Data](https://img.cleberg.net/blog/20200726-ibm-data-science/02_clean_data-min.p # Visualize the Data -We now have a complete, clean data set. The next step is to visualize -this data onto the map we created earlier. We will be using folium\'s -`CircleMarker()` function to do this. +We now have a complete, clean data set. The next step is to visualize this data +onto the map we created earlier. We will be using folium's `CircleMarker()` +function to do this. ``` python # add markers to map @@ -227,15 +226,14 @@ map](https://img.cleberg.net/blog/20200726-ibm-data-science/03_data_map-min.png) # Clustering: *k-means* -To cluster the data, we will be using the *k-means* algorithm. This -algorithm is iterative and will automatically make sure that data points -in each cluster are as close as possible to each other, while being as -far as possible away from other clusters. +To cluster the data, we will be using the *k-means* algorithm. This algorithm is +iterative and will automatically make sure that data points in each cluster are +as close as possible to each other, while being as far as possible away from +other clusters. -However, we first have to figure out how many clusters to use (defined -as the variable *\'k\'*). To do so, we will use the next two functions -to calculate the sum of squares within clusters and then return the -optimal number of clusters. +However, we first have to figure out how many clusters to use (defined as the +variable *'k'*). To do so, we will use the next two functions to calculate the +sum of squares within clusters and then return the optimal number of clusters. ``` python # This function will return the sum of squares found in the data @@ -273,9 +271,9 @@ def optimal_number_of_clusters(wcss): n = optimal_number_of_clusters(sum_of_squares) ``` -Now that we have found that our optimal number of clusters is six, we -need to perform k-means clustering. When this clustering occurs, each -business is assigned a cluster number from 0 to 5 in the dataframe. +Now that we have found that our optimal number of clusters is six, we need to +perform k-means clustering. When this clustering occurs, each business is +assigned a cluster number from 0 to 5 in the dataframe. ``` python # set number of clusters equal to the optimal number @@ -288,9 +286,8 @@ kmeans = KMeans(n_clusters=kclusters, random_state=0).fit(cluster_df) nearby_venues.insert(0, 'Cluster Labels', kmeans.labels_) ``` -Success! We now have a dataframe with clean business data, along with a -cluster number for each business. Now let\'s map the data using six -different colors. +Success! We now have a dataframe with clean business data, along with a cluster +number for each business. Now let's map the data using six different colors. ``` python # create map with clusters @@ -318,12 +315,11 @@ Map](https://img.cleberg.net/blog/20200726-ibm-data-science/04_clusters-min.png) # Investigate Clusters -Now that we have figured out our clusters, let\'s do a little more -analysis to provide more insight into the clusters. With the information -below, we can see which clusters are more popular for businesses and -which are less popular. The results below show us that clusters 0 -through 3 are popular, while clusters 4 and 5 are not very popular at -all. +Now that we have figured out our clusters, let's do a little more analysis to +provide more insight into the clusters. With the information below, we can see +which clusters are more popular for businesses and which are less popular. The +results below show us that clusters 0 through 3 are popular, while clusters 4 +and 5 are not very popular at all. ``` python # Show how many venues are in each cluster @@ -337,9 +333,9 @@ for x in range(0,6): 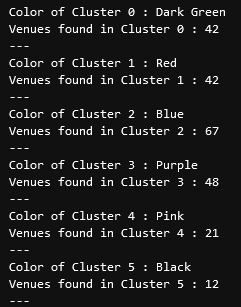 -Our last piece of analysis is to summarize the categories of businesses -within each cluster. With these results, we can clearly see that -restaurants, coffee shops, and grocery stores are the most popular. +Our last piece of analysis is to summarize the categories of businesses within +each cluster. With these results, we can clearly see that restaurants, coffee +shops, and grocery stores are the most popular. ``` python # Calculate how many venues there are in each category @@ -371,19 +367,17 @@ with pd.option_context('display.max_rows', None, 'display.max_columns', None): # Discussion -In this project, we gathered location data for Lincoln, Nebraska, USA -and clustered the data using the k-means algorithm in order to identify -the unique clusters of businesses in Lincoln. Through these actions, we -found that there are six unique business clusters in Lincoln and that -two of the clusters are likely unsuitable for investors. The remaining -four clusters have a variety of businesses, but are largely dominated by -restaurants and grocery stores. - -Using this project, investors can now make more informed decisions when -deciding the location and category of business in which to invest. - -Further studies may involve other attributes for business locations, -such as population density, average wealth across the city, or crime -rates. In addition, further studies may include additional location data -and businesses by utilizing multiple sources, such as Google Maps and -OpenStreetMap. +In this project, we gathered location data for Lincoln, Nebraska, USA and +clustered the data using the k-means algorithm in order to identify the unique +clusters of businesses in Lincoln. Through these actions, we found that there +are six unique business clusters in Lincoln and that two of the clusters are +likely unsuitable for investors. The remaining four clusters have a variety of +businesses, but are largely dominated by restaurants and grocery stores. + +Using this project, investors can now make more informed decisions when deciding +the location and category of business in which to invest. + +Further studies may involve other attributes for business locations, such as +population density, average wealth across the city, or crime rates. In addition, +further studies may include additional location data and businesses by utilizing +multiple sources, such as Google Maps and OpenStreetMap. diff --git a/content/blog/2020-08-22-redirect-github-pages.md b/content/blog/2020-08-22-redirect-github-pages.md index f92ae07..1a54b2a 100644 --- a/content/blog/2020-08-22-redirect-github-pages.md +++ b/content/blog/2020-08-22-redirect-github-pages.md @@ -9,18 +9,17 @@ draft = false ## Step 1 -Add a new file CNAME to your GitHub Pages repository containing only one -line: your top-level domain name. E.g.: `example.com` +Add a new file CNAME to your GitHub Pages repository containing only one line: +your top-level domain name. E.g.: `example.com` ## Step 2 -\[Optional\] but highly recommended +[Optional] but highly recommended -2.1: Remove all other top-level records (prefixed with @) of type A from -your DNS configuration. +2.1: Remove all other top-level records (prefixed with @) of type A from your +DNS configuration. -2.2: Remove a CNAME record for the second-level domain www if it is -present. +2.2: Remove a CNAME record for the second-level domain www if it is present. ## Step 3 @@ -34,70 +33,61 @@ Add these 5 entries to the very top of your DNS configuration: www CNAME your_github_username.github.io. ``` -Replace `your_github_username` with your actual GitHub -username. +Replace `your_github_username` with your actual GitHub username. ## Step 4 -Wait for your DNS changes to propagate. DNS changes aren\'t effective +Wait for your DNS changes to propagate. DNS changes aren't effective immediately. They can take up to a full day to propagate. # Long answer -This issue has two sides. One is the DNS configuration itself. Another -one is the way GitHub Pages will forward HTTP requests. +This issue has two sides. One is the DNS configuration itself. Another one is +the way GitHub Pages will forward HTTP requests. -We need to know a few things to understand what GitHub is trying to say -in their documentation. +We need to know a few things to understand what GitHub is trying to say in their +documentation. ## DNS Entry Types There are two types of DNS records which interest us: CNAME and A. -`A` is also known as `Apex` or sometimes as -`root entry`. It forwards requests to a specified fixed IP -address. `CNAME` entry forwards requests to a specified URL -(actual valid plain text URL, not an IP address). +`A` is also known as `Apex` or sometimes as `root entry`. It forwards requests +to a specified fixed IP address. `CNAME` entry forwards requests to a specified +URL (actual valid plain text URL, not an IP address). ## DNS Load balancing -GitHub has one central URL address which accepts all DNS requests for -GitHub Pages: `http://username.github.io`. That URL is -resolved to different IP addresses based on your geographical location. -Website hosted on GitHub Pages is a simple collection of -`HTML`, `CSS` and `JS` files. GitHub -distributes these files to different servers across the globe. So that -when your browser sends a request from Europe, it receives data from a -server in Europe. The same is valid for the requests from Asia and the -USA. +GitHub has one central URL address which accepts all DNS requests for GitHub +Pages: `http://username.github.io`. That URL is resolved to different IP +addresses based on your geographical location. Website hosted on GitHub Pages is +a simple collection of `HTML`, `CSS` and `JS` files. GitHub distributes these +files to different servers across the globe. So that when your browser sends a +request from Europe, it receives data from a server in Europe. The same is valid +for the requests from Asia and the USA. ## What GitHub is trying to say -Since `A` records in DNS must contain IP addresses, and they -must be either `185.199.108.153` or -`185.199.109.153` or `185.199.110.153` or -`185.199.111.153`, there is no way to forward requests to a -server located somewhere in Europe or Asia. Your website hosted at -GitHub Pages will be downloaded from a central GitHub Pages server. -There is a minor risk that if GitHub Pages DNS servers -(`x.x.x.153`) are down for some reason, all custom domains -which use fixed GitHub Pages IP addresses will not be accessible (their +Since `A` records in DNS must contain IP addresses, and they must be either +`185.199.108.153` or `185.199.109.153` or `185.199.110.153` or +`185.199.111.153`, there is no way to forward requests to a server located +somewhere in Europe or Asia. Your website hosted at GitHub Pages will be +downloaded from a central GitHub Pages server. There is a minor risk that if +GitHub Pages DNS servers (`x.x.x.153`) are down for some reason, all custom +domains which use fixed GitHub Pages IP addresses will not be accessible (their DNS requests will not be resolvable). -That is why GitHub strongly suggests to either use a second-level domain -for your GitHub Pages (e.g. `blog.example.com`) or use a DNS -service provider that supports a record type `ALIAS` that -acts as `A` record but forwards request to a URL address -(e.g. `username.github.io`) instead of a fixed IP address. +That is why GitHub strongly suggests to either use a second-level domain for +your GitHub Pages (e.g. `blog.example.com`) or use a DNS service provider that +supports a record type `ALIAS` that acts as `A` record but forwards request to a +URL address (e.g. `username.github.io`) instead of a fixed IP address. ## How GitHub Pages treats HTTP requests -After a DNS request for `your_github_username.github.io` is -resolved into an IP address, e.g. `185.199.108.153` your -browser sends an HTTP request to that server with an HTTP header -`Host`. Below are `curl` examples that load the -same website (these examples might not work if you are behind a proxy -server): +After a DNS request for `your_github_username.github.io` is resolved into an IP +address, e.g. `185.199.108.153` your browser sends an HTTP request to that +server with an HTTP header `Host`. Below are `curl` examples that load the same +website (these examples might not work if you are behind a proxy server): ```sh curl --header "Host: your_github_username.github.io" http://185.199.108.153/ @@ -107,31 +97,28 @@ curl --header "Host: example.com" http://185.199.108.153/ This way GitHub Pages servers know which user website to serve. -> GitHub Pages server will automatically redirect HTTP requests to the -> top-level domain if your `CNAME` file contains -> `example.com` but `www.example.com` is +> GitHub Pages server will automatically redirect HTTP requests to the top-level +> domain if your `CNAME` file contains `example.com` but `www.example.com` is > requested. > -> The same is valid if your `CNAME` file contains -> `www.example.com` but the header `Host` in the -> `HTTP` request contains `example.com`. +> The same is valid if your `CNAME` file contains `www.example.com` but the +> header `Host` in the `HTTP` request contains `example.com`. -## Why can\'t I add a `CNAME` record entry that accepts a top-level request (`@`) to my DNS configuration? +## Why can't I add a `CNAME` record entry that accepts a top-level request (`@`) to my DNS configuration? Quote from the GitHub Pages documentation: -> Warning: Do not create a CNAME record for your custom apex domain! -> Doing so may cause issues with other services, such as email, on that -> domain. +> Warning: Do not create a CNAME record for your custom apex domain! Doing so +> may cause issues with other services, such as email, on that domain. ## References: -1. [Setting up a custom domain with GitHub - Pages](https://docs.github.com/en/github/working-with-github-pages/configuring-a-custom-domain-for-your-github-pages-site) -2. [My custom domain isn\'t - working](https://docs.github.com/en/github/working-with-github-pages/troubleshooting-custom-domains-and-github-pages) -3. [Cannot access my GitHub Pages website by IP - Address](https://serverfault.com/questions/589370/cannot-access-my-github-pages-website-by-ip-address) -4. [How do I set up GitHub Pages to redirect DNS requests from a - subdomain (e.g. www) to the top-level domain (TLD, Apex - record)?](https://stackoverflow.com/questions/23375422/how-do-i-set-up-github-pages-to-redirect-dns-requests-from-a-subdomain-e-g-www) +1. [Setting up a custom domain with GitHub + Pages](https://docs.github.com/en/github/working-with-github-pages/configuring-a-custom-domain-for-your-github-pages-site) +2. [My custom domain isn't + working](https://docs.github.com/en/github/working-with-github-pages/troubleshooting-custom-domains-and-github-pages) +3. [Cannot access my GitHub Pages website by IP + Address](https://serverfault.com/questions/589370/cannot-access-my-github-pages-website-by-ip-address) +4. [How do I set up GitHub Pages to redirect DNS requests from a subdomain (e.g. + www) to the top-level domain (TLD, Apex + record)?](https://stackoverflow.com/questions/23375422/how-do-i-set-up-github-pages-to-redirect-dns-requests-from-a-subdomain-e-g-www) diff --git a/content/blog/2020-08-29-php-auth-flow.md b/content/blog/2020-08-29-php-auth-flow.md index 499eada..fcc9e02 100644 --- a/content/blog/2020-08-29-php-auth-flow.md +++ b/content/blog/2020-08-29-php-auth-flow.md @@ -7,16 +7,15 @@ draft = false # Introduction -When creating websites that will allow users to create accounts, the -developer always needs to consider the proper authentication flow for -their app. For example, some developers will utilize an API for -authentication, some will use OAuth, and some may just use their own -simple database. +When creating websites that will allow users to create accounts, the developer +always needs to consider the proper authentication flow for their app. For +example, some developers will utilize an API for authentication, some will use +OAuth, and some may just use their own simple database. -For those using pre-built libraries, authentication may simply be a -problem of copying and pasting the code from their library\'s -documentation. For example, here\'s the code I use to authenticate users -with the Tumblr OAuth API for my Tumblr client, Vox Populi: +For those using pre-built libraries, authentication may simply be a problem of +copying and pasting the code from their library's documentation. For example, +here's the code I use to authenticate users with the Tumblr OAuth API for my +Tumblr client, Vox Populi: ``` php // Start the session @@ -41,24 +40,23 @@ $client = new Tumblr\API\Client( ); ``` -However, developers creating authentication flows from scratch will need -to think carefully about when to make sure a web page will check the -user\'s authenticity. +However, developers creating authentication flows from scratch will need to +think carefully about when to make sure a web page will check the user's +authenticity. -In this article, we\'re going to look at a simple authentication flow -using a MySQL database and PHP. +In this article, we're going to look at a simple authentication flow using a +MySQL database and PHP. # Creating User Accounts -The beginning to any type of user authentication is to create a user -account. This process can take many formats, but the simplest is to -accept user input from a form (e.g., username and password) and send it -over to your database. For example, here\'s a snippet that shows how to -get username and password parameters that would come when a user submits -a form to your PHP script. +The beginning to any type of user authentication is to create a user account. +This process can take many formats, but the simplest is to accept user input +from a form (e.g., username and password) and send it over to your database. For +example, here's a snippet that shows how to get username and password +parameters that would come when a user submits a form to your PHP script. -**Note**: Ensure that your password column is large enough to hold the -hashed value (at least 60 characters or longer). +**Note**: Ensure that your password column is large enough to hold the hashed +value (at least 60 characters or longer). ``` php // Get the values from the URL @@ -97,9 +95,9 @@ $conn->close(); ## Validate Returning Users -To be able to verify that a returning user has a valid username and -password in your database is as simple as having users fill out a form -and comparing their inputs to your database. +To be able to verify that a returning user has a valid username and password in +your database is as simple as having users fill out a form and comparing their +inputs to your database. ``` php // Query the database for username and password @@ -116,24 +114,23 @@ if(password_verify($password_input, $hashed_password)) { # Storing Authentication State -Once you\'ve created the user\'s account, now you\'re ready to -initialize the user\'s session. **You will need to do this on every page -you load while the user is logged in.\*** To do so, simply enter the -following code snippet: +Once you've created the user's account, now you're ready to initialize the +user's session. **You will need to do this on every page you load while the +user is logged in.** To do so, simply enter the following code snippet: ``` php session_start(); ``` -Once you\'ve initialized the session, the next step is to store the -session in a cookie so that you can access it later. +Once you've initialized the session, the next step is to store the session in a +cookie so that you can access it later. ``` php setcookie(session_name()); ``` -Now that the session name has been stored, you\'ll be able to check if -there\'s an active session whenever you load a page. +Now that the session name has been stored, you'll be able to check if there's +an active session whenever you load a page. ``` php if(isset(session_name())) { @@ -143,9 +140,9 @@ if(isset(session_name())) { ## Removing User Authentication -The next logical step is to give your users the option to log out once -they are done using your application. This can be tricky in PHP since a -few of the standard ways do not always work. +The next logical step is to give your users the option to log out once they are +done using your application. This can be tricky in PHP since a few of the +standard ways do not always work. ``` php // Initialize the session. @@ -183,14 +180,13 @@ die(); # Wrapping Up -Now you should be ready to begin your authentication programming with -PHP. You can create user accounts, create sessions for users across -different pages of your site, and then destroy the user data when -they\'re ready to leave. +Now you should be ready to begin your authentication programming with PHP. You +can create user accounts, create sessions for users across different pages of +your site, and then destroy the user data when they're ready to leave. For more information on this subject, I recommend reading the [PHP -Documentation](https://www.php.net/). Specifically, you may want to look -at [HTTP Authentication with +Documentation](https://www.php.net/). Specifically, you may want to look at +[HTTP Authentication with PHP](https://www.php.net/manual/en/features.http-auth.php), [session handling](https://www.php.net/manual/en/book.session.php), and [hash](https://www.php.net/manual/en/function.hash.php). diff --git a/content/blog/2020-09-01-visual-recognition.md b/content/blog/2020-09-01-visual-recognition.md index 8329a5a..8d71286 100644 --- a/content/blog/2020-09-01-visual-recognition.md +++ b/content/blog/2020-09-01-visual-recognition.md @@ -7,42 +7,41 @@ draft = false # What is IBM Watson? -If you\'ve never heard of [Watson](https://www.ibm.com/watson), this -service is a suite of enterprise-ready AI services, applications, and -tooling provided by IBM. Watson contains quite a few useful tools for -data scientists and students, including the subject of this post today: -visual recognition. - -If you\'d like to view the official documentation for the Visual -Recognition API, visit the [API +If you've never heard of [Watson](https://www.ibm.com/watson), this service is +a suite of enterprise-ready AI services, applications, and tooling provided by +IBM. Watson contains quite a few useful tools for data scientists and students, +including the subject of this post today: visual recognition. + +If you'd like to view the official documentation for the Visual Recognition +API, visit the [API Docs](https://cloud.ibm.com/apidocs/visual-recognition/visual-recognition-v3?code=python). # Prerequisites -To be able to use Watson Visual Recognition, you\'ll need the following: - -1. Create a free account on [IBM Watson - Studio](https://www.ibm.com/cloud/watson-studio). -2. Add the [Watson Visual - Recognition](https://www.ibm.com/cloud/watson-visual-recognition) - service to your IBM Watson account. -3. Get your API key and URL. To do this, first go to the [profile - dashboard](https://dataplatform.cloud.ibm.com/home2?context=cpdaas) - for your IBM account and click on the Watson Visual Recognition - service you created. This will be listed in the section titled - **Your services**. Then click the **Credentials\*** tab and open the - **Auto-generated credentials\*** dropdown. Copy your API key and URL - so that you can use them in the Python script later. -4. **\[Optional\]\*** While not required, you can also create the - Jupyter Notebook for this project right inside [Watson - Studio](https://www.ibm.com/cloud/watson-studio). Watson Studio will - save your notebooks inside an organized project and allow you to use - their other integrated products, such as storage containers, AI - models, documentation, external sharing, etc. +To be able to use Watson Visual Recognition, you'll need the following: + +1. Create a free account on [IBM Watson + Studio](https://www.ibm.com/cloud/watson-studio). +2. Add the [Watson Visual + Recognition](https://www.ibm.com/cloud/watson-visual-recognition) service to + your IBM Watson account. +3. Get your API key and URL. To do this, first go to the [profile + dashboard](https://dataplatform.cloud.ibm.com/home2?context=cpdaas) for your + IBM account and click on the Watson Visual Recognition service you created. + This will be listed in the section titled **Your services**. Then click the + **Credentials** tab and open the **Auto-generated credentials** dropdown. + Copy your API key and URL so that you can use them in the Python script + later. +4. **[Optional]** While not required, you can also create the Jupyter Notebook + for this project right inside [Watson + Studio](https://www.ibm.com/cloud/watson-studio). Watson Studio will save + your notebooks inside an organized project and allow you to use their other + integrated products, such as storage containers, AI models, documentation, + external sharing, etc. # Calling the IBM Watson Visual Recognition API -Okay, now let\'s get started. +Okay, now let's get started. To begin, we need to install the proper Python package for IBM Watson. @@ -50,8 +49,8 @@ To begin, we need to install the proper Python package for IBM Watson. pip install --upgrade --user "ibm-watson>=4.5.0" ``` -Next, we need to specify the API key, version, and URL given to us when -we created the Watson Visual Recognition service. +Next, we need to specify the API key, version, and URL given to us when we +created the Watson Visual Recognition service. ``` python apikey = "<your-apikey>" @@ -59,7 +58,7 @@ version = "2018-03-19" url = "<your-url>" ``` -Now, let\'s import the necessary libraries and authenticate our service. +Now, let's import the necessary libraries and authenticate our service. ``` python import json @@ -75,16 +74,15 @@ visual_recognition = VisualRecognitionV3( visual_recognition.set_service_url(url) ``` -**\[Optional\]** If you\'d like to tell the API not to use any data to -improve their products, set the following header. +**[Optional]** If you'd like to tell the API not to use any data to improve +their products, set the following header. ``` python visual_recognition.set_default_headers({'x-watson-learning-opt-out': "true"}) ``` -Now we have our API all set and ready to go. For this example, I\'m -going to include a `dict` of photos to load as we test out -the API. +Now we have our API all set and ready to go. For this example, I'm going to +include a `dict` of photos to load as we test out the API. ``` python data = [ @@ -115,14 +113,14 @@ data = [ ] ``` -Now that we\'ve set up our libraries and have the photos ready, let\'s -create a loop to call the API for each image. The code below shows a -loop that calls the URL of each image and sends it to the API, -requesting results with at least 60% confidence. The results are output -to the console with dotted lines separating each section. +Now that we've set up our libraries and have the photos ready, let's create a +loop to call the API for each image. The code below shows a loop that calls the +URL of each image and sends it to the API, requesting results with at least 60% +confidence. The results are output to the console with dotted lines separating +each section. -In the case of an API error, the codes and explanations are output to -the console. +In the case of an API error, the codes and explanations are output to the +console. ``` python from ibm_watson import ApiException @@ -149,23 +147,22 @@ except ApiException as ex: # The Results -Here we can see the full result set of our function above. If you view -each of the URLs that we sent to the API, you\'ll be able to see that it -was remarkably accurate. To be fair, these are clear high-resolution, -clear photos shot with a professional camera. In reality, you will most -likely be processing images that are lower quality and may have a lot of -noise in the photo. +Here we can see the full result set of our function above. If you view each of +the URLs that we sent to the API, you'll be able to see that it was remarkably +accurate. To be fair, these are clear high-resolution, clear photos shot with a +professional camera. In reality, you will most likely be processing images that +are lower quality and may have a lot of noise in the photo. -However, we can clearly see the benefit of being able to call this API -instead of attempting to write our own image recognition function. Each -of the classifications returned was a fair description of the image. +However, we can clearly see the benefit of being able to call this API instead +of attempting to write our own image recognition function. Each of the +classifications returned was a fair description of the image. -If you wanted to restrict the results to those that are at least 90% -confident or greater, you would simply adjust the `threshold` -in the `visual_recognition.classify()` function. +If you wanted to restrict the results to those that are at least 90% confident +or greater, you would simply adjust the `threshold` in the +`visual_recognition.classify()` function. -When your program runs, it should show the output below for each photo -you provide. +When your program runs, it should show the output below for each photo you +provide. ``` txt ---------------------------------------------------------------- @@ -184,22 +181,19 @@ greenishness color ( 0.975 ) # Discussion -Now, this was a very minimal implementation of the API. We simply -supplied some images and looked to see how accurate the results were. -However, you could implement this type of API into many machine learning -(ML) models. - -For example, you could be working for a company that scans their -warehouses or inventory using drones. Would you want to pay employees to -sit there and watch drone footage all day in order to identify or count -things in the video? Probably not. Instead, you could use a -classification system similar to this one in order to train your machine -learning model to correctly identify items that the drones show through -video. More specifically, you could have your machine learning model -watch a drone fly over a field of sheep in order to count how many sheep -are living in that field. - -There are many ways to implement machine learning functionality, but -hopefully this post helped inspire some deeper thought about the tools -that can help propel us further into the future of machine learning and -AI. +Now, this was a very minimal implementation of the API. We simply supplied some +images and looked to see how accurate the results were. However, you could +implement this type of API into many machine learning (ML) models. + +For example, you could be working for a company that scans their warehouses or +inventory using drones. Would you want to pay employees to sit there and watch +drone footage all day in order to identify or count things in the video? +Probably not. Instead, you could use a classification system similar to this one +in order to train your machine learning model to correctly identify items that +the drones show through video. More specifically, you could have your machine +learning model watch a drone fly over a field of sheep in order to count how +many sheep are living in that field. + +There are many ways to implement machine learning functionality, but hopefully +this post helped inspire some deeper thought about the tools that can help +propel us further into the future of machine learning and AI. diff --git a/content/blog/2020-09-22-internal-audit.md b/content/blog/2020-09-22-internal-audit.md index b700062..39c1cce 100644 --- a/content/blog/2020-09-22-internal-audit.md +++ b/content/blog/2020-09-22-internal-audit.md @@ -10,66 +10,64 @@ Overview](https://img.cleberg.net/blog/20200922-what-is-internal-audit/internal- # Definitions -One of the many reasons that Internal Audit needs such thorough -explaining to non-auditors is that Internal Audit can serve many -purposes, depending on the organization\'s size and needs. However, the -Institute of Internal Auditors (IIA) defines Internal Auditing as: - -> Internal auditing is an independent, objective assurance and -> consulting activity designed to add value and improve an -> organization\'s operations. It helps an organization accomplish its -> objectives by bringing a systematic, disciplined approach to evaluate -> and improve the effectiveness of risk management, control, and -> governance processes. - -However, this definition uses quite a few terms that aren\'t clear -unless the reader already has a solid understanding of the auditing -profession. To further explain, the following is a list of definitions -that can help supplement understanding of internal auditing. +One of the many reasons that Internal Audit needs such thorough explaining to +non-auditors is that Internal Audit can serve many purposes, depending on the +organization's size and needs. However, the Institute of Internal Auditors +(IIA) defines Internal Auditing as: + +> Internal auditing is an independent, objective assurance and consulting +> activity designed to add value and improve an organization's operations. It +> helps an organization accomplish its objectives by bringing a systematic, +> disciplined approach to evaluate and improve the effectiveness of risk +> management, control, and governance processes. + +However, this definition uses quite a few terms that aren't clear unless the +reader already has a solid understanding of the auditing profession. To further +explain, the following is a list of definitions that can help supplement +understanding of internal auditing. ## Independent -Independence is the freedom from conditions that threaten the ability of -the internal audit activity to carry out internal audit responsibilities -in an unbiased manner. To achieve the degree of independence necessary -to effectively carry out the responsibilities of the internal audit -activity, the chief audit executive has direct and unrestricted access -to senior management and the board. This can be achieved through a -dual-reporting relationship. Threats to independence must be managed at -the individual auditor, engagement, functional, and organizational -levels. +Independence is the freedom from conditions that threaten the ability of the +internal audit activity to carry out internal audit responsibilities in an +unbiased manner. To achieve the degree of independence necessary to effectively +carry out the responsibilities of the internal audit activity, the chief audit +executive has direct and unrestricted access to senior management and the board. +This can be achieved through a dual-reporting relationship. Threats to +independence must be managed at the individual auditor, engagement, functional, +and organizational levels. ## Objective -Objectivity is an unbiased mental attitude that allows internal auditors -to perform engagements in such a manner that they believe in their work -product and that no quality compromises are made. Objectivity requires -that internal auditors do not subordinate their judgment on audit -matters to others. Threats to objectivity must be managed at the -individual auditor, engagement, functional, and organizational levels. +Objectivity is an unbiased mental attitude that allows internal auditors to +perform engagements in such a manner that they believe in their work product and +that no quality compromises are made. Objectivity requires that internal +auditors do not subordinate their judgment on audit matters to others. Threats +to objectivity must be managed at the individual auditor, engagement, +functional, and organizational levels. ## Assurance -Assurance services involve the internal auditor\'s objective assessment -of evidence to provide opinions or conclusions regarding an entity, -operation, function, process, system, or other subject matters. The -internal auditor determines the nature and scope of an assurance -engagement. Generally, three parties are participants in assurance -services: (1) the person or group directly involved with the entity, -operation, function, process, system, or other subject - (the process -owner), (2) the person or group making the assessment - (the internal -auditor), and (3) the person or group using the assessment - (the user). +Assurance services involve the internal auditor's objective assessment of +evidence to provide opinions or conclusions regarding an entity, operation, +function, process, system, or other subject matters. The internal auditor +determines the nature and scope of an assurance engagement. Generally, three +parties are participants in assurance services: (1) the person or group directly +involved with the entity, operation, function, process, system, or other subject +- (the process owner), (2) the person or group making the assessment - (the +internal auditor), and (3) the person or group using the assessment - (the +user). ## Consulting -Consulting services are advisory in nature and are generally performed -at the specific request of an engagement client. The nature and scope of -the consulting engagement are subject to agreement with the engagement -client. Consulting services generally involve two parties: (1) the -person or group offering the advice (the internal auditor), and (2) the -person or group seeking and receiving the advice (the engagement -client). When performing consulting services, the internal auditor -should maintain objectivity and not assume management responsibility. +Consulting services are advisory in nature and are generally performed at the +specific request of an engagement client. The nature and scope of the consulting +engagement are subject to agreement with the engagement client. Consulting +services generally involve two parties: (1) the person or group offering the +advice (the internal auditor), and (2) the person or group seeking and receiving +the advice (the engagement client). When performing consulting services, the +internal auditor should maintain objectivity and not assume management +responsibility. ## Governance, Risk Management, & Compliance (GRC) @@ -78,187 +76,173 @@ reliably achieve objectives, address uncertainty and act with integrity. # Audit Charter & Standards -First, it\'s important to note that not every organization needs -internal auditors. In fact, it\'s unwise for an organization to hire -internal auditors unless they have regulatory requirements for auditing -and have the capital to support the department. Internal audit is a cost -center that can only affect revenue indirectly. - -Once an organization determines the need for internal assurance -services, they will hire a Chief Audit Executive and create the audit -charter. This charter is a document, approved by the company\'s -governing body, that will define internal audit\'s purpose, authority, -responsibility, and position within the organization. Fortunately, the -IIA has model charters available to IIA members for those developing or -improving their charter. - -Beyond the charter and organizational documents, internal auditors -follow a few different standards in order to perform their job. First is -the International Professional Practices Framework (IPPF) by the IIA, -which is the model of standards for internal auditing. In addition, -ISACA\'s Information Technology Assurance Framework (ITAF) helps guide -auditors in reference to information technology (IT) compliance and -assurance. Finally, additional standards such as FASB, GAAP, and -industry-specific standards are used when performing internal audit -work. +First, it's important to note that not every organization needs internal +auditors. In fact, it's unwise for an organization to hire internal auditors +unless they have regulatory requirements for auditing and have the capital to +support the department. Internal audit is a cost center that can only affect +revenue indirectly. + +Once an organization determines the need for internal assurance services, they +will hire a Chief Audit Executive and create the audit charter. This charter is +a document, approved by the company's governing body, that will define internal +audit's purpose, authority, responsibility, and position within the +organization. Fortunately, the IIA has model charters available to IIA members +for those developing or improving their charter. + +Beyond the charter and organizational documents, internal auditors follow a few +different standards in order to perform their job. First is the International +Professional Practices Framework (IPPF) by the IIA, which is the model of +standards for internal auditing. In addition, ISACA's Information Technology +Assurance Framework (ITAF) helps guide auditors in reference to information +technology (IT) compliance and assurance. Finally, additional standards such as +FASB, GAAP, and industry-specific standards are used when performing internal +audit work. # Three Lines of Defense -[The IIA](https://theiia.org) released the original Three Lines of -Defense model in 2013, but have released an updated version in 2020. -Here is what the Three Lines of Defense model has historically looked -like: +[The IIA](https://theiia.org) released the original Three Lines of Defense model +in 2013, but have released an updated version in 2020. Here is what the Three +Lines of Defense model has historically looked like: 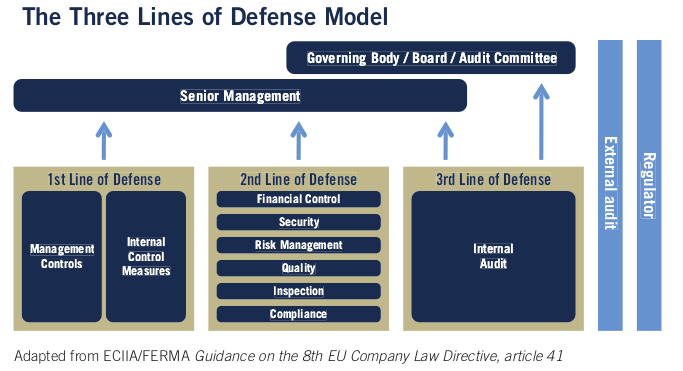 -I won\'t go into depth about the changes made to the model in this -article. Instead, let\'s take a look at the most current model. +I won't go into depth about the changes made to the model in this article. +Instead, let's take a look at the most current model. 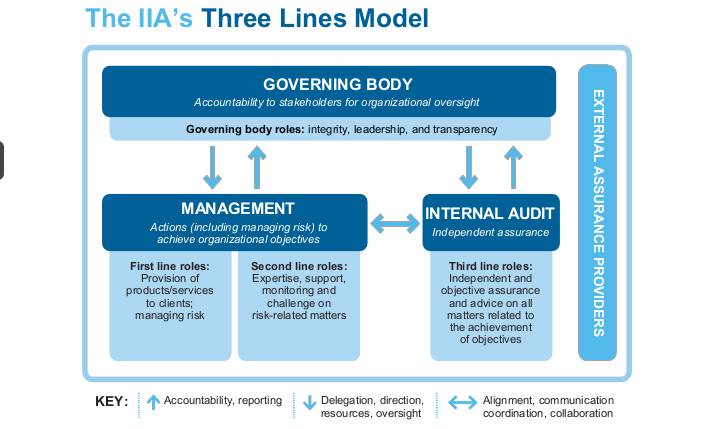 The updated model forgets the strict idea of areas performing their own -functions or line of defense. Instead of talking about management, risk, -and internal audit as 1-2-3, the new model creates a more fluid and -cooperative model. - -Looking at this model from an auditing perspective shows us that -auditors will need to align, communicate, and collaborate with -management, including business area managers and chief officers, as well -as reporting to the governing body. The governing body will instruct -internal audit *functionally* on their goals and track their progress -periodically. - -However, the internal audit department will report *administratively* to -a chief officer in the company for the purposes of collaboration, -direction, and assistance with the business. Note that in most -situations, the governing body is the audit committee on the company\'s -board of directors. - -The result of this structure is that internal audit is an independent -and objective function that can provide assurance over the topics they -audit. +functions or line of defense. Instead of talking about management, risk, and +internal audit as 1-2-3, the new model creates a more fluid and cooperative +model. + +Looking at this model from an auditing perspective shows us that auditors will +need to align, communicate, and collaborate with management, including business +area managers and chief officers, as well as reporting to the governing body. +The governing body will instruct internal audit *functionally* on their goals +and track their progress periodically. + +However, the internal audit department will report *administratively* to a chief +officer in the company for the purposes of collaboration, direction, and +assistance with the business. Note that in most situations, the governing body +is the audit committee on the company's board of directors. + +The result of this structure is that internal audit is an independent and +objective function that can provide assurance over the topics they audit. # Audit Process -A normal audit will generally follow the same process, regardless of the -topic. However, certain special projects or abnormal business areas may -call for changes to the audit process. The audit process is not set in -stone, it\'s simply a set of best practices so that audits can be -performed consistently. +A normal audit will generally follow the same process, regardless of the topic. +However, certain special projects or abnormal business areas may call for +changes to the audit process. The audit process is not set in stone, it's +simply a set of best practices so that audits can be performed consistently. 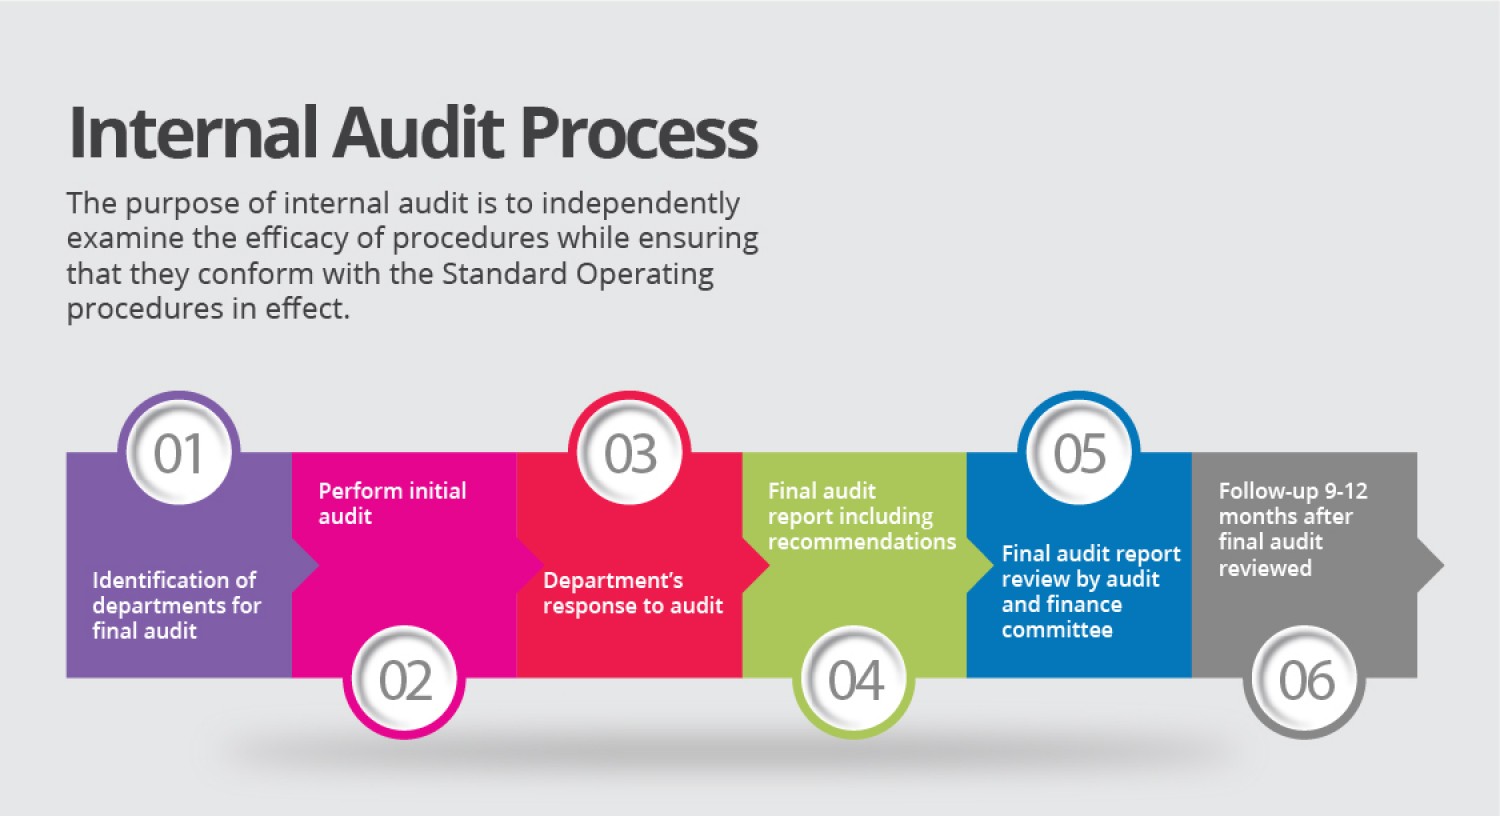 -While different organizations may tweak the process, it will generally -follow this flow: +While different organizations may tweak the process, it will generally follow +this flow: ## 1. Risk Assessment The risk assessment part of the process has historically been performed -annually, but many organizations have moved to performing this process -much more frequently. In fact, some organizations are moving to an agile -approach that can take new risks into the risk assessment and -re-prioritize risk areas on-the-go. To perform a risk assessment, -leaders in internal audit will research industry risks, consult with -business leaders around the company, and perform analyses on company -data. +annually, but many organizations have moved to performing this process much more +frequently. In fact, some organizations are moving to an agile approach that can +take new risks into the risk assessment and re-prioritize risk areas on-the-go. +To perform a risk assessment, leaders in internal audit will research industry +risks, consult with business leaders around the company, and perform analyses on +company data. Once a risk assessment has been documented, the audit department has a -prioritized list of risks that can be audited. This is usually in the -form of auditable entities, such as business areas or departments. +prioritized list of risks that can be audited. This is usually in the form of +auditable entities, such as business areas or departments. ## 2. Planning -During the planning phase of an audit, auditors will meet with the -business area to discuss the various processes, controls, and risks -applicable to the business. This helps the auditors determine the scope -limits for the audit, as well as timing and subject-matter experts. -Certain documents will be created in this phase that will be used to -keep the audit on-track an in-scope as it goes forward. +During the planning phase of an audit, auditors will meet with the business area +to discuss the various processes, controls, and risks applicable to the +business. This helps the auditors determine the scope limits for the audit, as +well as timing and subject-matter experts. Certain documents will be created in +this phase that will be used to keep the audit on-track an in-scope as it goes +forward. ## 3. Testing -The testing phase, also known as fieldwork or execution, is where -internal auditors will take the information they\'ve discovered and test -it against regulations, industry standards, company rules, best -practices, as well as validating that any processes are complete and -accurate. For example, an audit of HR would most likely examine -processes such as employee on-boarding, employee termination, security -of personally identifiable information (PII), or the IT systems involved -in these processes. Company standards would be examined and compared -against how the processes are actually being performed day-to-day, as -well as compared against regulations such as the Equal Employment -Opportunity (EEO), American with Disabilities Act, and National Labor -Relations Act. +The testing phase, also known as fieldwork or execution, is where internal +auditors will take the information they've discovered and test it against +regulations, industry standards, company rules, best practices, as well as +validating that any processes are complete and accurate. For example, an audit +of HR would most likely examine processes such as employee on-boarding, employee +termination, security of personally identifiable information (PII), or the IT +systems involved in these processes. Company standards would be examined and +compared against how the processes are actually being performed day-to-day, as +well as compared against regulations such as the Equal Employment Opportunity +(EEO), American with Disabilities Act, and National Labor Relations Act. ## 4. Reporting -Once all the tests have been completed, the audit will enter the -reporting phase. This is when the audit team will conclude on the -evidence they\'ve collected, interviews they\'ve held, and any opinions -they\'ve formed on the controls in place. A summary of the audit -findings, conclusions, and specific recommendations are officially -communicated to the client through a draft report. Clients have the -opportunity to respond to the report and submit an action plan and time -frame. These responses become part of the final report which is -distributed to the appropriate level of administration. +Once all the tests have been completed, the audit will enter the reporting +phase. This is when the audit team will conclude on the evidence they've +collected, interviews they've held, and any opinions they've formed on the +controls in place. A summary of the audit findings, conclusions, and specific +recommendations are officially communicated to the client through a draft +report. Clients have the opportunity to respond to the report and submit an +action plan and time frame. These responses become part of the final report +which is distributed to the appropriate level of administration. ## 5. Follow-Up -After audits have been completed and management has formed action plans -and time frames for audit issues, internal audit will follow up once -that due date has arrived. In most cases, the follow-up will simply -consist of a meeting to discuss how the action plan has been completed -and to request documentation to prove it. +After audits have been completed and management has formed action plans and time +frames for audit issues, internal audit will follow up once that due date has +arrived. In most cases, the follow-up will simply consist of a meeting to +discuss how the action plan has been completed and to request documentation to +prove it. # Audit Department Structure While an internal audit department is most often thought of as a team of full-time employees, there are actually many different ways in which a -department can be structured. As the world becomes more digital and -fast-paced, outsourcing has become a more attractive option for some -organizations. Internal audit can be fully outsourced or partially -outsourced, allowing for flexibility in cases where turnover is high. - -In addition, departments can implement a rotational model. This allows -for interested employees around the organization to rotate into the -internal audit department for a period of time, allowing them to obtain -knowledge of risks and controls and allowing the internal audit team to -obtain more business area knowledge. This program is popular in very -large organizations, but organizations tend to rotate lower-level audit -staff instead of managers. This helps prevent any significant knowledge -loss as auditors rotate out to business areas. +department can be structured. As the world becomes more digital and fast-paced, +outsourcing has become a more attractive option for some organizations. Internal +audit can be fully outsourced or partially outsourced, allowing for flexibility +in cases where turnover is high. + +In addition, departments can implement a rotational model. This allows for +interested employees around the organization to rotate into the internal audit +department for a period of time, allowing them to obtain knowledge of risks and +controls and allowing the internal audit team to obtain more business area +knowledge. This program is popular in very large organizations, but +organizations tend to rotate lower-level audit staff instead of managers. This +helps prevent any significant knowledge loss as auditors rotate out to business +areas. # Consulting -Consulting is not an easy task at any organization, especially for a -department that can have negative perceptions within the organization as -the \"compliance police.\" However, once an internal audit department -has delivered value to organization, adding consulting to their suite of -services is a smart move. In most cases, Internal Audit can insert -themselves into a consulting role without affecting the process of -project management at the company. This means that internal audit can -add objective assurance and opinions to business areas as they develop -new processes, instead of coming in periodically to audit an area and -file issues that could have been fixed at the beginning. +Consulting is not an easy task at any organization, especially for a department +that can have negative perceptions within the organization as the "compliance +police." However, once an internal audit department has delivered value to +organization, adding consulting to their suite of services is a smart move. In +most cases, Internal Audit can insert themselves into a consulting role without +affecting the process of project management at the company. This means that +internal audit can add objective assurance and opinions to business areas as +they develop new processes, instead of coming in periodically to audit an area +and file issues that could have been fixed at the beginning. # Data Science & Data Analytics 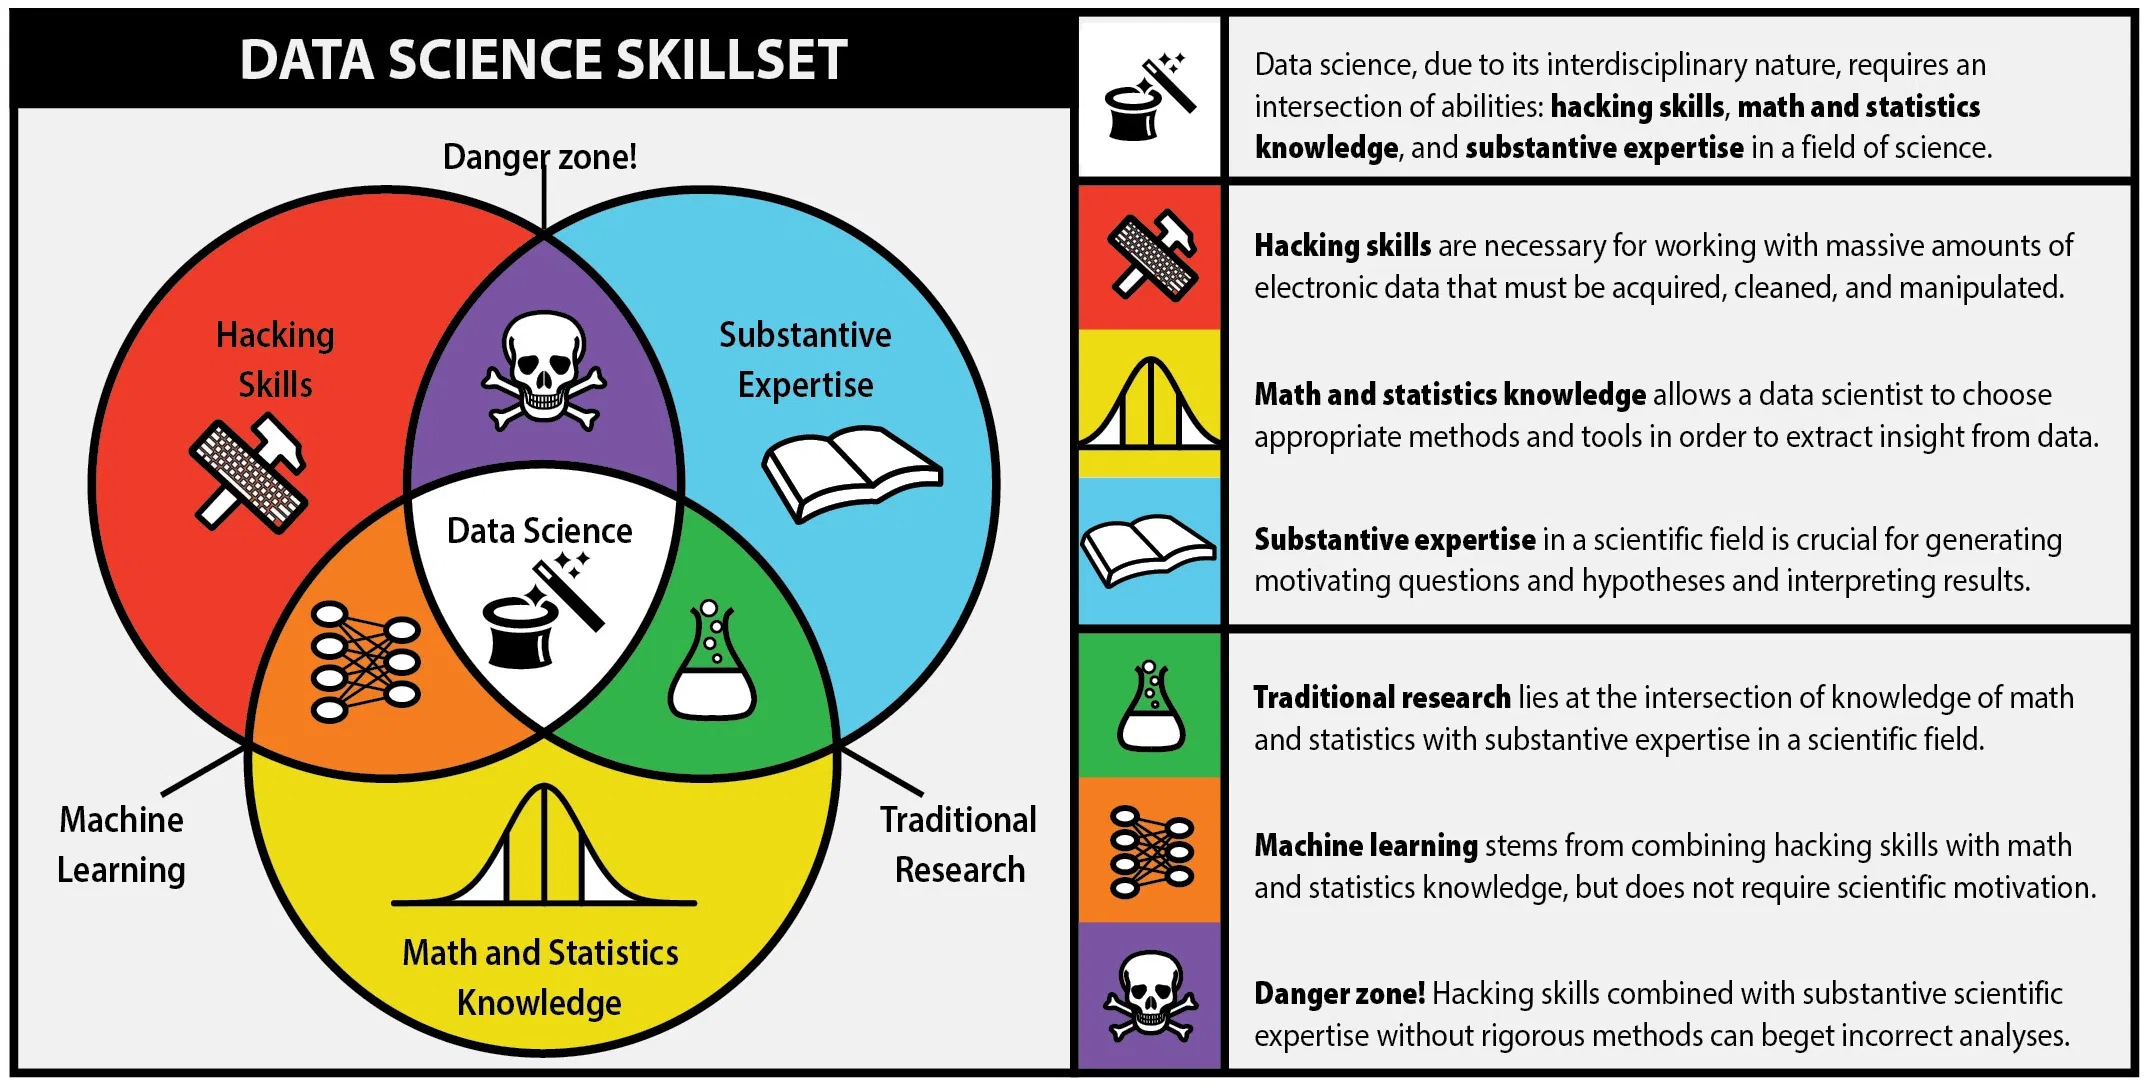 -One major piece of the internal audit function in the modern world is -data science. While the process is data science, most auditors will -refer to anything in this realm as data analytics. Hot topics such as -robotic process automation (RPA), machine learning (ML), and data mining -have taken over the auditing world in recent years. These technologies -have been immensely helpful with increasing the effectiveness and -efficiency of auditors. - -For example, mundane and repetitive tasks can be automated in order for -auditors to make more room in their schedules for labor-intensive work. -Further, auditors will need to adapt technologies like machine learning -in order to extract more value from the data they\'re using to form -conclusions. +One major piece of the internal audit function in the modern world is data +science. While the process is data science, most auditors will refer to anything +in this realm as data analytics. Hot topics such as robotic process automation +(RPA), machine learning (ML), and data mining have taken over the auditing world +in recent years. These technologies have been immensely helpful with increasing +the effectiveness and efficiency of auditors. + +For example, mundane and repetitive tasks can be automated in order for auditors +to make more room in their schedules for labor-intensive work. Further, auditors +will need to adapt technologies like machine learning in order to extract more +value from the data they're using to form conclusions. diff --git a/content/blog/2020-09-25-happiness-map.md b/content/blog/2020-09-25-happiness-map.md index a9ba336..77d9c55 100644 --- a/content/blog/2020-09-25-happiness-map.md +++ b/content/blog/2020-09-25-happiness-map.md @@ -8,28 +8,28 @@ draft = false # Background Information The dataset (obtained from -[Kaggle](https://www.kaggle.com/unsdsn/world-happiness)) used in this -article contains a list of countries around the world, their happiness -rankings and scores, as well as other national scoring measures. +[Kaggle](https://www.kaggle.com/unsdsn/world-happiness)) used in this article +contains a list of countries around the world, their happiness rankings and +scores, as well as other national scoring measures. Fields include: -- Overall rank -- Country or region -- GDP per capita -- Social support -- Healthy life expectancy -- Freedom to make life choices -- Generosity -- Perceptions of corruption +- Overall rank +- Country or region +- GDP per capita +- Social support +- Healthy life expectancy +- Freedom to make life choices +- Generosity +- Perceptions of corruption -There are 156 records. Since there are \~195 countries in the world, we -can see that around 40 countries will be missing from this dataset. +There are 156 records. Since there are ~195 countries in the world, we can see +that around 40 countries will be missing from this dataset. # Install Packages -As always, run the `install` command for all packages needed -to perform analysis. +As always, run the `install` command for all packages needed to perform +analysis. ``` python !pip install folium geopandas matplotlib numpy pandas @@ -38,9 +38,9 @@ to perform analysis. # Import the Data We only need a couple packages to create a choropleth map. We will use -[Folium](https://python-visualization.github.io/folium/), which provides -map visualizations in Python. We will also use geopandas and pandas to -wrangle our data before we put it on a map. +[Folium](https://python-visualization.github.io/folium/), which provides map +visualizations in Python. We will also use geopandas and pandas to wrangle our +data before we put it on a map. ``` python # Import the necessary Python packages @@ -49,14 +49,14 @@ import geopandas as gpd import pandas as pd ``` -To get anything to show up on a map, we need a file that will specify -the boundaries of each country. Luckily, GeoJSON files exist (for free!) -on the internet. To get the boundaries of every country in the world, we -will use the GeoJSON link shown below. +To get anything to show up on a map, we need a file that will specify the +boundaries of each country. Luckily, GeoJSON files exist (for free!) on the +internet. To get the boundaries of every country in the world, we will use the +GeoJSON link shown below. -GeoPandas will take this data and load it into a dataframe so that we -can easily match it to the data we\'re trying to analyze. Let\'s look at -the GeoJSON dataframe: +GeoPandas will take this data and load it into a dataframe so that we can easily +match it to the data we're trying to analyze. Let's look at the GeoJSON +dataframe: ``` python # Load the GeoJSON data with geopandas @@ -67,9 +67,9 @@ geo_data.head() 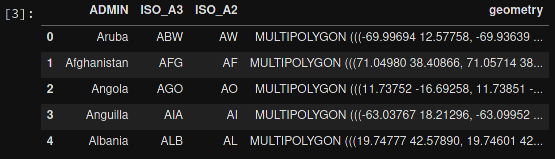 -Next, let\'s load the data from the Kaggle dataset. I\'ve downloaded -this file, so update the file path if you have it somewhere else. After -loading, let\'s take a look at this dataframe: +Next, let's load the data from the Kaggle dataset. I've downloaded this file, +so update the file path if you have it somewhere else. After loading, let's +take a look at this dataframe: ``` python # Load the world happiness data with pandas @@ -82,12 +82,11 @@ Dataframe](https://img.cleberg.net/blog/20200925-world-choropleth-map/happiness_ # Clean the Data -Some countries need to be renamed, or they will be lost when you merge -the happiness and GeoJSON dataframes. This is something I discovered -when the map below showed empty countries. I searched both data frames -for the missing countries to see the naming differences. Any countries -that do not have records in the `happy_data` df will not show -up on the map. +Some countries need to be renamed, or they will be lost when you merge the +happiness and GeoJSON dataframes. This is something I discovered when the map +below showed empty countries. I searched both data frames for the missing +countries to see the naming differences. Any countries that do not have records +in the `happy_data` df will not show up on the map. ``` python # Rename some countries to match our GeoJSON data @@ -112,11 +111,11 @@ happy_data.at[democratic_congo_index, 'Country or region'] = 'Democratic Republi # Merge the Data Now that we have clean data, we need to merge the GeoJSON data with the -happiness data. Since we\'ve stored them both in dataframes, we just -need to call the `.merge()` function. +happiness data. Since we've stored them both in dataframes, we just need to +call the `.merge()` function. -We will also rename a couple columns, just so that they\'re a little -easier to use when we create the map. +We will also rename a couple columns, just so that they're a little easier to +use when we create the map. ``` python # Merge the two previous dataframes into a single geopandas dataframe @@ -133,10 +132,9 @@ Dataframe](https://img.cleberg.net/blog/20200925-world-choropleth-map/merged_df. # Create the Map The data is finally ready to be added to a map. The code below shows the -simplest way to find the center of the map and create a Folium map -object. The important part is to remember to reference the merged -dataframe for our GeoJSON data and value data. The columns specify which -geo data and value data to use. +simplest way to find the center of the map and create a Folium map object. The +important part is to remember to reference the merged dataframe for our GeoJSON +data and value data. The columns specify which geo data and value data to use. ``` python # Assign centroids to map @@ -164,17 +162,16 @@ folium.Choropleth( ).add_to(world_map) ``` -Let\'s look at the resulting map. +Let's look at the resulting map.  # Create a Tooltip on Hover -Now that we have a map set up, we could stop. However, I want to add a -tooltip so that I can see more information about each country. The -`tooltip_data` code below will show a popup on hover with all -the data fields shown. +Now that we have a map set up, we could stop. However, I want to add a tooltip +so that I can see more information about each country. The `tooltip_data` code +below will show a popup on hover with all the data fields shown. ``` python # Adding labels to map @@ -219,8 +216,8 @@ folium.LayerControl().add_to(world_map) world_map ``` -The final image below will show you what the tooltip looks like whenever -you hover over a country. +The final image below will show you what the tooltip looks like whenever you +hover over a country.  diff --git a/content/blog/2020-10-12-mediocrity.md b/content/blog/2020-10-12-mediocrity.md index c13a5ea..f919900 100644 --- a/content/blog/2020-10-12-mediocrity.md +++ b/content/blog/2020-10-12-mediocrity.md @@ -7,115 +7,110 @@ draft = false # Perfect is the Enemy of Good -As the saying goes, \"the best is the enemy of the good.\" As we strive -for perfection, we often fail to realize the implications of such an -undertaking. Attempting to reach perfection is often unrealistic. Even -worse, it can get in the way of achieving a good outcome. In certain -situations, we try so hard to achieve the ideal solution that we have -burned the bridges that would have allowed us to reach a lesser yet -still superb solution. - -Philosophers throughout history have inspected this plight from many -viewpoints. Greek mythology speaks of the [golden -mean](https://en.wikipedia.org/wiki/Golden_mean_(philosophy)), which -uses the story of Icarus to illustrate that sometimes \"the middle -course\" is the best solution. In this story, Daedalus, a famous artist -of his time, built feathered wings for himself and his son so that they -might escape the clutches of King Minos. Daedalus warns his beloved son -whom he loved so much to \"fly the middle course\", between the sea -spray and the sun\'s heat. Icarus did not heed his father; he flew up -and up until the sun melted the wax off his wings. For not heeding the -middle course, he fell into the sea and drowned. +As the saying goes, "the best is the enemy of the good." As we strive for +perfection, we often fail to realize the implications of such an undertaking. +Attempting to reach perfection is often unrealistic. Even worse, it can get in +the way of achieving a good outcome. In certain situations, we try so hard to +achieve the ideal solution that we have burned the bridges that would have +allowed us to reach a lesser yet still superb solution. + +Philosophers throughout history have inspected this plight from many viewpoints. +Greek mythology speaks of the [golden +mean](https://en.wikipedia.org/wiki/Golden_mean_(philosophy)), which uses the +story of Icarus to illustrate that sometimes "the middle course" is the best +solution. In this story, Daedalus, a famous artist of his time, built feathered +wings for himself and his son so that they might escape the clutches of King +Minos. Daedalus warns his beloved son whom he loved so much to "fly the middle +course", between the sea spray and the sun's heat. Icarus did not heed his +father; he flew up and up until the sun melted the wax off his wings. For not +heeding the middle course, he fell into the sea and drowned. More recently, management scholars have explored the [Pareto -principle](https://en.wikipedia.org/wiki/Pareto_principle) and found -that as we increase the frequency of something, or strive to perform -actions to achieve some form of perfection, we run into [diminishing +principle](https://en.wikipedia.org/wiki/Pareto_principle) and found that as we +increase the frequency of something, or strive to perform actions to achieve +some form of perfection, we run into [diminishing returns](https://en.wikipedia.org/wiki/Diminishing_returns). Even further, Harold Demsetz is noted as coining the term [the Nirvana -fallacy](https://en.wikipedia.org/wiki/Nirvana_fallacy) in 1969, which -shows the fallacy of comparing actual things with unrealistic, idealized -alternatives. This is another trap that we may fall into, where we are -constantly thinking of the ultimate solutions to problems, when -something more realistic needs to be considered. - -Over and over throughout history, we\'ve found that perfection is often -unrealistic and unachievable. However, we push ourselves and our peers -to \"give 100%\" or \"go the extra mile,\" while it may be that the -better course is to give a valuable level of effort while considering -the effects of further effort on the outcome. Working harder does not -always help us achieve loftier goals. - -This has presented itself to me most recently during my time studying at -my university. I was anxious and feeling the stresses of my courses, -career, and personal life for quite a while, which was greatly affecting -how well I was doing at school and my level of effort at work. One day, -I happened to be talking to my father when he said something simple that -hit home: - -> All you can do is show up and do your best. Worrying about the -> outcomes won\'t affect the outcome itself. +fallacy](https://en.wikipedia.org/wiki/Nirvana_fallacy) in 1969, which shows the +fallacy of comparing actual things with unrealistic, idealized alternatives. +This is another trap that we may fall into, where we are constantly thinking of +the ultimate solutions to problems, when something more realistic needs to be +considered. + +Over and over throughout history, we've found that perfection is often +unrealistic and unachievable. However, we push ourselves and our peers to "give +100%" or "go the extra mile," while it may be that the better course is to +give a valuable level of effort while considering the effects of further effort +on the outcome. Working harder does not always help us achieve loftier goals. + +This has presented itself to me most recently during my time studying at my +university. I was anxious and feeling the stresses of my courses, career, and +personal life for quite a while, which was greatly affecting how well I was +doing at school and my level of effort at work. One day, I happened to be +talking to my father when he said something simple that hit home: + +> All you can do is show up and do your best. Worrying about the outcomes won't +> affect the outcome itself. The thought was extremely straightforward and uncomplicated, yet it was -something that I had lost sight of during my stress-filled years at -school. Ever since then, I\'ve found myself pausing and remembering that -quote every time I get anxious or stressed. It helps to stop and think -\"Can I do anything to affect the outcome, or am I simply worrying over -something I can\'t change?\" - -# When Mediocrity Isn\'t Enough - -One problem with the philosophies presented in this post is that they -are implemented far too often in situations where mediocrity simply -isn\'t adequate. For example, let\'s take a look at digital user data, -specifically personally-identifiable information (PII). As a -cybersecurity auditor in the United States, I have found that most -companies are concerned more with compliance than any actual safeguards -over the privacy or protection of user data. Other than companies who -have built their reputation on privacy and security, most companies will -use [satisficing](https://en.wikipedia.org/wiki/Satisficing) as their -primary decision-making strategy around user data. - -> Satisficing is a decision-making strategy or cognitive heuristic that -> entails searching through the available alternatives until an -> acceptability threshold is met. - -This means that each decision will be met with certain possible -solutions until one of the solutions meets their minimum acceptable -standards. For companies that deal with user data, the -minimum-acceptable standards come from three areas: - -1. Laws and regulations -2. Competitive pressure -3. Risk of monetary or reputation loss - -Working with project management or auditing, the primary concern here is -the risk of legal ramifications. Since the primary risk comes from laws -and regulations, companies will require that any project that involves -user data must follow all the rules of those laws so that the company -can protect itself from fines or other penalties. - -Following this, companies will consider best practices in order to place -itself in a competitive position (e.g. Google vs. Apple) and review any -recent or ongoing litigation against companies regarding user data. In a -perfect company, management would then consider the ethical -responsibilities of their organization and discuss their -responsibilities over things like personally-identifiable information. - -However, as we mentioned above, most companies follow the idea of -satisficing, which states that they have met the minimum acceptable -standards and can now move on to other decisions. Modern business -culture in the United States dictates that profits are the golden -measure of how well a company or manager is performing, so we often -don\'t think about our responsibilities beyond these basic standards. - -Not all situations demand excellence, but I believe that applying any -philosophy as a broad stroke across one\'s life can be a mistake. We -must be able to think critically about what we are doing as we do it and -ask ourselves a few questions. Have I done everything I can in this -situation? Is mediocrity an acceptable outcome, or should we strive for -perfection, even if we can\'t attain it? +something that I had lost sight of during my stress-filled years at school. Ever +since then, I've found myself pausing and remembering that quote every time I +get anxious or stressed. It helps to stop and think "Can I do anything to +affect the outcome, or am I simply worrying over something I can't change?" + +# When Mediocrity Isn't Enough + +One problem with the philosophies presented in this post is that they are +implemented far too often in situations where mediocrity simply isn't adequate. +For example, let's take a look at digital user data, specifically +personally-identifiable information (PII). As a cybersecurity auditor in the +United States, I have found that most companies are concerned more with +compliance than any actual safeguards over the privacy or protection of user +data. Other than companies who have built their reputation on privacy and +security, most companies will use +[satisficing](https://en.wikipedia.org/wiki/Satisficing) as their primary +decision-making strategy around user data. + +> Satisficing is a decision-making strategy or cognitive heuristic that entails +> searching through the available alternatives until an acceptability threshold +> is met. + +This means that each decision will be met with certain possible solutions until +one of the solutions meets their minimum acceptable standards. For companies +that deal with user data, the minimum-acceptable standards come from three +areas: + +1. Laws and regulations +2. Competitive pressure +3. Risk of monetary or reputation loss + +Working with project management or auditing, the primary concern here is the +risk of legal ramifications. Since the primary risk comes from laws and +regulations, companies will require that any project that involves user data +must follow all the rules of those laws so that the company can protect itself +from fines or other penalties. + +Following this, companies will consider best practices in order to place itself +in a competitive position (e.g. Google vs. Apple) and review any recent or +ongoing litigation against companies regarding user data. In a perfect company, +management would then consider the ethical responsibilities of their +organization and discuss their responsibilities over things like +personally-identifiable information. + +However, as we mentioned above, most companies follow the idea of satisficing, +which states that they have met the minimum acceptable standards and can now +move on to other decisions. Modern business culture in the United States +dictates that profits are the golden measure of how well a company or manager is +performing, so we often don't think about our responsibilities beyond these +basic standards. + +Not all situations demand excellence, but I believe that applying any philosophy +as a broad stroke across one's life can be a mistake. We must be able to think +critically about what we are doing as we do it and ask ourselves a few +questions. Have I done everything I can in this situation? Is mediocrity an +acceptable outcome, or should we strive for perfection, even if we can't attain +it? Taking a few moments to think critically throughout our day, as we make decisions, can have a tremendous effect on the outcomes we create. diff --git a/content/blog/2020-12-27-website-redesign.md b/content/blog/2020-12-27-website-redesign.md index 9224348..cb34ca0 100644 --- a/content/blog/2020-12-27-website-redesign.md +++ b/content/blog/2020-12-27-website-redesign.md @@ -7,98 +7,89 @@ draft = false # A Brief History -As a form of continuous learning and entertainment, I\'ve been running a -handful of websites since 2016 when I took my first programming courses -in college. I maintain one main website, the place I consider the -official website to represent me. Under this site, I have a handful of -subdirectories and subdomains. - -One of the parts I\'ve enjoyed the most about web development is the -aspect of designing an identity for a web page and working to find -exciting ways to display the site\'s content. Inevitably, this means -I\'ve changed the designs for my websites more times than I could -possibly count. Since I don\'t really host anything on my main webpage -that\'s vital, it allows me the freedom to change things as inspiration -strikes. - -Historically, I\'ve relied on core utilities for spacing, components, -and layouts from [Bootstrap](https://getbootstrap.com) and added custom -CSS for fonts, accents, colors, and other items. I also tend to create -sites with no border radius on items, visible borders, and content that -takes up the entire screen (using whitespace inside components instead -of whitespace around my components). +As a form of continuous learning and entertainment, I've been running a handful +of websites since 2016 when I took my first programming courses in college. I +maintain one main website, the place I consider the official website to +represent me. Under this site, I have a handful of subdirectories and +subdomains. + +One of the parts I've enjoyed the most about web development is the aspect of +designing an identity for a web page and working to find exciting ways to +display the site's content. Inevitably, this means I've changed the designs +for my websites more times than I could possibly count. Since I don't really +host anything on my main webpage that's vital, it allows me the freedom to +change things as inspiration strikes. + +Historically, I've relied on core utilities for spacing, components, and +layouts from [Bootstrap](https://getbootstrap.com) and added custom CSS for +fonts, accents, colors, and other items. I also tend to create sites with no +border radius on items, visible borders, and content that takes up the entire +screen (using whitespace inside components instead of whitespace around my +components). # The Redesign Process -About a week ago, I found myself wishing for a new design yet again. The -prior design was largely inspired by IBM\'s [Carbon Design -System](https://www.carbondesignsystem.com) and relied on jQuery, -Bootstrap, along with some compressed -[.webp](https://en.wikipedia.org/wiki/WebP) images. +About a week ago, I found myself wishing for a new design yet again. The prior +design was largely inspired by IBM's [Carbon Design +System](https://www.carbondesignsystem.com) and relied on jQuery, Bootstrap, +along with some compressed [.webp](https://en.wikipedia.org/wiki/WebP) images. -To anyone who knows my preferences toward web design - and even in my -personal life - it should be no surprise that I immediately started -looking for inspiration on minimalism. While there are some decent -minimalistic designs on sites like +To anyone who knows my preferences toward web design - and even in my personal +life - it should be no surprise that I immediately started looking for +inspiration on minimalism. While there are some decent minimalistic designs on +sites like [Dribbble](https://dribbble.com/search/shots/popular/web-design?q=minimalism), people seem to mostly discuss [brutalist web -design](https://brutalist-web.design) when you ask about minimalism. -While brutalist web design doesn\'t have to be minimal, it often is. - -I suppose, in a way, I did create a brutalist website since my HTML is -semantic and accessible, hyperlinks are colored and underlined, and all -native browser functions like scrolling and the back button work as -expected. However, I didn\'t think about brutalism while designing these -sites. - -The new design followed a simple design process. I walked through the -screens on my blog and asked myself: \"Is this element necessary for a -user?\" This allowed me to first start by removing all javascript, which -had the sole purpose of allowing users to open a collapsed navbar on -mobile. Replacing the collapsible navbar allowed me to remove both -jQuery and Bootstrap\'s javascript. - -Next, I removed things like author names (since I\'m literally the only -person who will ever write on this site), multiple ways to click on a -blog post card, blog post descriptions, and the scroll-to-top button. It -also helped to move all categories to a single page, rather than have -each category on its own page. +design](https://brutalist-web.design) when you ask about minimalism. While +brutalist web design doesn't have to be minimal, it often is. + +I suppose, in a way, I did create a brutalist website since my HTML is semantic +and accessible, hyperlinks are colored and underlined, and all native browser +functions like scrolling and the back button work as expected. However, I +didn't think about brutalism while designing these sites. + +The new design followed a simple design process. I walked through the screens on +my blog and asked myself: "Is this element necessary for a user?" This allowed +me to first start by removing all javascript, which had the sole purpose of +allowing users to open a collapsed navbar on mobile. Replacing the collapsible +navbar allowed me to remove both jQuery and Bootstrap's javascript. + +Next, I removed things like author names (since I'm literally the only person +who will ever write on this site), multiple ways to click on a blog post card, +blog post descriptions, and the scroll-to-top button. It also helped to move all +categories to a single page, rather than have each category on its own page. The final big piece to finish the -\"[KonMari](https://en.wikipedia.org/wiki/Marie_Kondo#KonMari_method)\"-like -part of my process was to remove Bootstrap CSS in its entirety. However, -this meant pulling out a few very useful classes, such as -`.img-fluid` and the default font stacks to keep in my custom -CSS. - -After removing all the unnecessary pieces, I was finally able to -reorganize my content and add a very small amount of custom CSS to make -everything pretty. This took a brief amount of time, effectively just -consisting of me converting `<div>` tags into things like -`<ul>` lists and choosing accent colors. +"[KonMari](https://en.wikipedia.org/wiki/Marie_Kondo#KonMari_method)"-like +part of my process was to remove Bootstrap CSS in its entirety. However, this +meant pulling out a few very useful classes, such as `.img-fluid` and the +default font stacks to keep in my custom CSS. + +After removing all the unnecessary pieces, I was finally able to reorganize my +content and add a very small amount of custom CSS to make everything pretty. +This took a brief amount of time, effectively just consisting of me converting +`<div>` tags into things like `<ul>` lists and choosing accent colors. # The Results ## Reflection So, what did all of this reorganizing do to my webpages? Well, first, my -websites are now **ridiculously fast**. Since the prior designs were -also minimal and didn\'t have many images, they measured up in -Firefox\'s Network Monitor around 300 KB - 600KB. After making the -changes, my main site is at 5 KB transferred (22 KB total), and my blog -is at 6.5 KB transferred (13 KB total). **That means the redesigned -pages are less than 2% the size of the old designs.** - -Google Lighthouse ranks the new webpage as 100 in performance, -accessibility, and best practices, with SEO at 92 since they think tap -targets are not sized appropriately for mobile users. First contextual -paints of the pages are under 0.8 seconds with 0 ms of blocking time. -However, the blog subdomain ranks at 100 for all four categories! First -contextual paints of the blog homepage are under 1.0 seconds with 0 ms -of blocking time, due to the fact that the CSS for my blog is within a -separate CSS file, and the CSS for my main website is simply embedded in -the HTML file. - -Now that everything is complete, I can confidently say I\'m happy with -the result and proud to look at the fastest set of websites I\'ve -created so far. +websites are now **ridiculously fast**. Since the prior designs were also +minimal and didn't have many images, they measured up in Firefox's Network +Monitor around 300 KB - 600KB. After making the changes, my main site is at 5 KB +transferred (22 KB total), and my blog is at 6.5 KB transferred (13 KB total). +**That means the redesigned pages are less than 2% the size of the old +designs.** + +Google Lighthouse ranks the new webpage as 100 in performance, accessibility, +and best practices, with SEO at 92 since they think tap targets are not sized +appropriately for mobile users. First contextual paints of the pages are under +0.8 seconds with 0 ms of blocking time. However, the blog subdomain ranks at 100 +for all four categories! First contextual paints of the blog homepage are under +1.0 seconds with 0 ms of blocking time, due to the fact that the CSS for my blog +is within a separate CSS file, and the CSS for my main website is simply +embedded in the HTML file. + +Now that everything is complete, I can confidently say I'm happy with the +result and proud to look at the fastest set of websites I've created so far. diff --git a/content/blog/2020-12-28-neon-drive.md b/content/blog/2020-12-28-neon-drive.md index bce7223..97f73e4 100644 --- a/content/blog/2020-12-28-neon-drive.md +++ b/content/blog/2020-12-28-neon-drive.md @@ -7,51 +7,49 @@ draft = false # Game Description -[Neon Drive](https://store.steampowered.com/app/433910/Neon_Drive/) -presents itself as a simple arcade-style game inspired by the arcade -race games of the 1980s, yet it has managed to take up hours of my life -without much effort. The game description, directly from the Steam page, -is intriguing enough to entice anyone who\'s been looking for a good -arcade racing game: +[Neon Drive](https://store.steampowered.com/app/433910/Neon_Drive/) presents +itself as a simple arcade-style game inspired by the arcade race games of the +1980s, yet it has managed to take up hours of my life without much effort. The +game description, directly from the Steam page, is intriguing enough to entice +anyone who's been looking for a good arcade racing game: -> Neon Drive is a slick retro-futuristic arcade game that will make your -> brain melt. You\'ve been warned. From beautiful cityscapes and ocean -> roads to exploding enemy spaceships, Neon Drive has it all. +> Neon Drive is a slick retro-futuristic arcade game that will make your brain +> melt. You've been warned. From beautiful cityscapes and ocean roads to +> exploding enemy spaceships, Neon Drive has it all. # Gameplay The game holds true to the -[retro-futurism](https://en.wikipedia.org/wiki/Retrofuturism) style, -including chrome female robots, pixelated arcade machines, and +[retro-futurism](https://en.wikipedia.org/wiki/Retrofuturism) style, including +chrome female robots, pixelated arcade machines, and [outrun](https://teddit.net/r/outrun/) aesthetics. -Each level of the game is shown as a separate arcade machine. Each -arcade machine lets you play on Normal, Hard, Insane, Practice, and Free -Run. To beat each arcade, you must reach the end of the level without -crashing your car into the various obstacles on the course. Basic levels -let you move left or right to avoid blocks in the road. Later levels put -you through other tests, such as dodging traffic or blasting asteroids. +Each level of the game is shown as a separate arcade machine. Each arcade +machine lets you play on Normal, Hard, Insane, Practice, and Free Run. To beat +each arcade, you must reach the end of the level without crashing your car into +the various obstacles on the course. Basic levels let you move left or right to +avoid blocks in the road. Later levels put you through other tests, such as +dodging traffic or blasting asteroids. -The game uses synthwave music to keep you on track to make the correct -moves by timing the beats of the songs to the correct moves on the -screen. It reminds me of the early Guitar Hero games, as well as mobile -apps like VOEZ - repetition and staying on-beat is the only way to win. +The game uses synthwave music to keep you on track to make the correct moves by +timing the beats of the songs to the correct moves on the screen. It reminds me +of the early Guitar Hero games, as well as mobile apps like VOEZ - repetition +and staying on-beat is the only way to win. # In-Game Screenshots -Taking a look at the main menu, you can see that Neon Drive plays into -every stereotype you can think of around retro-futuristic, synthwave -arcades (in a good way). +Taking a look at the main menu, you can see that Neon Drive plays into every +stereotype you can think of around retro-futuristic, synthwave arcades (in a +good way).  -Once you get into the first level, we see that the choice of car fits -right in with the stereotypical cars of the 80s, like the +Once you get into the first level, we see that the choice of car fits right in +with the stereotypical cars of the 80s, like the [DeLorean](https://en.wikipedia.org/wiki/DMC_DeLorean) or the [Ferrari -F40](https://en.wikipedia.org/wiki/Ferrari_F40). Each new level comes -with new color schemes and cars, so you should never get tired of the -aesthetic. +F40](https://en.wikipedia.org/wiki/Ferrari_F40). Each new level comes with new +color schemes and cars, so you should never get tired of the aesthetic.  @@ -61,35 +59,34 @@ Personally, I love the orange and blue colors used in level 2:  -If you\'re the competitive type and getting 100% on all arcade machines -isn\'t enough, there are leaderboards for the regular part of the game, -and the endurance game mode. +If you're the competitive type and getting 100% on all arcade machines isn't +enough, there are leaderboards for the regular part of the game, and the +endurance game mode.  # Other Suggestions -Neon Drive sits nicely within the well-founded cult genre of Outrun. -Other games that I\'ve enjoyed in this same spectrum are: +Neon Drive sits nicely within the well-founded cult genre of Outrun. Other games +that I've enjoyed in this same spectrum are: -- [Far Cry 3: Blood +- [Far Cry 3: Blood Dragon](https://store.steampowered.com/app/233270/Far_Cry_3__Blood_Dragon/) -- [Retrowave](https://store.steampowered.com/app/1239690/Retrowave/) -- [Slipstream](https://store.steampowered.com/app/732810/Slipstream/) +- [Retrowave](https://store.steampowered.com/app/1239690/Retrowave/) +- [Slipstream](https://store.steampowered.com/app/732810/Slipstream/) -Although these games aren\'t necessarily in the same genre, they do have -aspects that place them close enough to interest gamers that enjoyed -Neon Drive: +Although these games aren't necessarily in the same genre, they do have aspects +that place them close enough to interest gamers that enjoyed Neon Drive: -- [Black Ice](https://store.steampowered.com/app/311800/Black_Ice/) -- [Cloudpunk](https://store.steampowered.com/app/746850/Cloudpunk/) -- [Need for Speed: +- [Black Ice](https://store.steampowered.com/app/311800/Black_Ice/) +- [Cloudpunk](https://store.steampowered.com/app/746850/Cloudpunk/) +- [Need for Speed: Heat](https://store.steampowered.com/app/1222680/Need_for_Speed_Heat/) -- [VirtuaVerse](https://store.steampowered.com/app/1019310/VirtuaVerse/) - -Of course, if all you really care about is the arcade aspect of these -games, you can check out the [Atari -Vault](https://store.steampowered.com/app/400020/Atari_Vault/) or any of -the other classic games sold on Steam by companies like Namco, Atari. -For something like Nintendo, you\'d have to settle for buying used -classic consoles or delve into the world of emulation. +- [VirtuaVerse](https://store.steampowered.com/app/1019310/VirtuaVerse/) + +Of course, if all you really care about is the arcade aspect of these games, you +can check out the [Atari +Vault](https://store.steampowered.com/app/400020/Atari_Vault/) or any of the +other classic games sold on Steam by companies like Namco, Atari. For something +like Nintendo, you'd have to settle for buying used classic consoles or delve +into the world of emulation. diff --git a/content/blog/2020-12-29-zork.md b/content/blog/2020-12-29-zork.md index 06ccd77..894ae00 100644 --- a/content/blog/2020-12-29-zork.md +++ b/content/blog/2020-12-29-zork.md @@ -7,34 +7,33 @@ draft = false # Download (Free) -Before we get into the game itself, you should know that you can -download Zork for free from Infocom\'s [download -page](http://infocom-if.org/downloads/downloads.html). So feel free to -boot it up and take a ride back to the 1980s with this masterpiece. +Before we get into the game itself, you should know that you can download Zork +for free from Infocom's [download +page](http://infocom-if.org/downloads/downloads.html). So feel free to boot it +up and take a ride back to the 1980s with this masterpiece. # Game Description Zork is an interactive, text-based computer game originally released in -1980. This series, split into three separate games, introduced a robust -and sophisticated text parser to gamers. People were largely used to the -simple commands used in the popular game [Colossal Cave -Adventure](https://en.wikipedia.org/wiki/Colossal_Cave_Adventure), but -Zork allowed users to send more complex commands that included -prepositions and conjunctions. - -Zork tracks your score as you explore the map, find tools, and collect -trophy items (e.g., a jewel-encrusted egg). When you place your trophy -items in the trophy case found in the Living Room area, you gain score -points. Collecting the Twenty Treasures of Zork and placing them within -the trophy case wins the game. However, you must explore the map, solve -puzzles, and avoid being eaten by a grue to collect these treasures. +1980. This series, split into three separate games, introduced a robust and +sophisticated text parser to gamers. People were largely used to the simple +commands used in the popular game [Colossal Cave +Adventure](https://en.wikipedia.org/wiki/Colossal_Cave_Adventure), but Zork +allowed users to send more complex commands that included prepositions and +conjunctions. + +Zork tracks your score as you explore the map, find tools, and collect trophy +items (e.g., a jewel-encrusted egg). When you place your trophy items in the +trophy case found in the Living Room area, you gain score points. Collecting the +Twenty Treasures of Zork and placing them within the trophy case wins the game. +However, you must explore the map, solve puzzles, and avoid being eaten by a +grue to collect these treasures. # The Map -Since Zork is a vast and complex game, it helps to have a map as you -explore and collect your trophies. However, if you want to play the game -as it was truly intended, you should try to play it without using the -map. +Since Zork is a vast and complex game, it helps to have a map as you explore and +collect your trophies. However, if you want to play the game as it was truly +intended, you should try to play it without using the map.  @@ -42,55 +41,47 @@ map. # In-Game Screenshots -After playing the game (for the first time ever) for several weeks -around 2014, I was finally able to beat the game with some online help -to find the last couple items. As I was writing this post, I installed -the game again to grab some screenshots to show off the true glory of -this game. As noted in [Jimmy Maher\'s -playthrough](https://www.filfre.net/2012/01/exploring-zork-part-1/), the -original Zork games looked quite a bit different due to the older -hardware of computers like the Apple II and multiple bug fixes that -Infocom pushed out after the game\'s initial release. My play-through -uses the [Zork -Anthology](https://store.steampowered.com/app/570580/Zork_Anthology/) -version, which utilizes DOSBox on Windows. - -The first screenshot here shows the introductory information, which -doesn\'t include instructions of any kind for the player. If you -haven\'t played text adventures before, try to use simple commands like -\"go west,\" \"look around,\" or \"hit troll with elvish sword.\" - -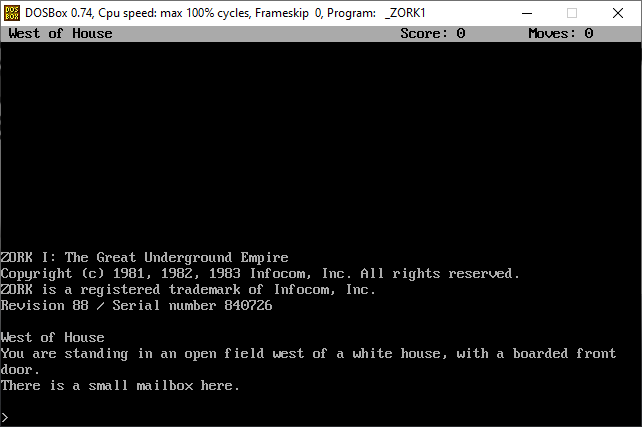 - -In this second screenshot, we see the player has entered the house and -found the trophy case in the living room. The lantern and sword in this -room allow the player to explore dark areas and attack enemies. If you -don\'t use the lantern, you won\'t be able to see anything in dark -areas, and you may be eaten by a grue. - -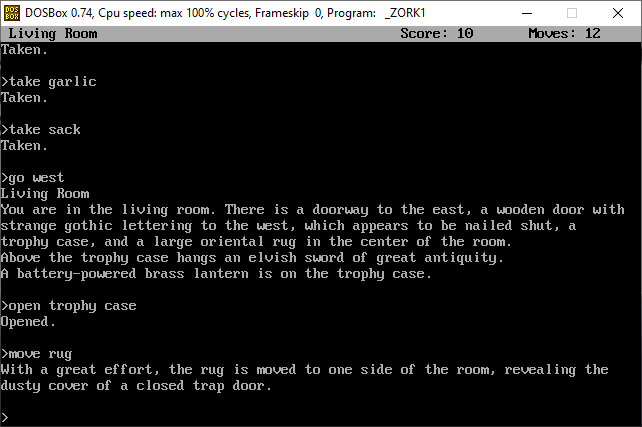 - -Finally, we see that the player has found the first treasure: a -jewel-encrusted egg. These treasures can be taken back to the house and -placed in the trophy case or carried until you feel like you want to put -things away. - -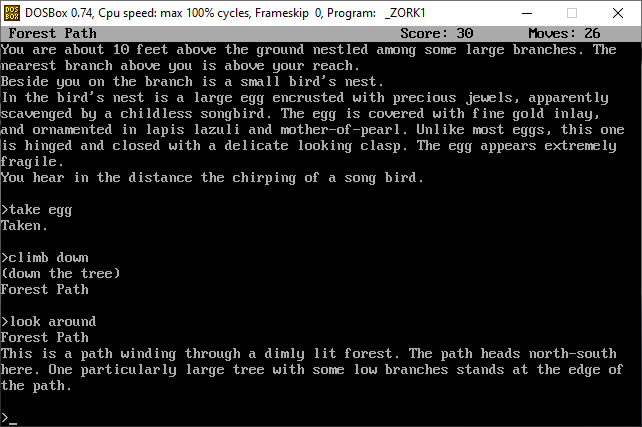 +After playing the game (for the first time ever) for several weeks around 2014, +I was finally able to beat the game with some online help to find the last +couple items. As I was writing this post, I installed the game again to grab +some screenshots to show off the true glory of this game. As noted in [Jimmy +Maher's playthrough](https://www.filfre.net/2012/01/exploring-zork-part-1/), +the original Zork games looked quite a bit different due to the older hardware +of computers like the Apple II and multiple bug fixes that Infocom pushed out +after the game's initial release. My play-through uses the [Zork +Anthology](https://store.steampowered.com/app/570580/Zork_Anthology/) version, +which utilizes DOSBox on Windows. + +The first screenshot here shows the introductory information, which doesn't +include instructions of any kind for the player. If you haven't played text +adventures before, try to use simple commands like "go west," "look around," +or "hit troll with elvish sword." + + + +In this second screenshot, we see the player has entered the house and found the +trophy case in the living room. The lantern and sword in this room allow the +player to explore dark areas and attack enemies. If you don't use the lantern, +you won't be able to see anything in dark areas, and you may be eaten by a +grue. + + + +Finally, we see that the player has found the first treasure: a jewel-encrusted +egg. These treasures can be taken back to the house and placed in the trophy +case or carried until you feel like you want to put things away. + + # Conclusion -It\'s been quite a few years since I first played Zork, but I clearly -remember the late nights and bloodshot eyes that helped me find all the -treasures. This game is well worth the time and effort, even though the -text-based aspect may be off-putting to gamers who didn\'t have to grow -up playing games without graphics. However, I believe that the strategy -and skills learned in early video games like Zork can actually help you, -even when playing newer games. +It's been quite a few years since I first played Zork, but I clearly remember +the late nights and bloodshot eyes that helped me find all the treasures. This +game is well worth the time and effort, even though the text-based aspect may be +off-putting to gamers who didn't have to grow up playing games without +graphics. However, I believe that the strategy and skills learned in early video +games like Zork can actually help you, even when playing newer games. If you do decide to play Zork, you can download Zork I, II, and III from -Infocom\'s [download -page](http://infocom-if.org/downloads/downloads.html) for free or search -the internet for an online version. +Infocom's [download page](http://infocom-if.org/downloads/downloads.html) for +free or search the internet for an online version. diff --git a/content/blog/2021-01-01-seum.md b/content/blog/2021-01-01-seum.md index 49cac88..1cdb759 100644 --- a/content/blog/2021-01-01-seum.md +++ b/content/blog/2021-01-01-seum.md @@ -8,86 +8,79 @@ draft = false # Game Description [SEUM: Speedrunners from -Hell](https://store.steampowered.com/app/457210/SEUM_Speedrunners_from_Hell/) -is an incredibly fast-paced mashup of a puzzle game and a free-running -game. Created by [Pine Studio](https://pinestudio.co) in early 2016 and -first released as a [demo on +Hell](https://store.steampowered.com/app/457210/SEUM_Speedrunners_from_Hell/) is +an incredibly fast-paced mashup of a puzzle game and a free-running game. +Created by [Pine Studio](https://pinestudio.co) in early 2016 and first released +as a [demo on GameJolt](https://gamejolt.com/games/seum-speedrunners-from-hell-demo/154868), -this game was successfully green-lit on Steam and has amassed a cult -following on multiple consoles. +this game was successfully green-lit on Steam and has amassed a cult following +on multiple consoles. -Here\'s the game description straight from the developers: +Here's the game description straight from the developers: -> Like a bastard child of Quake 3 and Super Meat Boy, SEUM: Speedrunners -> from Hell is truly hardcore and focuses on speed and fast reaction. +> Like a bastard child of Quake 3 and Super Meat Boy, SEUM: Speedrunners from +> Hell is truly hardcore and focuses on speed and fast reaction. # Story -SEUM does a great job setting the stage when you open the game for the -first time, playing an animated video in the form of comic book images. -You see Marty, the protagonist, sitting around drinking his beer as -Satan busts down the door, cuts his hand off, and steals all his beer -and bacon. As Satan is leaving, Marty whips a vinyl record across the -room and cuts off one of Satan\'s hands. This hand is what allows you to -use all the powers in the game. +SEUM does a great job setting the stage when you open the game for the first +time, playing an animated video in the form of comic book images. You see Marty, +the protagonist, sitting around drinking his beer as Satan busts down the door, +cuts his hand off, and steals all his beer and bacon. As Satan is leaving, Marty +whips a vinyl record across the room and cuts off one of Satan's hands. This +hand is what allows you to use all the powers in the game. -Check out the screenshot below for one of the first panels of the -storyline: +Check out the screenshot below for one of the first panels of the storyline:  # Gameplay -To accomplish each level, you will need to get to the final blue portal -under a certain time limit. You can beat a level by getting to the -portal before the time meter runs out or \"Dominate\" a level by beating -it within a shorter time limit (noted by a bright red/orange color in -the time meter). - -The portal is usually set behind locked gates, protected by dangerous -defenses, or in hard-to-reach places. To reach the portal, you\'ll need -to go through any existing orange portals, light all yellow beacons, -avoid things like fireballs and blades, or use any satanic power orbs -lying around. These special abilities include: - -- Gravity -- Teleport -- Rewind -- Spawn platform -- Roar (DLC) -- Rocket (DLC) -- Shadow world (DLC) - -For the main storyline, there are nine floors to beat. Each floor -contains nine regular levels, one boss level, and one bonus level; -although you don\'t technically need to beat all levels to advance to -the next floor. - - +To accomplish each level, you will need to get to the final blue portal under a +certain time limit. You can beat a level by getting to the portal before the +time meter runs out or "Dominate" a level by beating it within a shorter time +limit (noted by a bright red/orange color in the time meter). + +The portal is usually set behind locked gates, protected by dangerous defenses, +or in hard-to-reach places. To reach the portal, you'll need to go through any +existing orange portals, light all yellow beacons, avoid things like fireballs +and blades, or use any satanic power orbs lying around. These special abilities +include: + +- Gravity +- Teleport +- Rewind +- Spawn platform +- Roar (DLC) +- Rocket (DLC) +- Shadow world (DLC) + +For the main storyline, there are nine floors to beat. Each floor contains nine +regular levels, one boss level, and one bonus level; although you don't +technically need to beat all levels to advance to the next floor. + + # In-Game Screenshots -The main menu gives you plenty of options for tuning your system, -playing main levels, playing the DLC, or exploring the other game modes. +The main menu gives you plenty of options for tuning your system, playing main +levels, playing the DLC, or exploring the other game modes. - + -Once you enter a level, you can look around and strategize before -starting. Clicking any button will start the menu, and you\'ll have to -restart if you die. One of the great things about SEUM is that it has -great keyboard shortcuts. You can quickly smash `R` to -restart the level or `M` to return to the level menu. +Once you enter a level, you can look around and strategize before starting. +Clicking any button will start the menu, and you'll have to restart if you die. +One of the great things about SEUM is that it has great keyboard shortcuts. You +can quickly smash `R` to restart the level or `M` to return to the level menu.  -Once you\'re able to win a level, you\'ll see the high scores and can -watch replays of the best scores. +Once you're able to win a level, you'll see the high scores and can watch +replays of the best scores.  -Each regular level contains a beer in a disguised location that may take -some out-of-the-box thinking. +Each regular level contains a beer in a disguised location that may take some +out-of-the-box thinking.  diff --git a/content/blog/2021-01-04-fediverse.md b/content/blog/2021-01-04-fediverse.md index e663f45..bf23946 100644 --- a/content/blog/2021-01-04-fediverse.md +++ b/content/blog/2021-01-04-fediverse.md @@ -7,101 +7,97 @@ draft = false # What is the Fediverse? -The fediverse is a federated universe of servers commonly used for -sharing content, like social media. So, instead of having to rely on a -single organization to run the server (e.g. Facebook), the fediverse is -a giant collection of servers across the world, owned by many people and -organizations. - -Take a look at this depiction of a federated network. Each server in -this photo is owned and run by different administrators/owners. -Federated networks are best explained as email servers: you have an -email account that exists on a server (e.g. Outlook), your friend has an -account on a different server (e.g. GMail), and another friend has an -account on a third server (e.g. ProtonMail). All three of you can talk -and communicate back and forth without having to be on the same server. -However, responsible email admins are there to set rules and control the +The fediverse is a federated universe of servers commonly used for sharing +content, like social media. So, instead of having to rely on a single +organization to run the server (e.g. Facebook), the fediverse is a giant +collection of servers across the world, owned by many people and organizations. + +Take a look at this depiction of a federated network. Each server in this photo +is owned and run by different administrators/owners. Federated networks are best +explained as email servers: you have an email account that exists on a server +(e.g. Outlook), your friend has an account on a different server (e.g. GMail), +and another friend has an account on a third server (e.g. ProtonMail). All three +of you can talk and communicate back and forth without having to be on the same +server. However, responsible email admins are there to set rules and control the traffic going in/out of the server.  -The main objective of this architecture is to decentralize the control -within the internet connections. For example, if you run your own -Mastodon instance, you and your users can\'t be censored or impacted in -any way by authorities of another Mastodon instance. Some users have -praised these features due to recent criticism of popular social media -websites that may be over-censoring their users. - -This strategy is great for making sure control of the social web isn\'t -controlled by a single organization, but it also has some downsides. If -I create a Mastodon instance and get a ton of users to sign up, I can -shut the server down at any time. That means you\'re at risk of losing -the content you\'ve created unless you back it up, or the server backs -it up for you. Also, depending on the software used (e.g. Mastodon, -Pixelfed, etc.), censorship may still be an issue if the server admins -decide they want to censor their users. Now, censorship isn\'t always a -bad thing and can even benefit the community as a whole, but you\'ll -want to determine which servers align with your idea of proper -censorship. - -However, these are risks that we take when we sign up for any online -platform. Whatever your reason is for trying out federated social -networks, they are part of the future of the internet. However, the -popularity of these services is still yet to be determined, especially -with the increased difficulty understanding and signing up for these -platforms. Perhaps increased regulation and litigation against current -social media sites will push more users into the fediverse. +The main objective of this architecture is to decentralize the control within +the internet connections. For example, if you run your own Mastodon instance, +you and your users can't be censored or impacted in any way by authorities of +another Mastodon instance. Some users have praised these features due to recent +criticism of popular social media websites that may be over-censoring their +users. + +This strategy is great for making sure control of the social web isn't +controlled by a single organization, but it also has some downsides. If I create +a Mastodon instance and get a ton of users to sign up, I can shut the server +down at any time. That means you're at risk of losing the content you've +created unless you back it up, or the server backs it up for you. Also, +depending on the software used (e.g. Mastodon, Pixelfed, etc.), censorship may +still be an issue if the server admins decide they want to censor their users. +Now, censorship isn't always a bad thing and can even benefit the community as +a whole, but you'll want to determine which servers align with your idea of +proper censorship. + +However, these are risks that we take when we sign up for any online platform. +Whatever your reason is for trying out federated social networks, they are part +of the future of the internet. However, the popularity of these services is +still yet to be determined, especially with the increased difficulty +understanding and signing up for these platforms. Perhaps increased regulation +and litigation against current social media sites will push more users into the +fediverse. # Federated Alternatives to Popular Sites -The list below is a small guide that will show you federated -alternatives to current popular websites. There are many more out there, -so go and explore: you might just find the perfect home. +The list below is a small guide that will show you federated alternatives to +current popular websites. There are many more out there, so go and explore: you +might just find the perfect home. ## Reddit -- [Lemmy](https://lemmy.ml/instances) +- [Lemmy](https://lemmy.ml/instances) ## Twitter/Facebook/Tumblr -- [Mastodon](https://joinmastodon.org) -- [Diaspora](https://diasporafoundation.org) -- [Friendica](https://friendi.ca) -- [GNU Social](https://gnusocial.network) -- [Pleroma](https://pleroma.social) +- [Mastodon](https://joinmastodon.org) +- [Diaspora](https://diasporafoundation.org) +- [Friendica](https://friendi.ca) +- [GNU Social](https://gnusocial.network) +- [Pleroma](https://pleroma.social) ## Instagram -- [Pixelfed](https://pixelfed.org) +- [Pixelfed](https://pixelfed.org) ## Slack/Discord -- [Matrix](https://element.io) +- [Matrix](https://element.io) ## Youtube/Vimeo -- [Peertube](https://joinpeertube.org) +- [Peertube](https://joinpeertube.org) ## Spotify/Soundcloud -- [Funkwhale](https://funkwhale.audio) +- [Funkwhale](https://funkwhale.audio) ## Podcasting -- [Pubcast](https://pubcast.pub) +- [Pubcast](https://pubcast.pub) ## Medium/Blogger -- [WriteFreely](https://writefreely.org) +- [WriteFreely](https://writefreely.org) # Get Started -The best way to get started is to simply sign up and learn as you go. If -you\'re comfortable signing up through a Mastodon, Pleroma, or Friendica -server, here is [a list of themed -servers](https://fediverse.party/en/portal/servers) to choose from. If -you\'re looking for something else, try a web search for a federated +The best way to get started is to simply sign up and learn as you go. If you're +comfortable signing up through a Mastodon, Pleroma, or Friendica server, here is +[a list of themed servers](https://fediverse.party/en/portal/servers) to choose +from. If you're looking for something else, try a web search for a federated alternative to your favorite sites. Find a server that focuses on your passions and start there! diff --git a/content/blog/2021-01-07-ufw.md b/content/blog/2021-01-07-ufw.md index da62aac..803173c 100644 --- a/content/blog/2021-01-07-ufw.md +++ b/content/blog/2021-01-07-ufw.md @@ -7,30 +7,29 @@ draft = false # Uncomplicated Firewall -Uncomplicated Firewall, also known as ufw, is a convenient and -beginner-friendly way to enforce OS-level firewall rules. For those who -are hosting servers or any device that is accessible to the world (i.e., -by public IP or domain name), it\'s critical that a firewall is properly -implemented and active. - -Ufw is available by default in all Ubuntu installations after 8.04 LTS. -For other distributions, you can look to install ufw or check if there -are alternative firewalls installed already. There are usually -alternatives available, such as Fedora\'s `firewall` and the -package available on most distributions: `iptables`. Ufw is -considered a beginner-friendly front-end to iptables. - -[Gufw](https://gufw.org) is available as a graphical user interface -(GUI) application for users who are uncomfortable setting up a firewall -through a terminal. +Uncomplicated Firewall, also known as ufw, is a convenient and beginner-friendly +way to enforce OS-level firewall rules. For those who are hosting servers or any +device that is accessible to the world (i.e., by public IP or domain name), +it's critical that a firewall is properly implemented and active. + +Ufw is available by default in all Ubuntu installations after 8.04 LTS. For +other distributions, you can look to install ufw or check if there are +alternative firewalls installed already. There are usually alternatives +available, such as Fedora's `firewall` and the package available on most +distributions: `iptables`. Ufw is considered a beginner-friendly front-end to +iptables. + +[Gufw](https://gufw.org) is available as a graphical user interface (GUI) +application for users who are uncomfortable setting up a firewall through a +terminal. 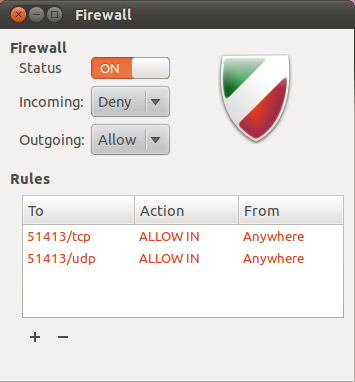 # Getting Help -If you need help figuring out commands, remember that you can run the -`--help` flag to get a list of options. +If you need help figuring out commands, remember that you can run the `--help` +flag to get a list of options. ```sh sudo ufw --help @@ -38,20 +37,19 @@ sudo ufw --help # Set Default State -The proper way to run a firewall is to set a strict default state and -slowly open up ports that you want to allow. This helps prevent anything -malicious from slipping through the cracks. The following command -prevents all incoming traffic (other than the rules we specify later), -but you can also set this for outgoing connections, if necessary. +The proper way to run a firewall is to set a strict default state and slowly +open up ports that you want to allow. This helps prevent anything malicious from +slipping through the cracks. The following command prevents all incoming traffic +(other than the rules we specify later), but you can also set this for outgoing +connections, if necessary. ```sh sudo ufw default deny incoming ``` -You should also allow outgoing traffic if you want to allow the device -to communicate back to you or other parties. For example, media servers -like Plex need to be able to send out data related to streaming the -media. +You should also allow outgoing traffic if you want to allow the device to +communicate back to you or other parties. For example, media servers like Plex +need to be able to send out data related to streaming the media. ```sh sudo ufw default allow outgoing @@ -59,24 +57,23 @@ sudo ufw default allow outgoing # Adding Port Rules -Now that we\'ve disabled all incoming traffic by default, we need to -open up some ports (or else no traffic would be able to come in). If you -need to be able to `ssh` into the machine, you\'ll need to -open up port 22. +Now that we've disabled all incoming traffic by default, we need to open up +some ports (or else no traffic would be able to come in). If you need to be able +to `ssh` into the machine, you'll need to open up port 22. ```sh sudo ufw allow 22 ``` -You can also issue more restrictive rules. The following rule will allow -`ssh` connections only from machines on the local subnet. +You can also issue more restrictive rules. The following rule will allow `ssh` +connections only from machines on the local subnet. ```sh sudo ufw allow proto tcp from 192.168.0.0/24 to any port 22 ``` -If you need to set a rule that isn\'t tcp, just append your connection -type to the end of the rule. +If you need to set a rule that isn't tcp, just append your connection type to +the end of the rule. ```sh sudo ufw allow 1900/udp @@ -99,8 +96,7 @@ sudo reboot now # Checking Status -Now that the firewall is enabled, let\'s check and see what the rules -look like. +Now that the firewall is enabled, let's check and see what the rules look like. ```sh sudo ufw status numbered @@ -117,9 +113,9 @@ Status: active # Deleting Rules -If you need to delete a rule, you need to know the number associated -with that rule. Let\'s delete the first rule in the table above. You\'ll -be asked to confirm the deletion as part of this process. +If you need to delete a rule, you need to know the number associated with that +rule. Let's delete the first rule in the table above. You'll be asked to +confirm the deletion as part of this process. ```sh sudo ufw delete 1 @@ -127,11 +123,10 @@ sudo ufw delete 1 # Managing App Rules -Luckily, there\'s a convenient way for installed applications to create -files that ufw can easily implement so that you don\'t have to search -and find which ports your application requires. To see if your device -has any applications with pre-installed ufw rules, execute the following -command: +Luckily, there's a convenient way for installed applications to create files +that ufw can easily implement so that you don't have to search and find which +ports your application requires. To see if your device has any applications with +pre-installed ufw rules, execute the following command: ```sh sudo ufw app list @@ -148,14 +143,14 @@ Available applications: plexmediaserver-dlna ``` -If you want to get more information on a specific app rule, use the -`info` command. +If you want to get more information on a specific app rule, use the `info` +command. ```sh sudo ufw app info plexmediaserver-dlna ``` -You\'ll get a blurb of info back like this: +You'll get a blurb of info back like this: ``` txt Profile: plexmediaserver-dlna @@ -167,8 +162,8 @@ Ports: 32469/tcp ``` -You can add or delete app rules the same way that you\'d add or delete -specific port rules. +You can add or delete app rules the same way that you'd add or delete specific +port rules. ```sh sudo ufw allow plexmediaserver-dlna @@ -180,12 +175,12 @@ sudo ufw delete RULE|NUM # Creating App Rules -If you\'d like to create you own app rule, you\'ll need to create a file -in the `/etc/ufw/applications.d` directory. Within the file -you create, you need to make sure the content is properly formatted. +If you'd like to create you own app rule, you'll need to create a file in the +`/etc/ufw/applications.d` directory. Within the file you create, you need to +make sure the content is properly formatted. -For example, here are the contents my `plexmediaserver` file, -which creates three distinct app rules for ufw: +For example, here are the contents my `plexmediaserver` file, which creates +three distinct app rules for ufw: ``` config [plexmediaserver] @@ -204,8 +199,8 @@ description=The Plex Media Server (with additional DLNA capability) ports=32400/tcp|3005/tcp|5353/udp|8324/tcp|32410:32414/udp|1900/udp|32469/tcp ``` -So, if I wanted to create a custom app rule called \"mycustomrule,\" -I\'d create a file and add my content like this: +So, if I wanted to create a custom app rule called "mycustomrule," I'd create +a file and add my content like this: ```sh sudo nano /etc/ufw/applications.d/mycustomrule diff --git a/content/blog/2021-02-19-macos.md b/content/blog/2021-02-19-macos.md index 26fdaa7..bcdf698 100644 --- a/content/blog/2021-02-19-macos.md +++ b/content/blog/2021-02-19-macos.md @@ -7,79 +7,74 @@ draft = false # Diving into macOS -After spending nearly 15 years working with Windows and 8 years on -Linux, I have experienced macOS for the first time. By chance, my spouse -happened to buy a new MacBook and gifted me their 2013 model. Of course, -I still consider my Linux desktop to be my daily driver and keep Windows -around for gaming needs, but over the past week I\'ve found myself using -the MacBook more and more for things that don\'t require gaming specs or -advanced dev tools. +After spending nearly 15 years working with Windows and 8 years on Linux, I have +experienced macOS for the first time. By chance, my spouse happened to buy a new +MacBook and gifted me their 2013 model. Of course, I still consider my Linux +desktop to be my daily driver and keep Windows around for gaming needs, but over +the past week I've found myself using the MacBook more and more for things that +don't require gaming specs or advanced dev tools. # Initial Thoughts -Before I move on to the technical aspects of my set-up, I want to take -some time and express my thoughts on the overall OS. +Before I move on to the technical aspects of my set-up, I want to take some time +and express my thoughts on the overall OS.  -As expected, the initial computer setup is a breeze with Mac\'s guided -GUI installer. - -The desktop itself reminds me of GNOME more than anything else I\'ve -seen: even Pantheon from [ElementaryOS](https://elementary.io/), which -people commonly refer to as the closest Linux distro to macOS. The -desktop toolbar is great and far surpasses the utility of the GNOME -toolbar due to the fact that the extensions and icons *actually work*. I -launch macOS and immediately see my shortcuts for Tresorit, Bitwarden, -and Mullvad pop up as the computer loads. - -Even further, the app dock is very useful and will be yet another -familiarity for GNOME users. I know many people like panels instead of -docks, but I\'ve always found docks to have a more pleasing UI. However, -I had to disable the \"Show recent applications in Dock\" preference; I -can\'t stand items taking up precious screen space if I\'m not currently -using them. On that same note, it\'s taking me some time to get use to -the fact that I have to manually quit an app or else it will still stay -open/active in the dock, even if I\'ve closed out all windows for that -app (e.g. Firefox). - -Overall, I\'m having a lot of fun and for users who spend a large -majority of their time performing basic tasks like web browsing, -writing, watching media, etc., macOS is a fantastic option. +As expected, the initial computer setup is a breeze with Mac's guided GUI +installer. + +The desktop itself reminds me of GNOME more than anything else I've seen: even +Pantheon from [ElementaryOS](https://elementary.io/), which people commonly +refer to as the closest Linux distro to macOS. The desktop toolbar is great and +far surpasses the utility of the GNOME toolbar due to the fact that the +extensions and icons *actually work*. I launch macOS and immediately see my +shortcuts for Tresorit, Bitwarden, and Mullvad pop up as the computer loads. + +Even further, the app dock is very useful and will be yet another familiarity +for GNOME users. I know many people like panels instead of docks, but I've +always found docks to have a more pleasing UI. However, I had to disable the +"Show recent applications in Dock" preference; I can't stand items taking up +precious screen space if I'm not currently using them. On that same note, it's +taking me some time to get use to the fact that I have to manually quit an app +or else it will still stay open/active in the dock, even if I've closed out all +windows for that app (e.g. Firefox). + +Overall, I'm having a lot of fun and for users who spend a large majority of +their time performing basic tasks like web browsing, writing, watching media, +etc., macOS is a fantastic option. The rest of this post explains the technicalities of how I set up my CLI -environment to make me feel more at-home, similar to the environments I -set up on Fedora, Ubuntu, etc. +environment to make me feel more at-home, similar to the environments I set up +on Fedora, Ubuntu, etc. # Making it Feel Like Home -If you\'re someone who uses Linux primarily, no doubt your first thought -when booting macOS will be the same as mine was: \"Where is the terminal -and how do I set up my favorite utilities?\" +If you're someone who uses Linux primarily, no doubt your first thought when +booting macOS will be the same as mine was: "Where is the terminal and how do I +set up my favorite utilities?" -Luckily, macOS hasn\'t completely hidden away the development tools from -the average user. You can easily find the Terminal app in the Launchpad -area, but it\'s probably not what you\'re used to. I was surprised (and -happy) to see that the default shell is `zsh`, the shell I -use on all of my Linux distros. However, the commands are not the same - -even the ones you may think are native to the shell. Commands like -`dir` do not exist, so other native commands like -`ls -la` or `pwd` are more useful here. +Luckily, macOS hasn't completely hidden away the development tools from the +average user. You can easily find the Terminal app in the Launchpad area, but +it's probably not what you're used to. I was surprised (and happy) to see that +the default shell is `zsh`, the shell I use on all of my Linux distros. However, +the commands are not the same - even the ones you may think are native to the +shell. Commands like `dir` do not exist, so other native commands like `ls -la` +or `pwd` are more useful here. -With only a few minutes of installing and tweaking a few packages, I was -able to recreate a terminal environment that I feel very comfortable -using. See the image below for a preview of the iTerm2 app with a split -view between my macOS desktop shell and an SSH session into my server. +With only a few minutes of installing and tweaking a few packages, I was able to +recreate a terminal environment that I feel very comfortable using. See the +image below for a preview of the iTerm2 app with a split view between my macOS +desktop shell and an SSH session into my server.  # Xcode -My first step was to search the web for any hints on how to get -`zsh` back up to the state I like, with extensions, themes, -etc. My first step was to install the CLI tools for -[Xcode](https://developer.apple.com/xcode/), Apple\'s suite of +My first step was to search the web for any hints on how to get `zsh` back up to +the state I like, with extensions, themes, etc. My first step was to install the +CLI tools for [Xcode](https://developer.apple.com/xcode/), Apple's suite of development tools. ```sh @@ -92,8 +87,8 @@ sudo xcode-select --install # Homebrew -Next up is to install [Homebrew](https://brew.sh), a nifty package -manager for macOS. +Next up is to install [Homebrew](https://brew.sh), a nifty package manager for +macOS. ```sh /bin/bash -c "$(curl -fsSL https://raw.githubusercontent.com/Homebrew/install/HEAD/install.sh)" @@ -107,10 +102,9 @@ Error: Failed to link all completions, docs and manpages: Failed during: /usr/local/bin/brew update --force --quiet ``` -I found that the following permission modification worked like a charm. -However, I noted that some users online discussed the fact that this -solution may not work if your system has multiple users who use -Homebrew. +I found that the following permission modification worked like a charm. However, +I noted that some users online discussed the fact that this solution may not +work if your system has multiple users who use Homebrew. ```sh sudo chown -R $(whoami) $(brew --prefix)/* @@ -128,17 +122,16 @@ brew cleanup # iTerm2 -Now that I\'ve installed the basic utilities for development, I moved -onto installing iTerm2, a much better terminal than the default. +Now that I've installed the basic utilities for development, I moved onto +installing iTerm2, a much better terminal than the default. ```sh brew install --cask iterm2 ``` -I also used the `Make iTerm2 Default Term` and -`Install Shell Integration` options in the iTerm2 application -menu to make sure I don\'t run into any issues later on with different -terminals. +I also used the `Make iTerm2 Default Term` and `Install Shell Integration` +options in the iTerm2 application menu to make sure I don't run into any issues +later on with different terminals. We will also install `zsh` so we can use it in iTerm2. @@ -148,9 +141,9 @@ brew install zsh # Oh-My-Zsh -I\'ve shown the great aspects of [Oh My Zsh](https://ohmyz.sh) in other -blog posts, so I\'ll skip over that speech for now. Simply install it -and run an update. +I've shown the great aspects of [Oh My Zsh](https://ohmyz.sh) in other blog +posts, so I'll skip over that speech for now. Simply install it and run an +update. ```sh sh -c "$(curl -fsSL https://raw.githubusercontent.com/robbyrussell/oh-my-zsh/master/tools/install.sh)" @@ -160,41 +153,36 @@ sh -c "$(curl -fsSL https://raw.githubusercontent.com/robbyrussell/oh-my-zsh/mas omz update ``` -Finally, restart the iTerm2 application to ensure all changes go into -effect. +Finally, restart the iTerm2 application to ensure all changes go into effect. # Oh-My-Zsh Themes -Let\'s change the theme of the terminal to make it a little more -friendly. +Let's change the theme of the terminal to make it a little more friendly. ```sh open ~/.zshrc ``` -The third section of this file should contain a line like the code -below. Change that theme to [any theme you -want](https://github.com/ohmyzsh/ohmyzsh/wiki/Themes), save the file, -and exit. +The third section of this file should contain a line like the code below. Change +that theme to [any theme you +want](https://github.com/ohmyzsh/ohmyzsh/wiki/Themes), save the file, and exit. ```sh ZSH_THEME="af-magic" ``` -After changing the `.zshrc` file, you\'ll need to close your -terminal and re-open it to see the changes. Optionally, just open a new -tab if you\'re using iTerm2, and you\'ll see the new shell config. +After changing the `.zshrc` file, you'll need to close your terminal and +re-open it to see the changes. Optionally, just open a new tab if you're using +iTerm2, and you'll see the new shell config. # Oh-My-Zsh Plugins -Of course, my customization of `zsh` would not be complete -without -[zsh-autosuggestions](https://github.com/zsh-users/zsh-autosuggestions). -This will bring up commands you\'ve run in the past as you type them. -For example, if you\'ve run `ssh user@192.168.1.99` before, -the terminal will show this command as soon as you start typing it (e.g. -`zsh u`), and you can hit the right arrow to autocomplete the -command. +Of course, my customization of `zsh` would not be complete without +[zsh-autosuggestions](https://github.com/zsh-users/zsh-autosuggestions). This +will bring up commands you've run in the past as you type them. For example, if +you've run `ssh user@192.168.1.99` before, the terminal will show this command +as soon as you start typing it (e.g. `zsh u`), and you can hit the right arrow +to autocomplete the command. ```sh git clone https://github.com/zsh-users/zsh-autosuggestions ${ZSH_CUSTOM:-~/.oh-my-zsh/custom}/plugins/zsh-autosuggestions @@ -209,7 +197,6 @@ open ~/.zshrc plugins=(git zsh-autosuggestions) ``` -Remember: After changing the `.zshrc` file, you\'ll need to -close your terminal and re-open it to see the changes. Optionally, just -open a new tab if you\'re using iTerm2, and you\'ll see the new shell -config. +Remember: After changing the `.zshrc` file, you'll need to close your terminal +and re-open it to see the changes. Optionally, just open a new tab if you're +using iTerm2, and you'll see the new shell config. diff --git a/content/blog/2021-03-19-clone-github-repos.md b/content/blog/2021-03-19-clone-github-repos.md index f5db436..e2b1ce0 100644 --- a/content/blog/2021-03-19-clone-github-repos.md +++ b/content/blog/2021-03-19-clone-github-repos.md @@ -7,29 +7,27 @@ draft = false # Cloning from GitHub -If you\'re like me and use a lot of different devices (and sometimes -decide to just wipe your device and start with a new OS), you probably -know the pain of cloning all your old code repositories down to your -local file system. +If you're like me and use a lot of different devices (and sometimes decide to +just wipe your device and start with a new OS), you probably know the pain of +cloning all your old code repositories down to your local file system. -If you\'re using GitHub, you can easily clone all of your code back down -in just seconds. First, create a bash script. I do so by opening a new -file in `nano`, but you can use `gedit`, -`vim`, or something else: +If you're using GitHub, you can easily clone all of your code back down in just +seconds. First, create a bash script. I do so by opening a new file in `nano`, +but you can use `gedit`, `vim`, or something else: ```sh nano clone_github_repos.sh ``` -Next, paste in the following information. Note that you can replace the -word `users` in the first line with `orgs` and -type an organization\'s name instead of a user\'s name. +Next, paste in the following information. Note that you can replace the word +`users` in the first line with `orgs` and type an organization's name instead +of a user's name. ```sh CNTX=users; NAME=YOUR-USERNAME; PAGE=1 curl "https://api.github.com/$CNTX/$NAME/repos?page=$PAGE&per_page=100" | grep -e 'git_url*' | - cut -d \" -f 4 | + cut -d " -f 4 | xargs -L1 git clone ``` @@ -47,12 +45,12 @@ Now you can run the script and should see the cloning process begin. # Cloning from Sourcehut -I haven\'t fully figured out how to directly incorporate Sourcehut\'s -GraphQL API into a bash script yet, so this one will take two steps. +I haven't fully figured out how to directly incorporate Sourcehut's GraphQL +API into a bash script yet, so this one will take two steps. First, log-in to Sourcehut and go to their [GraphQL playground for -Git](https://git.sr.ht/graphql). Next, paste the following query into -the left box: +Git](https://git.sr.ht/graphql). Next, paste the following query into the left +box: ```sh query { @@ -68,24 +66,22 @@ query { } ``` -The output on the right side will give you an object of all your -repositories. Just grab that text and remove all the characters such as -quotation marks and curly brackets. You will need a single-line list of -space-separated values for the next step. +The output on the right side will give you an object of all your repositories. +Just grab that text and remove all the characters such as quotation marks and +curly brackets. You will need a single-line list of space-separated values for +the next step. -Now let\'s create the bash script: +Now let's create the bash script: ```sh nano clone_sourcehut_repos.sh ``` -Next, paste the following bash script in with the list of repositories -you obtained above and replace `your-username` with your -username. +Next, paste the following bash script in with the list of repositories you +obtained above and replace `your-username` with your username. -Note that this uses the SSH-based Git cloning method (e.g. -`git@git...`), so you\'ll need to ensure you have set up -Sourcehut with your SSH key. +Note that this uses the SSH-based Git cloning method (e.g. `git@git...`), so +you'll need to ensure you have set up Sourcehut with your SSH key. ```sh repos=(repo1 repo2 repo3) @@ -112,19 +108,18 @@ Now you can run the script and should see the cloning process begin. # Moving Repositories to a New Host -Now that you have all of your code repositories cloned to your local -computer, you may want to change the remote host (e.g., moving from -GitHub to GitLab). To do this, let\'s create another bash script: +Now that you have all of your code repositories cloned to your local computer, +you may want to change the remote host (e.g., moving from GitHub to GitLab). To +do this, let's create another bash script: ```sh nano change_remote_urls.sh ``` -Past the following information and be sure to change the URL information -to whichever host you are moving to. For this example, I am looping -through all of my cloned GitHub directories and changing them to -Sourcehut (e.g. `<YOUR_NEW_REMOTE_URL>` -\> -`git@git.sr.ht:~myusername`). +Past the following information and be sure to change the URL information to +whichever host you are moving to. For this example, I am looping through all of +my cloned GitHub directories and changing them to Sourcehut (e.g. +`<YOUR_NEW_REMOTE_URL>` -> `git@git.sr.ht:~myusername`). ```sh # List all sub-directories in the current directory diff --git a/content/blog/2021-03-28-gemini-capsule.md b/content/blog/2021-03-28-gemini-capsule.md index 0fb2a2c..183f744 100644 --- a/content/blog/2021-03-28-gemini-capsule.md +++ b/content/blog/2021-03-28-gemini-capsule.md @@ -7,23 +7,20 @@ draft = false # What is Gemini? -[Gemini](https://gemini.circumlunar.space/) is an internet protocol -introduced in June 2019 as an alternative to HTTP(S) or Gopher. In -layman\'s terms, it\'s an alternative way to browse sites (called -capsules) that requires a special browser. Since Gemini is not -standardized as an internet standard, normal web browsers won\'t be able -to load a Gemini capsule. Instead, you\'ll need to use [a -Gemini-specific -browser](https://gemini.%20circumlunar.space/clients.html). +[Gemini](https://gemini.circumlunar.space/) is an internet protocol introduced +in June 2019 as an alternative to HTTP(S) or Gopher. In layman's terms, it's +an alternative way to browse sites (called capsules) that requires a special +browser. Since Gemini is not standardized as an internet standard, normal web +browsers won't be able to load a Gemini capsule. Instead, you'll need to use +[a Gemini-specific browser](https://gemini.%20circumlunar.space/clients.html). The content found within a Gemini page is called [Gemtext](https://gemini.circumlunar.space/docs/cheatsheet.gmi) and is -*extremely* basic (on purpose). Gemini only processes the text, no media -content like images. However, you\'re able to style 3 levels of -headings, regular text, links (which will display on their own line), -quotes, and an unordered list. +*extremely* basic (on purpose). Gemini only processes the text, no media content +like images. However, you're able to style 3 levels of headings, regular text, +links (which will display on their own line), quotes, and an unordered list. -Here\'s a complete listing of valid Gemtext: +Here's a complete listing of valid Gemtext: ``` txt # Heading 1 @@ -46,79 +43,72 @@ My List: ### Free Option -There are probably numerous websites that allow you to create your -personal Gemini capsule, but I\'m going to focus on the two sites that I -have personally tested. The first option below, Midnight Pub, allows you -to create/edit any Gemini files you want in your account. This is -essentially a GUI option with a built-in text box for editing. The -second option below, Sourcehut, allows you to use a Git repository and -automatic build process to deploy your personal Gemini capsule every -time you push a commit. +There are probably numerous websites that allow you to create your personal +Gemini capsule, but I'm going to focus on the two sites that I have personally +tested. The first option below, Midnight Pub, allows you to create/edit any +Gemini files you want in your account. This is essentially a GUI option with a +built-in text box for editing. The second option below, Sourcehut, allows you to +use a Git repository and automatic build process to deploy your personal Gemini +capsule every time you push a commit. ## Midnight Pub - Beginner Friendly -[Midnight Pub](https://midnight.pub/) is a small, virtual community -meant to reflect the atmosphere of wandering into a small alley pub. The -site is built in Gemtext and has a server-side process to convert -Gemtext to HTML if someone loads the site in an HTTP(S) browser. +[Midnight Pub](https://midnight.pub/) is a small, virtual community meant to +reflect the atmosphere of wandering into a small alley pub. The site is built in +Gemtext and has a server-side process to convert Gemtext to HTML if someone +loads the site in an HTTP(S) browser. -To create an account, you\'ll need to email the owner of the website to -obtain a key. You can find their email on the Midnight Pub homepage. -Once registered, head to [your account](https://midnight.pub/account) -and select [manage site](https://midnight.pub/site). This is the screen -where you can upload or create any files to be displayed on the -internet. +To create an account, you'll need to email the owner of the website to obtain a +key. You can find their email on the Midnight Pub homepage. Once registered, +head to [your account](https://midnight.pub/account) and select [manage +site](https://midnight.pub/site). This is the screen where you can upload or +create any files to be displayed on the internet. -For example, I\'ve created both an HTML file and a Gemini file. Remember -that Gemini is automatically converted to HTML on the Pub, so you don\'t -need an HTML version. For example, I created an HTML version to add in -some extra styling. +For example, I've created both an HTML file and a Gemini file. Remember that +Gemini is automatically converted to HTML on the Pub, so you don't need an HTML +version. For example, I created an HTML version to add in some extra styling. -All you need to do is create a page like `index.gmi` and use -your Gemini browser to head over to your-username.midnight.pub to see -the result. +All you need to do is create a page like `index.gmi` and use your Gemini browser +to head over to your-username.midnight.pub to see the result. -That\'s all there is to it! Easy enough, right? Let\'s check out a more -advanced version in the next section. +That's all there is to it! Easy enough, right? Let's check out a more advanced +version in the next section. # Paid Option -As of 2021, Sourcehut has decided to require users to have a paid -account in order to utilize their automated build system. For now, paid -accounts can be as low as \$2/month. +As of 2021, Sourcehut has decided to require users to have a paid account in +order to utilize their automated build system. For now, paid accounts can be as +low as $2/month. ## Sourcehut -[Sourcehut](https://sourcehut.org/) is a collection of software -development tools, but mostly surrounds their hosted Git repository -service. Simply put, it\'s a minimal and more private alternative to -services like GitHub. +[Sourcehut](https://sourcehut.org/) is a collection of software development +tools, but mostly surrounds their hosted Git repository service. Simply put, +it's a minimal and more private alternative to services like GitHub. -This walkthrough is more advanced and involves things like Git, SSH, the -command line. If you don\'t think you know enough to do this, check out -my walkthrough on creating a Gemini capsule for the Midnight Pub -instead. +This walkthrough is more advanced and involves things like Git, SSH, the command +line. If you don't think you know enough to do this, check out my walkthrough +on creating a Gemini capsule for the Midnight Pub instead. -The first thing you\'ll need to do is create an SSH key pair, if you -don\'t already have one on your system. Once created, grab the contents -of `id_rsa.pub` and add it to your Sourcehut account -settings - this will allow you to push and pull code changes without -using a username/password. +The first thing you'll need to do is create an SSH key pair, if you don't +already have one on your system. Once created, grab the contents of `id_rsa.pub` +and add it to your Sourcehut account settings - this will allow you to push and +pull code changes without using a username/password. ```sh ssh keygen ``` -Next up, let\'s create a repository with the proper name so that the -Sourcehut build system will know we want them to host a website for us. -Use the following format exactly: +Next up, let's create a repository with the proper name so that the Sourcehut +build system will know we want them to host a website for us. Use the following +format exactly: ```sh mkdir your-username.srht.site && cd your-username.srht.site ``` -Now that we\'ve created the repo, let\'s initialize Git and add the -proper remote URL. +Now that we've created the repo, let's initialize Git and add the proper +remote URL. ```sh git init @@ -128,14 +118,14 @@ git init git remote add origin git@git.sr.ht:~your-username/your-username.srht.site ``` -Now that our repository is set up and configured, we will need to create -at least two files: +Now that our repository is set up and configured, we will need to create at +least two files: -- `index.gmi` -- `.build.yml` +- `index.gmi` +- `.build.yml` -For your `.build.yml` file, use the following content and be -sure to update the `site` line with your username! +For your `.build.yml` file, use the following content and be sure to update the +`site` line with your username! ``` yaml image: alpine/latest @@ -150,11 +140,11 @@ tasks: acurl -f https://pages.sr.ht/publish/$site -Fcontent=@site.tar.gz -Fprotocol=GEMINI ``` -For the `index.gmi` file, put whatever you want in there and -save it. You could even just copy and paste the Gemtext cheatsheet. +For the `index.gmi` file, put whatever you want in there and save it. You could +even just copy and paste the Gemtext cheatsheet. -If you want to serve both HTML and Gemini files from this repository, -just add a second command to the `upload` section: +If you want to serve both HTML and Gemini files from this repository, just add a +second command to the `upload` section: ``` yaml - upload: | @@ -168,19 +158,18 @@ Lastly, commit your changes and push them to the remote repo. git add .; git commit -m "initial commit"; git push --set-upstream origin HEAD ``` -If you\'ve successfully created the files with the proper format, -you\'ll see the terminal print a message that lets you know where the -automatic build is taking place. For example, here\'s what the terminal -tells me: +If you've successfully created the files with the proper format, you'll see +the terminal print a message that lets you know where the automatic build is +taking place. For example, here's what the terminal tells me: ```sh remote: Build started: remote: https://builds.sr.ht/~user/job/689803 [.build.yml] ``` -Now that you\'ve properly built your Sourcehut page, you can browse to -your-username.srht.site in a Gemini browser and view the final results. -Take a look at the image below for my Sourcehut Gemini capsule. +Now that you've properly built your Sourcehut page, you can browse to +your-username.srht.site in a Gemini browser and view the final results. Take a +look at the image below for my Sourcehut Gemini capsule.  diff --git a/content/blog/2021-03-28-vaporwave-vs-outrun.md b/content/blog/2021-03-28-vaporwave-vs-outrun.md index 1ac49e9..a89074b 100644 --- a/content/blog/2021-03-28-vaporwave-vs-outrun.md +++ b/content/blog/2021-03-28-vaporwave-vs-outrun.md @@ -7,15 +7,14 @@ draft = false # Overview -When it comes to an aesthetic that originated primarily online, there -tends to be a lot of confusion around what falls into each specific -genre. This post discusses Vaporwave and Outrun, which have become -almost synonymous in the minds of those online who aren\'t hardcore into -these genres of media. More specifically, Outrun is largely an unknown -term while all aesthetics in these two genres are usually attributed to -Vaporwave. For example, take a look at the image search results for -Vaporwave: the results include **a lot\*** of Outrun-themed images. -You\'ll find a similar trend almost everywhere. +When it comes to an aesthetic that originated primarily online, there tends to +be a lot of confusion around what falls into each specific genre. This post +discusses Vaporwave and Outrun, which have become almost synonymous in the minds +of those online who aren't hardcore into these genres of media. More +specifically, Outrun is largely an unknown term while all aesthetics in these +two genres are usually attributed to Vaporwave. For example, take a look at the +image search results for Vaporwave: the results include **a lot** of +Outrun-themed images. You'll find a similar trend almost everywhere. 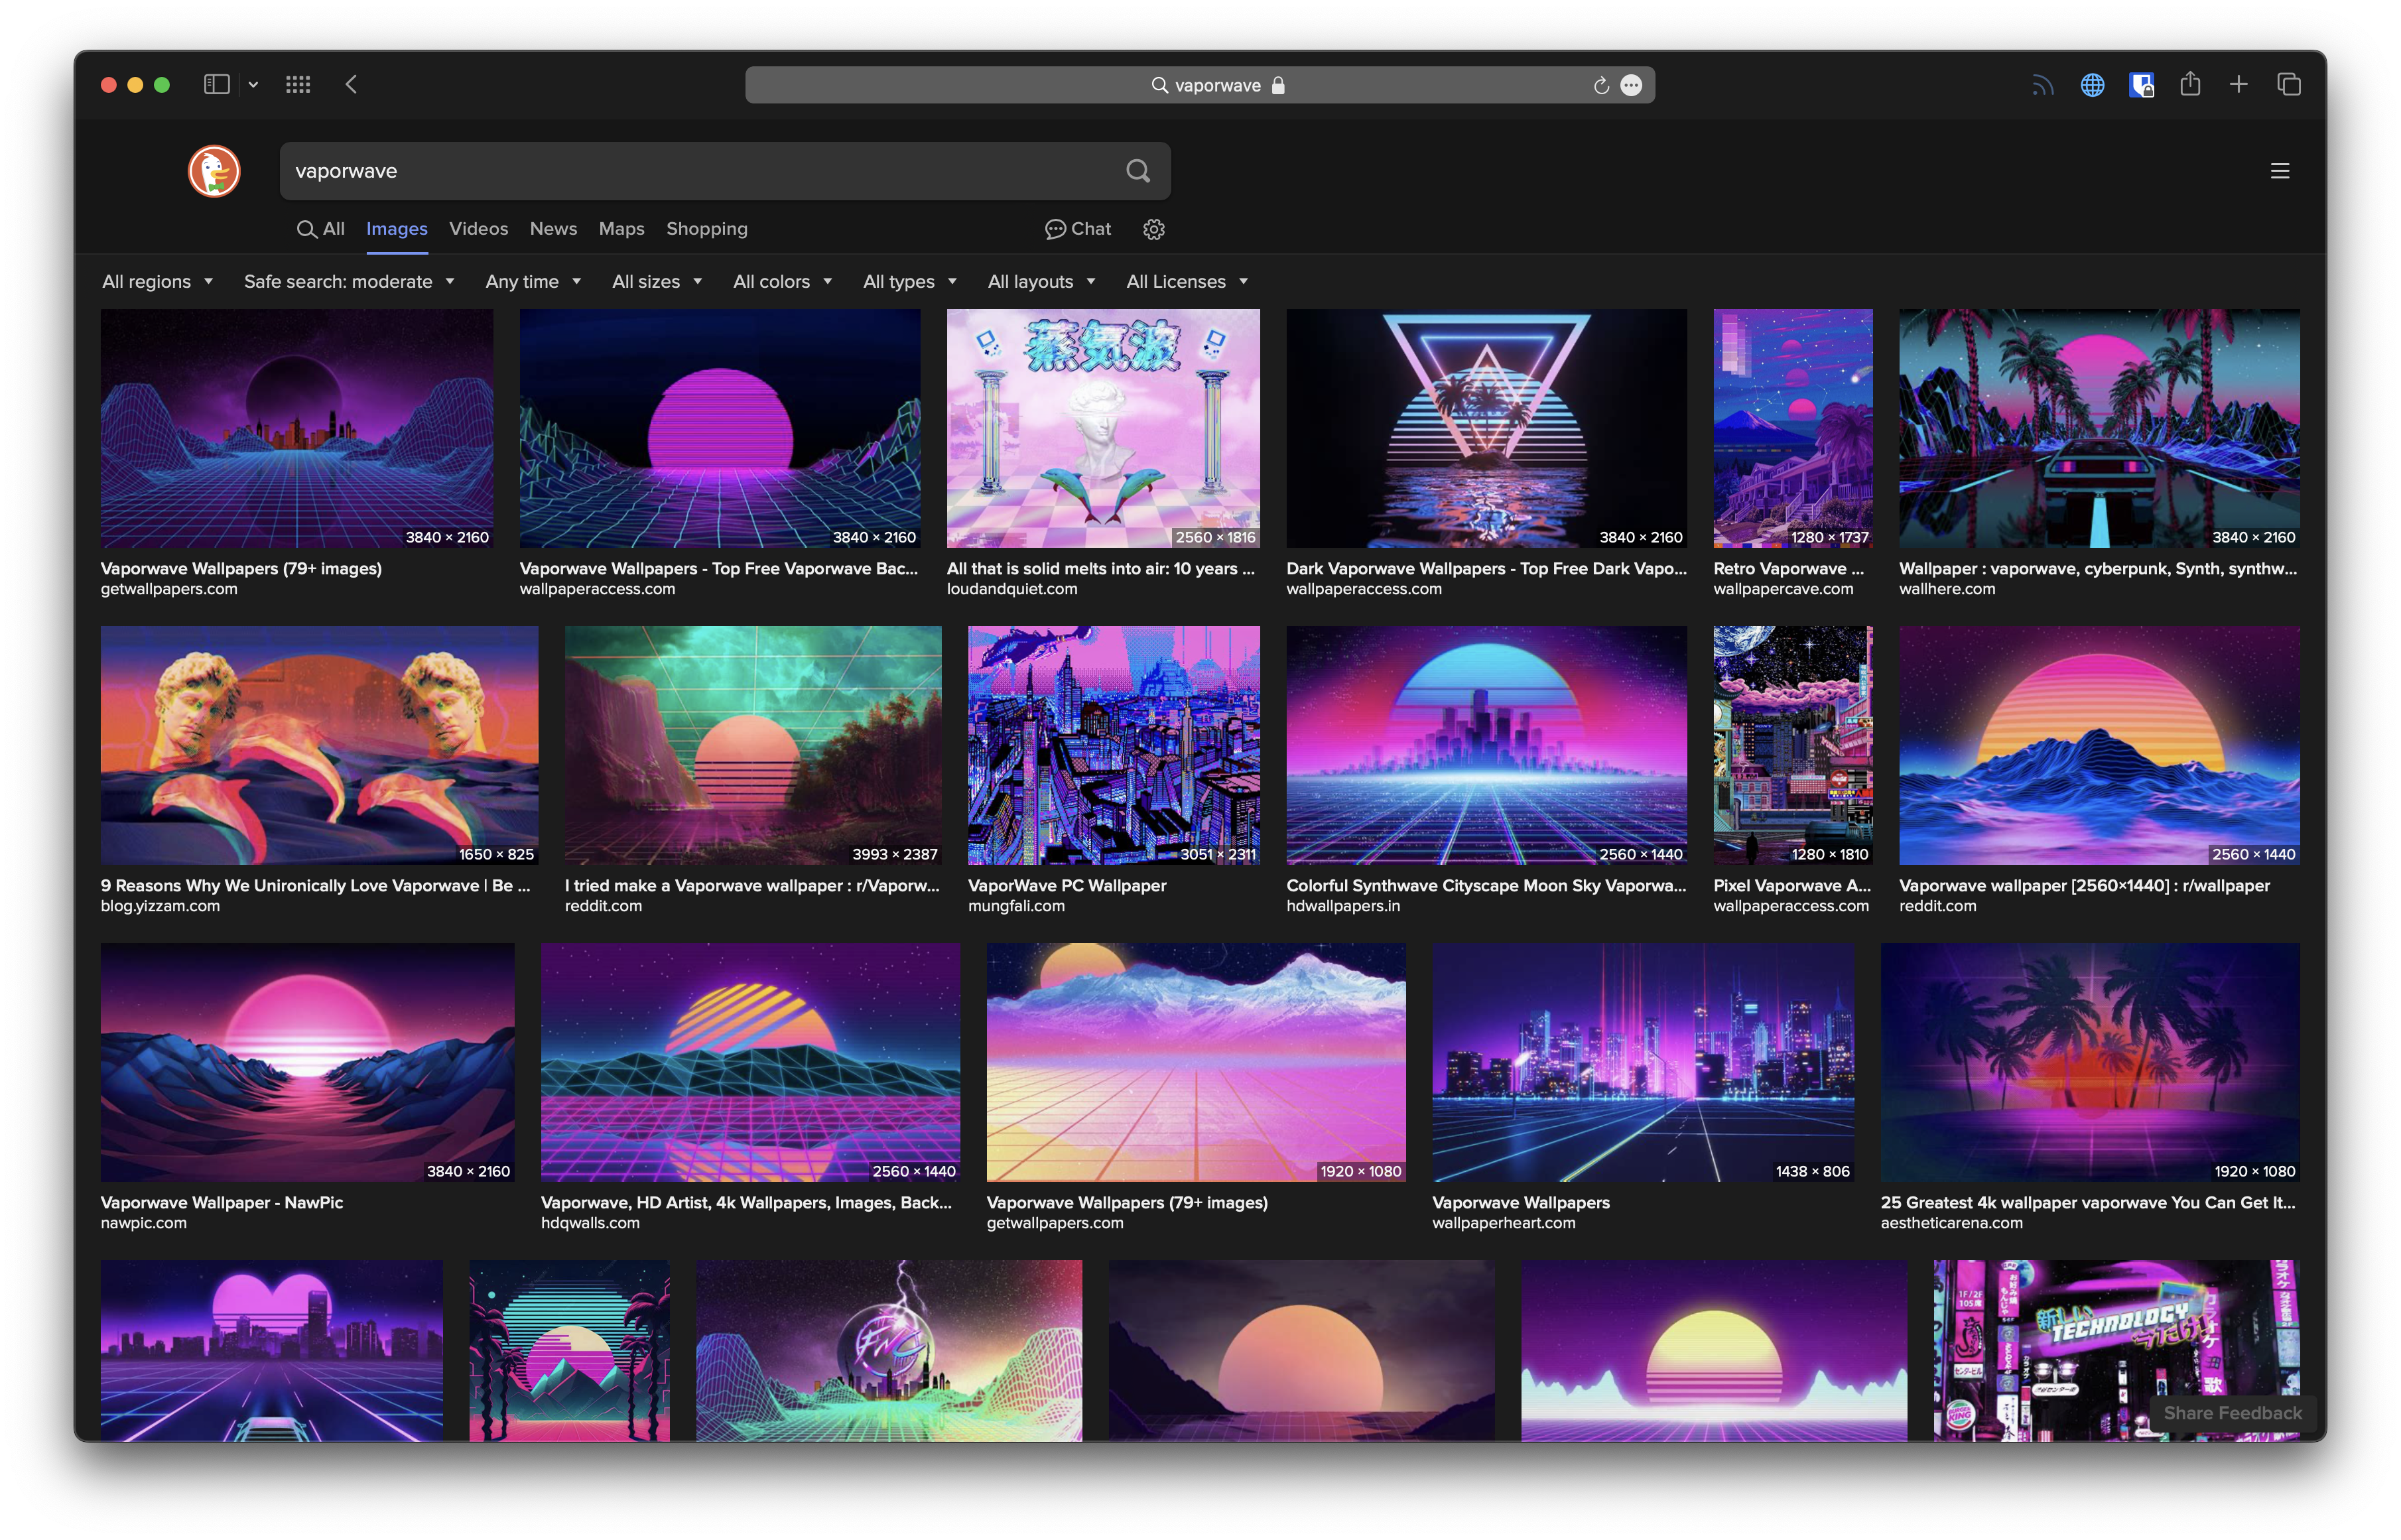 @@ -25,99 +24,93 @@ Results](https://img.cleberg.net/blog/20210328-vaporwave-vs-outrun/vaporwave-sea  -Okay, so what is Vaporwave? I\'m going to just copy-and-paste some -general info from the Wikipedia article on -[Vaporwave](https://en.wikipedia.org/wiki/Vaporwave), so that I\'m not -repeating everything you can already search for online: - -> Vaporwave is a microgenre of electronic music, a visual art style, and -> an Internet meme that emerged in the early 2010s. It is defined partly -> by its slowed-down, chopped and screwed samples of smooth jazz, -> elevator, R&B, and lounge music from the 1980s and 1990s. The -> surrounding subculture is sometimes associated with an ambiguous or -> satirical take on consumer capitalism and pop culture, and tends to be -> characterized by a nostalgic or surrealist engagement with the popular -> entertainment, technology and advertising of previous decades. -> Visually, it incorporates early Internet imagery, late 1990s web -> design, glitch art, anime, 3D-rendered objects, and cyberpunk tropes -> in its cover artwork and music videos. - -This is an excellent summary, and it helps address my point here: there -are specific aspects that make Vaporwave unique: +Okay, so what is Vaporwave? I'm going to just copy-and-paste some general info +from the Wikipedia article on +[Vaporwave](https://en.wikipedia.org/wiki/Vaporwave), so that I'm not repeating +everything you can already search for online: + +> Vaporwave is a microgenre of electronic music, a visual art style, and an +> Internet meme that emerged in the early 2010s. It is defined partly by its +> slowed-down, chopped and screwed samples of smooth jazz, elevator, R&B, and +> lounge music from the 1980s and 1990s. The surrounding subculture is sometimes +> associated with an ambiguous or satirical take on consumer capitalism and pop +> culture, and tends to be characterized by a nostalgic or surrealist engagement +> with the popular entertainment, technology and advertising of previous +> decades. Visually, it incorporates early Internet imagery, late 1990s web +> design, glitch art, anime, 3D-rendered objects, and cyberpunk tropes in its +> cover artwork and music videos. + +This is an excellent summary, and it helps address my point here: there are +specific aspects that make Vaporwave unique: ## Time Frame -The time frame for references, logos, etc. focuses mostly on the 1990s -in Vaporwave. You\'ll see old school Pepsi logos, Microsoft 95 screens, -tropical plants, classic marble sculptures, and many references from -Japan\'s influence in the 90s. +The time frame for references, logos, etc. focuses mostly on the 1990s in +Vaporwave. You'll see old school Pepsi logos, Microsoft 95 screens, tropical +plants, classic marble sculptures, and many references from Japan's influence +in the 90s. ## Art -The color scheme is generally a soft, light palette that uses pastel -colors. The backdrop will often be in a light-pink or teal blue. +The color scheme is generally a soft, light palette that uses pastel colors. The +backdrop will often be in a light-pink or teal blue. ## Music -The musical genre of Vaporwave incorporates soft tunes, lounge music, -and sound effects that will make the listener reminisce of the 90s. The -sounds of the genre are generally slower-paced and calming. The major -breakthrough artist for Vaporwave was [Macintosh -Plus](https://en.wikipedia.org/wiki/Vektroid), who released the album -[Floral -Shoppe](https://archive.org/details/MACINTOSHPLUS-FLORALSHOPPE_complete) -in 2011. Another more recent example is the artist -[sadbert](https://sadbert.bandcamp.com/), whose latest album -incorporates the upbeat tones of the 1999 Dilbert TV series. - -Notice that Vaporwave doesn\'t include things like racing cars, -futuristic technology, chrome, or the deep orange/purple color scheme. -Vaporwave is a focus on the idyllic state of the world when technology -was becoming common in households, a reality that we have already -experienced. Focus on the most aesthetically-pleasing parts of that past -is a large part of Vaporwave. +The musical genre of Vaporwave incorporates soft tunes, lounge music, and sound +effects that will make the listener reminisce of the 90s. The sounds of the +genre are generally slower-paced and calming. The major breakthrough artist for +Vaporwave was [Macintosh Plus](https://en.wikipedia.org/wiki/Vektroid), who +released the album [Floral +Shoppe](https://archive.org/details/MACINTOSHPLUS-FLORALSHOPPE_complete) in +2011. Another more recent example is the artist +[sadbert](https://sadbert.bandcamp.com/), whose latest album incorporates the +upbeat tones of the 1999 Dilbert TV series. + +Notice that Vaporwave doesn't include things like racing cars, futuristic +technology, chrome, or the deep orange/purple color scheme. Vaporwave is a focus +on the idyllic state of the world when technology was becoming common in +households, a reality that we have already experienced. Focus on the most +aesthetically-pleasing parts of that past is a large part of Vaporwave. # Outrun  -Now, let\'s get to Outrun. This one is a little trickier since the genre -has largely been lumped under the Vaporwave title for so long. However, -it stems from the [Synthwave](https://en.wikipedia.org/wiki/Synthwave) -music genre and is likely named after the 1986 racer game, [Out +Now, let's get to Outrun. This one is a little trickier since the genre has +largely been lumped under the Vaporwave title for so long. However, it stems +from the [Synthwave](https://en.wikipedia.org/wiki/Synthwave) music genre and is +likely named after the 1986 racer game, [Out Run](https://en.wikipedia.org/wiki/Out_Run). ## Time Frame -Outrun can be thought of as a retro-futuristic aesthetic born from the -1980s. +Outrun can be thought of as a retro-futuristic aesthetic born from the 1980s. ## Art -The color scheme uses a very dark color palette with the main colors -being deep oranges, blues, and purples. Red edges are common around -objects in Outrun art. The background of the Outrun aesthetic is almost -always a neon grid like you\'d expect to see in Tron or a 1980s arcade -machine. +The color scheme uses a very dark color palette with the main colors being deep +oranges, blues, and purples. Red edges are common around objects in Outrun art. +The background of the Outrun aesthetic is almost always a neon grid like you'd +expect to see in Tron or a 1980s arcade machine. -Classic sports cars, chrome robots, computer generated graphics and -fonts, and the occasional use of rain or palm trees can be found in -Outrun art. +Classic sports cars, chrome robots, computer generated graphics and fonts, and +the occasional use of rain or palm trees can be found in Outrun art. ## Music -This aesthetic has a more aggressive and fast-paced style of music, -which tends to match the subject of the art in this aesthetic. +This aesthetic has a more aggressive and fast-paced style of music, which tends +to match the subject of the art in this aesthetic. -Outrun enthusiasts love what people in the 1980s thought the future -would look like. Take a look at a common video game discussed in Outrun -circles, Far Cry 3: Blood Dragon: +Outrun enthusiasts love what people in the 1980s thought the future would look +like. Take a look at a common video game discussed in Outrun circles, Far Cry 3: +Blood Dragon:  -Another example that doesn\'t force the color scheme as hard as some -online art does is Kung Fury: +Another example that doesn't force the color scheme as hard as some online art +does is Kung Fury:  @@ -127,7 +120,7 @@ Scene](https://img.cleberg.net/blog/20210328-vaporwave-vs-outrun/kung-fury-hacke # Conclusion -While Vaporwave and Outrun share similarities, they are two distinct -aesthetics with many important distinctions. Someone who enjoys one may -not necessarily enjoy the other, so it\'s important to make sure we -properly describe the aesthetic we\'re looking for. +While Vaporwave and Outrun share similarities, they are two distinct aesthetics +with many important distinctions. Someone who enjoys one may not necessarily +enjoy the other, so it's important to make sure we properly describe the +aesthetic we're looking for. diff --git a/content/blog/2021-03-30-vps-web-server.md b/content/blog/2021-03-30-vps-web-server.md index f3a29bf..508f720 100644 --- a/content/blog/2021-03-30-vps-web-server.md +++ b/content/blog/2021-03-30-vps-web-server.md @@ -7,105 +7,96 @@ draft = false # Shared Hosting vs. VPS -Choosing a place to host a website is one of the most confusing -decisions for beginner web developers. Even for experienced web devs, -choosing between different forms of web hosting can be a daunting -choice. - -First, let\'s take a look at [shared web -hosting](https://en.wikipedia.org/wiki/Shared_web_hosting_service). -Shared web hosting is a product where you are purchasing a small piece -of a web server that is being shared between many websites. As a result, -the cost of shared hosting is extremely low. You won\'t have access to -the server itself, which means you can\'t install your own software on -the server, such as Docker. Usually, you are simply allowed to connect -your domains to the server, set up domain security, and other small -utilities. +Choosing a place to host a website is one of the most confusing decisions for +beginner web developers. Even for experienced web devs, choosing between +different forms of web hosting can be a daunting choice. + +First, let's take a look at [shared web +hosting](https://en.wikipedia.org/wiki/Shared_web_hosting_service). Shared web +hosting is a product where you are purchasing a small piece of a web server that +is being shared between many websites. As a result, the cost of shared hosting +is extremely low. You won't have access to the server itself, which means you +can't install your own software on the server, such as Docker. Usually, you are +simply allowed to connect your domains to the server, set up domain security, +and other small utilities. In contrast, a [virtual private -server](https://en.wikipedia.org/wiki/Virtual_private_server) (VPS) is a -virtual machine that replicates the environment of having a dedicated -server to yourself. You are able to control the virtual server\'s host -names, base file system, package manager, etc. Another great upside of a -VPS is that since it\'s virtual, the company providing the VPS can -dynamically increase the disk size, RAM size, or number of CPUs at any -time. However, the virtual server is still physically located on a -server that is shared between multiple virtual servers. - -The choice between shared hosting and VPS mostly depends on your skill -level with system administration. If you\'re comforting working on a -server that is mostly left up to you (or you\'re willing to learn), then -a VPS is usually a better option. However, shared hosting is a fantastic -option for people who don\'t want to have to learn how to manage their -server. +server](https://en.wikipedia.org/wiki/Virtual_private_server) (VPS) is a virtual +machine that replicates the environment of having a dedicated server to +yourself. You are able to control the virtual server's host names, base file +system, package manager, etc. Another great upside of a VPS is that since it's +virtual, the company providing the VPS can dynamically increase the disk size, +RAM size, or number of CPUs at any time. However, the virtual server is still +physically located on a server that is shared between multiple virtual servers. + +The choice between shared hosting and VPS mostly depends on your skill level +with system administration. If you're comforting working on a server that is +mostly left up to you (or you're willing to learn), then a VPS is usually a +better option. However, shared hosting is a fantastic option for people who +don't want to have to learn how to manage their server. # My Situation -I had used shared hosting for approximately 5 years before trying my -first VPS. I manage a homelab and have had success running a server and -performing typical sysadmin duties, but I was still hesitant to get a -VPS. One fear was that I always struggled to properly set up the -networking part of a server - DNS and hostname configurations were not -my friend. +I had used shared hosting for approximately 5 years before trying my first VPS. +I manage a homelab and have had success running a server and performing typical +sysadmin duties, but I was still hesitant to get a VPS. One fear was that I +always struggled to properly set up the networking part of a server - DNS and +hostname configurations were not my friend. As a little bit of background, I originally used -[Siteground](https://www.siteground.com) for my initially shared hosting -and stayed on that platform for at least a year. However, the UI was -clunky, and I didn\'t like how they handled certain technical aspects, -so I switched to [Namecheap](https://www.namecheap.com). Namecheap was -great because it is the service I primarily use for purchasing domain -names, which made it incredibly easy to link them to my hosting service. -However, it was still mediocre shared hosting, and Namecheap is -notorious for not letting you use [Let\'s -Encrypt](https://letsencrypt.org) to obtain free SSL/TLS certificates; -Namecheap wants to make you purchase certificates through their store. - -Finally, I settled down with [iWebFusion](https://www.iwebfusion.net) -for about the last year of my shared hosting. This service was pretty -great, came with free SSL/TLS, and I never had any complaints. - -However, I finally grew tired of not being able to install software on -my own web server. I wanted to be able to try out things like -[Postmill](https://postmill.xyz) or [Matrix](https://matrix.org). This -is possible with a VPS, so I decided to grab a new domain name to try it -out. +[Siteground](https://www.siteground.com) for my initially shared hosting and +stayed on that platform for at least a year. However, the UI was clunky, and I +didn't like how they handled certain technical aspects, so I switched to +[Namecheap](https://www.namecheap.com). Namecheap was great because it is the +service I primarily use for purchasing domain names, which made it incredibly +easy to link them to my hosting service. However, it was still mediocre shared +hosting, and Namecheap is notorious for not letting you use [Let's +Encrypt](https://letsencrypt.org) to obtain free SSL/TLS certificates; Namecheap +wants to make you purchase certificates through their store. + +Finally, I settled down with [iWebFusion](https://www.iwebfusion.net) for about +the last year of my shared hosting. This service was pretty great, came with +free SSL/TLS, and I never had any complaints. + +However, I finally grew tired of not being able to install software on my own +web server. I wanted to be able to try out things like +[Postmill](https://postmill.xyz) or [Matrix](https://matrix.org). This is +possible with a VPS, so I decided to grab a new domain name to try it out. # Getting Started: Buying a VPS -The first step to moving over to a VPS is (you guessed it): finding a -VPS provider. For my VPSs, I use [1984](https://1984hosting.com) and -prefer their services much more than any alternative, due to their -location (Iceland), their [privacy -policy](https://1984hosting.com/GDPR/), their respect for GDPR, and the +The first step to moving over to a VPS is (you guessed it): finding a VPS +provider. For my VPSs, I use [1984](https://1984hosting.com) and prefer their +services much more than any alternative, due to their location (Iceland), their +[privacy policy](https://1984hosting.com/GDPR/), their respect for GDPR, and the ability to remain anonymous if you pay in Bitcoin or Monero. -[Njalla](https://njal.la) is another good, privacy-oriented option for -VPS services. +[Njalla](https://njal.la) is another good, privacy-oriented option for VPS +services. -You\'ll have to decide what specifications you want on your VPS. For me, -I only build and deploy low-resource HTML, PHP, and Python websites. -This means I can survive on the smallest VPS: 1 CPU, 1GB of RAM, and -25GB SSD for \$5.00 per month. +You'll have to decide what specifications you want on your VPS. For me, I only +build and deploy low-resource HTML, PHP, and Python websites. This means I can +survive on the smallest VPS: 1 CPU, 1GB of RAM, and 25GB SSD for $5.00 per +month. -As noted above, the great thing about a VPS is you can request your -provider to increase the resources at any time. +As noted above, the great thing about a VPS is you can request your provider to +increase the resources at any time. # Configuring DNS Settings -Okay, so now let\'s get into some actual work that has to be done to get -content moved from a shared host to a VPS. At this point, I\'m assuming -you have a shared host with website content that you can still access, -and you\'ve purchased a new VPS and can SSH into that server. +Okay, so now let's get into some actual work that has to be done to get content +moved from a shared host to a VPS. At this point, I'm assuming you have a +shared host with website content that you can still access, and you've +purchased a new VPS and can SSH into that server. -The first change is minor, but it should be done immediately in order to -get things moving: DNS settings. Go to wherever your DNS settings are -handled. If your shared host also managed your DNS settings, you\'ll -need to first move that DNS over to your new VPS provider. For me, I -route my DNS through [Gandi](https://www.gandi.net). +The first change is minor, but it should be done immediately in order to get +things moving: DNS settings. Go to wherever your DNS settings are handled. If +your shared host also managed your DNS settings, you'll need to first move that +DNS over to your new VPS provider. For me, I route my DNS through +[Gandi](https://www.gandi.net). -Once you know where your DNS settings are, go ahead and update the -`A` records to match the public IP address of your VPS. For -example: +Once you know where your DNS settings are, go ahead and update the `A` records +to match the public IP address of your VPS. For example: ``` txt A example.com xxx.xxx.xxx.xxx @@ -113,37 +104,36 @@ A subdomain xxx.xxx.xxx.xxx CNAME www example.com. ``` -If you have any other records that require updates, such as MX or TXT -records for a mail server, be sure to update those accordingly. -Personally, I don\'t host my own mail server. I route all mail on my -custom domains to [Migadu](https://www.migadu.com). Hosting your own -email server can become complex quickly and is not for beginners. +If you have any other records that require updates, such as MX or TXT records +for a mail server, be sure to update those accordingly. Personally, I don't +host my own mail server. I route all mail on my custom domains to +[Migadu](https://www.migadu.com). Hosting your own email server can become +complex quickly and is not for beginners. -DNS changes can take up to 48 hours to propagate, so be sure to give it -some time before assuming you\'ve made an error. +DNS changes can take up to 48 hours to propagate, so be sure to give it some +time before assuming you've made an error. # Server Updates and Packages -Now that the DNS settings have been changed, let\'s set up our server -while we wait for the DNS to propagate. First up is to ssh into your -server. If you\'ve signed up with a service like DigitalOcean, you can -add your SSH key to your account and to your VPS droplet so that you -don\'t need a password in order to SSH. +Now that the DNS settings have been changed, let's set up our server while we +wait for the DNS to propagate. First up is to ssh into your server. If you've +signed up with a service like DigitalOcean, you can add your SSH key to your +account and to your VPS droplet so that you don't need a password in order to +SSH. ```sh ssh root@xxx.xxx.xxx.xxx ``` -The VPS that is used in this blog post runs Ubuntu 20.04 with an Apache -web server. If you\'re working on a different operating system (OS) or -want a different web server, such as Nginx, you\'ll have to use -different commands to set it up. +The VPS that is used in this blog post runs Ubuntu 20.04 with an Apache web +server. If you're working on a different operating system (OS) or want a +different web server, such as Nginx, you'll have to use different commands to +set it up. -First, let\'s update and upgrade our server. +First, let's update and upgrade our server. -**NOTE:** Since we have logged in to the server as `root` for -now, we don\'t need to use the `sudo` modifier before our -commands. +**NOTE:** Since we have logged in to the server as `root` for now, we don't +need to use the `sudo` modifier before our commands. ```sh apt update && apt upgrade -y @@ -151,11 +141,11 @@ apt update && apt upgrade -y # Create A User Account -While being able to use `root` can be beneficial at times, -you shouldn\'t use `root` unless you have to. +While being able to use `root` can be beneficial at times, you shouldn't use +`root` unless you have to. -So let\'s set up a new user in our system. The `-m` option -below tells the OS to create a home directory for the new user. +So let's set up a new user in our system. The `-m` option below tells the OS to +create a home directory for the new user. ```sh adduser USERNAME @@ -167,41 +157,40 @@ Now, create a password for that user. passwd USERNAME ``` -Finally, add the user to the sudoers file, so they can perform -priveleged commands. +Finally, add the user to the sudoers file, so they can perform priveleged +commands. ```sh usermod -a -G sudo USERNAME ``` -If you are using SSH keys and not passwords, you\'ll need to copy your -SSH key from your local machine to the VPS. If you haven\'t disabled -password-based SSH yet, the easiest way to do this is -`ssh-copy-id` from your local computer (not from the VPS): +If you are using SSH keys and not passwords, you'll need to copy your SSH key +from your local machine to the VPS. If you haven't disabled password-based SSH +yet, the easiest way to do this is `ssh-copy-id` from your local computer (not +from the VPS): ```sh ssh-copy-id testuser@xxx.xxx.xxx.xxx ``` -If you\'ve disabled password-based SSH, you\'ll need to manually copy -your SSH key into the `~/.ssh/authorized_keys` file. +If you've disabled password-based SSH, you'll need to manually copy your SSH +key into the `~/.ssh/authorized_keys` file. # Install Software -Our goal here is to host a web server, so the next step is to install -the Apache web server and any other packages we need. +Our goal here is to host a web server, so the next step is to install the Apache +web server and any other packages we need. -From this point on, I will be logged in as a user (not -`root`) and will need to use the `sudo` modifier -for most commands. +From this point on, I will be logged in as a user (not `root`) and will need to +use the `sudo` modifier for most commands. ```sh sudo apt update; sudo apt upgrade -y; sudo apt autoremove -y sudo apt install apache2 ``` -If you need other language support, such as PHP, you\'ll need to install -that too. +If you need other language support, such as PHP, you'll need to install that +too. ```sh sudo apt install libapache2-mod-php php-dom @@ -211,20 +200,18 @@ sudo systemctl restart apache2 # Website Files & Folders -Next up is to create the directories for the domain(s) we want to be -hosted on this web server. +Next up is to create the directories for the domain(s) we want to be hosted on +this web server. ```sh cd /var/www sudo mkdir example.com ``` -We have a folder for `example.com` now, so let\'s add an -`index.html` file and put it within a specific -`public_html` folder. You don\'t need this -`public_html` if you don\'t want it, but it helps with -organizing items related to `example.com` that you don\'t -want to publish to the internet. +We have a folder for `example.com` now, so let's add an `index.html` file and +put it within a specific `public_html` folder. You don't need this +`public_html` if you don't want it, but it helps with organizing items related +to `example.com` that you don't want to publish to the internet. ```sh cd example.com @@ -232,8 +219,8 @@ sudo mkdir public_html && cd public_html sudo nano index.html ``` -You can put anything you want in this `index.html` file. If -you can\'t think of anything, paste this in there: +You can put anything you want in this `index.html` file. If you can't think of +anything, paste this in there: ``` html <!DOCTYPE html> @@ -249,10 +236,9 @@ you can\'t think of anything, paste this in there: </html> ``` -If you want something to be served at -`example.com/page01/file.txt`, you\'ll have to create the -`page01` directory under the `example.com` -directory. For example: +If you want something to be served at `example.com/page01/file.txt`, you'll +have to create the `page01` directory under the `example.com` directory. For +example: ```sh cd /var/www/example.com/public_html @@ -262,9 +248,9 @@ sudo nano file.txt # Apache Configuration -Now, let\'s set up the files that will tell the server where to find the -files for `example.com`. We will copy the default -configuration file and create our own. +Now, let's set up the files that will tell the server where to find the files +for `example.com`. We will copy the default configuration file and create our +own. ```sh cd /etc/apache2/sites-available @@ -272,9 +258,8 @@ sudo cp 000-default.conf example.com.conf sudo nano example.com.conf ``` -This configuration file will have a few default lines, but you\'ll need -to edit it to look similar to this (settings may change based on your -personal needs): +This configuration file will have a few default lines, but you'll need to edit +it to look similar to this (settings may change based on your personal needs): ``` config <VirtualHost *:80> @@ -296,35 +281,33 @@ sudo a2dissite 000-default.conf sudo systemctl reload apache2 ``` -You can always run a test to make sure no errors or warnings are found -in your configuration files. +You can always run a test to make sure no errors or warnings are found in your +configuration files. ```sh sudo apache2ctl configtest ``` -Now, restart the web server entirely. After this, you should be able to -browse to `http://example.com` and see the HTML content you -provided earlier. Note that SSL/TLS has not been enabled yet, so you -won\'t be able to use the secure version yet -(`https://example.com`). +Now, restart the web server entirely. After this, you should be able to browse +to `http://example.com` and see the HTML content you provided earlier. Note that +SSL/TLS has not been enabled yet, so you won't be able to use the secure +version yet (`https://example.com`). ```sh sudo systemctl restart apache2 ``` -You can repeat this for as many websites as you need. Just create the -domain folders in `/var/www/`, add the configuration file, -enable the configuration, and restart `apache2`. +You can repeat this for as many websites as you need. Just create the domain +folders in `/var/www/`, add the configuration file, enable the configuration, +and restart `apache2`. # SSL/TLS Certificates: Serve Websites Over HTTPS -In order to serve secure content, you\'ll need to obtain SSL/TLS -certificates. Luckily, there\'s a free tool called -[Certbot](https://certbot.eff.org) that helps us with the process. +In order to serve secure content, you'll need to obtain SSL/TLS certificates. +Luckily, there's a free tool called [Certbot](https://certbot.eff.org) that +helps us with the process. -The first step is to install `snapd` and `core` -for Ubuntu. +The first step is to install `snapd` and `core` for Ubuntu. ```sh sudo apt install snapd @@ -338,8 +321,7 @@ Next, install the `certbot` snap package. sudo snap install --classic certbot ``` -Execute the following command to ensure that the `certbot` -command can be run. +Execute the following command to ensure that the `certbot` command can be run. ```sh sudo ln -s /snap/bin/certbot /usr/bin/certbot @@ -347,10 +329,10 @@ sudo ln -s /snap/bin/certbot /usr/bin/certbot Finally, you can run `certbot` one of two ways: -1. run it and let it alter your Apache configuration files - automatically to enable HTTPS redirects. -2. run it and only allow it to create certificates. You\'ll need to - manually alter the config files to enable HTTPS redirects. +1. run it and let it alter your Apache configuration files automatically to + enable HTTPS redirects. +2. run it and only allow it to create certificates. You'll need to manually + alter the config files to enable HTTPS redirects. Run certbot and allow automatic config changes: @@ -358,18 +340,16 @@ Run certbot and allow automatic config changes: sudo certbot --apache ``` -Run certbot for certificates only and don\'t allow it to alter config -files: +Run certbot for certificates only and don't allow it to alter config files: ```sh sudo certbot certonly --apache ``` -The Certbot packages on your system come with a cron job or systemd -timer that will renew your certificates automatically before they -expire. You will not need to run Certbot again unless you change your -configuration. You can test automatic renewal for your certificates by -running this command: +The Certbot packages on your system come with a cron job or systemd timer that +will renew your certificates automatically before they expire. You will not need +to run Certbot again unless you change your configuration. You can test +automatic renewal for your certificates by running this command: ```sh sudo certbot renew --dry-run @@ -379,13 +359,13 @@ Now, test your domains by going to `https://example.com`. # Firewall Security -To enable better security on your server, you\'ll need to enable a basic -firewall. For Ubuntu, we\'ll use [the uncomplicated +To enable better security on your server, you'll need to enable a basic +firewall. For Ubuntu, we'll use [the uncomplicated firewall](../secure-your-network-with-the-uncomplicated-firewall/). -Now, add the following rules to the firewall allow SSH, Apache, and -HTTP(S) connections. If you need to, you can enable different ports for -specifics applications, SFTP, etc. +Now, add the following rules to the firewall allow SSH, Apache, and HTTP(S) +connections. If you need to, you can enable different ports for specifics +applications, SFTP, etc. ```sh sudo ufw default deny incoming @@ -395,7 +375,7 @@ sudo ufw allow Apache sudo ufw allow proto tcp from any to any port 80,443 ``` -Once you\'ve added all the rules you need, enable the firewall. +Once you've added all the rules you need, enable the firewall. ```sh sudo ufw enable @@ -403,16 +383,15 @@ sudo ufw enable # Troubleshooting -If you run into any issues during your VPS set-up, be sure to walk back -through your actions and make sure you didn\'t miss any steps. +If you run into any issues during your VPS set-up, be sure to walk back through +your actions and make sure you didn't miss any steps. -Many websites have fantastic guides to setting up various web servers. -This is one of the areas [where DigitalOcean -shines](https://www.digitalocean.%20com/community/tutorials). For -simpler or more Linux-oriented questions, I suggest using \[Linuxize\] +Many websites have fantastic guides to setting up various web servers. This is +one of the areas [where DigitalOcean +shines](https://www.digitalocean.%20com/community/tutorials). For simpler or +more Linux-oriented questions, I suggest using [Linuxize] (<https://linuxize.com>). -If you\'re getting certain errors (e.g. -`500 Internal Server Error`) and need to debug locally, you -can view the `access.log` and `error.log` files in -the `/var/log/apache/` directory. +If you're getting certain errors (e.g. `500 Internal Server Error`) and need to +debug locally, you can view the `access.log` and `error.log` files in the +`/var/log/apache/` directory. diff --git a/content/blog/2021-04-17-gemini-server.md b/content/blog/2021-04-17-gemini-server.md index 7b4aafe..19b336f 100644 --- a/content/blog/2021-04-17-gemini-server.md +++ b/content/blog/2021-04-17-gemini-server.md @@ -7,28 +7,27 @@ draft = false # Similar Article Available -To read more about Gemini and ways to test out this new protocol without -your own server, see my previous post [Launching a Gemini +To read more about Gemini and ways to test out this new protocol without your +own server, see my previous post [Launching a Gemini Capsule](../launching-a-gemini-capsule/). # Preparation -This guide assumes you have access to a server accessible to the world -through a public IP address and that you own a domain name used for this -Gemini capsule. +This guide assumes you have access to a server accessible to the world through a +public IP address and that you own a domain name used for this Gemini capsule. # Getting Started with Agate We are going to use [Agate](https://github.com/mbrubeck/agate) for this -tutorial. This is a basic Gemini server written in Rust. It takes very -little time and maintenance to get it running. +tutorial. This is a basic Gemini server written in Rust. It takes very little +time and maintenance to get it running. # Install Dependencies -First, you will need to install the Rust package for your system. On -Ubuntu, use the following commands (remember to use `sudo` if -you are not the root user). The Rust installation will give you options -to customize the installation; I used the default installation options. +First, you will need to install the Rust package for your system. On Ubuntu, use +the following commands (remember to use `sudo` if you are not the root user). +The Rust installation will give you options to customize the installation; I +used the default installation options. ```sh sudo apt update && sudo apt upgrade -y @@ -41,15 +40,14 @@ Remember to configure your shell with the new configuration: source $HOME/.cargo/env ``` -Before we install agate, make sure you have the `gcc` package -installed: +Before we install agate, make sure you have the `gcc` package installed: ```sh sudo apt install gcc ``` -Next, you\'ll need to install the agate executable with Rust\'s Cargo -package maintainer: +Next, you'll need to install the agate executable with Rust's Cargo package +maintainer: ```sh cargo install agate @@ -57,18 +55,17 @@ cargo install agate # Create Symlinks -Once Cargo has finished installing all the required packages, symlink -the executable to your \$PATH. +Once Cargo has finished installing all the required packages, symlink the +executable to your $PATH. ```sh sudo ln -s $HOME/.cargo/bin/agate /usr/local/bin/agate ``` -# Using Agate\'s Built-In Installation Tool +# Using Agate's Built-In Installation Tool -If you\'re running Ubuntu or Debian, use the Debian installation script -found in Agate\'s GitHub repository, under the `tools/debian` -folder. +If you're running Ubuntu or Debian, use the Debian installation script found in +Agate's GitHub repository, under the `tools/debian` folder. ```sh git clone https://github.com/mbrubeck/agate @@ -78,11 +75,10 @@ sudo ./install.sh # Configure the Gemini Service -We have a little more to do, but since this script tries to immediately -run the service, it will likely fail with an exit code. Let\'s add our -finishing touches. Edit the following file and replace the hostname with -your desired URL. You can also change the directory where content will -be served. +We have a little more to do, but since this script tries to immediately run the +service, it will likely fail with an exit code. Let's add our finishing +touches. Edit the following file and replace the hostname with your desired URL. +You can also change the directory where content will be served. ```sh sudo nano /etc/systemd/system/gemini.service @@ -101,8 +97,8 @@ WorkingDirectory=/var/gemini/ ExecStart=agate --hostname gemini.example.com --lang en ``` -Since we\'ve altered the systemd configuration files, we have to reload -the daemon. Let\'s do that, restart our service, and check its status. +Since we've altered the systemd configuration files, we have to reload the +daemon. Let's do that, restart our service, and check its status. ```sh sudo systemctl daemon-reload @@ -112,8 +108,8 @@ sudo systemctl status gemini.service # Fixing Systemd Errors -If you\'re still getting errors, the installation process may not have -properly enabled the gemini service. Fix it with the following commands. +If you're still getting errors, the installation process may not have properly +enabled the gemini service. Fix it with the following commands. ```sh sudo systemctl enable gemini.service @@ -123,9 +119,9 @@ sudo systemctl status gemini.service # Firewall Rules -Great! Our server is now functional and running. The first consideration -now is that you need to be able to access port 1965 on the server. If -you have a firewall enabled, you\'ll need to open that port up. +Great! Our server is now functional and running. The first consideration now is +that you need to be able to access port 1965 on the server. If you have a +firewall enabled, you'll need to open that port up. ```sh sudo ufw allow 1965 @@ -134,19 +130,19 @@ sudo ufw reload # Creating Content -Let\'s create the Gemini capsule. Note that wherever you set the -WorkingDirectory variable to earlier, Agate will expect you to put your -Gemini capsule contents in a sub-folder called \"content.\" So, I place -my files in \"/var/gmi/content.\" I\'m going to create that folder now -and put a file in there. +Let's create the Gemini capsule. Note that wherever you set the +WorkingDirectory variable to earlier, Agate will expect you to put your Gemini +capsule contents in a sub-folder called "content." So, I place my files in +"/var/gmi/content." I'm going to create that folder now and put a file in +there. ```sh sudo mkdir /var/gemini/content sudo nano /var/gemini/content/index.gmi ``` -You can put whatever you want in the \"index.gmi\" file, just make sure -it\'s valid Gemtext. +You can put whatever you want in the "index.gmi" file, just make sure it's +valid Gemtext. # The Results diff --git a/content/blog/2021-04-23-php-comment-system.md b/content/blog/2021-04-23-php-comment-system.md index f369d0c..dcc96ff 100644 --- a/content/blog/2021-04-23-php-comment-system.md +++ b/content/blog/2021-04-23-php-comment-system.md @@ -7,85 +7,78 @@ draft = false # The Terrible-ness of Commenting Systems -The current state of affairs regarding interactive comment systems is, -well, terrible. It is especially awful if you\'re a privacy conscious -person who does not generally load third-party scripts or frames on the -websites you visit. +The current state of affairs regarding interactive comment systems is, well, +terrible. It is especially awful if you're a privacy conscious person who does +not generally load third-party scripts or frames on the websites you visit. -Even further, many comment systems are charging exorbitant fees for -something that should be standard. +Even further, many comment systems are charging exorbitant fees for something +that should be standard. Of course, there are some really terrible options: -- Facebook Comments -- Discourse +- Facebook Comments +- Discourse -There are some options that are better but still use too many scripts, -frames, or social integrations on your web page that could impact some -users: +There are some options that are better but still use too many scripts, frames, +or social integrations on your web page that could impact some users: -- Disqus -- Isso -- Remark42 +- Disqus +- Isso +- Remark42 -Lastly, I looked into a few unique ways of generating blog comments, -such as using Twitter threads or GitHub issues to automatically post -issues. However, these both rely on external third-party sites that I -don\'t currently use. +Lastly, I looked into a few unique ways of generating blog comments, such as +using Twitter threads or GitHub issues to automatically post issues. However, +these both rely on external third-party sites that I don't currently use. # Stay Static with Server-Side Comments -The main issue for my personal use-case is that my blog is completely, -100% static. I use PHP on the back-end but website visitors only see -HTML and a single CSS file. No external javascript and no embedded -frames. - -So, how do we keep a site static and still allow users to interact with -blog posts? The key actually pretty simple - I\'m already using PHP, so -why not rely on the classic HTML `<form>` and a PHP script to -save the comments somewhere? As it turns out, this was a perfect -solution for me. - -The second issue for my personal use-case is that I am trying to keep -the contents of my website accessible over time, as described by -@brandur, in his post entitled [Blog with Markdown + Git, and degrade -gracefully through +The main issue for my personal use-case is that my blog is completely, 100% +static. I use PHP on the back-end but website visitors only see HTML and a +single CSS file. No external javascript and no embedded frames. + +So, how do we keep a site static and still allow users to interact with blog +posts? The key actually pretty simple - I'm already using PHP, so why not rely +on the classic HTML `<form>` and a PHP script to save the comments somewhere? As +it turns out, this was a perfect solution for me. + +The second issue for my personal use-case is that I am trying to keep the +contents of my website accessible over time, as described by @brandur, in his +post entitled [Blog with Markdown + Git, and degrade gracefully through time](https://brandur.org/fragments/graceful-degradation-time) . -This means I cannot rely on a database for comments, since I do not rely -on a database for any other part of my websites. +This means I cannot rely on a database for comments, since I do not rely on a +database for any other part of my websites. -I blog in plain Markdown files, commit all articles to Git, and ensure -that future readers will be able to see the source data long after I\'m -gone, or the website has gone offline. However, I still haven\'t -committed any images served on my blog to Git, as I\'m not entirely sold -on Git LFS yet - for now, images can be found at -[img.cleberg.net](https://img.cleberg.net). +I blog in plain Markdown files, commit all articles to Git, and ensure that +future readers will be able to see the source data long after I'm gone, or the +website has gone offline. However, I still haven't committed any images served +on my blog to Git, as I'm not entirely sold on Git LFS yet - for now, images +can be found at [img.cleberg.net](https://img.cleberg.net). -Saving my comments back to the Git repository ensures that another -aspect of my site will degrade gracefully. +Saving my comments back to the Git repository ensures that another aspect of my +site will degrade gracefully. # Create a Comment Form -Okay, let\'s get started. The first step is to create an HTML form that -users can see and utilize to submit comments. This is fairly easy and -can be changed depending on your personal preferences. +Okay, let's get started. The first step is to create an HTML form that users +can see and utilize to submit comments. This is fairly easy and can be changed +depending on your personal preferences. -Take a look at the code block below for the form I currently use. Note -that `<current-url>` is replaced automatically in PHP with -the current post\'s URL, so that my PHP script used later will know -which blog post the comment is related to. +Take a look at the code block below for the form I currently use. Note that +`<current-url>` is replaced automatically in PHP with the current post's URL, +so that my PHP script used later will know which blog post the comment is +related to. The form contains the following structure: -1. `<form>` - This is the form and will determine which PHP - script to send the comment to. -2. `<section hidden>` - This section is hidden from the user - and is used to ensure that we know which blog post sent the comment. -3. `<section>` Display Name (Optional) - Used to accept a - display name, if entered. -4. `<section>` Comment (Required) - Used to accept the - user\'s full comment. Markdown is allowed. +1. `<form>` - This is the form and will determine which PHP script to send the + comment to. +2. `<section hidden>` - This section is hidden from the user and is used to + ensure that we know which blog post sent the comment. +3. `<section>` Display Name (Optional) - Used to accept a display name, if + entered. +4. `<section>` Comment (Required) - Used to accept the user's full comment. + Markdown is allowed. 5. `<button>` - A button to submit the form. ``` html @@ -132,13 +125,12 @@ The form contains the following structure: # Handle Comments via POST -Now that we have a form and can submit comments, we need to create a PHP -script so that the server can fetch the comment data and save it. Make -sure your PHP script name matches the name you entered in the -`action` field in your form. +Now that we have a form and can submit comments, we need to create a PHP script +so that the server can fetch the comment data and save it. Make sure your PHP +script name matches the name you entered in the `action` field in your form. -See the code block below for the contents of my `comment.php` -script. We perform the following tasks in this script: +See the code block below for the contents of my `comment.php` script. We perform +the following tasks in this script: 1. Grab the POST data from the HTML form. 2. Sanitize the comment data with `htmlentities`. @@ -146,12 +138,11 @@ script. We perform the following tasks in this script: 4. Create a PHP object that combines all of this data. 5. Check if our destination file `comments.json` exists. 6. If so, convert the PHP object to JSON and save it to the file. -7. If the `comments.json` file does not exist, the script - will exit with an error. You can alter this to ensure it creates the - script, but my source code includes the file by default, so it will - always exist. -8. Finally, send the user back to the `#comments` section of - the blog post they just read. +7. If the `comments.json` file does not exist, the script will exit with an + error. You can alter this to ensure it creates the script, but my source + code includes the file by default, so it will always exist. +8. Finally, send the user back to the `#comments` section of the blog post they + just read. ``` php // Get the content sent from the comment form @@ -190,9 +181,9 @@ if (file_exists($file_name)) { header('Location: ' . $post_url . '#comments'); ``` -If you\'re using Apache, make sure the `www-data` user on -your server has the correct permissions to your website directory or -else it will not be able to write to `comments.json`. +If you're using Apache, make sure the `www-data` user on your server has the +correct permissions to your website directory or else it will not be able to +write to `comments.json`. ```sh chgrp -R www-data /path/to/website/ @@ -201,18 +192,15 @@ chmod -R g+w comments.json # Display User Comments -Now that we can submit comments, and they are saved to the -`comments.json` file, let\'s make sure we can show those -comments in each blog post. +Now that we can submit comments, and they are saved to the `comments.json` file, +let's make sure we can show those comments in each blog post. -The code block below shows the function I use to decode my -`comments.json` file, check if the comments apply to the -current post, and then display them. +The code block below shows the function I use to decode my `comments.json` file, +check if the comments apply to the current post, and then display them. -This piece of code should **really\*** be inside a function (or at least -in an organized PHP workflow). Don\'t just copy-and-paste and expect it -to work. You need to at least supply a `$query` variable -depending on the page visited. +This piece of code should **really** be inside a function (or at least in an +organized PHP workflow). Don't just copy-and-paste and expect it to work. You +need to at least supply a `$query` variable depending on the page visited. ``` php $query = 'your-blog-post.html'; @@ -248,30 +236,26 @@ foreach ($comments as $comment) { echo $comment_section; ``` -# Bonus: Create a \'Recent Comments\' Page +# Bonus: Create a 'Recent Comments' Page -Finally, the last part of my current system is to create a Recent -Comments page so that I can easily check-in on my blog and moderate any -spam. As an alternative, you could use PHP\'s `mail()` -function to email you for each blog comment. +Finally, the last part of my current system is to create a Recent Comments page +so that I can easily check-in on my blog and moderate any spam. As an +alternative, you could use PHP's `mail()` function to email you for each blog +comment. -The code to do this is literally the same code as the previous section, -I just make sure it is printed when someone visits -`https://example.com/comments/`. +The code to do this is literally the same code as the previous section, I just +make sure it is printed when someone visits `https://example.com/comments/`. # Possible Enhancements -This comment system is by no means a fully-developed system. I have -noted a few possible enhancements here that I may implement in the -future: - -- Create a secure moderator page with user authentication at - `https://blog.example.com/mod/`. This page could have the - option to edit or delete any comment found in - `comments.json`. -- Create a temporary file, such as `pending_comments.json`, - that will store newly-submitted comments and won\'t display on blog - posts until approved by a moderator. -- Create a `/modlog/` page with a chronological log, - showing which moderator approved which comments and why certain - comments were rejected. +This comment system is by no means a fully-developed system. I have noted a few +possible enhancements here that I may implement in the future: + +- Create a secure moderator page with user authentication at + `https://blog.example.com/mod/`. This page could have the option to edit or + delete any comment found in `comments.json`. +- Create a temporary file, such as `pending_comments.json`, that will store + newly-submitted comments and won't display on blog posts until approved by a + moderator. +- Create a `/modlog/` page with a chronological log, showing which moderator + approved which comments and why certain comments were rejected. diff --git a/content/blog/2021-04-28-photography.md b/content/blog/2021-04-28-photography.md index e2a1fac..73df4d5 100644 --- a/content/blog/2021-04-28-photography.md +++ b/content/blog/2021-04-28-photography.md @@ -7,67 +7,62 @@ draft = false # Why Photography? -I\'ve often wondered why photography is as enticing as it is. You can -see billions of people around the world taking photographs every single -moment of the day. New technology often boasts about their photographic -capabilities, especially smartphones. I would even assume that we live -in a world where there is never a moment in which a photograph is not -being taken somewhere on Earth. +I've often wondered why photography is as enticing as it is. You can see +billions of people around the world taking photographs every single moment of +the day. New technology often boasts about their photographic capabilities, +especially smartphones. I would even assume that we live in a world where there +is never a moment in which a photograph is not being taken somewhere on Earth. -As for myself, I would simply say that I enjoy preserving a memory in -physical (or digital) form. I\'ve never had the best memory when it -comes to recalling details of places and people gone by, so it helps to -have a frame of reference lying around. +As for myself, I would simply say that I enjoy preserving a memory in physical +(or digital) form. I've never had the best memory when it comes to recalling +details of places and people gone by, so it helps to have a frame of reference +lying around. -Regardless of the reason, I think most people would agree that you -simply cannot have too many hobbies. +Regardless of the reason, I think most people would agree that you simply cannot +have too many hobbies. # Older Cameras -I started playing around with the idea of photography when my family -purchased a Fujifilm camera for family-specific events. I don\'t recall -the specific model, but I do recall it was a point-and-shoot camera -without an interchangeable lens. However, it was of great value to -someone, like myself, who couldn\'t afford any other camera. I took -about 10,000 shots with that camera over a 3-5 year span. Most notably, -all of my trips to California were documented through this camera. +I started playing around with the idea of photography when my family purchased a +Fujifilm camera for family-specific events. I don't recall the specific model, +but I do recall it was a point-and-shoot camera without an interchangeable lens. +However, it was of great value to someone, like myself, who couldn't afford any +other camera. I took about 10,000 shots with that camera over a 3-5 year span. +Most notably, all of my trips to California were documented through this camera. -When possible, I would borrow my sister\'s camera, which is a Sony -SLT-A58. This camera was great and allowed for some of my best early -shots, especially those taken in Utah\'s and Nevada\'s parks. +When possible, I would borrow my sister's camera, which is a Sony SLT-A58. This +camera was great and allowed for some of my best early shots, especially those +taken in Utah's and Nevada's parks. # My Current Kit -I\'ve finally come to a point in my life where I have the disposable -income to invest in a solid photography kit. I played around with the -idea of a lot of different cameras, different types, new vs used, etc. -Finally, I settled on the [Sony α7 -III](https://en.wikipedia.org/wiki/Sony_%CE%B17_III). This camera is -mirror-less and uses a full-frame image sensor at 24 megapixels. I -don\'t create large prints, and I am mostly focused on preserving -memories in high quality for the next 5-10 years with this camera, so -the specifications here are just perfect for me. +I've finally come to a point in my life where I have the disposable income to +invest in a solid photography kit. I played around with the idea of a lot of +different cameras, different types, new vs used, etc. Finally, I settled on the +[Sony α7 III](https://en.wikipedia.org/wiki/Sony_%CE%B17_III). This camera is +mirror-less and uses a full-frame image sensor at 24 megapixels. I don't create +large prints, and I am mostly focused on preserving memories in high quality for +the next 5-10 years with this camera, so the specifications here are just +perfect for me. For lenses, I decided to buy two lenses that could carry me through most situations: -- [Vario-Tessar T\*\* FE 24-70 mm F4 ZA - OSS](https://electronics.sony.com/imaging/lenses/full-frame-e-mount/p/sel2470z) -- [Tamron 70-300mm f4.5-6.3 Di III - RXD](https://www.tamron-usa.com/product/lenses/a047.html) +- [Vario-Tessar T** FE 24-70 mm F4 ZA + OSS](https://electronics.sony.com/imaging/lenses/full-frame-e-mount/p/sel2470z) +- [Tamron 70-300mm f4.5-6.3 Di III + RXD](https://www.tamron-usa.com/product/lenses/a047.html) In addition, I grabbed a couple [HGX Prime -67mm](https://www.promaster.com/Product/6725) protection filters for the -lenses. +67mm](https://www.promaster.com/Product/6725) protection filters for the lenses. -As I delve further into photography and pick up more skills, I will most -likely go back and grab a lens with a higher f-stop value, such as -f/1.8. I toyed with the idea of grabbing a 50 mm at `f/1.8`, -but decided to keep things in a reasonable price range instead. +As I delve further into photography and pick up more skills, I will most likely +go back and grab a lens with a higher f-stop value, such as f/1.8. I toyed with +the idea of grabbing a 50 mm at `f/1.8`, but decided to keep things in a +reasonable price range instead. -Finally, I made sure to buy a photography-specific backpack with a rain -guard, and the zipper on the back panel, to protect the equipment while -wearing the bag. If you\'ve ever had to haul around a DSLR (or camera of -similar heft) in a bag that only has a shoulder strap, you\'ll know the -pain it can cause. Putting all my equipment in a backpack was an easy -decision. +Finally, I made sure to buy a photography-specific backpack with a rain guard, +and the zipper on the back panel, to protect the equipment while wearing the +bag. If you've ever had to haul around a DSLR (or camera of similar heft) in a +bag that only has a shoulder strap, you'll know the pain it can cause. Putting +all my equipment in a backpack was an easy decision. diff --git a/content/blog/2021-05-30-changing-git-authors.md b/content/blog/2021-05-30-changing-git-authors.md index 6c31b08..18fe966 100644 --- a/content/blog/2021-05-30-changing-git-authors.md +++ b/content/blog/2021-05-30-changing-git-authors.md @@ -7,25 +7,25 @@ draft = false # Changing Git Author/Email Based on Previously Committed Email -Here\'s the dilemma: You\'ve been committing changes to your git -repository with an incorrect name or email (or multiple repositories), -and now you want to fix it. Luckily, there\'s a semi-reliable way to fix -that. While I have never experienced issues with this method, some -people have warned that it can mess with historical hashes and integrity -of commits, so use this method only if you\'re okay accepting that risk. +Here's the dilemma: You've been committing changes to your git repository with +an incorrect name or email (or multiple repositories), and now you want to fix +it. Luckily, there's a semi-reliable way to fix that. While I have never +experienced issues with this method, some people have warned that it can mess +with historical hashes and integrity of commits, so use this method only if +you're okay accepting that risk. -Okay, let\'s create the bash script: +Okay, let's create the bash script: ```sh nano change_git_authors.sh ``` -The following information can be pasted directly into your bash script. -The only changes you need to make are to the following variables: +The following information can be pasted directly into your bash script. The only +changes you need to make are to the following variables: -- `OLD_EMAIL` -- `CORRECT_NAME` -- `CORRECT_EMAIL` +- `OLD_EMAIL` +- `CORRECT_NAME` +- `CORRECT_EMAIL` ```sh #!/bin/sh diff --git a/content/blog/2021-07-15-delete-gitlab-repos.md b/content/blog/2021-07-15-delete-gitlab-repos.md index 748630e..5188f59 100644 --- a/content/blog/2021-07-15-delete-gitlab-repos.md +++ b/content/blog/2021-07-15-delete-gitlab-repos.md @@ -7,31 +7,31 @@ draft = false # Background -Have you ever used GitLab to host your source code, moved to a different -host, and wanted to delete everything from your GitLab account? Well, -this post covers any scenario where you would want to delete all -repositories from your GitLab account. +Have you ever used GitLab to host your source code, moved to a different host, +and wanted to delete everything from your GitLab account? Well, this post covers +any scenario where you would want to delete all repositories from your GitLab +account. -For me, I currently maintain around 30 repositories and don\'t like to -manually delete them whenever I switch host. GitHub has a few different -tools online to delete all repositories for you, but I have not found -anything similar for GitLab, so I needed an alternative solution. +For me, I currently maintain around 30 repositories and don't like to manually +delete them whenever I switch host. GitHub has a few different tools online to +delete all repositories for you, but I have not found anything similar for +GitLab, so I needed an alternative solution. # Use a Python Script ## Requirements -Before we look at the script, make sure you know your GitLab username. -Next, [create an authorization -token](https://gitlab.com/-/profile/personal_access_tokens) so that the -Python script can delete your repositories. Don\'t lose this token or -else you\'ll need to create a new one. +Before we look at the script, make sure you know your GitLab username. Next, +[create an authorization +token](https://gitlab.com/-/profile/personal_access_tokens) so that the Python +script can delete your repositories. Don't lose this token or else you'll need +to create a new one. ## Create the Script -To run a Python script, you must first create it. Open a terminal and -enter the following commands in whichever directory you prefer to store -the script. You can do the same things in a file manager if you prefer. +To run a Python script, you must first create it. Open a terminal and enter the +following commands in whichever directory you prefer to store the script. You +can do the same things in a file manager if you prefer. ```sh mkdir delete-gitlab @@ -103,13 +103,12 @@ if __name__ == "__main__": main() ``` -Now that you have the proper information, replace `{user-id}` -with your GitLab username and `{auth-token}` with the -authorization token you created earlier. +Now that you have the proper information, replace `{user-id}` with your GitLab +username and `{auth-token}` with the authorization token you created earlier. -Finally, simply run the script and watch the output. You can also use -PyCharm Community Edition to edit and run the Python script if you -don\'t want to work in a terminal. +Finally, simply run the script and watch the output. You can also use PyCharm +Community Edition to edit and run the Python script if you don't want to work +in a terminal. ```sh python3 main.py diff --git a/content/blog/2021-08-25-audit-sampling.md b/content/blog/2021-08-25-audit-sampling.md index 2a7073a..93576e3 100644 --- a/content/blog/2021-08-25-audit-sampling.md +++ b/content/blog/2021-08-25-audit-sampling.md @@ -8,44 +8,43 @@ draft = false # Introduction For anyone who is familiar with internal auditing, external auditing, or -consulting, you will understand how tedious audit testing can become -when you are required to test large swaths of data. When we cannot -establish an automated means of testing an entire population, we -generate samples to represent the population of data. This helps ensure -we can have a small enough data pool to test and that our results still -represent the population. - -However, sampling data within the world of audit still seems to confuse -quite a lot of people. While some audit-focused tools have introduced -sampling functionality (e.g. Wdesk), many audit departments and firms -cannot use software like this due to certain constraints, such as the -team\'s budget or knowledge. Here is where this article comes in: we\'re -going to use [Python](https://www.python.org), a free and open-source -programming language, to generate random samples from a dataset in order -to suffice numerous audit situations. +consulting, you will understand how tedious audit testing can become when you +are required to test large swaths of data. When we cannot establish an automated +means of testing an entire population, we generate samples to represent the +population of data. This helps ensure we can have a small enough data pool to +test and that our results still represent the population. + +However, sampling data within the world of audit still seems to confuse quite a +lot of people. While some audit-focused tools have introduced sampling +functionality (e.g. Wdesk), many audit departments and firms cannot use software +like this due to certain constraints, such as the team's budget or knowledge. +Here is where this article comes in: we're going to use +[Python](https://www.python.org), a free and open-source programming language, +to generate random samples from a dataset in order to suffice numerous audit +situations. # Audit Requirements for Sampling -Before we get into the details of how to sample with Python, I want to -make sure I discuss the different requirements that auditors may have of -samples used within their projects. +Before we get into the details of how to sample with Python, I want to make sure +I discuss the different requirements that auditors may have of samples used +within their projects. ## Randomness -First, let\'s discuss randomness. When testing out new technology to -help assist with audit sampling, you need to understand exactly how your -samples are being generated. For example, if the underlying function is -just picking every 57th element from a list, that\'s not truly random; -it\'s a systematic form of sampling. Luckily, since Python is -open-source, we have access to its codebase. Through this blog post, I -will be using the [pandas](https://pandas.pydata.org) module in order to -generate the random samples. More specifically, I will be using the +First, let's discuss randomness. When testing out new technology to help assist +with audit sampling, you need to understand exactly how your samples are being +generated. For example, if the underlying function is just picking every 57th +element from a list, that's not truly random; it's a systematic form of +sampling. Luckily, since Python is open-source, we have access to its codebase. +Through this blog post, I will be using the [pandas](https://pandas.pydata.org) +module in order to generate the random samples. More specifically, I will be +using the [pandas.DataFrame.sample](https://pandas.pydata.org/pandas-docs/stable/reference/api/pandas.DataFrame.sample.html) function provided by Pandas. -Now that you know what you\'re using, you can always check out the code -behind `pandas.DataFrame.sample`. This function does a lot of -work, but we really only care about the following snippets of code: +Now that you know what you're using, you can always check out the code behind +`pandas.DataFrame.sample`. This function does a lot of work, but we really only +care about the following snippets of code: ``` python # Process random_state argument @@ -61,67 +60,59 @@ result.index = ibase.default_index(len(result)) return result ``` -The block of code above shows you that if you assign a -`random_state` argument when you run the function, that will -be used as a seed number in the random generation and will allow you to -reproduce a sample, given that nothing else changes. This is critical to -the posterity of audit work. After all, how can you say your audit -process is adequately documented if the next person can\'t run the code -and get the same sample? The final piece here on randomness is to look -at the -[choice](https://docs.%20python.org/3/library/random.html#random.choice) -function used above. This is the crux of the generation and can also be -examined for more detailed analysis on its reliability. As far as -auditing goes, we will trust that these functions are mathematically -random. +The block of code above shows you that if you assign a `random_state` argument +when you run the function, that will be used as a seed number in the random +generation and will allow you to reproduce a sample, given that nothing else +changes. This is critical to the posterity of audit work. After all, how can you +say your audit process is adequately documented if the next person can't run +the code and get the same sample? The final piece here on randomness is to look +at the [choice](https://docs.%20python.org/3/library/random.html#random.choice) +function used above. This is the crux of the generation and can also be examined +for more detailed analysis on its reliability. As far as auditing goes, we will +trust that these functions are mathematically random. ## Sample Sizes -As mentioned in the intro, sampling is only an effective method of -auditing when it truly represents the entire population. While some -audit departments or firms may consider certain judgmental sample sizes -to be adequate, you may need to rely on statistically-significant -confidence levels of sample testing at certain points. I will -demonstrate both here. For statistically-significant confidence levels, -most people will assume a 90% - 99% confidence level. In order to -actually calculate the correct sample size, it is best to use -statistical tools due to the tedious math work required. For example, -for a population of 1000, and a 90% confidence level that no more than -5% of the items are nonconforming, you would sample 45 items. - -However, in my personal experience, many audit departments and firms do -not use statistical sampling. Most people use a predetermined, often -proprietary, table that will instruct auditors which sample sizes to -choose. This allows for uniform testing and reduces overall workload. -See the table below for a common implementation of sample sizes: +As mentioned in the intro, sampling is only an effective method of auditing when +it truly represents the entire population. While some audit departments or firms +may consider certain judgmental sample sizes to be adequate, you may need to +rely on statistically-significant confidence levels of sample testing at certain +points. I will demonstrate both here. For statistically-significant confidence +levels, most people will assume a 90% - 99% confidence level. In order to +actually calculate the correct sample size, it is best to use statistical tools +due to the tedious math work required. For example, for a population of 1000, +and a 90% confidence level that no more than 5% of the items are nonconforming, +you would sample 45 items. + +However, in my personal experience, many audit departments and firms do not use +statistical sampling. Most people use a predetermined, often proprietary, table +that will instruct auditors which sample sizes to choose. This allows for +uniform testing and reduces overall workload. See the table below for a common +implementation of sample sizes: Control Frequency Sample Size - High Risk Sample Size - Low Risk ------------------- ------------------------- ------------------------ - More Than Daily 40 25 - Daily 40 25 - Weekly 12 5 - Monthly 5 3 - Quarterly 2 2 - Semi-Annually 1 1 - Annually 1 1 - Ad-hoc 1 1 + More Than Daily 40 25 Daily 40 + 25 Weekly 12 5 Monthly 5 + 3 Quarterly 2 2 Semi-Annually 1 + 1 Annually 1 1 Ad-hoc 1 + 1 ### Sampling with Python & Pandas -In this section, I am going to cover a few basic audit situations that -require sampling. While some situations may require more effort, the -syntax, organization, and intellect used remain largely the same. If -you\'ve never used Python before, note that lines starting with a -\'`#`\' symbol are called comments, and they will be skipped -by Python. I highly recommend taking a quick tutorial online to -understand the basics of Python if any of the code below is confusing to -you. +In this section, I am going to cover a few basic audit situations that require +sampling. While some situations may require more effort, the syntax, +organization, and intellect used remain largely the same. If you've never used +Python before, note that lines starting with a '`#`' symbol are called +comments, and they will be skipped by Python. I highly recommend taking a quick +tutorial online to understand the basics of Python if any of the code below is +confusing to you. ## Simple Random Sample -First, let\'s look at a simple, random sample. The code block below will -import the `pandas` module, load a data file, sample the -data, and export the sample to a file. +First, let's look at a simple, random sample. The code block below will import +the `pandas` module, load a data file, sample the data, and export the sample to +a file. ``` python # Import the Pandas module @@ -145,8 +136,8 @@ sample.to_excel(file_output) ## Simple Random Sample: Using Multiple Input Files -Now that we\'ve created a simple sample, let\'s create a sample from -multiple files. +Now that we've created a simple sample, let's create a sample from multiple +files. ``` python # Import the Pandas module @@ -179,9 +170,9 @@ sample.to_excel(file_output) ## Stratified Random Sample -Well, what if you need to sample distinct parts of a single file? For -example, let\'s write some code to separate our data by \"Region\" and -sample those regions independently. +Well, what if you need to sample distinct parts of a single file? For example, +let's write some code to separate our data by "Region" and sample those +regions independently. ``` python # Import the Pandas module @@ -213,10 +204,10 @@ sample.to_excel(file_output) ## Stratified Systematic Sample -This next example is quite useful if you need audit coverage over a -certain time period. This code will generate samples for each month in -the data and combine them all together at the end. Obviously, this code -can be modified to stratify by something other than months, if needed. +This next example is quite useful if you need audit coverage over a certain time +period. This code will generate samples for each month in the data and combine +them all together at the end. Obviously, this code can be modified to stratify +by something other than months, if needed. ``` python # Import the Pandas module @@ -262,17 +253,17 @@ sample.to_excel(file_output) ### Documenting the Results -Once you\'ve generated a proper sample, there are a few things left to -do in order to properly ensure your process is reproducible. - -1. Document the sample. Make sure the resulting file is readable and - includes the documentation listed in the next bullet. -2. Include documentation around the data source, extraction techniques, - any modifications made to the data, and be sure to include a copy of - the script itself. -3. Whenever possible, perform a completeness and accuracy test to - ensure your sample is coming from a complete and accurate - population. To ensure completeness, compare the record count from - the data source to the record count loaded into Python. To ensure - accuracy, test a small sample against the source data (e.g., test 5 - sales against the database to see if the details are accurate). +Once you've generated a proper sample, there are a few things left to do in +order to properly ensure your process is reproducible. + +1. Document the sample. Make sure the resulting file is readable and includes + the documentation listed in the next bullet. +2. Include documentation around the data source, extraction techniques, any + modifications made to the data, and be sure to include a copy of the script + itself. +3. Whenever possible, perform a completeness and accuracy test to ensure your + sample is coming from a complete and accurate population. To ensure + completeness, compare the record count from the data source to the record + count loaded into Python. To ensure accuracy, test a small sample against the + source data (e.g., test 5 sales against the database to see if the details + are accurate). diff --git a/content/blog/2021-10-09-apache-redirect.md b/content/blog/2021-10-09-apache-redirect.md index 13794f0..87ea38e 100644 --- a/content/blog/2021-10-09-apache-redirect.md +++ b/content/blog/2021-10-09-apache-redirect.md @@ -7,26 +7,25 @@ draft = false # The Problem -After recently switching static site generators (SSG), my blog URLs -changed with no option to preserve the classic `.html` -extension at the end of my blog post URLs. +After recently switching static site generators (SSG), my blog URLs changed with +no option to preserve the classic `.html` extension at the end of my blog post +URLs. -I really disliked using my old SSG ([Jekyll](https://jekyllrb.com)) and -prefer my new tool ([Zola](https://www.getzola.org)) much more, so I was -determined to figure out a way to get the proper redirect set up so that -people who find my posts online aren\'t constantly met by 404 errors. +I really disliked using my old SSG ([Jekyll](https://jekyllrb.com)) and prefer +my new tool ([Zola](https://www.getzola.org)) much more, so I was determined to +figure out a way to get the proper redirect set up so that people who find my +posts online aren't constantly met by 404 errors. # The Solution To solve this problem, I really needed to solve two pieces: -1. Redirect all blog post URL requests from - `/blog/some-post.html` to `/blog/some-post/`. -2. Ensure that no other `.html` files are redirected, such - as `index.html`. +1. Redirect all blog post URL requests from `/blog/some-post.html` to + `/blog/some-post/`. +2. Ensure that no other `.html` files are redirected, such as `index.html`. -After *a lot* of tweaking and testing, I believe I have finally found -the solution. The solution is shown below. +After *a lot* of tweaking and testing, I believe I have finally found the +solution. The solution is shown below. ``` conf RewriteEngine On @@ -34,14 +33,13 @@ RewriteCond %{REQUEST_URI} !\index.html$ [NC] RewriteRule ^(.*).html$ https://example.com/$1 [R=301,L] ``` -This piece of code in the Apache `.conf` or -`.htaccess` file will do the following: - -1. Turn on the RewriteEngine so that we can modify URLs. -2. Ignore any `index.html` files from the rule we are about - to specify. -3. Find any `.html` files within the website directory and - redirect it to exclude the file extension. -4. The final piece is adding the trailing slash (`/`) at the - end of the URL - you\'ll notice that I don\'t have an Apache rule - for that since Apache handles that automatically. +This piece of code in the Apache `.conf` or `.htaccess` file will do the +following: + +1. Turn on the RewriteEngine so that we can modify URLs. +2. Ignore any `index.html` files from the rule we are about to specify. +3. Find any `.html` files within the website directory and redirect it to + exclude the file extension. +4. The final piece is adding the trailing slash (`/`) at the end of the URL - + you'll notice that I don't have an Apache rule for that since Apache + handles that automatically. diff --git a/content/blog/2021-12-04-cisa.md b/content/blog/2021-12-04-cisa.md index 7060d5e..b605493 100644 --- a/content/blog/2021-12-04-cisa.md +++ b/content/blog/2021-12-04-cisa.md @@ -8,208 +8,193 @@ draft = false # What is the CISA? For those of you lucky enough not to be knee-deep in the world of IT/IS -Auditing, [CISA](https://www.isaca.org/credentialing/cisa) stands for -Certified Information Systems Auditor. This certification and exam are -part of ISACA\'s suite of certifications. As I often explain it to -people like my family, it basically means you\'re employed to use your -knowledge of information systems, regulations, common threats, risks, -etc. in order to assess an organization\'s current control of their -risk. If a risk isn\'t controlled (and the company doesn\'t want to -accept the risk), an IS auditor will suggest implementing a control to -address that risk. - -Now, the CISA certification itself is, in my opinion, the main -certification for this career. While certifications such as the CPA or -CISSP are beneficial, nothing matches the power of the CISA for an IS -auditor when it comes to getting hired, getting a raise/bonus, or -earning respect in the field. - -However, to be honest, I am a skeptic of most certifications. I -understand the value they hold in terms of how much you need to commit -to studying or learning on the job, as well as the market value for -certifications such as the CISA. But I also have known some very -~~incompetent~~ *less than stellar* auditors who have CPAs, CISAs, CIAs, -etc. - -The same goes for most industries: if a person is good at studying, they -can earn the certification. However, that knowledge means nothing unless -you\'re actually able to use it in real life and perform as expected of -a certification holder. The challenge comes when people are hired or -connected strictly because of their certifications or resume; you need -to see a person work before you can assume them having a CISA means -they\'re better than someone without the CISA. - -Okay, rant over. Certifications are generally accepted as a measuring -stick of commitment and quality of an employee, so I am accepting it -too. +Auditing, [CISA](https://www.isaca.org/credentialing/cisa) stands for Certified +Information Systems Auditor. This certification and exam are part of ISACA's +suite of certifications. As I often explain it to people like my family, it +basically means you're employed to use your knowledge of information systems, +regulations, common threats, risks, etc. in order to assess an organization's +current control of their risk. If a risk isn't controlled (and the company +doesn't want to accept the risk), an IS auditor will suggest implementing a +control to address that risk. + +Now, the CISA certification itself is, in my opinion, the main certification for +this career. While certifications such as the CPA or CISSP are beneficial, +nothing matches the power of the CISA for an IS auditor when it comes to getting +hired, getting a raise/bonus, or earning respect in the field. + +However, to be honest, I am a skeptic of most certifications. I understand the +value they hold in terms of how much you need to commit to studying or learning +on the job, as well as the market value for certifications such as the CISA. But +I also have known some very ~~incompetent~~ *less than stellar* auditors who +have CPAs, CISAs, CIAs, etc. + +The same goes for most industries: if a person is good at studying, they can +earn the certification. However, that knowledge means nothing unless you're +actually able to use it in real life and perform as expected of a certification +holder. The challenge comes when people are hired or connected strictly because +of their certifications or resume; you need to see a person work before you can +assume them having a CISA means they're better than someone without the CISA. + +Okay, rant over. Certifications are generally accepted as a measuring stick of +commitment and quality of an employee, so I am accepting it too. # Exam Content -The CISA is broken down into five sections, each weighted with a -percentage of test questions that may appear. +The CISA is broken down into five sections, each weighted with a percentage of +test questions that may appear. 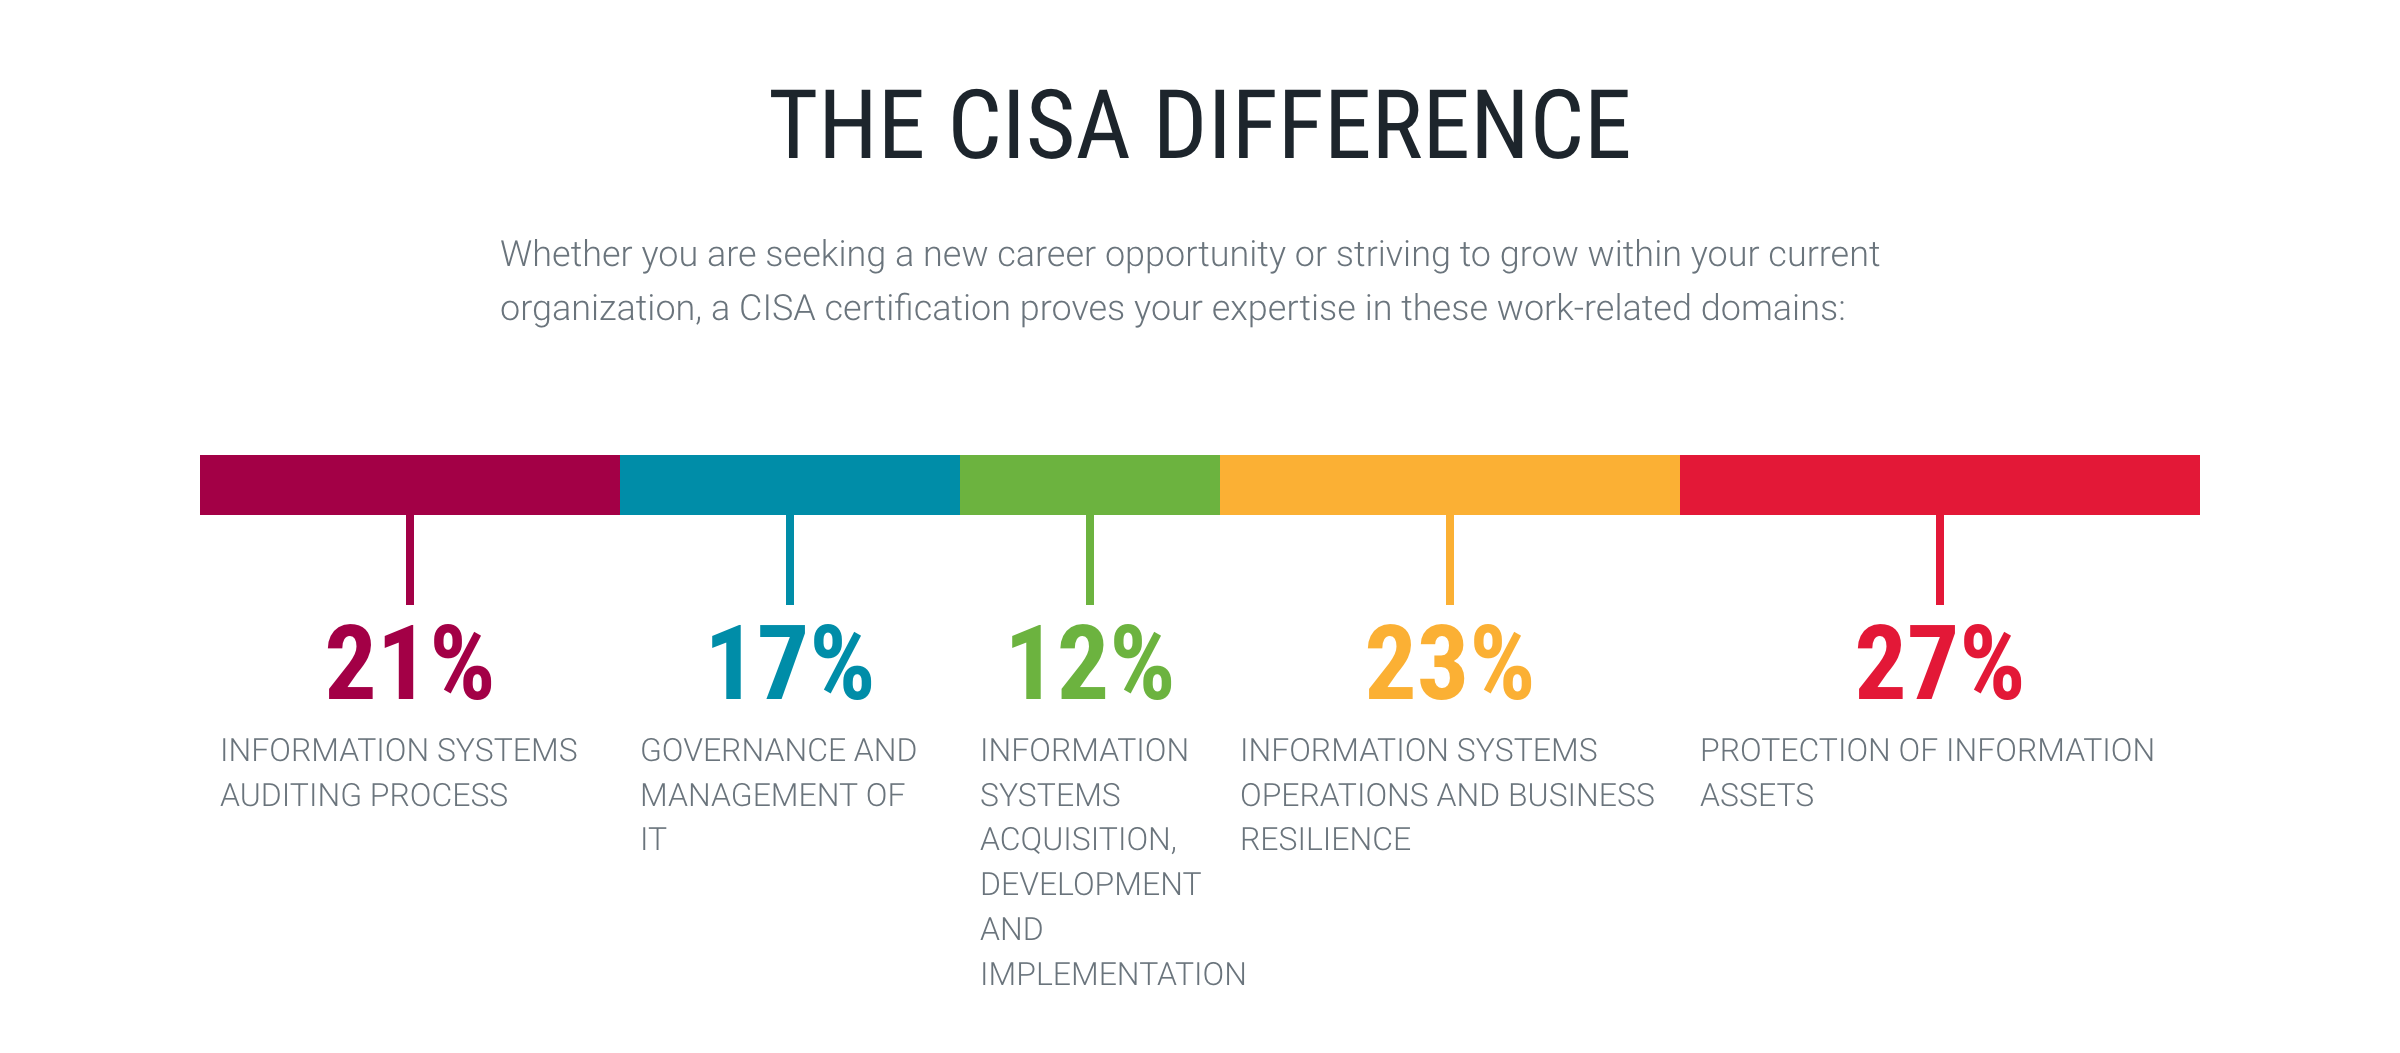 -Since the exam contains 150 questions, here\'s how those sections break -down: +Since the exam contains 150 questions, here's how those sections break down: - Exam Section Percentage of Exam Questions - ----------------- -------------------- ----------- - 1 21% 32 - 2 17% 26 - 3 12% 18 - 4 23% 34 - 5 27% 40 - **Grand Total** **100%** **150** +| Exam Section | Percentage of Exam | Questions | +|-----------------|--------------------|-----------| +| 1 | 21% | 32 | +| 2 | 17% | 26 | +| 3 | 12% | 18 | +| 4 | 23% | 34 | +| 5 | 27% | 40 | +| **Grand Total** | **100%** | **150** | # My Studying Habits -This part is a little hard for me to break down into specific detail due -to the craziness of the last year. While I officially purchased my -studying materials in December 2020 and opened them to \"start -studying\" in January 2021, I really wasn\'t able to study much due to -the demands of my job and personal life. +This part is a little hard for me to break down into specific detail due to the +craziness of the last year. While I officially purchased my studying materials +in December 2020 and opened them to "start studying" in January 2021, I really +wasn't able to study much due to the demands of my job and personal life. Let me approach this from a few different viewpoints. ## Study Materials -Let\'s start by discussing the study materials I purchased. I\'ll be -referring to #1 as the CRM and #2 as the QAE. - -1. [CISA Review Manual, 27th Edition \| - Print](https://store.isaca.org/s/store#/store/browse/detail/a2S4w000004KoCbEAK) -2. \[\[<https://store.isaca.org/s/store#/store/browse/detail/a2S4w000004KoCcEAK>\]\[CISA - Review Questions, Answers & Explanations Manual, 12th Edition \| - Print\]\] - -The CRM is an excellent source of information and could honestly be used -as a reference for most IS auditors as a learning reference during their -daily audit responsibilities. However, it is **full\*** of information -and can be overloading if you\'re not good at filtering out useless -information while studying. - -The QAE is the real star of the show here. This book contains 1000 -questions, separated by exam section, and a practice exam. My only -complaint about the QAE is that each question is immediately followed -with the correct answer and explanations below it, which means I had to -use something to constantly cover the answers while I was studying. - -I didn\'t use the online database version of the QAE, but I\'ve heard -that it\'s easier to use than the printed book. However, it is more -expensive (\$299 database vs \$129 book) which might be important if -you\'re paying for materials yourself. - -In terms of question difficulty, I felt that the QAE was a good -representation of the actual exam. I\'ve seen a lot of people online say -it wasn\'t accurate to the exam or that it was much easier/harder, but I -disagree with all of those. The exam was fairly similar to the QAE, just -focusing on whichever topics they chose for my version of the exam. - -If you understand the concepts, skim the CRM (and read in-depth on -topics you struggle with), and use the QAE to continue practicing -exam-like questions, you should be fine. I didn\'t use any online -courses, videos, etc. - the ISACA materials are more than enough. +Let's start by discussing the study materials I purchased. I'll be referring +to #1 as the CRM and #2 as the QAE. + +1. [CISA Review Manual, 27th Edition | +Print](https://store.isaca.org/s/store#/store/browse/detail/a2S4w000004KoCbEAK) +2. [CISA Review Questions, Answers & Explanations Manual, 12th Edition | +Print](https://store.isaca.org/s/store#/store/browse/detail/a2S4w000004KoCcEAK) + +The CRM is an excellent source of information and could honestly be used as a +reference for most IS auditors as a learning reference during their daily audit +responsibilities. However, it is **full** of information and can be +overloading if you're not good at filtering out useless information while +studying. + +The QAE is the real star of the show here. This book contains 1000 questions, +separated by exam section, and a practice exam. My only complaint about the QAE +is that each question is immediately followed with the correct answer and +explanations below it, which means I had to use something to constantly cover +the answers while I was studying. + +I didn't use the online database version of the QAE, but I've heard that it's +easier to use than the printed book. However, it is more expensive ($299 +database vs $129 book) which might be important if you're paying for materials +yourself. + +In terms of question difficulty, I felt that the QAE was a good representation +of the actual exam. I've seen a lot of people online say it wasn't accurate to +the exam or that it was much easier/harder, but I disagree with all of those. +The exam was fairly similar to the QAE, just focusing on whichever topics they +chose for my version of the exam. + +If you understand the concepts, skim the CRM (and read in-depth on topics you +struggle with), and use the QAE to continue practicing exam-like questions, you +should be fine. I didn't use any online courses, videos, etc. - the ISACA +materials are more than enough. ## Studying Process -While I was able to briefly read through sections 1 and 2 in early 2021, -I had to stop and take a break from February/March to September. I -switched jobs in September, which allowed me a lot more free time to -study. +While I was able to briefly read through sections 1 and 2 in early 2021, I had +to stop and take a break from February/March to September. I switched jobs in +September, which allowed me a lot more free time to study. -In September, I studied sections 3-5, took notes, and did a quick review -of the section topics. Once I felt comfortable with my notes, I took a -practice exam from the QAE manual and scored 70% (105/150). +In September, I studied sections 3-5, took notes, and did a quick review of the +section topics. Once I felt comfortable with my notes, I took a practice exam +from the QAE manual and scored 70% (105/150). -Here\'s a breakdown of my initial practice exam: +Here's a breakdown of my initial practice exam: - Exam Section Incorrect Correct Grand Total Percent - ------------------- ----------- ----------- ------------- ----------- - 1 8 25 33 76% - 2 5 20 25 80% - 3 6 12 18 67% - 4 10 23 33 70% - 5 16 25 41 61% - **Grand Total\*** **45\*** **105\*** **150\*** **70%\*** +| Exam Section | Incorrect | Correct | Grand Total | Percent | +|-----------------|-----------|---------|-------------|---------| +| 1 | 8 | 25 | 33 | 76% | +| 2 | 5 | 20 | 25 | 80% | +| 3 | 6 | 12 | 18 | 67% | +| 4 | 10 | 23 | 33 | 70% | +| 5 | 16 | 25 | 41 | 61% | +| **Grand Total** | **45** | **105** | **150** | **70%** | As I expected, my toughest sections were related to project management, development, implementation, and security. -This just leaves October and November. For these months, I tried to -practice every few days, doing 10 questions for each section, until the -exam. This came out to 13 practice sessions, \~140 questions per -section, and \~700 questions total. - -While some practice sessions were worse and some were better, the final -results were similar to my practice exam results. As you can see below, -my averages were slightly worse than my practice exam. However, I got in -over 700 questions of practice and, most importantly, \*I read through -the explanations every time I answered incorrectly and learned from my -mistakes\*. - - Exam Section Incorrect Correct Grand Total Percent - ------------------- ----------- ----------- ------------- ----------- - 1 33 108 141 77% - 2 33 109 142 77% - 3 55 89 144 62% - 4 52 88 140 63% - 5 55 85 140 61% - **Grand Total\*** **228\*** **479\*** **707\*** **68%\*** +This just leaves October and November. For these months, I tried to practice +every few days, doing 10 questions for each section, until the exam. This came +out to 13 practice sessions, ~140 questions per section, and ~700 questions +total. + +While some practice sessions were worse and some were better, the final results +were similar to my practice exam results. As you can see below, my averages were +slightly worse than my practice exam. However, I got in over 700 questions of +practice and, most importantly, *I read through the explanations every time I +answered incorrectly and learned from my mistakes*. + +| Exam Section | Incorrect | Correct | Grand Total | Percent | +|-----------------|-----------|---------|-------------|---------| +| 1 | 33 | 108 | 141 | 77% | +| 2 | 33 | 109 | 142 | 77% | +| 3 | 55 | 89 | 144 | 62% | +| 4 | 52 | 88 | 140 | 63% | +| 5 | 55 | 85 | 140 | 61% | +| **Grand Total** | **228** | **479** | **707** | **68%** |  # Results -Now, how do the practice scores reflect my actual results? After all, -it\'s hard to tell how good a practice regimen is unless you see how it -turns out. - - Exam Section Section Name Score - -------------- ------------------------------------------------------------------ --------- - 1 Information Systems Auditing Process 678 - 2 Governance and Management of IT 590 - 3 Information Systems Acquisition, Development, and Implementation 721 - 4 Information Systems Operations and Business Resilience 643 - 5 Protection of Information Assets 511 - **TOTAL** **616** - -Now, in order to pass the CISA, you need at least 450 on a sliding scale -of 200-800. Personally, I really have no clue what an average CISA score -is. After a *very* brief look online, I can see that the high end is -usually in the low 700s. In addition, only about 50-60% of people pass -the exam. - -Given this information, I feel great about my scores. 616 may not be -phenomenal, and I wish I had done better on sections 2 & 5, but my -practicing seems to have worked very well overall. - -However, the practice results do not conform to the actual results. -Section 2 was one of my highest practice sections and was my -second-lowest score in the exam. Conversely, section 3 was my -second-lowest practice section and turned out to be my highest actual -score! - -After reflecting, it is obvious that if you have any background on the -CISA topics at all, the most important part of studying is doing -practice questions. You really need to understand how to read the -questions critically and pick the best answer. +Now, how do the practice scores reflect my actual results? After all, it's hard +to tell how good a practice regimen is unless you see how it turns out. + +| Exam Section | Section Name | Score | +|--------------|------------------------------------------------------------------|-------| +| 1 | Information Systems Auditing Process | 678 | +| 2 | Governance and Management of IT | 590 | +| 3 | Information Systems Acquisition, Development, and Implementation | 721 | +| 4 | Information Systems Operations and Business Resilience | 643 | +| 5 | Protection of Information Assets | 511 | + +Now, in order to pass the CISA, you need at least 450 on a sliding scale of +200-800. Personally, I really have no clue what an average CISA score is. After +a *very* brief look online, I can see that the high end is usually in the low +700s. In addition, only about 50-60% of people pass the exam. + +Given this information, I feel great about my scores. 616 may not be phenomenal, +and I wish I had done better on sections 2 & 5, but my practicing seems to have +worked very well overall. + +However, the practice results do not conform to the actual results. Section 2 +was one of my highest practice sections and was my second-lowest score in the +exam. Conversely, section 3 was my second-lowest practice section and turned out +to be my highest actual score! + +After reflecting, it is obvious that if you have any background on the CISA +topics at all, the most important part of studying is doing practice questions. +You really need to understand how to read the questions critically and pick the +best answer. # Looking Forward -I am extremely happy that I was finally able to pass the CISA. Looking -to the future, I\'m not sure what\'s next in terms of professional -learning. My current company offers internal learning courses, so I will -most likely focus on that if I need to gain more knowledge in certain -areas. - -To be fair, even if you pass the CISA, it\'s hard to become an expert on -any specific topic found within. My career may take me in a different -direction, and I might need to focus more on security or networking -certifications (or possibly building a better analysis/visualization -portfolio if I want to go into data analysis/science). +I am extremely happy that I was finally able to pass the CISA. Looking to the +future, I'm not sure what's next in terms of professional learning. My current +company offers internal learning courses, so I will most likely focus on that if +I need to gain more knowledge in certain areas. + +To be fair, even if you pass the CISA, it's hard to become an expert on any +specific topic found within. My career may take me in a different direction, and +I might need to focus more on security or networking certifications (or possibly +building a better analysis/visualization portfolio if I want to go into data +analysis/science). All I know is that I am content at the moment and extremely proud of my accomplishment. diff --git a/content/blog/2022-02-10-leaving-the-office.md b/content/blog/2022-02-10-leaving-the-office.md index 76adad3..c16aae8 100644 --- a/content/blog/2022-02-10-leaving-the-office.md +++ b/content/blog/2022-02-10-leaving-the-office.md @@ -7,195 +7,180 @@ draft = false # The Working World is Changing -There has been a trend for the past few years of companies slowly -realizing that the pandemic is not just a temporary state that will go -away eventually and let everything return to the way it was before. In -terms of business and employment, this means that more and more jobs are -being offered as permanently remote roles. +There has been a trend for the past few years of companies slowly realizing that +the pandemic is not just a temporary state that will go away eventually and let +everything return to the way it was before. In terms of business and employment, +this means that more and more jobs are being offered as permanently remote +roles. I had always dreamt of working from home but thought of it as a fantasy, -especially since I did not want to move over into the software -development field. However, I have found that almost all roles being -sent to me via recruiters are permanently remote (although most are -limited to US citizens or even region-locked for companies who only -operate in select states). +especially since I did not want to move over into the software development +field. However, I have found that almost all roles being sent to me via +recruiters are permanently remote (although most are limited to US citizens or +even region-locked for companies who only operate in select states). -I decided to take a look back at my relatively short career so far and -compare the positive and negative effects of the different work -environments I\'ve been in. +I decided to take a look back at my relatively short career so far and compare +the positive and negative effects of the different work environments I've been +in. # In-Person Offices ## Retail Internship -I started my first job as a management intern at a busy retail pharmacy, -working my 40-hour weeks on my feet. As these retail stores don\'t -believe in resting or sitting down, you can guarantee that you will -spend entire shifts standing, walking, or running around the store. -Unfortunately, I worked at a time when our store didn\'t have enough -managers, so I spent the majority of my tenure at the store running and -breaking a sweat. - -Now, things aren\'t all bad in retail stores like this. It is definitely -tiring and inefficient to force employees to work constantly, or pretend -to work if there\'s nothing to do, and not allow anyone to sit down. -However, if you are able to operate a retail store with a limited crew -and provide enough comfort and support, I believe these jobs could be -both comfortable and efficient. +I started my first job as a management intern at a busy retail pharmacy, working +my 40-hour weeks on my feet. As these retail stores don't believe in resting or +sitting down, you can guarantee that you will spend entire shifts standing, +walking, or running around the store. Unfortunately, I worked at a time when our +store didn't have enough managers, so I spent the majority of my tenure at the +store running and breaking a sweat. + +Now, things aren't all bad in retail stores like this. It is definitely tiring +and inefficient to force employees to work constantly, or pretend to work if +there's nothing to do, and not allow anyone to sit down. However, if you are +able to operate a retail store with a limited crew and provide enough comfort +and support, I believe these jobs could be both comfortable and efficient. ## Semi-Private Cubicles  -After about a year, I was able to find another internship - this time, -it was in my field of interest: internal auditing. This was for a life -insurance company that was well over 100 years old. The age of the -company shows if you work there, as most people in management are well -into their 40s-60s with little to no youthful leadership in the company. -Likewise, they owned a large headquarters in a nice area of town with -plenty of space, parking, etc. - -One upside is that each person gets their own large L-shaped desk, -formed into cubicles that house 4 desks/employees. These \"pods\" of -4-person cubicles are linked throughout each floor of the headquarters -(except the sales people, who had that open-floor concept going on). The -walls of the cubicle were tall and provided a lot of privacy and -sound-proofing, except when I used the standing desk feature (I\'m over -6 feet tall, so probably not an issue for most people). +After about a year, I was able to find another internship - this time, it was in +my field of interest: internal auditing. This was for a life insurance company +that was well over 100 years old. The age of the company shows if you work +there, as most people in management are well into their 40s-60s with little to +no youthful leadership in the company. Likewise, they owned a large headquarters +in a nice area of town with plenty of space, parking, etc. + +One upside is that each person gets their own large L-shaped desk, formed into +cubicles that house 4 desks/employees. These "pods" of 4-person cubicles are +linked throughout each floor of the headquarters (except the sales people, who +had that open-floor concept going on). The walls of the cubicle were tall and +provided a lot of privacy and sound-proofing, except when I used the standing +desk feature (I'm over 6 feet tall, so probably not an issue for most people). I loved this environment, it allowed me to focus on my work with minimal -distractions, but also allowed easy access, so I could spin around in my -chair and chat with my friends without leaving my chair. This is the -closest I\'ve been to a home office environment (which is my personal -favorite, as I\'ll get to later in this post). +distractions, but also allowed easy access, so I could spin around in my chair +and chat with my friends without leaving my chair. This is the closest I've +been to a home office environment (which is my personal favorite, as I'll get +to later in this post). ## Semi-Open Floor Concept  -When I shifted to my first full-time internal audit job out of college, -I was working at a company that was headquartered on a floor in a -downtown high-rise building. The company was only about 20 years old -when I worked there and were trying a lot of new things to attract young -talent, one of which was a semi-open floor concept for the office. My -department worked just around the hallway corner from the executive -offices and used that \"modern\" layout young tech companies started -using in the 2000s/2010s. - -Each desk was brief, and you could look most coworkers in the face -without moving from your chair, I hated this so much. Directly to my -left was the Chief Audit Executive (our department\'s leading boss), and -his desk was pointed so that his face would stare straight at my desk -all day. I spent more time thinking about who was looking at me or -checking on me than actually working. - -The other annoying part of the open concept they used was that the -kitchen area and pathways were too close to everyone\'s desks (since the -desks were spread out, to provide space or something), so noise and -conversation would be constant throughout the day while you try to work. -For someone like me, who needs silence to get work done, that was a -non-starter. +When I shifted to my first full-time internal audit job out of college, I was +working at a company that was headquartered on a floor in a downtown high-rise +building. The company was only about 20 years old when I worked there and were +trying a lot of new things to attract young talent, one of which was a semi-open +floor concept for the office. My department worked just around the hallway +corner from the executive offices and used that "modern" layout young tech +companies started using in the 2000s/2010s. + +Each desk was brief, and you could look most coworkers in the face without +moving from your chair, I hated this so much. Directly to my left was the Chief +Audit Executive (our department's leading boss), and his desk was pointed so +that his face would stare straight at my desk all day. I spent more time +thinking about who was looking at me or checking on me than actually working. + +The other annoying part of the open concept they used was that the kitchen area +and pathways were too close to everyone's desks (since the desks were spread +out, to provide space or something), so noise and conversation would be constant +throughout the day while you try to work. For someone like me, who needs silence +to get work done, that was a non-starter. ## Hotel Office Concept  -I currently work for a company remotely (for now) and travel to the -office every once in a while for events and to help coach the staff -underneath me. The office I visit uses the hotel desk concept, where you -need to check in at a touch screen when you enter the office and -\"rent\" a desk for the day. The same goes for offices and meeting -rooms. - -These desks are flat-top only and do not have any walls at all. In -addition, they\'re stacked with one row of 4 desks facing another row of -4 desks. These pairs of desk rows are repeated through the office. - -This means that when I go, I need to rent a random desk or try to -remember the unique ID numbers on desks I like. Once I rent it, I have -to make sure no one sat down in that desk without renting it. Then, I -can sit down and work, but will probably need to adjust the monitors so -that I\'m not staring in the face of the person across from me all day. -Finally, I need to wear headphones as this environment does nothing to -provide you with peace or quiet. - -Luckily, you can rent offices with doors that offer quiet and privacy, -which can be very nice if you have a lot of meetings or webinars on a -certain day. +I currently work for a company remotely (for now) and travel to the office every +once in a while for events and to help coach the staff underneath me. The office +I visit uses the hotel desk concept, where you need to check in at a touch +screen when you enter the office and "rent" a desk for the day. The same goes +for offices and meeting rooms. + +These desks are flat-top only and do not have any walls at all. In addition, +they're stacked with one row of 4 desks facing another row of 4 desks. These +pairs of desk rows are repeated through the office. + +This means that when I go, I need to rent a random desk or try to remember the +unique ID numbers on desks I like. Once I rent it, I have to make sure no one +sat down in that desk without renting it. Then, I can sit down and work, but +will probably need to adjust the monitors so that I'm not staring in the face +of the person across from me all day. Finally, I need to wear headphones as this +environment does nothing to provide you with peace or quiet. + +Luckily, you can rent offices with doors that offer quiet and privacy, which can +be very nice if you have a lot of meetings or webinars on a certain day. # Home Office  -Okay, now let\'s finally get to the home office concept. I have worked -from home for a little over two years at this point, across three -different jobs/employers. Over this time, I have experimented with a -plethora of different organizational ideas, desks, and room layouts to -find what works best for me. +Okay, now let's finally get to the home office concept. I have worked from home +for a little over two years at this point, across three different +jobs/employers. Over this time, I have experimented with a plethora of different +organizational ideas, desks, and room layouts to find what works best for me. -These things might not apply to you, and that\'s fine. Everyone has a -different situation, and I really don\'t think you\'ll know what works -until you try. +These things might not apply to you, and that's fine. Everyone has a different +situation, and I really don't think you'll know what works until you try. ## Tip #1 -Let\'s start with my top rule for a home office: +Let's start with my top rule for a home office: > If you live with others, working in a shared space is not effective. -It just does not work. If you have another person sleeping in your -bedroom, it is difficult to manage your work schedule with their -sleeping/work/school schedule. If they wake up after you need to start -work, you might wake them up or have to suffer the agony of staring at -bright screens in a dark room. +It just does not work. If you have another person sleeping in your bedroom, it +is difficult to manage your work schedule with their sleeping/work/school +schedule. If they wake up after you need to start work, you might wake them up +or have to suffer the agony of staring at bright screens in a dark room. -In a similar vein, working from a location such as the living room -likely won\'t work either. Distractions will come far more frequently: -televisions, cooking, cleaning, deliveries, etc. If you\'re like me, -you\'ll end up playing a game instead of actually doing any work. +In a similar vein, working from a location such as the living room likely won't +work either. Distractions will come far more frequently: televisions, cooking, +cleaning, deliveries, etc. If you're like me, you'll end up playing a game +instead of actually doing any work. ## Tip #2 -Okay, the second thing I\'ve discovered that works for me: +Okay, the second thing I've discovered that works for me: -> Use the pomodoro method (or something similar) to balance work tasks -> with personal tasks. +> Use the pomodoro method (or something similar) to balance work tasks with +> personal tasks. -I use a very casual version of the pomodoro method where I will work for -1-2 hours (usually set in strict intervals like 1, 1.5, 2 hours) and -then will allow myself 30-60 minutes for personal tasks. This schedule -works for me, since my work schedule really only comes to 3-6 hours of -work per day. +I use a very casual version of the pomodoro method where I will work for 1-2 +hours (usually set in strict intervals like 1, 1.5, 2 hours) and then will allow +myself 30-60 minutes for personal tasks. This schedule works for me, since my +work schedule really only comes to 3-6 hours of work per day. -In this case, I\'ll work through my list of tasks for an hour or two and -then give myself personal time to get drinks and food, wash dishes, put -clothes in the washer, get the mail, etc. If you\'re in a convenient -location, this usually gives time for things like getting groceries (as -long as you\'re not a slow shopper). +In this case, I'll work through my list of tasks for an hour or two and then +give myself personal time to get drinks and food, wash dishes, put clothes in +the washer, get the mail, etc. If you're in a convenient location, this usually +gives time for things like getting groceries (as long as you're not a slow +shopper). ## Tip #3 -While I listed this one as number three, I don\'t think I\'d accomplish -anything without it: +While I listed this one as number three, I don't think I'd accomplish anything +without it: -> Document everything: even things you didn\'t before - such as task -> lists and notes from casual calls or meetings. +> Document everything: even things you didn't before - such as task lists and +> notes from casual calls or meetings. -I\'ve noticed that staying in an office gave me more constant reminders -of outstanding tasks or facts I had learned in a conversation. -Translating everything to a digital world has made me lose a bit of that -focus (perhaps since I don\'t have visual reminders?). +I've noticed that staying in an office gave me more constant reminders of +outstanding tasks or facts I had learned in a conversation. Translating +everything to a digital world has made me lose a bit of that focus (perhaps +since I don't have visual reminders?). -Keeping a running task list of all things I have to do - even potential -tasks! - has helped me keep up without missing anything small. Likewise, -keeping notes for ALL meetings and calls, no matter how casual/quick, -has improved my retention immensely. Beyond helping my mental -recollection, it has saved me numerous times when I need to do a keyword -search for some topic that was discussed 6+ months ago. +Keeping a running task list of all things I have to do - even potential tasks! - +has helped me keep up without missing anything small. Likewise, keeping notes +for ALL meetings and calls, no matter how casual/quick, has improved my +retention immensely. Beyond helping my mental recollection, it has saved me +numerous times when I need to do a keyword search for some topic that was +discussed 6+ months ago. ## Tip #4 @@ -203,39 +188,35 @@ Okay, last one for now. > Keep your work area clean. -This one is straightforward, but I know some people struggle with -cleanliness or may not believe it makes a difference. Trust me, keeping -your desk area clean and organized makes a huge difference, both -mentally and emotionally. +This one is straightforward, but I know some people struggle with cleanliness or +may not believe it makes a difference. Trust me, keeping your desk area clean +and organized makes a huge difference, both mentally and emotionally. -Just think about it, you walk into your home office and see a clean desk -with a laptop, dock, monitors, keyboard, mouse, and a notepad with a pen -on top. +Just think about it, you walk into your home office and see a clean desk with a +laptop, dock, monitors, keyboard, mouse, and a notepad with a pen on top. -Now imagine the opposite, there\'s an office with the same equipment, -but there are clothes hanging on the chair, empty drink bottles, candy -wrappers and dirty plates. This can take both a mental and emotional -toll by bringing constant disarray and stress into your working -environment. +Now imagine the opposite, there's an office with the same equipment, but there +are clothes hanging on the chair, empty drink bottles, candy wrappers and dirty +plates. This can take both a mental and emotional toll by bringing constant +disarray and stress into your working environment. -Just keep things clean each day, and you won\'t need to do any big -cleaning days to recover. +Just keep things clean each day, and you won't need to do any big cleaning days +to recover. # My Preferences -I\'ve talked about the different environments I\'ve worked in and -expressed some honest thoughts on pros or cons to each, but what do I -prefer? Well, if you\'re reading along, you should be able to tell that -I much prefer a home office above all else. +I've talked about the different environments I've worked in and expressed some +honest thoughts on pros or cons to each, but what do I prefer? Well, if you're +reading along, you should be able to tell that I much prefer a home office above +all else. -Being able to control my own day and allot my time as needed has brought -a calmness to my life and has allowed me to maximize each day. I feel -far more effective and efficient in a home office than any other office, -especially open-office layouts. +Being able to control my own day and allot my time as needed has brought a +calmness to my life and has allowed me to maximize each day. I feel far more +effective and efficient in a home office than any other office, especially +open-office layouts. -If I do need to return to an office part-time in the future, I really -hope the office will have privacy and quietness in order for me to get -my work done. +If I do need to return to an office part-time in the future, I really hope the +office will have privacy and quietness in order for me to get my work done. Cubicles are good! I agree with Alice (from the comic Dilbert): diff --git a/content/blog/2022-02-10-njalla-dns-api.md b/content/blog/2022-02-10-njalla-dns-api.md index 67b4ebf..52b65fc 100644 --- a/content/blog/2022-02-10-njalla-dns-api.md +++ b/content/blog/2022-02-10-njalla-dns-api.md @@ -5,48 +5,46 @@ description = "" draft = false +++ -# Njalla\'s API +# Njalla's API As noted in my recent post about [switching to Njalla from -Cloudflare](file:///blog/ditching-cloudflare/), I was searching for a -way to replace my very easy-to-use bash script to [update Cloudflare\'s -DNS via their API](file:///blog/cloudflare-dns-api/). +Cloudflare](file:///blog/ditching-cloudflare/), I was searching for a way to +replace my very easy-to-use bash script to [update Cloudflare's DNS via their +API](file:///blog/cloudflare-dns-api/). -To reiterate what I said in those posts, this is a common necessity for -those of us who have non-static IP addresses that can change at any -moment due to ISP policy. +To reiterate what I said in those posts, this is a common necessity for those of +us who have non-static IP addresses that can change at any moment due to ISP +policy. -In order to keep a home server running smoothly, the server admin needs -to have a process to constantly monitor their public IP address and -update their domain\'s DNS records if it changes. +In order to keep a home server running smoothly, the server admin needs to have +a process to constantly monitor their public IP address and update their +domain's DNS records if it changes. -This post explains how to use Python to update Njalla\'s DNS records -whenever a machine\'s public IP address changes. +This post explains how to use Python to update Njalla's DNS records whenever a +machine's public IP address changes. ## Creating a Token -To use Njalla\'s API, you will first need to create a token that will be -used to authenticate you every time you call the API. Luckily, this is -very easy to do if you have an account with Njalla. +To use Njalla's API, you will first need to create a token that will be used to +authenticate you every time you call the API. Luckily, this is very easy to do +if you have an account with Njalla. -Simply go the [API Settings](https://njal.la/settings/api/) page and -click the `Add Token` button. Next, enter a name for the -token and click `Add`. +Simply go the [API Settings](https://njal.la/settings/api/) page and click the +`Add Token` button. Next, enter a name for the token and click `Add`. -Finally, click the `Manage` button next to your newly created -token and copy the `API Token` field. +Finally, click the `Manage` button next to your newly created token and copy the +`API Token` field. ## Finding the Correct API Request -Once you have a token, you\'re ready to call the Njalla API for any -number of requests. For a full listing of available requests, see the -[Njalla API Documentation](https://njal.la/api/). +Once you have a token, you're ready to call the Njalla API for any number of +requests. For a full listing of available requests, see the [Njalla API +Documentation](https://njal.la/api/). -For this demo, we are using the `list-records` and -`edit-record` requests. +For this demo, we are using the `list-records` and `edit-record` requests. -The `list-records` request requires the following payload to -be sent when calling the API: +The `list-records` request requires the following payload to be sent when +calling the API: ``` txt params: { @@ -54,8 +52,8 @@ params: { } ``` -The `edit-record` request requires the following payload to -be sent when calling the API: +The `edit-record` request requires the following payload to be sent when calling +the API: ``` txt params: { @@ -67,14 +65,14 @@ params: { # Server Set-Up -To create this script, we will be using Python. By default, I use Python -3 on my servers, so please note that I did not test this in Python 2, -and I do not know if Python 2 will work for this. +To create this script, we will be using Python. By default, I use Python 3 on my +servers, so please note that I did not test this in Python 2, and I do not know +if Python 2 will work for this. ## Creating the Script -First, find a suitable place to create your script. Personally, I just -create a directory called `ddns` in my home directory: +First, find a suitable place to create your script. Personally, I just create a +directory called `ddns` in my home directory: ```sh mkdir ~/ddns @@ -86,23 +84,17 @@ Next, create a Python script file: nano ~/ddns/ddns.py ``` -The following code snippet is quite long, so I won\'t go into depth on -each part. However, I suggest you read through the entire script before -running it; it is quite simple and contains comments to help explain -each code block. +The following code snippet is quite long, so I won't go into depth on each +part. However, I suggest you read through the entire script before running it; +it is quite simple and contains comments to help explain each code block. -:warning: **Note**: You will need to update the following variables for -this to work: +:warning: **Note**: You will need to update the following variables for this to +work: -- `token`: This is the Njalla API token you created - earlier. -- `user_domain`: This is the top-level domain you want to - modify. -- `include_subdomains`: Set this to `True` if - you also want to modify subdomains found under the TLD. -- `subdomains`: If `include_subdomains` = - `True`, you can include your list of subdomains to be - modified here. +- `token`: This is the Njalla API token you created earlier. +- `user_domain`: This is the top-level domain you want to modify. +- `include_subdomains`: Set this to `True` if you also want to modify subdomains found under the TLD. +- `subdomains`: If `include_subdomains` = `True`, you can include your list of subdomains to be modified here. ``` python #!/usr/bin/python @@ -187,8 +179,8 @@ for record in data['records']: ## Running the Script -Once you\'ve created the script and are ready to test it, run the -following command: +Once you've created the script and are ready to test it, run the following +command: ```sh python3 ~/ddns/ddns.py @@ -196,16 +188,15 @@ python3 ~/ddns/ddns.py ## Setting the Script to Run Automatically -To make sure the scripts run automatically, add it to the -`cron` file so that it will run on a schedule. To do this, -open the `cron` file: +To make sure the scripts run automatically, add it to the `cron` file so that it +will run on a schedule. To do this, open the `cron` file: ```sh crontab -e ``` -In the cron file, paste the following at the bottom of the editor in -order to check the IP every five minutes: +In the cron file, paste the following at the bottom of the editor in order to +check the IP every five minutes: ```sh */5 ** ** ** ** python3 /home/<your_username>/ddns/ddns.py diff --git a/content/blog/2022-02-16-debian-and-nginx.md b/content/blog/2022-02-16-debian-and-nginx.md index 8c9bb31..846b8df 100644 --- a/content/blog/2022-02-16-debian-and-nginx.md +++ b/content/blog/2022-02-16-debian-and-nginx.md @@ -10,34 +10,33 @@ draft = false 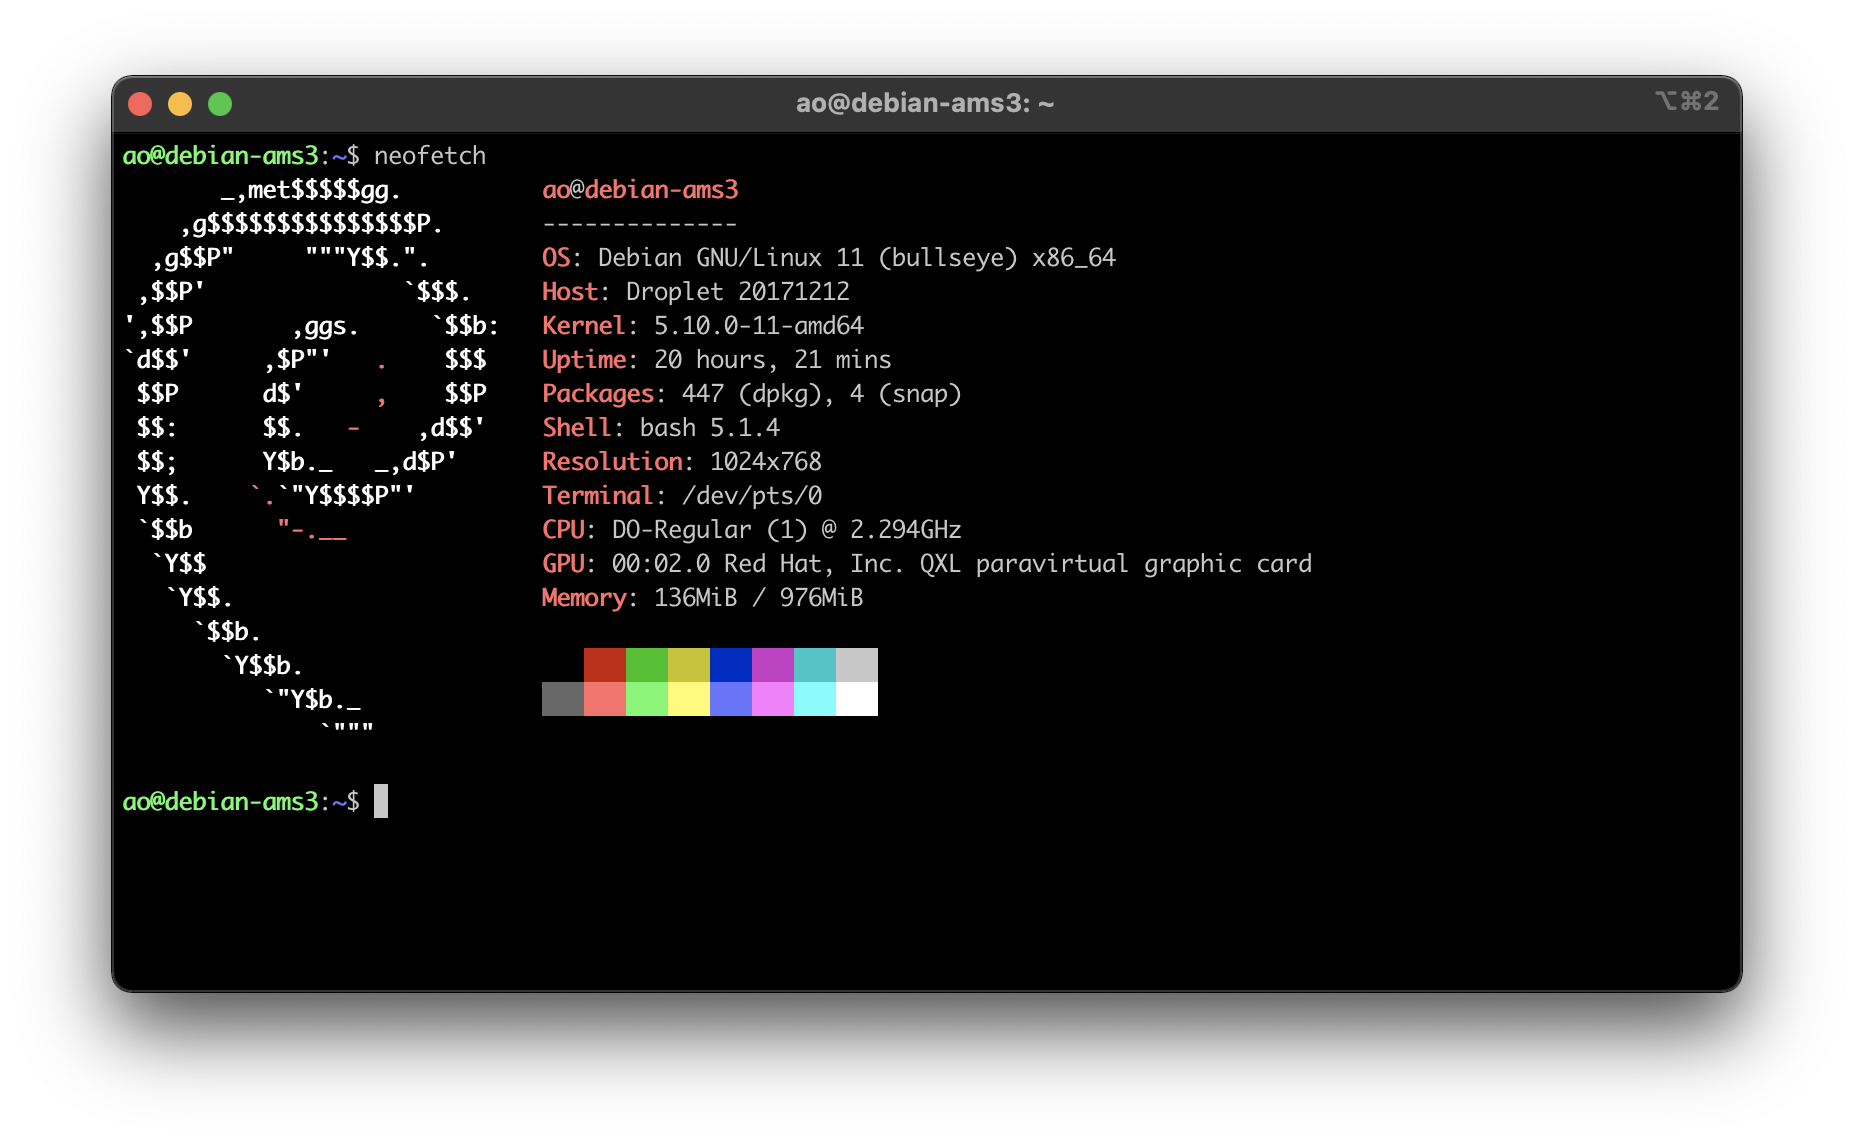 -I\'ve used various Linux distributions throughout the years, but I\'ve -never used anything except Ubuntu for my servers. Why? I really have no -idea, mostly just comfort around the commands and software availability. - -However, I have always wanted to try Debian as a server OS after testing -it out in a VM a few years ago (side-note: I\'d love to try Alpine too, -but I always struggle with compatibility). So, I decided to launch a new -VPS and use [Debian](https://www.debian.org) 11 as the OS. Spoiler -alert: it feels identical to Ubuntu for my purposes. - -I did the normal things when first launching the VPS, such as adding a -new user, locking down SSH, etc. If you want to see that level of -detail, read my other post about [How to Set Up a VPS Web +I've used various Linux distributions throughout the years, but I've never +used anything except Ubuntu for my servers. Why? I really have no idea, mostly +just comfort around the commands and software availability. + +However, I have always wanted to try Debian as a server OS after testing it out +in a VM a few years ago (side-note: I'd love to try Alpine too, but I always +struggle with compatibility). So, I decided to launch a new VPS and use +[Debian](https://www.debian.org) 11 as the OS. Spoiler alert: it feels identical +to Ubuntu for my purposes. + +I did the normal things when first launching the VPS, such as adding a new user, +locking down SSH, etc. If you want to see that level of detail, read my other +post about [How to Set Up a VPS Web Server](https://cleberg.net/blog/how-to-set-up-a-vps-web-server/). -All of this has been similar, apart from small things such as the -location of users\' home folders. No complaints at all from me - Debian -seems great. +All of this has been similar, apart from small things such as the location of +users' home folders. No complaints at all from me - Debian seems great. # Web Server: Nginx 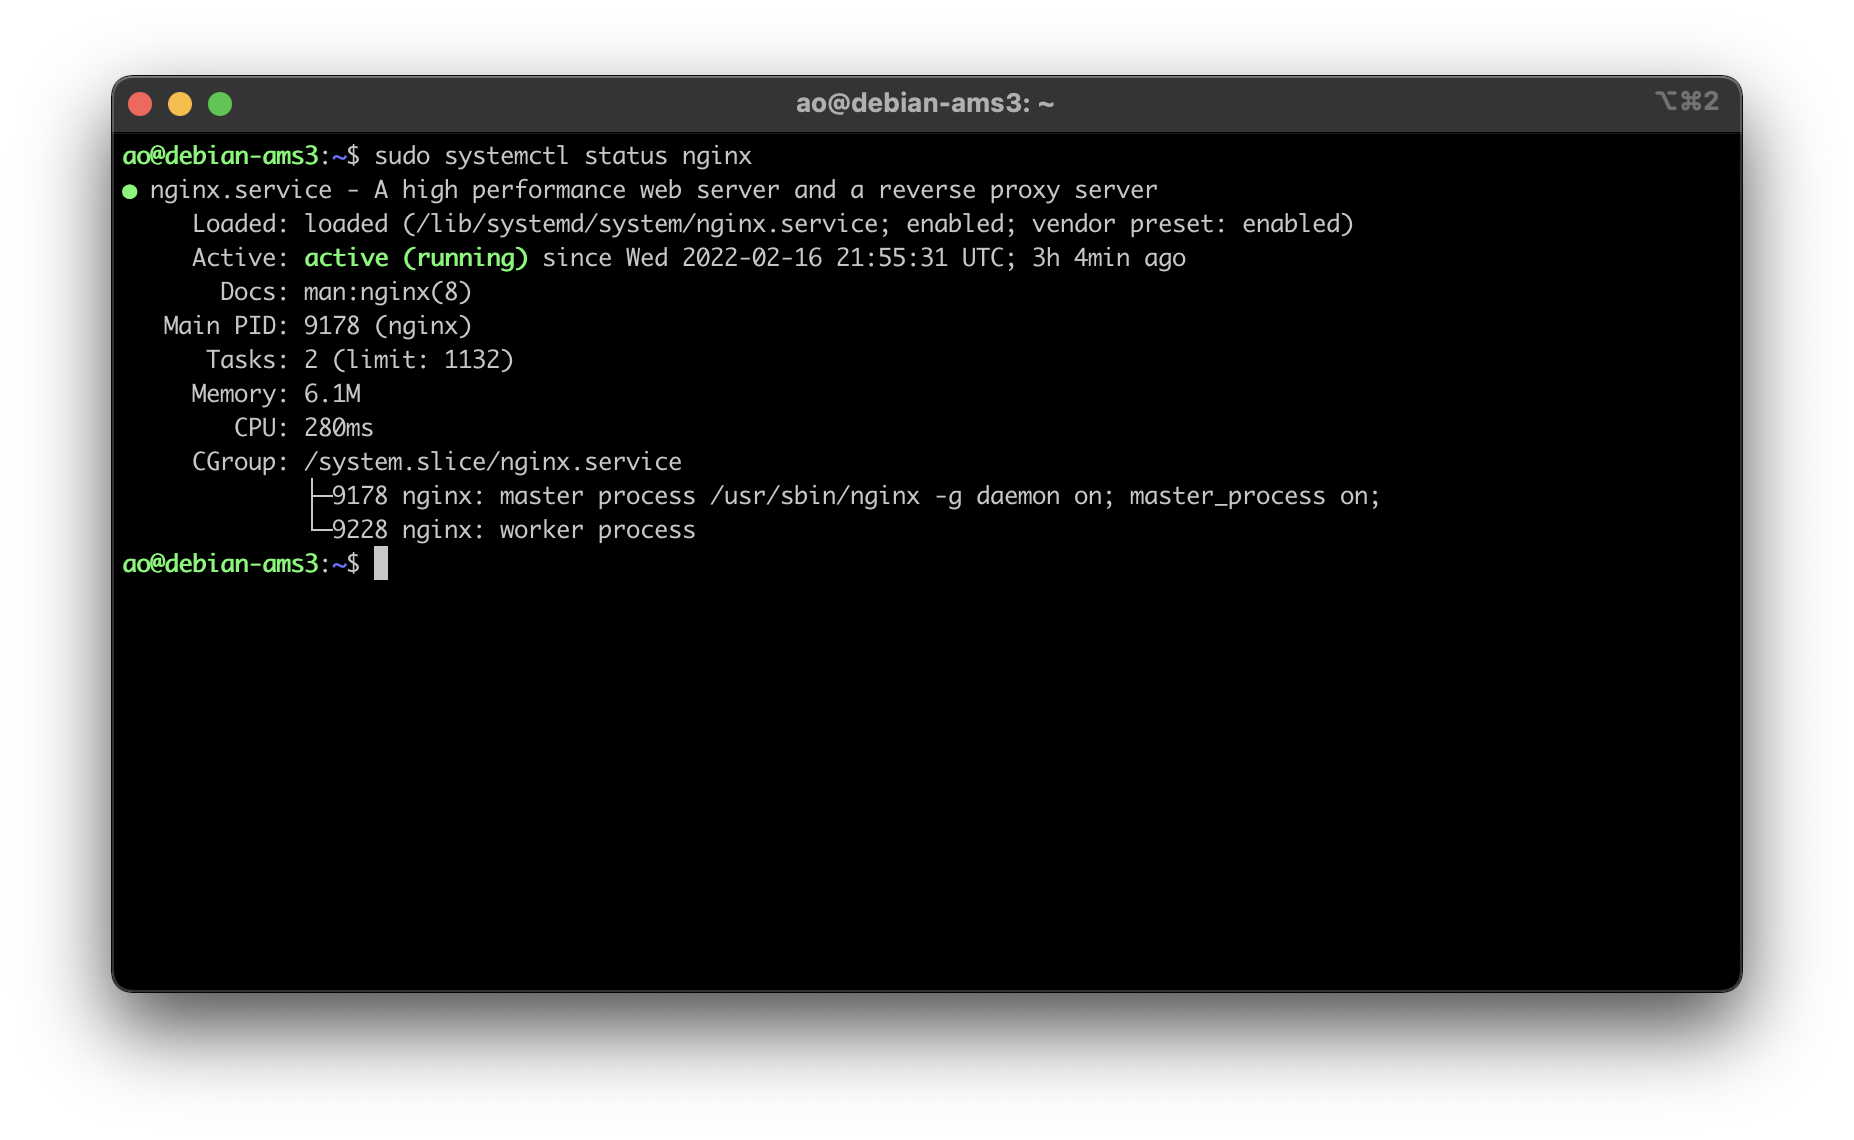 -Once I had the baseline server configuration set-up for Debian, I moved -on to trying out [Nginx](https://nginx.org) as my web server software. -This required me to install the `nginx` and `ufw` -packages, as well as setting up the initial UFW config: +Once I had the baseline server configuration set-up for Debian, I moved on to +trying out [Nginx](https://nginx.org) as my web server software. This required +me to install the `nginx` and `ufw` packages, as well as setting up the initial +UFW config: ```sh sudo apt install nginx ufw @@ -48,9 +47,9 @@ sudo ufw status sudo systemctl status nginx ``` -Once I had the firewall set, I moved on to creating the directories and -files for my website. This is very easy and is basically the same as -setting up an Apache server, so no struggles here. +Once I had the firewall set, I moved on to creating the directories and files +for my website. This is very easy and is basically the same as setting up an +Apache server, so no struggles here. ```sh sudo mkdir -p /var/www/your_domain/html @@ -59,10 +58,9 @@ sudo chmod -R 755 /var/www/your_domain nano /var/www/your_domain/html/index.html ``` -The next part, creating the Nginx configuration files, is quite a bit -different from Apache. First, you need to create the files in the -`sites-available` folder and symlink it the -`sites-enabled` folder. +The next part, creating the Nginx configuration files, is quite a bit different +from Apache. First, you need to create the files in the `sites-available` folder +and symlink it the `sites-enabled` folder. Creating the config file for your domain: @@ -95,11 +93,10 @@ sudo ln -s /etc/nginx/sites-available/your_domain /etc/nginx/sites-enabled/ ``` This will make your site available to the public (as long as you have -`your_domain` DNS records pointed at the server\'s IP -address)! +`your_domain` DNS records pointed at the server's IP address)! -Next, I used [certbot](https://certbot.eff.org/) to issue an HTTPS -certificate for my domains using the following commands: +Next, I used [certbot](https://certbot.eff.org/) to issue an HTTPS certificate +for my domains using the following commands: ```sh sudo apt install snapd; sudo snap install core; sudo snap refresh core @@ -108,17 +105,15 @@ sudo ln -s /snap/bin/certbot /usr/bin/certbot sudo certbot --nginx ``` -Now that certbot ran successfully and updated my Nginx config files to -include a `443` server block of code, I went back in and -edited the config file to include security HTTP headers. This part is -optional, but is recommended for security purposes; you can even test a -website\'s HTTP header security at [Security +Now that certbot ran successfully and updated my Nginx config files to include a +`443` server block of code, I went back in and edited the config file to include +security HTTP headers. This part is optional, but is recommended for security +purposes; you can even test a website's HTTP header security at [Security Headers](https://securityheaders.com/). -The configuration below shows a set-up where you only want your website -to serve content from its own domain, except for images and scripts, -which may come from `nullitics.com`. All other content would -be blocked from loading in a browser. +The configuration below shows a set-up where you only want your website to serve +content from its own domain, except for images and scripts, which may come from +`nullitics.com`. All other content would be blocked from loading in a browser. ```sh sudo nano /etc/nginx/sites-available/your_domain @@ -143,39 +138,36 @@ sudo systemctl restart nginx ## Nginx vs. Apache -As I stated at the beginning, my historical hesitation with trying Nginx -was that the differences in configuration formats scared me away from -leaving Apache. However, I prefer Nginx to Apache for a few reasons: - -1. Nginx uses only one config file (`your_domain`) vs. - Apache\'s two-file approach for HTTP vs. HTTPS - (`your_domain.conf` and - `your_domain-le-ssl.conf`). -2. Symlinking new configurations files and reloading Nginx are way - easier than Apache\'s process of having to enable headers with - `a2enmod mod_headers`, enable PHP with - `a2enmod php` (plus any other mods you need), and then - enabling sites with `a2ensite`, and THEN reloading - Apache. -3. The contents of the Nginx config files seem more organized and - logical with the curly-bracket approach. This is a minor reason, but - everything just felt cleaner while I was installing my sites and - that had a big quality of life impact on the installation for me. - -They\'re both great software packages, but Nginx just seems more -organized and easier to use these days. I will certainly be exploring -the Nginx docs to see what other fun things I can do with all of this. +As I stated at the beginning, my historical hesitation with trying Nginx was +that the differences in configuration formats scared me away from leaving +Apache. However, I prefer Nginx to Apache for a few reasons: + +1. Nginx uses only one config file (`your_domain`) vs. Apache's two-file + approach for HTTP vs. HTTPS (`your_domain.conf` and + `your_domain-le-ssl.conf`). +2. Symlinking new configurations files and reloading Nginx are way easier than + Apache's process of having to enable headers with `a2enmod mod_headers`, + enable PHP with `a2enmod php` (plus any other mods you need), and then + enabling sites with `a2ensite`, and THEN reloading Apache. +3. The contents of the Nginx config files seem more organized and logical with + the curly-bracket approach. This is a minor reason, but everything just felt + cleaner while I was installing my sites and that had a big quality of life + impact on the installation for me. + +They're both great software packages, but Nginx just seems more organized and +easier to use these days. I will certainly be exploring the Nginx docs to see +what other fun things I can do with all of this. # Gemini Server: Agate 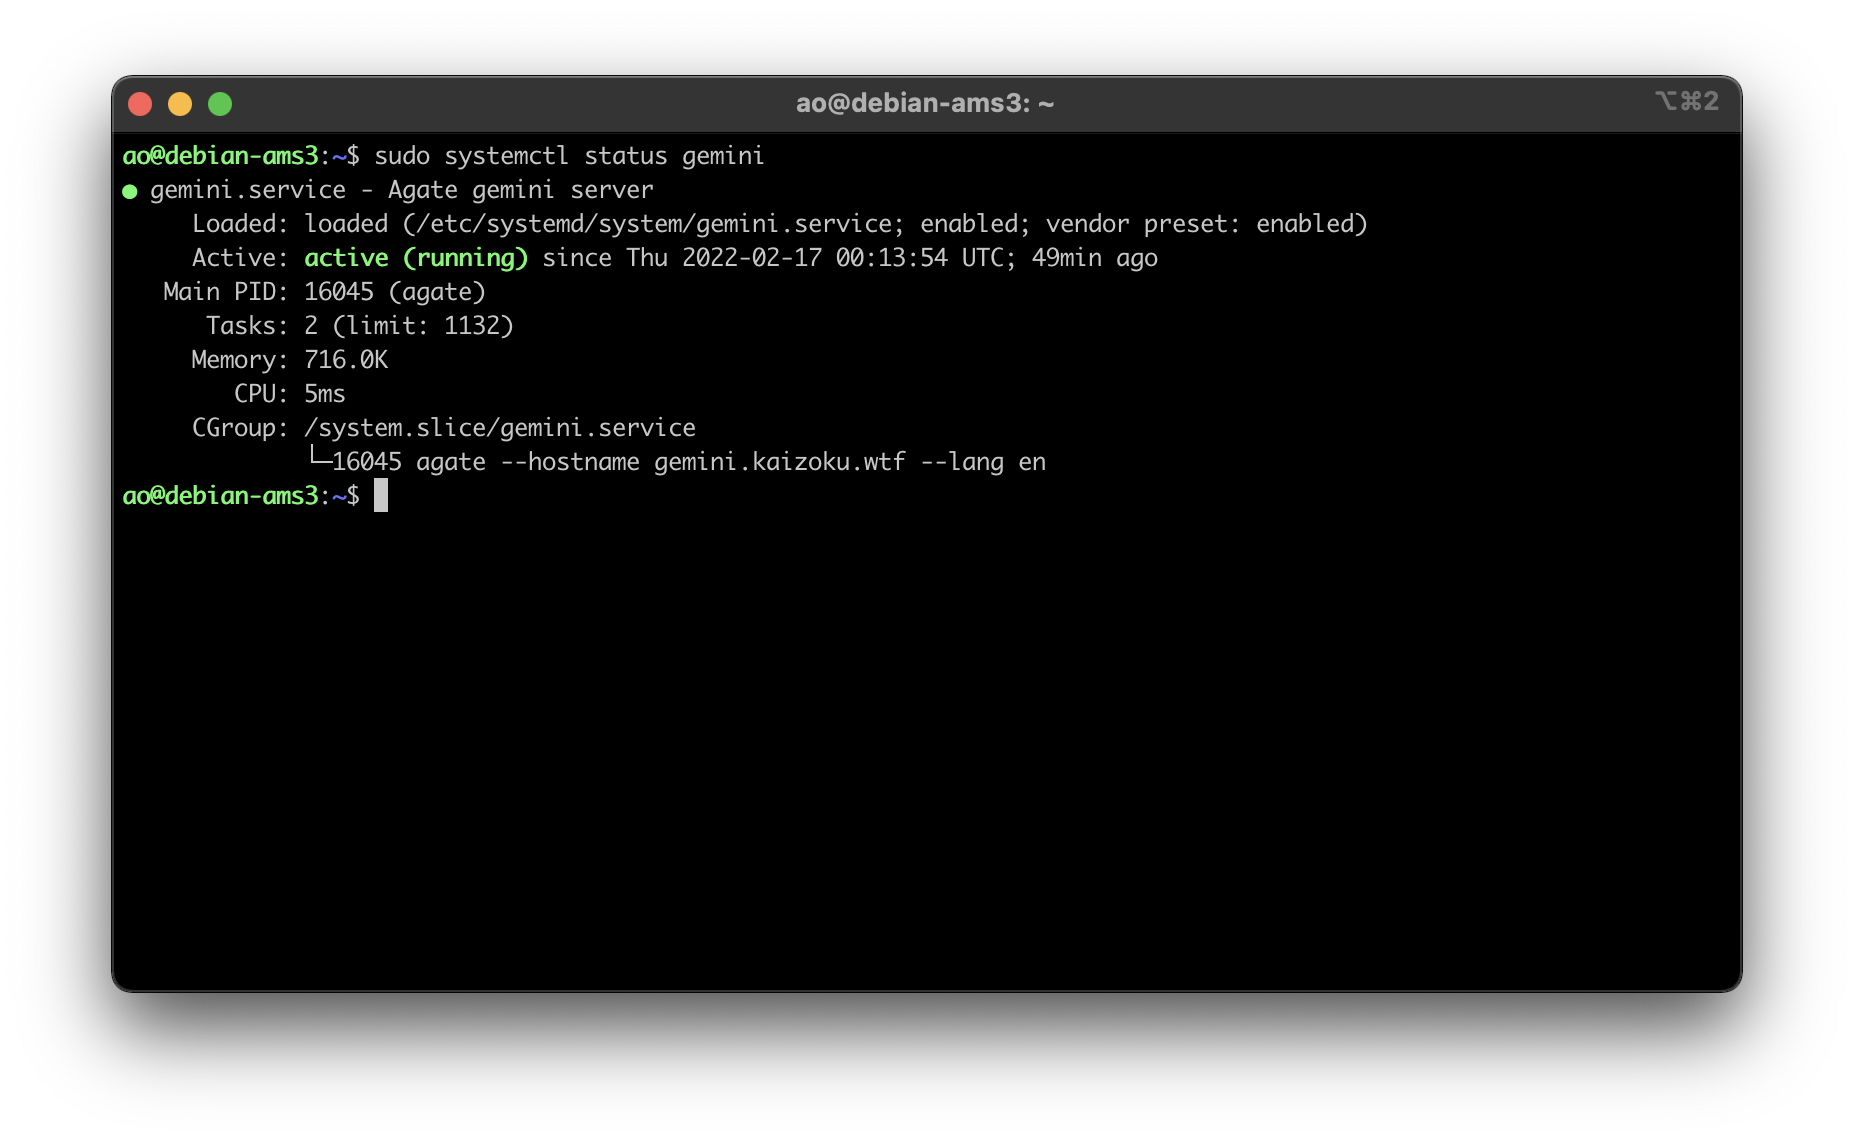 -Finally, I set up the Agate software on this server again to host my -Gemini server content, using Rust as I have before. You can read my -other post for more information on installing Agate: [Hosting a Gemini +Finally, I set up the Agate software on this server again to host my Gemini +server content, using Rust as I have before. You can read my other post for more +information on installing Agate: [Hosting a Gemini Server](https://cleberg.net/blog/hosting-a-gemini-server/). -All in all, Debian + Nginx is very slick and I prefer it over my old -combination of Ubuntu + Apache (although it\'s really just Nginx \> -Apache for me, since Debian seems mostly the same as Ubuntu is so far). +All in all, Debian + Nginx is very slick and I prefer it over my old combination +of Ubuntu + Apache (although it's really just Nginx > Apache for me, since +Debian seems mostly the same as Ubuntu is so far). diff --git a/content/blog/2022-02-17-exiftool.md b/content/blog/2022-02-17-exiftool.md index 2fa9adb..bc310ec 100644 --- a/content/blog/2022-02-17-exiftool.md +++ b/content/blog/2022-02-17-exiftool.md @@ -7,36 +7,34 @@ draft = false ## Why Strip Metadata? -Okay, so you want to strip metadata from your photos. Perhaps you take -pictures of very rare birds, and the location metadata is a gold mine -for poachers, or perhaps you\'re just privacy-oriented like me and -prefer to strip metadata from publicly-available images. +Okay, so you want to strip metadata from your photos. Perhaps you take pictures +of very rare birds, and the location metadata is a gold mine for poachers, or +perhaps you're just privacy-oriented like me and prefer to strip metadata from +publicly-available images. -There are various components of image metadata that you may want to -delete before releasing a photo to the public. Here\'s an incomplete -list of things I could easily see just by inspecting a photo on my -laptop: +There are various components of image metadata that you may want to delete +before releasing a photo to the public. Here's an incomplete list of things I +could easily see just by inspecting a photo on my laptop: -- Location (Latitude & Longitude) -- Dimensions -- Device Make & Model -- Color Space -- Color Profile -- Focal Length -- Alpha Channel -- Red Eye -- Metering Mode -- F Number +- Location (Latitude & Longitude) +- Dimensions +- Device Make & Model +- Color Space +- Color Profile +- Focal Length +- Alpha Channel +- Red Eye +- Metering Mode +- F Number -Regardless of your reasoning, I\'m going to explain how I used the -`exiftool` package in Linux to automatically strip metadata -from all images in a directory (+ subdirectories). +Regardless of your reasoning, I'm going to explain how I used the `exiftool` +package in Linux to automatically strip metadata from all images in a directory +(+ subdirectories). ## Installing `exiftool` -First things first: we need to install the tool. I\'m running Debian 11 -on my server (Ubuntu will work the same), so the command is as simple -as: +First things first: we need to install the tool. I'm running Debian 11 on my +server (Ubuntu will work the same), so the command is as simple as: ```sh sudo apt install exiftool @@ -47,22 +45,20 @@ distributions, but I really only care to test out this one package. ## Recursively Strip Data -I actually use this tool extensively to strip any photos uploaded to the -website that serves all the images for my blog -(`img.cleberg.net`). +I actually use this tool extensively to strip any photos uploaded to the website +that serves all the images for my blog (`img.cleberg.net`). -The following command is incredibly useful and can be modified to -include any image extensions that `exiftool` supports: +The following command is incredibly useful and can be modified to include any +image extensions that `exiftool` supports: ```sh exiftool -r -all= -ext jpg -ext png /path/to/directory/ ``` -See below for the results of my most recent usage of -`exiftool` after I uploaded the image for this blog post. You -can see that the command will let you know how many directories were -scanned, how many images were updated, and how many images were -unchanged. +See below for the results of my most recent usage of `exiftool` after I uploaded +the image for this blog post. You can see that the command will let you know how +many directories were scanned, how many images were updated, and how many images +were unchanged. 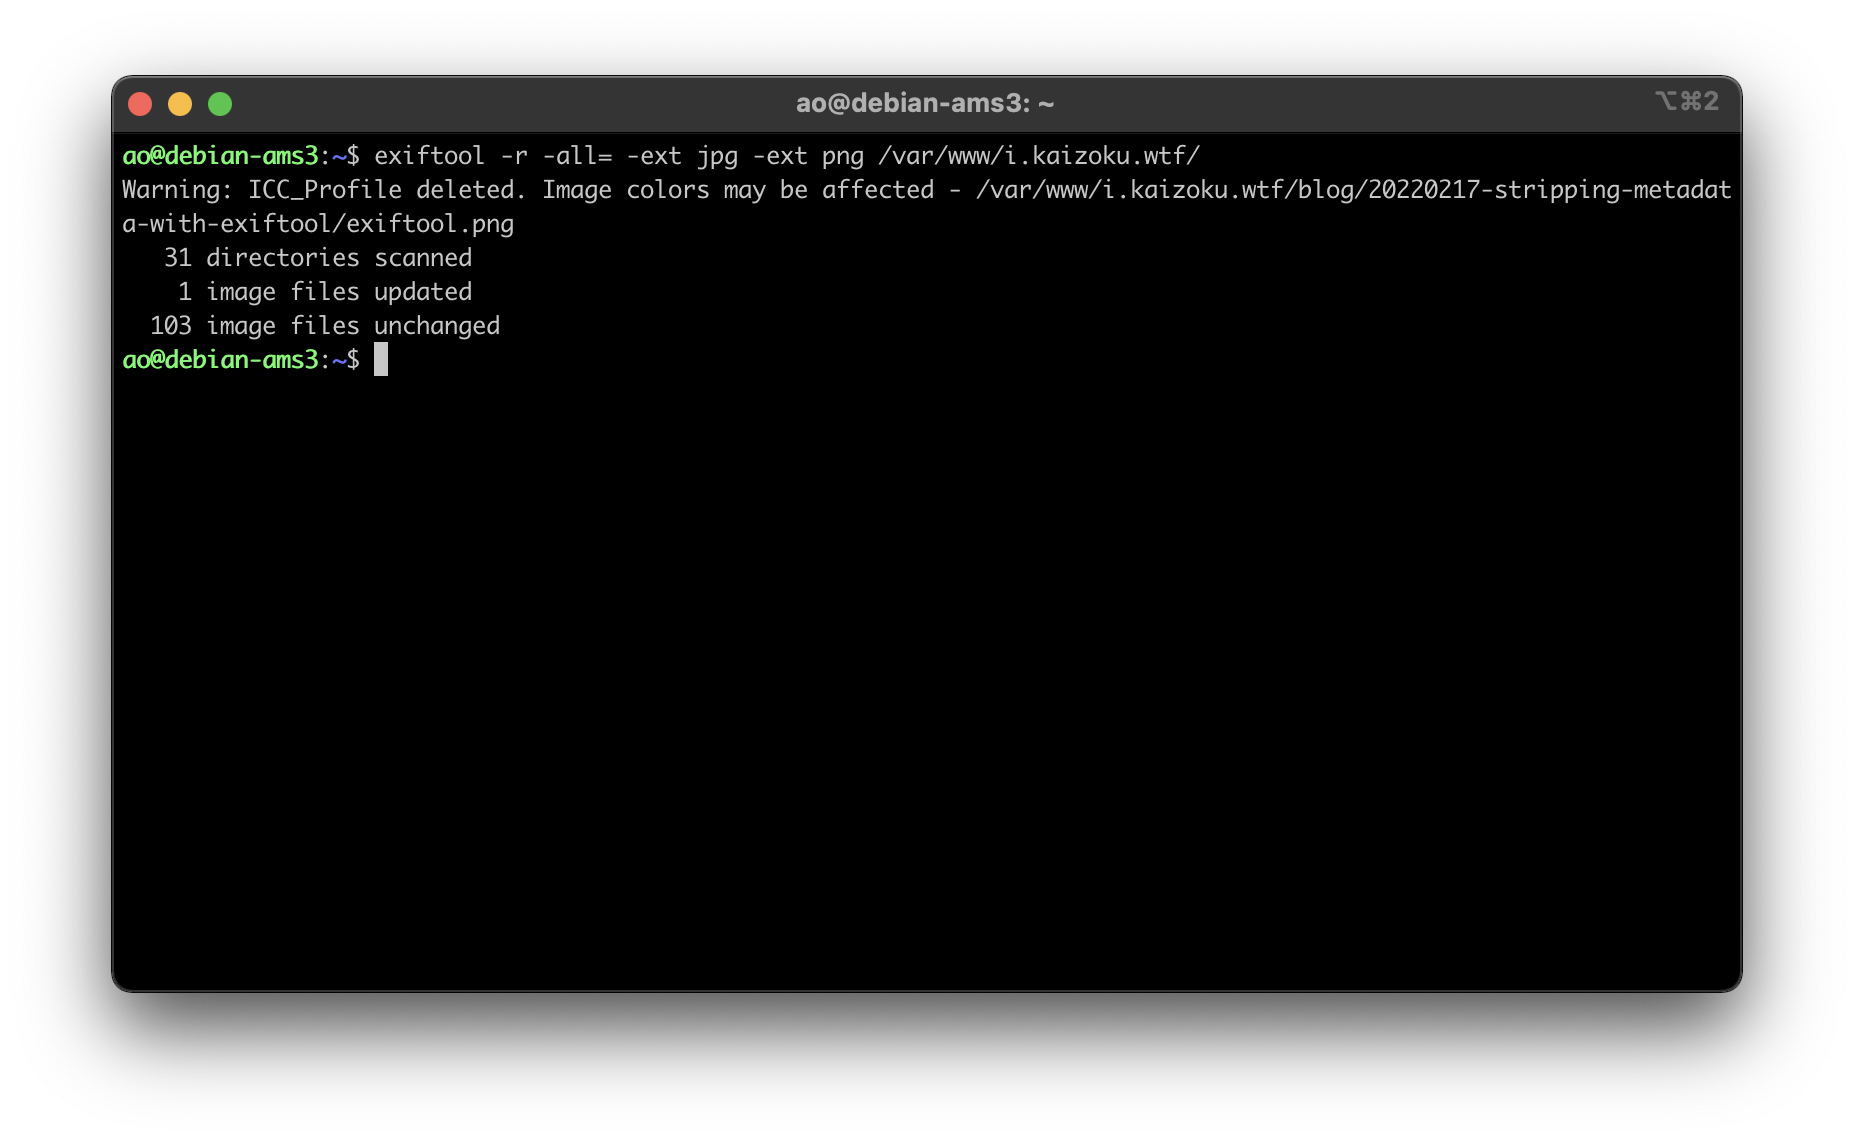 diff --git a/content/blog/2022-02-20-nginx-caching.md b/content/blog/2022-02-20-nginx-caching.md index 2df95e3..fc39b39 100644 --- a/content/blog/2022-02-20-nginx-caching.md +++ b/content/blog/2022-02-20-nginx-caching.md @@ -7,16 +7,15 @@ draft = false # Update Your Nginx Config to Cache Static Files -If you run a website on Nginx that serves static content (i.e., content -that is not dynamic and changing with interactions from the user), you -would likely benefit from caching that content on the client-side. If -you\'re used to Apache and looking for the Nginx equivalent, this post -should help. +If you run a website on Nginx that serves static content (i.e., content that is +not dynamic and changing with interactions from the user), you would likely +benefit from caching that content on the client-side. If you're used to Apache +and looking for the Nginx equivalent, this post should help. -Luckily, setting up the cache is as easy as identifying the file types -you want to cache and determining the expiration length. To include more -file types, simply use the bar separator (`|`) and type the -new file extension you want to include. +Luckily, setting up the cache is as easy as identifying the file types you want +to cache and determining the expiration length. To include more file types, +simply use the bar separator (`|`) and type the new file extension you want to +include. ``` config server { @@ -30,44 +29,40 @@ server { } ``` -I have seen some people who prefer to set `expires` as -`365d` or even `max`, but that is only for stable, -infrequently changing websites. As my site often changes (i.e., I\'m -never content with my website), I need to know that my readers are -seeing the new content without waiting too long. +I have seen some people who prefer to set `expires` as `365d` or even `max`, but +that is only for stable, infrequently changing websites. As my site often +changes (i.e., I'm never content with my website), I need to know that my +readers are seeing the new content without waiting too long. -So, I went ahead and set the expiration date at `30d`, which -is short enough to refresh for readers but long enough that -clients/browsers won\'t be re-requesting the static files too often, -hopefully resulting in faster loading times, as images should be the -only thing slowing down my site. +So, I went ahead and set the expiration date at `30d`, which is short enough to +refresh for readers but long enough that clients/browsers won't be +re-requesting the static files too often, hopefully resulting in faster loading +times, as images should be the only thing slowing down my site. # Testing Results To test my changes to the Nginx configuration, I used the [HTTP Header Live](https://addons.mozilla.org/en-US/firefox/addon/http-header-live/) -extension on my Gecko browser and used the sidebar to inspect the -headers of a recent image from my blog. +extension on my Gecko browser and used the sidebar to inspect the headers of a +recent image from my blog. -In the image below, you can see that the `Cache-Control` -header is now present and set to 2592000, which is 30 days represented -in seconds (30 days \_ 24 hours/day \_ 60 minutes/hour \*\* 60 -seconds/minute = 2,592,000 seconds). +In the image below, you can see that the `Cache-Control` header is now present +and set to 2592000, which is 30 days represented in seconds (30 days \_ 24 +hours/day \_ 60 minutes/hour ** 60 seconds/minute = 2,592,000 seconds). -The `Expires` field is now showing 22 March 2022, which is 30 -days from the day of this post, 20 February 2022. +The `Expires` field is now showing 22 March 2022, which is 30 days from the day +of this post, 20 February 2022. 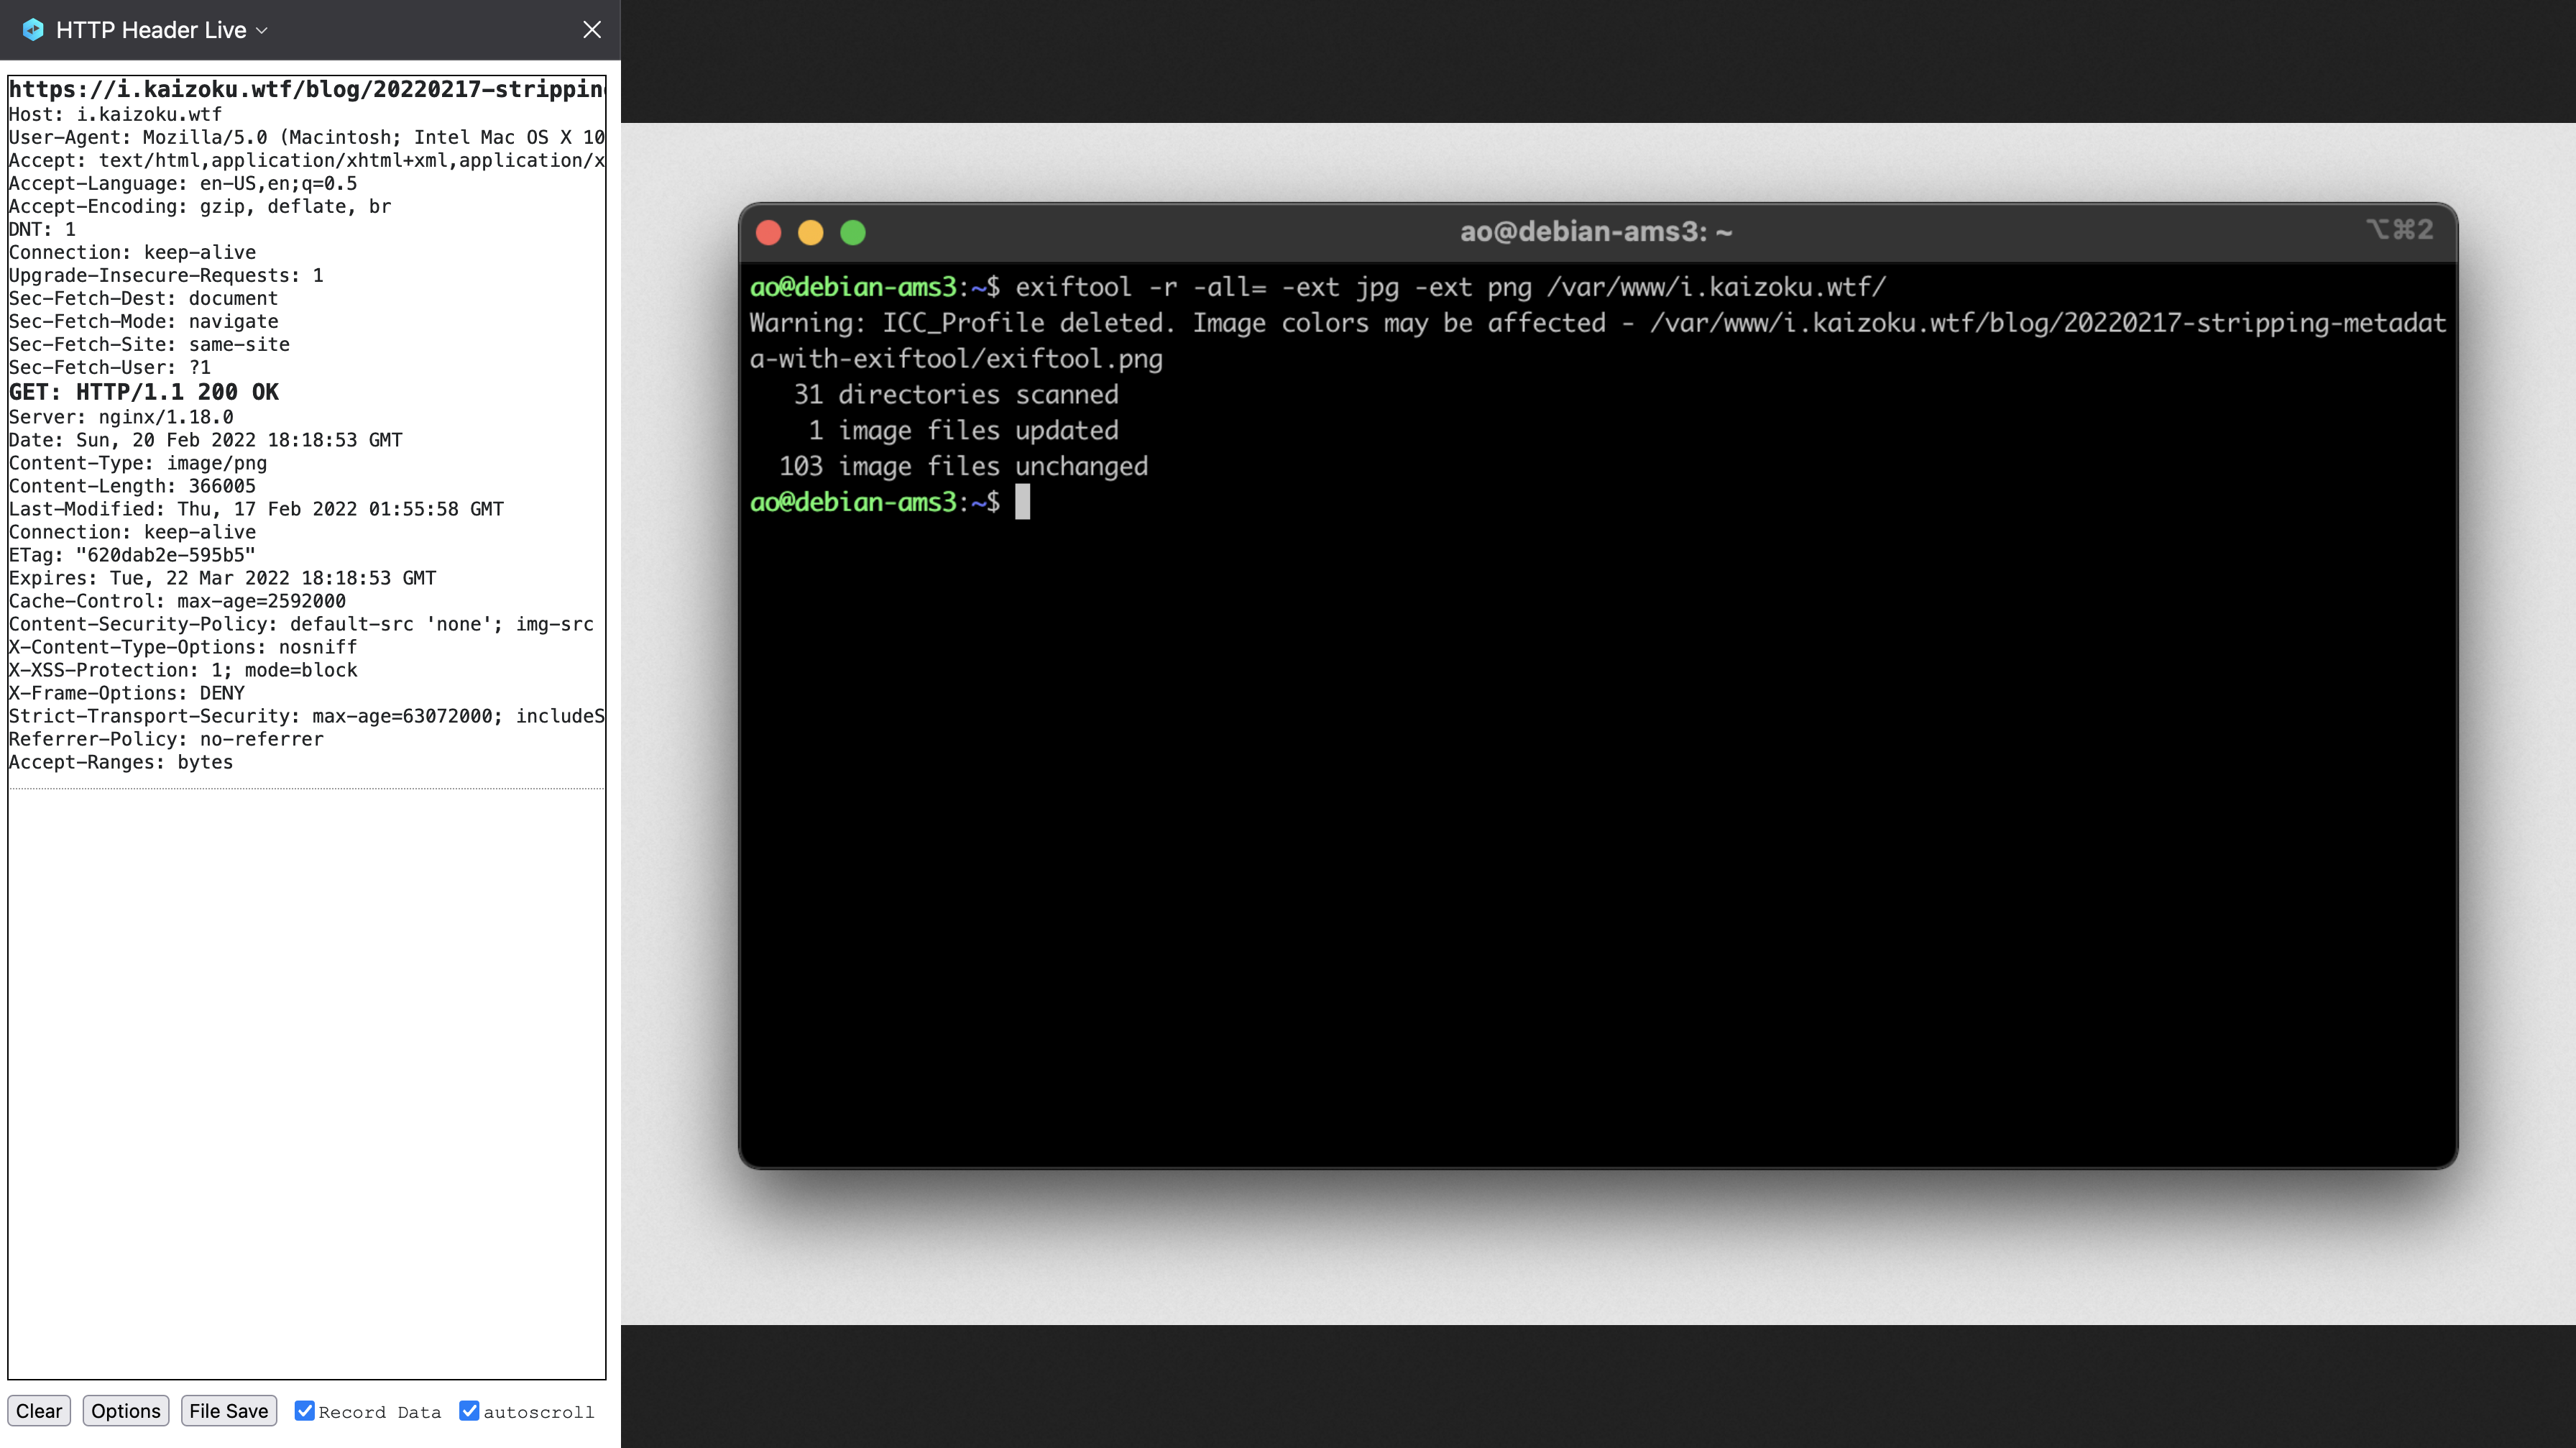 # Caveats -Remember that this caching system is **client-side**, which means that -content is only cached for as long as a client allows it. For example, -my browser purges all caches, data, etc. upon exit, so this caching -policy will only work as long as my browser remains open and running. +Remember that this caching system is **client-side**, which means that content +is only cached for as long as a client allows it. For example, my browser purges +all caches, data, etc. upon exit, so this caching policy will only work as long +as my browser remains open and running. -If you need to test updates to your site, you\'ll need to clear the -cache to see updates for any file extension you configured. This can -often be done with the `Shift + F5` or `Ctrl + F5` -key combinations in most browsers. +If you need to test updates to your site, you'll need to clear the cache to see +updates for any file extension you configured. This can often be done with the +`Shift + F5` or `Ctrl + F5` key combinations in most browsers. diff --git a/content/blog/2022-02-22-tuesday.md b/content/blog/2022-02-22-tuesday.md index d4664cd..1ba600f 100644 --- a/content/blog/2022-02-22-tuesday.md +++ b/content/blog/2022-02-22-tuesday.md @@ -7,36 +7,29 @@ draft = false # Tuesday, Twosday -I\'m taking a break from my usual technology-related posts and writing -about something a little more enjoyable today. +I'm taking a break from my usual technology-related posts and writing about +something a little more enjoyable today. -Today is Tuesday, February 22nd, 2022. Today is 02-22-2022. Today is -Twosday. +Today is Tuesday, February 22nd, 2022. Today is 02-22-2022. Today is Twosday. -Let\'s look at everything that fell in place today: +Let's look at everything that fell in place today: -1. Written in the `m-dd-yy` or `dd-m-yy` formats, - today is 2-22-22 or 22-2-22, which is a neat little palindrome in - either format. (The last ubiquitous six-digit palindrome was - 1-11-11.) -2. Today is Tuesday, which is why everyone is using the nickname - Twosday to call out these similarities. -3. Falling on Tuesday means today is the 2nd day of the week (for most - cultures. For the US, it\'s the 3rd day of the week since we start - on Sunday). -4. The only culture I could find with a connection to a `2` - is that some Slavic languages derived their version of Tuesday from - the Old Church Slavonic word `въторъ`, meaning \"the - second.\" -5. Written in the classic monospaced, digital font (think of digital - clocks from the 80s/90s), there is nice symmetry to the numbers - ([view the image - here](https://img.cleberg.net/blog/20220222-tuesday/digital_font.png)!). -6. This one isn\'t naturally-occurring, but it seems people around the - world are celebrating the day. For example, a group is putting - together - \[\[<https://www.eventbrite.com/e/2-22-22-a-collective-wedding-ceremony-at-the-state-capitol-tickets-211434605597>\]\[a - wedding of 222 couples at the California State Capitol in - Sacramento\]\], concluding at exactly 2:22 PM. These couples will - record their marriage dates as 2-22-22 2:22 PM. Tickets were on sale - for \$222.22. +1. Written in the `m-dd-yy` or `dd-m-yy` formats, today is 2-22-22 or 22-2-22, + which is a neat little palindrome in either format. (The last ubiquitous + six-digit palindrome was 1-11-11.) +2. Today is Tuesday, which is why everyone is using the nickname Twosday to call + out these similarities. +3. Falling on Tuesday means today is the 2nd day of the week (for most cultures. + For the US, it's the 3rd day of the week since we start on Sunday). +4. The only culture I could find with a connection to a `2` is that some Slavic + languages derived their version of Tuesday from the Old Church Slavonic word + `въторъ`, meaning "the second." +5. Written in the classic monospaced, digital font (think of digital clocks from + the 80s/90s), there is nice symmetry to the numbers ([view the image + here](https://img.cleberg.net/blog/20220222-tuesday/digital_font.png)!). +6. This one isn't naturally-occurring, but it seems people around the world are + celebrating the day. For example, a group is putting together [a wedding of + 222 couples at the California State Capitol in + Sacramento](https://www.eventbrite.com/e/2-22-22-a-collective-wedding-ceremony-at-the-state-capitol-tickets-211434605597), + concluding at exactly 2:22 PM. These couples will record their marriage dates + as 2-22-22 2:22 PM. Tickets were on sale for $222.22. diff --git a/content/blog/2022-03-02-reliable-notes.md b/content/blog/2022-03-02-reliable-notes.md index b2681bb..86526d5 100644 --- a/content/blog/2022-03-02-reliable-notes.md +++ b/content/blog/2022-03-02-reliable-notes.md @@ -7,132 +7,121 @@ draft = false # Choosing Durable File Formats -> TL;DR: Write in a format that can be easily rendered and read in -> plain-text mode (e.g., `.txt`, `.md`, etc.). +> TL;DR: Write in a format that can be easily rendered and read in plain-text +> mode (e.g., `.txt`, `.md`, etc.). -As I\'ve written more and more over the years, I\'ve found that my love -of note-taking is always growing. Everything I learn or need to remember -can be written down in a note and saved digitally, with no cost to -myself. Unlike paper copies that need physical storage space, digital -files simply need space on your local disk or cloud storage, which is -fairly abundant these days. +As I've written more and more over the years, I've found that my love of +note-taking is always growing. Everything I learn or need to remember can be +written down in a note and saved digitally, with no cost to myself. Unlike paper +copies that need physical storage space, digital files simply need space on your +local disk or cloud storage, which is fairly abundant these days. -However, I had a historical struggle with migration of notes between -different apps that require different formats and applied proprietary -styling. This meant that I had to go through each note during migration -and edit the file to look presentable again. +However, I had a historical struggle with migration of notes between different +apps that require different formats and applied proprietary styling. This meant +that I had to go through each note during migration and edit the file to look +presentable again. For the last year or two, I have written everything exclusively in [Markdown](https://en.wikipedia.org/wiki/Markdown) format. Small notes, -long-form writings, and even these blog posts are all written in -Markdown. - -Why Markdown? While I do appreciate the simplicity of plain-text files -without any formatting, I often need visual cues such as heading and -code blocks to keep my thoughts straight. Markdown provides a minimal -set of styling indicators for me to style my notes without adding any -proprietary, embedded data into the files. If I want a top-level -heading, I simply add a hash (`#`) before the line. An added -bonus is that even if a system doesn\'t understand Markdown, it will +long-form writings, and even these blog posts are all written in Markdown. + +Why Markdown? While I do appreciate the simplicity of plain-text files without +any formatting, I often need visual cues such as heading and code blocks to keep +my thoughts straight. Markdown provides a minimal set of styling indicators for +me to style my notes without adding any proprietary, embedded data into the +files. If I want a top-level heading, I simply add a hash (`#`) before the line. +An added bonus is that even if a system doesn't understand Markdown, it will render it as plain-text and I can read it just as easily. -For example, here\'s how TextEdit on macOS will open and display a -Markdown file in plain-text, since it does contain any features to -preview Markdown as HTML: +For example, here's how TextEdit on macOS will open and display a Markdown file +in plain-text, since it does contain any features to preview Markdown as HTML:  ## Saving & Syncing Files -In order to read and edit my notes across platforms, I use my personal -cloud storage through Tresorit due to its native integration with macOS -and iOS file managers. In addition, Tresorit works well on Debian-based -Linux distros, which I used before macOS (and will likely switch back to -in a few years). +In order to read and edit my notes across platforms, I use my personal cloud +storage through Tresorit due to its native integration with macOS and iOS file +managers. In addition, Tresorit works well on Debian-based Linux distros, which +I used before macOS (and will likely switch back to in a few years). -You can use whatever sync software you want - syncing plain-text or -markdown files is incredibly easy and fast, since the files are -generally tiny. +You can use whatever sync software you want - syncing plain-text or markdown +files is incredibly easy and fast, since the files are generally tiny. -Since the cloud storage syncs files automatically, there is no need for -me to sync anything manually or kick-off a sync job to update my files. -This means that I can edit on mobile, and it takes about 5-10 seconds to -see the changes on desktop. +Since the cloud storage syncs files automatically, there is no need for me to +sync anything manually or kick-off a sync job to update my files. This means +that I can edit on mobile, and it takes about 5-10 seconds to see the changes on +desktop. ### Version Control with Git -A different approach I\'ve contemplated is storing my notes and -attachments is using a hosted Git repository to track changes to the -files. However, I don\'t want to rely on an external service that could -potentially see into my data, even if the repository is private. +A different approach I've contemplated is storing my notes and attachments is +using a hosted Git repository to track changes to the files. However, I don't +want to rely on an external service that could potentially see into my data, +even if the repository is private. -I might just do `git init` locally and then commit my changes -each time I write or update a note, but that seems to be a lot of work -just for tracking changes - which I don\'t necessarily care to know. +I might just do `git init` locally and then commit my changes each time I write +or update a note, but that seems to be a lot of work just for tracking changes - +which I don't necessarily care to know. ### Backups! -One small addition to the storage/sync conversation is the idea of -backups. Personally, I manually create periodic backups of my entire -cloud storage, compress it into an archive, and store it on my home -server. +One small addition to the storage/sync conversation is the idea of backups. +Personally, I manually create periodic backups of my entire cloud storage, +compress it into an archive, and store it on my home server. -To improve my workflow, I am going to be exploring options to -automatically compress the mounted cloud directory and send it over to -my server on a set schedule. +To improve my workflow, I am going to be exploring options to automatically +compress the mounted cloud directory and send it over to my server on a set +schedule. ## Writing on Desktop -> **Update (06.14.22)**: Since writing this post, I have reverted to -> simply keeping my `notes` folder open and opening notes -> individually in TextEdit for a more minimal and relaxing writing -> experience on the desktop. +> **Update (06.14.22)**: Since writing this post, I have reverted to simply +> keeping my `notes` folder open and opening notes individually in TextEdit for +> a more minimal and relaxing writing experience on the desktop. -The bulk of my writing occurs in a desktop environment, with a full -keyboard layout and wide screen. I don\'t illustrate with a smart pen, I -rarely use embedded images, and I love being able to see all of my -notes/directories in a sidebar. +The bulk of my writing occurs in a desktop environment, with a full keyboard +layout and wide screen. I don't illustrate with a smart pen, I rarely use +embedded images, and I love being able to see all of my notes/directories in a +sidebar. -With this simple set of requirements, I chose -[Obsidian](https://obsidian.md) as my desktop text editor. Obsidian has -some in-depth tools like a graph view, command palette, mentions, etc., -but I\'ve found that using it as a simple Markdown editor is incredibly -easy and straightforward. +With this simple set of requirements, I chose [Obsidian](https://obsidian.md) as +my desktop text editor. Obsidian has some in-depth tools like a graph view, +command palette, mentions, etc., but I've found that using it as a simple +Markdown editor is incredibly easy and straightforward. -Here\'s an example of how my Markdown notes look when opened in -plain-text mode: +Here's an example of how my Markdown notes look when opened in plain-text mode: 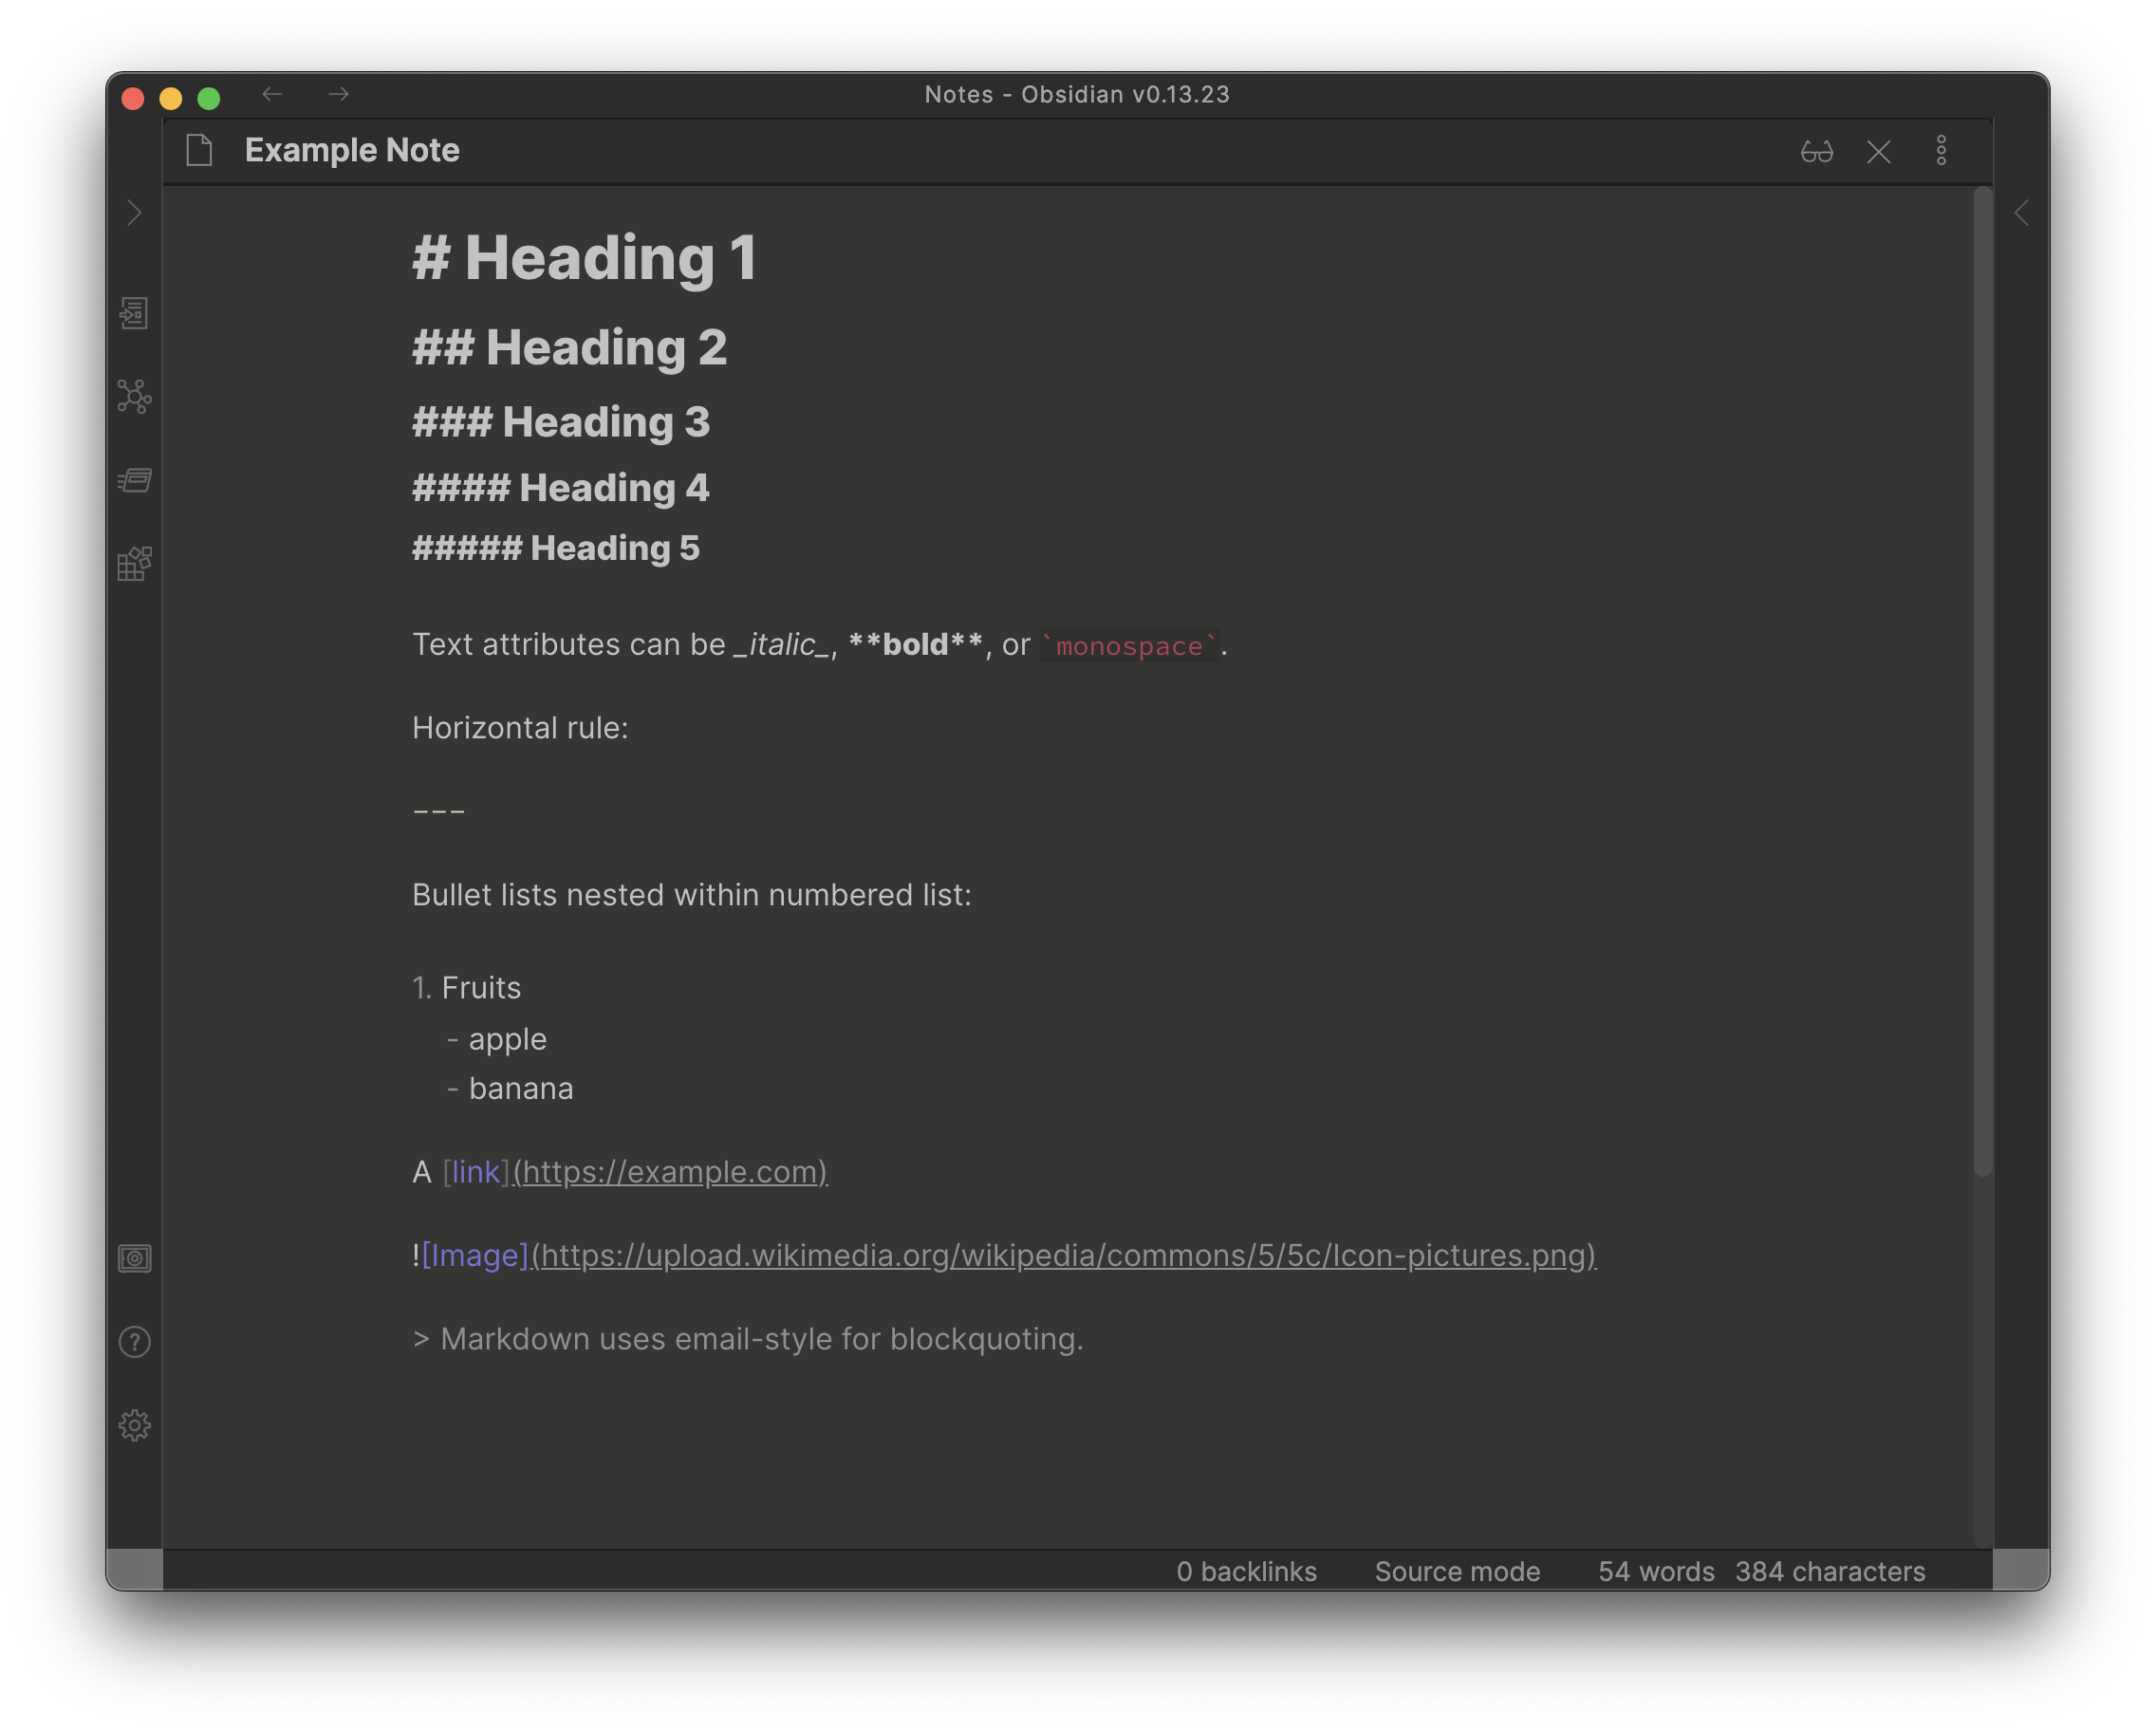 -Here\'s the \"live preview\" version, where the Markdown is rendered -into its HTML format: +Here's the "live preview" version, where the Markdown is rendered into its +HTML format: 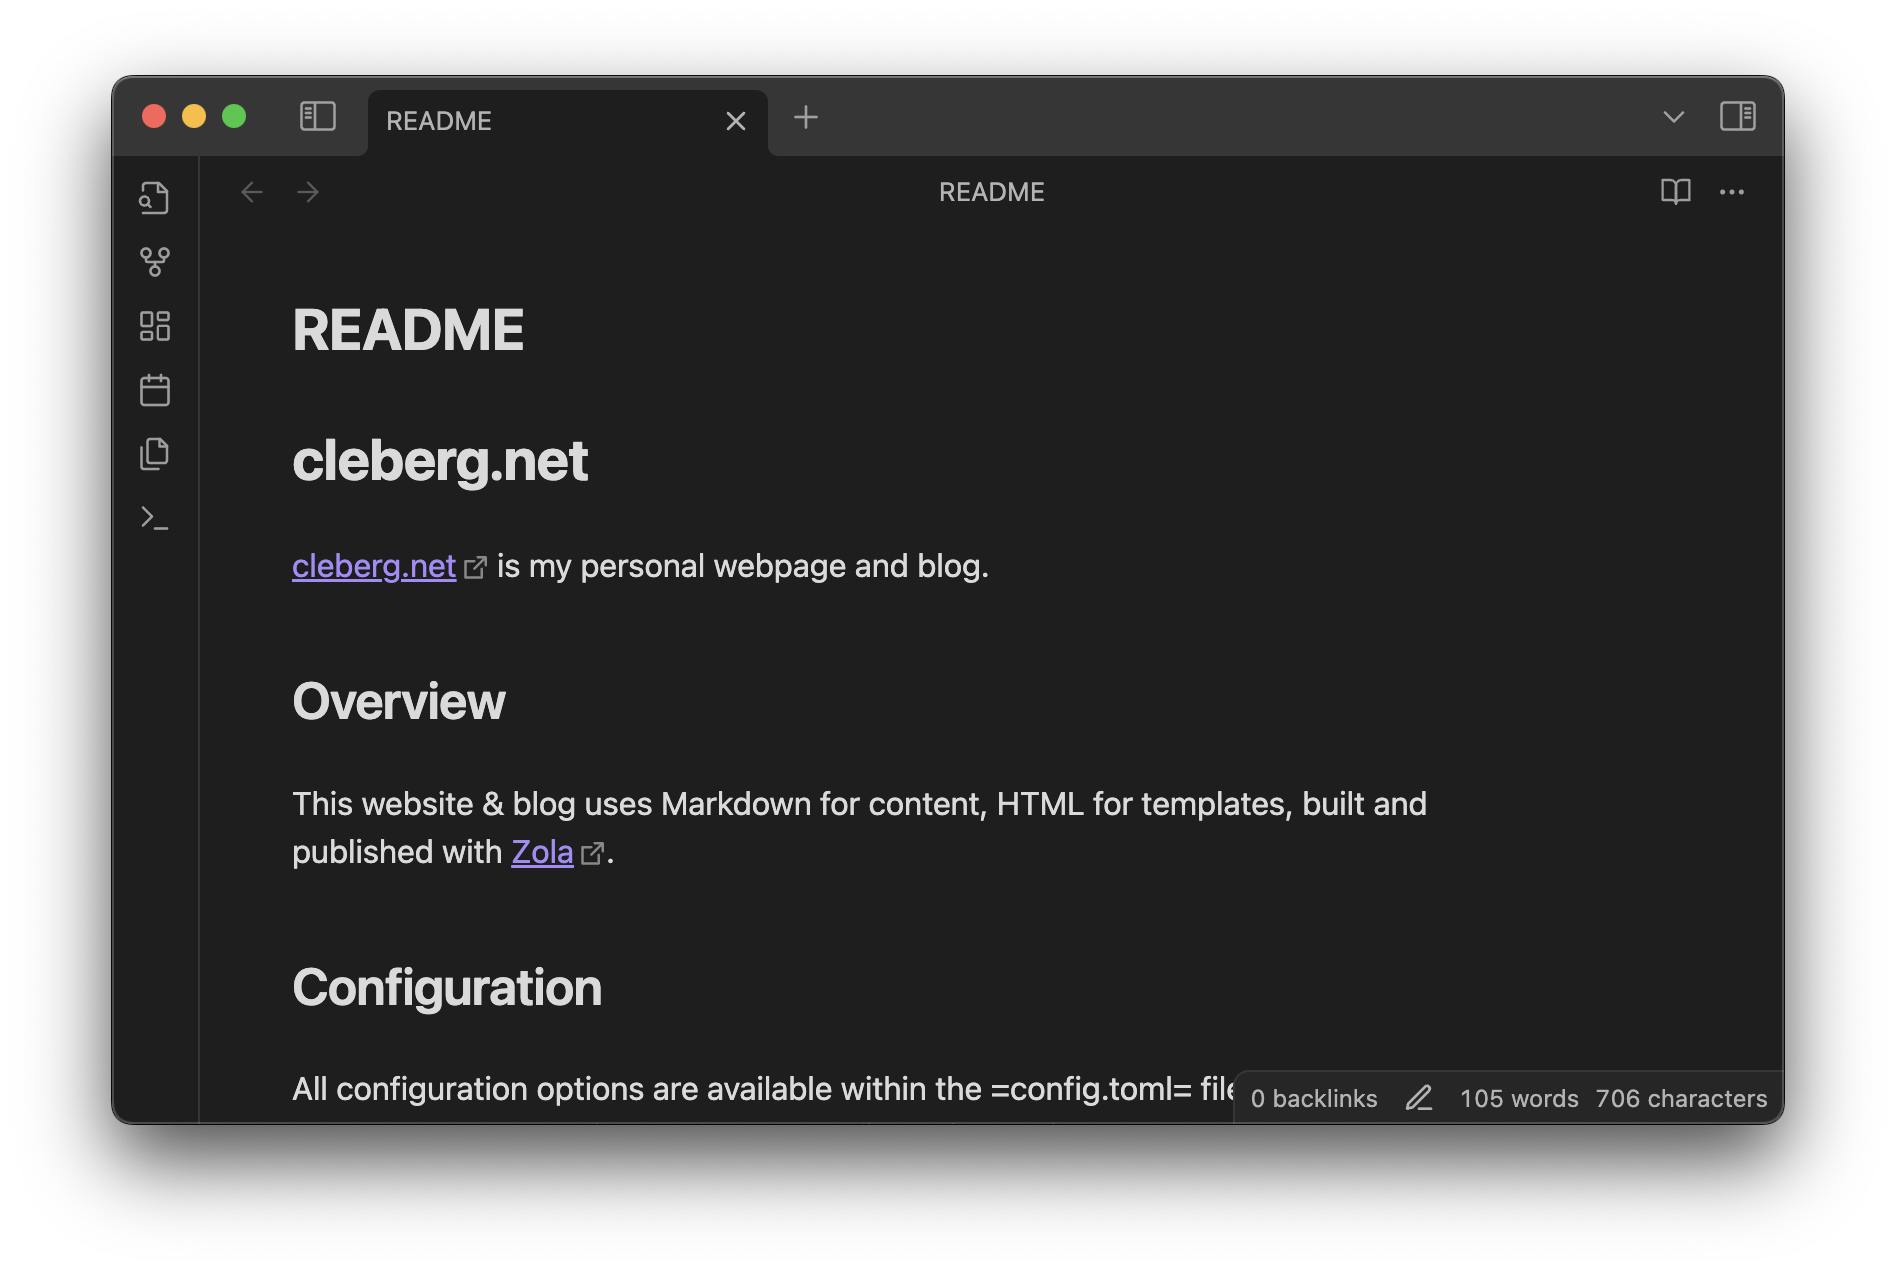 ### Programming on Desktop -While I was writing this, I realized I should specify that I don\'t use -the same editor for writing notes and for writing code. For programming -purposes, I use [VSCodium](https://vscodium.com) as my development IDE. +While I was writing this, I realized I should specify that I don't use the same +editor for writing notes and for writing code. For programming purposes, I use +[VSCodium](https://vscodium.com) as my development IDE. ## Writing on Mobile -Personally, I write very little on mobile, except when needing to take -important notes on-the-go. Any long-form writing, journals, etc. are -done at home, where I always have my laptop available. +Personally, I write very little on mobile, except when needing to take important +notes on-the-go. Any long-form writing, journals, etc. are done at home, where I +always have my laptop available. -I wanted a simple and foolproof editor for iOS, preferably open-source. -After a long journey of testing the few (& terrible) open-source iOS -note-taking apps, I finally found a phenomenal one: -[Runestone](https://github.com/simonbs/runestone). This app is fantastic -for note-taking, has plenty of optional features, and integrates -natively with the iOS file manager. +I wanted a simple and foolproof editor for iOS, preferably open-source. After a +long journey of testing the few (& terrible) open-source iOS note-taking apps, I +finally found a phenomenal one: +[Runestone](https://github.com/simonbs/runestone). This app is fantastic for +note-taking, has plenty of optional features, and integrates natively with the +iOS file manager. -This app opens the iOS file manager and allows you to click any file you -want, opens it up in an editor, and lets me save and close out of that -note. +This app opens the iOS file manager and allows you to click any file you want, +opens it up in an editor, and lets me save and close out of that note. Quite simple but effective. diff --git a/content/blog/2022-03-03-financial-database.md b/content/blog/2022-03-03-financial-database.md index 49ffc7b..bfe5a98 100644 --- a/content/blog/2022-03-03-financial-database.md +++ b/content/blog/2022-03-03-financial-database.md @@ -7,54 +7,50 @@ draft = false # Personal Financial Tracking -For the last 6-ish years, I\'ve tracked my finances in a spreadsheet. -This is common practice in the business world, but any good dev will -cringe at the thought of storing long-term data in a spreadsheet. A -spreadsheet is not for long-term storage or as a source of data to pull -data/reports. - -As I wanted to expand the functionality of my financial data (e.g., -adding more reports), I decided to migrate the data into a database. To -run reports, I would query the database and use a language like Python -or Javascript to process the data, perform calculations, and visualize -the data. +For the last 6-ish years, I've tracked my finances in a spreadsheet. This is +common practice in the business world, but any good dev will cringe at the +thought of storing long-term data in a spreadsheet. A spreadsheet is not for +long-term storage or as a source of data to pull data/reports. + +As I wanted to expand the functionality of my financial data (e.g., adding more +reports), I decided to migrate the data into a database. To run reports, I would +query the database and use a language like Python or Javascript to process the +data, perform calculations, and visualize the data. # SQLite -When choosing the type of database I wanted to use for this project, I -was split between three options: +When choosing the type of database I wanted to use for this project, I was split +between three options: -1. MySQL: The database I have the most experience with and have used - for years. -2. PostgreSQL: A database I\'m new to, but want to learn. -3. SQLite: A database that I\'ve used for a couple projects and have - moderate experience. +1. MySQL: The database I have the most experience with and have used for years. +2. PostgreSQL: A database I'm new to, but want to learn. +3. SQLite: A database that I've used for a couple projects and have moderate + experience. -I ended up choosing SQLite since it can be maintained within a single -`.sqlite` file, which allows me more flexibility for storage -and backup. I keep this file in my cloud storage and pull it up whenever -needed. +I ended up choosing SQLite since it can be maintained within a single `.sqlite` +file, which allows me more flexibility for storage and backup. I keep this file +in my cloud storage and pull it up whenever needed. ## GUI Editing -Since I didn\'t want to try and import 1000--1500 records into my new -database via the command line, I opted to use [DB Browser for SQLite +Since I didn't want to try and import 1000--1500 records into my new database +via the command line, I opted to use [DB Browser for SQLite (DB4S)](https://sqlitebrowser.org/) as a GUI tool. This application is -excellent, and I don\'t see myself going back to the CLI when working in -this database. +excellent, and I don't see myself going back to the CLI when working in this +database. DB4S allows you to copy a range of cells from a spreadsheet and paste it -straight into the SQL table. I used this process for all 36 accounts, -1290 account statements, and 126 pay statements. Overall, I\'m guessing -this took anywhere between 4--8 hours. In comparison, it probably took -me 2-3 days to initially create the spreadsheet. +straight into the SQL table. I used this process for all 36 accounts, 1290 +account statements, and 126 pay statements. Overall, I'm guessing this took +anywhere between 4--8 hours. In comparison, it probably took me 2-3 days to +initially create the spreadsheet. 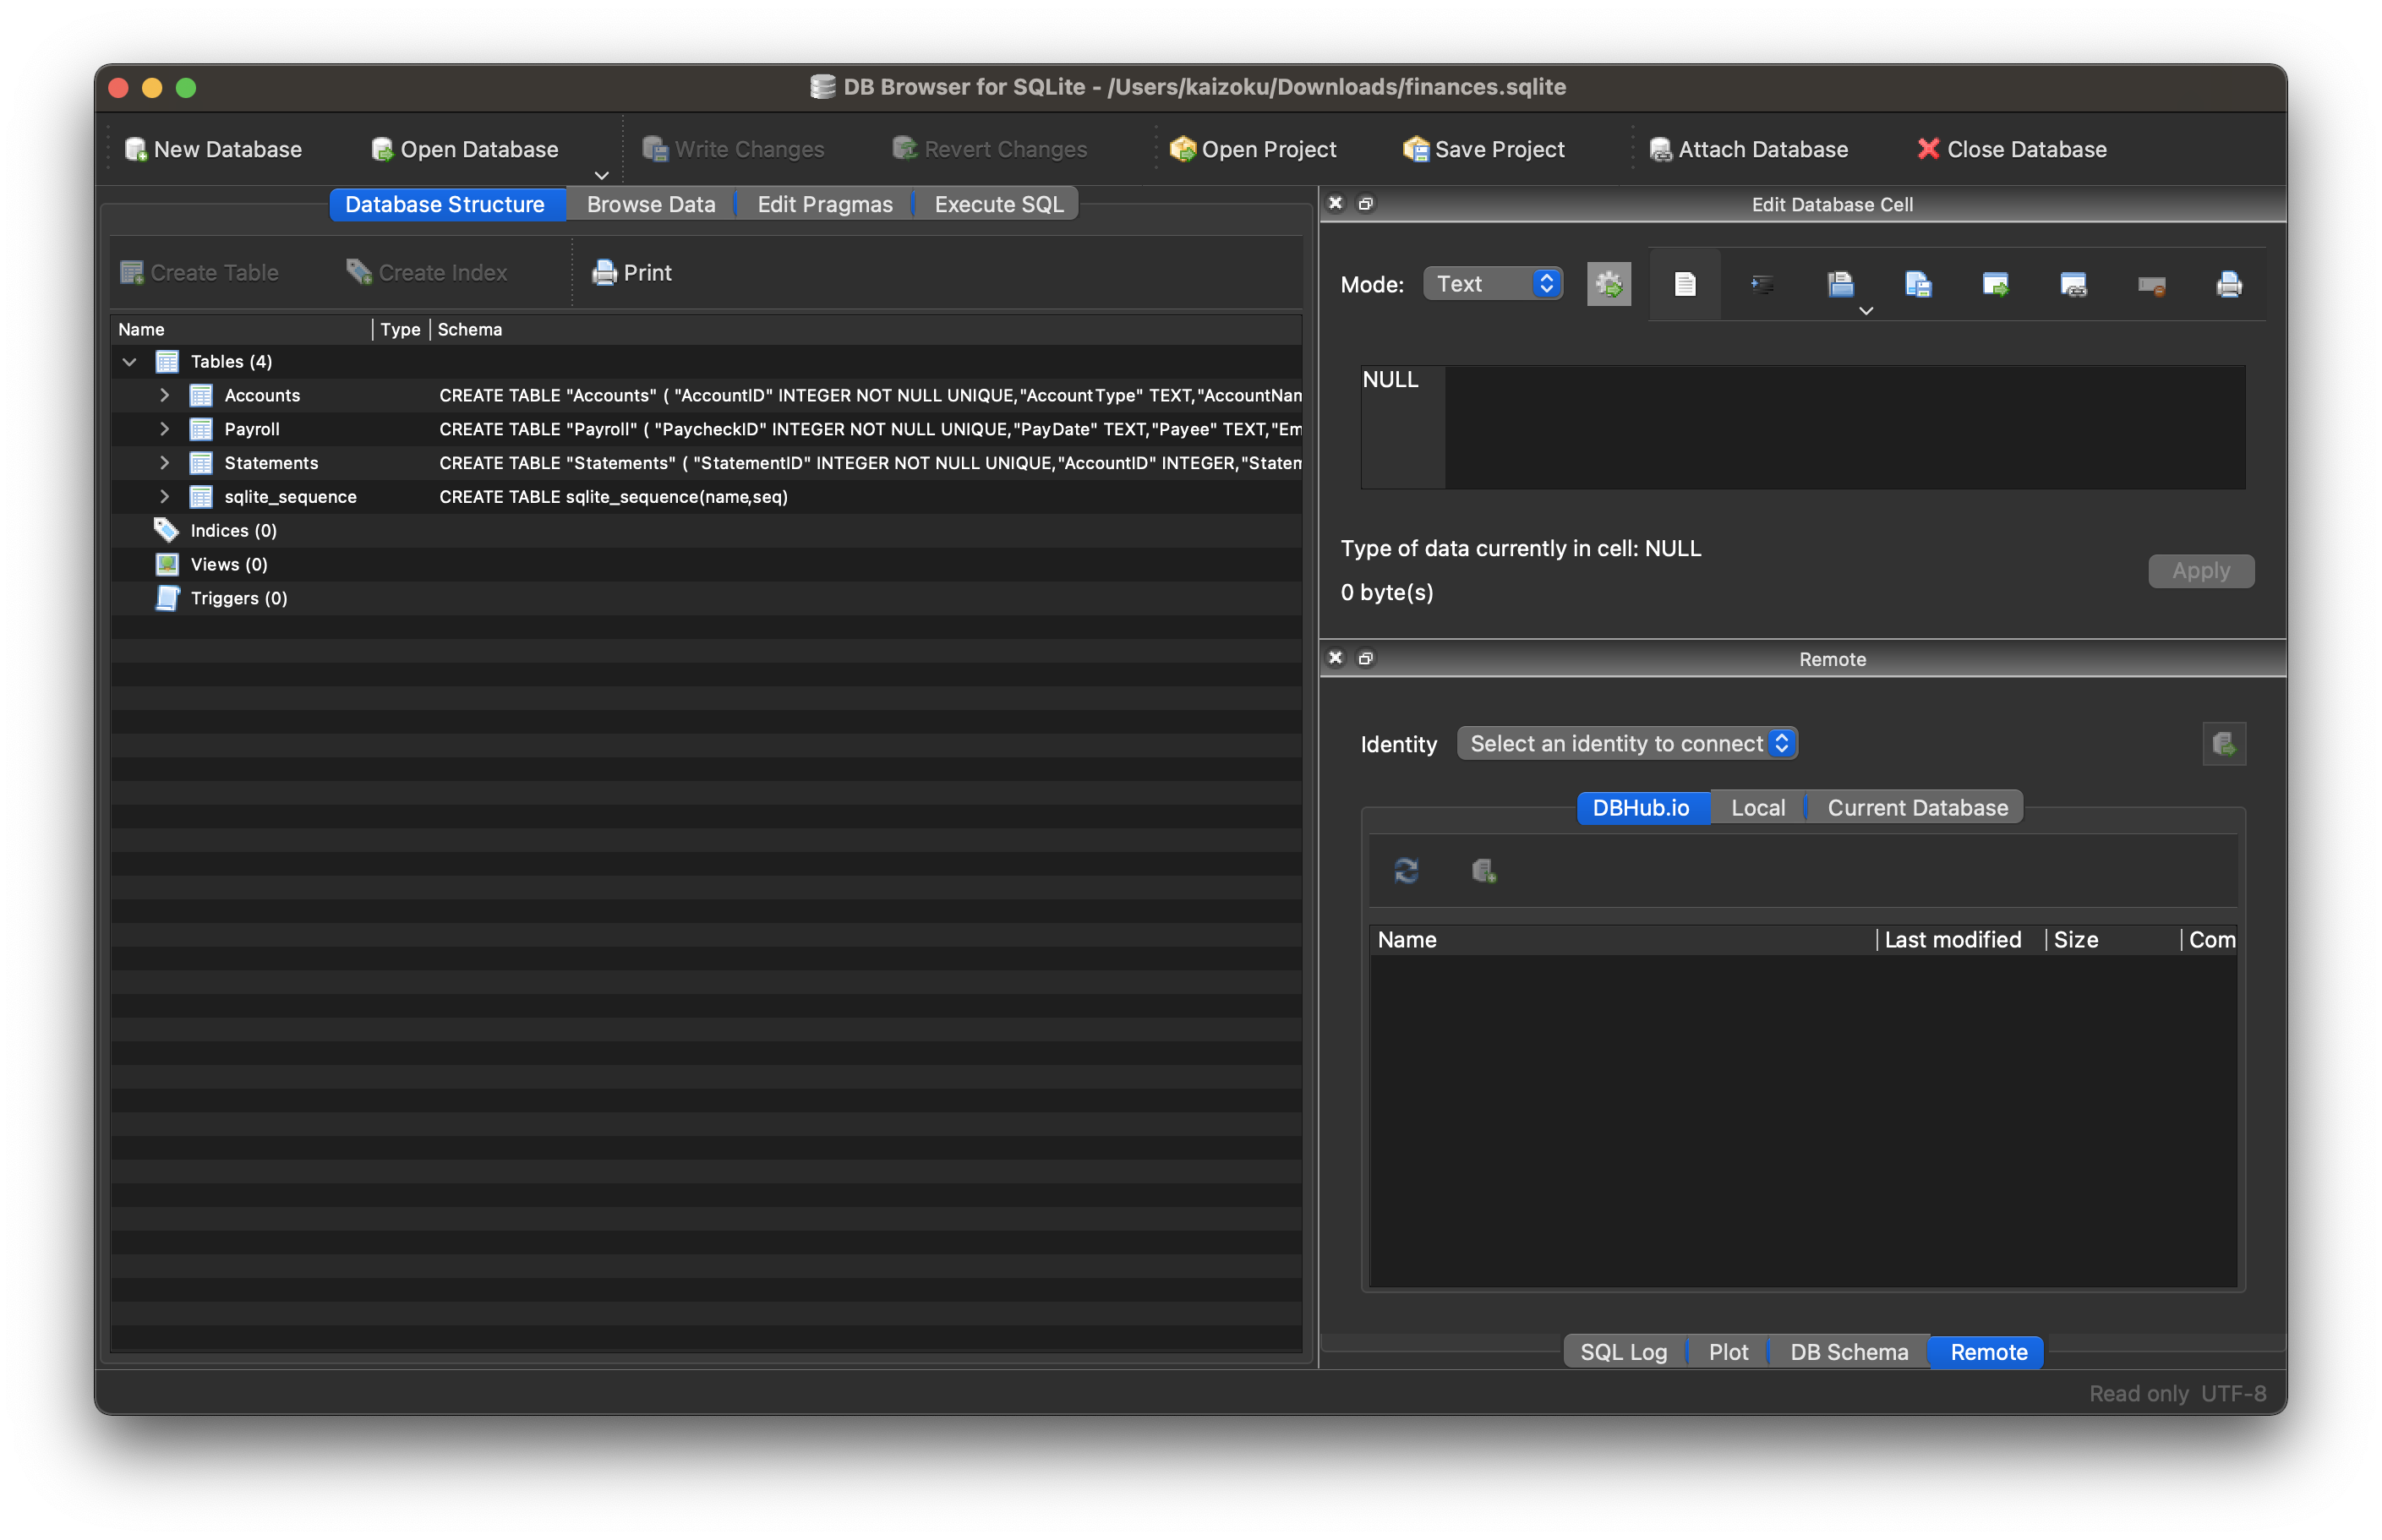 ## Schema -The schema for this database is actually extremely simple and involves -only three tables (for now): +The schema for this database is actually extremely simple and involves only +three tables (for now): 1. Accounts 2. Statements @@ -62,9 +58,9 @@ only three tables (for now): **Accounts** -The Accounts table contains summary information about an account, such -as a car loan or a credit card. By viewing this table, you can find -high-level data, such as interest rate, credit line, or owner. +The Accounts table contains summary information about an account, such as a car +loan or a credit card. By viewing this table, you can find high-level data, such +as interest rate, credit line, or owner. ``` sql CREATE TABLE "Accounts" ( @@ -82,10 +78,10 @@ CREATE TABLE "Accounts" ( **Statements** -The Statements table uses the same unique identifier as the Accounts -table, meaning you can join the tables to find a monthly statement for -any of the accounts listed in the Accounts table. Each statement has an -account ID, statement date, and total balance. +The Statements table uses the same unique identifier as the Accounts table, +meaning you can join the tables to find a monthly statement for any of the +accounts listed in the Accounts table. Each statement has an account ID, +statement date, and total balance. ``` sql CREATE TABLE "Statements" ( @@ -100,10 +96,10 @@ CREATE TABLE "Statements" ( **Payroll** -The Payroll table is a separate entity, unrelated to the Accounts or -Statements tables. This table contains all information you would find on -a pay statement from an employer. As you change employers or obtain new -perks/benefits, just add new columns to adapt to the new data. +The Payroll table is a separate entity, unrelated to the Accounts or Statements +tables. This table contains all information you would find on a pay statement +from an employer. As you change employers or obtain new perks/benefits, just add +new columns to adapt to the new data. ``` sql CREATE TABLE "Payroll" ( @@ -139,134 +135,122 @@ CREATE TABLE "Payroll" ( ## Python Reporting -Once I created the database tables and imported all my data, the only -step left was to create a process to report and visualize on various -aspects of the data. - -In order to explore and create the reports I\'m interested in, I -utilized a two-part process involving Jupyter Notebooks and Python -scripts. - -1. Step 1: Jupyter Notebooks - - When I need to explore data, try different things, and re-run my - code cell-by-cell, I use Jupyter Notebooks. For example, I explored - the `Accounts` table until I found the following useful - information: - - ``` python - import sqlite3 - import pandas as pd - import matplotlib - - # Set up database filename and connect - db = "finances.sqlite" - connection = sqlite3.connect(db) - df = pd.read_sql_query("SELECT ** FROM Accounts", connection) - - # Set global matplotlib variables - %matplotlib inline - matplotlib.rcParams['text.color'] = 'white' - matplotlib.rcParams['axes.labelcolor'] = 'white' - matplotlib.rcParams['xtick.color'] = 'white' - matplotlib.rcParams['ytick.color'] = 'white' - matplotlib.rcParams['legend.labelcolor'] = 'black' - - # Display graph - df.groupby(['AccountType']).sum().plot.pie(title='Credit Line by Account Type', y='CreditLine', figsize=(5,5), autopct='%1.1f%%') - ``` - -2. Step 2: Python Scripts - - Once I explored enough through the notebooks and had a list of - reports I wanted, I moved on to create a Python project with the - following structure: - - ``` txt - finance/ - ├── notebooks/ - │ │ ├── account_summary.ipynb - │ │ ├── account_details.ipynb - │ │ └── payroll.ipynb - ├── public/ - │ │ ├── image-01.png - │ │ └── image-0X.png - ├── src/ - │ └── finance.sqlite - ├── venv/ - ├── _init.py - ├── database.py - ├── process.py - ├── requirements.txt - └── README.md - ``` - - This structure allows me to: - - 1. Compile all required python packages into - `requirements.txt` for easy installation if I move to - a new machine. - 2. Activate a virtual environment in `venv/` so I don\'t - need to maintain a system-wide Python environment just for this - project. - 3. Keep my `notebooks/` folder to continuously explore - the data as I see fit. - 4. Maintain a local copy of the database in `src/` for - easy access. - 5. Export reports, images, HTML files, etc. to - `public/`. - - Now, onto the differences between the code in a Jupyter Notebook and - the actual Python files. To create the report in the Notebook - snippet above, I created the following function inside - `process.py`: - - ``` python - # Create summary pie chart - def summary_data(accounts: pandas.DataFrame) -> None: - accounts_01 = accounts[accounts["Owner"] == "Person01"] - accounts_02 = accounts[accounts["Owner"] == "Person02"] - for x in range(1, 4): - if x == 1: - df = accounts - account_string = "All Accounts" - elif x == 2: - df = accounts_01 - account_string = "Person01's Accounts" - elif x == 3: - df = accounts_02 - account_string = "Person02's Accounts" - print(f"Generating pie chart summary image for {account_string}...") - summary_chart = ( - df.groupby(["AccountType"]) - .sum() - .plot.pie( - title=f"Credit Line by Type for {account_string}", - y="CreditLine", - autopct="%1.1f%%", - ) +Once I created the database tables and imported all my data, the only step left +was to create a process to report and visualize on various aspects of the data. + +In order to explore and create the reports I'm interested in, I utilized a +two-part process involving Jupyter Notebooks and Python scripts. + +### Step 1: Jupyter Notebooks + +When I need to explore data, try different things, and re-run my code +cell-by-cell, I use Jupyter Notebooks. For example, I explored the +`Accounts` table until I found the following useful information: + +``` python +import sqlite3 +import pandas as pd +import matplotlib + +# Set up database filename and connect +db = "finances.sqlite" +connection = sqlite3.connect(db) +df = pd.read_sql_query("SELECT ** FROM Accounts", connection) + +# Set global matplotlib variables +%matplotlib inline +matplotlib.rcParams['text.color'] = 'white' +matplotlib.rcParams['axes.labelcolor'] = 'white' +matplotlib.rcParams['xtick.color'] = 'white' +matplotlib.rcParams['ytick.color'] = 'white' +matplotlib.rcParams['legend.labelcolor'] = 'black' + +# Display graph +df.groupby(['AccountType']).sum().plot.pie(title='Credit Line by Account Type', y='CreditLine', figsize=(5,5), autopct='%1.1f%%') +``` + +### Step 2: Python Scripts + +Once I explored enough through the notebooks and had a list of reports I +wanted, I moved on to create a Python project with the following structure: + +``` txt +finance/ +├── notebooks/ +│ │ ├── account_summary.ipynb +│ │ ├── account_details.ipynb +│ │ └── payroll.ipynb +├── public/ +│ │ ├── image-01.png +│ │ └── image-0X.png +├── src/ +│ └── finance.sqlite +├── venv/ +├── _init.py +├── database.py +├── process.py +├── requirements.txt +└── README.md +``` + +This structure allows me to: + +1. Compile all required python packages into `requirements.txt` for easy + installation if I move to a new machine. +2. Activate a virtual environment in `venv/` so I don't need to maintain a + system-wide Python environment just for this project. +3. Keep my `notebooks/` folder to continuously explore the data as I see + fit. +4. Maintain a local copy of the database in `src/` for easy access. +5. Export reports, images, HTML files, etc. to `public/`. + +Now, onto the differences between the code in a Jupyter Notebook and the +actual Python files. To create the report in the Notebook snippet above, I +created the following function inside `process.py`: + +``` python +# Create summary pie chart +def summary_data(accounts: pandas.DataFrame) -> None: + accounts_01 = accounts[accounts["Owner"] == "Person01"] + accounts_02 = accounts[accounts["Owner"] == "Person02"] + for x in range(1, 4): + if x == 1: + df = accounts + account_string = "All Accounts" + elif x == 2: + df = accounts_01 + account_string = "Person01's Accounts" + elif x == 3: + df = accounts_02 + account_string = "Person02's Accounts" + print(f"Generating pie chart summary image for {account_string}...") + summary_chart = ( + df.groupby(["AccountType"]) + .sum() + .plot.pie( + title=f"Credit Line by Type for {account_string}", + y="CreditLine", + autopct="%1.1f%%", ) - summary_chart.figure.savefig(f"public/summary_chart_{x}.png", dpi=1200) - ``` - - The result? A high-quality pie chart that is read directly by the - `public/index.html` template I use. - -  - - Other charts generated by this project include: - - - Charts of account balances over time. - - Line chart of effective tax rate (taxes divided by taxable - income). - - Salary projections and error limits using past income and - inflation rates. - - Multi-line chart of gross income, taxable income, and net - income. - - The best thing about this project? I can improve it at any given - time, shaping it into whatever helps me the most for that time. I - imagine that I will be introducing an asset tracking table soon to - track the depreciating value of cars, houses, etc. Who knows what\'s - next? + ) + summary_chart.figure.savefig(f"public/summary_chart_{x}.png", dpi=1200) +``` + +The result? A high-quality pie chart that is read directly by the +`public/index.html` template I use. + + + +Other charts generated by this project include: + +- Charts of account balances over time. +- Line chart of effective tax rate (taxes divided by taxable income). +- Salary projections and error limits using past income and inflation + rates. +- Multi-line chart of gross income, taxable income, and net income. + +The best thing about this project? I can improve it at any given time, +shaping it into whatever helps me the most for that time. I imagine that I +will be introducing an asset tracking table soon to track the depreciating +value of cars, houses, etc. Who knows what's next? diff --git a/content/blog/2022-03-08-plex-migration.md b/content/blog/2022-03-08-plex-migration.md index c6acd6e..7c4ec57 100644 --- a/content/blog/2022-03-08-plex-migration.md +++ b/content/blog/2022-03-08-plex-migration.md @@ -7,15 +7,13 @@ draft = false # Migration Phases -I recently decided to migrate my server from an old OptiPlex desktop -machine to a custom-built tower with better hardware in every category. -In order to do this, I would need to properly migrate a full Plex -installation. +I recently decided to migrate my server from an old OptiPlex desktop machine to +a custom-built tower with better hardware in every category. In order to do +this, I would need to properly migrate a full Plex installation. -The second part of this migration is that the new server uses an Nvidia -GPU and does not have any integrated graphics, which requires extra work -for installation, but provides much better hardware transcoding options -for Plex. +The second part of this migration is that the new server uses an Nvidia GPU and +does not have any integrated graphics, which requires extra work for +installation, but provides much better hardware transcoding options for Plex. Therefore, I have broken this migration down into three phases: @@ -28,42 +26,38 @@ Therefore, I have broken this migration down into three phases: ## Choosing an OS In order to migrate Plex to my new server, I first needed to choose an -appropriate operating system (OS) and install it on the machine. Given -that I have encountered numerous issues installing other Linux -distributions properly with Nvidia graphics, I chose [Ubuntu +appropriate operating system (OS) and install it on the machine. Given that I +have encountered numerous issues installing other Linux distributions properly +with Nvidia graphics, I chose [Ubuntu Server](https://ubuntu.com/download/server). -The first step is to create a bootable USB with Ubuntu Server. This is -easy with [Etcher](https://www.balena.io/etcher/), an app that runs on -many different platforms. Just download the Ubuntu Server -`.iso` image, launch Etcher, and install the -`.iso` on the USB. +The first step is to create a bootable USB with Ubuntu Server. This is easy with +[Etcher](https://www.balena.io/etcher/), an app that runs on many different +platforms. Just download the Ubuntu Server `.iso` image, launch Etcher, and +install the `.iso` on the USB. -Once the USB is created, insert it into my server, reboot, and click -`Esc` (or any of the `F1-12` keys) until the BIOS -menu appears. Finally, launch the USB boot drive. +Once the USB is created, insert it into my server, reboot, and click `Esc` (or +any of the `F1-12` keys) until the BIOS menu appears. Finally, launch the USB +boot drive. ## Booting with Nvidia In order to install Ubuntu Server with an Nvidia Graphics card (and no -integrated graphics on this device for some reason), you\'ll have to -configure the boot menu to allow different graphics drivers to be -loaded. +integrated graphics on this device for some reason), you'll have to configure +the boot menu to allow different graphics drivers to be loaded. -When booting from the USB, the machine will launch the initial -installation menu. From this menu, type `e` to view the -default command options that come with the device - it\'s a good idea to -take a photo of this screen, so you can enter these commands on the next -screen (along with adding support for Nvidia). +When booting from the USB, the machine will launch the initial installation +menu. From this menu, type `e` to view the default command options that come +with the device - it's a good idea to take a photo of this screen, so you can +enter these commands on the next screen (along with adding support for Nvidia). -Finally, type `Ctrl + C` to enter the command line. From this -command line, enter the commands found on the `e` screen. -\*Remember to add `nomodeset` to the `linux ...` -line so that your Nvidia device will display the installation screens -properly!\* +Finally, type `Ctrl + C` to enter the command line. From this command line, +enter the commands found on the `e` screen. *Remember to add `nomodeset` to the +`linux ...` line so that your Nvidia device will display the installation +screens properly!* -Here\'s an example of the commands I pulled from the `e` -screen and entered on the command line. +Here's an example of the commands I pulled from the `e` screen and entered on +the command line. ```sh setparams 'Install Ubuntu Server' @@ -79,12 +73,11 @@ boot 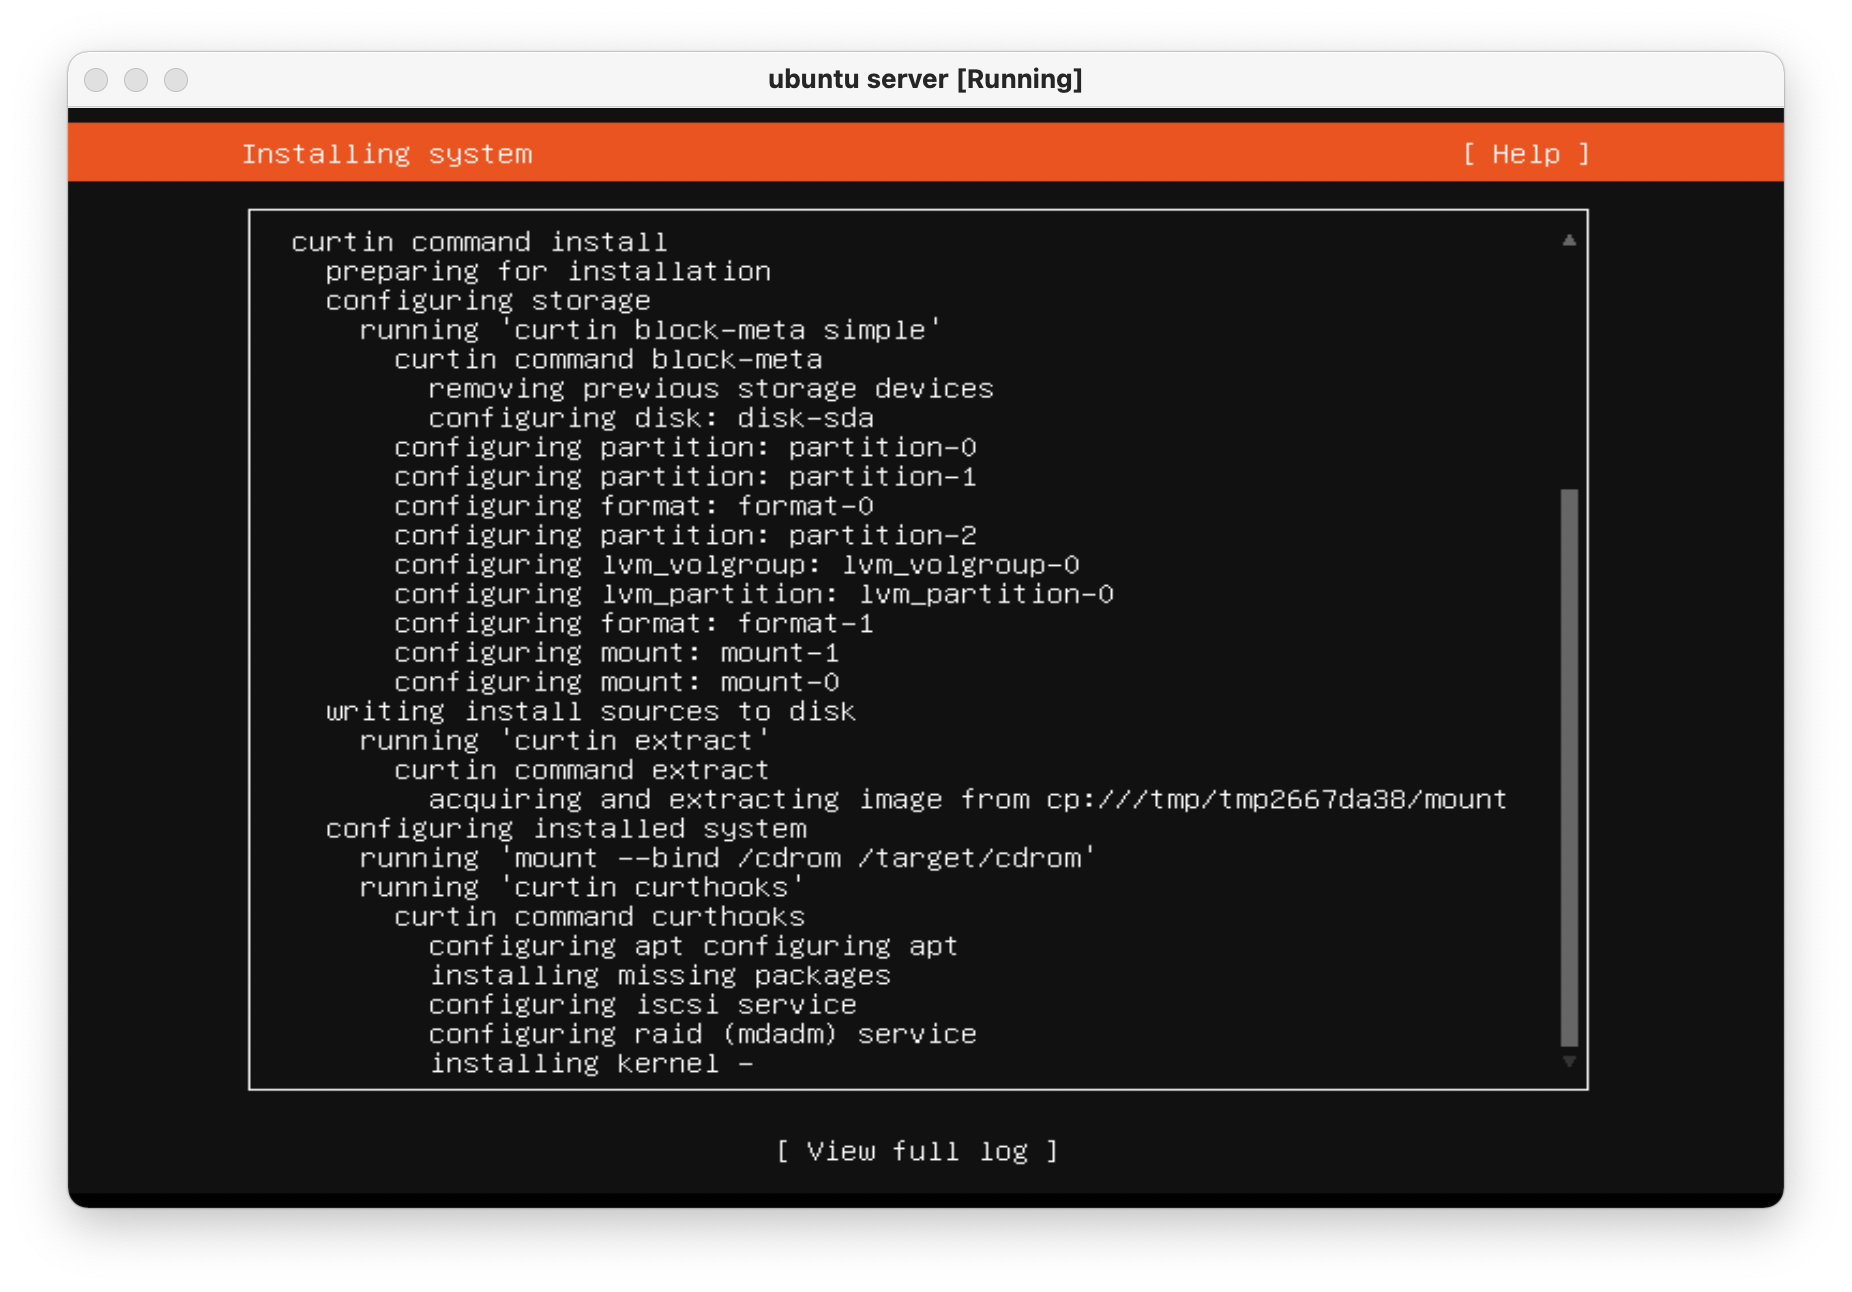 -Once the machine is rebooted, enter the `e` screen again and -add `nomodeset` to the `linux ...` line again and -press `Ctrl + X` to save the boot options. +Once the machine is rebooted, enter the `e` screen again and add `nomodeset` to +the `linux ...` line again and press `Ctrl + X` to save the boot options. -The machine is now fully installed and can properly display on an -external display using the Nvidia GPU. +The machine is now fully installed and can properly display on an external +display using the Nvidia GPU. Always remember to update and upgrade on a new installation: @@ -94,33 +87,30 @@ sudo apt update; sudo apt upgrade -y; sudo apt autoremove -y # Phase 2: Migrate Plex Data & Devices -This phase uses the great Plex article on migrations ([Move an -Installation to Another +This phase uses the great Plex article on migrations ([Move an Installation to +Another System](https://support.plex.tv/articles/201370363-move-an-install-to-another-system/)) and adds a bit more information to help with commands and context. ## Terminology -**Source:\*** The original server that is being replaced.\ -**Destination:\*** The new server.\ -**Client:\*** Any application that can be used to modify settings for -both source/destination. +**Source:** The original server that is being replaced.\ +**Destination:** The new server.\ +**Client:** Any application that can be used to modify settings for both +source/destination. -## Step 01: \[Client\] Update Settings +## Step 01: [Client] Update Settings -Open up a Plex app and *disable* the `Account` \> -`Library` \> -`Empty trash automatically after every scan` preference for -the source server. +Open up a Plex app and *disable* the `Account` > `Library` > `Empty trash +automatically after every scan` preference for the source server. -## Step 02: \[Destination\] Install Plex +## Step 02: [Destination] Install Plex Open up the [Plex Media Server download -page](https://www.plex.tv/media-server-downloads/) and copy the link for -the appropriate platform. +page](https://www.plex.tv/media-server-downloads/) and copy the link for the +appropriate platform. -Execute the following commands on the destination server to install -Plex: +Execute the following commands on the destination server to install Plex: ```sh wget <url> @@ -128,48 +118,45 @@ sudo dpkg -i <filename> sudo systemctl stop plexmediaserver.service ``` -## Step 03: \[Source\] Stop Plex & Migrate Data +## Step 03: [Source] Stop Plex & Migrate Data -First, stop the Plex service so that no data is created or modified -during the migration. +First, stop the Plex service so that no data is created or modified during the +migration. ```sh sudo systemctl stop plexmediaserver.service ``` -Next, copy the data to the new server. To find where the Plex data -directory is located, Plex has another excellent article available: -[Where is the Plex Media Server data directory +Next, copy the data to the new server. To find where the Plex data directory is +located, Plex has another excellent article available: [Where is the Plex Media +Server data directory located?](https://support.plex.tv/articles/202915258-where-is-the-plex-media-server-data-directory-located/). -There are many ways to copy the data to the new server and will largely -depend on the size of the folder being copied. Personally, my data -folder was \~23GB and I opted to simply use the `scp` command -to copy the files over SSH. +There are many ways to copy the data to the new server and will largely depend +on the size of the folder being copied. Personally, my data folder was ~23GB +and I opted to simply use the `scp` command to copy the files over SSH. -This process was throttled by the old server\'s slow HDD and ports and -took approximately 90 minutes to complete. In comparison, moving the -data from the new server\'s `home/user/` directory to the -`/var/.../Plex Media Server` directory took 2-3 minutes. +This process was throttled by the old server's slow HDD and ports and took +approximately 90 minutes to complete. In comparison, moving the data from the +new server's `home/user/` directory to the `/var/.../Plex Media Server` +directory took 2-3 minutes. ```sh scp -r "/var/lib/plexmediaserver/Library/Application Support/Plex Media Server" your_user@xxx.xxx.xxx.xxx:"'/path/to/destination/'" ``` -## Step 04: \[Destination\] Update File Permissions +## Step 04: [Destination] Update File Permissions -In case you move the data directory to a common area on the new server, -it will have to be moved to the proper location before Plex can function -properly: +In case you move the data directory to a common area on the new server, it will +have to be moved to the proper location before Plex can function properly: ```sh mv "Plex Media Server" /var/lib/plexmediaserver/Library/Application Support/ ``` -To ensure permissions were retained properly, the server will need to -show that all files and folders in the data directory are owned by -`plex:plex` (or whichever user is running the Plex -application). +To ensure permissions were retained properly, the server will need to show that +all files and folders in the data directory are owned by `plex:plex` (or +whichever user is running the Plex application). ```sh sudo chown -R plex:plex "/var/lib/plexmediaserver/Library/Application Support/Plex Media Server" @@ -182,43 +169,40 @@ sudo systemctl start plexmediaserver.service sudo systemctl status plexmediaserver.service ``` -## Step 05: \[Client\] Update Libraries & Metadata +## Step 05: [Client] Update Libraries & Metadata -The first step - now that the new server is up and running - is to sign -out of the client and sign back in. Once this is done, update any -library locations, if necessary. This was unnecessary in my case since I -simply moved my storage drives from the source server to the destination -server. +The first step - now that the new server is up and running - is to sign out of +the client and sign back in. Once this is done, update any library locations, if +necessary. This was unnecessary in my case since I simply moved my storage +drives from the source server to the destination server. Next, perform the following actions in the client: -1. On the left sidebar, click `More` \> Three-Dot Menu \> - `Scan Library Files` -2. *Enable* the `Account` \> `Library` \> - `Empty trash automatically after every scan` preference - for the source server. -3. On the left sidebar, click `More` \> Three-Dot Menu \> - `Manage Server` \> `Empty Trash` -4. On the left sidebar, click `More` \> Three-Dot Menu \> - `Manage Server` \> `Clean Bundles` -5. On the left sidebar, click `More` \> Three-Dot Menu \> - `Manage Server` \> `Optimize Database` +1. On the left sidebar, click `More` > Three-Dot Menu > `Scan Library Files` +2. *Enable* the `Account` > `Library` > `Empty trash automatically after every + scan` preference for the source server. +3. On the left sidebar, click `More` > Three-Dot Menu > `Manage Server` > + `Empty Trash` +4. On the left sidebar, click `More` > Three-Dot Menu > `Manage Server` > + `Clean Bundles` +5. On the left sidebar, click `More` > Three-Dot Menu > `Manage Server` > + `Optimize Database` -Finally, double-check the Remote Access settings to make sure no changes -have caused issues with accessing the server from outside the network. +Finally, double-check the Remote Access settings to make sure no changes have +caused issues with accessing the server from outside the network. -In my case, I use a single port forwarding rule in my router and needed -to update the Local LAN IP Address to the new server IP address. +In my case, I use a single port forwarding rule in my router and needed to +update the Local LAN IP Address to the new server IP address. 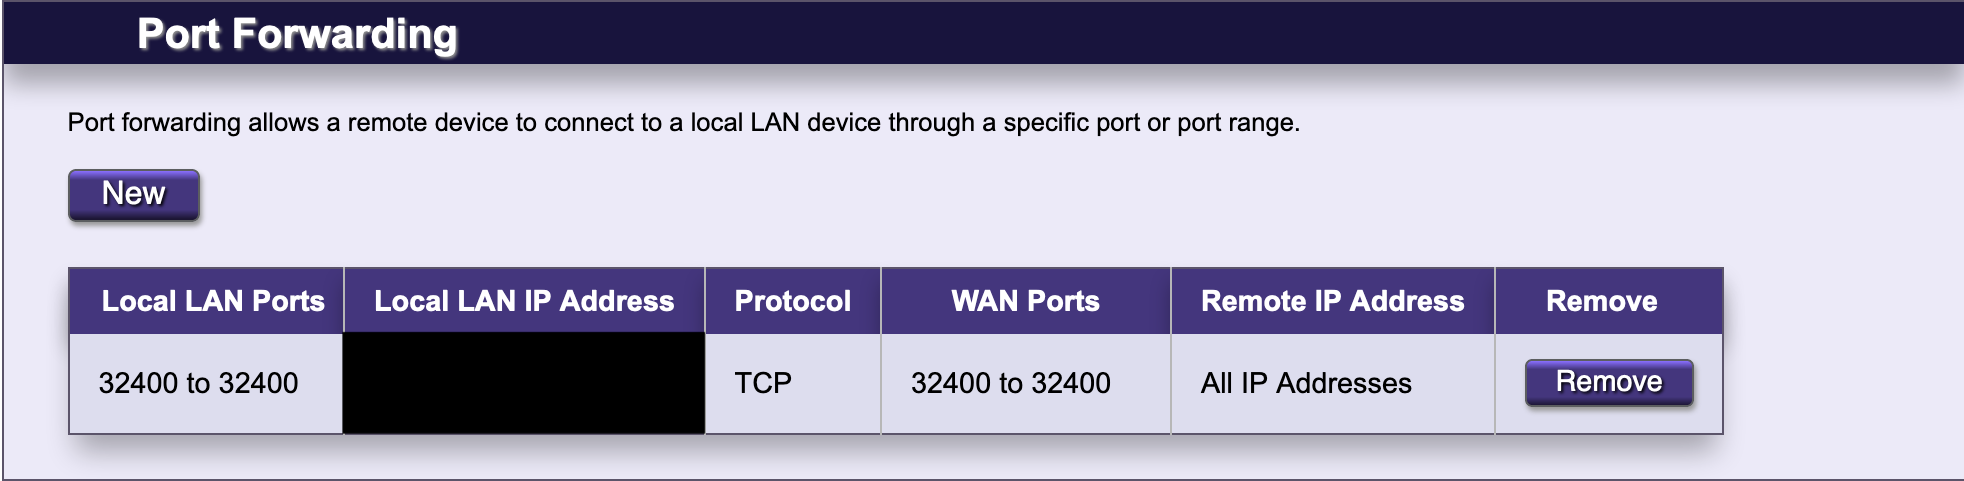 # Phase 3: Configure GPU Transcoding -The final piece to the migration is enabling hardware transcoding so -that Plex can fully utilize the new Nvidia GPU available in the server. -The first step is to install Nvidia graphics drivers. This process may -take a few minutes, but the commands are pretty simple: +The final piece to the migration is enabling hardware transcoding so that Plex +can fully utilize the new Nvidia GPU available in the server. The first step is +to install Nvidia graphics drivers. This process may take a few minutes, but the +commands are pretty simple: ```sh sudo add-apt-repository ppa:graphics-drivers/ppa diff --git a/content/blog/2022-03-23-cloudflare-dns-api.md b/content/blog/2022-03-23-cloudflare-dns-api.md index 555c6aa..07a89f5 100644 --- a/content/blog/2022-03-23-cloudflare-dns-api.md +++ b/content/blog/2022-03-23-cloudflare-dns-api.md @@ -7,15 +7,14 @@ draft = false # DDNS: Dynamic DNS -If you\'re hosting a service from a location with dynamic DNS (where -your IP may change at any time), you must have a solution to update the -DNS so that you can access your service even when the IP of the server -changes. +If you're hosting a service from a location with dynamic DNS (where your IP may +change at any time), you must have a solution to update the DNS so that you can +access your service even when the IP of the server changes. -The process below uses the [Cloudflare API](https://api.cloudflare.com/) -to update DNS `A` and `AAAA` records with the -server\'s current IP. If you use another DNS provider, you will have to -find a way to update your DNS (or find a way to get a static IP). +The process below uses the [Cloudflare API](https://api.cloudflare.com/) to +update DNS `A` and `AAAA` records with the server's current IP. If you use +another DNS provider, you will have to find a way to update your DNS (or find a +way to get a static IP). First, install `jq` since we will use it in the next script: @@ -23,18 +22,16 @@ First, install `jq` since we will use it in the next script: sudo apt install jq ``` -Next, create a location for your DDNS update scripts and open the first -script: +Next, create a location for your DDNS update scripts and open the first script: ```sh mkdir ~/ddns nano ~/ddns/update.sh ``` -The following `update.sh` script will take all of your -domains and subdomains and check Cloudflare to see if the current -`A` and `AAAA` records match your server\'s IP -address. If not, it will update the records. +The following `update.sh` script will take all of your domains and subdomains +and check Cloudflare to see if the current `A` and `AAAA` records match your +server's IP address. If not, it will update the records. ```sh # file: update.sh @@ -60,17 +57,16 @@ do done ``` -Next, open up the `ddns.sh` script. Paste the following into -the script and update the `api_token` and `email` -variables. +Next, open up the `ddns.sh` script. Paste the following into the script and +update the `api_token` and `email` variables. ```sh nano ~/ddns/ddns.sh ``` -**Note**: If you want your DNS records to be proxied through Cloudflare, -find and update the following snippet: `"proxied":false}"` to -say `true` instead of `false`. +**Note**: If you want your DNS records to be proxied through Cloudflare, find +and update the following snippet: `"proxied":false}"` to say `true` instead of +`false`. ```sh # file: ddns.sh @@ -180,9 +176,8 @@ You can test the script by running it manually: ./update.sh ``` -To make sure the scripts run automatically, add it to the -`cron` file so that it will run on a schedule. To do this, -open the cron file: +To make sure the scripts run automatically, add it to the `cron` file so that it +will run on a schedule. To do this, open the cron file: ```sh crontab -e diff --git a/content/blog/2022-03-23-nextcloud-on-ubuntu.md b/content/blog/2022-03-23-nextcloud-on-ubuntu.md index 66f6a82..93d539f 100644 --- a/content/blog/2022-03-23-nextcloud-on-ubuntu.md +++ b/content/blog/2022-03-23-nextcloud-on-ubuntu.md @@ -7,8 +7,8 @@ draft = false # What is Nextcloud? -[Nextcloud](https://nextcloud.com/) is a self-hosted solution for -storage, communications, editing, calendar, contacts, and more. +[Nextcloud](https://nextcloud.com/) is a self-hosted solution for storage, +communications, editing, calendar, contacts, and more. This tutorial assumes that you have an Ubuntu server and a domain name configured to point toward the server. @@ -25,16 +25,14 @@ sudo apt install php7.4-gmp php7.4-bcmath php-imagick php7.4-xml php7.4-zip # Set Up MySQL -Next, you will need to log in to MySQL as the `root` user of -the machine. +Next, you will need to log in to MySQL as the `root` user of the machine. ```sh sudo mysql -uroot -p ``` -Once you\'ve logged in, you must create a new user so that Nextcloud can -manage the database. You will also create a `nextcloud` -database and assign privileges: +Once you've logged in, you must create a new user so that Nextcloud can manage +the database. You will also create a `nextcloud` database and assign privileges: ``` sql CREATE USER 'username'@'localhost' IDENTIFIED BY 'password'; @@ -47,14 +45,12 @@ quit; # Download & Install Nextcloud To download Nextcloud, go the [Nextcloud downloads -page](https://nextcloud.com/install/#instructions-server), click on -`Archive File` and right-click the big blue button to copy -the link. +page](https://nextcloud.com/install/#instructions-server), click on `Archive +File` and right-click the big blue button to copy the link. -Then, go to your server and enter the following commands to download, -unzip, and move the files to your destination directory. This example -uses `example.com` as the destination, but you can put it -wherever you want to server your files from. +Then, go to your server and enter the following commands to download, unzip, and +move the files to your destination directory. This example uses `example.com` as +the destination, but you can put it wherever you want to server your files from. ```sh wget https://download.nextcloud.com/server/releases/nextcloud-23.0.3.zip @@ -65,9 +61,9 @@ sudo cp -r nextcloud /var/www/example.com # Configure the Apache Web Server -Now that the database is set up and Nextcloud is installed, you need to -set up the Apache configuration files to tell the server how to handle -requests for `example.com/nextcloud`. +Now that the database is set up and Nextcloud is installed, you need to set up +the Apache configuration files to tell the server how to handle requests for +`example.com/nextcloud`. First, open the following file in the editor: @@ -75,8 +71,8 @@ First, open the following file in the editor: sudo nano /etc/apache2/sites-available/nextcloud.conf ``` -Once the editor is open, paste the following information in. Then, save -and close the file. +Once the editor is open, paste the following information in. Then, save and +close the file. ``` config <VirtualHost *:80> @@ -111,16 +107,15 @@ Next, enable the Apache mods required by Nextcloud: sudo a2enmod rewrite headers env dir mime ``` -Finally, restart Apache. If any errors arise, you must solve those -before continuing. +Finally, restart Apache. If any errors arise, you must solve those before +continuing. ```sh sudo systemctl restart apache2 ``` For the app to work, you must have the correct file permissions on your -`nextcloud` directory. Set the owner to be -`www-data`: +`nextcloud` directory. Set the owner to be `www-data`: ```sh sudo chown -R www-data:www-data /var/www/example.com/nextcloud/ @@ -129,17 +124,15 @@ sudo chown -R www-data:www-data /var/www/example.com/nextcloud/ # DNS If you do not have a static IP address, you will need to update your DNS -settings (at your DNS provider) whenever your dynamic IP address -changes. +settings (at your DNS provider) whenever your dynamic IP address changes. -For an example on how I do that with Cloudflare, see my other post: -[Updating Dynamic DNS with Cloudflare -API](../updating-dynamic-dns-with-cloudflare-api/) +For an example on how I do that with Cloudflare, see my other post: [Updating +Dynamic DNS with Cloudflare API](../updating-dynamic-dns-with-cloudflare-api/) # Certbot -If you want to serve Nextcloud from HTTPS rather than plain HTTP, use -the following commands to issue Let\'s Encrypt SSL certificates: +If you want to serve Nextcloud from HTTPS rather than plain HTTP, use the +following commands to issue Let's Encrypt SSL certificates: ```sh sudo apt install snapd @@ -152,12 +145,11 @@ sudo certbot --apache # Results -Voilà! You\'re all done and should be able to access Nextcloud from your -domain or IP address. +Voilà! You're all done and should be able to access Nextcloud from your domain +or IP address. -See the screenshots below for the dashboard and a settings page on my -instance of Nextcloud, using the `Breeze Dark` theme I -installed from the Apps page. +See the screenshots below for the dashboard and a settings page on my instance +of Nextcloud, using the `Breeze Dark` theme I installed from the Apps page. 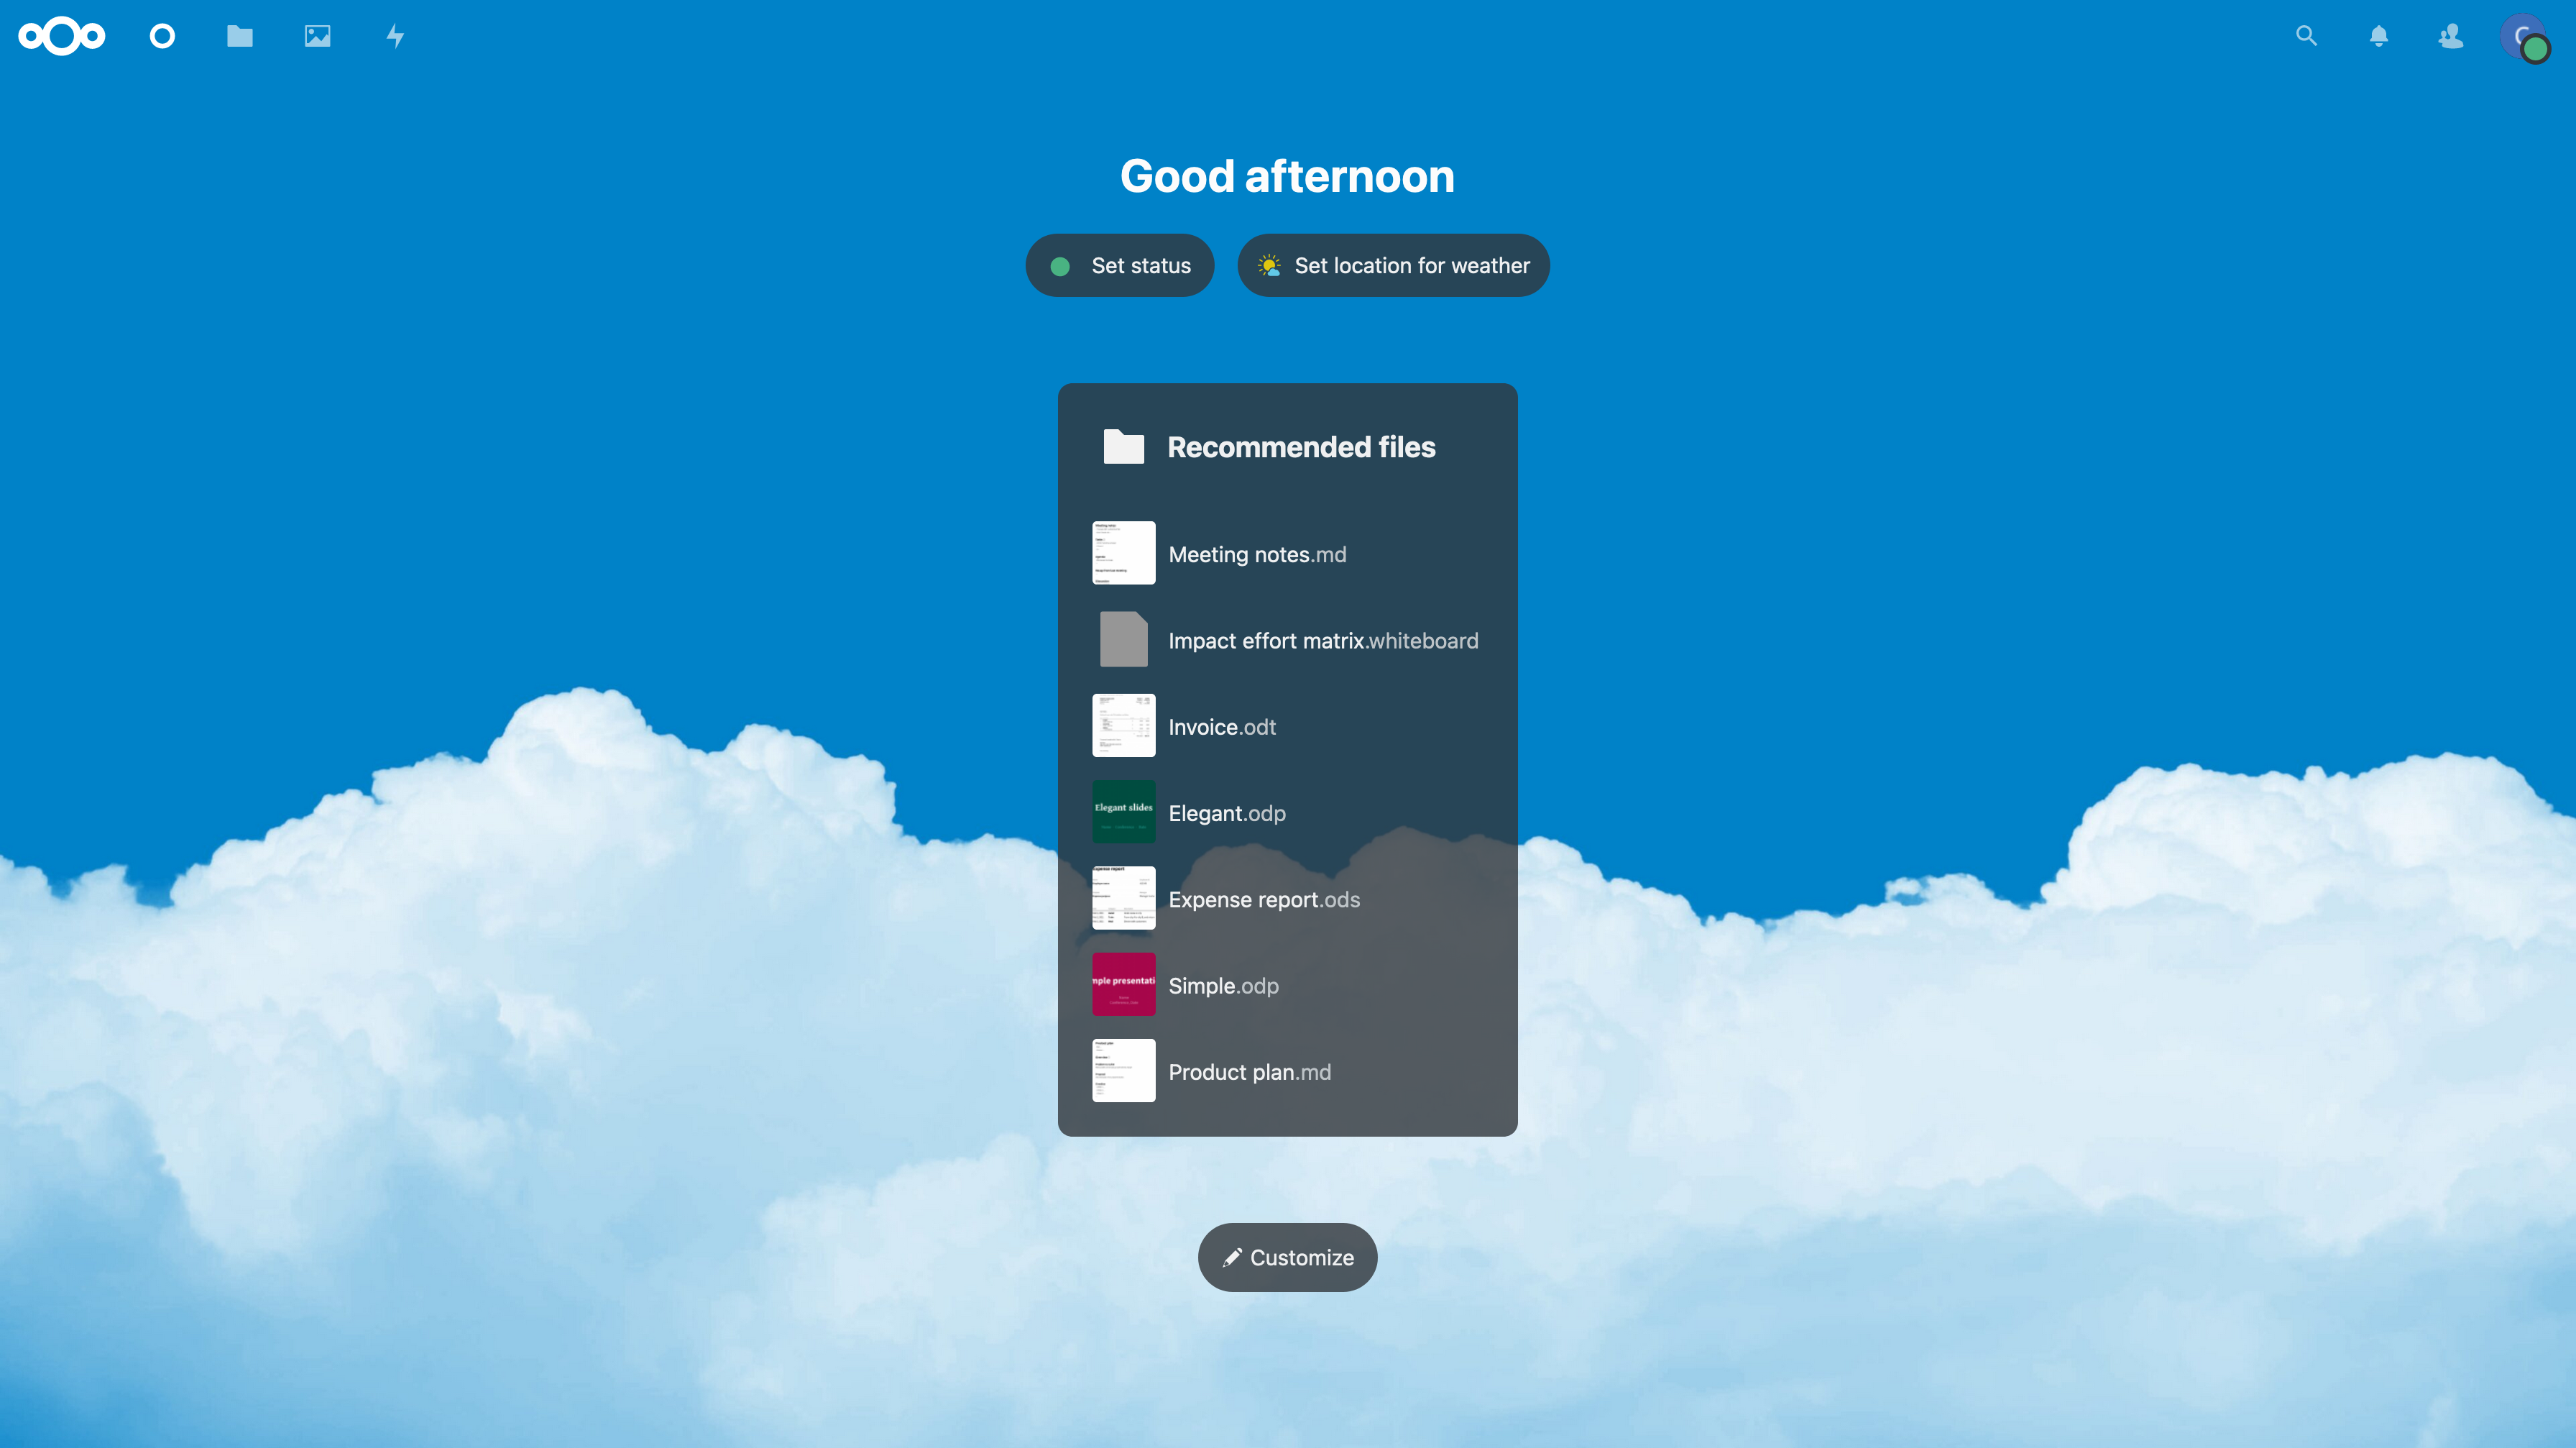 diff --git a/content/blog/2022-03-24-server-hardening.md b/content/blog/2022-03-24-server-hardening.md index ffe684d..6952571 100644 --- a/content/blog/2022-03-24-server-hardening.md +++ b/content/blog/2022-03-24-server-hardening.md @@ -7,11 +7,10 @@ draft = false # Post Updates -> After reviewing this post today (2022-10-04), I noticed quite a few -> gaps in my write-up and wanted to add a few things, even though this -> blog is really just a retrospective and knowledge dump for myself. I -> left things intact and simply crossed them out (~~like this~~) for -> posterity. +> After reviewing this post today (2022-10-04), I noticed quite a few gaps in my +> write-up and wanted to add a few things, even though this blog is really just +> a retrospective and knowledge dump for myself. I left things intact and simply +> crossed them out (~~like this~~) for posterity. # Planning Data Flows & Security @@ -31,104 +30,97 @@ draft = false ## Thought Process -To serve content from your home server and harden your security posture, -you have to think about the transport of data from `server` -to `client`. - -Let\'s start with the actual server itself. Think about the following: - -- Do I have a firewall enabled? Do I need to update this to allow new - ports or IPs? -- Do I have an IPS/IDS that may prevent outside traffic? -- Do I have any other security software installed? -- Are the services hosted inside Docker containers, behind a reverse - proxy, or virtualized? If so, are they configured to allow outside - traffic? - -Once the data leaves the server, where does it go? In my case, it goes -to a managed switch. In this case, I asked the following: - -- What configurations is the switch using? -- Am I using VLANs? - - Yes, I am using 802.1Q VLANs. -- Are the VLANs configured properly? - - Yes, as shown in the Switch section below, I have a separate - VLAN to allow outside traffic to and from the server alone. No - other devices, except for a service port, and in that VLAN. - -At this point, the data has been processed through the switch. Where -does it go next? In my case, it\'s pretty simple: it goes to the -router/modem device. - -- Does my ISP block any ports that I need? - - This is an important step that a lot of people run into when - self-hosting at home. Use an online port-checker tool for your - IP or call your ISP if you think ports are blocked. -- Is there a router firewall? - - Yes, I checked that it\'s configured to allow the ports I need - to run my services publicly. Common web servers and reverse - proxies require ports 80 and 443, but other services like media - servers or games can require unique ports, so be sure to check - the documentation for your service(s). -- Are there any other settings affecting inbound/outbound traffic? - - Schedules or access blocks - - Static Routing - - QoS - - Port Forwarding - - DMZ Hosting - - Remote Management (this can sometimes mess with services that - also require the use of ports 80 and 443) - -Once the data leaves my router, it goes to the upstream ISP and can be -accessed publicly. +To serve content from your home server and harden your security posture, you +have to think about the transport of data from `server` to `client`. + +Let's start with the actual server itself. Think about the following: + +- Do I have a firewall enabled? Do I need to update this to allow new ports or + IPs? +- Do I have an IPS/IDS that may prevent outside traffic? +- Do I have any other security software installed? +- Are the services hosted inside Docker containers, behind a reverse proxy, or + virtualized? If so, are they configured to allow outside traffic? + +Once the data leaves the server, where does it go? In my case, it goes to a +managed switch. In this case, I asked the following: + +- What configurations is the switch using? +- Am I using VLANs? + - Yes, I am using 802.1Q VLANs. +- Are the VLANs configured properly? + - Yes, as shown in the Switch section below, I have a separate VLAN to allow + outside traffic to and from the server alone. No other devices, except for + a service port, and in that VLAN. + +At this point, the data has been processed through the switch. Where does it go +next? In my case, it's pretty simple: it goes to the router/modem device. + +- Does my ISP block any ports that I need? + - This is an important step that a lot of people run into when self-hosting + at home. Use an online port-checker tool for your IP or call your ISP if + you think ports are blocked. +- Is there a router firewall? + - Yes, I checked that it's configured to allow the ports I need to run my + services publicly. Common web servers and reverse proxies require ports 80 + and 443, but other services like media servers or games can require unique + ports, so be sure to check the documentation for your service(s). +- Are there any other settings affecting inbound/outbound traffic? + - Schedules or access blocks + - Static Routing + - QoS + - Port Forwarding + - DMZ Hosting + - Remote Management (this can sometimes mess with services that also require + the use of ports 80 and 443) + +Once the data leaves my router, it goes to the upstream ISP and can be accessed +publicly. ### Server -+The services I run on my server are installed straight into the OS, -without any use of Docker or VMs, so I don\'t need any extra application -configuration to make them accessible to the outside world.+ - -As of 2022-10-04, the paragraph above is no longer true as I now run a -reverse proxy with Nginx and host many services inside Docker. However, -it doesn\'t change anything regarding this post as I still just need to -open ports 80 & 443 and create the necessary website configuration -files. - -When creating new services - either installed directly on bare metal or -within something like Docker - I ensure that I read through the -documentation thoroughly to understand a few key things: - What network -activities should this app perform (if any)? Using which ports and -protocols? - Does this app require any commands/services to be run as -`root`? - Does this app log errors, authentication -failures/successes, or anything else that would be useful for an ++The services I run on my server are installed straight into the OS, without any +use of Docker or VMs, so I don't need any extra application configuration to +make them accessible to the outside world.+ + +As of 2022-10-04, the paragraph above is no longer true as I now run a reverse +proxy with Nginx and host many services inside Docker. However, it doesn't +change anything regarding this post as I still just need to open ports 80 & 443 +and create the necessary website configuration files. + +When creating new services - either installed directly on bare metal or within +something like Docker - I ensure that I read through the documentation +thoroughly to understand a few key things: - What network activities should this +app perform (if any)? Using which ports and protocols? - Does this app require +any commands/services to be run as `root`? - Does this app log errors, +authentication failures/successes, or anything else that would be useful for an investigation? -For extra security, I use limit all incoming connections to SSH -connections through my server firewall (`ufw`) and disable -common SSH settings. After all of that, I use `fail2ban` as a -preventative measure against brute-force login attempts. +For extra security, I use limit all incoming connections to SSH connections +through my server firewall (`ufw`) and disable common SSH settings. After all of +that, I use `fail2ban` as a preventative measure against brute-force login +attempts. -As another piece of security, you can randomize your SSH port to ensure -that random scanners or attackers can\'t easily try to force their way -into your network. For example, you can edit the port rules in your -server to block all connection requests to port `22` but -forward all remote connections from port `12345` to your -server\'s port `22`. Then you just need to SSH to your -network via your randomized port. +As another piece of security, you can randomize your SSH port to ensure that +random scanners or attackers can't easily try to force their way into your +network. For example, you can edit the port rules in your server to block all +connection requests to port `22` but forward all remote connections from port +`12345` to your server's port `22`. Then you just need to SSH to your network +via your randomized port. ## `ufw` -To see how to configure `ufw`, see my other post: [Secure -Your Network with the Uncomplicated +To see how to configure `ufw`, see my other post: [Secure Your Network with the +Uncomplicated Firewall](../secure-your-network-with-the-uncomplicated-firewall/). -The general notion with an on-device firewall is that you want to deny -all incoming connections by default and then selectively open certain -ports for services or users that you know need access. +The general notion with an on-device firewall is that you want to deny all +incoming connections by default and then selectively open certain ports for +services or users that you know need access. -If you know that you will only be logging into this server from a -certain set or list of IPs, you can always set the firewall to only -allow connections to port 22 from those IPs. +If you know that you will only be logging into this server from a certain set or +list of IPs, you can always set the firewall to only allow connections to port +22 from those IPs. For a quick start to only allow SSH connections to the server, use this: @@ -145,31 +137,30 @@ sudo ufw enable 1. Using SSH Keys - First, make sure you have an SSH keypair generated on the device(s) - that you\'ll be using to log in to the server. If you don\'t have an - SSH key, run this command: + First, make sure you have an SSH keypair generated on the device(s) that + you'll be using to log in to the server. If you don't have an SSH key, run + this command: ```sh ssh-keygen ``` - Now that we have an SSH key, copy it to the server with the - following command, which will ask for the user\'s password before - accepting the key: + Now that we have an SSH key, copy it to the server with the following + command, which will ask for the user's password before accepting the key: ```sh ssh-copy-id my_user@my_server ``` - If you have multiple keys, you\'ll need to specify which to use. - After it\'s complete, `ssh` back into the server as that - user and make sure it doesn\'t ask for a password. + If you have multiple keys, you'll need to specify which to use. After it's + complete, `ssh` back into the server as that user and make sure it doesn't + ask for a password. 2. Disable Password & Root Authentication - Now that we can access the server without a password, we will - disable password authentication and disable anyone from using - `ssh` to login as `root`. + Now that we can access the server without a password, we will disable + password authentication and disable anyone from using `ssh` to login as + `root`. To do this, open the `sshd_config` file: @@ -177,9 +168,9 @@ sudo ufw enable sudo nano /etc/ssh/sshd_config ``` - You\'ll need to update the parameters to the values below. If one of - these rules is commented-out or doesn\'t exist, create the rule at - the bottom of the file. + You'll need to update the parameters to the values below. If one of these + rules is commented-out or doesn't exist, create the rule at the bottom of + the file. ``` config PermitRootLogin no @@ -193,36 +184,33 @@ sudo ufw enable sudo systemctl restart sshd.service ``` - To test that everything\'s working so far, open ANOTHER terminal and - try logging in as `root` over SSH. It is very important - that you keep your current SSH session open and test with an - additional session, or you will lock yourself out at some point and - will need to use a recovery method (e.g., hooking monitor up to home - server) to get yourself back in. + To test that everything's working so far, open ANOTHER terminal and try + logging in as `root` over SSH. It is very important that you keep your + current SSH session open and test with an additional session, or you will + lock yourself out at some point and will need to use a recovery method + (e.g., hooking monitor up to home server) to get yourself back in. 3. Enable MFA for `ssh` - This part is optional, but I highly recommend it. So far, we\'ve - ensured that no one can log into our user on the server without - using our secret key, and we\'ve ensured that no one can log in - remotely as `root`. Next, you can enable MFA - authentication for `ssh` connections. + This part is optional, but I highly recommend it. So far, we've ensured + that no one can log into our user on the server without using our secret + key, and we've ensured that no one can log in remotely as `root`. Next, you + can enable MFA authentication for `ssh` connections. - This process involves editing a couple files and installing an MFA - package, so I will not include all the details in this post. To see - how to configure MFA for `ssh`, see my other post: - [Enabling MFA for SSH](../enable-totp-mfa-for-ssh/). + This process involves editing a couple files and installing an MFA package, + so I will not include all the details in this post. To see how to configure + MFA for `ssh`, see my other post: [Enabling MFA for + SSH](../enable-totp-mfa-for-ssh/). 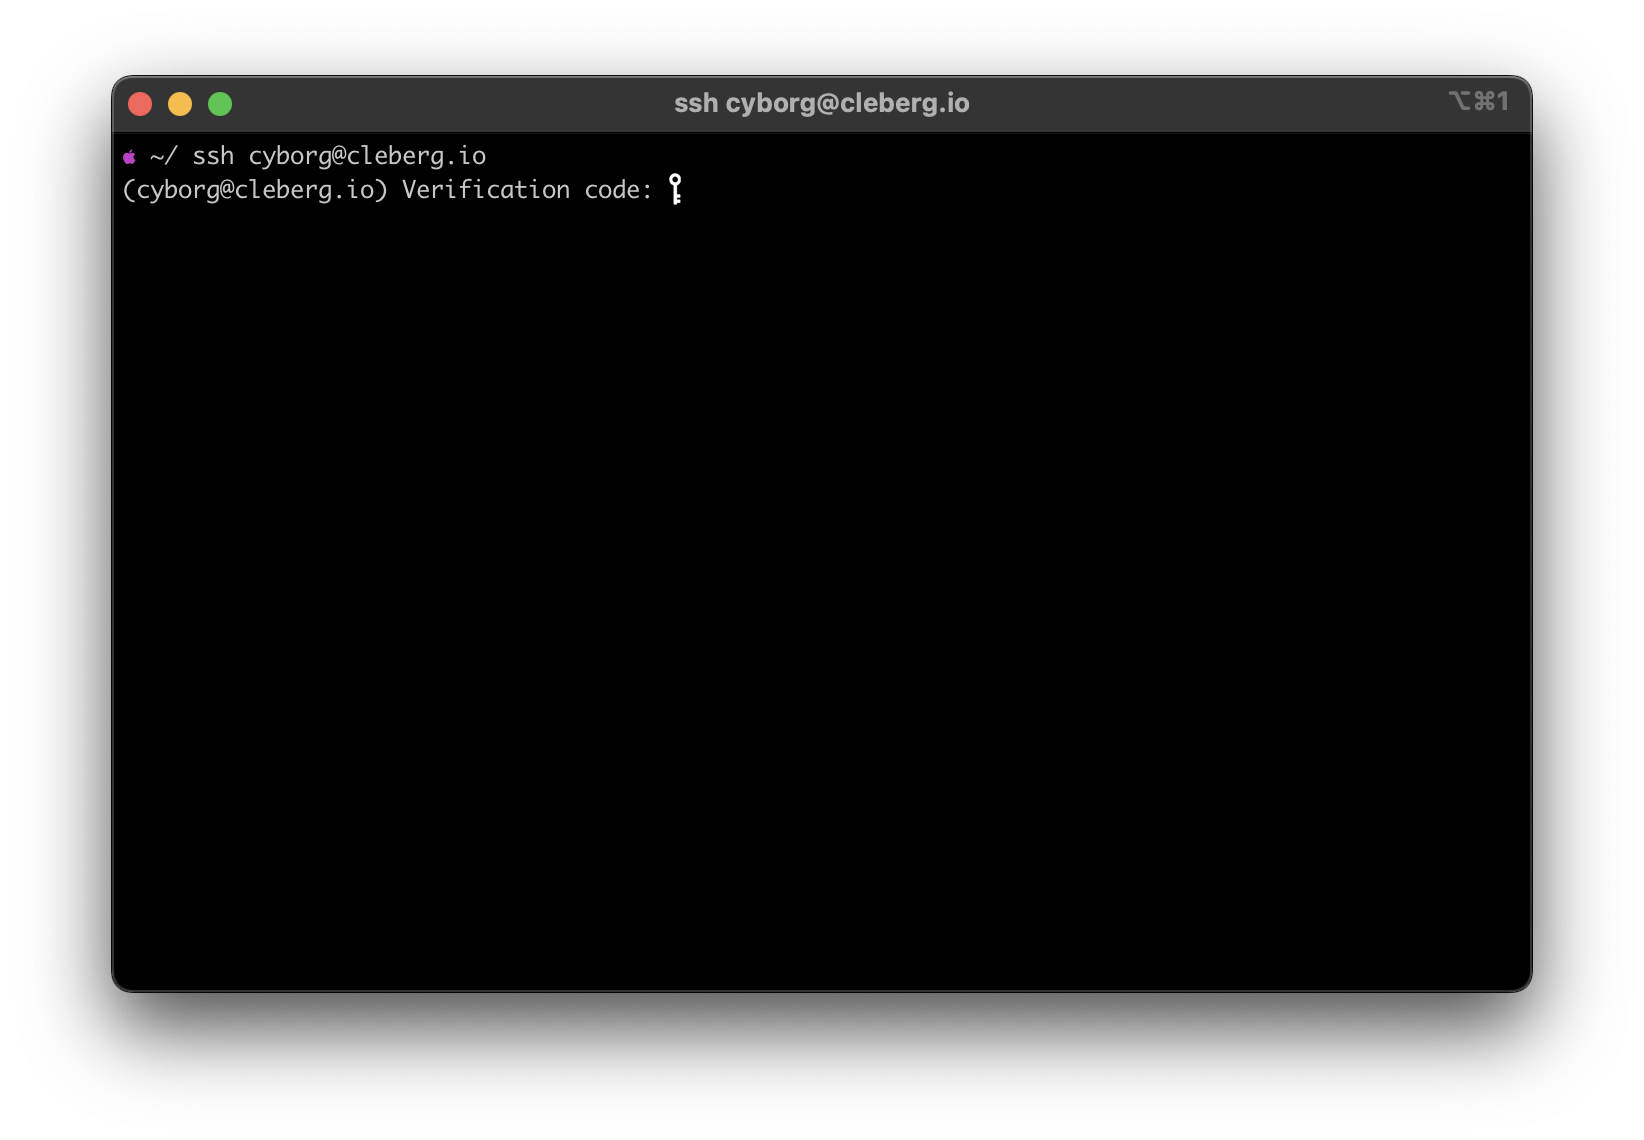 ## `fail2ban` -I haven\'t written a post on how I use `fail2ban`, but it\'s -quite simple. I use the default `sshd` jail, but you can -always create new jails for respective applications or ports. For -example, if you use Nginx as your web server, you can use the -`nginx-http-auth` jail. +I haven't written a post on how I use `fail2ban`, but it's quite simple. I use +the default `sshd` jail, but you can always create new jails for respective +applications or ports. For example, if you use Nginx as your web server, you can +use the `nginx-http-auth` jail. In order to get it up and running, use the following commands: @@ -232,122 +220,132 @@ sudo fail2ban-client start sshd sudo fail2ban-client status sshd ``` -This should be used as a last-resort defense and shouldn\'t be a -replacement for the security measures mentioned above. +This should be used as a last-resort defense and shouldn't be a replacement for +the security measures mentioned above. 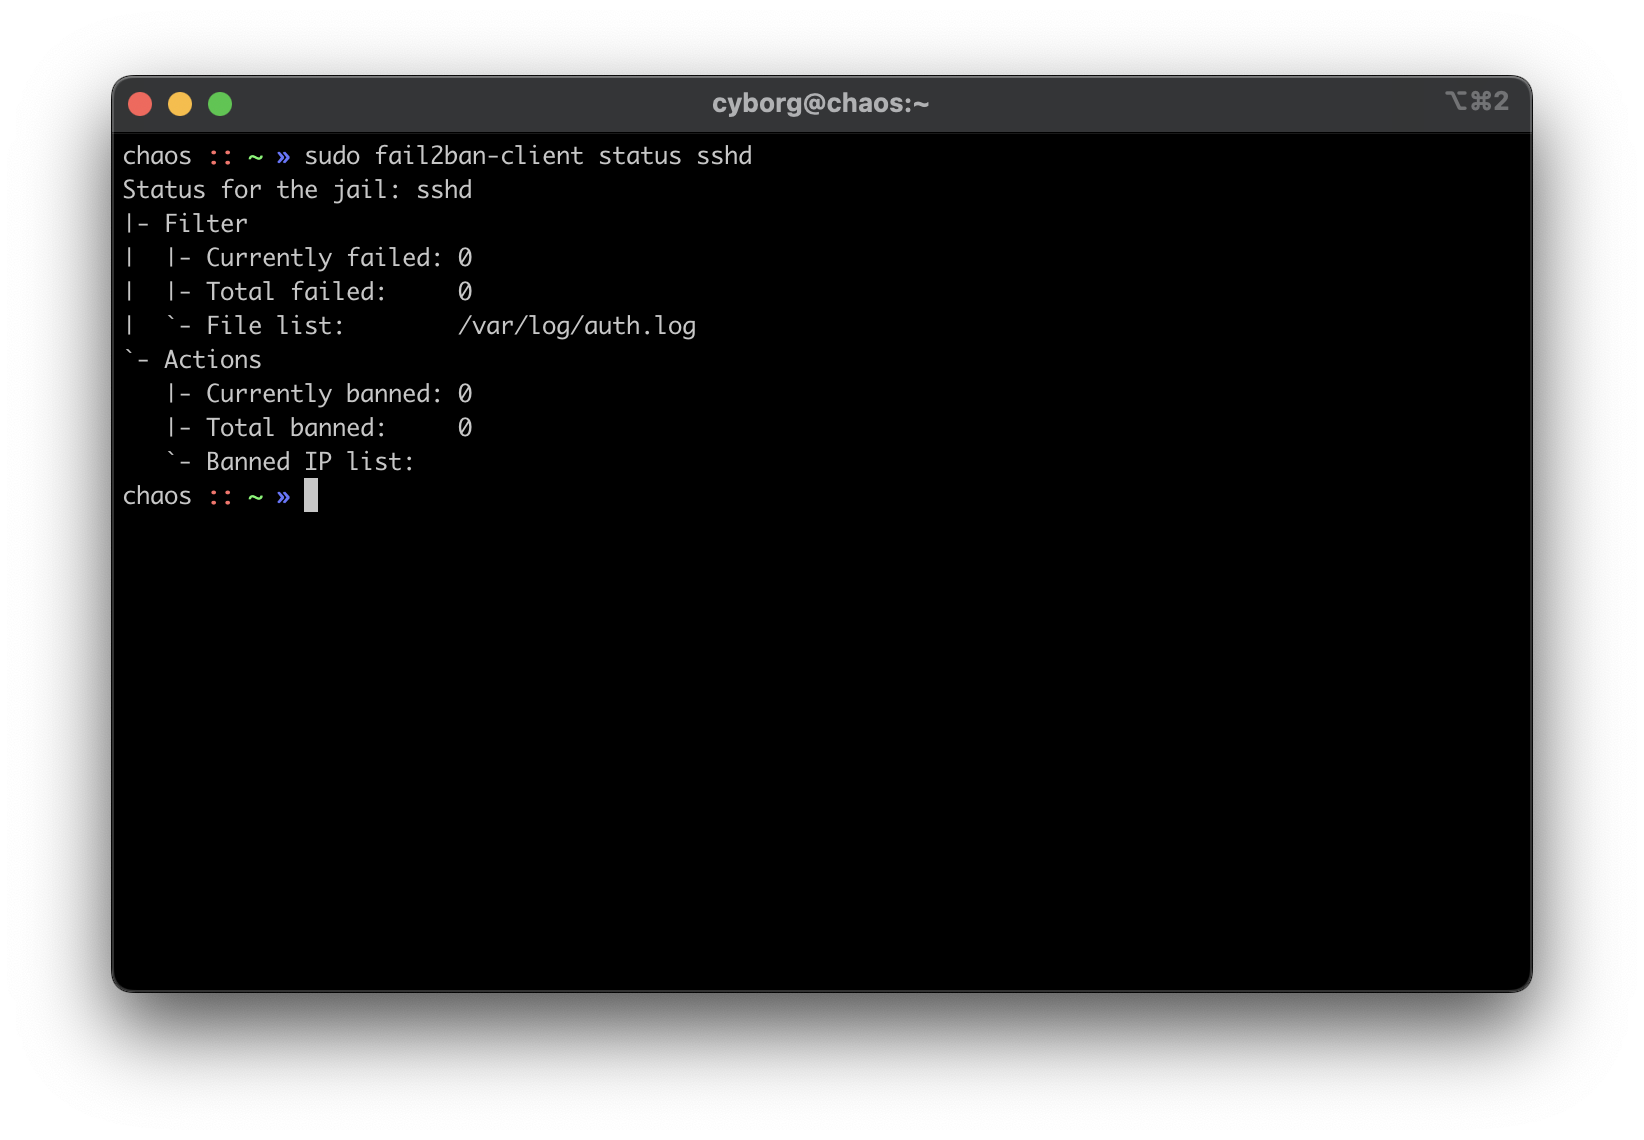 # Switch -Between the router and any local devices is my managed switch, which is -used to create VLANs. The example below shows how I would isolate the -VLANs if I were starting to host a single service at home. +Between the router and any local devices is my managed switch, which is used to +create VLANs. The example below shows how I would isolate the VLANs if I were +starting to host a single service at home. ## 802.1Q VLAN Configuration -In this configuration, port 8 is the public server that needs to be -accessed from the outside. Port 23 is my \'dedicated service port\' for -this server. In order to SSH to this server, I need to plug my laptop -into port 23 or else I cannot SSH. Otherwise, I\'d need to hook up a -monitor and keyboard directly to the server to manage it. +In this configuration, port 8 is the public server that needs to be accessed +from the outside. Port 23 is my 'dedicated service port' for this server. In +order to SSH to this server, I need to plug my laptop into port 23 or else I +cannot SSH. Otherwise, I'd need to hook up a monitor and keyboard directly to +the server to manage it. - VLAN ID VLAN Name Member Ports Tagged Ports Untagged Ports - --------- ----------- -------------- -------------- ---------------- - 1 Default 1-24 1-24 - 2 Server 1,8,23 1,8,23 +| + +| VLAN ID | VLAN Name | Member Ports | Tagged Ports | Untagged Ports | +|---------|-----------|--------------|--------------|----------------| +| 1 | Default | 1-24 | 1-24 | | +| 2 | Server | 1,8,23 | 1,8,23 | | ## 802.1Q VLAN PVID Setting -Once the VLAN is created, I simply add the `VLAN ID` of -`2` as the `PVID` for any related ports (in this -case, see that ports `8` and `23` have a PVID of +Once the VLAN is created, I simply add the `VLAN ID` of `2` as the `PVID` for +any related ports (in this case, see that ports `8` and `23` have a PVID of `2`). - Port PVID - ------ ------ - 1 1 - 2 1 - 3 1 - 4 1 - 5 1 - 6 1 - 7 1 - 8 2 - 9 1 - 10 1 - 11 1 - 12 1 - 13 1 - 14 1 - 15 1 - 16 1 - 17 1 - 18 1 - 19 1 - 20 1 - 21 1 - 22 1 - 23 2 - 24 1 +| Port | PVID | +|------|------| +| 1 | 1 | +| 2 | 1 | +| 3 | 1 | +| 4 | 1 | +| 5 | 1 | +| 6 | 1 | +| 7 | 1 | +| 8 | 2 | +| 9 | 1 | +| 10 | 1 | +| 11 | 1 | +| 12 | 1 | +| 13 | 1 | +| 14 | 1 | +| 15 | 1 | +| 16 | 1 | +| 17 | 1 | +| 18 | 1 | +| 19 | 1 | +| 20 | 1 | +| 21 | 1 | +| 22 | 1 | +| 23 | 2 | +| 24 | 1 | # Router -On my router, the configuration was as easy as opening the firewall -settings and unblocking the ports I needed for my services (e.g., -HTTP/S, Plex, SSH, MySQL, etc.). +On my router, the configuration was as easy as opening the firewall settings and +unblocking the ports I needed for my services (e.g., HTTP/S, Plex, SSH, MySQL, +etc.). -+Since I\'m relying on an ISP-provided modem/router combo for now (not -by choice), I do not use any other advanced settings on my router that -would inhibit any valid traffic to these services.+ +*Since I'm relying on an ISP-provided modem/router combo for now (not by +choice), I do not use any other advanced settings on my router that would +inhibit any valid traffic to these services.* -The paragraph above regarding the ISP-owned router is no longer accurate -as I now use the Ubiquiti Unifi Dream Machine Pro as my router. Within -this router, I enabled port forwarding/firewall rules, segregate the -network based on the device, and enable traffic restrictions (e.g., -silently drop traffic from certain countries and threat categories). +The paragraph above regarding the ISP-owned router is no longer accurate as I +now use the Ubiquiti Unifi Dream Machine Pro as my router. Within this router, I +enabled port forwarding/firewall rules, segregate the network based on the +device, and enable traffic restrictions (e.g., silently drop traffic from +certain countries and threat categories). -If you have the option with your ISP, I recommend using a personal -router with software that you are familiar with so that you can explore -all the options available to you. +If you have the option with your ISP, I recommend using a personal router with +software that you are familiar with so that you can explore all the options +available to you. # Physical Security -One large piece of self-hosting that people generally don\'t discuss -online is physical security. However, physical security is very -important for everyone who hosts a server like this. Exactly *how* -important it is depends on the server use/purpose. +One large piece of self-hosting that people generally don't discuss online is +physical security. However, physical security is very important for everyone who +hosts a server like this. Exactly *how* important it is depends on the server +use/purpose. -If you self-host customer applications that hold protected data (HIPAA, -GDPR, COPPA, etc.), then physical security is extremely important and -cannot be ignored. If you simply host a blog and some hobby sites, then -it\'s a relatively minor consideration, but one you still need to think -about. +If you self-host customer applications that hold protected data (HIPAA, GDPR, +COPPA, etc.), then physical security is extremely important and cannot be +ignored. If you simply host a blog and some hobby sites, then it's a relatively +minor consideration, but one you still need to think about. ## Location -The first consideration is quite simple: location. - Is the server -within a property you own or housed on someone else\'s property? - Is it -nearby (in your house, in your work office, in your neighbor\'s garage, -in a storage unit, etc.)? - Do you have 24/7 access to the server? - Are -there climate considerations, such as humidity, fires, tornadoes, -monsoons? - Do you have emergency equipment nearby in case of emergency? +The first consideration is quite simple: location. + +- Is the server within a property you own or housed on someone else's property? +- Is it nearby (in your house, in your work office, in your neighbor's garage, + in a storage unit, etc.)? +- Do you have 24/7 access to the server? +- Are there climate considerations, such as humidity, fires, tornadoes, + monsoons? +- Do you have emergency equipment nearby in case of emergency? ## Hardware Ownership -Secondly, consider the hardware itself: - Do you own the server in its -entirety? - Are any other users able to access the server, even if your -data/space is segregated? - If you\'re utilizing a third party, do they -have any documentation to show responsibility? This could be a SOC 1/2/3 -report, ISO compliance report, internal security/safety documentation. +Secondly, consider the hardware itself: + +- Do you own the server in its entirety? +- Are any other users able to access the server, even if your data/space is + segregated? +- If you're utilizing a third party, do they have any documentation to show + responsibility? This could be a SOC 1/2/3 report, ISO compliance report, + internal security/safety documentation. ## Physical Controls -Regardless of who owns the hardware, ensure that there are adequate -safeguards in place, if necessary. These usually don\'t apply to small -home servers and are usually covered already if you\'re utilizing a -third party. +Regardless of who owns the hardware, ensure that there are adequate safeguards +in place, if necessary. These usually don't apply to small home servers and are +usually covered already if you're utilizing a third party. + +These can include: -These can include: - Server bezel locks - Server room locks - physical, -digital, or biometric authentication - Security cameras - Raised -floors/lowered ceilings with proper guards/gates in-place within the -floors or ceilings - Security personnel - Log sheets and/or guest badges +- Server bezel locks +- Server room locks - physical, digital, or biometric authentication +- Security cameras +- Raised floors/lowered ceilings with proper guards/gates in-place within the + floors or ceilings +- Security personnel +- Log sheets and/or guest badges diff --git a/content/blog/2022-03-26-ssh-mfa.md b/content/blog/2022-03-26-ssh-mfa.md index fd92446..8b444f4 100644 --- a/content/blog/2022-03-26-ssh-mfa.md +++ b/content/blog/2022-03-26-ssh-mfa.md @@ -1,35 +1,33 @@ +++ date = 2022-03-26 -title = "Enablt TOTP MFA for SSH" +title = "Enable TOTP MFA for SSH" description = "" draft = false +++ # Why Do I Need MFA for SSH? -If you are a sysadmin of a server anywhere (that includes at home!), you -may want an added layer of protection against intruders. This is not a -replacement for other security measures, such as: +If you are a sysadmin of a server anywhere (that includes at home!), you may +want an added layer of protection against intruders. This is not a replacement +for other security measures, such as: -- Disable root SSH -- Disable SSH password authentication -- Allow only certain users to login via SSH -- Allow SSH only from certain IPs +- Disable root SSH +- Disable SSH password authentication +- Allow only certain users to login via SSH +- Allow SSH only from certain IPs -However, MFA can be added as an additional security measure to ensure -that your server is protected. This is especially important if you need -to allow password authentication for SSH. +However, MFA can be added as an additional security measure to ensure that your +server is protected. This is especially important if you need to allow password +authentication for SSH. -For more guidance on server security measures, see my other post: -[Hardening a Public-Facing Home -Server](../hardening-a-public-facing-home-server/). +For more guidance on server security measures, see my other post: [Hardening a +Public-Facing Home Server](../hardening-a-public-facing-home-server/). # Install MFA PAM Module -PAM, which stands for Pluggable Authentication Module, is an -authentication infrastructure used on Linux systems to authenticate a -user. In order to use this technology, let\'s install the -`libpam-google-authenticator` package: +PAM, which stands for Pluggable Authentication Module, is an authentication +infrastructure used on Linux systems to authenticate a user. In order to use +this technology, let's install the `libpam-google-authenticator` package: ```sh sudo apt-get update @@ -43,16 +41,16 @@ sudo apt-get install libpam-google-authenticator ## Interactive Method -Once the package is installed, initialize it and following the -interactive prompts to generate your OTP or TOTP: +Once the package is installed, initialize it and following the interactive +prompts to generate your OTP or TOTP: ```sh google-authenticator ``` -If you are not sure how to answer, read the prompts carefully and think -about having to how each situation would affect your normal login -attempts. If you are still not sure, use my default responses below. +If you are not sure how to answer, read the prompts carefully and think about +having to how each situation would affect your normal login attempts. If you are +still not sure, use my default responses below. ``` txt OUTPUT @@ -60,9 +58,9 @@ OUTPUT Do you want authentication tokens to be time-based (y/n) y ``` -At this point, use an authenticator app somewhere one of your devices to -scan the QR code. Any future login attempts after our upcoming -configuration changes will require that TOTP. +At this point, use an authenticator app somewhere one of your devices to scan +the QR code. Any future login attempts after our upcoming configuration changes +will require that TOTP. ``` txt OUTPUT @@ -104,9 +102,9 @@ Do you want to enable rate-limiting? (y/n) y ## Non-Interactive Method -If you need to do this quickly, know your responses to the prompts, or -are setting this up for numerous users, the non-interactive method can -be much faster: +If you need to do this quickly, know your responses to the prompts, or are +setting this up for numerous users, the non-interactive method can be much +faster: ```sh google-authenticator -t -d -f -r 3 -R 30 -w 3 @@ -136,23 +134,23 @@ google-authenticator [<options>] -e, --emergency-codes=N Number of emergency codes to generate ``` -This fully configures the authenticator, saves it to a file, and then -outputs the secret key, QR code, and recovery codes. (If you add the -flag `-q`, then there won\'t be any output). If you use this -command in an automated fashion, make sure your script captures the -secret key and/or recovery codes and makes them available to the user. +This fully configures the authenticator, saves it to a file, and then outputs +the secret key, QR code, and recovery codes. (If you add the flag `-q`, then +there won't be any output). If you use this command in an automated fashion, +make sure your script captures the secret key and/or recovery codes and makes +them available to the user. # PAM Configuration Settings -Once you\'ve enabled the T/OTP and have it saved to an MFA app on your -phone or other device, open the PAM `sshd` file: +Once you've enabled the T/OTP and have it saved to an MFA app on your phone or +other device, open the PAM `sshd` file: ```sh sudo nano /etc/pam.d/sshd ``` -You need to do two things in this file. First, add the following lines -to the bottom of the file: +You need to do two things in this file. First, add the following lines to the +bottom of the file: ``` config auth required pam_google_authenticator.so nullok @@ -161,8 +159,8 @@ auth required pam_permit.so Second, comment-out the following line near the top of the file. -If you leave this line uncommented, every SSH login attempt will ask for -the following three authentication factors: +If you leave this line uncommented, every SSH login attempt will ask for the +following three authentication factors: 1. Publickey 2. Password @@ -180,9 +178,8 @@ Finally, edit the `sshd_config` file again: sudo nano /etc/ssh/sshd_config ``` -You\'ll need to change `ChallengeResponseAuthentication` to -yes and add the `AuthenticationMethods` line to the bottom of -the file. +You'll need to change `ChallengeResponseAuthentication` to yes and add the +`AuthenticationMethods` line to the bottom of the file. ``` config ChallengeResponseAuthentication yes diff --git a/content/blog/2022-04-02-nginx-reverse-proxy.md b/content/blog/2022-04-02-nginx-reverse-proxy.md index 70b8794..4ece921 100644 --- a/content/blog/2022-04-02-nginx-reverse-proxy.md +++ b/content/blog/2022-04-02-nginx-reverse-proxy.md @@ -7,36 +7,34 @@ draft = false # What is a Reverse Proxy? -A reverse proxy is a server that is placed between local servers or -services and clients/users (e.g., the internet). The reverse proxy -intercepts all requests from clients at the network edge and uses its -configuration files to determine where each request should be sent. +A reverse proxy is a server that is placed between local servers or services and +clients/users (e.g., the internet). The reverse proxy intercepts all requests +from clients at the network edge and uses its configuration files to determine +where each request should be sent. ## A Brief Example -For example, let\'s say that I run three servers in my home: +For example, let's say that I run three servers in my home: -- Server~01~ (`example.com`) -- Server~02~ (`service01.example.com`) -- Server~03~ (`service02.example.com`) +- Server01 (`example.com`) +- Server02 (`service01.example.com`) +- Server03 (`service02.example.com`) -I also run a reverse proxy in my home that intercepts all public -traffic: +I also run a reverse proxy in my home that intercepts all public traffic: -- Reverse Proxy +- Reverse Proxy -Assume that I have a domain name (`example.com`) that allows -clients to request websites or services from my home servers. +Assume that I have a domain name (`example.com`) that allows clients to request +websites or services from my home servers. -In this case, the reverse proxy will intercept all traffic from -`example.com` that enters my network and determine if the -client is requesting valid data, based on my configuration. +In this case, the reverse proxy will intercept all traffic from `example.com` +that enters my network and determine if the client is requesting valid data, +based on my configuration. -If the user is requesting `example.com` and my configuration -files say that Server~01~ holds that data, Nginx will send the user to -Server~01~. If I were to change the configuration so that -`example.com` is routed to Server~02~, that same user would -be sent to Server~02~ instead. +If the user is requesting `example.com` and my configuration files say that +Server~01~ holds that data, Nginx will send the user to Server~01~. If I were to +change the configuration so that `example.com` is routed to Server~02~, that +same user would be sent to Server~02~ instead. ``` txt ┌──────┐ ┌───────────┐ @@ -52,62 +50,61 @@ be sent to Server~02~ instead. # Reverse Proxy Options -There are a lot of options when it comes to reverse proxy servers, so -I\'m just going to list a few of the options I\'ve heard recommended -over the last few years: +There are a lot of options when it comes to reverse proxy servers, so I'm just +going to list a few of the options I've heard recommended over the last few +years: -- [Nginx](https://nginx.com) -- [Caddy](https://caddyserver.com) -- [Traefik](https://traefik.io/) -- [HAProxy](https://www.haproxy.org/) -- [Squid](https://ubuntu.com/server/docs/proxy-servers-squid) +- [Nginx](https://nginx.com) +- [Caddy](https://caddyserver.com) +- [Traefik](https://traefik.io/) +- [HAProxy](https://www.haproxy.org/) +- [Squid](https://ubuntu.com/server/docs/proxy-servers-squid) -In this post, we will be using Nginx as our reverse proxy, running on -Ubuntu Server 20.04.4 LTS. +In this post, we will be using Nginx as our reverse proxy, running on Ubuntu +Server 20.04.4 LTS. # Nginx Reverse Proxy Example ## Local Applications -You may be like me and have a lot of applications running on your local -network that you\'d like to expose publicly with a domain. +You may be like me and have a lot of applications running on your local network +that you'd like to expose publicly with a domain. -In my case, I have services running in multiple Docker containers within -a single server and want a way to visit those services from anywhere -with a URL. For example, on my local network, [Dashy](https://dashy.to) -runs through port 4000 (`localhost:4000`) and [Uptime +In my case, I have services running in multiple Docker containers within a +single server and want a way to visit those services from anywhere with a URL. +For example, on my local network, [Dashy](https://dashy.to) runs through port +4000 (`localhost:4000`) and [Uptime Kuma](https://github.com/louislam/uptime-kuma) runs through port 3001 (`localhost:3001`). In order to expose these services to the public, I will need to do the following: -1. Set up DNS records for a domain or subdomain (one per service) to - point toward the IP address of the server. -2. Open up the server network\'s HTTP and HTTPS ports (80 & 443) so - that the reverse proxy can accept traffic and determine where to - send it. -3. Install the reverse proxy software. -4. Configure the reverse proxy to recognize which service should get - traffic from any of the domains or subdomains. +1. Set up DNS records for a domain or subdomain (one per service) to point + toward the IP address of the server. +2. Open up the server network's HTTP and HTTPS ports (80 & 443) so that the + reverse proxy can accept traffic and determine where to send it. +3. Install the reverse proxy software. +4. Configure the reverse proxy to recognize which service should get traffic + from any of the domains or subdomains. ## Step 1: DNS Configuration -To start, update your DNS configuration so that you have an -`A` record for each domain or subdomain. +To start, update your DNS configuration so that you have an `A` record for each +domain or subdomain. -The `A` records should point toward the public IP address of -the server. If you don\'t know the public IP address, log in to the -server and run the following command: +The `A` records should point toward the public IP address of the server. If you +don't know the public IP address, log in to the server and run the following +command: ```sh curl ifconfig.co ``` -In the DNS example below, `xxx.xxx.xxx.xxx` is the public IP -address of the server. +In the DNS example below, `xxx.xxx.xxx.xxx` is the public IP address of the +server. -``` config +```conf example.com A xxx.xxx.xxx.xxx uptime.example.com A xxx.xxx.xxx.xxx dashy.example.com A xxx.xxx.xxx.xxx @@ -115,33 +112,30 @@ www CNAME example.com ``` Finally, ensure the DNS has propagated correctly with [DNS -Checker](https://dnschecker.org) by entering your domains or subdomains -in the search box and ensuring the results are showing the correct IP -address. +Checker](https://dnschecker.org) by entering your domains or subdomains in the +search box and ensuring the results are showing the correct IP address. ## Step 2: Open Network Ports -This step will be different depending on which router you have in your -home. If you\'re not sure, try to visit -[192.168.1.1](http://192.168.1.1) in your browser. Login credentials are -usually written on a sticker somewhere on your modem/router. +This step will be different depending on which router you have in your home. If +you're not sure, try to visit [192.168.1.1](http://192.168.1.1) in your +browser. Login credentials are usually written on a sticker somewhere on your +modem/router. -Once you\'re able to log in to your router, find the Port Forwarding -settings. You will need to forward ports `80` and -`443` to whichever machine is running the reverse proxy. +Once you're able to log in to your router, find the Port Forwarding settings. +You will need to forward ports `80` and `443` to whichever machine is running +the reverse proxy. -In my case, the table below shows the port-forwarding rules I\'ve -created. In this table, `xxx.xxx.xxx.xxx` is the local device -IP of the reverse proxy server, it will probably be an IP between -`192.168.1.1` and `192.168.1.255`. +In my case, the table below shows the port-forwarding rules I've created. In +this table, `xxx.xxx.xxx.xxx` is the local device IP of the reverse proxy +server, it will probably be an IP between `192.168.1.1` and `192.168.1.255`. - NAME FROM PORT DEST PORT/IP ENABLED - ------- ------ ------ ----------------- --------- - HTTP \*\* 80 xxx.xxx.xxx.xxx TRUE - HTTPS \*\* 443 xxx.xxx.xxx.xxx TRUE +| NAME | FROM PORT | DEST PORT/IP | ENABLED | +|-------|-----------|-----------------|---------| +| HTTP | 80 | xxx.xxx.xxx.xxx | TRUE | +| HTTPS | 443 | xxx.xxx.xxx.xxx | TRUE | -Once configured, these rules will direct all web traffic to your reverse -proxy. +Once configured, these rules will direct all web traffic to your reverse proxy. ## Step 3: Nginx Installation @@ -151,12 +145,11 @@ To install Nginx, simply run the following command: sudo apt install nginx ``` -If you have a firewall enabled, open up ports `80` and -`443` on your server so that Nginx can accept web traffic -from the router. +If you have a firewall enabled, open up ports `80` and `443` on your server so +that Nginx can accept web traffic from the router. -For example, if you want to use `ufw` for web traffic and -SSH, run the following commands: +For example, if you want to use `ufw` for web traffic and SSH, run the following +commands: ```sh sudo ufw allow 'Nginx Full' @@ -166,14 +159,12 @@ sudo ufw enable ## Step 4: Nginx Configuration -Now that we have domains pointing toward the server, the only step left -is to configure the reverse proxy to direct traffic from domains to -local services. +Now that we have domains pointing toward the server, the only step left is to +configure the reverse proxy to direct traffic from domains to local services. -To start, you\'ll need to create a configuration file for each domain in -`/etc/nginx/sites-available/`. They will look identical -except for the `server_name` variable and the -`proxy_pass` port. +To start, you'll need to create a configuration file for each domain in +`/etc/nginx/sites-available/`. They will look identical except for the +`server_name` variable and the `proxy_pass` port. Dashy: @@ -209,8 +200,8 @@ server { } ``` -Once the configuration files are created, you will need to enable them -with the `symlink` command: +Once the configuration files are created, you will need to enable them with the +`symlink` command: ```sh sudo ln -s /etc/nginx/sites-available/dashy.example.com /etc/nginx/sites-enabled/ @@ -220,12 +211,12 @@ Voilà! Your local services should now be available through their URLs. # HTTPS with Certbot -If you\'ve followed along, you\'ll notice that your services are only -available via HTTP (not HTTPS). +If you've followed along, you'll notice that your services are only available +via HTTP (not HTTPS). -If you want to enable HTTPS for your new domains, you will need to -generate SSL/TLS certificates for them. The easiest way to generate -certificates on Nginx is [Certbot](https://certbot.eff.org): +If you want to enable HTTPS for your new domains, you will need to generate +SSL/TLS certificates for them. The easiest way to generate certificates on Nginx +is [Certbot](https://certbot.eff.org): ```sh sudo apt install snapd; sudo snap install core; sudo snap refresh core diff --git a/content/blog/2022-04-09-pinetime.md b/content/blog/2022-04-09-pinetime.md index 98ec7bf..d76015a 100644 --- a/content/blog/2022-04-09-pinetime.md +++ b/content/blog/2022-04-09-pinetime.md @@ -9,48 +9,46 @@ draft = false ## Overview -The [PineTime](https://www.pine64.org/pinetime/) is an open-source -smartwatch, created by [PINE64](https://www.pine64.org). Originally -announced in September 2019, this ARM-based watch is a fantastic option -for users who want the benefits of a modern smartwatch with the backing -of open-source components and software. +The [PineTime](https://www.pine64.org/pinetime/) is an open-source smartwatch, +created by [PINE64](https://www.pine64.org). Originally announced in September +2019, this ARM-based watch is a fantastic option for users who want the benefits +of a modern smartwatch with the backing of open-source components and software. ## Product Specifications -I won\'t dive into too many details that you can find on [the product -page](https://www.pine64.org/pinetime/), but I wanted to point out the -prices for each watch and the primary functions: +I won't dive into too many details that you can find on [the product +page](https://www.pine64.org/pinetime/), but I wanted to point out the prices +for each watch and the primary functions: 1. Price: - - \$26.99 (Sealed) - - \$24.99 (Dev Kit) - - \$51.98 (One Sealed + One Dev Kit) + - $26.99 (Sealed) + - $24.99 (Dev Kit) + - $51.98 (One Sealed + One Dev Kit) 2. Primary Functionality: - - Clock (+ Smartphone Sync) - - Pedometer - - Heart Rate Monitor - - Sleep Monitor - - Calories burned - - Messaging - - Smartphone Notifications - - Media Controls + - Clock (+ Smartphone Sync) + - Pedometer + - Heart Rate Monitor + - Sleep Monitor + - Calories burned + - Messaging + - Smartphone Notifications + - Media Controls # Unboxing -Now, my PineTime was ordered on 2022-02-17, shipped on 2022-02-22, and -was delivered on 2022-03-23. With the current delays on shipping times -around the world (and the semiconductor shortage), a month for delivery -from China seems reasonable to me. +Now, my PineTime was ordered on 2022-02-17, shipped on 2022-02-22, and was +delivered on 2022-03-23. With the current delays on shipping times around the +world (and the semiconductor shortage), a month for delivery from China seems +reasonable to me. -The packaging is simple, and the watch comes with instructions, -technical information, the watch, and a charger (it does not include a -USB wall adapter). +The packaging is simple, and the watch comes with instructions, technical +information, the watch, and a charger (it does not include a USB wall adapter). -The watch itself was able to turn on immediately when I pulled it out of -the box, but the battery was depleted and required charging right away. +The watch itself was able to turn on immediately when I pulled it out of the +box, but the battery was depleted and required charging right away.  @@ -59,62 +57,60 @@ Contents](https://img.cleberg.net/blog/20220409-pinetime-smart-watch/pinetime_bo ## Watch OS: InfiniTime -While turning on the watch for the first time, some of the main design -choices you can see in the watch OS, +While turning on the watch for the first time, some of the main design choices +you can see in the watch OS, [InfiniTime](https://wiki.pine64.org/wiki/InfiniTime), are: -- A square bezel, not too thin against the sides of the watch. -- A simple, rubber band. -- Basic font and screen pixel design. -- Swipe gestures to access other screens. +- A square bezel, not too thin against the sides of the watch. +- A simple, rubber band. +- Basic font and screen pixel design. +- Swipe gestures to access other screens.  -The OS itself is fantastic in terms of functionality for me. It does -exactly what a smartwatch should do - track time, steps, heart rates, -and connect to another smart device, without being overly burdensome to -the user. +The OS itself is fantastic in terms of functionality for me. It does exactly +what a smartwatch should do - track time, steps, heart rates, and connect to +another smart device, without being overly burdensome to the user. -My only gripe so far is that it\'s *really* difficult to swipe to -different screens, such as pulling down the notification tray. I\'m not -sure if this is an OS or hardware issue, but it makes it quite hard to -quickly move around the screens. +My only gripe so far is that it's *really* difficult to swipe to different +screens, such as pulling down the notification tray. I'm not sure if this is an +OS or hardware issue, but it makes it quite hard to quickly move around the +screens. -However, my absolute favorite design choice is that the button the side -turns the screen on and off and tilting/waving my wrist doesn\'t -accidentally turn on the screen. With other watches, I absolutely hated -not being able to turn off the raise-to-wake or wave features (i.e., -blinding myself while wearing a watch at night because I moved my arm). +However, my absolute favorite design choice is that the button the side turns +the screen on and off and tilting/waving my wrist doesn't accidentally turn on +the screen. With other watches, I absolutely hated not being able to turn off +the raise-to-wake or wave features (i.e., blinding myself while wearing a watch +at night because I moved my arm). ## iOS App: InfiniLink Since I am using iOS as my primary mobile device OS, I am using the -[InfiniLink](https://github.com/xan-m/InfiniLink) app to connect my -watch. +[InfiniLink](https://github.com/xan-m/InfiniLink) app to connect my watch. This app provides the following for PineTime owners: -- Firmware updates -- Steps -- Charts -- Notifications +- Firmware updates +- Steps +- Charts +- Notifications -I mashed up a few screenshots to show off the home page, menu, firmware -update, and notification test screens: +I mashed up a few screenshots to show off the home page, menu, firmware update, +and notification test screens: 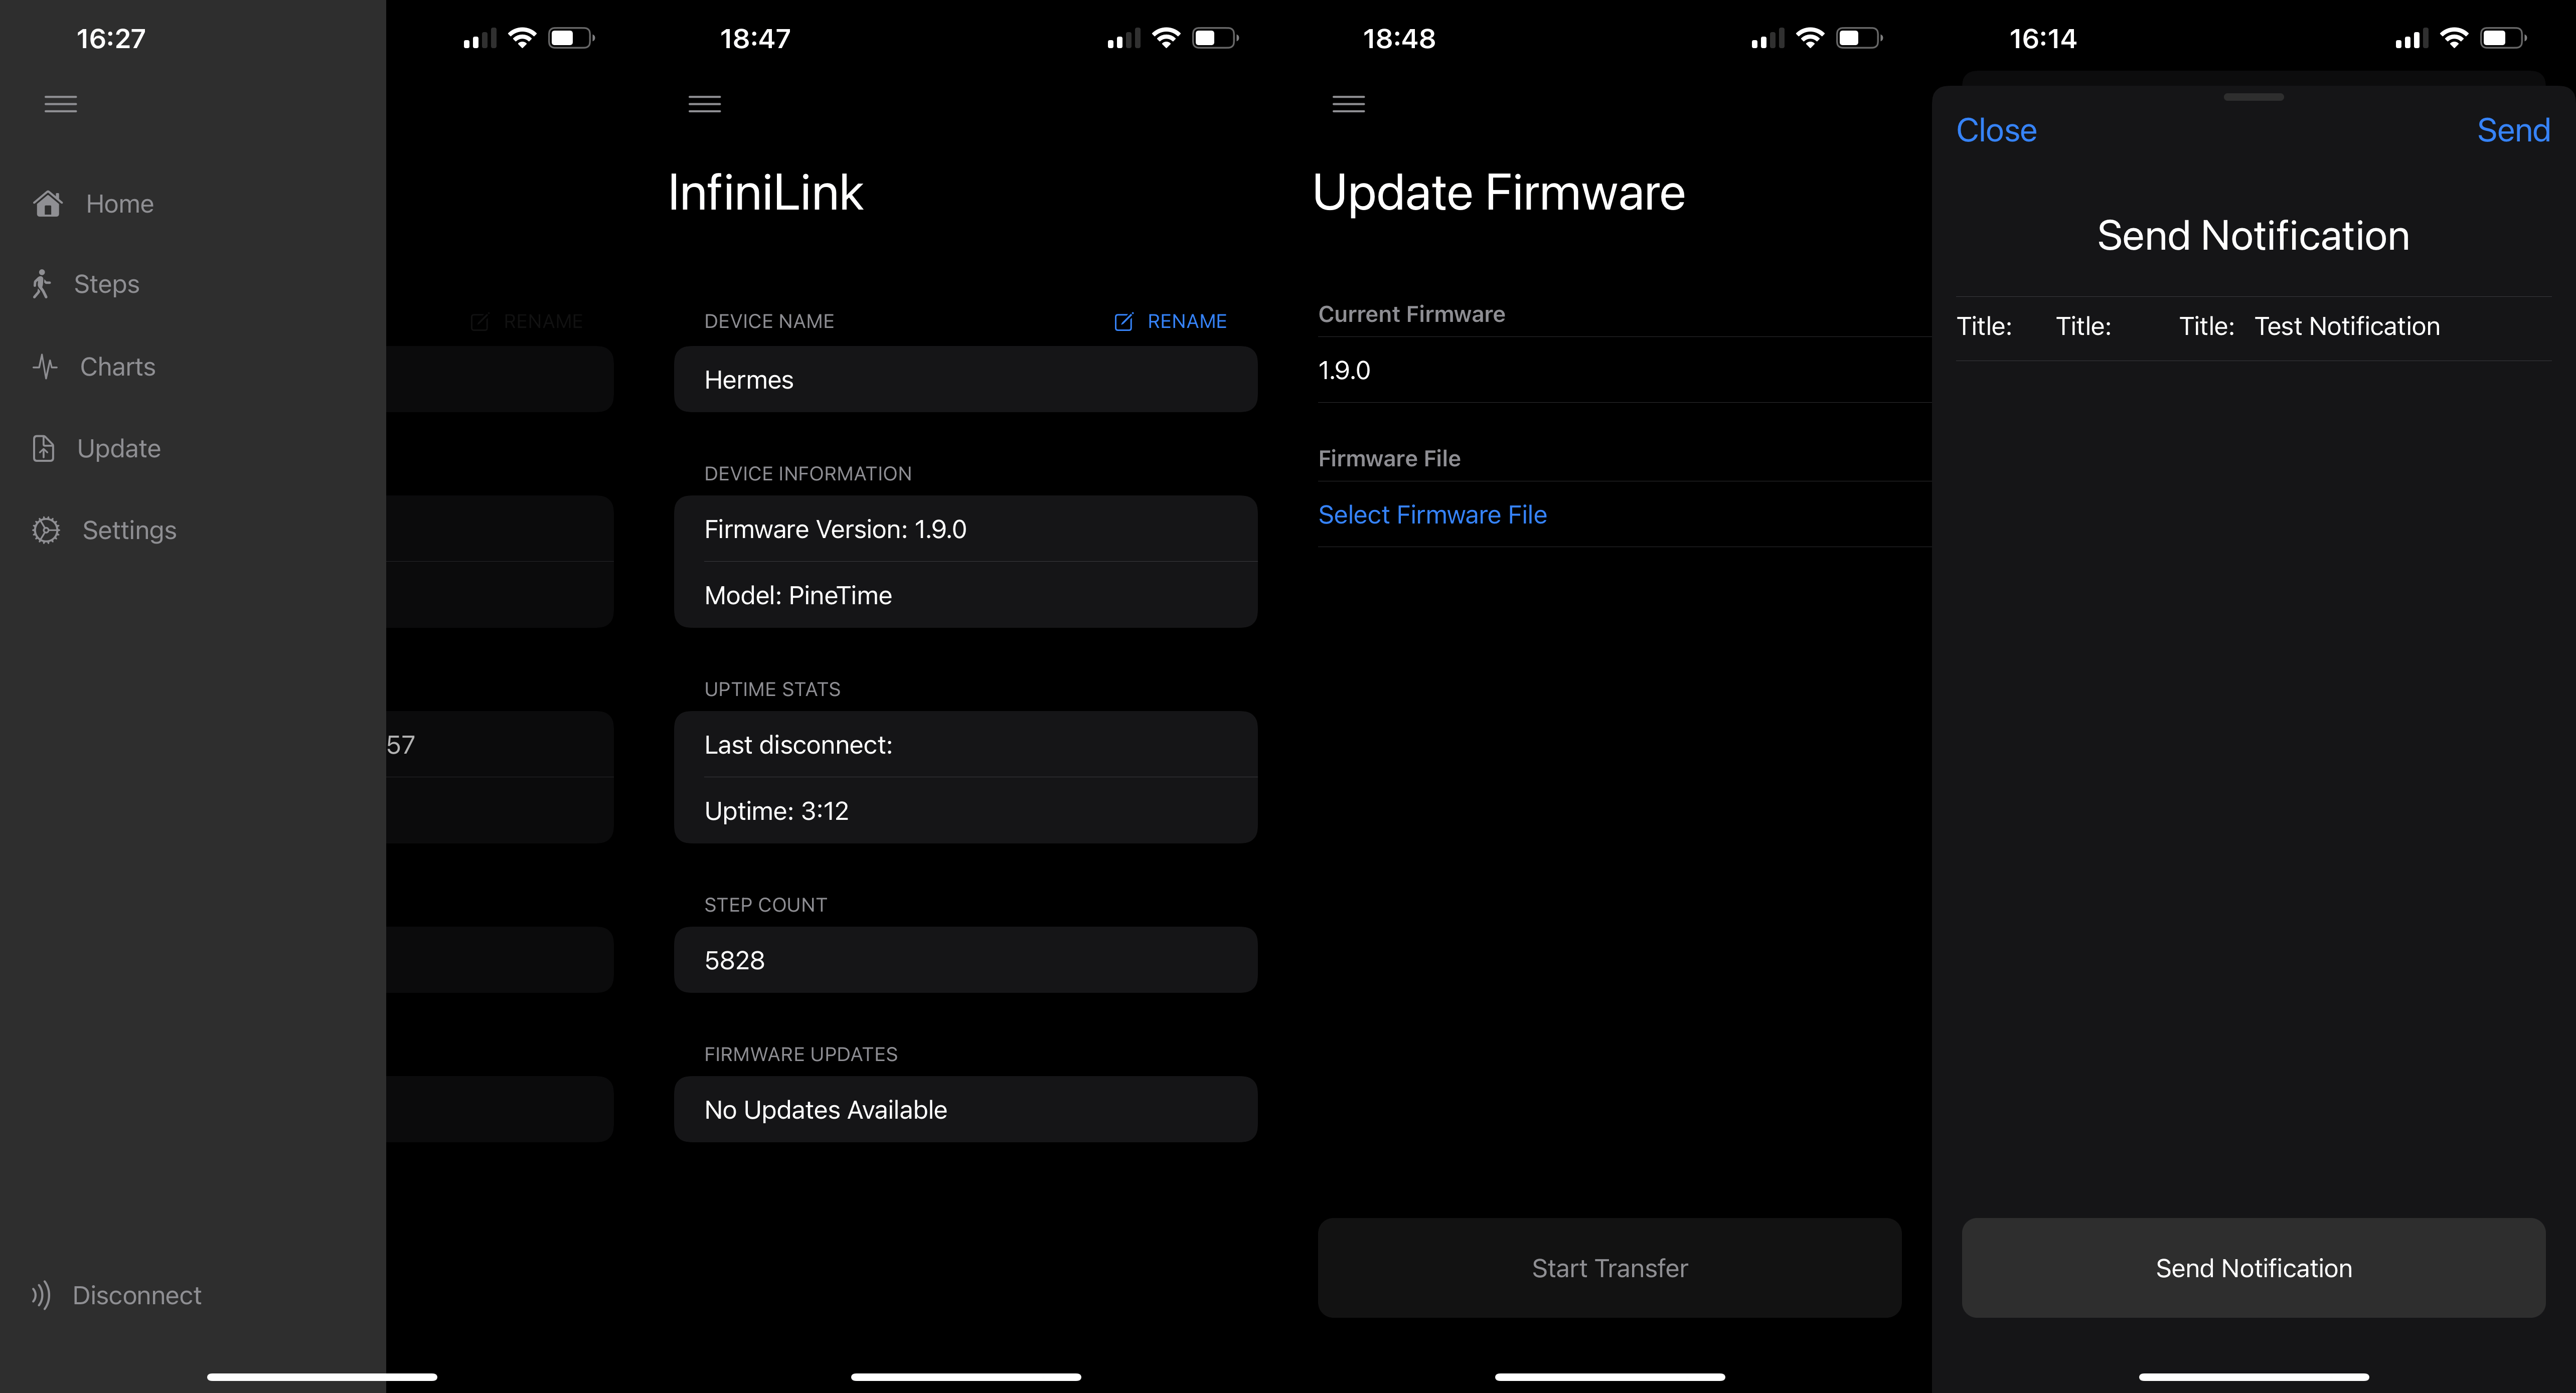 -Another big feature of InfiniLink is the ability to track pedometer -steps in a collection of beautiful graphs, with the option to change -your step goal and add in manual steps. +Another big feature of InfiniLink is the ability to track pedometer steps in a +collection of beautiful graphs, with the option to change your step goal and add +in manual steps.  -Finally, there are charts to display the battery percentage and heart -rates over time. This area also comes with an option to clear data. +Finally, there are charts to display the battery percentage and heart rates over +time. This area also comes with an option to clear data. 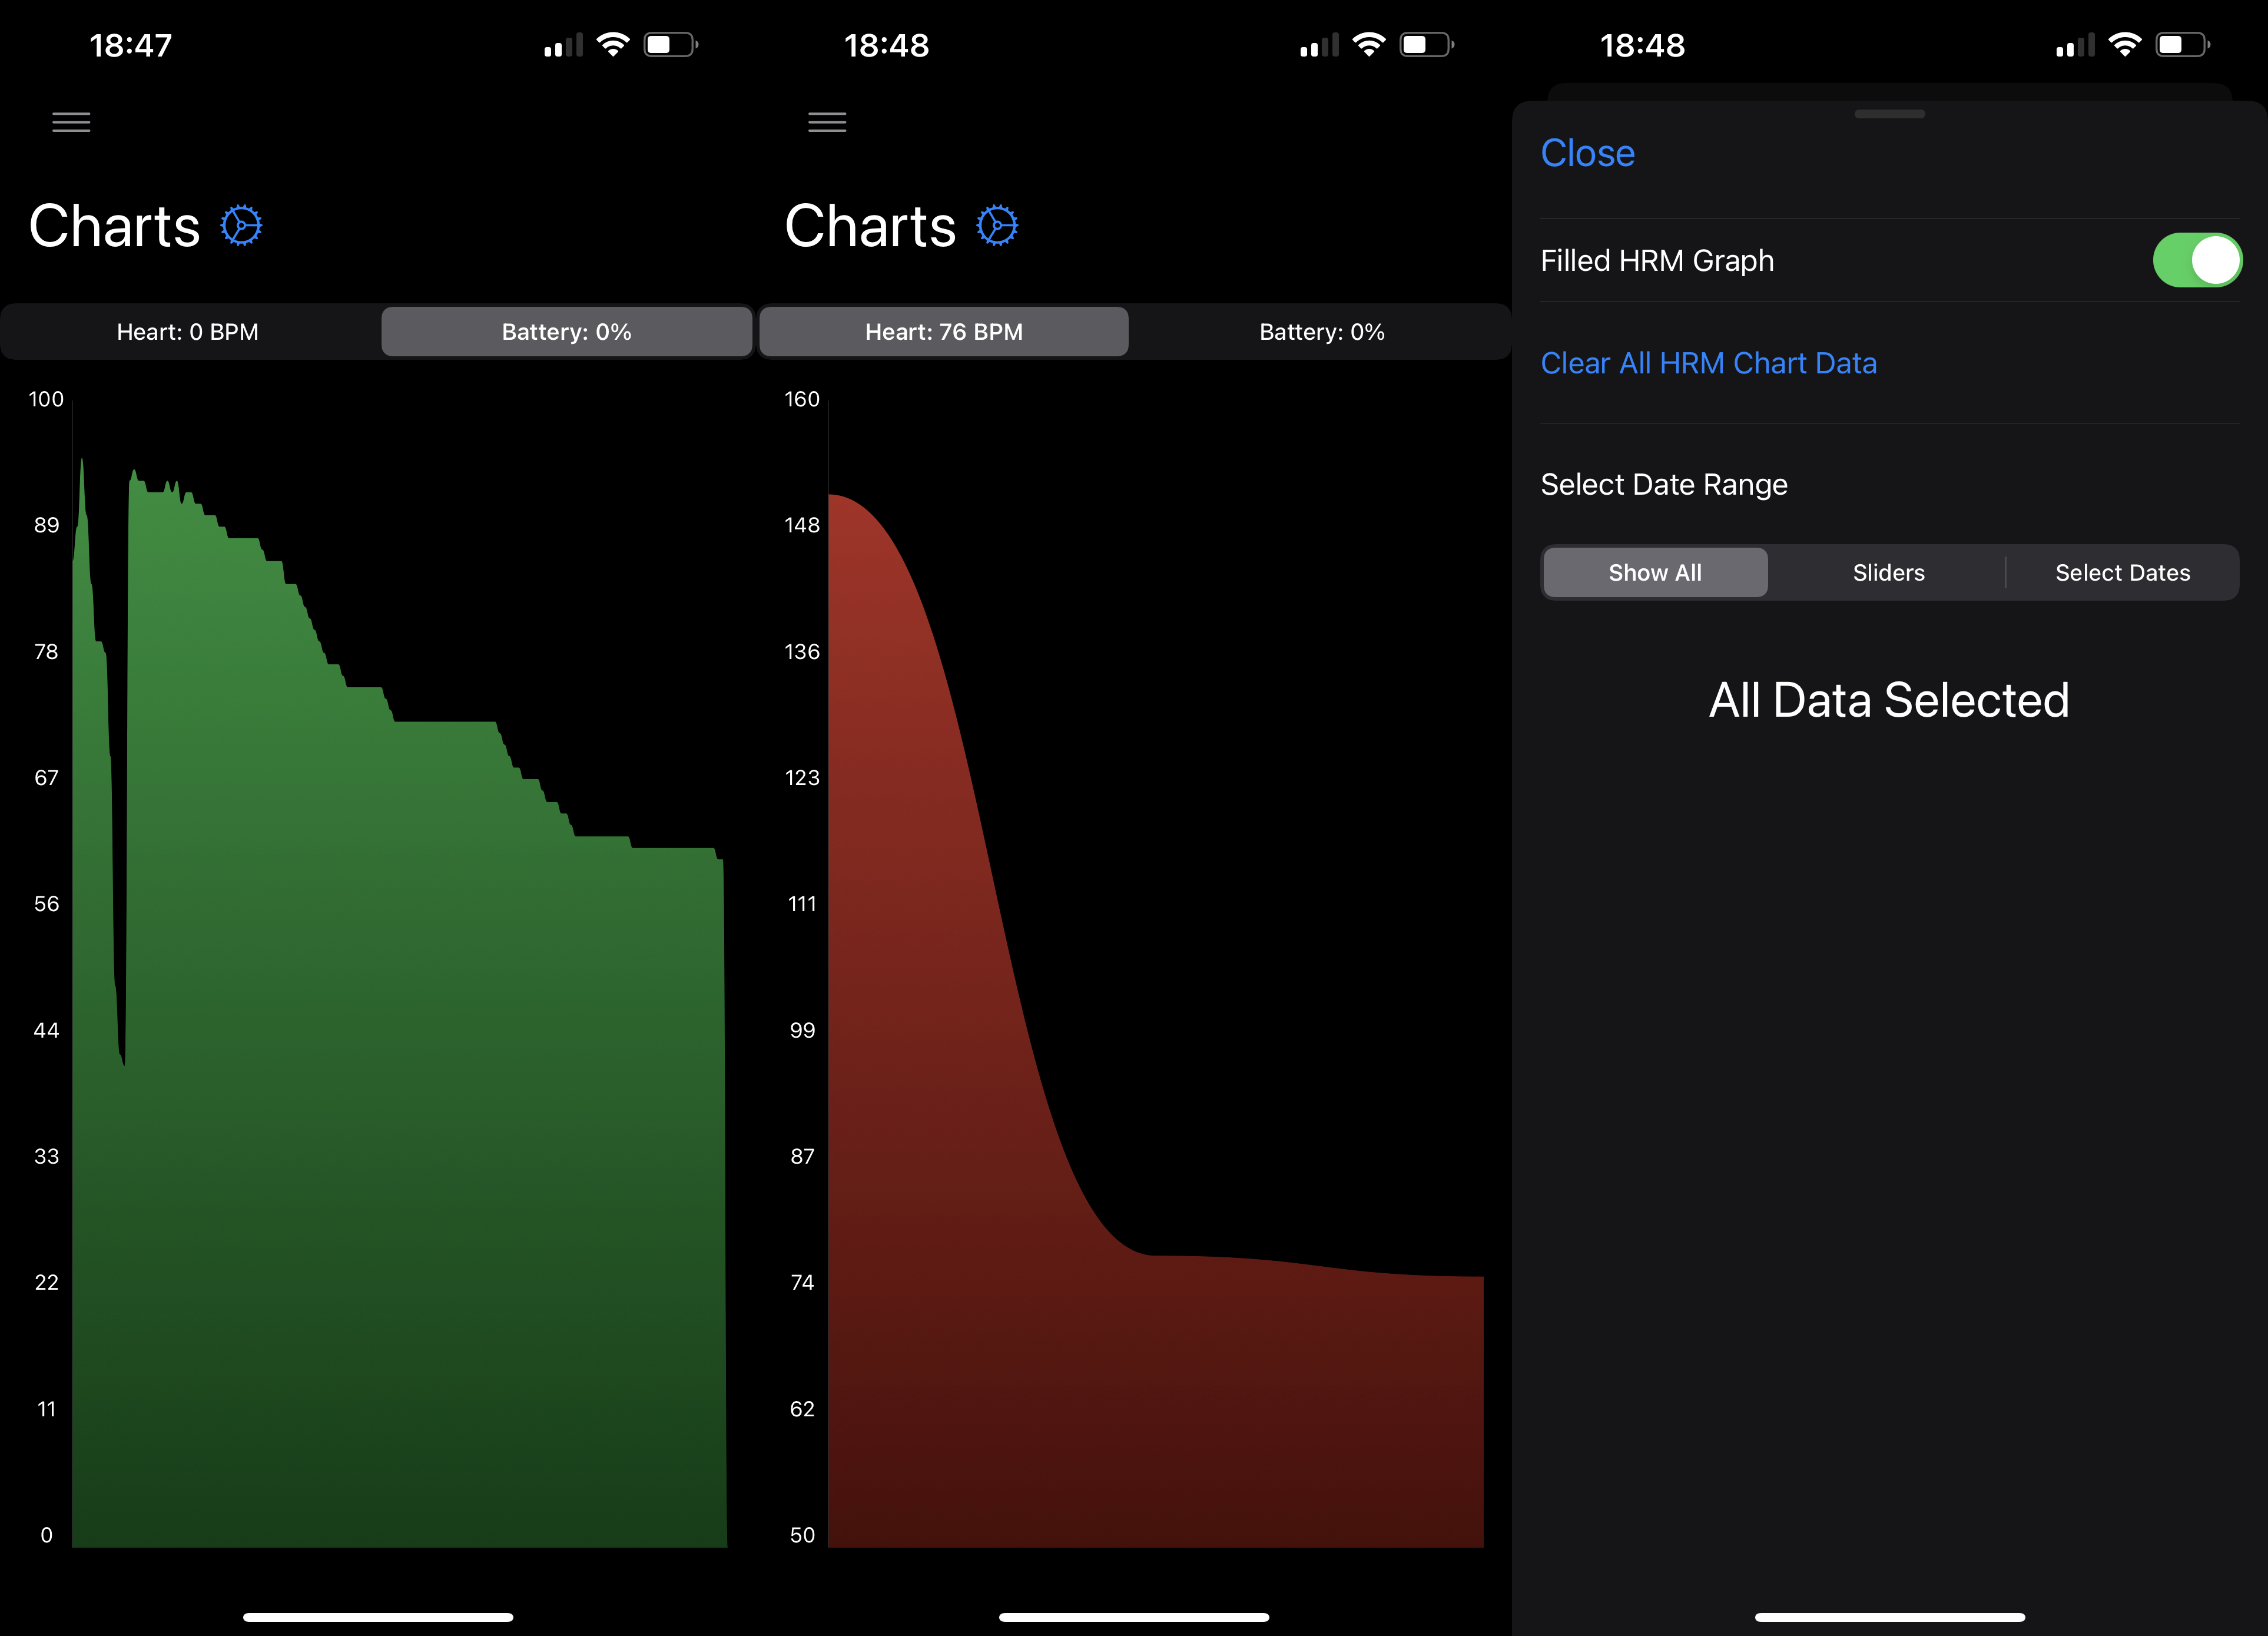 @@ -123,36 +119,34 @@ Charts](https://img.cleberg.net/blog/20220409-pinetime-smart-watch/infinilink_ch ## Pros -After wearing my watch for a few weeks, I have mostly positive thoughts -about the watch so far. In the past, I have owned smartwatches by -FitBit, Fossil, Apple, etc. - **but I prefer the PineTime over all of -those watches**. +After wearing my watch for a few weeks, I have mostly positive thoughts about +the watch so far. In the past, I have owned smartwatches by FitBit, Fossil, +Apple, etc. - **but I prefer the PineTime over all of those watches**. -The PineTime strips out all the unnecessary features and performs the -functions that it provides effectively and efficiently. +The PineTime strips out all the unnecessary features and performs the functions +that it provides effectively and efficiently. -The battery life is amazing on this device. By default, the watch seems -to last anywhere from a few days to a week before dying. +The battery life is amazing on this device. By default, the watch seems to last +anywhere from a few days to a week before dying. -And of course, it\'s open source and backed by some of the most -dedicated enthusiasts and developers I\'ve seen. Watching the Matrix -channel, forums, and website have been exciting to see. +And of course, it's open source and backed by some of the most dedicated +enthusiasts and developers I've seen. Watching the Matrix channel, forums, and +website have been exciting to see. ## Cons -If I had to complain about anything, it would simply be the small bugs -in some features that can be contributed to the companion apps more than -the watch itself. +If I had to complain about anything, it would simply be the small bugs in some +features that can be contributed to the companion apps more than the watch +itself. -A regular user would want native notification support out-of-the-box, -which is the biggest item not working for me at the moment. +A regular user would want native notification support out-of-the-box, which is +the biggest item not working for me at the moment. -My only other complaint is that the battery indicator on the watch -doesn\'t seem accurate when it\'s nearing depletion - it seems that -there\'s a bit of battery life left and then my watch is dead very -suddenly after. This could just be me misinterpreting the battery level -icons, but it has fooled me a few times into thinking I had more battery -left than I actually did. +My only other complaint is that the battery indicator on the watch doesn't seem +accurate when it's nearing depletion - it seems that there's a bit of battery +life left and then my watch is dead very suddenly after. This could just be me +misinterpreting the battery level icons, but it has fooled me a few times into +thinking I had more battery left than I actually did. -Other than those small items, I really do love this watch and am glad I -replaced my Apple Watch with the PineTime. +Other than those small items, I really do love this watch and am glad I replaced +my Apple Watch with the PineTime. diff --git a/content/blog/2022-06-01-ditching-cloudflare.md b/content/blog/2022-06-01-ditching-cloudflare.md index 82096b0..8d5d049 100644 --- a/content/blog/2022-06-01-ditching-cloudflare.md +++ b/content/blog/2022-06-01-ditching-cloudflare.md @@ -7,89 +7,83 @@ draft = false # Registrar -After spending a year or so using Cloudflare for DNS only - no proxying -or applications - I spent the last few months using Cloudflare Tunnels -and Cloudflare Access to protect my self-hosted websites and -applications via their proxy traffic model. +After spending a year or so using Cloudflare for DNS only - no proxying or +applications - I spent the last few months using Cloudflare Tunnels and +Cloudflare Access to protect my self-hosted websites and applications via their +proxy traffic model. -However, I have never liked using Cloudflare due to their increasingly -large share of control over web traffic, as well as their business model -of being a MITM for all of your traffic. +However, I have never liked using Cloudflare due to their increasingly large +share of control over web traffic, as well as their business model of being a +MITM for all of your traffic. So, as of today, I have switched over to [Njalla](https://njal.la) as my registrar and DNS manager. I was able to easily transfer my domains over -rapidly, with only one domain taking more than 15-30 minutes to -propagate. +rapidly, with only one domain taking more than 15-30 minutes to propagate. -+I do still have two domains sitting at Cloudflare for the moment while -I decide if they\'re worth the higher rates (one domain is 30€ and the -other is 45€).+ ++I do still have two domains sitting at Cloudflare for the moment while I decide +if they're worth the higher rates (one domain is 30€ and the other is 45€).+ -> **Update (2022.06.03)**: I ended up transferring my final two domains -> over to Njalla, clearing my Cloudflare account of personal data, and -> deleting the Cloudflare account entirely. *I actually feel relieved to -> have moved on to a provider I trust.* +> **Update (2022.06.03)**: I ended up transferring my final two domains over to +> Njalla, clearing my Cloudflare account of personal data, and deleting the +> Cloudflare account entirely. *I actually feel relieved to have moved on to a +> provider I trust.* # DNS -As noted above, I\'m using Njalla exclusively for DNS configurations on -my domains. +As noted above, I'm using Njalla exclusively for DNS configurations on my +domains. -However, the transfer process was not ideal. As soon as the domains -transferred over, I switched the nameservers from Cloudflare to Njalla -and lost most of the associated DNS records. So, the majority of the -time spent during the migration was simply re-typing all the DNS records -back in one-by-one. +However, the transfer process was not ideal. As soon as the domains transferred +over, I switched the nameservers from Cloudflare to Njalla and lost most of the +associated DNS records. So, the majority of the time spent during the migration +was simply re-typing all the DNS records back in one-by-one. -This would be much simpler if I were able to edit the plain-text format -of the DNS configuration. I was able to do that at a past registrar -(perhaps it was [Gandi.net](https://gandi.net/)?) and it made life a lot -easier. +This would be much simpler if I were able to edit the plain-text format of the +DNS configuration. I was able to do that at a past registrar (perhaps it was +[Gandi.net](https://gandi.net/)?) and it made life a lot easier. ## Dynamic DNS Updates -I have built an easy Python script to run (or set-up in -`cron` to run automatically) that will check my server\'s -IPv4 and IPv6, compare it to Njalla, and update the DNS records if they -don\'t match. You can see the full script and process in my other post: -[Updating Dynamic DNS with Njalla API](../njalla-dns-api/). +I have built an easy Python script to run (or set-up in `cron` to run +automatically) that will check my server's IPv4 and IPv6, compare it to Njalla, +and update the DNS records if they don't match. You can see the full script and +process in my other post: [Updating Dynamic DNS with Njalla +API](../njalla-dns-api/). -I haven\'t used this other method, but I do know that you can create -`Dynamic` DNS records with Njalla that [work for updating -dynamic subdomains](https://njal.la/docs/ddns/). +I haven't used this other method, but I do know that you can create `Dynamic` +DNS records with Njalla that [work for updating dynamic +subdomains](https://njal.la/docs/ddns/). -## Njalla\'s DNS Tool +## Njalla's DNS Tool One neat upside to Njalla is that they have a [DNS lookup -tool](https://check.njal.la/dns/) that provides a lot of great -information for those of you (AKA: me) who hate using the -`dig` command. +tool](https://check.njal.la/dns/) that provides a lot of great information for +those of you (AKA: me) who hate using the `dig` command. -This was very useful for monitoring a couple of my transferred domains -to see when the changes in nameservers, records, and DNSSEC went into -effect. +This was very useful for monitoring a couple of my transferred domains to see +when the changes in nameservers, records, and DNSSEC went into effect. # Tunnel Cloudflare Tunnel is a service that acts as a reverse-proxy (hosted on -Cloudflare\'s servers) and allowed me to mask the private IP address of -the server hosting my various websites and apps. +Cloudflare's servers) and allowed me to mask the private IP address of the +server hosting my various websites and apps. -However, as I was moving away from Cloudflare, I was not able to find a -suitable replacement that was both inexpensive and simple. So, I simply -went back to hosting [my own reverse proxy with -Nginx](file:///blog/set-up-nginx-reverse-proxy/). With the recent -additions of Unifi hardware in my server/network rack, I am much more -protected against spam and malicious attacks at the network edge than I -was before I switched to Cloudflare. +However, as I was moving away from Cloudflare, I was not able to find a suitable +replacement that was both inexpensive and simple. So, I simply went back to +hosting [my own reverse proxy with +Nginx](file:///blog/set-up-nginx-reverse-proxy/). With the recent additions of +Unifi hardware in my server/network rack, I am much more protected against spam +and malicious attacks at the network edge than I was before I switched to +Cloudflare. # Access -Cloudflare Access, another app I used in combination with Cloudflare -Tunnel, provided an authentication screen that required you to enter -valid credentials before Cloudflare would forward you to the actual -website or app (if the website/app has their own authentication, you\'d -then have to authenticate a second time). +Cloudflare Access, another app I used in combination with Cloudflare Tunnel, +provided an authentication screen that required you to enter valid credentials +before Cloudflare would forward you to the actual website or app (if the +website/app has their own authentication, you'd then have to authenticate a +second time). -I did not replace this service with anything since I only host a handful -of non-sensitive apps that don\'t require duplicate authentication. +I did not replace this service with anything since I only host a handful of +non-sensitive apps that don't require duplicate authentication. diff --git a/content/blog/2022-06-07-self-hosting-freshrss.md b/content/blog/2022-06-07-self-hosting-freshrss.md index 27e9d09..1ac2127 100644 --- a/content/blog/2022-06-07-self-hosting-freshrss.md +++ b/content/blog/2022-06-07-self-hosting-freshrss.md @@ -7,46 +7,43 @@ draft = false # Why RSS? -After noticing that I have collected 50+ blogs as bookmarks, I decided -to migrate back to using RSS feeds to stay up-to-date with my favorite -websites. Using RSS allows me to read all of these posts in a single app -(on both mobile & desktop) and allows me to be notified when new posts -are available. +After noticing that I have collected 50+ blogs as bookmarks, I decided to +migrate back to using RSS feeds to stay up-to-date with my favorite websites. +Using RSS allows me to read all of these posts in a single app (on both mobile & +desktop) and allows me to be notified when new posts are available. -However, I ran into one issue: syncing subscriptions and read/unread -posts across devices. Since I want to be able to easily read on both -mobile and desktop, I decided to look for a self-hosted RSS solution. +However, I ran into one issue: syncing subscriptions and read/unread posts +across devices. Since I want to be able to easily read on both mobile and +desktop, I decided to look for a self-hosted RSS solution. -Thus, I found [FreshRSS](https://www.freshrss.org/) and was able to -successfully install it on my server in about 30 minutes. +Thus, I found [FreshRSS](https://www.freshrss.org/) and was able to successfully +install it on my server in about 30 minutes. # Documentation -While it\'s certainly not robust, the [FreshRSS -documentation](https://freshrss.github.io/FreshRSS/) is helpful for -figuring out basic information about the service. +While it's certainly not robust, the [FreshRSS +documentation](https://freshrss.github.io/FreshRSS/) is helpful for figuring out +basic information about the service. -However, I wanted to install this service as a Docker container and -stumbled across the [Docker -README](https://github.com/FreshRSS/FreshRSS/tree/edge/Docker) within -the GitHub repository. +However, I wanted to install this service as a Docker container and stumbled +across the [Docker +README](https://github.com/FreshRSS/FreshRSS/tree/edge/Docker) within the GitHub +repository. -This README was the documentation I actually needed. However, as you\'ll -see below, I still had to manually edit one file -(`config.php`) to access the API externally via my RSS apps. +This README was the documentation I actually needed. However, as you'll see +below, I still had to manually edit one file (`config.php`) to access the API +externally via my RSS apps. # Installation ## DNS -The first step, as required by any external web service, was assigning a -domain name to use. I chose to use a subdomain, like -`rss.example.com`. +The first step, as required by any external web service, was assigning a domain +name to use. I chose to use a subdomain, like `rss.example.com`. -To assign this, I created an `A` record in my DNS settings -with the IPv4 address of the server and an `AAAA` record with -the IPv6 address of the server. Note: assigning an IPv6 -(`AAAA`) record is optional, but I like to enable IPV6 for my +To assign this, I created an `A` record in my DNS settings with the IPv4 address +of the server and an `AAAA` record with the IPv6 address of the server. Note: +assigning an IPv6 (`AAAA`) record is optional, but I like to enable IPV6 for my services. ``` config @@ -56,15 +53,13 @@ rss.example.com AAAA xxxx:xxxx: ... :xxxx ## Docker -I initially tried to set up a `docker-compose.yml` file with -a `.env` file because I prefer to have a file I can look back -at later to see how I initially started the container, but it simply -wouldn\'t work for me. I\'m not sure why, but I assume I wasn\'t telling -`docker-compose` where the `.env` file was. +I initially tried to set up a `docker-compose.yml` file with a `.env` file +because I prefer to have a file I can look back at later to see how I initially +started the container, but it simply wouldn't work for me. I'm not sure why, +but I assume I wasn't telling `docker-compose` where the `.env` file was. -Regardless, I chose to simply run the service with -`docker run`. See the following command for my -`docker run` configuration: +Regardless, I chose to simply run the service with `docker run`. See the +following command for my `docker run` configuration: ```sh sudo docker run -d --restart unless-stopped --log-opt max-size=10m \ @@ -77,32 +72,29 @@ sudo docker run -d --restart unless-stopped --log-opt max-size=10m \ freshrss/freshrss ``` -This started the container successfully and allowed me to visit the -FreshRSS instance at `localhost:8080`. +This started the container successfully and allowed me to visit the FreshRSS +instance at `localhost:8080`. ## Fresh RSS Set-Up -I **HIGHLY\*** suggest that you set up your user account prior to -exposing this service to the public. It\'s unlikely that someone is -trying to access the exact domain or IP/port you\'re assigning here, but -as soon as you expose this service, the first person to open the URL -will be able to create the admin user. +I **HIGHLY** suggest that you set up your user account prior to exposing this +service to the public. It's unlikely that someone is trying to access the exact +domain or IP/port you're assigning here, but as soon as you expose this +service, the first person to open the URL will be able to create the admin user. -In order to set up your FreshRSS service, open the -`localhost:8080` URL in your browser (you may need to use a -local IP instead of `localhost` if you\'re accessing the page -from a different machine on the network - e.g., +In order to set up your FreshRSS service, open the `localhost:8080` URL in your +browser (you may need to use a local IP instead of `localhost` if you're +accessing the page from a different machine on the network - e.g., `192.168.1.20:8080`). Once the page loads, set up your default user with a strong username and -password. You may also choose to configure other settings prior to -exposing this service. +password. You may also choose to configure other settings prior to exposing this +service. ## Nginx Reverse-Proxy In order to access this service outside my home, I needed to set up a -reverse-proxy to connect `localhost:8080` to -`rss.example.com`. +reverse-proxy to connect `localhost:8080` to `rss.example.com`. First, I created a new Nginx configuration file: @@ -143,8 +135,7 @@ server { } ``` -Finally, restart Nginx and you will be able to access your service via -HTTP: +Finally, restart Nginx and you will be able to access your service via HTTP: ```sh sudo systemctl restart nginx.service @@ -152,51 +143,46 @@ sudo systemctl restart nginx.service ## HTTPS -However, I don\'t want to access my RSS feeds via HTTP. I want it -available only via HTTPS. In order to do this, I ran the -[certbot](https://certbot.eff.org/) program to generate SSL certificates -for me: +However, I don't want to access my RSS feeds via HTTP. I want it available only +via HTTPS. In order to do this, I ran the [certbot](https://certbot.eff.org/) +program to generate SSL certificates for me: ```sh sudo certbot --nginx ``` -This process will automatically generate an SSL certificate for you and -modify the Nginx configuration file to include a redirect from HTTP to -HTTPS. +This process will automatically generate an SSL certificate for you and modify +the Nginx configuration file to include a redirect from HTTP to HTTPS. # Post-Installation Fixes -At this point, we have a functional FreshRSS website, available from -anywhere and secured with HTTPS. However, attempting to connect this -service to an RSS app resulted in many errors regarding unavailable URLs -and incorrect credentials. +At this point, we have a functional FreshRSS website, available from anywhere +and secured with HTTPS. However, attempting to connect this service to an RSS +app resulted in many errors regarding unavailable URLs and incorrect +credentials. ## API Set-Up -First, you need to open your user profile in FreshRSS -(`Settings` \> `Profile`) and set an API password -in the field at the bottom. This is the password you will need to -provide to your RSS apps. +First, you need to open your user profile in FreshRSS (`Settings` > `Profile`) +and set an API password in the field at the bottom. This is the password you +will need to provide to your RSS apps. -Once that is set and saved, click the link below the API password field -to open the API check tool. It should look something like -`https://localhost:8080/api/` or -`https://rss.example.com/api/`. +Once that is set and saved, click the link below the API password field to open +the API check tool. It should look something like `https://localhost:8080/api/` +or `https://rss.example.com/api/`. -Within this page, you *should* see your correct external URL and -\"PASS\" at the bottom of each API type. This would mean everything is -set up correctly, and you can now move on and login to any RSS apps that -support self-hosted options. +Within this page, you *should* see your correct external URL and "PASS" at the +bottom of each API type. This would mean everything is set up correctly, and you +can now move on and login to any RSS apps that support self-hosted options. In my case, the URL showed an internal URL and I had a warning that the -`base_url` variable may be misconfigured. If this is the -case, see the next section for a fix. +`base_url` variable may be misconfigured. If this is the case, see the next +section for a fix. ## Base URL Fix -In order to fix the `base_url` for the API, I opened up my -docker container with the following command: +In order to fix the `base_url` for the API, I opened up my docker container with +the following command: ```sh sudo docker exec -it freshrss bash @@ -209,17 +195,15 @@ apt-get update apt-get install nano ``` -Finally, open up `config.php` in the `data` -directory: +Finally, open up `config.php` in the `data` directory: ```sh nano data/config.php ``` -Within `config.php`, you will need to update the -`base_url` variable and update it to match your external URL. -In my case, I simply commented-out the incorrect URL with -`//` and added the correct one on a new line: +Within `config.php`, you will need to update the `base_url` variable and update +it to match your external URL. In my case, I simply commented-out the incorrect +URL with `//` and added the correct one on a new line: ``` php <?php @@ -232,9 +216,8 @@ In my case, I simply commented-out the incorrect URL with > ``` -You can now exit the file with `Ctrl + x`, press -`y` to save the file, and then click `Enter` to -keep the same file name. +You can now exit the file with `Ctrl + x`, press `y` to save the file, and then +click `Enter` to keep the same file name. Finally, just exit out of the docker container: @@ -248,8 +231,8 @@ Next, just restart the container: sudo docker restart freshrss ``` -Voilà! Your API check should now \"PASS\" and you should be able to use -one of the API URLs in your RSS apps. +Voilà! Your API check should now "PASS" and you should be able to use one of +the API URLs in your RSS apps. -In my case, I use [NetNewsWire](https://netnewswire.com) on my desktop -and phone. +In my case, I use [NetNewsWire](https://netnewswire.com) on my desktop and +phone. diff --git a/content/blog/2022-06-16-terminal-lifestyle.md b/content/blog/2022-06-16-terminal-lifestyle.md index 3935c7b..d8c7b75 100644 --- a/content/blog/2022-06-16-terminal-lifestyle.md +++ b/content/blog/2022-06-16-terminal-lifestyle.md @@ -7,165 +7,155 @@ draft = false # Text-Based Simplicity -I\'ve detailed my views on web-based minimalism and related topics in -other posts throughout the years; e.g., JavaScript/CSS bloat slowing -down websites that are essentially a text document. However, I have -never really expanded beyond talking about the web and describing how I -focus on minimizing distractions in other digital environments. - -This post is going to set the baseline for how I *try* to live my -digital life. It does not necessarily get into my physical life, which -is often harder to control and contain all the noise in our modern -world. - -While there are new things to do every day in our digital world, I find -that keeping a core set of values and interests can ground you and keep -you mindful of *why* you are participating in the digital world. For -example, if - at your core - you have no interest in what strangers -think about random topics, it would be unwise to start participating in -social media. However, I am someone who has been dragged in by effective -advertising to participate in communities that I realize I do not care -for. - -I won\'t dive much further into explaining the philosophy of all this, -but I will link a few helpful articles that may pique your interest if -you\'re in search of more meaningful experiences: - -- [Mindfulness](https://en.wikipedia.org/wiki/Mindfulness) -- [Minimalism](https://en.wikipedia.org/wiki/Minimalism) -- [Stoicism](https://en.wikipedia.org/wiki/Stoicism) +I've detailed my views on web-based minimalism and related topics in other +posts throughout the years; e.g., JavaScript/CSS bloat slowing down websites +that are essentially a text document. However, I have never really expanded +beyond talking about the web and describing how I focus on minimizing +distractions in other digital environments. + +This post is going to set the baseline for how I *try* to live my digital life. +It does not necessarily get into my physical life, which is often harder to +control and contain all the noise in our modern world. + +While there are new things to do every day in our digital world, I find that +keeping a core set of values and interests can ground you and keep you mindful +of *why* you are participating in the digital world. For example, if - at your +core - you have no interest in what strangers think about random topics, it +would be unwise to start participating in social media. However, I am someone +who has been dragged in by effective advertising to participate in communities +that I realize I do not care for. + +I won't dive much further into explaining the philosophy of all this, but I +will link a few helpful articles that may pique your interest if you're in +search of more meaningful experiences: + +- [Mindfulness](https://en.wikipedia.org/wiki/Mindfulness) +- [Minimalism](https://en.wikipedia.org/wiki/Minimalism) +- [Stoicism](https://en.wikipedia.org/wiki/Stoicism) # Living Life in the Terminal -My personal approach to reducing digital distractions and increasing my -focus on the task at hand is to use a terminal for as much as I possibly -can. +My personal approach to reducing digital distractions and increasing my focus on +the task at hand is to use a terminal for as much as I possibly can. -Most days, this means that I have a few tabs open constantly in my -terminal: +Most days, this means that I have a few tabs open constantly in my terminal: -1. A web browser -2. A chat client -3. An email client -4. An RSS feed reader -5. A local shell for navigating my computer\'s files -6. A remote shell for managing servers and other machines +1. A web browser +2. A chat client +3. An email client +4. An RSS feed reader +5. A local shell for navigating my computer's files +6. A remote shell for managing servers and other machines -Beyond this, I rarely open other tabs or GUI applications, unless -absolutely necessary. If you look, you may be surprised what can be -accomplished in the terminal. +Beyond this, I rarely open other tabs or GUI applications, unless absolutely +necessary. If you look, you may be surprised what can be accomplished in the +terminal. -For example, I have moved my music and entertainment downloads to the -terminal, along with my device VPN connections. I am exploring options -for moving my RSS subscriptions to something like -[Newsboat](https://newsboat.org/), so that I can read my daily articles -without all the fuss. +For example, I have moved my music and entertainment downloads to the terminal, +along with my device VPN connections. I am exploring options for moving my RSS +subscriptions to something like [Newsboat](https://newsboat.org/), so that I can +read my daily articles without all the fuss. -Now that we have some examples out of the way, let\'s dive into the -specifics. +Now that we have some examples out of the way, let's dive into the specifics. ## Browsing the Web -I\'m going to start off with a hard topic for those who prefer to live -in the terminal: web browsing. This task is made hard mostly by websites -and web apps that require JavaScript to run. The other difficult part is -that if you\'re using a text-based browser, that means images won\'t -load (hopefully that\'s obvious). +I'm going to start off with a hard topic for those who prefer to live in the +terminal: web browsing. This task is made hard mostly by websites and web apps +that require JavaScript to run. The other difficult part is that if you're +using a text-based browser, that means images won't load (hopefully that's +obvious). -I am using [Lynx](https://lynx.invisible-island.net), a text-based -browser that runs quickly and easily in the terminal. Lynx allows me to -browser most websites by simply typing `g` and then typing in -the URL I want. +I am using [Lynx](https://lynx.invisible-island.net), a text-based browser that +runs quickly and easily in the terminal. Lynx allows me to browser most websites +by simply typing `g` and then typing in the URL I want. 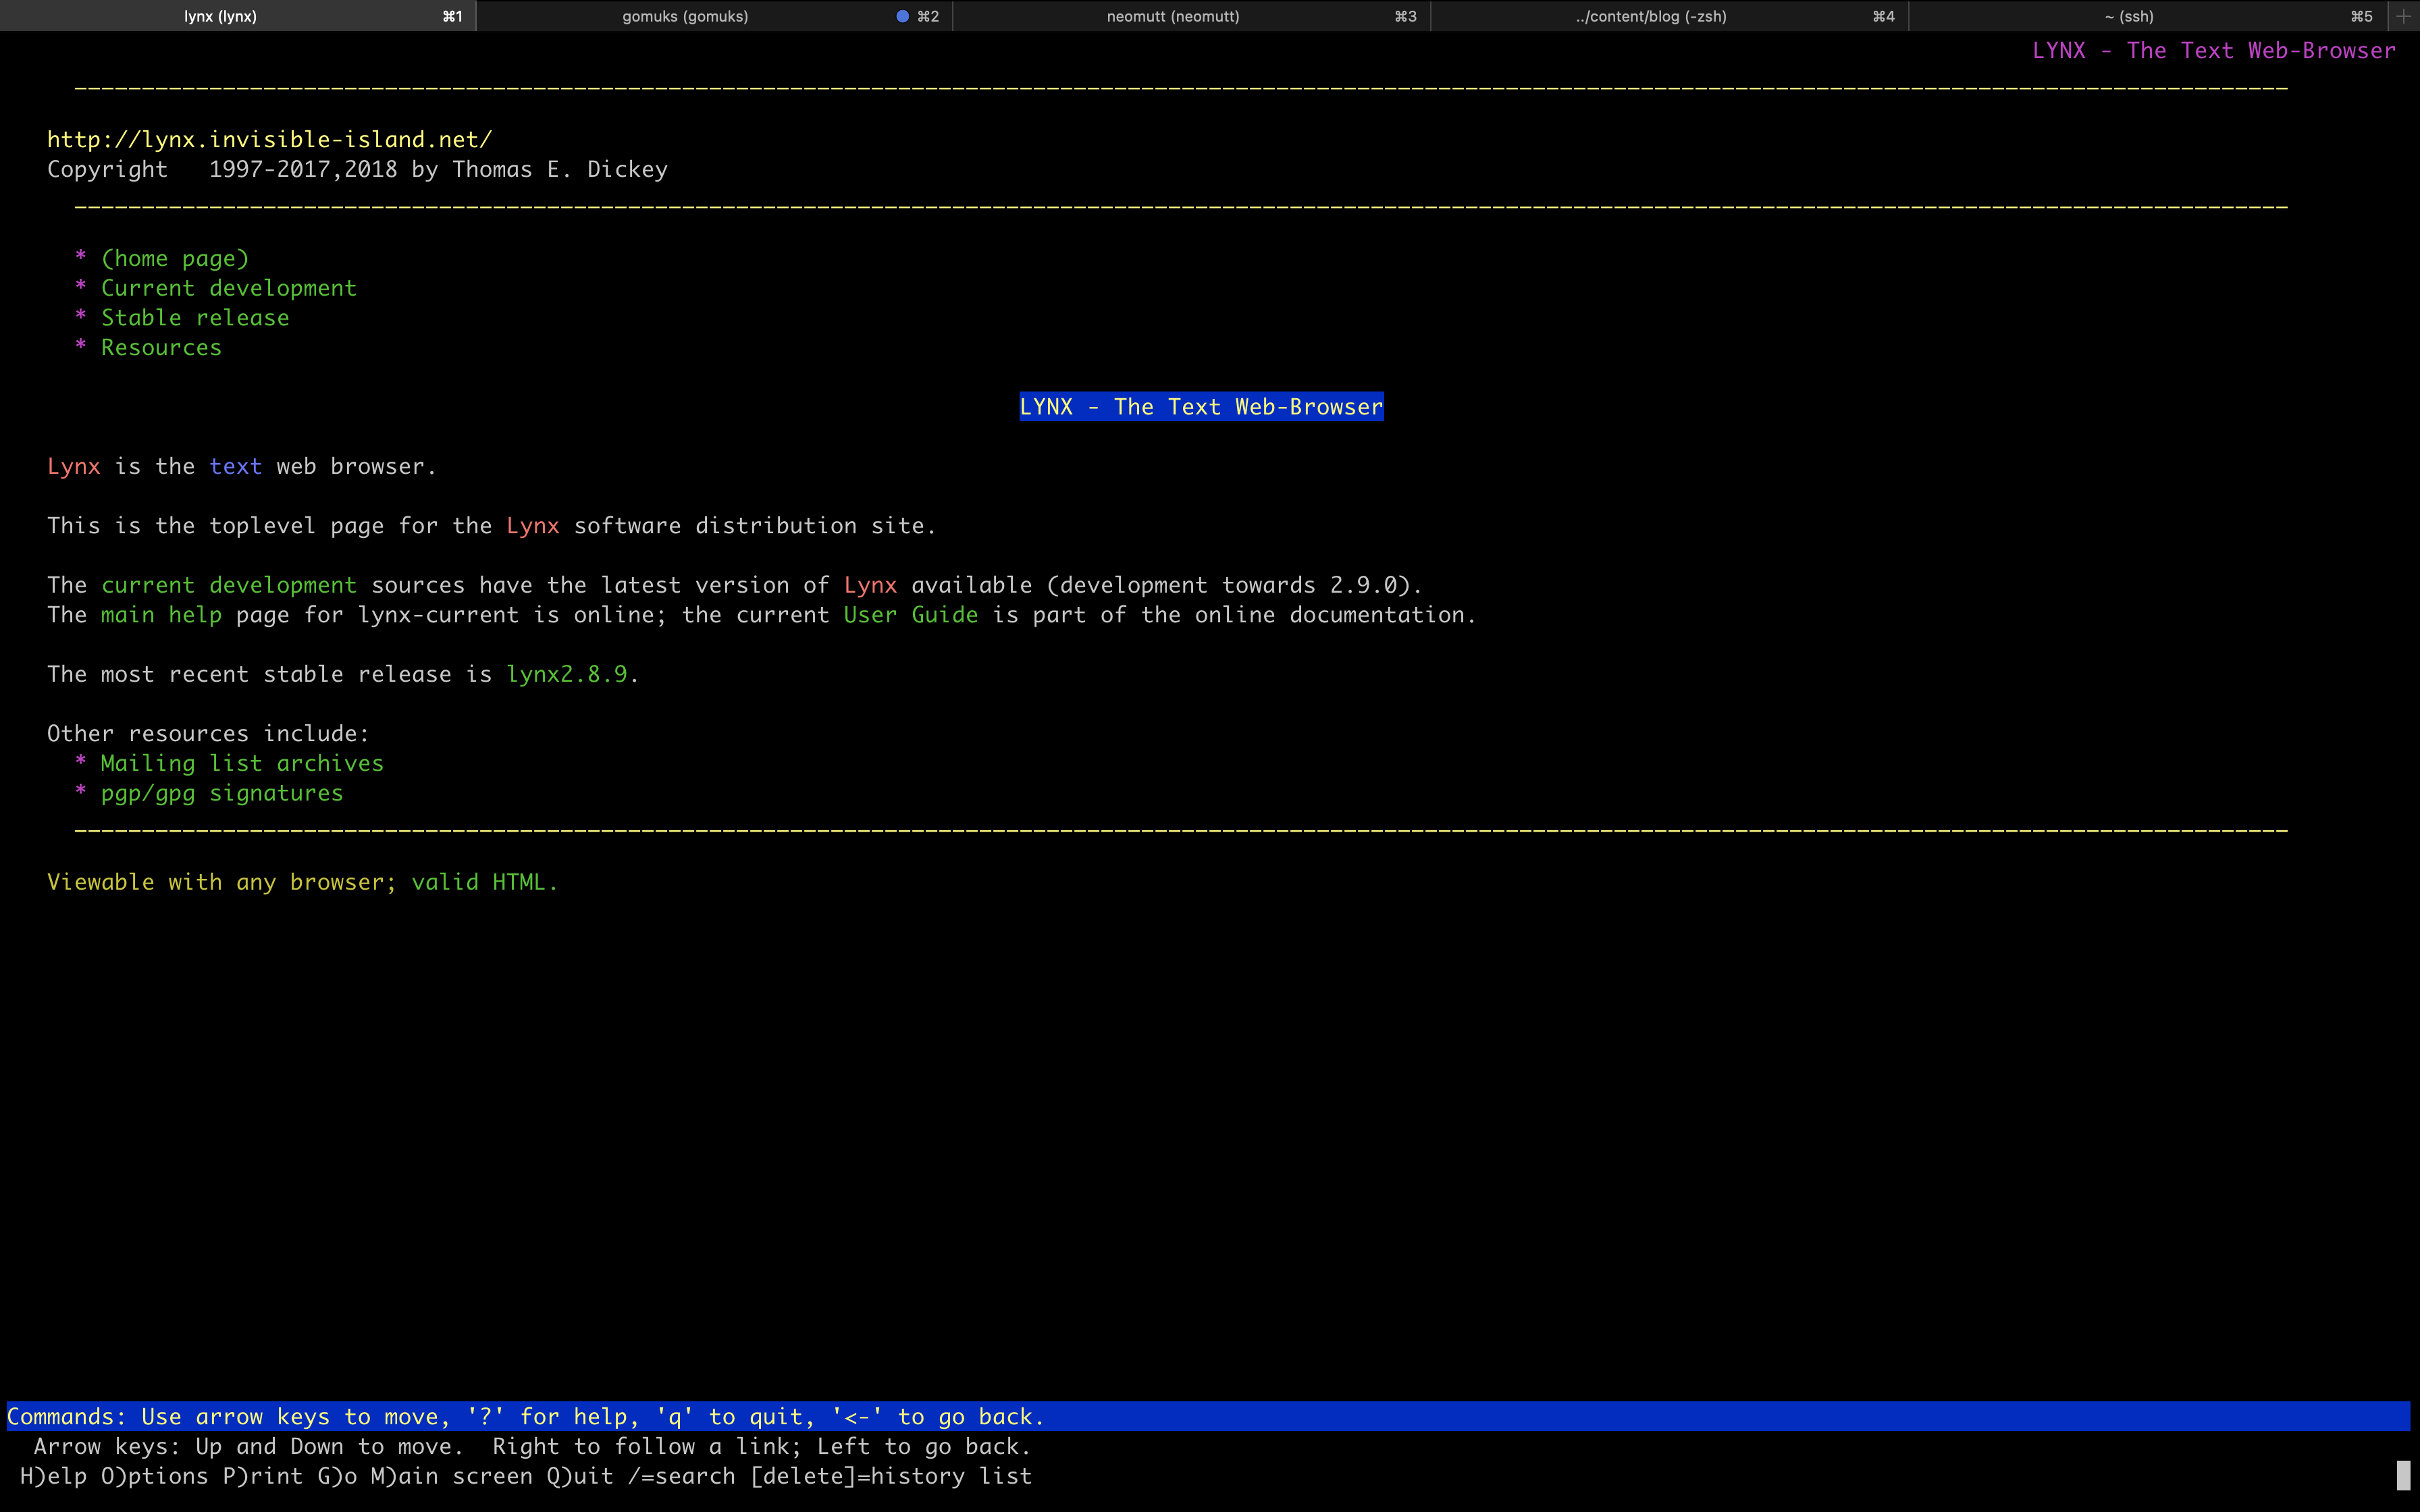 If you need a search engine while in Lynx, I recommend [DuckDuckGo -(Lite)](https://lite.duckduckgo.com/lite/), which allows you to search -the web using their text-only interface. +(Lite)](https://lite.duckduckgo.com/lite/), which allows you to search the web +using their text-only interface. 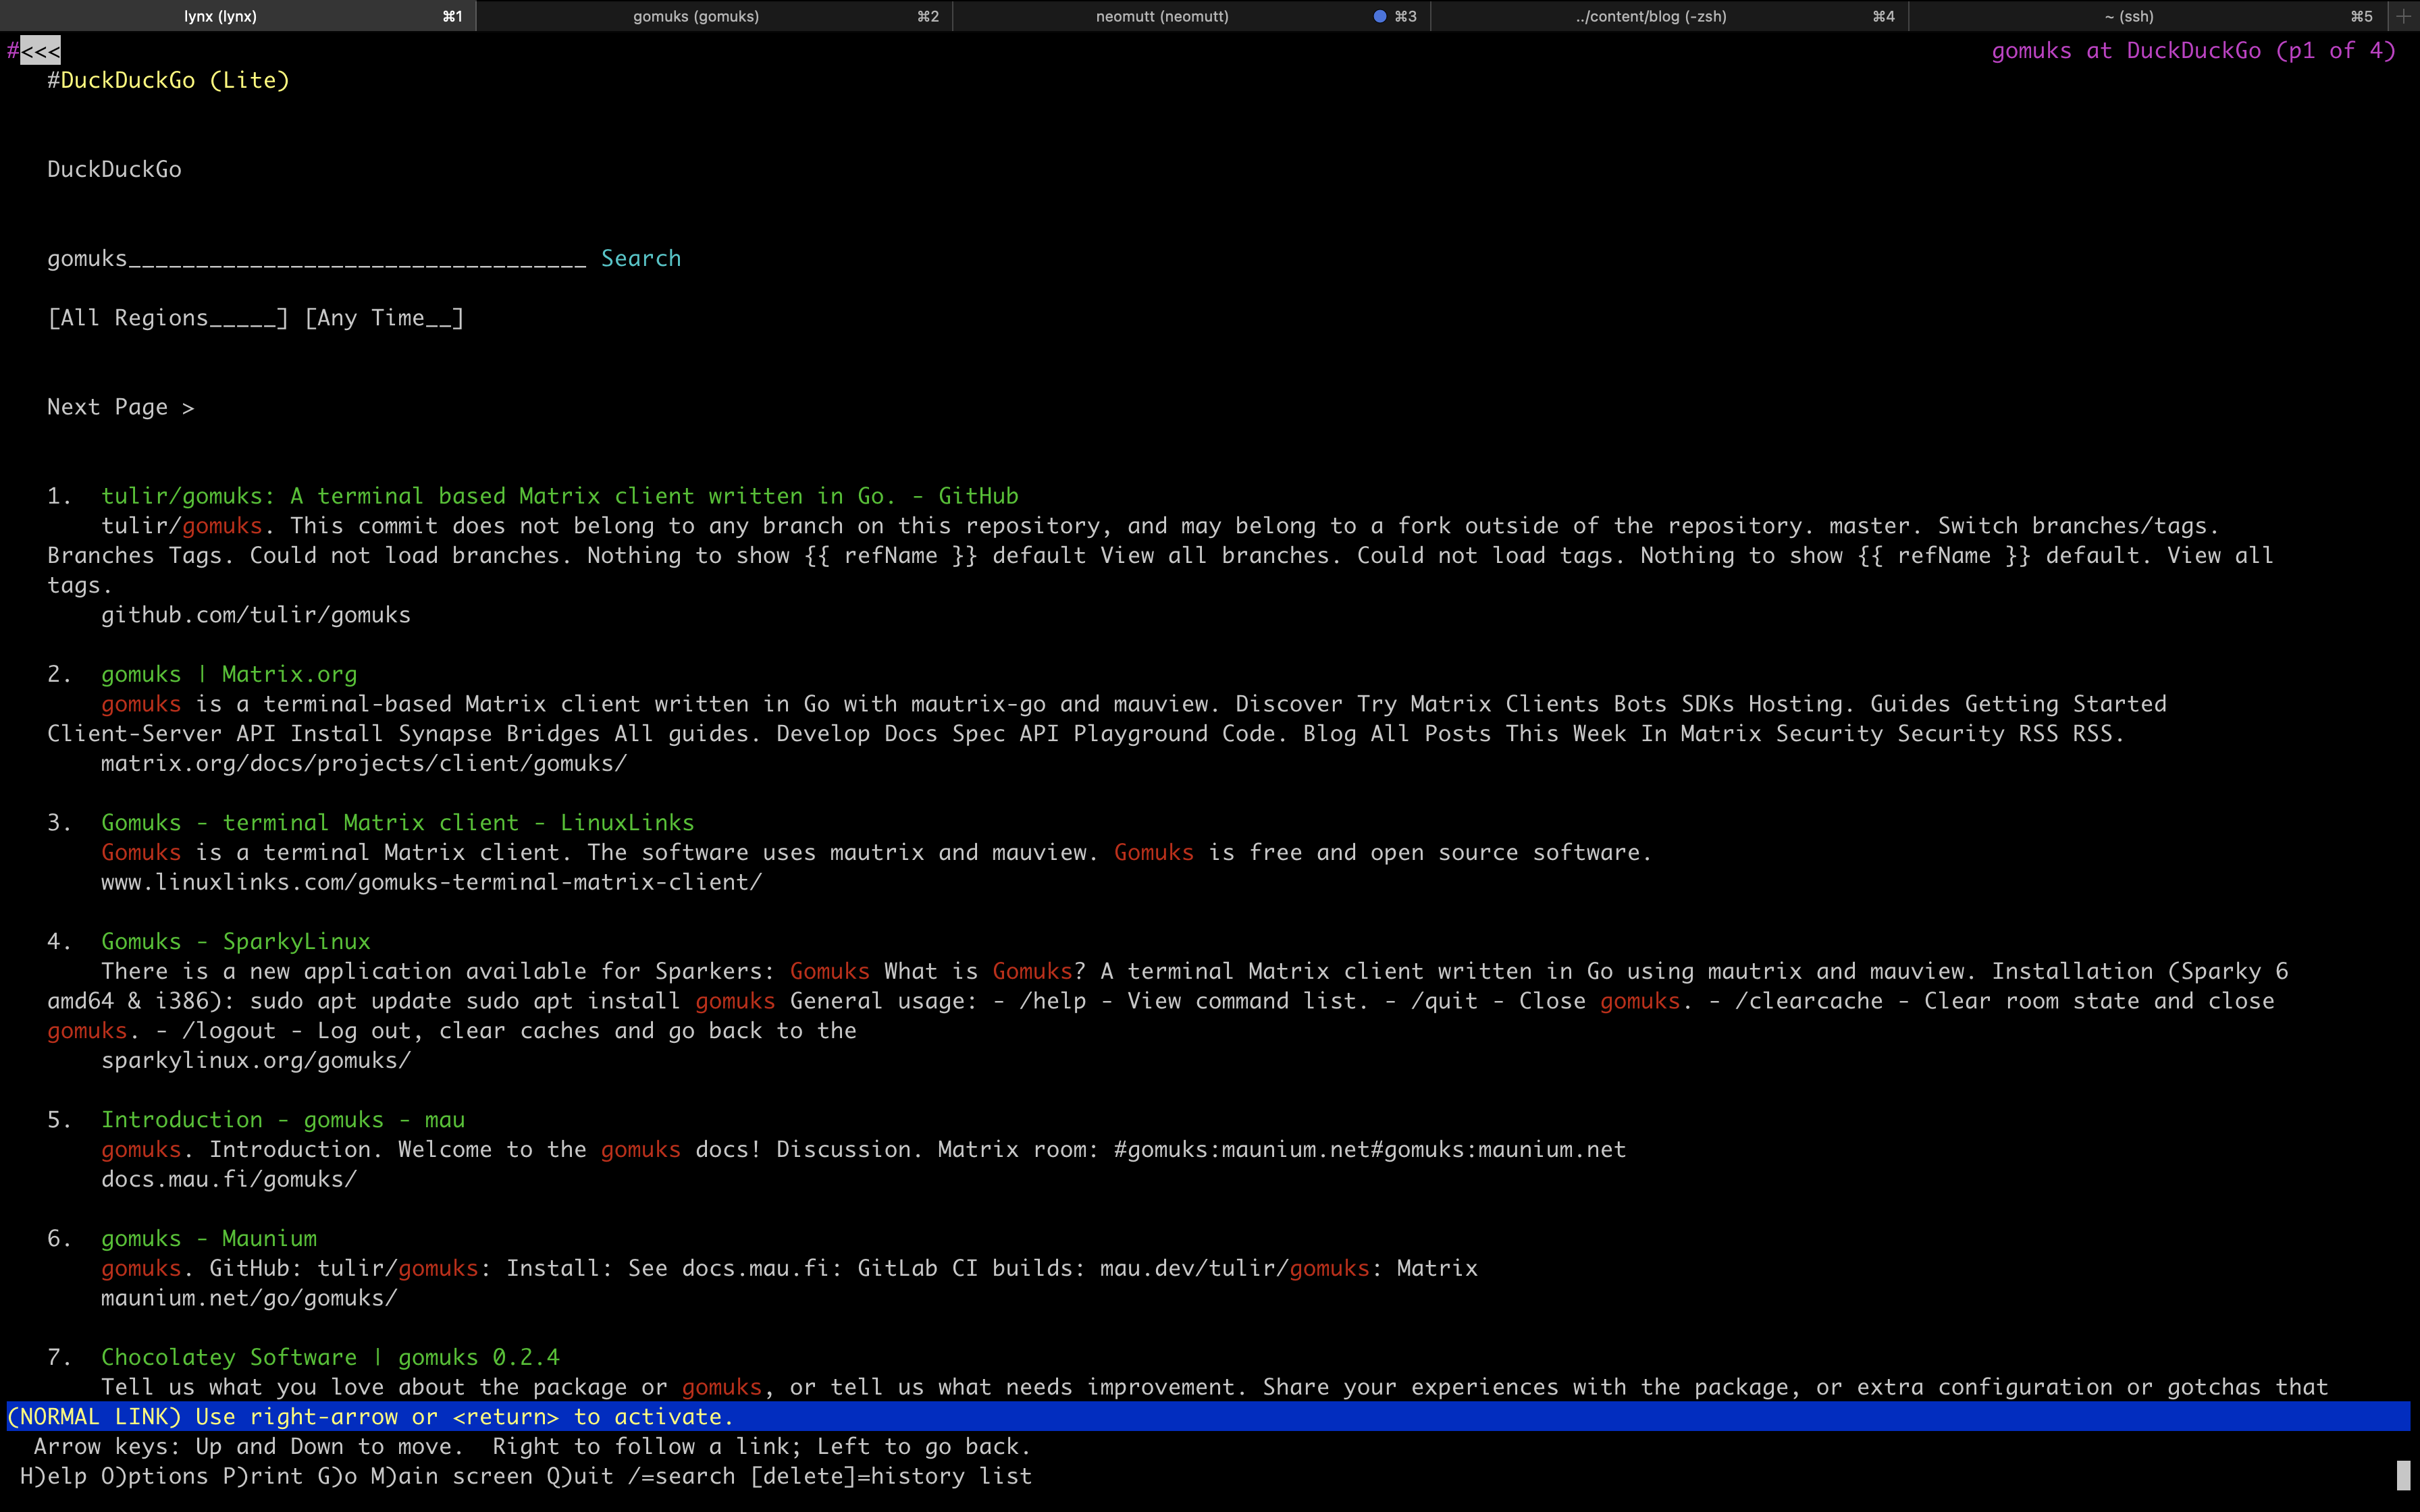 -Eventually, you will run into websites that don\'t work (or are just too -ugly and messy) in a text-only mode, and you\'ll be forced to switch -over to a GUI browser to look at that site. Personally, I don\'t mind -this as it doesn\'t happen as often as I thought it would. +Eventually, you will run into websites that don't work (or are just too ugly +and messy) in a text-only mode, and you'll be forced to switch over to a GUI +browser to look at that site. Personally, I don't mind this as it doesn't +happen as often as I thought it would. -The only time I need to do this is when I want to browse an -image/video-focused webpage or if I need to log in to a site, and it -doesn\'t support a text-only login page. For example, I am able to -easily log in to [Sourcehut](https://sr.ht) in lynx. +The only time I need to do this is when I want to browse an image/video-focused +webpage or if I need to log in to a site, and it doesn't support a text-only +login page. For example, I am able to easily log in to +[Sourcehut](https://sr.ht) in lynx. ## Chatting with Friends -After web browsing activities, my main form of terminal communication is -Matrix. I use the [gomuks](https://docs.mau.fi/gomuks/) client -currently. +After web browsing activities, my main form of terminal communication is Matrix. +I use the [gomuks](https://docs.mau.fi/gomuks/) client currently. -This was incredibly easy to install on macOS (but I will need to see if -it\'ll be just as easy on Linux when my new laptop arrives): +This was incredibly easy to install on macOS (but I will need to see if it'll +be just as easy on Linux when my new laptop arrives): ```sh brew install gomuks ``` -Once you launch gomuks, it will sync and require your username and -password to login. After doing so, the only problem I ran into was -verifying my gomuks client so that I could participate in rooms with -E2EE. +Once you launch gomuks, it will sync and require your username and password to +login. After doing so, the only problem I ran into was verifying my gomuks +client so that I could participate in rooms with E2EE. -Finally, I was able to verify the session by opening the Element desktop -app (I assume you can do this in the browser and mobile app too, but -I\'m not sure) and manually verifying myself with this process: +Finally, I was able to verify the session by opening the Element desktop app (I +assume you can do this in the browser and mobile app too, but I'm not sure) and +manually verifying myself with this process: -1. Open the Element desktop app -2. Open a room I was a member of -3. Open the `Room Info` pane -4. Open the `People` menu and search for myself -5. Click on my profile name -6. Click on the session link under the `Security` section - and follow the prompts to manually verify the session +1. Open the Element desktop app +2. Open a room I was a member of +3. Open the `Room Info` pane +4. Open the `People` menu and search for myself +5. Click on my profile name +6. Click on the session link under the `Security` section and follow the prompts + to manually verify the session -Overall, I like gomuks and am able to enjoy all the features I was using -in Element. The only hiccup I have occurred is manually downloading -images to view them, which can be annoying. +Overall, I like gomuks and am able to enjoy all the features I was using in +Element. The only hiccup I have occurred is manually downloading images to view +them, which can be annoying. 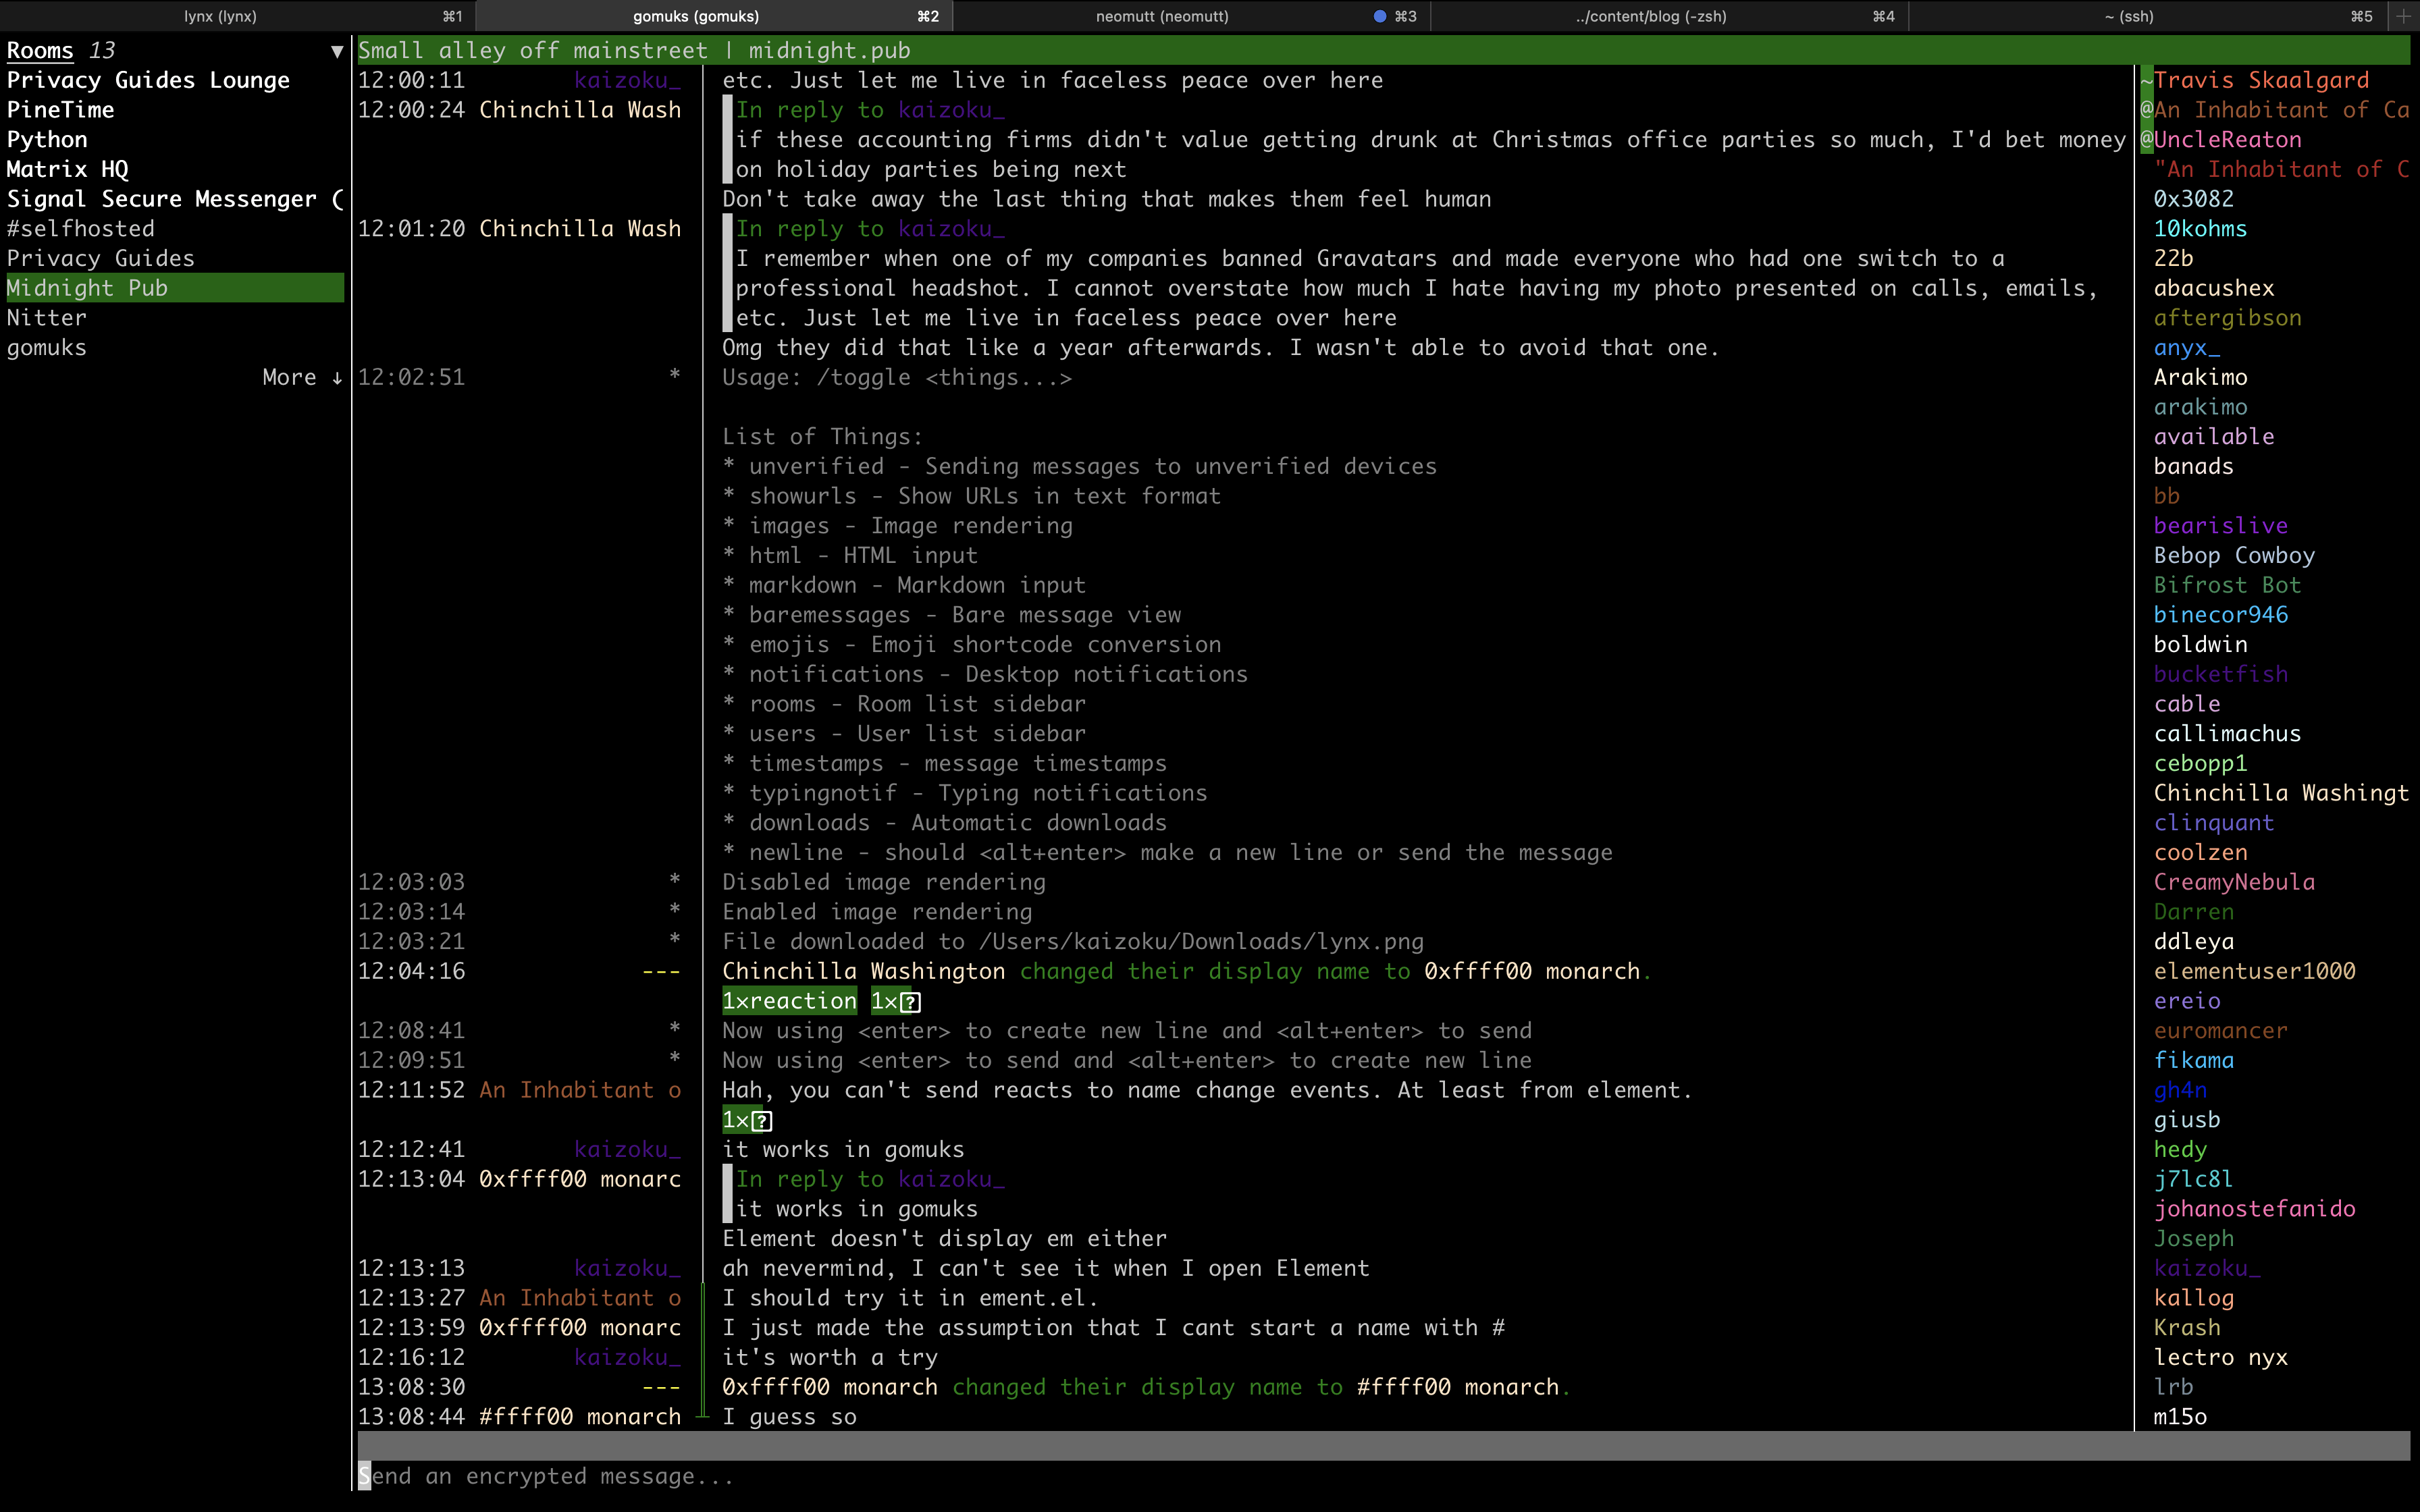 ## Email -Moving email to the terminal has been the hardest of the tasks for me. -Unlike web browsing, where I can simply decide to not look at a website -that does not work in the terminal, I cannot simply ignore emails sent -to me. +Moving email to the terminal has been the hardest of the tasks for me. Unlike +web browsing, where I can simply decide to not look at a website that does not +work in the terminal, I cannot simply ignore emails sent to me. Personally, I am experimenting with [neomutt](https://neomutt.org/) as a potential email client. -However, this requires a **TON\*** of configuration and tweaking to get -right. Even when I was able to set up neomutt, configure my email -account, and customize a few personal preferences, a lot of emails still -do not display correctly (mostly due to HTML and images). +However, this requires a **TON** of configuration and tweaking to get right. +Even when I was able to set up neomutt, configure my email account, and +customize a few personal preferences, a lot of emails still do not display +correctly (mostly due to HTML and images). -I won\'t get into the details of configuring `neomutt`; I -mostly followed this blog post: [Email in the Terminal: Configuring +I won't get into the details of configuring `neomutt`; I mostly followed this +blog post: [Email in the Terminal: Configuring Neomutt](https://gideonwolfe.com/posts/workflow/neomutt/intro/). -Finally, I have yet to figure out how to connect my GPG keys to -`neomutt`, but that\'s a problem for another day. +Finally, I have yet to figure out how to connect my GPG keys to `neomutt`, but +that's a problem for another day. ## RSS Feed Reader -I have just started using [Newsboat](https://newsboat.org/) to read -articles in my terminal and have found quick success with it. +I have just started using [Newsboat](https://newsboat.org/) to read articles in +my terminal and have found quick success with it. -I\'ll show you a quick screenshot first: +I'll show you a quick screenshot first:  -The configuration was super easy for this app; I simply installed the -app, created a file for URLs, and imported my OPML subscriptions that I -had exported out of my old feed reader: +The configuration was super easy for this app; I simply installed the app, +created a file for URLs, and imported my OPML subscriptions that I had exported +out of my old feed reader: ```sh brew install newsboat @@ -181,13 +171,12 @@ newsboat -i=my_subscriptions.opml ## Writing & Programming -Unfortunately, the weak link in my terminal-based environment right now -is my grasp of the possibilities of editing files within a shell. +Unfortunately, the weak link in my terminal-based environment right now is my +grasp of the possibilities of editing files within a shell. -I am used to the easy extensions found in VSCodium and Kate, so I am -slowly learning how to mold the default editing tools to my needs. -Currently, this means I am using `nano` with the following -configuration: +I am used to the easy extensions found in VSCodium and Kate, so I am slowly +learning how to mold the default editing tools to my needs. Currently, this +means I am using `nano` with the following configuration: ``` config set breaklonglines @@ -199,18 +188,16 @@ set fill 80 ``` This configuration allows nano to automatically hard-wrap lines at 80 -characters, autoindent the wrapped lines (if the previous line was -indented), use 2 spaces per tab, and display line numbers within each -file I open. - -I am currently looking to see if `vim` or `emacs` -would be more useful for my current needs, but I\'m not in any rush, so -I don\'t expect to find an answer anytime soon. - -With my current life demands, I am not programming at the moment and -have not explored the best terminal set-up for programming. However, I -have seen many peers find success configuring `vim` and -`emacs`, so that\'s where I will start when I pick my -projects back up. +characters, autoindent the wrapped lines (if the previous line was indented), +use 2 spaces per tab, and display line numbers within each file I open. + +I am currently looking to see if `vim` or `emacs` would be more useful for my +current needs, but I'm not in any rush, so I don't expect to find an answer +anytime soon. + +With my current life demands, I am not programming at the moment and have not +explored the best terminal set-up for programming. However, I have seen many +peers find success configuring `vim` and `emacs`, so that's where I will start +when I pick my projects back up. 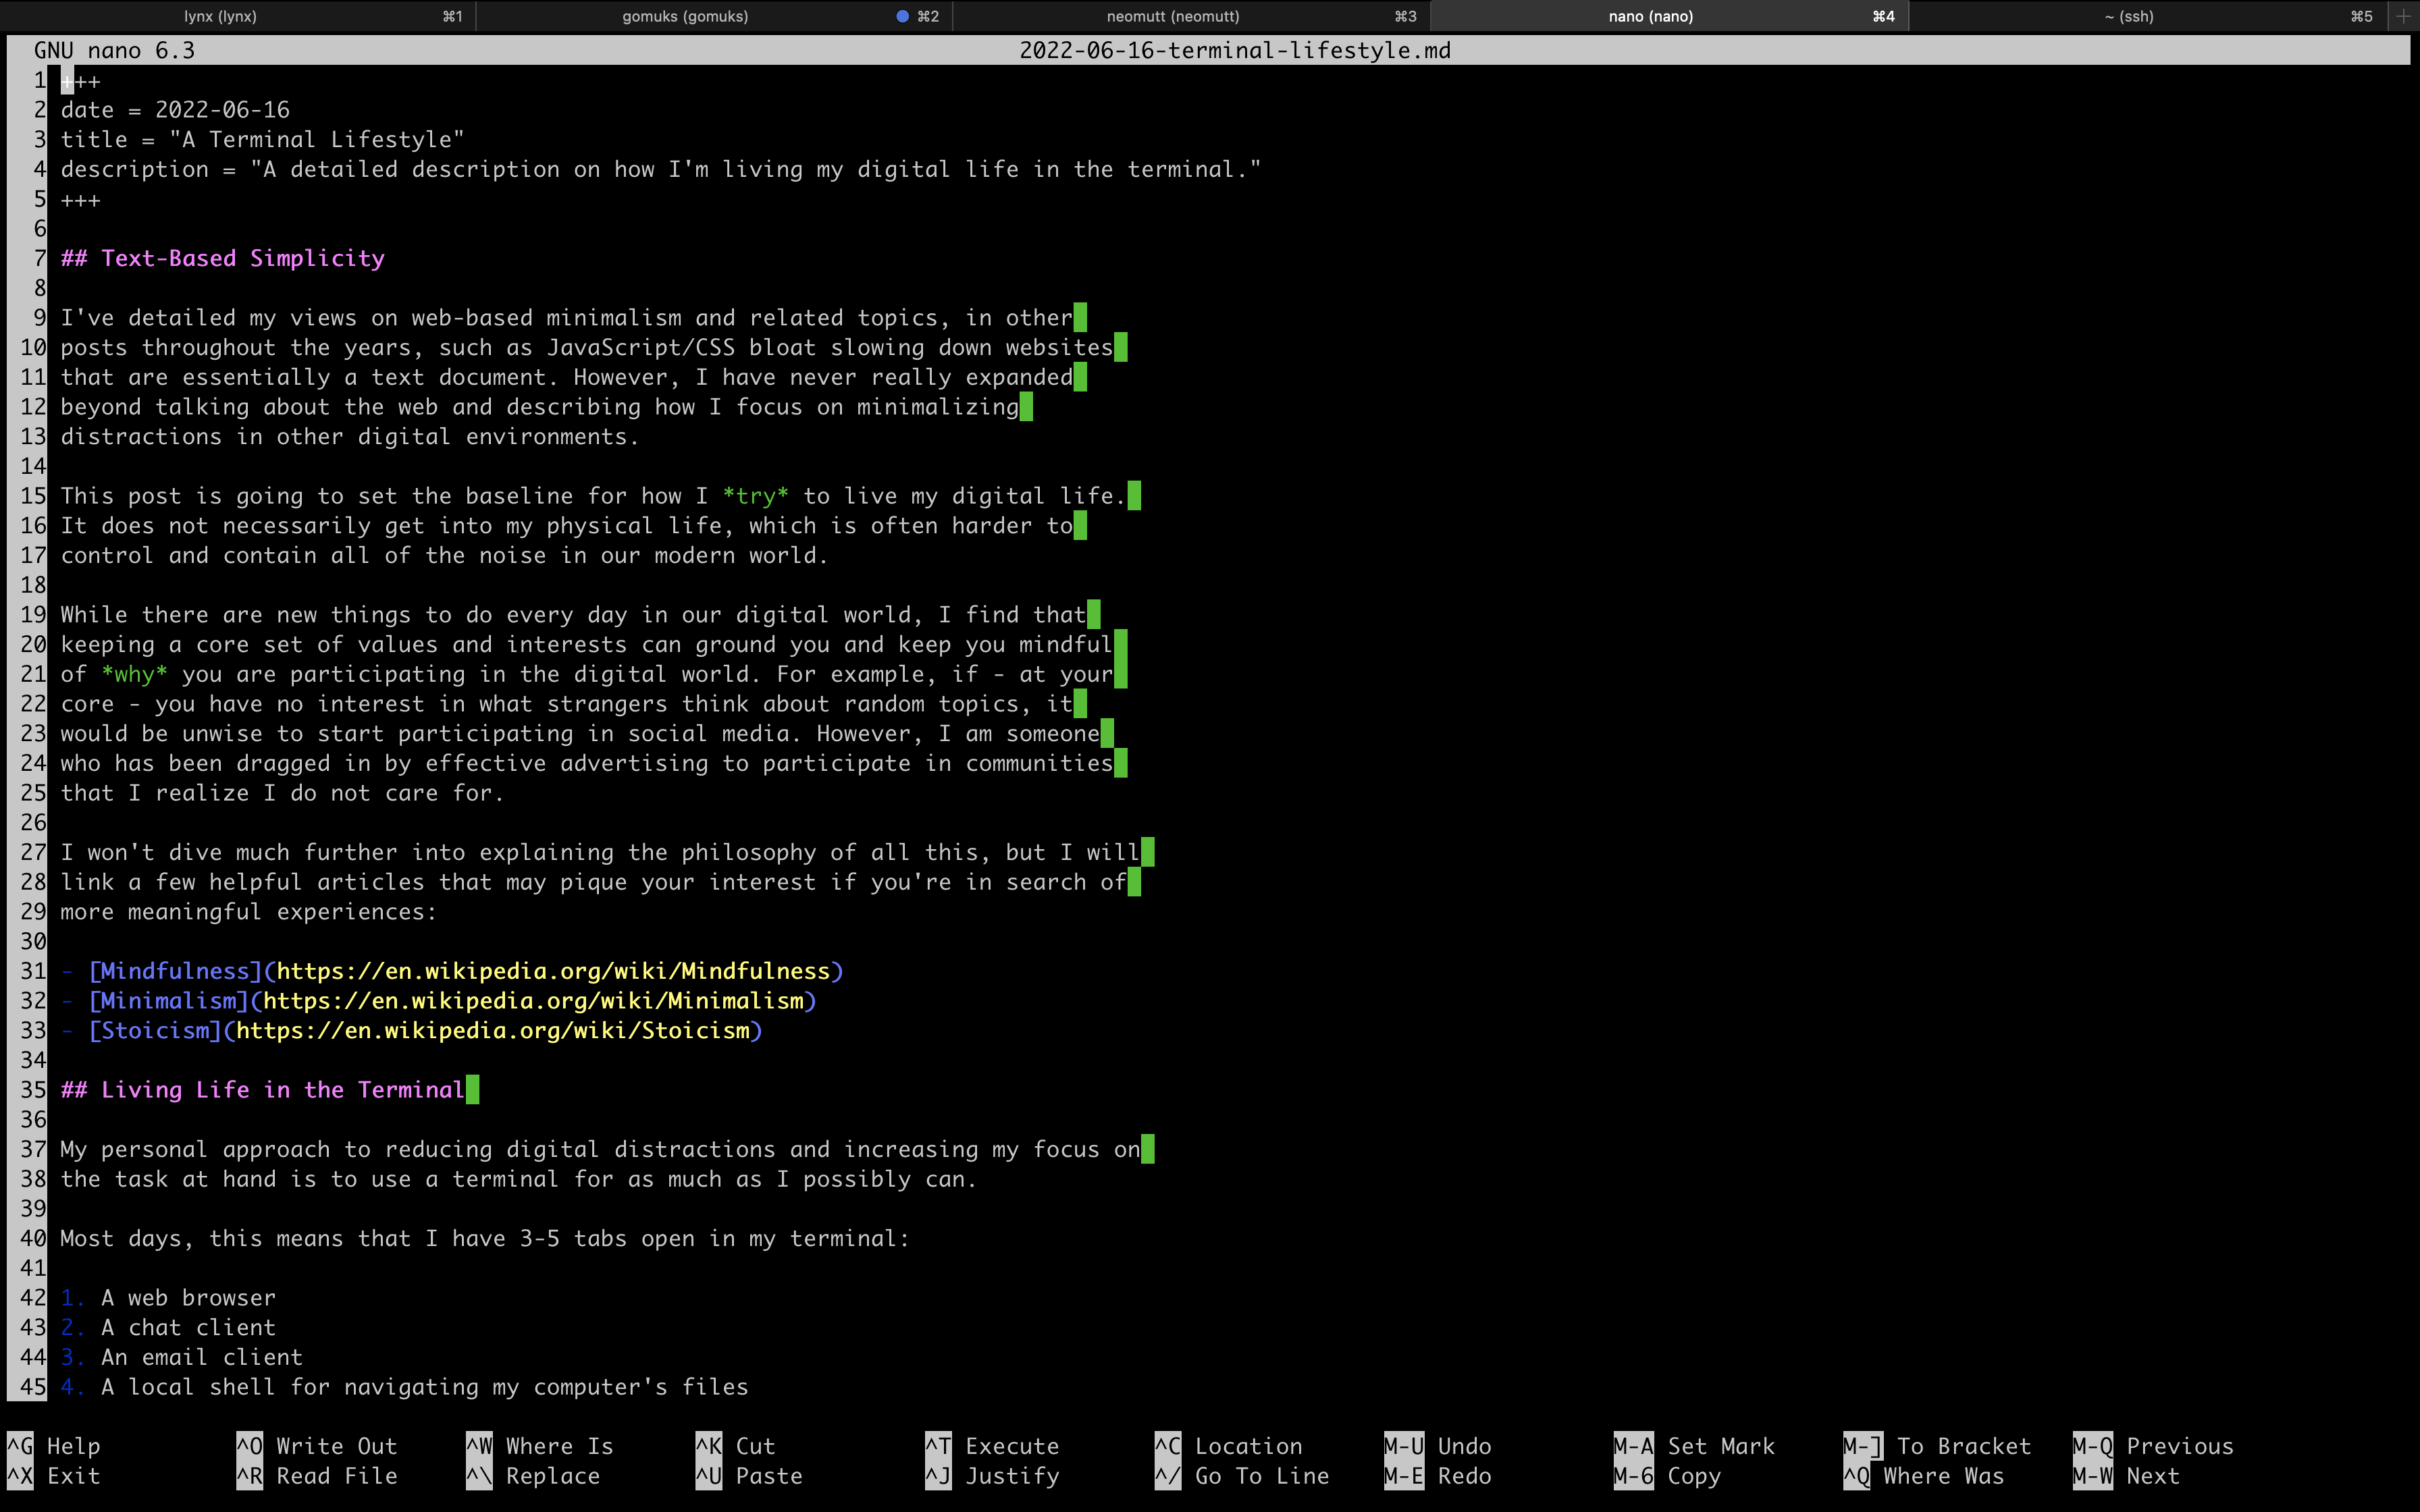 diff --git a/content/blog/2022-06-22-daily-poetry.md b/content/blog/2022-06-22-daily-poetry.md index e3a0fba..a687ce3 100644 --- a/content/blog/2022-06-22-daily-poetry.md +++ b/content/blog/2022-06-22-daily-poetry.md @@ -7,9 +7,8 @@ draft = false # Source Code -I don\'t want to bury the lede here, so if you\'d like to see the full -source code I use to email myself plaintext poems daily, visit the -repository: +I don't want to bury the lede here, so if you'd like to see the full source +code I use to email myself plaintext poems daily, visit the repository: [daily-poem.git](https://git.cleberg.net/?p=daily-poem.git;a=summary). # My Daily Dose of Poetry @@ -17,36 +16,35 @@ repository: Most of my programming projects are small, random projects that are made strictly to fix some small problem I have or enhance my quality of life. -In this case, I was looking for a simply and easy way to get a daily -dose of literature or poetry to read in the mornings. +In this case, I was looking for a simply and easy way to get a daily dose of +literature or poetry to read in the mornings. -However, I don\'t want to sign up for a random mailing list on just any -website. I also don\'t want to have to work to find the reading content -each morning, as I know I would simply give up and stop reading daily. +However, I don't want to sign up for a random mailing list on just any website. +I also don't want to have to work to find the reading content each morning, as +I know I would simply give up and stop reading daily. -Thus, I found a way to deliver poetry to myself in plain-text format, on -a daily basis, and scheduled to deliver automatically. +Thus, I found a way to deliver poetry to myself in plain-text format, on a daily +basis, and scheduled to deliver automatically. # Prerequisites -This solution uses Python and email, so the following process requires -the following to be installed: +This solution uses Python and email, so the following process requires the +following to be installed: -1. An SMTP server, which can be as easy as installing - `mailutils` if you\'re on a Debian-based distro. -2. Python (& pip!) -3. The following Python packages: `email`, - `smtplib`, `json`, and `requests` +1. An SMTP server, which can be as easy as installing `mailutils` if you're on + a Debian-based distro. +2. Python (& pip!) +3. The following Python packages: `email`, `smtplib`, `json`, and `requests` # Breaking Down the Logic -I want to break down the logic for this program, as it\'s quite simple -and informational. +I want to break down the logic for this program, as it's quite simple and +informational. ## Required Packages -This program starts with a simple import of the required packages, so I -wanted to explain why each package is used: +This program starts with a simple import of the required packages, so I wanted +to explain why each package is used: ``` python from email.mime.text import MIMEText # Required for translating MIMEText @@ -57,9 +55,9 @@ import requests # Required to send out a request to the API ## Sending the API Request -Next, we need to actually send the API request. In my case, I\'m calling -a random poem from the entire API. If you want, you can call specific -poems or authors from this API. +Next, we need to actually send the API request. In my case, I'm calling a +random poem from the entire API. If you want, you can call specific poems or +authors from this API. ``` python json_data = requests.get('https://poetrydb.org/random').json() @@ -97,24 +95,22 @@ This gives us the following result in JSON: ## Parsing the API Results -In order to parse this into a readable format, we need to use the -`json` package and extract the fields we want. In the example -below, I am grabbing every field presented by the API. +In order to parse this into a readable format, we need to use the `json` package +and extract the fields we want. In the example below, I am grabbing every field +presented by the API. -For the actual poem content, we need to loop over each line in the -`lines` variable since each line is a separate string by -default. +For the actual poem content, we need to loop over each line in the `lines` +variable since each line is a separate string by default. -> You *could* also extract the title or author and make another call out -> to the API to avoid having to build the plaintext poem with a loop, -> but it just doesn\'t make sense to me to send multiple requests when -> we can create a simple loop on our local machine to work with the data -> we already have. +> You *could* also extract the title or author and make another call out to the +> API to avoid having to build the plaintext poem with a loop, but it just +> doesn't make sense to me to send multiple requests when we can create a +> simple loop on our local machine to work with the data we already have. > > For > [example](https://poetrydb.org/title/Sonnet%20XXII:%20With%20Fools%20and%20Children/lines.text), -> look at the raw data response of this link to see the poem\'s lines -> returned in plaintext. +> look at the raw data response of this link to see the poem's lines returned +> in plaintext. ``` python title = json_data[0]['title'] @@ -127,21 +123,20 @@ for line in json_data[0]['lines']: ## Composing the Email -Now that I have all the data I need, I just need to compose it into a -message and prepare the message metadata. +Now that I have all the data I need, I just need to compose it into a message +and prepare the message metadata. -For my daily email, I want to see the title of the poem first, followed -by the author, then a blank line, and finally the full poem. This code -snippet combines that data and packages it into a MIMEText container, -ready to be emailed. +For my daily email, I want to see the title of the poem first, followed by the +author, then a blank line, and finally the full poem. This code snippet combines +that data and packages it into a MIMEText container, ready to be emailed. ``` python msg_body = title + "\n" + author + "\n\n" + lines msg = MIMEText(msg_body) ``` -Before we send the email, we need to prepare the metadata (subject, -from, to, etc.): +Before we send the email, we need to prepare the metadata (subject, from, to, +etc.): ``` python sender_email = 'example@server.local' @@ -153,10 +148,9 @@ msg['To'] = recipient_email ## Sending the Email -Now that I have everything ready to be emailed, the last step is to -simply connect to an SMTP server and send the email out to the -recipients. In my case, I installed `mailutils` on Ubuntu and -let my SMTP server be `localhost`. +Now that I have everything ready to be emailed, the last step is to simply +connect to an SMTP server and send the email out to the recipients. In my case, +I installed `mailutils` on Ubuntu and let my SMTP server be `localhost`. ``` python smtp_server = 'localhost' @@ -167,9 +161,8 @@ s.quit() # The Result! -Instead of including a screenshot, I\'ve copied the contents of the -email that was delivered to my inbox below since I set this process up -in plaintext format. +Instead of including a screenshot, I've copied the contents of the email that +was delivered to my inbox below since I set this process up in plaintext format. ``` txt Date: Wed, 22 Jun 2022 14:37:19 +0000 (UTC) @@ -201,18 +194,17 @@ Some, wise in show, more fools indeed than they. # Scheduling the Daily Email -Last, but not least, is scheduling this Python script with -`crontab`. To schedule a script to run daily, you can add it -to the `crontab` file. To do this, open `crontab` -in editing mode: +Last, but not least, is scheduling this Python script with `crontab`. To +schedule a script to run daily, you can add it to the `crontab` file. To do +this, open `crontab` in editing mode: ```sh crontab -e ``` -In the file, simply paste the following snippet at the bottom of the -file and ensure that the file path is correctly pointing to wherever you -saved your Python script: +In the file, simply paste the following snippet at the bottom of the file and +ensure that the file path is correctly pointing to wherever you saved your +Python script: ``` config 0 8 ** ** ** python3 /home/<your_user>/dailypoem/main.py diff --git a/content/blog/2022-06-24-fedora-i3.md b/content/blog/2022-06-24-fedora-i3.md index 35045c4..002ba1f 100644 --- a/content/blog/2022-06-24-fedora-i3.md +++ b/content/blog/2022-06-24-fedora-i3.md @@ -15,20 +15,19 @@ world of Linux again. My decision to leave macOS really came down to just a few important things: -- Apple Security (Gatekeeper) restricting me from running any software - I want. Even if you disable Gatekeeper and allow software to bypass - the rest of the device installation security, you still have to - repeat that process every time the allowed software is updated. -- macOS sends out nearly constant connections, pings, telemetry, etc. - to a myriad of mysterious Apple services. I\'m not even going to - dive into how many macOS apps have constant telemetry on, as well. -- Lastly, I just *really* missed the customization and freedom that - comes with Linux. Being able to switch to entirely new kernel, OS, - or desktop within minutes is a freedom I took for granted when I - switched to macOS. - -Now that I\'ve covered macOS, I\'m going to move on to more exciting -topics: my personal choice of OS, DE, and various customizations I\'m +- Apple Security (Gatekeeper) restricting me from running any software I want. + Even if you disable Gatekeeper and allow software to bypass the rest of the + device installation security, you still have to repeat that process every time + the allowed software is updated. +- macOS sends out nearly constant connections, pings, telemetry, etc. to a + myriad of mysterious Apple services. I'm not even going to dive into how many + macOS apps have constant telemetry on, as well. +- Lastly, I just *really* missed the customization and freedom that comes with + Linux. Being able to switch to entirely new kernel, OS, or desktop within + minutes is a freedom I took for granted when I switched to macOS. + +Now that I've covered macOS, I'm going to move on to more exciting +topics: my personal choice of OS, DE, and various customizations I'm using. # Fedora @@ -37,8 +36,8 @@ After trying a ton of distros (I think I booted and tested around 20-25 distros), I finally landed on [Fedora Linux](https://getfedora.org/). I have quite a bit of experience with Fedora and enjoy the `dnf` package manager. Fedora allows me to keep up-to-date -with recent software (I\'m looking at you, Debian), but still provides a -level of stability you don\'t find in every distro. +with recent software (I'm looking at you, Debian), but still provides a +level of stability you don't find in every distro. In a very close second place was Arch Linux, as well as its spin-off: Garuda Linux (Garuda w/ sway is *beautiful*). Arch is great for @@ -47,8 +46,8 @@ had the time to properly sit down and learn the methodology behind their packaging systems. Basically, everything else I tested was unacceptable in at least one way -or another. Void (`glibc`) was great, but doesn\'t support -all the software I need. Slackware worked well as a tui, but I wasn\'t +or another. Void (`glibc`) was great, but doesn't support +all the software I need. Slackware worked well as a tui, but I wasn't skilled enough to get a tiling window manager (WM) working on it. ## i3 @@ -57,7 +56,7 @@ One of the reasons I settled on Fedora is that it comes with an official i3 spin. Being able to use a tiling WM, such as i3 or sway, is one of the biggest things I wanted to do as soon as I adopted Linux again. -I will probably set up a dotfile repository soon, so that I don\'t lose +I will probably set up a dotfile repository soon, so that I don't lose any of my configurations, but nothing big has been configured thus far. The two main things I have updated in i3wm are natural scrolling and @@ -123,37 +122,37 @@ binding my brightness keys to the `brightnessctl` program. My config for this menu bar is basically just the default settings with modified colors and an added battery block to quickly show me - the machine\'s battery info. + the machine's battery info. 4. `alacritty` - Not much to say on this part yet, as I haven\'t configured it much, + Not much to say on this part yet, as I haven't configured it much, but I installed `alacritty` as my default terminal, and I am using `zsh` and the shell. # Software Choices -Again, I\'m not going to say much that I haven\'t said yet in other blog -posts, so I\'ll just do a quick rundown of the apps I installed +Again, I'm not going to say much that I haven't said yet in other blog +posts, so I'll just do a quick rundown of the apps I installed immediately after I set up the environment. Flatpak Apps: -- Cryptomator -- pCloud -- Signal +- Cryptomator +- pCloud +- Signal Fedora Packages: -- gomuks -- neomutt -- neofetch -- Firefox - - uBlock Origin - - Bitwarden - - Stylus - - Privacy Redirect +- gomuks +- neomutt +- neofetch +- Firefox + - uBlock Origin + - Bitwarden + - Stylus + - Privacy Redirect Other: -- exiftool +- exiftool diff --git a/content/blog/2022-07-01-git-server.md b/content/blog/2022-07-01-git-server.md index 61c4049..64a4a43 100644 --- a/content/blog/2022-07-01-git-server.md +++ b/content/blog/2022-07-01-git-server.md @@ -7,60 +7,54 @@ draft = false # My Approach to Self-Hosting Git -I have often tried to self-host my Git repositories, but have always -fallen short when I tried to find a suitable web interface to show on -the front-end. - -After a few years, I have finally found a combination of methods that -allow me to easily self-host my projects, view them on the web, and -access them from anywhere. - -Before I dive into the details, I want to state a high-level summary of -my self-hosted Git approach: - -- This method uses the `ssh://` (read & write) and - `git://` (read-only) protocols for push and pull access. - - For the `git://` protocol, I create a - `git-daemon-export-ok` file in any repository that I - want to be cloneable by anyone. - - The web interface I am using (`cgit`) allows simple - HTTP cloning by default. I do not disable this setting as I want - beginners to be able to clone one of my repositories even if - they don\'t know the proper method. -- I am not enabling Smart HTTPS for any repositories. Updates to - repositories must be pushed via SSH. -- Beyond the actual repository management, I am using - `cgit` for the front-end web interface. - - If you use the `scan-path=<path>` configuration in - the `cgitrc` configuration file to automatically find - repositories, you can\'t exclude a repository from - `cgit` if it\'s stored within the path that - `cgit` reads. To host private repositories, you\'d - need to set up another directory that `cgit` can\'t - read. +I have often tried to self-host my Git repositories, but have always fallen +short when I tried to find a suitable web interface to show on the front-end. + +After a few years, I have finally found a combination of methods that allow me +to easily self-host my projects, view them on the web, and access them from +anywhere. + +Before I dive into the details, I want to state a high-level summary of my +self-hosted Git approach: + +- This method uses the `ssh://` (read & write) and `git://` (read-only) + protocols for push and pull access. + - For the `git://` protocol, I create a `git-daemon-export-ok` file in any + repository that I want to be cloneable by anyone. + - The web interface I am using (`cgit`) allows simple HTTP cloning by default. + I do not disable this setting as I want beginners to be able to clone one of + my repositories even if they don't know the proper method. +- I am not enabling Smart HTTPS for any repositories. Updates to repositories + must be pushed via SSH. +- Beyond the actual repository management, I am using `cgit` for the front-end + web interface. + - If you use the `scan-path=<path>` configuration in the `cgitrc` + configuration file to automatically find repositories, you can't exclude a + repository from `cgit` if it's stored within the path that `cgit` reads. To + host private repositories, you'd need to set up another directory that + `cgit` can't read. # Assumptions For the purposes of this walkthrough, I am assuming you have a URL -(`git.example.com`) or IP address -(`207.84.26.991`) addressed to the server that you will be -using to host your git repositories. +(`git.example.com`) or IP address (`207.84.26.991`) addressed to the server that +you will be using to host your git repositories. # Adding a Git User -In order to use the SSH method associated with git, we will need to add -a user named `git`. If you have used the SSH method for other -git hosting sites, you are probably used to the following syntax: +In order to use the SSH method associated with git, we will need to add a user +named `git`. If you have used the SSH method for other git hosting sites, you +are probably used to the following syntax: ```sh git clone [user@]server:project.git ``` -The syntax above is an `scp`-like syntax for using SSH on the -`git` user on the server to access your repository. +The syntax above is an `scp`-like syntax for using SSH on the `git` user on the +server to access your repository. -Let\'s delete any remnants of an old `git` user, if any, and -create the new user account: +Let's delete any remnants of an old `git` user, if any, and create the new user +account: ```sh sudo deluser --remove-home git @@ -69,21 +63,19 @@ sudo adduser git ## Import Your SSH Keys to the Git User -Once the `git` user is created, you will need to copy your -public SSH key on your local development machine to the `git` -user on the server. +Once the `git` user is created, you will need to copy your public SSH key on +your local development machine to the `git` user on the server. -If you don\'t have an SSH key yet, create one with this command: +If you don't have an SSH key yet, create one with this command: ```sh ssh-keygen ``` -Once you create the key pair, the public should be saved to -`~/.ssh/id_rsa.pub`. +Once you create the key pair, the public should be saved to `~/.ssh/id_rsa.pub`. -If your server still has password-based authentication available, you -can copy it over to your user\'s home directory like this: +If your server still has password-based authentication available, you can copy +it over to your user's home directory like this: ```sh ssh-copy-id git@server @@ -95,8 +87,8 @@ Otherwise, copy it over to any user that you can access. scp ~/.ssh/id_rsa.pub your_user@your_server: ``` -Once on the server, you will need to copy the contents into the -`git` user\'s `authorized_keys` file: +Once on the server, you will need to copy the contents into the `git` user's +`authorized_keys` file: ```sh cat id_rsa.pub > /home/git/.ssh/authorized_keys @@ -104,16 +96,15 @@ cat id_rsa.pub > /home/git/.ssh/authorized_keys ## (Optional) Disable Password-Based SSH -If you want to lock down your server and ensure that no one can -authenticate in via SSH with a password, you will need to edit your SSH -configuration. +If you want to lock down your server and ensure that no one can authenticate in +via SSH with a password, you will need to edit your SSH configuration. ```sh sudo nano /etc/ssh/sshd_config ``` -Within this file, find the following settings and set them to the values -I am showing below: +Within this file, find the following settings and set them to the values I am +showing below: ``` conf PermitRootLogin no @@ -121,19 +112,17 @@ PasswordAuthentication no AuthenticationMethods publickey ``` -You may have other Authentication Methods required in your personal -set-up, so the key here is just to ensure that -`AuthenticationMethods` does not allow passwords. +You may have other Authentication Methods required in your personal set-up, so +the key here is just to ensure that `AuthenticationMethods` does not allow +passwords. ### Setting up the Base Directory -Now that we have set up a `git` user to handle all transport -methods, we need to set up the directory that we will be using as our -base of all repositories. +Now that we have set up a `git` user to handle all transport methods, we need to +set up the directory that we will be using as our base of all repositories. -In my case, I am using `/git` as my source folder. To create -this folder and assign it to the user we created, execute the following -commands: +In my case, I am using `/git` as my source folder. To create this folder and +assign it to the user we created, execute the following commands: ```sh sudo mkdir /git @@ -142,15 +131,15 @@ sudo chown -R git:git /git ### Creating a Test Repository -On your server, switch over to the `git` user in order to -start managing git files. +On your server, switch over to the `git` user in order to start managing git +files. ```sh su git ``` -Once logged-in as the `git` user, go to your base directory -and create a test repository. +Once logged-in as the `git` user, go to your base directory and create a test +repository. ```sh cd /git @@ -158,9 +147,9 @@ mkdir test.git && cd test.git git init --bare ``` -If you want to make this repo viewable/cloneable to the public via the -`git://` protocol, you need to create a -`git-daemon-export-ok` file inside the repository. +If you want to make this repo viewable/cloneable to the public via the `git://` +protocol, you need to create a `git-daemon-export-ok` file inside the +repository. ```sh touch git-daemon-export-ok @@ -168,34 +157,33 @@ touch git-daemon-export-ok # Change the Login Shell for `git` -To make sure that the `git` user is only used for git -operations and nothing else, you need to change the user\'s login shell. -To do this, simply use the `chsh` command: +To make sure that the `git` user is only used for git operations and nothing +else, you need to change the user's login shell. To do this, simply use the +`chsh` command: ```sh sudo chsh git ``` -The interactive prompt will ask which shell you want the -`git` user to use. You must use the following value: +The interactive prompt will ask which shell you want the `git` user to use. You +must use the following value: ```sh /usr/bin/git-shell ``` -Once done, no one will be able to SSH to the `git` user or -execute commands other than the standard git commands. +Once done, no one will be able to SSH to the `git` user or execute commands +other than the standard git commands. # Opening the Firewall -Don\'t forget to open up ports on the device firewall and network -firewall if you want to access these repositories publicly. If you\'re -using default ports, forward ports `22` (ssh) and -`9418` (git) from your router to your server\'s IP address. +Don't forget to open up ports on the device firewall and network firewall if +you want to access these repositories publicly. If you're using default ports, +forward ports `22` (ssh) and `9418` (git) from your router to your server's IP +address. -If your server also has a firewall, ensure that the firewall allows the -same ports that are forwarded from the router. For example, if you use -`ufw`: +If your server also has a firewall, ensure that the firewall allows the same +ports that are forwarded from the router. For example, if you use `ufw`: ```sh sudo ufw allow 22 @@ -204,12 +192,12 @@ sudo ufw allow 9418 ## Non-Standard SSH Ports -If you use a non-standard port for SSH, such as `9876`, you -will need to create an SSH configuration file on your local development -machine in order to connect to your server\'s git repositories. +If you use a non-standard port for SSH, such as `9876`, you will need to create +an SSH configuration file on your local development machine in order to connect +to your server's git repositories. -To do this, you\'ll need to define your custom port on your client -machine in your `~/.ssh/config` file: +To do this, you'll need to define your custom port on your client machine in +your `~/.ssh/config` file: ```sh nano ~/.ssh/config @@ -227,11 +215,11 @@ Host git.example.com There are two main syntaxes you can use to manage git over SSH: -- `git clone [user@]server:project.git` -- `git clone ssh://[user@]server/project.git` +- `git clone [user@]server:project.git` +- `git clone ssh://[user@]server/project.git` -I prefer the first, which is an `scp`-like syntax. To test -it, try to clone the test repository you set up on the server: +I prefer the first, which is an `scp`-like syntax. To test it, try to clone the +test repository you set up on the server: ```sh git clone git@git.example.com:/git/test.git @@ -239,9 +227,8 @@ git clone git@git.example.com:/git/test.git # Enabling Read-Only Access -If you want people to be able to clone any repository where you\'ve -placed a `git-daemon-export-ok` file, you will need to start -the git daemon. +If you want people to be able to clone any repository where you've placed a +`git-daemon-export-ok` file, you will need to start the git daemon. To do this on a system with `systemd`, create a service file: @@ -279,8 +266,7 @@ sudo systemctl enable git-daemon.service sudo systemctl start git-daemon.service ``` -To clone read-only via the `git://` protocol, you can use the -following syntax: +To clone read-only via the `git://` protocol, you can use the following syntax: ```sh git clone git://git.example.com/test.git @@ -291,9 +277,9 @@ git clone git://git.example.com/test.git At this point, we have a working git server that works with both SSH and read-only access. -For each of the repositories I had hosted a different provider, I -executed the following commands in order to place a copy on my server as -my new source of truth: +For each of the repositories I had hosted a different provider, I executed the +following commands in order to place a copy on my server as my new source of +truth: Server: @@ -316,23 +302,20 @@ git push # Optional Web View: `cgit` -If you want a web viewer for your repositories, you can use various -tools, such as `gitweb`, `cgit`, or -`klaus`. I chose `cgit` due to its simple -interface and fairly easy set-up (compared to others). Not to mention -that the [Linux kernel uses `cgit`](https://git.kernel.org/). +If you want a web viewer for your repositories, you can use various tools, such +as `gitweb`, `cgit`, or `klaus`. I chose `cgit` due to its simple interface and +fairly easy set-up (compared to others). Not to mention that the [Linux kernel +uses `cgit`](https://git.kernel.org/). ## Docker Compose -Instead of using my previous method of using a `docker run` -command, I\'ve updated this section to use `docker-compose` -instead for an easier installation and simpler management and -configuration. +Instead of using my previous method of using a `docker run` command, I've +updated this section to use `docker-compose` instead for an easier installation +and simpler management and configuration. -In order to use Docker Compose, you will set up a -`docker-compose.yml` file to automatically connect resources -like the repositories, `cgitrc`, and various files or folders -to the `cgit` container you\'re creating: +In order to use Docker Compose, you will set up a `docker-compose.yml` file to +automatically connect resources like the repositories, `cgitrc`, and various +files or folders to the `cgit` container you're creating: ```sh mkdir ~/cgit && cd ~/cgit @@ -363,17 +346,16 @@ Then, just start the container: sudo docker-compose up -d ``` -Once it\'s finished installing, you can access the site at -`<SERVER_IP>:8763` or use a reverse-proxy service to forward -`cgit` to a URL, such as `git.example.com`. See -the next section for more details on reverse proxying a URL to a local -port. +Once it's finished installing, you can access the site at `<SERVER_IP>:8763` or +use a reverse-proxy service to forward `cgit` to a URL, such as +`git.example.com`. See the next section for more details on reverse proxying a +URL to a local port. ## Nginx Reverse Proxy -I am using Nginx as my reverse proxy so that the `cgit` -Docker container can use `git.example.com` as its URL. To do -so, I simply created the following configuration file: +I am using Nginx as my reverse proxy so that the `cgit` Docker container can use +`git.example.com` as its URL. To do so, I simply created the following +configuration file: ```sh sudo nano /etc/nginx/sites-available/git.example.com @@ -422,29 +404,26 @@ sudo ln -s /etc/nginx/sites-available/git.example.com /etc/nginx/sites-enabled/ sudo systemctl restart nginx.service ``` -As we can see below, my site at `git.example.com` is -available and running: +As we can see below, my site at `git.example.com` is available and running: ## Settings Up Git Details -Once you have `cgit` running, you can add some small details, -such as repository owners and descriptions by editing the following -files within each repository. +Once you have `cgit` running, you can add some small details, such as repository +owners and descriptions by editing the following files within each repository. -Alternatively, you can use the `cgitrc` file to edit these -details if you only care to edit them for the purpose of seeing them on -your website. +Alternatively, you can use the `cgitrc` file to edit these details if you only +care to edit them for the purpose of seeing them on your website. -The `description` file within the repository on your server -will display the description online. +The `description` file within the repository on your server will display the +description online. ```sh cd /git/example.git nano description ``` -You can add a `[gitweb]` block to the `config` -file in order to display the owner of the repository. +You can add a `[gitweb]` block to the `config` file in order to display the +owner of the repository. ```sh cd /git/example.git @@ -456,21 +435,20 @@ nano config owner = "YourName" ``` -Note that you can ignore the configuration within each repository and -simply set up this information in the `cgitrc` file, if you -want to do it that way. +Note that you can ignore the configuration within each repository and simply set +up this information in the `cgitrc` file, if you want to do it that way. ## Editing `cgit` -In order to edit certain items within `cgit`, you need to -edit the `cgitrc` file. +In order to edit certain items within `cgit`, you need to edit the `cgitrc` +file. ```sh nano ~/cgit/cgitrc ``` -Below is an example configuration for `cgitrc`. You can find -all the configuration options within the \[configuration manual\] +Below is an example configuration for `cgitrc`. You can find all the +configuration options within the [configuration manual] (<https://git.zx2c4.com/cgit/plain/cgitrc.5.txt>). ``` conf @@ -549,17 +527,14 @@ repo.desc=An example repository! ## Final Fixes: Syntax Highlighting & README Rendering -After completing my initial install and playing around with it for a few -days, I noticed two issues: +After completing my initial install and playing around with it for a few days, I +noticed two issues: -1. Syntax highlighting did not work when viewing the source code within - a file. -2. The `about` tab within a repository was not rendered to - HTML. +1. Syntax highlighting did not work when viewing the source code within a file. +2. The `about` tab within a repository was not rendered to HTML. -The following process fixes these issues. To start, let\'s go to the -`cgit` directory where we were editing our configuration file -earlier. +The following process fixes these issues. To start, let's go to the `cgit` +directory where we were editing our configuration file earlier. ```sh cd ~/cgit @@ -589,15 +564,13 @@ curl https://git.zx2c4.com/cgit/plain/filters/html-converters/md2html > md2html chmod 755 md2html ``` -If you need other filters or html-converters found within [the cgit -project files](https://git.zx2c4.com/cgit/tree/filters), repeat the -`curl` and `chmod` process above for whichever -files you need. +If you need other filters or html-converters found within [the cgit project +files](https://git.zx2c4.com/cgit/tree/filters), repeat the `curl` and `chmod` +process above for whichever files you need. -However, formatting will not work quite yet since the Docker cgit -container we\'re using doesn\'t have the formatting package installed. -You can install this easily by install Python 3+ and the -`pygments` package: +However, formatting will not work quite yet since the Docker cgit container +we're using doesn't have the formatting package installed. You can install +this easily by install Python 3+ and the `pygments` package: ```sh # Enter the container's command line @@ -613,13 +586,11 @@ pip3 install markdown pygments && \ exit ``` -**You will need to enter the cgit docker container and re-run these -`yum` commands every time you kill and restart the -container!** +**You will need to enter the cgit docker container and re-run these `yum` +commands every time you kill and restart the container!** -If not done already, we need to add the following variables to our -`cgitrc` file in order for `cgit` to know where -our filtering files are: +If not done already, we need to add the following variables to our `cgitrc` file +in order for `cgit` to know where our filtering files are: ``` conf # Highlight source code with python pygments-based highlighter @@ -630,26 +601,24 @@ source-filter=/var/www/htdocs/cgit/filters/syntax-highlighting.py about-filter=/var/www/htdocs/cgit/filters/about-formatting.sh ``` -Now you should see that syntax highlighting and README rendering to the -`about` tab is fixed. +Now you should see that syntax highlighting and README rendering to the `about` +tab is fixed. ## Theming -I won\'t go into much detail in this section, but you can fully theme -your installation of `cgit` since you have access to the -`cgit.css` file in your web root. This is another file you -can add as a volume to the `docker-compose.yml` file if you -want to edit this without entering the container\'s command line. +I won't go into much detail in this section, but you can fully theme your +installation of `cgit` since you have access to the `cgit.css` file in your web +root. This is another file you can add as a volume to the `docker-compose.yml` +file if you want to edit this without entering the container's command line. ### :warning: Remember to Back Up Your Data! -The last thing to note is that running services on your own equipment -means that you\'re assuming a level of risk that exists regarding data -loss, catastrophes, etc. In order to reduce the impact of any such -occurrence, I suggest backing up your data regularly. +The last thing to note is that running services on your own equipment means that +you're assuming a level of risk that exists regarding data loss, catastrophes, +etc. In order to reduce the impact of any such occurrence, I suggest backing up +your data regularly. -Backups can be automated via `cron`, by hooking your base -directory up to a cloud provider, or even setting up hooks to push all -repository info to git mirrors on other git hosts. Whatever the method, -make sure that your data doesn\'t vanish in the event that your drives -or servers fail. +Backups can be automated via `cron`, by hooking your base directory up to a +cloud provider, or even setting up hooks to push all repository info to git +mirrors on other git hosts. Whatever the method, make sure that your data +doesn't vanish in the event that your drives or servers fail. diff --git a/content/blog/2022-07-14-gnupg.md b/content/blog/2022-07-14-gnupg.md index 9bd2e19..8daba99 100644 --- a/content/blog/2022-07-14-gnupg.md +++ b/content/blog/2022-07-14-gnupg.md @@ -7,33 +7,31 @@ draft = false # The History of GPG -[GNU Privacy Guard](https://gnupg.org/), also known as GnuPG and GPG, is -a free (\"free\" as in both speech and beer) software that fully -implements the OpenPGP Message Format documented in [RFC -4880](https://www.rfc-editor.org/rfc/rfc4880). +[GNU Privacy Guard](https://gnupg.org/), also known as GnuPG and GPG, is a free +("free" as in both speech and beer) software that fully implements the OpenPGP +Message Format documented in [RFC 4880](https://www.rfc-editor.org/rfc/rfc4880). -I won\'t go in-depth on the full history of the software in this post, -but it is important to understand that GPG is not the same as PGP -(Pretty Good Privacy), which is a different implementation of RFC 4880. -However, GPG was designed to interoperate with PGP. +I won't go in-depth on the full history of the software in this post, but it is +important to understand that GPG is not the same as PGP (Pretty Good Privacy), +which is a different implementation of RFC 4880. However, GPG was designed to +interoperate with PGP. GPG was originally developed in the late 1990s by [Werner -Koch](https://en.wikipedia.org/wiki/Werner_Koch) and has historically -been funded generously by the German government. +Koch](https://en.wikipedia.org/wiki/Werner_Koch) and has historically been +funded generously by the German government. -Now that we have all the high-level info out of the way, let\'s dive -into the different aspects of GPG and its uses. +Now that we have all the high-level info out of the way, let's dive into the +different aspects of GPG and its uses. # Encryption Algorithms GPG supports a wide range of different encryption algorithms, including -public-key, cipher, hash, and compression algorithms. The support for -these algorithms has grown since the adoption of the Libgcrypt library -in the 2.x versions of GPG. +public-key, cipher, hash, and compression algorithms. The support for these +algorithms has grown since the adoption of the Libgcrypt library in the 2.x +versions of GPG. -As you will be able to see below in an example of a full key generation -with the GPG command line tool, GPG recommends the following algorithms -to new users: +As you will be able to see below in an example of a full key generation with the +GPG command line tool, GPG recommends the following algorithms to new users: ```sh Please select what kind of key you want: @@ -45,77 +43,71 @@ Please select what kind of key you want: (10) ECC (sign only) ``` -I am not doing an in-depth explanation here in order to keep the focus -on GPG and not encryption algorithms. If you want a deep dive into -cryptography or encryption algorithms, please read my other posts: +I am not doing an in-depth explanation here in order to keep the focus on GPG +and not encryption algorithms. If you want a deep dive into cryptography or +encryption algorithms, please read my other posts: -- [AES Encryption](../aes-encryption/) (2018) -- [Cryptography Basics](../cryptography-basics/) (2020) +- [AES Encryption](../aes-encryption/) (2018) +- [Cryptography Basics](../cryptography-basics/) (2020) ## Vulnerabilities -As of 2022-07-14, there are a few different vulnerabilities associated -with GPG or the libraries it uses: - -- GPG versions 1.0.2--1.2.3 contains a bug where \"as soon as one - (GPG-generated) ElGamal signature of an arbitrary message is - released, one can recover the signer\'s private key in less than a - second on a PC.\" - ([Source](https://www.di.ens.fr/~pnguyen/pub_Ng04.htm)) -- GPG versions prior to 1.4.2.1 contain a false positive signature - verification bug. - ([Source](https://lists.gnupg.%20org/pipermail/gnupg-announce/2006q1/000211.html)) -- GPG versions prior to 1.4.2.2 cannot detect injection of unsigned - data. ( - [Source](https://lists.gnupg.org/pipermail/gnupg-announce/2006q1/000218.html)) -- Libgcrypt, a library used by GPG, contained a bug which enabled full - key recovery for RSA-1024 and some RSA-2048 keys. This was resolved - in a GPG update in 2017. - ([Source](https://lwn.net/Articles/727179/)) -- The [ROCA - Vulnerability](https://en.wikipedia.org/wiki/ROCA_vulnerability) - affects RSA keys generated by YubiKey 4 tokens. - ([Source](https://crocs.fi.%20muni.cz/_media/public/papers/nemec_roca_ccs17_preprint.pdf)) -- The [SigSpoof Attack](https://en.wikipedia.org/wiki/SigSpoof) allows - an attacker to spoof digital signatures. - ([Source](https://arstechnica.%20com/information-technology/2018/06/decades-old-pgp-bug-allowed-hackers-to-spoof-just-about-anyones-signature/)) -- Libgcrypt 1.9.0 contains a severe flaw related to a heap buffer - overflow, fixed in Libgcrypt 1.9.1 - ([Source](https://web.archive.%20org/web/20210221012505/https://www.theregister.com/2021/01/29/severe_libgcrypt_bug/)) +As of 2022-07-14, there are a few different vulnerabilities associated with GPG +or the libraries it uses: + +- GPG versions 1.0.2--1.2.3 contains a bug where "as soon as one + (GPG-generated) ElGamal signature of an arbitrary message is released, one can + recover the signer's private key in less than a second on a PC." + ([Source](https://www.di.ens.fr/~pnguyen/pub_Ng04.htm)) +- GPG versions prior to 1.4.2.1 contain a false positive signature verification + bug. + ([Source](https://lists.gnupg.%20org/pipermail/gnupg-announce/2006q1/000211.html)) +- GPG versions prior to 1.4.2.2 cannot detect injection of unsigned data. ( + [Source](https://lists.gnupg.org/pipermail/gnupg-announce/2006q1/000218.html)) +- Libgcrypt, a library used by GPG, contained a bug which enabled full key + recovery for RSA-1024 and some RSA-2048 keys. This was resolved in a GPG + update in 2017. ([Source](https://lwn.net/Articles/727179/)) +- The [ROCA Vulnerability](https://en.wikipedia.org/wiki/ROCA_vulnerability) + affects RSA keys generated by YubiKey 4 tokens. + ([Source](https://crocs.fi.%20muni.cz/_media/public/papers/nemec_roca_ccs17_preprint.pdf)) +- The [SigSpoof Attack](https://en.wikipedia.org/wiki/SigSpoof) allows an + attacker to spoof digital signatures. + ([Source](https://arstechnica.%20com/information-technology/2018/06/decades-old-pgp-bug-allowed-hackers-to-spoof-just-about-anyones-signature/)) +- Libgcrypt 1.9.0 contains a severe flaw related to a heap buffer overflow, + fixed in Libgcrypt 1.9.1 + ([Source](https://web.archive.%20org/web/20210221012505/https://www.theregister.com/2021/01/29/severe_libgcrypt_bug/)) ### Platforms -Originally developed as a command-line program for \*nix systems, GPG -now has a wealth of front-end applications and libraries available for -end-users. However, the most recommended programs remain the same: +Originally developed as a command-line program for *nix systems, GPG now has a +wealth of front-end applications and libraries available for end-users. However, +the most recommended programs remain the same: -- [GnuPG](https://gnupg.org) for Linux (depending on distro) -- [Gpg4win](https://gpg4win.org) for Windows -- [GPGTools](https://gpgtools.org) for macOS +- [GnuPG](https://gnupg.org) for Linux (depending on distro) +- [Gpg4win](https://gpg4win.org) for Windows +- [GPGTools](https://gpgtools.org) for macOS # Creating a Key Pair -In order to create a GPG key pair, a user would first need to install -GPG on their system. If we\'re assuming that the user is on Fedora -Linux, they would execute the following: +In order to create a GPG key pair, a user would first need to install GPG on +their system. If we're assuming that the user is on Fedora Linux, they would +execute the following: ```sh sudo dnf install gpg ``` -Once installed, a user can create a new key pair with the following -command(s): +Once installed, a user can create a new key pair with the following command(s): ```sh gpg --full-generate-key ``` -GPG will walk the user through an interactive setup that asks for an -algorithm preference, expiration date, name, and email to associate with -this key. +GPG will walk the user through an interactive setup that asks for an algorithm +preference, expiration date, name, and email to associate with this key. -See the following example key set-up for a default key generation using -the GnuPG command-line interface: +See the following example key set-up for a default key generation using the +GnuPG command-line interface: ```sh gpg (GnuPG) 2.3.6; Copyright (C) 2021 Free Software Foundation, Inc. @@ -178,66 +170,63 @@ interface. As noted in RFC 4880, the general functions of OpenPGP are as follows: -- digital signatures -- encryption -- compression -- Radix-64 conversion -- key management and certificate services +- digital signatures +- encryption +- compression +- Radix-64 conversion +- key management and certificate services -From this, you can probably gather that the main use of GPG is for -encrypting data and/or signing the data with a key. The purpose of -encrypting data with GPG is to ensure that no one except the intended -recipient(s) can access the data. +From this, you can probably gather that the main use of GPG is for encrypting +data and/or signing the data with a key. The purpose of encrypting data with GPG +is to ensure that no one except the intended recipient(s) can access the data. -Let\'s explore some specific GPG use-cases. +Let's explore some specific GPG use-cases. ## Email -One of the more popular uses of GPG is to sign and/or encrypt emails. -With the use of a GPG keypair, you can encrypt a message, its subject, -and even the attachments within. - -The first process, regarding the signing of a message without any -encryption, is generally used to provide assurance that an email is -truly coming from the sender that the message claims. When I send an -email, and it\'s signed with my public key, the recipient(s) of the -message can verify that the message was signed with my personal key. - -The second process, regarding the actual encryption of the message and -its contents, works by using a combination of the sender\'s keys and the -recipient\'s keys. This process may vary slightly by implementation, but -it most commonly uses asymmetric cryptography, also known as public-key -cryptography. In this version of encryption, the sender\'s private key -to sign the message and a combination of the sender\'s keys and the -recipient\'s public key to encrypt the message. - -If two people each have their own private keys and exchange their public -keys, they can send encrypted messages back and forth with GPG. This is -also possible with symmetric cryptography, but the process differs since -there are no key pairs. - -Implementation of email encryption varies greatly between email clients, -so you will need to reference your email client\'s documentation to -ensure you are setting it up correctly for that specific client. +One of the more popular uses of GPG is to sign and/or encrypt emails. With the +use of a GPG keypair, you can encrypt a message, its subject, and even the +attachments within. + +The first process, regarding the signing of a message without any encryption, is +generally used to provide assurance that an email is truly coming from the +sender that the message claims. When I send an email, and it's signed with my +public key, the recipient(s) of the message can verify that the message was +signed with my personal key. + +The second process, regarding the actual encryption of the message and its +contents, works by using a combination of the sender's keys and the +recipient's keys. This process may vary slightly by implementation, but it most +commonly uses asymmetric cryptography, also known as public-key cryptography. In +this version of encryption, the sender's private key to sign the message and a +combination of the sender's keys and the recipient's public key to encrypt the +message. + +If two people each have their own private keys and exchange their public keys, +they can send encrypted messages back and forth with GPG. This is also possible +with symmetric cryptography, but the process differs since there are no key +pairs. + +Implementation of email encryption varies greatly between email clients, so you +will need to reference your email client's documentation to ensure you are +setting it up correctly for that specific client. ## File Encryption -As noted in the section above regarding emails, GPG enables users to be -able to send a message to each other if they are both set-up with GPG -keys. In this example, I am going to show how a user could send a file -called `example_file.txt` to another user via the -recipient\'s email. +As noted in the section above regarding emails, GPG enables users to be able to +send a message to each other if they are both set-up with GPG keys. In this +example, I am going to show how a user could send a file called +`example_file.txt` to another user via the recipient's email. -The sender would find the file they want to send and execute the -following command: +The sender would find the file they want to send and execute the following +command: ```sh gpg --encrypt --output example_file.txt.gpg --recipient \ recipient@example.com example_file.txt ``` -Once received, the recipient can decrypt the file with the following -command: +Once received, the recipient can decrypt the file with the following command: ```sh gpg --decrypt --output example_file.txt example_file.txt.gpg @@ -245,29 +234,28 @@ gpg --decrypt --output example_file.txt example_file.txt.gpg ## Ownership Signatures -One important aspect of GPG, especially for developers, is the ability -to sign data without encrypting it. For example, developers often sign -code changes when they commit the changes back to a central repository, -in order to display ownership of who made the changes. This allows other -users to look at a code change and determine that the change was valid. +One important aspect of GPG, especially for developers, is the ability to sign +data without encrypting it. For example, developers often sign code changes when +they commit the changes back to a central repository, in order to display +ownership of who made the changes. This allows other users to look at a code +change and determine that the change was valid. -In order to do this using [Git](https://git-scm.com), the developer -simply needs to alter the `git commit` command to include the -`-S` flag. Here\'s an example: +In order to do this using [Git](https://git-scm.com), the developer simply needs +to alter the `git commit` command to include the `-S` flag. Here's an example: ```sh git commit -S -m "my commit message" ``` -As an expansion of the example above, Git users can configure their -environment with a default key to use by adding their GPG signature: +As an expansion of the example above, Git users can configure their environment +with a default key to use by adding their GPG signature: ```sh git config --global user.signingkey XXXXXXXXXXXXXXXX ``` -If you\'re not sure what your signature is, you can find it titled -`sig` in the output of this command: +If you're not sure what your signature is, you can find it titled `sig` in the +output of this command: ```sh gpg --list-signatures @@ -275,12 +263,11 @@ gpg --list-signatures ## File Integrity -When a person generates a signature for data, they are allowing users -the ability to verify the signature on that data in the future to ensure -the data has not been corrupted. This is most common with software -applications hosted on the internet - developers provide signatures so -that users can verify a website was not hijacked and download links -replaced with dangerous software. +When a person generates a signature for data, they are allowing users the +ability to verify the signature on that data in the future to ensure the data +has not been corrupted. This is most common with software applications hosted on +the internet - developers provide signatures so that users can verify a website +was not hijacked and download links replaced with dangerous software. In order to verify signed data, a user needs to have: @@ -288,9 +275,8 @@ In order to verify signed data, a user needs to have: 2. A signature file 3. The public GPG key of the signer -Once the signer\'s public key is imported on the user\'s system, and -they have the data and signature, they can verify the data with the -following commands: +Once the signer's public key is imported on the user's system, and they have +the data and signature, they can verify the data with the following commands: ```sh # If the signature is attached to the data @@ -302,13 +288,13 @@ gpg --verify [signature-file] [original-file] ### Finding Public Keys -In order to use GPG with others, a user needs to know the other user(s) -keys. This is easy to do if the user knows the other user(s) in person, -but may be hard if the relationship is strictly digital. Luckily, there -are a few options. The first option is to look at a user\'s web page or -social pages if they have them. +In order to use GPG with others, a user needs to know the other user(s) keys. +This is easy to do if the user knows the other user(s) in person, but may be +hard if the relationship is strictly digital. Luckily, there are a few options. +The first option is to look at a user's web page or social pages if they have +them. Otherwise, the best option is to use a keyserver, such as: -- [pgp.mit.edu](https://pgp.mit.edu) -- [keys.openpgp.org](https://keys.openpgp.org) +- [pgp.mit.edu](https://pgp.mit.edu) +- [keys.openpgp.org](https://keys.openpgp.org) diff --git a/content/blog/2022-07-25-curseradio.md b/content/blog/2022-07-25-curseradio.md index 683e750..11ef965 100644 --- a/content/blog/2022-07-25-curseradio.md +++ b/content/blog/2022-07-25-curseradio.md @@ -8,62 +8,56 @@ draft = false # Overview While exploring some interesting Linux applications, I stumbled across -[curseradio](https://github.com/chronitis/curseradio), a command-line -radio player based on Python. +[curseradio](https://github.com/chronitis/curseradio), a command-line radio +player based on Python. -This application is fantastic and incredibly easy to install, so I -wanted to dedicate a post today to this app. Let\'s look at the features -within the app and then walk through the installation process I took to -get `curseradio` working. +This application is fantastic and incredibly easy to install, so I wanted to +dedicate a post today to this app. Let's look at the features within the app +and then walk through the installation process I took to get `curseradio` +working. # Features 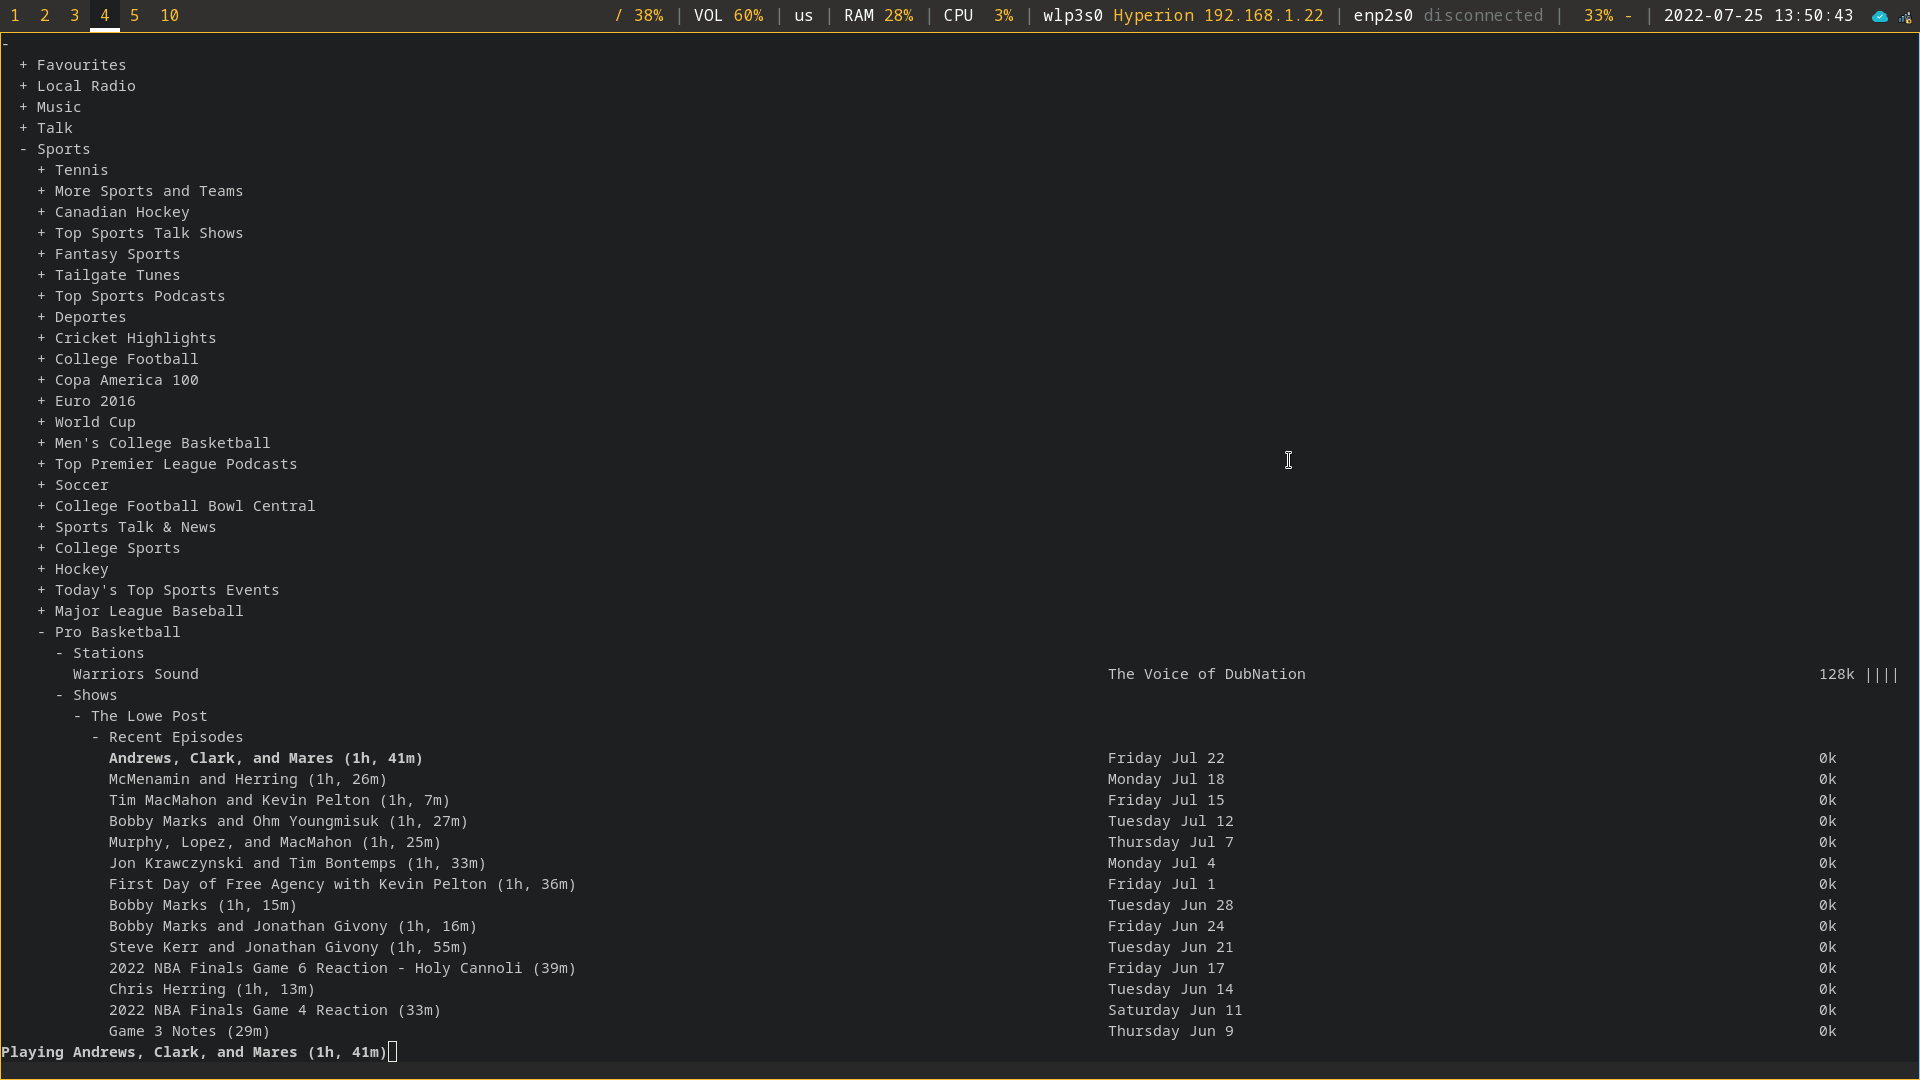 -The radio player itself is quite minimal. As you can see in the -screenshot above, it contains a simple plaintext list of all available -categories, which can be broken down further and further. In addition, -radio shows are available for listening, alongside regular radio -stations. +The radio player itself is quite minimal. As you can see in the screenshot +above, it contains a simple plaintext list of all available categories, which +can be broken down further and further. In addition, radio shows are available +for listening, alongside regular radio stations. -For example, the `Sports` \> `Pro Basketball` \> -`Shows` category contains a number of specific shows related -to Professional Basketball. +For example, the `Sports` > `Pro Basketball` > `Shows` category contains a +number of specific shows related to Professional Basketball. -Aside from being able to play any of the listed stations/shows, you can -make a channel your favorite by pressing `f`. It will now -show up at the top of the radio player in the `Favourites` -category. +Aside from being able to play any of the listed stations/shows, you can make a +channel your favorite by pressing `f`. It will now show up at the top of the +radio player in the `Favourites` category. ## Commands/Shortcuts - Key(s) Command - ------------ --------------------------------- - ↑, ↓ navigate - PgUp, PgDn navigate quickly - Home, End to top/bottom - Enter open/close folders, play stream - k stop playing stream - q quit - f toggle favourite +| Key(s) | Command | +|------------|---------------------------------| +| ↑, ↓ | navigate | +| PgUp, PgDn | navigate quickly | +| Home, End | to top/bottom | +| Enter | open/close folders, play stream | +| k | stop playing stream | +| q | quit | +| f | toggle favourite | # Installation ## Dependencies -Before installing `curseradio`, a handful of system and -Python packages are required. To get started, install -`python3`, `pip3`, and `mpv` on your -system. In this example, I\'m using Fedora Linux, which uses the -`dnf` package manager. You may need to adjust this if you\'re -using a different system. +Before installing `curseradio`, a handful of system and Python packages are +required. To get started, install `python3`, `pip3`, and `mpv` on your system. +In this example, I'm using Fedora Linux, which uses the `dnf` package manager. +You may need to adjust this if you're using a different system. ```sh sudo dnf install python3 pip3 mpv ``` -Next, use `pip3` to install `requests`, -`xdg`, and `lxml`: +Next, use `pip3` to install `requests`, `xdg`, and `lxml`: ```sh pip3 install requests xdg lxml @@ -71,23 +65,23 @@ pip3 install requests xdg lxml ## Repository Source Installation -Once all the dependencies are installed, we can clone the source code -and enter that directory: +Once all the dependencies are installed, we can clone the source code and enter +that directory: ```sh git clone https://github.com/chronitis/curseradio && cd curseradio ``` -Once you\'re within the `curseradio` directory, you can -install the application with the provided `setup.py` script. +Once you're within the `curseradio` directory, you can install the application +with the provided `setup.py` script. ```sh sudo python3 setup.py install ``` -In my case, I ran into a few errors and needed to create the folders -that curseradio wanted to use for its installation. If you don\'t get -any errors, you can skip this and run the app. +In my case, I ran into a few errors and needed to create the folders that +curseradio wanted to use for its installation. If you don't get any errors, you +can skip this and run the app. ```sh sudo mkdir /usr/local/lib/python3.10/ diff --git a/content/blog/2022-07-30-flac-to-opus.md b/content/blog/2022-07-30-flac-to-opus.md index fe571bb..c96f2f5 100644 --- a/content/blog/2022-07-30-flac-to-opus.md +++ b/content/blog/2022-07-30-flac-to-opus.md @@ -11,59 +11,56 @@ I am currently rebuilding my music library from scratch so that I can effectively archive all the music I own in the [FLAC file format](https://en.wikipedia.org/wiki/FLAC), a lossless audio codec. -However, streaming FLAC files outside the home can be difficult due to -the size of the files, especially if you\'re using a weak connection. +However, streaming FLAC files outside the home can be difficult due to the size +of the files, especially if you're using a weak connection. -So, in order to archive the music in a lossless format and still be able -to stream it easily, I opted to create a copy of my FLAC files in the -[Opus audio codec](https://en.wikipedia.org/wiki/Opus_(audio_format)). -This allows me to archive a quality, lossless version of the music and -then point my streaming service to the smaller, stream-ready version. +So, in order to archive the music in a lossless format and still be able to +stream it easily, I opted to create a copy of my FLAC files in the [Opus audio +codec](https://en.wikipedia.org/wiki/Opus_(audio_format)). This allows me to +archive a quality, lossless version of the music and then point my streaming +service to the smaller, stream-ready version. ## Dependencies -The process I follow utilizes the `opus-tools` package in -Ubuntu. Before proceeding, install the package: +The process I follow utilizes the `opus-tools` package in Ubuntu. Before +proceeding, install the package: ```sh sudo apt install opus-tools ``` -If you want to use a different conversion method, such as -`ffmpeg` or `avconv`, simply install that package -instead. +If you want to use a different conversion method, such as `ffmpeg` or `avconv`, +simply install that package instead. ## Conversion Process -The script I\'m using is stored in my home directory, but feel free to -create it wherever you want. It does not need to be in the same -directory as your music files. +The script I'm using is stored in my home directory, but feel free to create it +wherever you want. It does not need to be in the same directory as your music +files. ```sh cd ~ && nano transform.sh ``` -Once you have your new bash script opened in an editor, go ahead and -paste the following logic into the script. +Once you have your new bash script opened in an editor, go ahead and paste the +following logic into the script. You **MUST** edit the following variables in order for it to work: -- `source`: The source directory where your FLAC files are - stored. -- `dest`: The destination directory where you want the - resulting Opus files to be stored. +- `source`: The source directory where your FLAC files are stored. +- `dest`: The destination directory where you want the resulting Opus files to + be stored. You **MAY** want to edit the following variables to suit your needs: -- `filename`: If you are converting to a file format other - than Opus, you\'ll need to edit this so that your resulting files - have the correct filename extension. -- `reldir`: This variable can be edited to strip out more - leading directories in the file path. As you\'ll see later, I ignore - this for now and simply clean it up afterward. -- `opusenc`: This is the actual conversion process. You may - want to edit the bitrate to suit your needs. I set mine at 128 but - some prefer 160 or higher. +- `filename`: If you are converting to a file format other than Opus, you'll + need to edit this so that your resulting files have the correct filename + extension. +- `reldir`: This variable can be edited to strip out more leading directories in + the file path. As you'll see later, I ignore this for now and simply clean it + up afterward. +- `opusenc`: This is the actual conversion process. You may want to edit the + bitrate to suit your needs. I set mine at 128 but some prefer 160 or higher. ```sh #!/bin/bash @@ -129,8 +126,8 @@ opusenc --vbr --bitrate 128 --date "$DATE" \ done ``` -Once you\'re done, simply save the file and exit your editor. Don\'t -forget to enable execution of the script: +Once you're done, simply save the file and exit your editor. Don't forget to +enable execution of the script: ```sh chmod +x transform.sh @@ -142,17 +139,16 @@ Finally, you may now run the script: ./transform.sh ``` -If you used `opusenc`, you\'ll see the conversions happen -within the terminal as it progresses. You will also see variables -printed if you uncommented any of the bash script\'s comments. +If you used `opusenc`, you'll see the conversions happen within the terminal as +it progresses. You will also see variables printed if you uncommented any of the +bash script's comments. ## Cleanup -As I noted above, I didn\'t customize my `reldir` variable in -the script, which caused my output directory to be -`/mnt/music/library/archives` instead of -`/mnt/music/library`. So, I moved the output up one level and -deleted the accidental directory. +As I noted above, I didn't customize my `reldir` variable in the script, which +caused my output directory to be `/mnt/music/library/archives` instead of +`/mnt/music/library`. So, I moved the output up one level and deleted the +accidental directory. ```sh cd /mnt/music/library @@ -162,8 +158,8 @@ rm -rf archives ## Check the Resulting Size -If you want to see what kind of file size savings you\'ve gained, you -can always use the `du` command to check: +If you want to see what kind of file size savings you've gained, you can always +use the `du` command to check: ```sh cd /mnt/music diff --git a/content/blog/2022-07-31-bash-it.md b/content/blog/2022-07-31-bash-it.md index a12054b..e5d0b42 100644 --- a/content/blog/2022-07-31-bash-it.md +++ b/content/blog/2022-07-31-bash-it.md @@ -8,30 +8,30 @@ draft = false # Bash For those who are not familiar, -[Bash](https://en.wikipedia.org/wiki/Bash_(Unix_shell)) is a Unix shell -that is used as the default login shell for most Linux distributions. -This shell and command processor should be familiar if you\'ve used -Linux (or older version of macOS) before. +[Bash](https://en.wikipedia.org/wiki/Bash_(Unix_shell)) is a Unix shell that is +used as the default login shell for most Linux distributions. This shell and +command processor should be familiar if you've used Linux (or older version of +macOS) before. -However, bash is not the only option. There are numerous other shells -that exist. Here are some popular examples: +However, bash is not the only option. There are numerous other shells that +exist. Here are some popular examples: -- [zsh](https://en.wikipedia.org/wiki/Z_shell) -- [fish](https://en.wikipedia.org/wiki/Fish_(Unix_shell)) -- [oksh](https://github.com/ibara/oksh) -- [mksh](https://wiki.gentoo.org/wiki/Mksh) -- [dash](https://en.wikipedia.org/wiki/Debian_Almquist_shell) +- [zsh](https://en.wikipedia.org/wiki/Z_shell) +- [fish](https://en.wikipedia.org/wiki/Fish_(Unix_shell)) +- [oksh](https://github.com/ibara/oksh) +- [mksh](https://wiki.gentoo.org/wiki/Mksh) +- [dash](https://en.wikipedia.org/wiki/Debian_Almquist_shell) -While each shell has its differences, bash is POSIX compliant and the -default for many Linux users. Because of this, I am going to explore a -program called `bash-it` below that helps bash users increase -the utility of their shell without installing a completely new shell. +While each shell has its differences, bash is POSIX compliant and the default +for many Linux users. Because of this, I am going to explore a program called +`bash-it` below that helps bash users increase the utility of their shell +without installing a completely new shell. ## Installation -First, if bash is not already installed on your system, you can -[download bash from GNU](https://www.gnu.org/software/bash/) or use your -package manager to install it. +First, if bash is not already installed on your system, you can [download bash +from GNU](https://www.gnu.org/software/bash/) or use your package manager to +install it. For example, this is how you can install bash on Fedora Linux: @@ -39,29 +39,29 @@ For example, this is how you can install bash on Fedora Linux: sudo dnf install bash ``` -If you are not using bash as your default shell, use the -`chsh` command to change your shell: +If you are not using bash as your default shell, use the `chsh` command to +change your shell: ```sh chsh ``` -You should see a prompt like the one below. If the brackets -(`[]`) contain `bash` already, you\'re done, and -you can simply continue by hitting the Enter key. +You should see a prompt like the one below. If the brackets (`[]`) contain +`bash` already, you're done, and you can simply continue by hitting the Enter +key. -If the brackets contain another shell path (e.g. -`/usr/bin/zsh`), enter the path to the bash program on your -system (it\'s most likely located at `/usr/bin/bash`). +If the brackets contain another shell path (e.g. `/usr/bin/zsh`), enter the path +to the bash program on your system (it's most likely located at +`/usr/bin/bash`). ```sh Changing shell for <user>. New shell [/usr/bin/bash]: ``` -You must log out or restart the machine in order for the login shell to -be refreshed. You can do it now or wait until you\'re finished -customizing the shell. +You must log out or restart the machine in order for the login shell to be +refreshed. You can do it now or wait until you're finished customizing the +shell. ```sh sudo reboot now @@ -69,30 +69,28 @@ sudo reboot now # Bash-it -As noted on the [Bash-it](https://github.com/Bash-it/bash-it) -repository: +As noted on the [Bash-it](https://github.com/Bash-it/bash-it) repository: -> Bash-it is a collection of community Bash commands and scripts for -> Bash 3.2+. (And a shameless ripoff of oh-my-zsh 😃) +> Bash-it is a collection of community Bash commands and scripts for Bash 3.2+. +> (And a shameless ripoff of oh-my-zsh 😃) -Bash-it makes it easy to install plugins, set up aliases for common -commands, and easily change the visual theme of your shell. +Bash-it makes it easy to install plugins, set up aliases for common commands, +and easily change the visual theme of your shell. ## Installation To install the framework, simply copy the repository files and use the -`install.sh` script provided. If you want, you can (and -should!) inspect the contents of the installation script before you run -it. +`install.sh` script provided. If you want, you can (and should!) inspect the +contents of the installation script before you run it. ```sh git clone --depth=1 https://github.com/Bash-it/bash-it.git ~/.bash_it ~/.bash_it/install.sh ``` -If you didn\'t restart your session after making bash the default, and -are currently working within another shell, be sure to enter a bash -session before using `bash-it`: +If you didn't restart your session after making bash the default, and are +currently working within another shell, be sure to enter a bash session before +using `bash-it`: ```sh bash @@ -101,16 +99,16 @@ bash ## Aliases Bash-it contains a number of aliases for common commands to help improve -efficiency in the terminal. To list all available options, use the -following command: +efficiency in the terminal. To list all available options, use the following +command: ```sh bash-it show aliases ``` -This will provide you a list that looks like the following text block. -Within this screen, you will be able to see all available options and -which ones are currently enabled. +This will provide you a list that looks like the following text block. Within +this screen, you will be able to see all available options and which ones are +currently enabled. ``` txt Alias Enabled? Description @@ -141,9 +139,8 @@ bash-it disable alias <alias name> [alias name]... -or- $ bash-it disable alias ## Plugins -Similar to aliases, plugins are available with bash-it. You can find a -complete list of plugins in the same way as aliases. Simply execute the -following: +Similar to aliases, plugins are available with bash-it. You can find a complete +list of plugins in the same way as aliases. Simply execute the following: ```sh bash-it show plugins @@ -188,9 +185,8 @@ To list all themes: ls ~/.bash_it/themes/ ``` -To use a new theme, you\'ll need to edit `.bashrc` and alter -the `BASH_IT_THEME` variable to your desired theme. For -example, I am using the `zork` theme. +To use a new theme, you'll need to edit `.bashrc` and alter the `BASH_IT_THEME` +variable to your desired theme. For example, I am using the `zork` theme. ```sh nano ~/.bashrc @@ -200,23 +196,22 @@ nano ~/.bashrc export BASH_IT_THEME='zork' ``` -Once you save your changes, you just need to exit your terminal and -create a new one in order to see your changes to the -`.bashrc` file. You can also `source` the file to -see changes, but I recommend starting a completely new shell instead. +Once you save your changes, you just need to exit your terminal and create a new +one in order to see your changes to the `.bashrc` file. You can also `source` +the file to see changes, but I recommend starting a completely new shell +instead. ### ble.sh -One big feature I was missing in Bash that both `zsh` and -`fish` have is an autosuggestion feature. To explain: as you -type, an autosuggestion feature in the shell will offer suggestions in a -lighter font color beyond the characters already typed. Once you see the -command you want, you can click the right arrow and have the shell -auto-complete that line for you. +One big feature I was missing in Bash that both `zsh` and `fish` have is an +autosuggestion feature. To explain: as you type, an autosuggestion feature in +the shell will offer suggestions in a lighter font color beyond the characters +already typed. Once you see the command you want, you can click the right arrow +and have the shell auto-complete that line for you. -Luckily, the [Bash Line Editor](https://github.com/akinomyoga/ble.sh) -(ble.sh) exists! This program provides a wonderful autosuggestions -feature perfectly, among other features that I haven\'t tested yet. +Luckily, the [Bash Line Editor](https://github.com/akinomyoga/ble.sh) (ble.sh) +exists! This program provides a wonderful autosuggestions feature perfectly, +among other features that I haven't tested yet. In order to install ble.sh, execute the following: @@ -226,17 +221,16 @@ make -C ble.sh install PREFIX=~/.local echo 'source ~/.local/share/blesh/ble.sh' >> ~/.bashrc ``` -Again, exit the terminal and open a new one in order to see the -newly-configured shell. +Again, exit the terminal and open a new one in order to see the newly-configured +shell. # Restart the Session -Finally, as mentioned above, you\'ll need to restart the session to -ensure that your user is using bash by default. +Finally, as mentioned above, you'll need to restart the session to ensure that +your user is using bash by default. -You will also need to exit and re-open a shell (e.g., terminal or -terminal tab) any time you make changes to the `.bashrc` -file. +You will also need to exit and re-open a shell (e.g., terminal or terminal tab) +any time you make changes to the `.bashrc` file. ```sh sudo reboot now diff --git a/content/blog/2022-08-31-privacy-com-changes.md b/content/blog/2022-08-31-privacy-com-changes.md index 1ba6746..930524b 100644 --- a/content/blog/2022-08-31-privacy-com-changes.md +++ b/content/blog/2022-08-31-privacy-com-changes.md @@ -7,93 +7,86 @@ draft = false # Privacy.com Changes Their Terms -Recently, Privacy.com reached out to their customers regarding a change -in their terms of use. Further, all customers are required to agree to -the changes in order to continue using their accounts. +Recently, Privacy.com reached out to their customers regarding a change in their +terms of use. Further, all customers are required to agree to the changes in +order to continue using their accounts. [You can view the new cardholder agreement here](https://privacy.com/commercial-cardholder-agreement). -When you log in, you\'ll be greeted with a pop-up window asking you to -review and agree to the new terms of use. You will also not be able to -open any new cards until the terms are agreed to. +When you log in, you'll be greeted with a pop-up window asking you to review +and agree to the new terms of use. You will also not be able to open any new +cards until the terms are agreed to. -## Changing from a \"Prepaid Debit\" Model to a \"Charge Card\" Model +## Changing from a "Prepaid Debit" Model to a "Charge Card" Model -The actual content of the changes is interesting. While the historical -model of using Privacy.com was akin to prepaid debit cards, the new -model is very similar to a credit card (they use the term \"charge -card\"). +The actual content of the changes is interesting. While the historical model of +using Privacy.com was akin to prepaid debit cards, the new model is very similar +to a credit card (they use the term "charge card"). -I have used Privacy.com for 1-2 years, and the process was always that -you would create a single-use or merchant-locked card. This card could -be used for any dollar limit you set and would immediately draw the -funds from whatever funding source you connected, e.g. PayPal account or -a bank account. +I have used Privacy.com for 1-2 years, and the process was always that you would +create a single-use or merchant-locked card. This card could be used for any +dollar limit you set and would immediately draw the funds from whatever funding +source you connected, e.g. PayPal account or a bank account. -The benefit this service provides with a premium account is masking the -merchant names from your funding source. If you have a concern that your -bank account uses merchant data from your account, you could direct all -charges through Privacy.com and set the merchant as one of their pre-set -options, such as \"Smiley\'s Corner Store\" or \"NSA Gift Shop.\" +The benefit this service provides with a premium account is masking the merchant +names from your funding source. If you have a concern that your bank account +uses merchant data from your account, you could direct all charges through +Privacy.com and set the merchant as one of their pre-set options, such as +"Smiley's Corner Store" or "NSA Gift Shop." -The new model still works with a bank account as a funding source, but -the model is changed so that you get a \"line of credit\" set according -to a 14-day billing cycle. It seems that Privacy.com will now allow -charges to be incurred without being immediately paid. +The new model still works with a bank account as a funding source, but the model +is changed so that you get a "line of credit" set according to a 14-day +billing cycle. It seems that Privacy.com will now allow charges to be incurred +without being immediately paid. ## Daily Payments and Available Credit -Instead of paying as charges are incurred, you must make a \"Daily -Payment\" and your \"Available Credit\" will be locked until you make -that payment. There are also \"End of Billing Cycle Payments\" that are -assigned a due date. +Instead of paying as charges are incurred, you must make a "Daily Payment" and +your "Available Credit" will be locked until you make that payment. There are +also "End of Billing Cycle Payments" that are assigned a due date. -Further, Privacy.com will decline charges that would cause you to exceed -your Available Credit or Credit Limit. +Further, Privacy.com will decline charges that would cause you to exceed your +Available Credit or Credit Limit. One particular interesting section states the following: -> YOUR OBLIGATION TO PAY US BACK FOR ALL CARD TRANSACTIONS AND OTHER -> OBLIGATIONS YOU INCUR IS SECURED BY THE SECURED ACCOUNT. IF YOU DO NOT -> PAY US BACK FOR ANY AMOUNT YOU OWE US WHEN YOUR PAYMENTS ARE DUE, WE -> WILL EXERCISE OUR INTEREST AND DEBIT THE SECURED ACCOUNT, AND YOU WILL -> LOSE THE MONEY IN THE SECURED ACCOUNT. SEE SECTION 8: SECURITY -> AGREEMENT FOR MORE INFORMATION. +> YOUR OBLIGATION TO PAY US BACK FOR ALL CARD TRANSACTIONS AND OTHER OBLIGATIONS +> YOU INCUR IS SECURED BY THE SECURED ACCOUNT. IF YOU DO NOT PAY US BACK FOR ANY +> AMOUNT YOU OWE US WHEN YOUR PAYMENTS ARE DUE, WE WILL EXERCISE OUR INTEREST +> AND DEBIT THE SECURED ACCOUNT, AND YOU WILL LOSE THE MONEY IN THE SECURED +> ACCOUNT. SEE SECTION 8: SECURITY AGREEMENT FOR MORE INFORMATION. ## Personal Information -Now that Privacy.com is more of a financial institution, they are -obligated to comply with the [know your -customer](https://en.wikipedia.org/wiki/Know_your_customer) -guidelines/laws. +Now that Privacy.com is more of a financial institution, they are obligated to +comply with the [know your +customer](https://en.wikipedia.org/wiki/Know_your_customer) guidelines/laws. -I did not proceed with the change to my Privacy.com account, but I have -heard from some peers that the changes require more personal information -to be submitted, such as SSN. I am not aware of all new personal -information required or if the funding source is now required to only be -a bank account. +I did not proceed with the change to my Privacy.com account, but I have heard +from some peers that the changes require more personal information to be +submitted, such as SSN. I am not aware of all new personal information required +or if the funding source is now required to only be a bank account. ## Fees -Luckily, the fees section did not change much. The subscription fees for -a premium account are still the only fees. +Luckily, the fees section did not change much. The subscription fees for a +premium account are still the only fees. # My Thoughts -Personally, I wiped my personal information from my account and then -permanently deleted it when I heard about these changes. I have no -interest in yet another method of credit lending offered by private -companies. While I accepted that they would have access to my bank -account information for the purposes of paying off my prepaid debit -payments, I have no interest in incurring charges that will need to be -paid back at a later date. I also have no interest in submitting +Personally, I wiped my personal information from my account and then permanently +deleted it when I heard about these changes. I have no interest in yet another +method of credit lending offered by private companies. While I accepted that +they would have access to my bank account information for the purposes of paying +off my prepaid debit payments, I have no interest in incurring charges that will +need to be paid back at a later date. I also have no interest in submitting personal information to Privacy.com. -This type of change toward a \"buy it now, pay us later\" model is -concerning, and I will be watching Privacy.com to see if they further -their interests in the credit model as time goes on. +This type of change toward a "buy it now, pay us later" model is concerning, +and I will be watching Privacy.com to see if they further their interests in the +credit model as time goes on. -Could we see them start charging interest, fees, etc.? I\'m not sure, -but this change does not inspire confidence in their mission as a -privacy-focused company. +Could we see them start charging interest, fees, etc.? I'm not sure, but this +change does not inspire confidence in their mission as a privacy-focused +company. diff --git a/content/blog/2022-09-17-serenity-os.md b/content/blog/2022-09-17-serenity-os.md index def7737..fc142cd 100644 --- a/content/blog/2022-09-17-serenity-os.md +++ b/content/blog/2022-09-17-serenity-os.md @@ -7,39 +7,37 @@ draft = false # Overview -[SerenityOS](https://serenityos.org) is a unique operating system (OS) -that I have seen pop up in my news feed a few times over the last few -years, but I have never had time to test it out until now. +[SerenityOS](https://serenityos.org) is a unique operating system (OS) that I +have seen pop up in my news feed a few times over the last few years, but I have +never had time to test it out until now. Testing out this system brought back fond memories of yellowed, -modem-screeching, 100-pound computers that brought so many fond memories -to my youth. +modem-screeching, 100-pound computers that brought so many fond memories to my +youth. Per their website: > A graphical Unix-like operating system for desktop computers! > -> SerenityOS is a love letter to \'90s user interfaces with a custom -> Unix-like core. It flatters with sincerity by stealing beautiful ideas -> from various other systems. +> SerenityOS is a love letter to '90s user interfaces with a custom Unix-like +> core. It flatters with sincerity by stealing beautiful ideas from various +> other systems. > -> Roughly speaking, the goal is a marriage between the aesthetic of -> late-1990s productivity software and the power-user accessibility of -> late-2000s \*nix. +> Roughly speaking, the goal is a marriage between the aesthetic of late-1990s +> productivity software and the power-user accessibility of late-2000s *nix. > > This is a system by us, for us, based on the things we like. # Building -Your first question may be \"Where\'s the iso?\" and the answer is... -there are none. SerenityOS does not provide pre-built images for -testing. You must build the images yourself. This seems intentionally to -limit participation to only those who are truly interested enough to -learn how to build the OS. +Your first question may be "Where's the iso?" and the answer is... there are +none. SerenityOS does not provide pre-built images for testing. You must build +the images yourself. This seems intentionally to limit participation to only +those who are truly interested enough to learn how to build the OS. ## Clone -In order to get started, you\'ll need to clone the source repository: +In order to get started, you'll need to clone the source repository: ```sh git clone https://github.com/SerenityOS/serenity && cd serenity @@ -50,23 +48,21 @@ git clone https://github.com/SerenityOS/serenity && cd serenity Note that I followed the [Build Instructions](https://github.com/SerenityOS/serenity/blob/master/Documentation/BuildInstructions.md) in the SerenityOS repository as of commit -`660d2b53b1206e868d5470eee80b5e62d7e30da7`. Things may have -changed since my installation, and you should double-check the -instructions first. +`660d2b53b1206e868d5470eee80b5e62d7e30da7`. Things may have changed since my +installation, and you should double-check the instructions first. -Regardless, I want to repeat my steps here to illustrate any errors or -differing commands I needed to run in order to build and run SerenityOS. +Regardless, I want to repeat my steps here to illustrate any errors or differing +commands I needed to run in order to build and run SerenityOS. -Since I am running Fedora, I needed to install these packages in order -to build the OS images: +Since I am running Fedora, I needed to install these packages in order to build +the OS images: ```sh sudo dnf install texinfo binutils-devel curl cmake mpfr-devel libmpc-devel gmp-devel e2fsprogs ninja-build patch ccache rsync @"C Development Tools and Libraries" @Virtualization ``` -Next, make sure you\'re inside the `serenity` directory -created earlier during the git cloning process and process to build the -toolchain: +Next, make sure you're inside the `serenity` directory created earlier during +the git cloning process and process to build the toolchain: ```sh Meta/serenity.sh rebuild-toolchain @@ -78,45 +74,43 @@ Once the toolchain is built, you can Build and run the OS! Meta/serenity.sh run ``` -After this process is completed, the image should run automatically and -launch. +After this process is completed, the image should run automatically and launch. # Issues -I played around in SerenityOS for an hour or two in order to see what I -could do and had a lot of fun with it. The only issue I ran into was a -lack of working internet. I didn\'t try very hard, but I could tell that -the main network link wasn\'t connecting to my Fedora host properly. +I played around in SerenityOS for an hour or two in order to see what I could do +and had a lot of fun with it. The only issue I ran into was a lack of working +internet. I didn't try very hard, but I could tell that the main network link +wasn't connecting to my Fedora host properly. # Screenshots -The initial launch of the image displays the SerenityOS desktop, with a -simple terminal already launched: +The initial launch of the image displays the SerenityOS desktop, with a simple +terminal already launched: 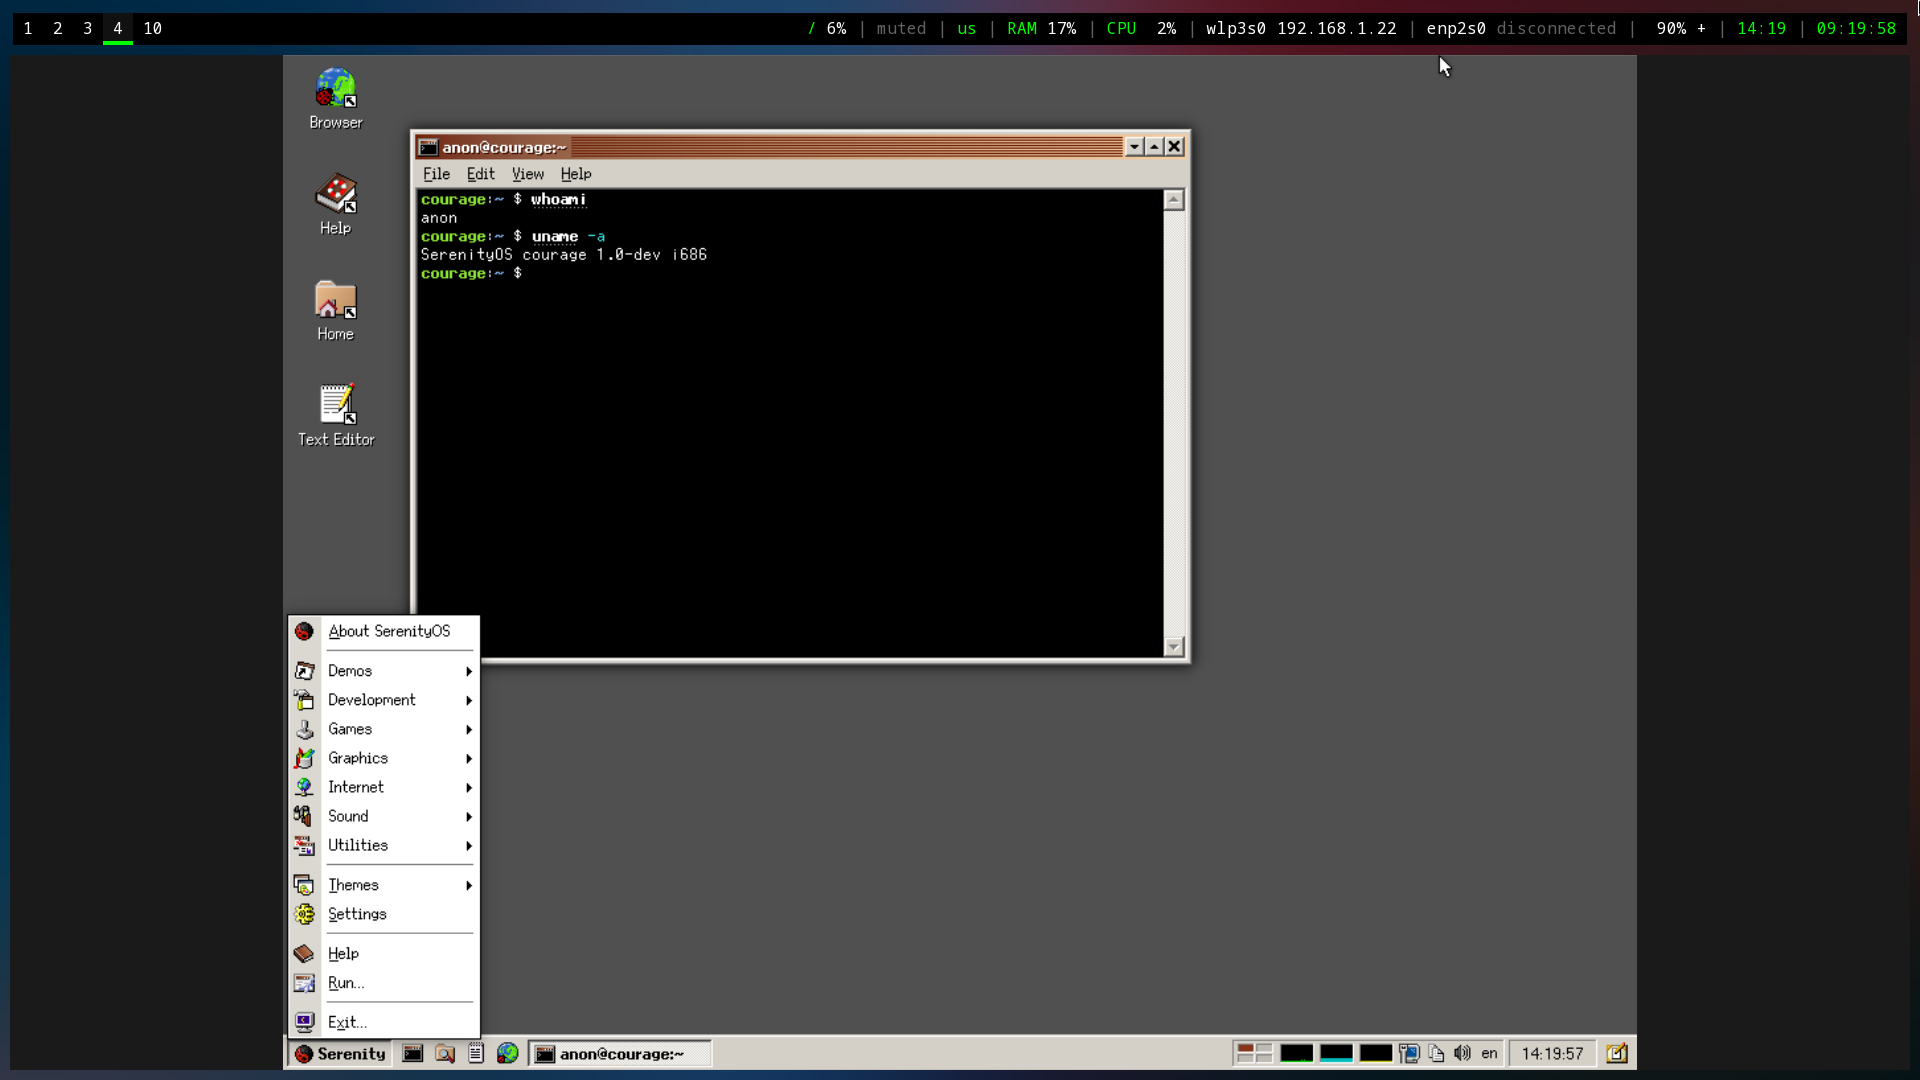 -Here you can see the Fire application (literally just shows fire -burning), a browser with the local Serenity Browser page loaded, and a -text editor. +Here you can see the Fire application (literally just shows fire burning), a +browser with the local Serenity Browser page loaded, and a text editor. 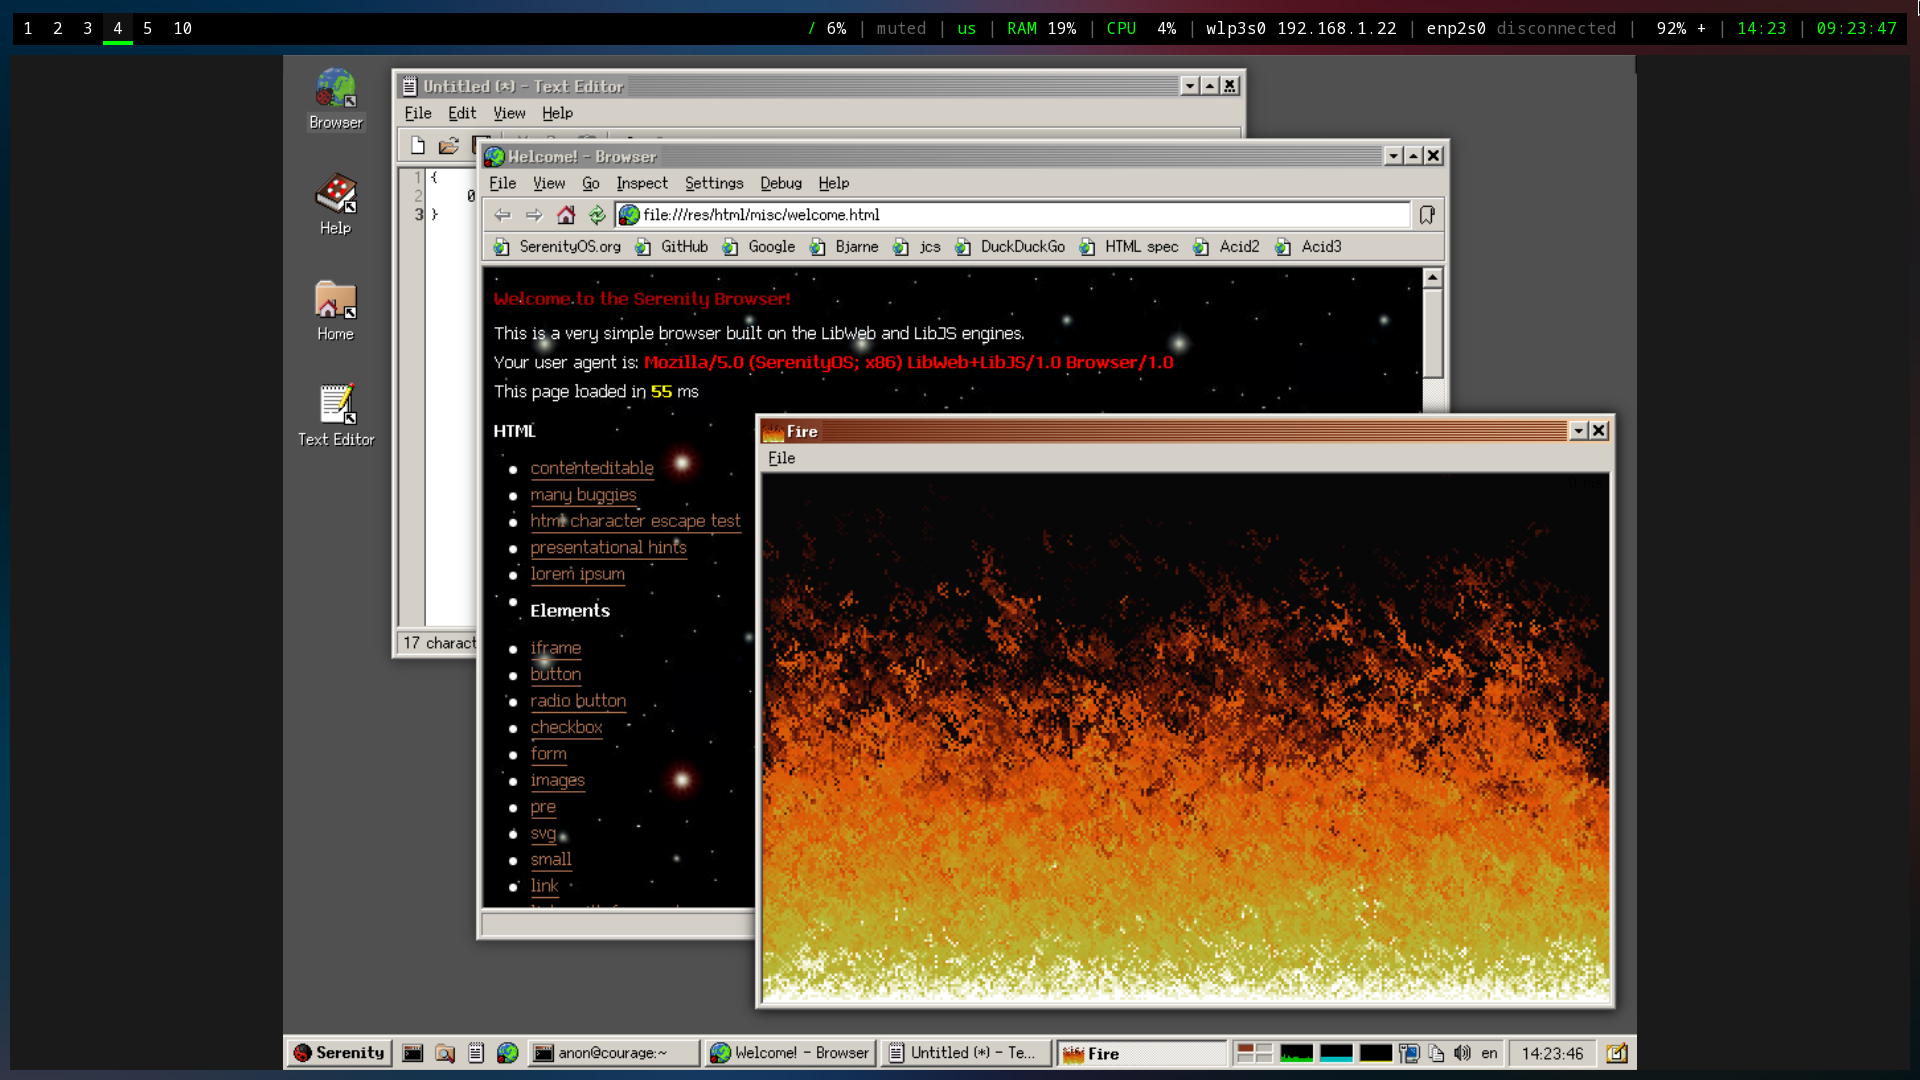 -I also poked around the system utilities and found most tools you\'d -expect to find within a standard desktop. +I also poked around the system utilities and found most tools you'd expect to +find within a standard desktop. 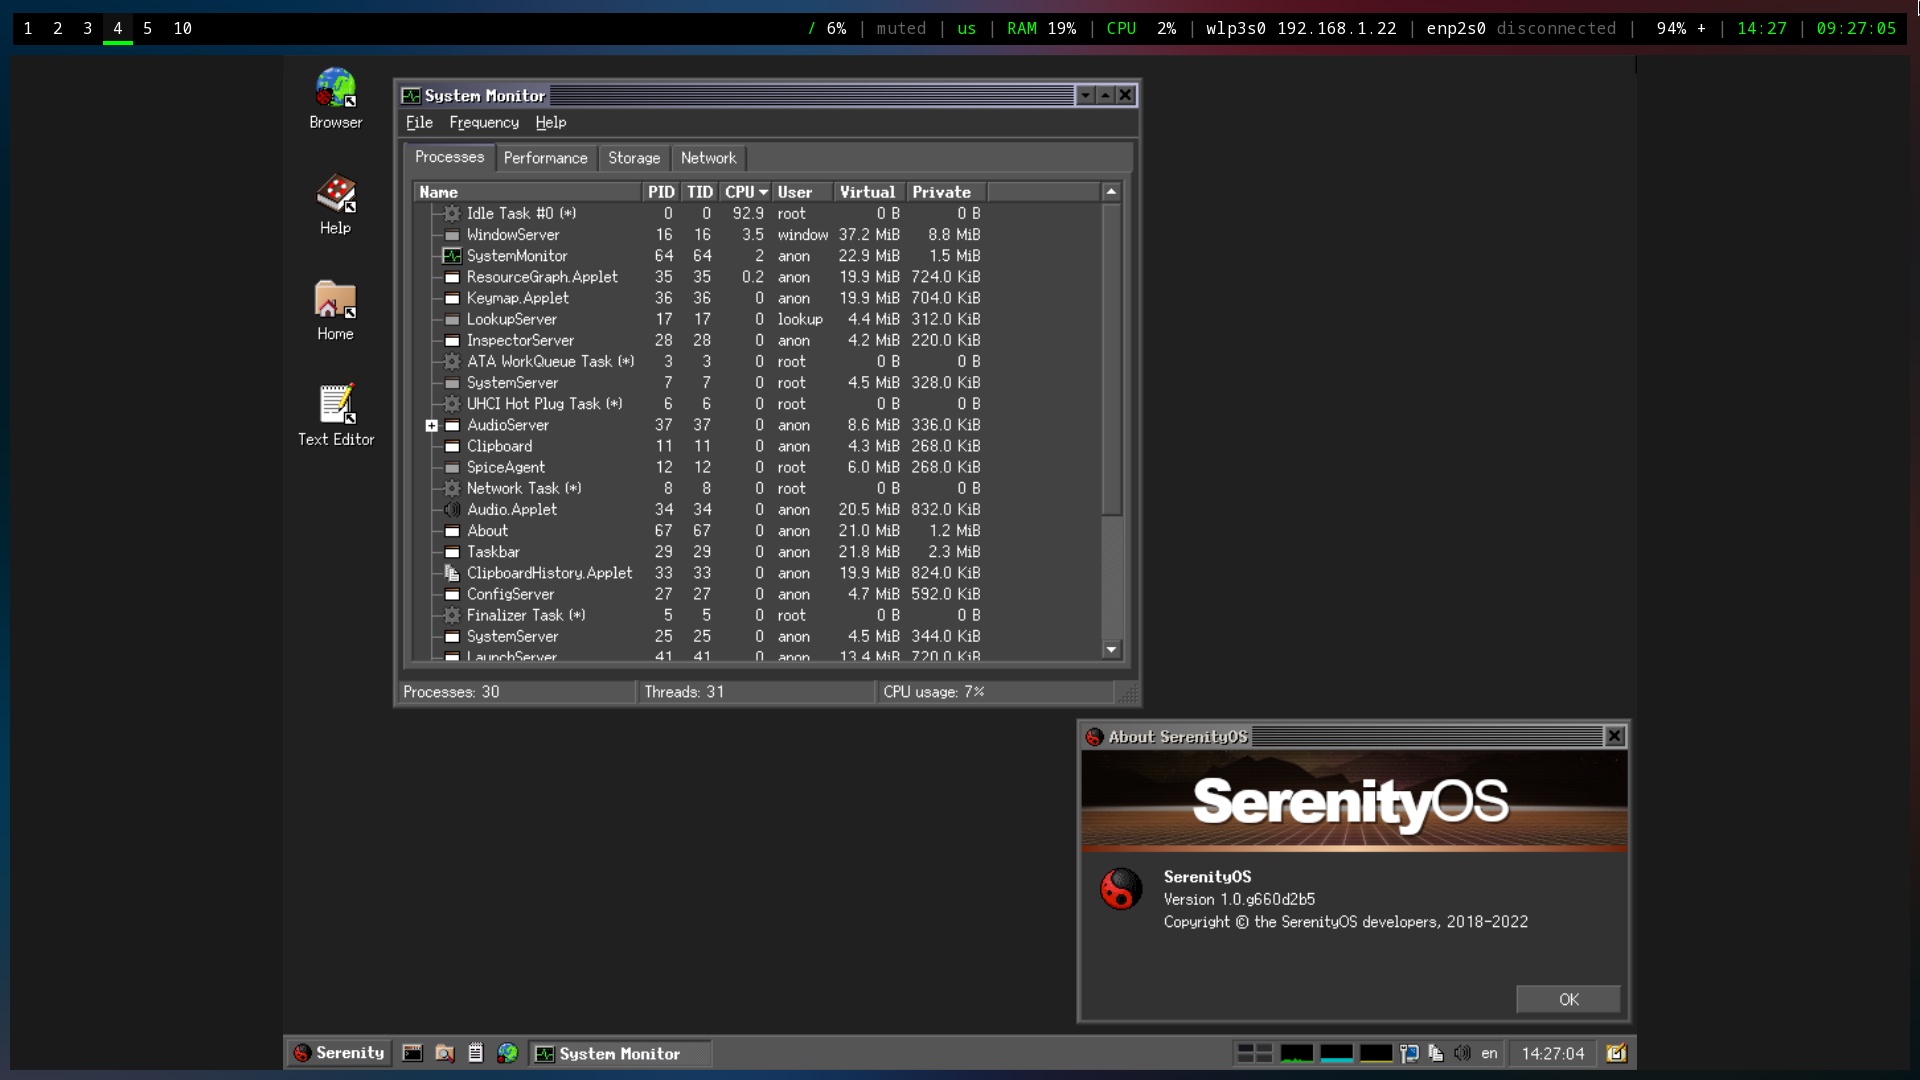 -Lastly, I noted that the default desktop contains numerous pre-defined -themes to choose from. This is a small piece, but it\'s actually -wonderful to see desktop developers consider theming directly out of the -box rather than using an addon-based mentality. +Lastly, I noted that the default desktop contains numerous pre-defined themes to +choose from. This is a small piece, but it's actually wonderful to see desktop +developers consider theming directly out of the box rather than using an +addon-based mentality.  -I didn\'t take a screenshot of the other pre-installed games, but I did -spend nearly 30 minutes playing Solitaire before remembering that I was -supposed to be writing a post about the OS. +I didn't take a screenshot of the other pre-installed games, but I did spend +nearly 30 minutes playing Solitaire before remembering that I was supposed to be +writing a post about the OS. diff --git a/content/blog/2022-09-21-graphene-os.md b/content/blog/2022-09-21-graphene-os.md index f36d92f..6c427b2 100644 --- a/content/blog/2022-09-21-graphene-os.md +++ b/content/blog/2022-09-21-graphene-os.md @@ -7,27 +7,24 @@ draft = false # Introduction -After using iOS for a couple of years, I finally took the plunge and -purchased a Pixel 6 Pro in order to test and use \[GrapheneOS\] -(<https://grapheneos.org>). +After using iOS for a couple of years, I finally took the plunge and purchased a +Pixel 6 Pro in order to test and use [GrapheneOS] (<https://grapheneos.org>). -The installation process was rather quick once you have the tools and -files you need. Overall, it can be done in just a few minutes. +The installation process was rather quick once you have the tools and files you +need. Overall, it can be done in just a few minutes. # Gathering Tools & Files ## Android Tools -First, in order to interact with the device, we will need the [Android -platform -tools](https://developer.android.com/studio/releases/platform-tools.html). -Find the Linux download and save the ZIP folder to your preferred -location. +First, in order to interact with the device, we will need the [Android platform +tools](https://developer.android.com/studio/releases/platform-tools.html). Find +the Linux download and save the ZIP folder to your preferred location. -Once we\'ve downloaded the files, we will need to unzip them, enter the -directory, and move the necessary executables to a central location, -such as `/usr/bin/`. For this installation, we only need the -`fastboot` and `adb` executables. +Once we've downloaded the files, we will need to unzip them, enter the +directory, and move the necessary executables to a central location, such as +`/usr/bin/`. For this installation, we only need the `fastboot` and `adb` +executables. ```sh cd ~/Downloads @@ -42,11 +39,11 @@ sudo mv adb /usr/bin ## GrapheneOS Files -Next, we need the [GrapheneOS files](https://grapheneos.org/releases) -for our device and model. For example, the Pixel 6 Pro is codenamed -`raven` on the release page. +Next, we need the [GrapheneOS files](https://grapheneos.org/releases) for our +device and model. For example, the Pixel 6 Pro is codenamed `raven` on the +release page. -Once we have the links, let\'s download them to our working directory: +Once we have the links, let's download them to our working directory: ```sh curl -O https://releases.grapheneos.org/factory.pub @@ -56,9 +53,8 @@ curl -0 https://releases.grapheneos.org/raven-factory-2022091400.zip.sig 1. Validate Integrity - In order to validate the integrity of the downloaded files, we will - need the `signify` package and Graphene\'s - `factory.pub` file. + In order to validate the integrity of the downloaded files, we will need the + `signify` package and Graphene's `factory.pub` file. ```sh sudo dnf install signify @@ -68,8 +64,8 @@ curl -0 https://releases.grapheneos.org/raven-factory-2022091400.zip.sig curl -O https://releases.grapheneos.org/factory.pub ``` - Then we can validate the files and ensure that no data was corrupted - or modified before it was saved to our device. + Then we can validate the files and ensure that no data was corrupted or + modified before it was saved to our device. ```sh signify -Cqp factory.pub -x raven-factory-2022091400.zip.sig && echo verified @@ -77,8 +73,8 @@ curl -0 https://releases.grapheneos.org/raven-factory-2022091400.zip.sig 2. Unzip Files - Once the files are verified, we can unzip the Graphene image and - enter the directory: + Once the files are verified, we can unzip the Graphene image and enter the + directory: ```sh unzip raven-factory-2022091400.zip && cd raven-factory-2022091400 @@ -88,35 +84,34 @@ curl -0 https://releases.grapheneos.org/raven-factory-2022091400.zip.sig ## Enable Developer Debugging & OEM Unlock -Before we can actually flash anything to the phone, we will need to -enable OEM Unlocking, as well as either USB Debugging or Wireless -Debugging, depending on which method we will be using. +Before we can actually flash anything to the phone, we will need to enable OEM +Unlocking, as well as either USB Debugging or Wireless Debugging, depending on +which method we will be using. -To start, enable developer mode by going to `Settings` \> -`About` and tapping `Build Number` seven (7) -times. You may need to enter your PIN to enable this mode. +To start, enable developer mode by going to `Settings` > `About` and tapping +`Build Number` seven (7) times. You may need to enter your PIN to enable this +mode. -Once developer mode is enabled, go to `Settings` \> -`System` \> `Devloper Options` and enable OEM -Unlocking, as well as USB or Wireless Debugging. In my case, I chose USB -Debugging and performed all actions via USB cable. +Once developer mode is enabled, go to `Settings` > `System` > `Devloper +Options` and enable OEM Unlocking, as well as USB or Wireless Debugging. In my +case, I chose USB Debugging and performed all actions via USB cable. -Once these options are enabled, plug the phone into the computer and -execute the following command: +Once these options are enabled, plug the phone into the computer and execute the +following command: ```sh adb devices ``` -If an unauthorized error occurs, make sure the USB mode on the phone is -changed from charging to something like \"File Transfer\" or \"PTP.\" -You can find the USB mode in the notification tray. +If an unauthorized error occurs, make sure the USB mode on the phone is changed +from charging to something like "File Transfer" or "PTP." You can find the +USB mode in the notification tray. ## Reboot Device -Once we have found the device via `adb`, we can either boot -into the bootloader interface by holding the volume down button while -the phone reboots or by executing the following command: +Once we have found the device via `adb`, we can either boot into the bootloader +interface by holding the volume down button while the phone reboots or by +executing the following command: ```sh adb reboot bootloader @@ -124,17 +119,14 @@ adb reboot bootloader ## Unlock the Bootloader -The phone will reboot and load the bootloader screen upon startup. At -this point, we are ready to start the actual flashing of GrapheneOS onto -the device. +The phone will reboot and load the bootloader screen upon startup. At this +point, we are ready to start the actual flashing of GrapheneOS onto the device. -**NOTE**: In my situation, I needed to use `sudo` with every -`fastboot` command, but not with `adb` commands. I -am not sure if this is standard or a Fedora quirk, but I\'m documenting -my commands verbatim in this post. +**NOTE**: In my situation, I needed to use `sudo` with every `fastboot` command, +but not with `adb` commands. I am not sure if this is standard or a Fedora +quirk, but I'm documenting my commands verbatim in this post. -First, we start by unlocking the bootloader so that we can load other -ROMs: +First, we start by unlocking the bootloader so that we can load other ROMs: ```sh sudo fastboot flashing unlock @@ -142,24 +134,23 @@ sudo fastboot flashing unlock ## Flashing Factory Images -Once the phone is unlocked, we can flash it with the -`flash-all.sh` script found inside the -`raven-factory-2022091400` folder we entered earlier: +Once the phone is unlocked, we can flash it with the `flash-all.sh` script found +inside the `raven-factory-2022091400` folder we entered earlier: ```sh sudo ./flash-all.sh ``` -This process should take a few minutes and will print informational -messages as things progress. Avoid doing anything on the phone while -this process is operating. +This process should take a few minutes and will print informational messages as +things progress. Avoid doing anything on the phone while this process is +operating. ## Lock the Bootloader -If everything was successful, the phone should reboot a few times and -finally land back on the bootloader screen. At this point, we can -re-lock the bootloader to enable full verified boot and protect the -device from unwanted flashing or erasure of data. +If everything was successful, the phone should reboot a few times and finally +land back on the bootloader screen. At this point, we can re-lock the bootloader +to enable full verified boot and protect the device from unwanted flashing or +erasure of data. ```sh sudo fastboot flashing lock diff --git a/content/blog/2022-10-04-mtp-linux.md b/content/blog/2022-10-04-mtp-linux.md index 03ba991..be726fc 100644 --- a/content/blog/2022-10-04-mtp-linux.md +++ b/content/blog/2022-10-04-mtp-linux.md @@ -5,31 +5,30 @@ description = "" draft = false +++ -I recently ran into trouble attempting to mount my GrapheneOS phone to -my laptop running Fedora Linux via the [Media Transfer -Protocol](https://en.wikipedia.org/wiki/Media_transfer_protocol) (MTP) -and discovered a simple and effective solution. +I recently ran into trouble attempting to mount my GrapheneOS phone to my laptop +running Fedora Linux via the [Media Transfer +Protocol](https://en.wikipedia.org/wiki/Media_transfer_protocol) (MTP) and +discovered a simple and effective solution. # Use a USB 3.0 Port -First, ensure that the device was plugged in to the laptop through a USB -3.0 port, if possible. From a brief glance online, it seems that USB 2.0 -ports may cause issues with dropped connections over MTP. This is purely -anecdotal since I don\'t have any evidence to link showing that USB 2.0 -causes issues, but I can confirm that switching to a USB 3.0 port seemed -to cut out most of my issues. +First, ensure that the device was plugged in to the laptop through a USB 3.0 +port, if possible. From a brief glance online, it seems that USB 2.0 ports may +cause issues with dropped connections over MTP. This is purely anecdotal since I +don't have any evidence to link showing that USB 2.0 causes issues, but I can +confirm that switching to a USB 3.0 port seemed to cut out most of my issues. # Switch USB Preferences to MTP -Secondly, you need to ensure that the phone\'s USB preferences/mode is -changed to MTP or File Transfer once the phone is plugged in. Other -modes will not allow you to access the phone\'s file system. +Secondly, you need to ensure that the phone's USB preferences/mode is changed +to MTP or File Transfer once the phone is plugged in. Other modes will not allow +you to access the phone's file system. # Install `jmtpfs` -Next, I used the `jmtpfs` package to mount my phone to my -laptop. There are other packages that exist, but this one worked -perfectly for me. On Fedora Linux, you can install it like this: +Next, I used the `jmtpfs` package to mount my phone to my laptop. There are +other packages that exist, but this one worked perfectly for me. On Fedora +Linux, you can install it like this: ```sh sudo dnf install jmtpfs -y @@ -37,19 +36,18 @@ sudo dnf install jmtpfs -y # Create a Mount Point -Once you have the package installed, you just need to create a folder -for the device to use as a mount point. In my case, I used -`/mnt/pixel`: +Once you have the package installed, you just need to create a folder for the +device to use as a mount point. In my case, I used `/mnt/pixel`: ```sh sudo mkdir /mnt/pixel sudo chown -R $USER:$USER /mnt/pixel ``` -# Mount & Access the Phone\'s File System +# Mount & Access the Phone's File System -Finally, plug-in and mount the device, and you should be able to see all -storage (internal and external) inside your new folder! +Finally, plug-in and mount the device, and you should be able to see all storage +(internal and external) inside your new folder! ```sh jmtpfs /mnt/pixel @@ -62,16 +60,15 @@ Device 0 (VID=18d1 and PID=4ee1) is a Google Inc Nexus/Pixel (MTP). Android device detected, assigning default bug flags ``` -Now you are mounted and can do anything you\'d like with the device\'s -files: +Now you are mounted and can do anything you'd like with the device's files: ```sh cd /mnt/pixel ls -lha ``` -From here, you will be able to see any internal or external storage -available on the device: +From here, you will be able to see any internal or external storage available on +the device: ```sh total 0 diff --git a/content/blog/2022-10-04-syncthing.md b/content/blog/2022-10-04-syncthing.md index 58df86e..cdb0faa 100644 --- a/content/blog/2022-10-04-syncthing.md +++ b/content/blog/2022-10-04-syncthing.md @@ -7,26 +7,25 @@ draft = false # An Overview of Syncthing -If you\'ve been looking around the self-hosted cloud storage space for a -while, you\'ve undoubtedly run into someone suggesting -[Syncthing](https://syncthing.net) as an option. However, it is an -unusual alternative for those users out there who are used to having a -centralized cloud server that serves as the \"controller\" of the data -and interacts with clients on devices to fetch files. +If you've been looking around the self-hosted cloud storage space for a while, +you've undoubtedly run into someone suggesting +[Syncthing](https://syncthing.net) as an option. However, it is an unusual +alternative for those users out there who are used to having a centralized cloud +server that serves as the "controller" of the data and interacts with clients +on devices to fetch files. -This post is a walkthrough of the Syncthing software, how I set up my -personal storage, and some pros and cons of using the software. +This post is a walkthrough of the Syncthing software, how I set up my personal +storage, and some pros and cons of using the software. # Installing Syncthing -To install Syncthing, visit the -[Downloads](https://syncthing.net/downloads/) page or install via your -device\'s package manager. +To install Syncthing, visit the [Downloads](https://syncthing.net/downloads/) +page or install via your device's package manager. ## Server & Desktop -You can install Syncthing on servers and desktops via the Downloads page -linked above or via the command-line. +You can install Syncthing on servers and desktops via the Downloads page linked +above or via the command-line. For Debian-based distros: @@ -43,37 +42,36 @@ sudo dnf install syncthing ## Mobile Syncthing for Android is available on -[F-Droid](https://f-droid.org/packages/com.nutomic.syncthingandroid/) -and [Google +[F-Droid](https://f-droid.org/packages/com.nutomic.syncthingandroid/) and +[Google Play](https://play.google.com/store/apps/details?id=com.nutomic.syncthingandroid). -Syncthing does not have an official iOS client, but there is a -third-party client called [Möbius +Syncthing does not have an official iOS client, but there is a third-party +client called [Möbius Sync](https://apps.apple.com/us/app/m%C3%B6bius-sync/id1539203216). # How Does Syncthing Work? -To start, I wanted to include the main marketing blurb from their -website: +To start, I wanted to include the main marketing blurb from their website: -> Syncthing is a continuous file synchronization program. It -> synchronizes files between two or more computers in real time, safely -> protected from prying eyes. Your data is your data alone, and you -> deserve to choose where it is stored, whether it is shared with some -> third party, and how it\'s transmitted over the internet. +> Syncthing is a continuous file synchronization program. It synchronizes files +> between two or more computers in real time, safely protected from prying eyes. +> Your data is your data alone, and you deserve to choose where it is stored, +> whether it is shared with some third party, and how it's transmitted over the +> internet. -Let\'s break this apart and add in some other details to help explain -what exactly Syncthing does in order to sync files between devices. +Let's break this apart and add in some other details to help explain what +exactly Syncthing does in order to sync files between devices. ## Local Syncthing Server(s) -Syncthing syncs files between multiple devices by creating a local -server on each device. These local servers handle a few different -things, such as watching files and directories for changes, hosting an -administrative GUI website, and authenticating with connected devices. +Syncthing syncs files between multiple devices by creating a local server on +each device. These local servers handle a few different things, such as watching +files and directories for changes, hosting an administrative GUI website, and +authenticating with connected devices. -You can also start, stop, and restart the Syncthing server via the -command-line or web dashboard. If you\'re running Syncthing on a device -with `systemd`, you can use the following commands: +You can also start, stop, and restart the Syncthing server via the command-line +or web dashboard. If you're running Syncthing on a device with `systemd`, you +can use the following commands: ```sh sudo systemctl start syncthing@username.service @@ -83,97 +81,89 @@ sudo systemctl stop syncthing@username.service ## Syncthing Dashboard -This biggest part of Syncthing is the admin GUI website that runs on -each device (note that mobile devices will use the Syncthing app rather -than the web GUI). The admin GUI is available through the web browser on -the local device that is running Syncthing - simply go to -`http://localhost:8384` or -`http://127.0.0.1:8384`. This web page is the place where you -will change settings, add/modify synced files, and add/modify connected -devices. +This biggest part of Syncthing is the admin GUI website that runs on each device +(note that mobile devices will use the Syncthing app rather than the web GUI). +The admin GUI is available through the web browser on the local device that is +running Syncthing - simply go to `http://localhost:8384` or +`http://127.0.0.1:8384`. This web page is the place where you will change +settings, add/modify synced files, and add/modify connected devices. -Here\'s an example web GUI dashboard: +Here's an example web GUI dashboard: 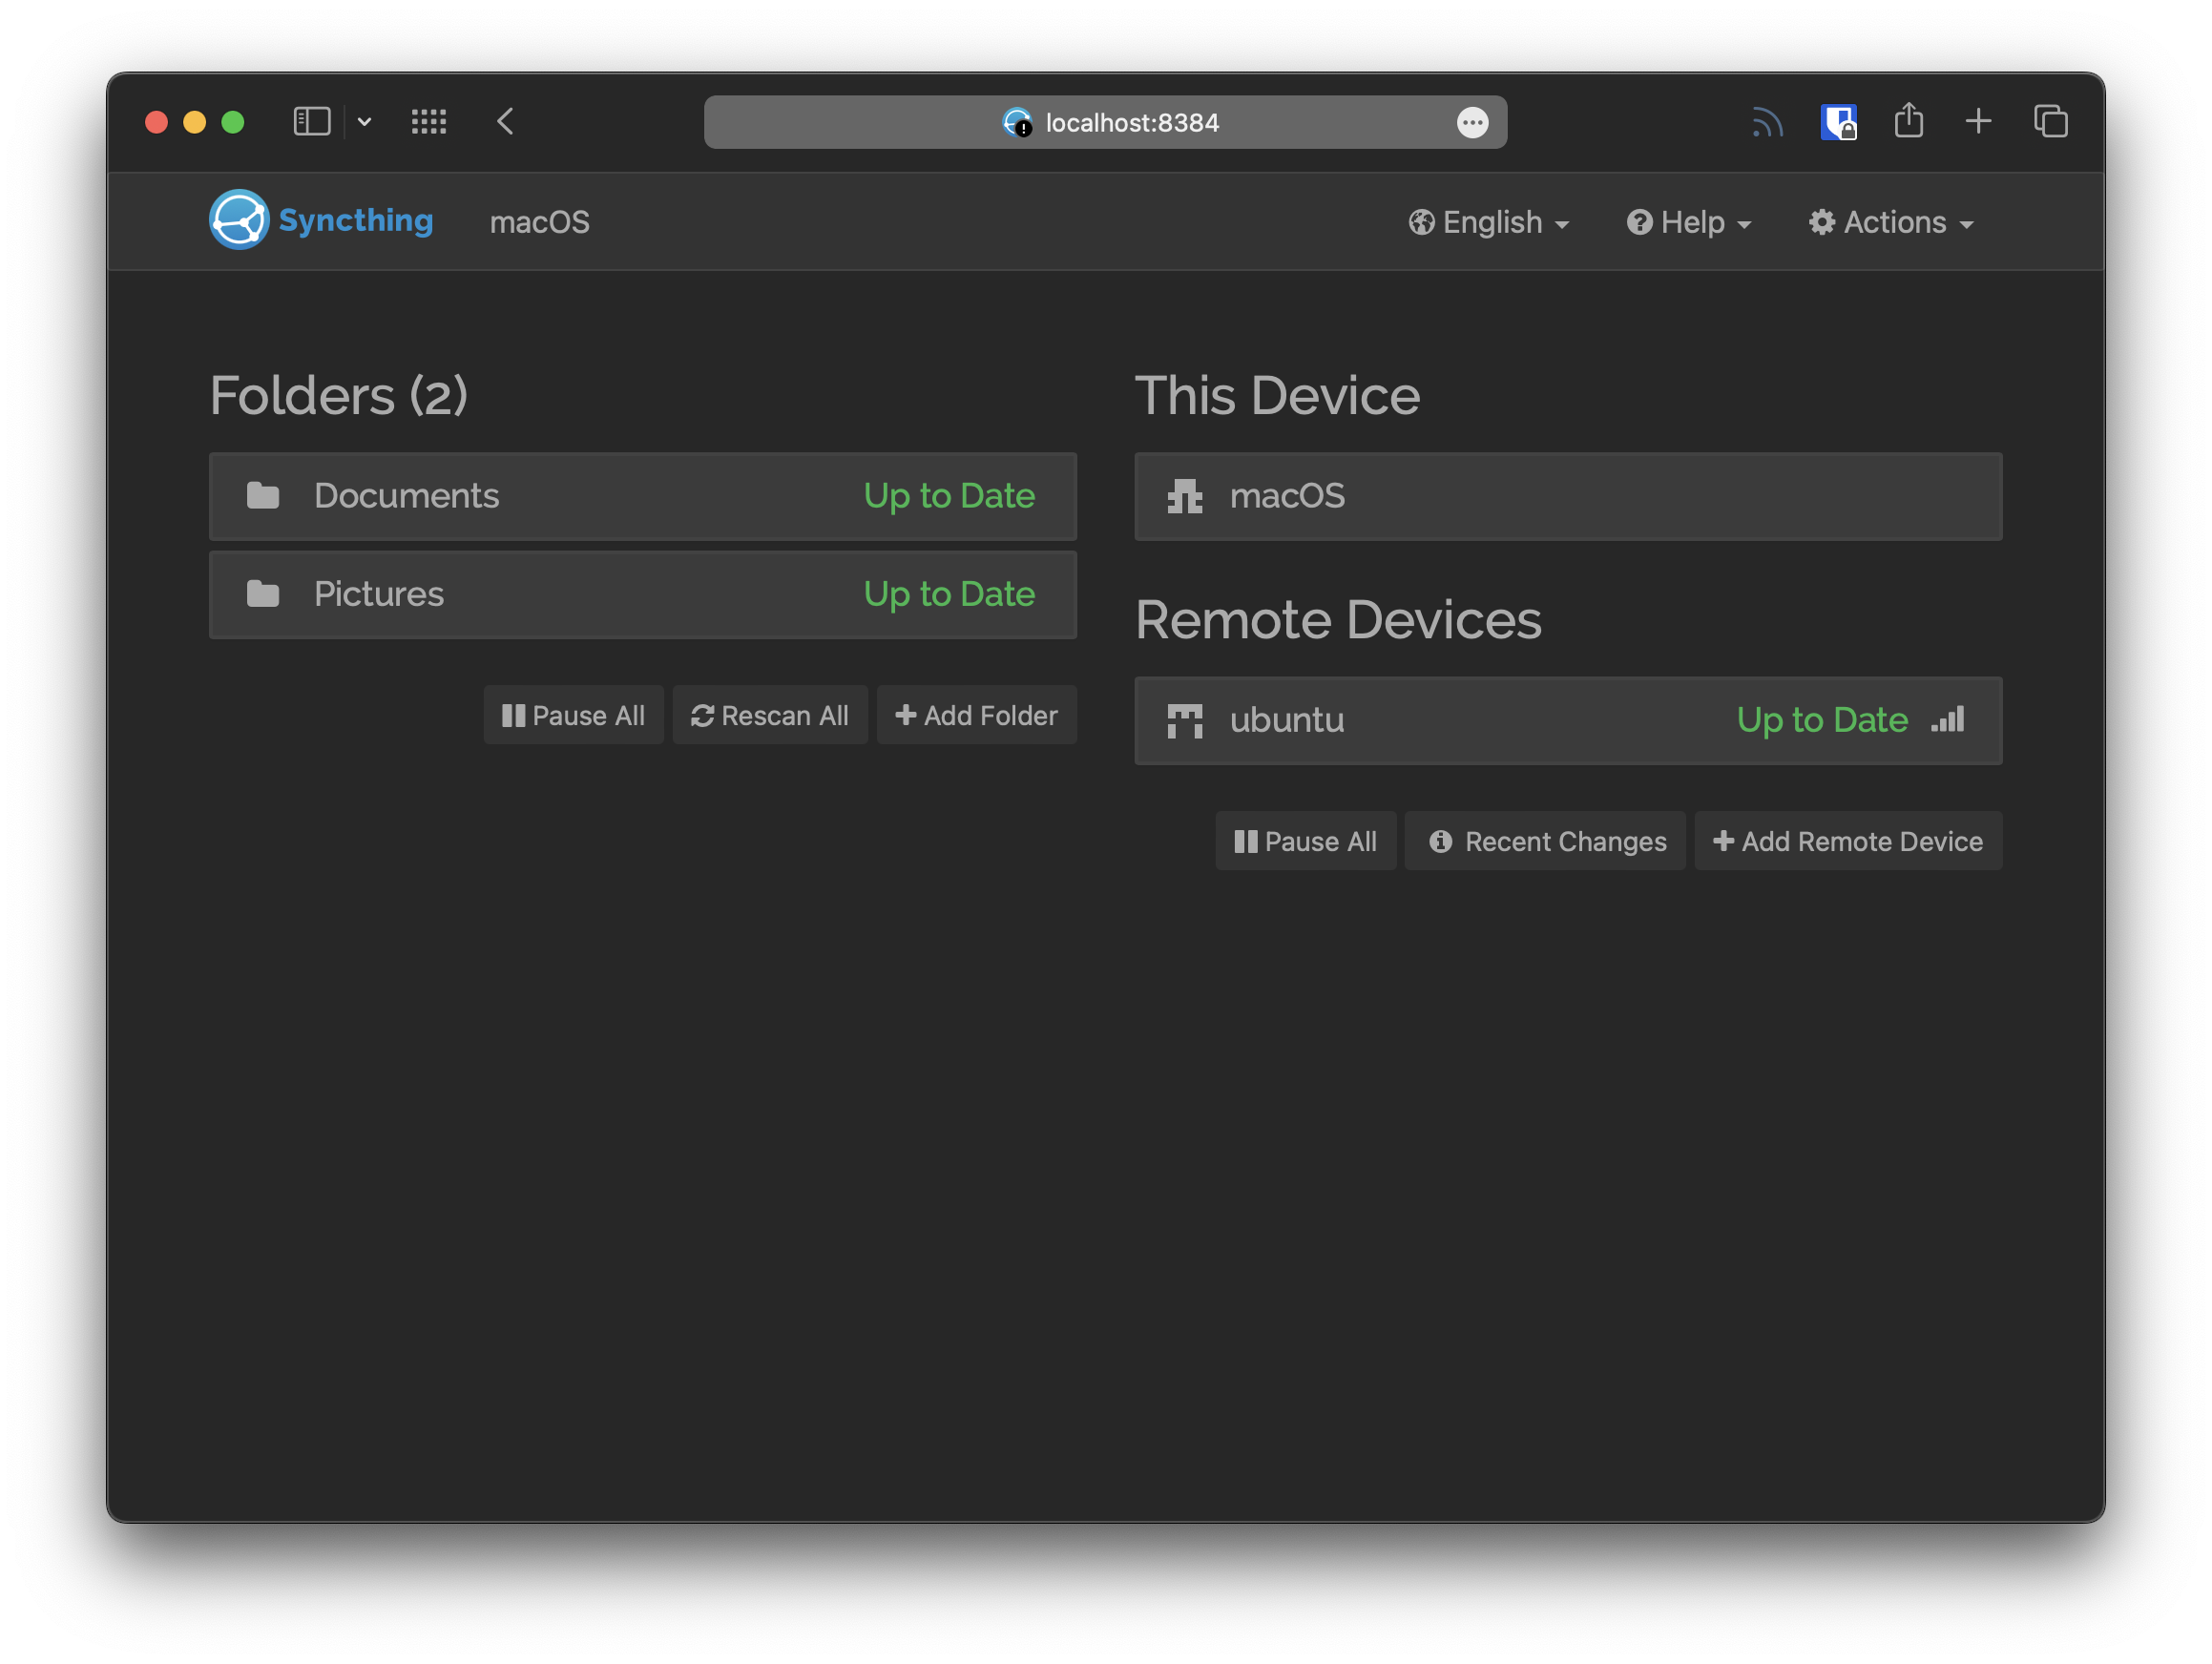 ## Remote Devices -A cloud storage solution wouldn\'t be very useful if you aren\'t able to -share data among various devices. Syncthing does this by sharing Device -IDs to connect servers, and then by manually sharing Folders with -devices that have been connected. +A cloud storage solution wouldn't be very useful if you aren't able to share +data among various devices. Syncthing does this by sharing Device IDs to connect +servers, and then by manually sharing Folders with devices that have been +connected. -For instance, if you have a laptop running Syncthing and then install -the Syncthing mobile app on a phone, you could scan the laptop\'s QR -code for Device ID and then accept the authentication on the laptop\'s -dashboard. Next, you can use either device to select a folder for -sharing and dictating which device should send, receive, or both. +For instance, if you have a laptop running Syncthing and then install the +Syncthing mobile app on a phone, you could scan the laptop's QR code for Device +ID and then accept the authentication on the laptop's dashboard. Next, you can +use either device to select a folder for sharing and dictating which device +should send, receive, or both. -When you connect devices, you can set one device as an \"Introducer,\" -which can add devices from the introducer to the device list, for -mutually shared folders. You can also configure Auto Accept, -compression, rate limits, and more settings per device. +When you connect devices, you can set one device as an "Introducer," which can +add devices from the introducer to the device list, for mutually shared folders. +You can also configure Auto Accept, compression, rate limits, and more settings +per device. # My Personal Cloud Storage Set-up -Personally, I use a model similar to a traditional cloud storage -service. I have a \"centralized\" server running 24/7 that acts as an -Introducer for my Syncthing network. I think of this as my main storage -and all other devices as tertiary client devices. I will likely add -additional servers as backups as time goes on so that I don\'t have to -rely on my laptop or phone as the only backups. +Personally, I use a model similar to a traditional cloud storage service. I have +a "centralized" server running 24/7 that acts as an Introducer for my +Syncthing network. I think of this as my main storage and all other devices as +tertiary client devices. I will likely add additional servers as backups as time +goes on so that I don't have to rely on my laptop or phone as the only backups. -Currently, I have one desktop and one mobile device connected to the -network, both running intermittently as they are not powered-on 24/7. +Currently, I have one desktop and one mobile device connected to the network, +both running intermittently as they are not powered-on 24/7. -The initial set-up of the software was easy enough, but data transfer -rates were incredibly slow for me due to the Wi-Fi. Instead, I plugged -my laptop into the ethernet network that my server is on and manually -copied my folders over to the server with `scp`. Once -complete, Syncthing validated that all files were there and not missing, -and it did not need to transfer any data through the WAN. +The initial set-up of the software was easy enough, but data transfer rates were +incredibly slow for me due to the Wi-Fi. Instead, I plugged my laptop into the +ethernet network that my server is on and manually copied my folders over to the +server with `scp`. Once complete, Syncthing validated that all files were there +and not missing, and it did not need to transfer any data through the WAN. -As slow as the transfer was going, this probably saved me a few days of -waiting for my \~100GB sync. +As slow as the transfer was going, this probably saved me a few days of waiting +for my ~100GB sync. # Pros & Cons -I\'ve put together a short list of pros and cons for Syncthing. I -thought about my experiences with Nextcloud, WebDAV, proprietary -services (Google Drive, iCloud, etc.), and privacy-focused cloud -solutions (pCloud, Tresorit, etc.). +I've put together a short list of pros and cons for Syncthing. I thought about +my experiences with Nextcloud, WebDAV, proprietary services (Google Drive, +iCloud, etc.), and privacy-focused cloud solutions (pCloud, Tresorit, etc.). **Pros:** -- I\'ve faced no data loss at all through my two-month trial run. -- No third-parties store your data on their servers. -- You have full control over your data and can take your data and - leave at any time. -- It\'s possible to encrypt client-side easily with software like - Cryptomator. -- No proprietary clients or mounted volumes, just plain files and - folders. +- I've faced no data loss at all through my two-month trial run. +- No third-parties store your data on their servers. +- You have full control over your data and can take your data and leave at any + time. +- It's possible to encrypt client-side easily with software like Cryptomator. +- No proprietary clients or mounted volumes, just plain files and folders. **Cons:** -- The learning curve is steeper than traditional cloud services and is - focused on a technical audience. -- If a device needs to modify files in a Folder, the devices will need - to sync ALL files from the folder, which may be large. To avoid size - restraints, split large folders into smaller folders for syncing. -- Syncing can be slow due to the clients/servers initially connecting - or re-connecting after sleeping. -- Multiple personal devices are required and require the user to own - or rent them as no third-party servers are involved in the storage - of data. - -Overall, I\'ve had a great experience with Syncthing so far. I\'ve had -no data loss, syncing has been quick and easy when changes are made to -files, device connections are reliable, and I love the freedom of -controlling the clients and servers as I choose. - -Not to mention that I appreciate that I - or someone else - could pull -the Syncthing [source code](https://github.com/syncthing) and continue -development/support if the Syncthing Foundation decides to stop -developing the software or sells the business. +- The learning curve is steeper than traditional cloud services and is focused + on a technical audience. +- If a device needs to modify files in a Folder, the devices will need to sync + ALL files from the folder, which may be large. To avoid size restraints, split + large folders into smaller folders for syncing. +- Syncing can be slow due to the clients/servers initially connecting or + re-connecting after sleeping. +- Multiple personal devices are required and require the user to own or rent + them as no third-party servers are involved in the storage of data. + +Overall, I've had a great experience with Syncthing so far. I've had no data +loss, syncing has been quick and easy when changes are made to files, device +connections are reliable, and I love the freedom of controlling the clients and +servers as I choose. + +Not to mention that I appreciate that I - or someone else - could pull the +Syncthing [source code](https://github.com/syncthing) and continue +development/support if the Syncthing Foundation decides to stop developing the +software or sells the business. diff --git a/content/blog/2022-10-22-alpine-linux.md b/content/blog/2022-10-22-alpine-linux.md index 2bc43cd..073d584 100644 --- a/content/blog/2022-10-22-alpine-linux.md +++ b/content/blog/2022-10-22-alpine-linux.md @@ -7,80 +7,73 @@ draft = false # Alpine Linux -[Alpine Linux](https://alpinelinux.org) is a very small distro, built on -musl libc and busybox. It uses ash as the default shell, OpenRC as the -init system, and apk as the package manager. According to their website, -an Alpine container \"requires no more than 8 MB and a minimal -installation to disk requires around 130 MB of storage.\" An actual bare -metal machine is recommended to have 100 MB of RAM and 0-700 MB of -storage space. - -Historically, I\'ve used Ubuntu\'s minimal installation image as my -server OS for the last five years. Ubuntu worked well and helped as my -original server contained an nVidia GPU and no onboard graphics, so -quite a few distros won\'t boot or install without a lot of tinkering. - -Alpine has given me a huge increase in performance across my Docker apps -and Nginx websites. CPU load for the new server I\'m using to test -Alpine hovers around 0-5% on average with an Intel(R) Core(TM) i3-6100 -CPU @ 3.70GHz. - -The only services I haven\'t moved over to Alpine are Plex Media Server -and Syncthing, which may increase CPU load quite a bit depending on how -many streams are running. +[Alpine Linux](https://alpinelinux.org) is a very small distro, built on musl +libc and busybox. It uses ash as the default shell, OpenRC as the init system, +and apk as the package manager. According to their website, an Alpine container +"requires no more than 8 MB and a minimal installation to disk requires around +130 MB of storage." An actual bare metal machine is recommended to have 100 MB +of RAM and 0-700 MB of storage space. + +Historically, I've used Ubuntu's minimal installation image as my server OS +for the last five years. Ubuntu worked well and helped as my original server +contained an nVidia GPU and no onboard graphics, so quite a few distros won't +boot or install without a lot of tinkering. + +Alpine has given me a huge increase in performance across my Docker apps and +Nginx websites. CPU load for the new server I'm using to test Alpine hovers +around 0-5% on average with an Intel(R) Core(TM) i3-6100 CPU @ 3.70GHz. + +The only services I haven't moved over to Alpine are Plex Media Server and +Syncthing, which may increase CPU load quite a bit depending on how many streams +are running. ## Installation In terms of installation, Alpine has an incredibly useful -[wiki](https://wiki.alpinelinux.org/wiki/Installation) that will guide a -user throughout the installation and post-installation processes, as -well as various other articles and guides. +[wiki](https://wiki.alpinelinux.org/wiki/Installation) that will guide a user +throughout the installation and post-installation processes, as well as various +other articles and guides. To install Alpine, find an appropriate [image to -download](https://alpinelinux.org/downloads/) and flash it to a USB -using software such as Rufus or Etcher. I opted to use the Standard -image for my x86~64~ architecture. +download](https://alpinelinux.org/downloads/) and flash it to a USB using +software such as Rufus or Etcher. I opted to use the Standard image for my +x86~64~ architecture. -Once the USB is ready, plug it into the machine and reboot. Note that -you may have to use a key such as `Esc` or `F1-12` -to access the boot menu. The Alpine Linux terminal will load quickly and -for a login. +Once the USB is ready, plug it into the machine and reboot. Note that you may +have to use a key such as `Esc` or `F1-12` to access the boot menu. The Alpine +Linux terminal will load quickly and for a login. -To log in to the installation image, use the `root` account; -there is no password. Once logged-in, execute the setup command: +To log in to the installation image, use the `root` account; there is no +password. Once logged-in, execute the setup command: ```sh setup-alpine ``` -The setup script will ask a series of questions to configure the system. -Be sure to answer carefully or else you may have to re-configure the -system after boot. - -- Keyboard Layout (Local keyboard language and usage mode, e.g., us - and variant of us-nodeadkeys.) -- Hostname (The name for the computer.) -- Network (For example, automatic IP address discovery with the - \"DHCP\" protocol.) -- DNS Servers (Domain Name Servers to query. For privacy reasons, it - is NOT recommended to route every local request to servers like - Google\'s 8.8.8.8 .) -- Timezone -- Proxy (Proxy server to use for accessing the web. Use \"none\" for - direct connections to the internet.) -- Mirror (From where to download packages. Choose the organization you - trust giving your usage patterns to.) -- SSH (Secure SHell remote access server. \"Openssh\" is part of the - default install image. Use \"none\" to disable remote login, e.g. on - laptops.) -- NTP (Network Time Protocol client used for keeping the system clock - in sync with a time-server. Package \"chrony\" is part of the - default install image.) -- Disk Mode (Select between diskless (disk=\"none\"), \"data\" or - \"sys\", as described above.) - -Once the setup script is finished, be sure to reboot the machine and -remove the USB device. +The setup script will ask a series of questions to configure the system. Be sure +to answer carefully or else you may have to re-configure the system after boot. + +- Keyboard Layout (Local keyboard language and usage mode, e.g., us and variant + of us-nodeadkeys.) +- Hostname (The name for the computer.) +- Network (For example, automatic IP address discovery with the "DHCP" + protocol.) +- DNS Servers (Domain Name Servers to query. For privacy reasons, it is NOT + recommended to route every local request to servers like Google's 8.8.8.8.) +- Timezone +- Proxy (Proxy server to use for accessing the web. Use "none" for direct + connections to the internet.) +- Mirror (From where to download packages. Choose the organization you trust + giving your usage patterns to.) +- SSH (Secure SHell remote access server. "Openssh" is part of the default + install image. Use "none" to disable remote login, e.g. on laptops.) +- NTP (Network Time Protocol client used for keeping the system clock in sync + with a time-server. Package "chrony" is part of the default install image.) +- Disk Mode (Select between diskless (disk="none"), "data" or "sys", as + described above.) + +Once the setup script is finished, be sure to reboot the machine and remove the +USB device. ```sh reboot @@ -89,14 +82,12 @@ reboot ## Post-Installation There are many things you can do once your Alpine Linux system is up and -running, and it largely depends on what you\'ll use the machine for. -I\'m going to walk through my personal post-installation setup for my -web server. +running, and it largely depends on what you'll use the machine for. I'm going +to walk through my personal post-installation setup for my web server. 1. Upgrade the System - First, login as `root` in order to update and upgrade the - system: + First, login as `root` in order to update and upgrade the system: ```sh apk -U upgrade @@ -104,9 +95,9 @@ web server. 2. Adding a User - I needed to add a user so that I don\'t need to log in as root. Note - that if you\'re used to using the `sudo` command, you - will now need to use the `doas` command on Alpine Linux. + I needed to add a user so that I don't need to log in as root. Note that if + you're used to using the `sudo` command, you will now need to use the + `doas` command on Alpine Linux. ```sh apk add doas @@ -122,15 +113,14 @@ web server. 3. Enable Community Packages - In order to install more common packages that aren\'t found in the - `main` repository, you will need to enable the - `community` repository: + In order to install more common packages that aren't found in the `main` + repository, you will need to enable the `community` repository: ```sh doas nano /etc/apk/repositories ``` - Uncomment the community line for whichever version of Alpine you\'re + Uncomment the community line for whichever version of Alpine you're running: ```sh @@ -144,9 +134,9 @@ web server. 4. Install Required Packages - Now that the community packages are available, you can install any - packages you need. In my case, I installed the web server packages I - need for my services: + Now that the community packages are available, you can install any packages + you need. In my case, I installed the web server packages I need for my + services: ```sh doas apk add nano nginx docker docker-compose ufw @@ -154,15 +144,15 @@ web server. 5. SSH - If you didn\'t install OpenSSH as part of the installation, you can - do so now: + If you didn't install OpenSSH as part of the installation, you can do so + now: ```sh doas apk add openssh ``` - Next, either create a new key or copy your SSH key to the server - from your current machines: + Next, either create a new key or copy your SSH key to the server from your + current machines: ```sh # Create a new key @@ -178,9 +168,9 @@ web server. 6. Firewall - Lastly, I installed `ufw` above as my firewall. To set - up, default to deny incoming and allow outgoing connections. Then - selectively allow other ports or apps as needed. + Lastly, I installed `ufw` above as my firewall. To set up, default to deny + incoming and allow outgoing connections. Then selectively allow other ports + or apps as needed. ```sh doas ufw default deny incoming @@ -192,8 +182,8 @@ web server. 7. Change Hostname - If you don\'t like the hostname set during installation, you just - need to edit two files. First, edit the simple hostname file: + If you don't like the hostname set during installation, you just need to + edit two files. First, edit the simple hostname file: ```sh doas nano /etc/hostname @@ -216,8 +206,8 @@ web server. # Nginx Web Server -To set up my web server, I simply created the `www` user and -created the necessary files. +To set up my web server, I simply created the `www` user and created the +necessary files. ```sh doas adduser -D -g 'www' www @@ -227,17 +217,17 @@ doas chown -R www:www /var/lib/nginx/ doas chown -R www:www /www ``` -If you\'re running a simple webroot, you can alter the main -`nginx.conf` file. Otherwise, you can drop configuration -files in the following directory. You don\'t need to enable or symlink -the configuration file like you do in other systems. +If you're running a simple webroot, you can alter the main `nginx.conf` file. +Otherwise, you can drop configuration files in the following directory. You +don't need to enable or symlink the configuration file like you do in other +systems. ```sh doas nano /etc/nginx/http.d/example_website.conf ``` -Once the configuration is set and pointed at the `/www` -directory to serve files, enable the Nginx service: +Once the configuration is set and pointed at the `/www` directory to serve +files, enable the Nginx service: ```sh # Note that 'default' must be included or Nginx will not start on boot @@ -246,19 +236,16 @@ doas rc-update add nginx default # Docker Containers -Docker works exactly the same as other systems. Either execute a -`docker run` command or create a -`docker-compose.yml` file and do -`docker-compose up -d`. +Docker works exactly the same as other systems. Either execute a `docker run` +command or create a `docker-compose.yml` file and do `docker-compose up -d`. # Git Server -I went in-depth on how to self-host a git server in another post: -[Self-Hosting a Personal Git Server](../git-server/). +I went in-depth on how to self-host a git server in another post: [Self-Hosting +a Personal Git Server](../git-server/). -However, there are a few differences with Alpine. First note that in -order to change the `git` user\'s shell, you must do a few -things a little different: +However, there are a few differences with Alpine. First note that in order to +change the `git` user's shell, you must do a few things a little different: ```sh doas apk add libuser @@ -270,12 +257,11 @@ doas lchsh git # Thoughts on Alpine -So far, I love Alpine Linux. I have no complaints about anything at this -point, but I\'m not completely finished with the migration yet. Once -I\'m able to upgrade my hardware to a rack-mounted server, I will -migrate Plex and Syncthing over to Alpine as well - possibly putting -Plex into a container or VM. +So far, I love Alpine Linux. I have no complaints about anything at this point, +but I'm not completely finished with the migration yet. Once I'm able to +upgrade my hardware to a rack-mounted server, I will migrate Plex and Syncthing +over to Alpine as well - possibly putting Plex into a container or VM. -The performance is stellar, the `apk` package manager is -seamless, and system administration tasks are effortless. My only regret -is that I didn\'t install Alpine sooner. +The performance is stellar, the `apk` package manager is seamless, and system +administration tasks are effortless. My only regret is that I didn't install +Alpine sooner. diff --git a/content/blog/2022-10-30-linux-display-manager.md b/content/blog/2022-10-30-linux-display-manager.md index 6b017ca..4d61caf 100644 --- a/content/blog/2022-10-30-linux-display-manager.md +++ b/content/blog/2022-10-30-linux-display-manager.md @@ -8,18 +8,16 @@ draft = false # Display Manager Services In order to change the [display -manager](https://en.wikipedia.org/wiki/Display_manager) on Void Linux - -or any other Linux distro - you need to identify the currently enabled -display manager. +manager](https://en.wikipedia.org/wiki/Display_manager) on Void Linux - or any +other Linux distro - you need to identify the currently enabled display manager. ## Disabling the Current Display Manager -Void Linux only has one ISO available for download with a pre-built -display manager at the time of this post: the XFCE ISO. If you\'ve -installed this version, the pre-assigned display manager is -`lxdm`. If you installed another display manager, replace -`lxdm` in the following command with the display manager you -have installed. +Void Linux only has one ISO available for download with a pre-built display +manager at the time of this post: the XFCE ISO. If you've installed this +version, the pre-assigned display manager is `lxdm`. If you installed another +display manager, replace `lxdm` in the following command with the display +manager you have installed. To disable `lxdm`, simply remove the service symlink: @@ -29,9 +27,8 @@ sudo rm /var/service/lxdm ## Enabling a New Display Manager -If you want to enable a new display manager, you can do so after -`lxdm` is disabled. Make sure to replace -`<new_display_manager>` with your new DM, such as +If you want to enable a new display manager, you can do so after `lxdm` is +disabled. Make sure to replace `<new_display_manager>` with your new DM, such as `gdm`, `xdm`, etc. ```sh @@ -41,8 +38,8 @@ sudo ln -s /etc/sv/<new_display_manager> /var/service # Set Up `.xinitrc` Depending on your setup, you may need to create a few X files, such as -`~/.xinitrc`. For my personal set-up, I created this file to -launch the i3wm as my desktop. +`~/.xinitrc`. For my personal set-up, I created this file to launch the i3wm as +my desktop. ```sh nano ~/.xinitrc @@ -54,21 +51,20 @@ nano ~/.xinitrc exec i3 ``` -If you run a desktop other than i3, simply replace `i3` with -the shell command that launches that desktop. +If you run a desktop other than i3, simply replace `i3` with the shell command +that launches that desktop. # Set Up Your Shell Profile -Finally, in order to automatically launch an X session upon login, you -will need to edit the `.bash_profile` (bash) or -`.zprofile` (zsh) files for your shell: +Finally, in order to automatically launch an X session upon login, you will need +to edit the `.bash_profile` (bash) or `.zprofile` (zsh) files for your shell: ```sh nano ~/.zprofile ``` -Add the following snippet to the end of the shell profile file. This -will execute the `startx` command upon login. +Add the following snippet to the end of the shell profile file. This will +execute the `startx` command upon login. ```sh if [ -z "${DISPLAY}" ] && [ "${XDG_VTNR}" -eq 1 ]; then @@ -76,7 +72,6 @@ if [ -z "${DISPLAY}" ] && [ "${XDG_VTNR}" -eq 1 ]; then fi ``` -Alternatively, you can ignore this step and simply choose to manually -execute `startx` upon login. This can be useful if you have -issues with your desktop or like to manually launch different desktops -by choice. +Alternatively, you can ignore this step and simply choose to manually execute +`startx` upon login. This can be useful if you have issues with your desktop or +like to manually launch different desktops by choice. diff --git a/content/blog/2022-11-07-self-hosting-matrix.md b/content/blog/2022-11-07-self-hosting-matrix.md index 2d13602..c98a48e 100644 --- a/content/blog/2022-11-07-self-hosting-matrix.md +++ b/content/blog/2022-11-07-self-hosting-matrix.md @@ -7,21 +7,21 @@ draft = false # Synpase -If you\'re reading this, you likely know that +If you're reading this, you likely know that [Synapse](https://github.com/matrix-org/synapse/) is a popular -[Matrix](https://matrix.org/) home server software that allows users to -run their own Matrix home server. +[Matrix](https://matrix.org/) home server software that allows users to run +their own Matrix home server. -This post is a short guide describing how I was able to get Synapse -working in a minimally-usable state on Alpine Linux. +This post is a short guide describing how I was able to get Synapse working in a +minimally-usable state on Alpine Linux. # Installation Process ## Dependencies -First, since there is no Alpine-specific package for Synapse, we need to -ensure that Alpine has the required dependencies for the Python-based -installation method. +First, since there is no Alpine-specific package for Synapse, we need to ensure +that Alpine has the required dependencies for the Python-based installation +method. ```sh doas apk -U update @@ -41,10 +41,9 @@ pip install matrix-synapse ## Running Synapse -Once installed, running Synapse is easy. Simply execute the following -command, replacing `example.com` with the domain name that -will be used with this home server. This will generate the configuration -files needed to run the server. +Once installed, running Synapse is easy. Simply execute the following command, +replacing `example.com` with the domain name that will be used with this home +server. This will generate the configuration files needed to run the server. ```sh python -m synapse.app.homeserver \ @@ -62,16 +61,14 @@ synctl start ## Configuring Synapse -To make any change to Synapse, we need to edit the `YAML` -configuration file: +To make any change to Synapse, we need to edit the `YAML` configuration file: ```sh nano ~/synapse/homeserver.yaml ``` -For now, we just need to ensure the `server_name` is -accurate. However, there are a lot of other configuration options found -in the [Configuring +For now, we just need to ensure the `server_name` is accurate. However, there +are a lot of other configuration options found in the [Configuring Synapse](https://matrix-org.github.io/synapse/develop/usage/configuration/config_documentation.html) documentation that can be enabled/disabled at any point. @@ -87,9 +84,9 @@ synctl restart ## Nginx Reverse-Proxy -To ensure that Synapse is reachable from the public, we need to connect -our domain to the Synapse server. In my case, I use a Nginx -reverse-proxy for this purpose. +To ensure that Synapse is reachable from the public, we need to connect our +domain to the Synapse server. In my case, I use a Nginx reverse-proxy for this +purpose. To use Nginx, we need to create a reverse-proxy configuration file: @@ -97,9 +94,8 @@ To use Nginx, we need to create a reverse-proxy configuration file: doas nano /etc/nginx/http.d/example.com.conf ``` -If you already have TLS certificates for this domain -(`example.com`), you can simply use the SSL configuration and -point toward your TLS certificates. +If you already have TLS certificates for this domain (`example.com`), you can +simply use the SSL configuration and point toward your TLS certificates. ``` conf server { @@ -143,10 +139,9 @@ server { ``` If you need to generate TLS certificates (I recommend -[Certbot](https://certbot.eff.org/)), you\'ll need a more minimal Nginx -conf file before you can use the TLS-enabled example above. Instead, use -this configuration file during the Certbot certificate generation -process: +[Certbot](https://certbot.eff.org/)), you'll need a more minimal Nginx conf +file before you can use the TLS-enabled example above. Instead, use this +configuration file during the Certbot certificate generation process: ``` conf server { @@ -158,20 +153,19 @@ server { } ``` -Once you\'re done editing the Nginx conf file, restart Nginx: +Once you're done editing the Nginx conf file, restart Nginx: ```sh doas rc-service nginx restart ``` -If you still need to generate TLS certificates, run `certbot` -now and obtain the certificates. Certbot will ask if you want to use a -webroot or spin up a temporary web server. I **highly\*** recommend -using the temporary web server due to the many issues with using a -webroot. +If you still need to generate TLS certificates, run `certbot` now and obtain the +certificates. Certbot will ask if you want to use a webroot or spin up a +temporary web server. I **highly** recommend using the temporary web server due +to the many issues with using a webroot. -You will need to stop Nginx in order to user the temporary web server -option with Certbot: +You will need to stop Nginx in order to user the temporary web server option +with Certbot: ```sh # Stop Nginx so certbot can spin up a temp webserver for cert generation @@ -182,13 +176,13 @@ doas rc-service nginx start ## Open Firewall & Router Ports -If you use a firewall on the server, open the `8448` port for -discovery and federation, as well as the normal web server ports if -you\'re using a reverse proxy. If you want additional services, such as -voice calls, you will need to read the Synapse documentation to see -which ports need to be opened for those features. +If you use a firewall on the server, open the `8448` port for discovery and +federation, as well as the normal web server ports if you're using a reverse +proxy. If you want additional services, such as voice calls, you will need to +read the Synapse documentation to see which ports need to be opened for those +features. -Here\'s an example of the Universal Firewall (UFW) software: +Here's an example of the Universal Firewall (UFW) software: ```sh # Matrix port @@ -197,15 +191,13 @@ doas ufw allow 8448 doas ufw allow "Nginx Full" ``` -Remember to forward any Synapse ports, such as `8448`, -`80`, and `443`, in your Router from the internet -to your server\'s IP address. +Remember to forward any Synapse ports, such as `8448`, `80`, and `443`, in your +Router from the internet to your server's IP address. ## Adding Matrix Users -Finally, if you didn\'t enable public registration in the -`homeserver.yaml` file, you can manually create users via the -command-line: +Finally, if you didn't enable public registration in the `homeserver.yaml` +file, you can manually create users via the command-line: ```sh cd ~/synapse @@ -213,9 +205,8 @@ register_new_matrix_user -c homeserver.yaml ``` Remember that the format for federated Matrix usernames is -`@username:example.com` when logging in to client -applications. +`@username:example.com` when logging in to client applications. -Once Synapse is running, and you have a username, you are ready to log -in to a Matrix client and start sending messages, joining rooms, and -utilizing your very own Matrix server. +Once Synapse is running, and you have a username, you are ready to log in to a +Matrix client and start sending messages, joining rooms, and utilizing your very +own Matrix server. diff --git a/content/blog/2022-11-11-nginx-tmp-errors.md b/content/blog/2022-11-11-nginx-tmp-errors.md index 989869b..356db15 100644 --- a/content/blog/2022-11-11-nginx-tmp-errors.md +++ b/content/blog/2022-11-11-nginx-tmp-errors.md @@ -5,15 +5,14 @@ description = "" draft = false +++ -*This is a brief post so that I personally remember the solution as it -has occurred multiple times for me.* +*This is a brief post so that I personally remember the solution as it has +occurred multiple times for me.* # The Problem -After migrating to a new server OS, I started receiving quite a few -permission errors like the one below. These popped up for various -different websites I\'m serving via Nginx on this server, but did not -prevent the website from loading. +After migrating to a new server OS, I started receiving quite a few permission +errors like the one below. These popped up for various different websites I'm +serving via Nginx on this server, but did not prevent the website from loading. I found the errors in the standard log file: @@ -25,20 +24,18 @@ cat /var/log/nginx/error.log 2022/11/11 11:30:34 [crit] 8970#8970: *10 open() "/var/lib/nginx/tmp/proxy/3/00/0000000003" failed (13: Permission denied) while reading upstream, client: 169.150.203.10, server: cyberchef.example.com, request: "GET /assets/main.css HTTP/2.0", upstream: "http://127.0.0.1:8111/assets/main.css", host: "cyberchef.example.com", referrer: "https://cyberchef.example.com/" ``` -You can see that the error is `13: Permission denied` and it -occurs in the `/var/lib/nginx/tmp/` directory. In my case, I -had thousands of errors where Nginx was denied permission to read/write -files in this directory. +You can see that the error is `13: Permission denied` and it occurs in the +`/var/lib/nginx/tmp/` directory. In my case, I had thousands of errors where +Nginx was denied permission to read/write files in this directory. So how do I fix it? # The Solution -In order to resolve the issue, I had to ensure the -`/var/lib/nginx` directory is owned by Nginx. Mine was owned -by the `www` user and Nginx was not able to read or write -files within that directory. This prevented Nginx from caching temporary -files. +In order to resolve the issue, I had to ensure the `/var/lib/nginx` directory is +owned by Nginx. Mine was owned by the `www` user and Nginx was not able to read +or write files within that directory. This prevented Nginx from caching +temporary files. ```sh # Alpine Linux @@ -48,9 +45,9 @@ doas chown -R nginx:nginx /var/lib/nginx sudo chown -R nginx:nginx /var/lib/nginx ``` -You *may* also be able to change the `proxy_temp_path` in -your Nginx config, but I did not try this. Here\'s a suggestion I found -online that may work if the above solution does not: +You *may* also be able to change the `proxy_temp_path` in your Nginx config, but +I did not try this. Here's a suggestion I found online that may work if the +above solution does not: ```sh nano /etc/nginx/http.d/example.com.conf @@ -68,8 +65,8 @@ server { } ``` -Finally, restart Nginx and your server should be able to cache temporary -files again. +Finally, restart Nginx and your server should be able to cache temporary files +again. ```sh # Alpine Linux (OpenRC) diff --git a/content/blog/2022-11-27-server-build.md b/content/blog/2022-11-27-server-build.md index acf07e8..17767b2 100644 --- a/content/blog/2022-11-27-server-build.md +++ b/content/blog/2022-11-27-server-build.md @@ -7,142 +7,137 @@ draft = false # The Dilemma -For years, I have been using desktops and a Raspberry Pi as the backbone -of my homelab. I have always wanted to move toward a single dedicated -server that could handle all of my tasks, but was often put off by the -complexity of the choices (and financial roadblocks at some times). +For years, I have been using desktops and a Raspberry Pi as the backbone of my +homelab. I have always wanted to move toward a single dedicated server that +could handle all of my tasks, but was often put off by the complexity of the +choices (and financial roadblocks at some times). -However, after purchasing a small server rack this past year, I have -been researching to see what kind of rack-mounted server I could buy. I -initially bought a Dell R720XD loaded up with everything I could ever -want in a server - but I did not care for it. It was far too loud, and -the age of the CPU/RAM was something I wanted to improve upon. +However, after purchasing a small server rack this past year, I have been +researching to see what kind of rack-mounted server I could buy. I initially +bought a Dell R720XD loaded up with everything I could ever want in a server - +but I did not care for it. It was far too loud, and the age of the CPU/RAM was +something I wanted to improve upon. -After returning the R720XD, I decided that I wanted to build my own -server with modern, consumer-grade PC components. This time, I am very -happy with the results of my server. +After returning the R720XD, I decided that I wanted to build my own server with +modern, consumer-grade PC components. This time, I am very happy with the +results of my server. # Components -I\'ll start by listing all the components I used for this server build: +I'll start by listing all the components I used for this server build: -- **Case**: [Rosewill RSV-R4100U 4U Server Chassis Rackmount +- **Case**: [Rosewill RSV-R4100U 4U Server Chassis Rackmount Case](https://www.rosewill.com/rosewill-rsv-r4100u-black/p/9SIA072GJ92825) -- **Motherboard**: [NZXT B550](https://nzxt.com/product/n7-b550) -- **CPU**: AMD Ryzen 7 5700G with Radeon Graphics -- **GPU**: N/A - I specifically chose one of the few AMD CPUs that - support onboard graphics. -- **RAM**: 64GB RAM (2x32GB) *Max of 128GB RAM on this motherboard* -- **Boot Drive**: Western Digital 500GB M.2 NVME SSD -- **HDD Bay**: - - 10TB WD White *(shucked, moved from previous server)* - - 8TB WD White *(shucked, moved from previous server)* - - 2 x 8TB WD Red Plus *(Black Friday lined up perfectly with this - build, so I grabbed two of these)* -- **PSU**: Corsair RM850 PSU -- **Extras**: - - Corsair TM3Q Thermal Paste - - Noctua 120mm fan *(replacement for front case fan)* - - 2 x Noctua 80mm fans *(replacement for rear case fans)* - - CableMatters 6Gbps SATA Cables +- **Motherboard**: [NZXT B550](https://nzxt.com/product/n7-b550) +- **CPU**: AMD Ryzen 7 5700G with Radeon Graphics +- **GPU**: N/A - I specifically chose one of the few AMD CPUs that support + onboard graphics. +- **RAM**: 64GB RAM (2x32GB) *Max of 128GB RAM on this motherboard* +- **Boot Drive**: Western Digital 500GB M.2 NVME SSD +- **HDD Bay**: + - 10TB WD White *(shucked, moved from previous server)* + - 8TB WD White *(shucked, moved from previous server)* + - 2 x 8TB WD Red Plus *(Black Friday lined up perfectly with this build, + so I grabbed two of these)* +- **PSU**: Corsair RM850 PSU +- **Extras**: + - Corsair TM3Q Thermal Paste + - Noctua 120mm fan *(replacement for front case fan)* + - 2 x Noctua 80mm fans *(replacement for rear case fans)* + - CableMatters 6Gbps SATA Cables # Building the Server -This took quite a while for me to build (in my opinion of time), -totaling around 3 hours from start to finish. The case has some peculiar -construction, so you have to completely remove the ODD & HDD cages to -install the motherboard and other components first. +This took quite a while for me to build (in my opinion of time), totaling around +3 hours from start to finish. The case has some peculiar construction, so you +have to completely remove the ODD & HDD cages to install the motherboard and +other components first. -Now, I\'ve never built a computer of any kind before, so I was quite -nervous. Personally, the only challenging part was getting the CPU -cooler to screw into the motherboard without sliding the thermal paste -around too much underneath. I\'m still not entirely sure if I did a -great job of it, but nothing\'s broken yet. +Now, I've never built a computer of any kind before, so I was quite nervous. +Personally, the only challenging part was getting the CPU cooler to screw into +the motherboard without sliding the thermal paste around too much underneath. +I'm still not entirely sure if I did a great job of it, but nothing's broken +yet. -The main components were all fine and simple. However, installing the -hard drives is slightly tedious as I need to power off the server and -completely unscrew the HDD cage to install or remove any drives. -Additionally, the drives are screwed directly into the metal cage with -small screws, which are quite a bit different from the HDD trays I\'m -used to in other machines. +The main components were all fine and simple. However, installing the hard +drives is slightly tedious as I need to power off the server and completely +unscrew the HDD cage to install or remove any drives. Additionally, the drives +are screwed directly into the metal cage with small screws, which are quite a +bit different from the HDD trays I'm used to in other machines. -Seeing that the cases with hot-swap bays were 3-4x the price, I\'m okay -dealing with the tedium of removing the cage to install new drives. +Seeing that the cases with hot-swap bays were 3-4x the price, I'm okay dealing +with the tedium of removing the cage to install new drives. # Software -I\'m not going to dive into the software as I have done so in other -recent posts. However, I wanted to note that I am using Alpine Linux on -this server and hosting most services inside Docker. No virtual machines -(VMs) and very few bare-metal services. +I'm not going to dive into the software as I have done so in other recent +posts. However, I wanted to note that I am using Alpine Linux on this server and +hosting most services inside Docker. No virtual machines (VMs) and very few +bare-metal services. # The Results -How did my build turn out? Well, after migrating my other servers and -their services over, I found that my server is blazing fast. The -heaviest of my applications, Plex, is handled with ease. Even 4k -streaming seems to be effortless. +How did my build turn out? Well, after migrating my other servers and their +services over, I found that my server is blazing fast. The heaviest of my +applications, Plex, is handled with ease. Even 4k streaming seems to be +effortless. -I am very happy with the results and will likely continue to improve on -this server as the years go by rather than buying another used server -online. +I am very happy with the results and will likely continue to improve on this +server as the years go by rather than buying another used server online. ## Mistakes I Made -This post wouldn\'t be complete unless I wrote about the mistakes I made -while building. The only real mistake I made beyond a \"whoops I dropped -a screw\" related to airflow and fan direction. +This post wouldn't be complete unless I wrote about the mistakes I made while +building. The only real mistake I made beyond a "whoops I dropped a screw" +related to airflow and fan direction. -While installing the two new hard drives that showed up on 2022-11-30 -and getting ready to install the case in my rack, I noticed that the -hard drive temperatures were quite high. +While installing the two new hard drives that showed up on 2022-11-30 and +getting ready to install the case in my rack, I noticed that the hard drive +temperatures were quite high. -I used the `smartctl` command for each of my drives -(`/dev/sda` through `/dev/sdd`): +I used the `smartctl` command for each of my drives (`/dev/sda` through +`/dev/sdd`): ```sh doas smartctl -a /dev/sda | grep Temperature_Celsius ``` -The results were unusual - all four drives were idling at \~44-46 -degrees Celsius. The only drive that was cooler was my 10TB drive, which -was at 38 degrees Celsius. I noted that this 10TB drive was also closest -to the case fan. +The results were unusual - all four drives were idling at ~44-46 degrees +Celsius. The only drive that was cooler was my 10TB drive, which was at 38 +degrees Celsius. I noted that this 10TB drive was also closest to the case fan. ```sh ID# ATTRIBUTE_NAME FLAG VALUE WORST THRESH TYPE UPDATED WHEN_FAILED RAW_VALUE # /dev/sda -194 Temperature_Celsius 0x0002 147 147 000 Old_age Always - 44 (Min/Max 22/46) +194 Temperature_Celsius 0x0002 147 147 000 Old_age Always - 44 (Min/Max 22/46) # /dev/sdb -194 Temperature_Celsius 0x0002 141 141 000 Old_age Always - 46 (Min/Max 21/48) +194 Temperature_Celsius 0x0002 141 141 000 Old_age Always - 46 (Min/Max 21/48) # /dev/sdc -194 Temperature_Celsius 0x0002 144 144 000 Old_age Always - 45 (Min/Max 19/61) +194 Temperature_Celsius 0x0002 144 144 000 Old_age Always - 45 (Min/Max 19/61) # /dev/sdd -194 Temperature_Celsius 0x0002 171 171 000 Old_age Always - 38 (Min/Max 14/56) +194 Temperature_Celsius 0x0002 171 171 000 Old_age Always - 38 (Min/Max 14/56) ``` -After looking to see if I could fit more fans into the case, I noticed -that the 120mm fan used for intake from the front of the case was -actually pushing air out of the case by mistake. This fan sits right in -front of the hard drive bay. +After looking to see if I could fit more fans into the case, I noticed that the +120mm fan used for intake from the front of the case was actually pushing air +out of the case by mistake. This fan sits right in front of the hard drive bay. -Once I flipped the fan around to act as an intake fan, the temperatures -dropped immediately! They are now idling at \~31-33 degrees Celsius. A -single fan spinning the wrong way caused my drives to idle 10-15 degrees -higher than they should have. +Once I flipped the fan around to act as an intake fan, the temperatures dropped +immediately! They are now idling at ~31-33 degrees Celsius. A single fan +spinning the wrong way caused my drives to idle 10-15 degrees higher than they +should have. ```sh ID# ATTRIBUTE_NAME FLAG VALUE WORST THRESH TYPE UPDATED WHEN_FAILED RAW_VALUE # /dev/sda -194 Temperature_Celsius 0x0002 209 209 000 Old_age Always - 31 (Min/Max 14/56) +194 Temperature_Celsius 0x0002 209 209 000 Old_age Always - 31 (Min/Max 14/56) # /dev/sdb -194 Temperature_Celsius 0x0002 196 196 000 Old_age Always - 33 (Min/Max 19/61) +194 Temperature_Celsius 0x0002 196 196 000 Old_age Always - 33 (Min/Max 19/61) # /dev/sdc -194 Temperature_Celsius 0x0002 203 203 000 Old_age Always - 32 (Min/Max 21/48) +194 Temperature_Celsius 0x0002 203 203 000 Old_age Always - 32 (Min/Max 21/48) # /dev/sdd -194 Temperature_Celsius 0x0002 196 196 000 Old_age Always - 33 (Min/Max 22/46) +194 Temperature_Celsius 0x0002 196 196 000 Old_age Always - 33 (Min/Max 22/46) ``` -This was a silly error to make, but I\'m glad I found it today before I -screwed the case into the rack and made things a lot more tedious to -fix. +This was a silly error to make, but I'm glad I found it today before I screwed +the case into the rack and made things a lot more tedious to fix. diff --git a/content/blog/2022-11-29-nginx-referrer-ban-list.md b/content/blog/2022-11-29-nginx-referrer-ban-list.md index 9144870..62d00c4 100644 --- a/content/blog/2022-11-29-nginx-referrer-ban-list.md +++ b/content/blog/2022-11-29-nginx-referrer-ban-list.md @@ -7,9 +7,9 @@ draft = false # Creating the Ban List -In order to ban list referral domains or websites with Nginx, you need -to create a ban list file. The file below will accept regexes for -different domains or websites you wish to block. +In order to ban list referral domains or websites with Nginx, you need to create +a ban list file. The file below will accept regexes for different domains or +websites you wish to block. First, create the file in your nginx directory: @@ -17,8 +17,8 @@ First, create the file in your nginx directory: doas nano /etc/nginx/banlist.conf ``` -Next, paste the following contents in and fill out the regexes with -whichever domains you\'re blocking. +Next, paste the following contents in and fill out the regexes with whichever +domains you're blocking. ``` conf # /etc/nginx/banlist.conf @@ -35,15 +35,15 @@ map $http_referer $bad_referer { # Configuring Nginx -In order for the ban list to work, Nginx needs to know it exists and how -to handle it. For this, edit the `nginx.conf` file. +In order for the ban list to work, Nginx needs to know it exists and how to +handle it. For this, edit the `nginx.conf` file. ```sh doas nano /etc/nginx/nginx.conf ``` -Within this file, find the `http` block and add your ban list -file location to the end of the block. +Within this file, find the `http` block and add your ban list file location to +the end of the block. ``` conf # /etc/nginx/nginx.conf @@ -58,24 +58,23 @@ http { # Enabling the Ban List -Finally, we need to take action when a bad referral site is found. To do -so, edit the configuration file for your website. For example, I have -all website configuration files in the `http.d` directory. -You may have them in the `sites-available` directory on some -distributions. +Finally, we need to take action when a bad referral site is found. To do so, +edit the configuration file for your website. For example, I have all website +configuration files in the `http.d` directory. You may have them in the +`sites-available` directory on some distributions. ```sh doas nano /etc/nginx/http.d/example.com.conf ``` -Within each website\'s configuration file, edit the `server` -blocks that are listening to ports 80 and 443 and create a check for the -`$bad_referrer` variable we created in the ban list file. +Within each website's configuration file, edit the `server` blocks that are +listening to ports 80 and 443 and create a check for the `$bad_referrer` +variable we created in the ban list file. If a matching site is found, you can return any [HTTP Status -Code](https://en.wikipedia.org/wiki/List_of_HTTP_status_codes) you want. -Code 403 (Forbidden) is logical in this case since you are preventing a -client connection due to a banned domain. +Code](https://en.wikipedia.org/wiki/List_of_HTTP_status_codes) you want. Code +403 (Forbidden) is logical in this case since you are preventing a client +connection due to a banned domain. ``` conf server { @@ -100,8 +99,8 @@ doas rc-service nginx restart # Testing Results -In order to test the results, let\'s curl the contents of our site. To -start, I\'ll curl the site normally: +In order to test the results, let's curl the contents of our site. To start, +I'll curl the site normally: ```sh curl https://cleberg.net @@ -113,15 +112,15 @@ The HTML contents of the page come back successfully: <!doctype html>...</html> ``` -Next, let\'s include a banned referrer: +Next, let's include a banned referrer: ```sh curl --referer https://news.ycombinator.com https://cleberg.net ``` -This time, I\'m met with a 403 Forbidden response page. That means we -are successful and any clients being referred from a banned domain will -be met with this same response code. +This time, I'm met with a 403 Forbidden response page. That means we are +successful and any clients being referred from a banned domain will be met with +this same response code. ``` html <html> diff --git a/content/blog/2022-12-01-nginx-compression.md b/content/blog/2022-12-01-nginx-compression.md index d027afe..492b04e 100644 --- a/content/blog/2022-12-01-nginx-compression.md +++ b/content/blog/2022-12-01-nginx-compression.md @@ -7,24 +7,23 @@ draft = false # Text Compression -Text compression allows a web server to serve text-based resources -faster than uncompressed data. This can speed up things like First -Contentful Paint, Tie to Interactive, and Speed Index. +Text compression allows a web server to serve text-based resources faster than +uncompressed data. This can speed up things like First Contentful Paint, Tie to +Interactive, and Speed Index. # Enable Nginx Compression with gzip -In order to enable text compression on Nginx, we need to enable it -within the configuration file: +In order to enable text compression on Nginx, we need to enable it within the +configuration file: ```sh nano /etc/nginx/nginx.conf ``` -Within the `http` block, find the section that shows -something like the block below. This is the default gzip configuration I -found in my `nginx.conf` file on Alpine Linux 3.17. Yours may -look slightly different, just make sure that you\'re not creating any -duplicate gzip options. +Within the `http` block, find the section that shows something like the block +below. This is the default gzip configuration I found in my `nginx.conf` file on +Alpine Linux 3.17. Yours may look slightly different, just make sure that +you're not creating any duplicate gzip options. ``` conf # Enable gzipping of responses. @@ -48,33 +47,30 @@ gzip_disable "MSIE [1-6]"; # Explanations of ngx~httpgzipmodule~ Options -Each of the lines above enables a different aspect of the gzip response -for Nginx. Here are the full explanations: +Each of the lines above enables a different aspect of the gzip response for +Nginx. Here are the full explanations: -- `gzip` -- Enables or disables gzipping of responses. -- `gzip_vary` -- Enables or disables inserting the \"Vary: - Accept-Encoding\" response header field if the directives gzip, - gzip~static~, or gunzip are active. -- `gzip_min_length` -- Sets the minimum length of a - response that will be gzipped. The length is determined only from - the \"Content-Length\" response header field. -- `gzip_proxied` -- Enables or disables gzipping of - responses for proxied requests depending on the request and - response. The fact that the request is proxied is determined by the - presence of the \"Via\" request header field. -- `gzip_types` -- Enables gzipping of responses for the - specified MIME types in addition to \"text/html\". The special value - "\*" matches any MIME type (0.8.29). Responses with the - \"text/html\" type are always compressed. -- `gzip_disable` -- Disables gzipping of responses for - requests with \"User-Agent\" header fields matching any of the - specified regular expressions. - - The special mask \"msie6\" (0.7.12) corresponds to the regular - expression \"MSIE \[4-6\].\", but works faster. Starting from - version 0.8.11, \"MSIE 6.0; ... SV1\" is excluded from this - mask. +- `gzip` -- Enables or disables gzipping of responses. +- `gzip_vary` -- Enables or disables inserting the "Vary: Accept-Encoding" + response header field if the directives gzip, gzip~static~, or gunzip are + active. +- `gzip_min_length` -- Sets the minimum length of a response that will be + gzipped. The length is determined only from the "Content-Length" response + header field. +- `gzip_proxied` -- Enables or disables gzipping of responses for proxied + requests depending on the request and response. The fact that the request is + proxied is determined by the presence of the "Via" request header field. +- `gzip_types` -- Enables gzipping of responses for the specified MIME types in + addition to "text/html". The special value "*" matches any MIME type + (0.8.29). Responses with the "text/html" type are always compressed. +- `gzip_disable` -- Disables gzipping of responses for requests with + "User-Agent" header fields matching any of the specified regular + expressions. + - The special mask "msie6" (0.7.12) corresponds to the regular expression + "MSIE [4-6].", but works faster. Starting from version 0.8.11, "MSIE + 6.0; ... SV1" is excluded from this mask. -More information on these directives and their options can be found on -the [Module +More information on these directives and their options can be found on the +[Module ngx~httpgzipmodule~](https://nginx.org/en/docs/http/ngx_http_gzip_module.html) -page in Nginx\'s documentation. +page in Nginx's documentation. diff --git a/content/blog/2022-12-07-nginx-wildcard-redirect.md b/content/blog/2022-12-07-nginx-wildcard-redirect.md index c2ef747..e8339b9 100644 --- a/content/blog/2022-12-07-nginx-wildcard-redirect.md +++ b/content/blog/2022-12-07-nginx-wildcard-redirect.md @@ -7,18 +7,18 @@ draft = false # Problem -I recently migrated domains and replaced the old webpage with a simple -info page with instructions to users on how to edit their bookmarks and -URLs to get to the page they were seeking. +I recently migrated domains and replaced the old webpage with a simple info page +with instructions to users on how to edit their bookmarks and URLs to get to the +page they were seeking. -This was not ideal as it left the work up to the user and may have -caused friction for users who accessed my RSS feed. +This was not ideal as it left the work up to the user and may have caused +friction for users who accessed my RSS feed. # Solution -Instead, I finally found a solution that allows me to redirect both -subdomains AND trailing content. For example, both of these URLs now -redirect properly using the logic I\'ll explain below: +Instead, I finally found a solution that allows me to redirect both subdomains +AND trailing content. For example, both of these URLs now redirect properly +using the logic I'll explain below: ``` txt # Example 1 - Simple base domain redirect with trailing content @@ -34,15 +34,15 @@ Go ahead, try the URLs if you want to test them. ## Nginx Config -To make this possible. I needed to configure a proper redirect scheme in -my Nginx configuration. +To make this possible. I needed to configure a proper redirect scheme in my +Nginx configuration. ```sh doas nano /etc/nginx/http.d/domain1.conf ``` -Within this file, I had one block configured to redirect HTTP requests -to HTTPS for the base domain and all subdomains. +Within this file, I had one block configured to redirect HTTP requests to HTTPS +for the base domain and all subdomains. ``` conf server { @@ -62,10 +62,9 @@ server { } ``` -For the base domain, I have another `server` block dedicated -to redirecting all base domain requests. You can see that the -`rewrite` line is instructing Nginx to gather all trailing -content and append it to the new `domain2.com` URL. +For the base domain, I have another `server` block dedicated to redirecting all +base domain requests. You can see that the `rewrite` line is instructing Nginx +to gather all trailing content and append it to the new `domain2.com` URL. ``` conf server { @@ -81,19 +80,16 @@ server { } ``` -Finally, the tricky part is figuring out how to tell Nginx to redirect -while keeping both a subdomain and trailing content intact. I found that -the easiest way to do this is to give it a `server` block of -its own. +Finally, the tricky part is figuring out how to tell Nginx to redirect while +keeping both a subdomain and trailing content intact. I found that the easiest +way to do this is to give it a `server` block of its own. -Within this block, we need to do some regex on the -`server_name` line before we can rewrite anything. This -creates a variable called `subdomain`. +Within this block, we need to do some regex on the `server_name` line before we +can rewrite anything. This creates a variable called `subdomain`. -Once the server gets to the `rewrite` line, it pulls the -`subdomain` variable from above and uses it on the new -`domain2.com` domain before appending the trailing content -(`$request_uri`). +Once the server gets to the `rewrite` line, it pulls the `subdomain` variable +from above and uses it on the new `domain2.com` domain before appending the +trailing content (`$request_uri`). ``` conf server { @@ -109,15 +105,15 @@ server { } ``` -That\'s all there is to it. With this, I simply restarted Nginx and -watched the redirections work in-action. +That's all there is to it. With this, I simply restarted Nginx and watched the +redirections work in-action. ```sh doas rc-service nginx restart ``` -Looking back on it, I wish I had done this sooner. Who knows how many -people went looking for my sites or bookmarks and gave up when they saw -the redirect instructions page. +Looking back on it, I wish I had done this sooner. Who knows how many people +went looking for my sites or bookmarks and gave up when they saw the redirect +instructions page. -Oh well, it\'s done now. Live and learn. +Oh well, it's done now. Live and learn. diff --git a/content/blog/2022-12-17-st.md b/content/blog/2022-12-17-st.md index 46f6cec..13236a0 100644 --- a/content/blog/2022-12-17-st.md +++ b/content/blog/2022-12-17-st.md @@ -7,17 +7,15 @@ draft = false # st -[st](https://st.suckless.org) standards for Simple Terminal, a simple -terminal implementation for X made by the -[suckless](https://suckless.org) team. +[st](https://st.suckless.org) standards for Simple Terminal, a simple terminal +implementation for X made by the [suckless](https://suckless.org) team. -This post walks through the dependencies needed and process to build and -install `st` on Fedora Workstation. +This post walks through the dependencies needed and process to build and install +`st` on Fedora Workstation. ## Obtain Files -To start, obtain the source files for `st` via -`git clone`. +To start, obtain the source files for `st` via `git clone`. ```sh mkdir ~/suckless && cd ~/suckless @@ -26,8 +24,8 @@ git clone https://git.suckless.org/st && cd st ## Dependencies -Once you have the files and are in the `st` directory, ensure -the following packages are installed. +Once you have the files and are in the `st` directory, ensure the following +packages are installed. ```sh sudo dnf update && sudo dnf upgrade @@ -42,13 +40,12 @@ Before building, ensure that you read the README file. cat README ``` -Once you\'ve read the instructions, open the `config.mk` file -and ensure it matches your setup. If you\'re not sure, leave the default -options within the file. +Once you've read the instructions, open the `config.mk` file and ensure it +matches your setup. If you're not sure, leave the default options within the +file. -Finally, you can build `st` with the following command. -Ensure you run as root (e.g., `sudo`) or else you may not end -up with a usable application file. +Finally, you can build `st` with the following command. Ensure you run as root +(e.g., `sudo`) or else you may not end up with a usable application file. ```sh sudo make clean install @@ -56,39 +53,38 @@ sudo make clean install ## Customization (Patches) -Note that customizing `st` requires you to modify the source -files or to download one of the [available -patches](https://st.suckless.org/patches/) for suckless.org. +Note that customizing `st` requires you to modify the source files or to +download one of the [available patches](https://st.suckless.org/patches/) for +suckless.org. -If you\'ve already installed `st` and want to customize or -install a patch, start by uninstalling the current program. +If you've already installed `st` and want to customize or install a patch, +start by uninstalling the current program. ```sh cd ~/suckless/st sudo make uninstall ``` -Next, grab the `<path>.diff` file from the page of the patch -you chose. For example, I will be using the -[defaultfontsize](https://st.suckless.org/patches/defaultfontsize/) -patch in the below example. +Next, grab the `<path>.diff` file from the page of the patch you chose. For +example, I will be using the +[defaultfontsize](https://st.suckless.org/patches/defaultfontsize/) patch in the +below example. ```sh wget https://st.suckless.org/patches/defaultfontsize/st-defaultfontsize-20210225-4ef0cbd.diff ``` -Once the file is downloaded inside the `st` folder, apply the -patch and re-install the program. You may need to install the -`patch` command if you don\'t have it installed already (you -should have installed it above). +Once the file is downloaded inside the `st` folder, apply the patch and +re-install the program. You may need to install the `patch` command if you +don't have it installed already (you should have installed it above). ```sh patch -i st-defaultfontsize-20210225-4ef0cbd.diff sudo make clean install ``` -Once installed, you can use the default font size patch to launch -`st` with any font size you wish: +Once installed, you can use the default font size patch to launch `st` with any +font size you wish: ```sh st -z 16 diff --git a/content/blog/2022-12-23-alpine-desktop.md b/content/blog/2022-12-23-alpine-desktop.md index 52538b5..ee4b1a4 100644 --- a/content/blog/2022-12-23-alpine-desktop.md +++ b/content/blog/2022-12-23-alpine-desktop.md @@ -5,33 +5,31 @@ description = "" draft = false +++ +# Isn't Alpine Linux for Servers? -# Isn\'t Alpine Linux for Servers? +This is a question I see a lot when people are presented with an example of +Alpine Linux running as a desktop OS. -This is a question I see a lot when people are presented with an example -of Alpine Linux running as a desktop OS. +While Alpine is small, fast, and minimal, that doesn't stop it from functioning +at a productive level for desktop users. -While Alpine is small, fast, and minimal, that doesn\'t stop it from -functioning at a productive level for desktop users. - -This post is documentation of how I installed and modified Alpine Linux -to become my daily desktop OS. +This post is documentation of how I installed and modified Alpine Linux to +become my daily desktop OS. # Installation -Note that I cover the installation of Alpine Linux in my other post, so -I won\'t repeat it here: [Alpine Linux: My New Server -OS](../alpine-linux/). +Note that I cover the installation of Alpine Linux in my other post, so I won't +repeat it here: [Alpine Linux: My New Server OS](../alpine-linux/). -Basically, get a bootable USB or whatever you prefer with Alpine on it, -boot the ISO, and run the setup script. +Basically, get a bootable USB or whatever you prefer with Alpine on it, boot the +ISO, and run the setup script. ```sh setup-alpine ``` -Once you have gone through all the options and installer finishes -without errors, reboot. +Once you have gone through all the options and installer finishes without +errors, reboot. ```sh reboot @@ -40,9 +38,9 @@ reboot # Initial Setup Once Alpine is installed and the machine has rebooted, login is as root -initially or `su` to root once you log in as your user. From -here, you should start by updating and upgrading the system in case the -ISO was not fully up-to-date. +initially or `su` to root once you log in as your user. From here, you should +start by updating and upgrading the system in case the ISO was not fully +up-to-date. ```sh # Update and upgrade system @@ -52,8 +50,8 @@ apk -U update && apk -U upgrade apk add nano ``` -You need to uncomment the `community` repository for your -version of Alpine Linux. +You need to uncomment the `community` repository for your version of Alpine +Linux. For v3.17, the `repositories` file should look like this: @@ -80,11 +78,11 @@ adduser $USER wheel # Window Manager (Desktop) -The [Sway installation guide](https://wiki.alpinelinux.org/wiki/Sway) -has everything you need to get Sway working on Alpine. +The [Sway installation guide](https://wiki.alpinelinux.org/wiki/Sway) has +everything you need to get Sway working on Alpine. -However, I\'ll include a brief list of the commands I ran and their -purpose for posterity here. +However, I'll include a brief list of the commands I ran and their purpose for +posterity here. ```sh # Add eudev and set it up @@ -126,11 +124,10 @@ apk add \ # Install optional dependencies: ``` Once you have the packages installed and set-up, you need to export the -`XDG_RUNTIME_DIR` upon login. To do this, edit your -`.profile` file. +`XDG_RUNTIME_DIR` upon login. To do this, edit your `.profile` file. -If you use another shell, such as `zsh`, you need to edit -that shell\'s profile (e.g., `~/.zprofile`)! +If you use another shell, such as `zsh`, you need to edit that shell's profile +(e.g., `~/.zprofile`)! ```sh nano ~/.profile @@ -148,7 +145,7 @@ if test -z "${XDG_RUNTIME_DIR}"; then fi ``` -Once that\'s complete, you can launch Sway manually. +Once that's complete, you can launch Sway manually. ```sh dbus-run-session -- sway @@ -156,8 +153,7 @@ dbus-run-session -- sway ## Personal Touches -I also added the following packages, per my personal preferences and -situation. +I also added the following packages, per my personal preferences and situation. ```sh doas apk add brightnessctl \ # Brightness controller @@ -171,16 +167,16 @@ doas apk add brightnessctl \ # Brightness controller gnupg # GPG key manager ``` -From here, I use my Syncthing storage to pull all the configuration -files I stored from prior desktops, such as [my +From here, I use my Syncthing storage to pull all the configuration files I +stored from prior desktops, such as [my dotfiles](https://git.sr.ht/~cmc/dotfiles). # Resolving Issues ## WiFi Issues -I initially tried to set up my Wi-Fi the standard way with -`iwd`, but it didn\'t work. +I initially tried to set up my Wi-Fi the standard way with `iwd`, but it didn't +work. Here is what I initially tried (I did all of this as `root`): @@ -191,8 +187,7 @@ iwctl station wlan0 connect <SSID> # This will prompt for the password rc-update add iwd boot && rc-update add dbus boot ``` -Then, I added the Wi-Fi entry to the bottom of the networking interface -file: +Then, I added the Wi-Fi entry to the bottom of the networking interface file: ```sh nano /etc/network/interfaces @@ -209,13 +204,11 @@ Finally, restart the networking service: rc-service networking restart ``` -My Wi-Fi interface would receive an IP address from the router, but it -could not ping anything in the network. To solve the Wi-Fi issues, I -originally upgraded to Alpine\'s `edge` repositories, which -was unnecessary. +My Wi-Fi interface would receive an IP address from the router, but it could not +ping anything in the network. To solve the Wi-Fi issues, I originally upgraded +to Alpine's `edge` repositories, which was unnecessary. -Really, the solution was to enable the -`NameResolvingService=resolvconf` in +Really, the solution was to enable the `NameResolvingService=resolvconf` in `/etc/iwd/main.conf`. ```sh @@ -232,8 +225,8 @@ Once I finished this process, my Wi-Fi is working flawlessly. ## Sound Issues -Same as with the Wi-Fi, I had no sound and could not control the -mute/unmute or volume buttons on my laptop. +Same as with the Wi-Fi, I had no sound and could not control the mute/unmute or +volume buttons on my laptop. To resolve this, I installed [pipewire](https://wiki.alpinelinux.org/wiki/PipeWire). @@ -247,9 +240,9 @@ addgroup $USER video apk add pipewire wireplumber pipewire-pulse pipewire-jack pipewire-alsa ``` -Finally, I needed to add `/usr/libexec/pipewire-launcher` to -my `.config/sway/config` file so that Pipewire would run -every time I launched sway. +Finally, I needed to add `/usr/libexec/pipewire-launcher` to my +`.config/sway/config` file so that Pipewire would run every time I launched +sway. ```sh nano ~/.config/sway/config @@ -266,8 +259,8 @@ bindsym XF86AudioMute exec --no-startup-id pactl set-sink-mute @DEFAULT_SINK@ to bindsym XF86AudioMicMute exec --no-startup-id pactl set-source-mute @DEFAULT_SOURCE@ toggle ``` -Note that I do not use bluetooth or screen sharing, so I won\'t cover -those options in this post. +Note that I do not use bluetooth or screen sharing, so I won't cover those +options in this post. -Other than these issues, I have a working Alpine desktop. No other -complaints thus far! +Other than these issues, I have a working Alpine desktop. No other complaints +thus far! diff --git a/content/blog/2023-01-03-recent-website-changes.md b/content/blog/2023-01-03-recent-website-changes.md index 2334444..3470429 100644 --- a/content/blog/2023-01-03-recent-website-changes.md +++ b/content/blog/2023-01-03-recent-website-changes.md @@ -7,80 +7,76 @@ draft = false # The State of This Website -Over the years, this website has changed URLs, styles, content focus, -and much more. However, it seems that I am never done, as I am yet again -changing this page to fit my current needs and wants. +Over the years, this website has changed URLs, styles, content focus, and much +more. However, it seems that I am never done, as I am yet again changing this +page to fit my current needs and wants. -While this site was already minimal (\~12kb), it contained a lot of -disorganized content and some poorly chosen color schemes. +While this site was already minimal (~12kb), it contained a lot of disorganized +content and some poorly chosen color schemes. -The recent updates attempt to fix these items while focusing on what I -truly care about here: the content within each page. +The recent updates attempt to fix these items while focusing on what I truly +care about here: the content within each page. # Recent Changes -I\'ve made quite a few changes to the style of this website today, both -in the CSS and in the HTML. +I've made quite a few changes to the style of this website today, both in the +CSS and in the HTML. -Here are some of the key takeaways from today\'s changes: +Here are some of the key takeaways from today's changes: -1. Reduce the width of the website from `60em` to - `40em`. -2. Remove breadcrumb navigation and replaced with a simple \"Return - Home\" link when visiting anything other than the homepage. -3. Remove syntax highlighting from code blocks. CSS now loads from a - single file. -4. Move blog posts on the homepage to the top, pushing tertiary content - down. -5. Update font-family from `monospace` to - `sans-serif` for readability. +1. Reduce the width of the website from `60em` to `40em`. +2. Remove breadcrumb navigation and replaced with a simple "Return Home" link + when visiting anything other than the homepage. +3. Remove syntax highlighting from code blocks. CSS now loads from a single + file. +4. Move blog posts on the homepage to the top, pushing tertiary content down. +5. Update font-family from `monospace` to `sans-serif` for readability. # Future Focus ## Accessibility -My main focus amidst all the changes this past year was accessibility. I -tried to improve the accessibility of all pages on this site as well as -I know how. For example, I added aria labels to identify different -navigation menus in November. +My main focus amidst all the changes this past year was accessibility. I tried +to improve the accessibility of all pages on this site as well as I know how. +For example, I added aria labels to identify different navigation menus in +November. -I want to continue this in 2023 and learn more about the accessibility -features I can utilize to help those who may need them. +I want to continue this in 2023 and learn more about the accessibility features +I can utilize to help those who may need them. ## Content First -Beyond accessibility, I am making a concerted effort to bring the -content of this site to the forefront and push the tertiary information -(e.g., About Me, Services, etc.) down below the content. +Beyond accessibility, I am making a concerted effort to bring the content of +this site to the forefront and push the tertiary information (e.g., About Me, +Services, etc.) down below the content. -Further, I want to review and edit previous blog posts for grammar, -accuracy, dead links, and more. Where necessary, I may even add a blurb -at the top of old posts that are no longer accurate or helpful. +Further, I want to review and edit previous blog posts for grammar, accuracy, +dead links, and more. Where necessary, I may even add a blurb at the top of old +posts that are no longer accurate or helpful. ## Style -As always, I will be searching for ways to reduce distractions and bring -a minimalistic approach to this site. While there are certainly more -drastic measures I could take, such as making this a [Shinobi -Website](https://shinobi.bt.ht) or a [No CSS -Website](https://nocss.club), I prefer to keep some modern features -here. +As always, I will be searching for ways to reduce distractions and bring a +minimalistic approach to this site. While there are certainly more drastic +measures I could take, such as making this a [Shinobi +Website](https://shinobi.bt.ht) or a [No CSS Website](https://nocss.club), I +prefer to keep some modern features here. -Two ideas have been floating around in my head, but I am not sure how I -feel about these approaches yet: +Two ideas have been floating around in my head, but I am not sure how I feel +about these approaches yet: -1. Going all-in with Emacs org-mode and creating a script to - auto-publish all my blog posts from org-mode to plain HTML files and - then letting my CSS style it after the fact. -2. Focus on publishing for Gemini or Gopher and then utilize a - conversion program to translate the pages to HTML. +1. Going all-in with Emacs org-mode and creating a script to auto-publish all my + blog posts from org-mode to plain HTML files and then letting my CSS style it + after the fact. +2. Focus on publishing for Gemini or Gopher and then utilize a conversion + program to translate the pages to HTML. # Looking Back -As I sit here and finalize the changes, as well as this post, I am happy -with the current state of this website. It\'s certainly a long way from -my first attempts (parallax background images, anyone?) and it\'s good -to see the progress. +As I sit here and finalize the changes, as well as this post, I am happy with +the current state of this website. It's certainly a long way from my first +attempts (parallax background images, anyone?) and it's good to see the +progress. -I can only hope and work hard to ensure that I make more meaningful -progress by this time next year. +I can only hope and work hard to ensure that I make more meaningful progress by +this time next year. diff --git a/content/blog/2023-01-05-mass-unlike-tumblr-posts.md b/content/blog/2023-01-05-mass-unlike-tumblr-posts.md index c86102c..971b61a 100644 --- a/content/blog/2023-01-05-mass-unlike-tumblr-posts.md +++ b/content/blog/2023-01-05-mass-unlike-tumblr-posts.md @@ -7,27 +7,24 @@ draft = false # The Dilemma -The dilemma I had was pretty simple: I wanted to unlike all the posts I -have liked on Tumblr so that I could follow a new focus on blogs and -start fresh. Otherwise, Tumblr will keep recommending content based on -your previous likes. +The dilemma I had was pretty simple: I wanted to unlike all the posts I have +liked on Tumblr so that I could follow a new focus on blogs and start fresh. +Otherwise, Tumblr will keep recommending content based on your previous likes. # The Solution -I searched the web for a while and noted that most solutions referenced -Tumblr setting and dashboard pages that no longer exist. Additionally, I -did not want to install a third party extension to do this, as some -suggested. +I searched the web for a while and noted that most solutions referenced Tumblr +setting and dashboard pages that no longer exist. Additionally, I did not want +to install a third party extension to do this, as some suggested. -Luckily, I used Javascript for a while a few years ago and figured it -would be easy enough to script a solution, as long as Tumblr had a -system for the unlike buttons. +Luckily, I used Javascript for a while a few years ago and figured it would be +easy enough to script a solution, as long as Tumblr had a system for the unlike +buttons. ## Identifying Unlike Buttons -Tumblr\'s unlike buttons are structured as you can see in the following -code block. All unlike buttons have an `aria-label` with a -value of `Unlike`. +Tumblr's unlike buttons are structured as you can see in the following code +block. All unlike buttons have an `aria-label` with a value of `Unlike`. ``` html <button class="TRX6J" aria-label="Unlike"> @@ -43,28 +40,26 @@ value of `Unlike`. ## Running a Script to Unlike All Likes To run this script, you will need to load the [Likes \| -Tumblr](https://www.tumblr.com/likes) page while logged in to your -account. +Tumblr](https://www.tumblr.com/likes) page while logged in to your account. -Further, be sure to scroll down to the bottom and force Tumblr to load -more posts so that this script unlikes more posts at a time. +Further, be sure to scroll down to the bottom and force Tumblr to load more +posts so that this script unlikes more posts at a time. -Once you are logged in and the page is loaded, open the Developer Tools -and be sure you\'re on the \"Console\" tab. It should look something -like this (this is in Firefox, Chromium should be similar): +Once you are logged in and the page is loaded, open the Developer Tools and be +sure you're on the "Console" tab. It should look something like this (this is +in Firefox, Chromium should be similar):  -All you need to do is paste the following snippet into the dev console. -This code will collect all unlike buttons (`elements`) and -then click each button to unlike it. +All you need to do is paste the following snippet into the dev console. This +code will collect all unlike buttons (`elements`) and then click each button to +unlike it. -Optionally, you can comment-out the line -`elements[i].click();` and uncomment the -`console.log()` lines to simply print out information without -performing any actions. This can be useful to debug issues or confirm -that the code below isn\'t doing anything you don\'t want it to. +Optionally, you can comment-out the line `elements[i].click();` and uncomment +the `console.log()` lines to simply print out information without performing any +actions. This can be useful to debug issues or confirm that the code below +isn't doing anything you don't want it to. ``` javascript const elements = document.querySelectorAll('[aria-label="Unlike"]'); @@ -78,18 +73,16 @@ for (let i=0; i < elements.length; i++) { # Results -The results were quick for my situation, as it unliked \~200 posts -within 2-3 seconds. I am not sure how this will perform on larger sets -of likes (or if Tumblr has a limit to unliking posts). +The results were quick for my situation, as it unliked ~200 posts within 2-3 +seconds. I am not sure how this will perform on larger sets of likes (or if +Tumblr has a limit to unliking posts). -You can see the below screenshot showing that I pasted the snippet into -the console, pressed Enter, and then the posts are automatically -unliked. +You can see the below screenshot showing that I pasted the snippet into the +console, pressed Enter, and then the posts are automatically unliked.  -Thinking about this further, I would bet that this would be fairly -simple to package into a browser add-on so that users could install the -add-on, go to their Likes page, and click a button to run the script. -Food for thought. +Thinking about this further, I would bet that this would be fairly simple to +package into a browser add-on so that users could install the add-on, go to +their Likes page, and click a button to run the script. Food for thought. diff --git a/content/blog/2023-01-08-fedora-login-manager.md b/content/blog/2023-01-08-fedora-login-manager.md index 2f1fdfa..8e98610 100644 --- a/content/blog/2023-01-08-fedora-login-manager.md +++ b/content/blog/2023-01-08-fedora-login-manager.md @@ -5,15 +5,15 @@ description = "" draft = false +++ -# Fedora i3\'s Login Manager +# Fedora i3's Login Manager -Since I use the i3 spin of Fedora Workstation, I don\'t like to have a -login manager installed by default. As of the current version of Fedora -i3, the default login manager is LightDM. +Since I use the i3 spin of Fedora Workstation, I don't like to have a login +manager installed by default. As of the current version of Fedora i3, the +default login manager is LightDM. -If this is no longer the case, you can search for currently-installed -packages with the following command and see if you can identify a -different login manager. +If this is no longer the case, you can search for currently-installed packages +with the following command and see if you can identify a different login +manager. ```sh sudo dnf list installed @@ -29,16 +29,16 @@ sudo dnf remove lightdm # Launching i3 Manually -In order to launch i3 manually, you need to set up your X session -properly. To start, create or edit the `~/.xinitrc` file to -include the following at the bottom. +In order to launch i3 manually, you need to set up your X session properly. To +start, create or edit the `~/.xinitrc` file to include the following at the +bottom. ``` config exec i3 ``` -Now, whenever you log in to the TTY, you can launch your desktop with -the following command. +Now, whenever you log in to the TTY, you can launch your desktop with the +following command. ```sh startx diff --git a/content/blog/2023-01-21-flatpak-symlinks.md b/content/blog/2023-01-21-flatpak-symlinks.md index a69b53b..382762f 100644 --- a/content/blog/2023-01-21-flatpak-symlinks.md +++ b/content/blog/2023-01-21-flatpak-symlinks.md @@ -7,45 +7,41 @@ draft = false # Running Flatpak Apps Should Be Faster -If you\'re like me and use Flatpak for those pesky apps that cannot run -on your system for one reason or another, you likely get annoyed with -opening a terminal and manually running the Flatpak app with the lengthy -`flatpak run ...` command. +If you're like me and use Flatpak for those pesky apps that cannot run on your +system for one reason or another, you likely get annoyed with opening a terminal +and manually running the Flatpak app with the lengthy `flatpak run ...` command. -In the past, I manually created aliases in my `.zshrc` file -for certain apps. For example, an alias would look like the example -below. +In the past, I manually created aliases in my `.zshrc` file for certain apps. +For example, an alias would look like the example below. This would allow me to run the command fast within the terminal, but it -wouldn\'t allow me to run it in an application launcher. +wouldn't allow me to run it in an application launcher. ```sh # ~/.zshrc alias librewolf = "flatpak run io.gitlab.librewolf-community" ``` -However, I now use a much faster and better method that integrates with -the tiling WMs I use and their application launchers - -`dmenu` and `bemenu`. +However, I now use a much faster and better method that integrates with the +tiling WMs I use and their application launchers - `dmenu` and `bemenu`. # Creating Symlinks for Flatpak Apps -Let\'s use the example of Librewolf below. I can install the application -like so: +Let's use the example of Librewolf below. I can install the application like +so: ```sh flatpak install flathub io.gitlab.librewolf-community ``` -Once installed, I can create a symlink to link the flatpak app to my new -symlink in a location commonly included in your PATH. In this case, I -chose `/usr/bin`. You may need to choose a different location -if `/usr/bin` isn\'t in your PATH. +Once installed, I can create a symlink to link the flatpak app to my new symlink +in a location commonly included in your PATH. In this case, I chose `/usr/bin`. +You may need to choose a different location if `/usr/bin` isn't in your PATH. ```sh ln -s /var/lib/flatpak/exports/bin/io.gitlab.librewolf-community /usr/bin/librewolf ``` -Once complete, you should be able to launch the app using the command -name you chose above in the symlink (`librewolf`) from a -terminal or from your application launcher! +Once complete, you should be able to launch the app using the command name you +chose above in the symlink (`librewolf`) from a terminal or from your +application launcher! diff --git a/content/blog/2023-01-23-random-wireguard.md b/content/blog/2023-01-23-random-wireguard.md index 6100ea3..1b42a3f 100644 --- a/content/blog/2023-01-23-random-wireguard.md +++ b/content/blog/2023-01-23-random-wireguard.md @@ -7,18 +7,18 @@ draft = false # Mullvad Wireguard -If you\'re using an OS that does not support one of Mullvad\'s apps, -you\'re likely using the Wireguard configuration files instead. +If you're using an OS that does not support one of Mullvad's apps, you're +likely using the Wireguard configuration files instead. -If not, the first step is to visit Mullvad\'s [Wireguard configuration -files](https://mullvad.net/en/account/#/wireguard-config) page and -download a ZIP of the configuration files you want to use. +If not, the first step is to visit Mullvad's [Wireguard configuration +files](https://mullvad.net/en/account/#/wireguard-config) page and download a +ZIP of the configuration files you want to use. -Personally, I downloaded all configuration files across the world and -chose my connections using the script below. +Personally, I downloaded all configuration files across the world and chose my +connections using the script below. -Once the files are downloaded, unzip them and move them to your -preferred location: +Once the files are downloaded, unzip them and move them to your preferred +location: ```sh cd Downloads @@ -28,8 +28,8 @@ mkdir ~/mullvad && mv ~/Downloads/*.conf ~/mullvad/ ### Creating a Script to Connect to a Random Host -Once you have a folder of Wireguard configuration files from Mullvad, -you can create a script to randomly connect to any one of the locations. +Once you have a folder of Wireguard configuration files from Mullvad, you can +create a script to randomly connect to any one of the locations. Start by creating a shell script - mine is called `vpn.sh`. @@ -37,10 +37,9 @@ Start by creating a shell script - mine is called `vpn.sh`. nano ~/vpn.sh ``` -Within this script, you can paste the following info. Note that I -specify `us-*` in my script, which means that it will only -consider US-based VPN locations. You can alter this or simply change it -`*` to consider all locations. +Within this script, you can paste the following info. Note that I specify `us-*` +in my script, which means that it will only consider US-based VPN locations. You +can alter this or simply change it `*` to consider all locations. ```sh #!/bin/sh @@ -55,8 +54,8 @@ ls /home/$USER/mullvad/us-** |sort -R |tail -n 1 |while read file; do done ``` -Once you\'ve modified the script to your liking, add executable -permissions and run the script: +Once you've modified the script to your liking, add executable permissions and +run the script: ```sh chmod +x ~/vpn.sh @@ -76,21 +75,20 @@ Printing new IP info: You are connected to Mullvad (server country-city-wg-num). Your IP address is 12.345.678.99 ``` -That\'s all there is to it. You can see your new location and IP via the -`printf` and `curl` commands included in the -script. +That's all there is to it. You can see your new location and IP via the +`printf` and `curl` commands included in the script. You can also go to the [Connection Check \| -Mullvad](https://mullvad.net/en/check/) page to see if you are fully -connected to Mullvad and if any leaks exist. +Mullvad](https://mullvad.net/en/check/) page to see if you are fully connected +to Mullvad and if any leaks exist. 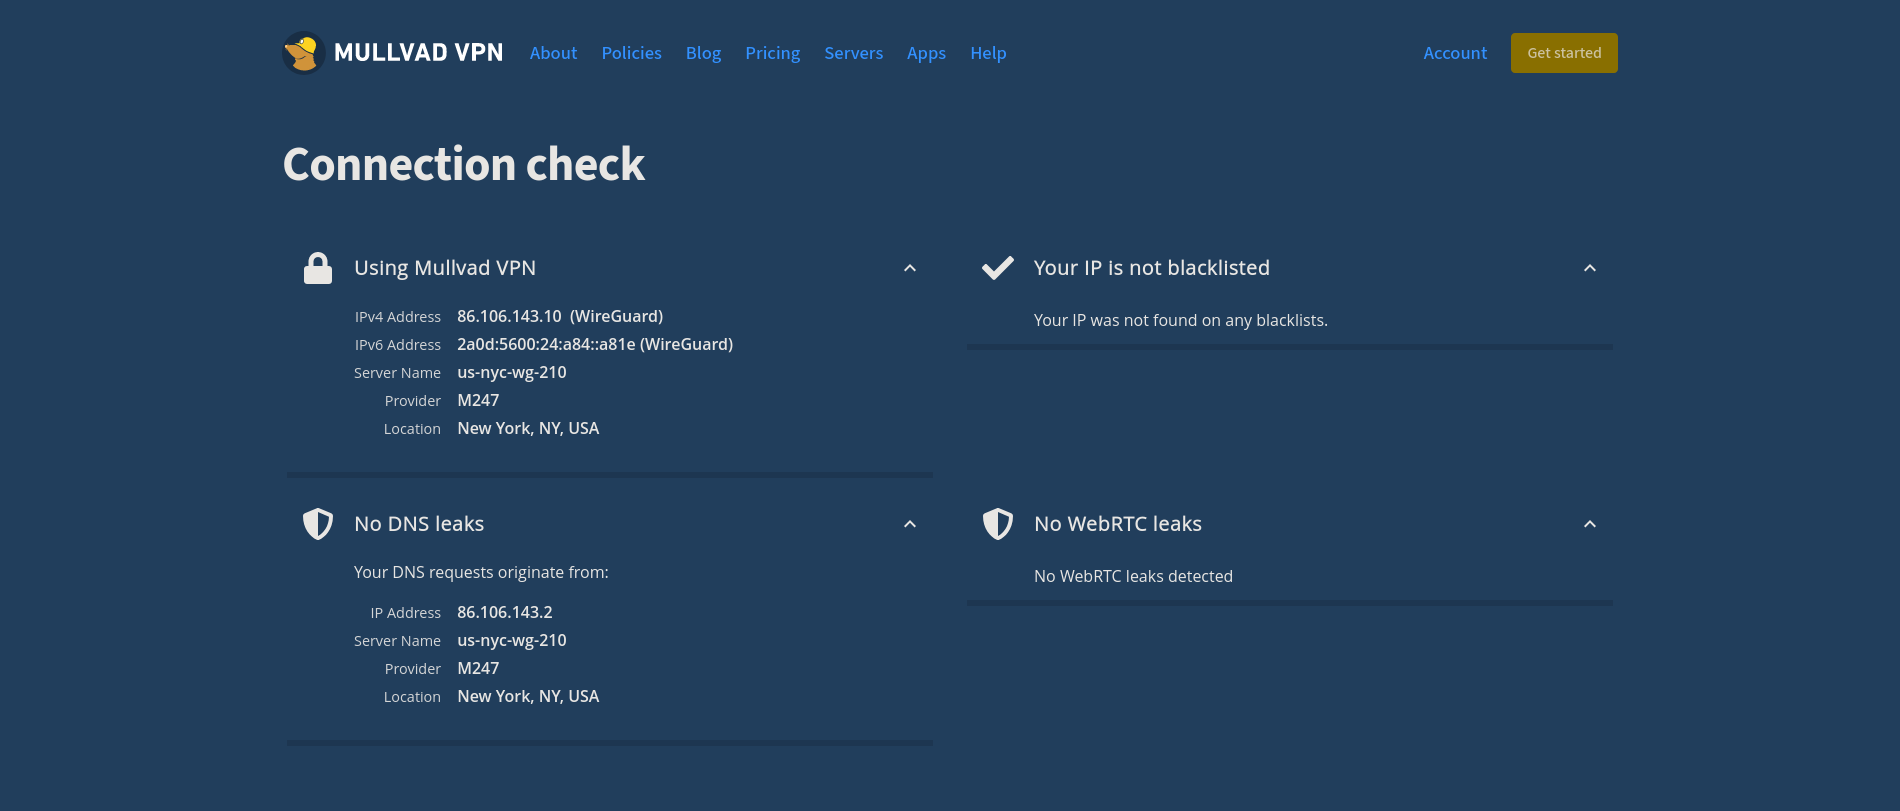 # Disconnecting from the Wireguard Connection -If you forget which connection you\'re using, you can execute the -following command to see where Wireguard is currently connected: +If you forget which connection you're using, you can execute the following +command to see where Wireguard is currently connected: ```sh wg show @@ -99,15 +97,15 @@ wg show This command will show you the Wireguard interfaces and should output a connection like so: `interface: us-lax-wg-104`. -Once you have this, just disconnect using that files\' full path: +Once you have this, just disconnect using that files' full path: ```sh wg-quick down /home/user/mullvad/us-lax-wg-104.conf ``` -I have a TODO item on figuring out how to easily export an environment -variable that contains the configuration file\'s full name, so that I -can just execute the following: +I have a TODO item on figuring out how to easily export an environment variable +that contains the configuration file's full name, so that I can just execute +the following: ```sh # Ideal situation if I can export the $file variable to the environment diff --git a/content/blog/2023-01-28-self-hosting-wger.md b/content/blog/2023-01-28-self-hosting-wger.md index 9fddc17..f1d4467 100644 --- a/content/blog/2023-01-28-self-hosting-wger.md +++ b/content/blog/2023-01-28-self-hosting-wger.md @@ -7,53 +7,52 @@ draft = false # Wger: The Self-Hosted Workout Manager -[Wger Workout Manager](https://wger.de) is a fitness tracking tool for -those who enjoy self-hosting their data. You can also register an -account on their main website if you\'d prefer to try without -self-hosting. +[Wger Workout Manager](https://wger.de) is a fitness tracking tool for those who +enjoy self-hosting their data. You can also register an account on their main +website if you'd prefer to try without self-hosting. ## Features -I didn\'t see a full listing of features anywhere, so I compiled this -list of my own after installing wger: +I didn't see a full listing of features anywhere, so I compiled this list of my +own after installing wger: 1. Dashboard - - Dashboard view of Workout Schedule, Nutrition Plan, Weight - Graph, & last 5 Weight Logs + - Dashboard view of Workout Schedule, Nutrition Plan, Weight Graph, & last + 5 Weight Logs 2. Training - - Workout Log - - Workout Schedule - - Calendar (shows weight logs and Bad/Neutral/Good days) - - Gallery (shows images you upload) - - Workout templates - - Public templates - - Exercises + - Workout Log + - Workout Schedule + - Calendar (shows weight logs and Bad/Neutral/Good days) + - Gallery (shows images you upload) + - Workout templates + - Public templates + - Exercises 3. Nutrition - - Nutrition plans - - BMI calculator - - Daily calories calculator - - Ingredient overview + - Nutrition plans + - BMI calculator + - Daily calories calculator + - Ingredient overview 4. Body Weight - - Weight overview + - Weight overview ## Documentation In order to self-host wger, I opted to use the Docker version of the application. You can read the README within the -[wger-project/docker](https://github.com/wger-project/docker) project on -GitHub for information and installation instructions. +[wger-project/docker](https://github.com/wger-project/docker) project on GitHub +for information and installation instructions. ## Installation -To start the installation, I created a folder for wger and started -creating the three necessary files: +To start the installation, I created a folder for wger and started creating the +three necessary files: ```sh mkdir ~/wger && mkdir ~/wger/config @@ -62,23 +61,20 @@ touch ~/wger/config/prod.env && \ touch ~/wger/config/nginx.conf ``` -Once you have the folders and files created, you will need to copy the -contents of the `docker-compose.yml`, `prod.env`, -and `nginx.conf` from the GitHub link above. +Once you have the folders and files created, you will need to copy the contents +of the `docker-compose.yml`, `prod.env`, and `nginx.conf` from the GitHub link +above. A few notes to explain the changes I made to the default files: -- I updated the `ALLOW_REGISTRAION` variable in - `prod.env` to `False` after I created an - account via my LAN connection, **before\*** I connected this app to - a publicly-available domain. -- I uncommented and updated `CSRF_TRUSTED_ORIGINS` to be - equal to the public version of this app: - `https://wger.example.com`. -- I updated the port within `docker-compose.yml`, within - the `nginx` block. The port I updated this to will be - reflected in my nginx configuration file on the server (NOT the wger - nginx.conf file). +- I updated the `ALLOW_REGISTRAION` variable in `prod.env` to `False` after I + created an account via my LAN connection, **before** I connected this app to a + publicly-available domain. +- I uncommented and updated `CSRF_TRUSTED_ORIGINS` to be equal to the public + version of this app: `https://wger.example.com`. +- I updated the port within `docker-compose.yml`, within the `nginx` block. The + port I updated this to will be reflected in my nginx configuration file on the + server (NOT the wger nginx.conf file). ## Deploy @@ -89,17 +85,16 @@ container. docker-compose up -d ``` -You can now visit the website on your LAN by going to -`localhost:YOUR_PORT` or by the server\'s IP, if you\'re not -on the same machine that is running the container. +You can now visit the website on your LAN by going to `localhost:YOUR_PORT` or +by the server's IP, if you're not on the same machine that is running the +container. -If you wish to connect this app to a public domain name, you\'ll need to -point an `A` DNS record from the domain to your server\'s -public IP. You\'ll then need to create a configuration file for -whichever web server or reverse proxy you\'re using. +If you wish to connect this app to a public domain name, you'll need to point +an `A` DNS record from the domain to your server's public IP. You'll then need +to create a configuration file for whichever web server or reverse proxy you're +using. -Wger\'s README suggests the following reverse proxy configuration for -Nginx: +Wger's README suggests the following reverse proxy configuration for Nginx: ``` conf upstream wger { @@ -132,20 +127,19 @@ server { # Thoughts on Wger -I\'m still playing around with the app itself, but it seems to be a -solid all-around workout manager, weight log, and food log. +I'm still playing around with the app itself, but it seems to be a solid +all-around workout manager, weight log, and food log. -I like that the weight log graph is fluid and updates quickly. You can -also import or export data in CSV format if you\'d like to move your -data elsewhere. +I like that the weight log graph is fluid and updates quickly. You can also +import or export data in CSV format if you'd like to move your data elsewhere. -The workout manager is slightly odd, as it requires you to enter sets -and reps for each exercise when you enter it into the plan. Then, when -you add a log entry for performing a workout, you then add what you -actually performed, in terms of reps and weight. +The workout manager is slightly odd, as it requires you to enter sets and reps +for each exercise when you enter it into the plan. Then, when you add a log +entry for performing a workout, you then add what you actually performed, in +terms of reps and weight. -I haven\'t tried the food log yet and I likely will not, at least for a -while. I have no need for a food log or calorie tracker at the moment. +I haven't tried the food log yet and I likely will not, at least for a while. I +have no need for a food log or calorie tracker at the moment. ## Screenshot Example diff --git a/content/blog/2023-02-02-exploring-hare.md b/content/blog/2023-02-02-exploring-hare.md index 15c448c..1424aff 100644 --- a/content/blog/2023-02-02-exploring-hare.md +++ b/content/blog/2023-02-02-exploring-hare.md @@ -7,87 +7,80 @@ draft = false # A Quick Note -By no means am I a professional developer, so this post will be rather -short. I won\'t be going into depth on the specification or anything -that technical. +By no means am I a professional developer, so this post will be rather short. I +won't be going into depth on the specification or anything that technical. -Instead, I will simply be talking about how I (a relatively basic -hobbyist programmer) have been playing with Hare and what intrigues me -about the language. +Instead, I will simply be talking about how I (a relatively basic hobbyist +programmer) have been playing with Hare and what intrigues me about the +language. # Hare -The [Hare](https://harelang.org) programming language is a -straightforward language that should look familiar if you\'ve ever -programmed with C, Rust, or other languages that aim to build software -at the system-level. +The [Hare](https://harelang.org) programming language is a straightforward +language that should look familiar if you've ever programmed with C, Rust, or +other languages that aim to build software at the system-level. The Hare homepage states the following: -> Hare is a systems programming language designed to be simple, stable, -> and robust. Hare uses a static type system, manual memory management, -> and minimal runtime. It is well-suited to writing operating systems, -> system tools, compilers, networking software, and other low-level, -> high performance tasks. +> Hare is a systems programming language designed to be simple, stable, and +> robust. Hare uses a static type system, manual memory management, and minimal +> runtime. It is well-suited to writing operating systems, system tools, +> compilers, networking software, and other low-level, high performance tasks. -I have found this all to be true while playing with it for the first -time today. In the next few sections, I\'m going to walk through my -installation and first program. +I have found this all to be true while playing with it for the first time today. +In the next few sections, I'm going to walk through my installation and first +program. ## Installation -I\'m currently running Alpine Linux on my Thinkpad, so the installation -was quite easy as there is a package for Hare in the `apk` -repositories. +I'm currently running Alpine Linux on my Thinkpad, so the installation was +quite easy as there is a package for Hare in the `apk` repositories. ```sh doas apk add hare hare-doc ``` -However, I was able to install Hare from scratch on Fedora Linux a short -while ago, which was also very easy to do. If you need further -instructions and Hare doesn\'t have a package on your system, take a -look at the [Hare Installation](https://harelang.org/installation/) -page. +However, I was able to install Hare from scratch on Fedora Linux a short while +ago, which was also very easy to do. If you need further instructions and Hare +doesn't have a package on your system, take a look at the [Hare +Installation](https://harelang.org/installation/) page. ## Creating a Test Project In order to play with the language, I created -[hare-test](https://git.sr.ht/~cmc/hare-projects) and will be putting -any of my Hare-related adventures in here. +[hare-test](https://git.sr.ht/~cmc/hare-projects) and will be putting any of my +Hare-related adventures in here. -> **Update:\*** I also created a simple Hare program for creating a file -> from user input: +> **Update:** I also created a simple Hare program for creating a file from user +> input: > [files.ha](https://git.sr.ht/~cmc/hare-projects/tree/main/item/files/files.ha) -Luckily, Hare doesn\'t require any complex set-up tools or build -environment. Once you have Hare installed, you simply need to create a -file ending with `.ha` and you can run a Hare program. +Luckily, Hare doesn't require any complex set-up tools or build environment. +Once you have Hare installed, you simply need to create a file ending with `.ha` +and you can run a Hare program. -I created a file called `rgb.ha` in order to test out the -random number generation and passing parameters between functions. +I created a file called `rgb.ha` in order to test out the random number +generation and passing parameters between functions. ```sh nano rgb.ha ``` -Within this file, I was able to easily import a few of the [standard -library modules](https://harelang.org/tutorials/stdlib/): -`fmt`, `math::random`, and `datetime`. +Within this file, I was able to easily import a few of the [standard library +modules](https://harelang.org/tutorials/stdlib/): `fmt`, `math::random`, and +`datetime`. With these modules, I created two functions: -1. `main`: This function calls the `generate_rgb` - function and then prints out the returned values. -2. `generate_rgb`: This function uses the current Unix epoch - time to generate a pseudo-random value and uses this value to create - three more random values between 0 and 255. These three numbers - represent a color in RGB format. +1. `main`: This function calls the `generate_rgb` function and then prints out + the returned values. +2. `generate_rgb`: This function uses the current Unix epoch time to generate a + pseudo-random value and uses this value to create three more random values + between 0 and 255. These three numbers represent a color in RGB format. -> **Note**: Some syntax coloring may look odd, as Zola currently -> doesn\'t have a syntax highlighting theme for Hare. Instead, I\'m -> using the C theme, which may not be exactly accurate when coloring the -> code below. +> **Note**: Some syntax coloring may look odd, as Zola currently doesn't have a +> syntax highlighting theme for Hare. Instead, I'm using the C theme, which may +> not be exactly accurate when coloring the code below. ```c use datetime; @@ -120,8 +113,7 @@ fn generate_rgb() []u64 = { ## Running a Program -Once you have a Hare file written and ready to run, you simply need to -run it: +Once you have a Hare file written and ready to run, you simply need to run it: ```sh hare run file.ha @@ -136,37 +128,34 @@ hare build -o example file.ha ## Initial Thoughts -1. Documentation Improvements Would Help +1. Documentation Improvements Would Help - While I was able to piece everything together eventually, the - biggest downfall right now in Hare\'s documentation. For such a new - project, the documentation is in a great spot. However, bare - specifications don\'t help as much as a brief examples section - would. + While I was able to piece everything together eventually, the biggest + downfall right now in Hare's documentation. For such a new project, the + documentation is in a great spot. However, bare specifications don't help + as much as a brief examples section would. - For example, it took me a while to figure out what the - `u64n` function was looking for. I could tell that it - took two parameters and the second was my max value (255), but - couldn\'t figure out what the first value should be. Eventually, I - inspected the `random.ha` file in the [Hare source + For example, it took me a while to figure out what the `u64n` function was + looking for. I could tell that it took two parameters and the second was my + max value (255), but couldn't figure out what the first value should be. + Eventually, I inspected the `random.ha` file in the [Hare source code](https://git.sr.ht/~sircmpwn/hare/tree/master/item/math/random/random.ha) - and found the test suite that helped me discover that it needed an - `init()` value in the form of `&var`. + and found the test suite that helped me discover that it needed an `init()` + value in the form of `&var`. -2. More Basic Modules +2. More Basic Modules - This is another point that comes from Hare being new and awaiting - more contributions, but there are some basic functions that I would - personally enjoy seeing in Hare, such as one to convert decimal - (base 10) values to hexadecimal (base 16). + This is another point that comes from Hare being new and awaiting more + contributions, but there are some basic functions that I would personally + enjoy seeing in Hare, such as one to convert decimal (base 10) values to + hexadecimal (base 16). - If I\'m feeling comfortable with my math, I may work on the list of - functions I want and see if any can make it into the Hare source - code. + If I'm feeling comfortable with my math, I may work on the list of + functions I want and see if any can make it into the Hare source code. -3. Overall Thoughts +3. Overall Thoughts - Overall, I actually really enjoy Hare. It\'s not as tedious to get a - project up and running as Rust, but it\'s also simpler and more - user-friendly than learning C. I am going to continue playing with - it and see if I can make anything of particular value. + Overall, I actually really enjoy Hare. It's not as tedious to get a project + up and running as Rust, but it's also simpler and more user-friendly than + learning C. I am going to continue playing with it and see if I can make + anything of particular value. diff --git a/content/blog/2023-05-22-burnout.md b/content/blog/2023-05-22-burnout.md index ad97cf6..fefd845 100644 --- a/content/blog/2023-05-22-burnout.md +++ b/content/blog/2023-05-22-burnout.md @@ -7,39 +7,39 @@ draft = false # RE: Burnout {#re-burnout-1} -I recently read [Drew DeVault\'s post on -burnout](https://drewdevault.com/2023/05/01/2023-05-01-Burnout.html) -around the same time I was pulling out of a burnout rut myself earlier -this month. Finally, seeing the light at the end of my burnout tunnel -made me want to write my first post back on this topic. +I recently read [Drew DeVault's post on +burnout](https://drewdevault.com/2023/05/01/2023-05-01-Burnout.html) around the +same time I was pulling out of a burnout rut myself earlier this month. Finally, +seeing the light at the end of my burnout tunnel made me want to write my first +post back on this topic. # Busy Seasons on Busy Seasons -My career deals with busy seasons, generally driven by client demand. -This last year, I dealt with a harsh busy season from Aug to Oct 2022 to -issue a few SOC reports for the period ending 2022-09-30. Immediately -following that, I had to pivot and found another busy season from Oct to -Jan for financial statement audits ending on 2022-12-31. Then again, -supporting other clients from Jan to Mar 2023, followed by my current -client workload aiming for SOC reports due on 2023-06-30. +My career deals with busy seasons, generally driven by client demand. This last +year, I dealt with a harsh busy season from Aug to Oct 2022 to issue a few SOC +reports for the period ending 2022-09-30. Immediately following that, I had to +pivot and found another busy season from Oct to Jan for financial statement +audits ending on 2022-12-31. Then again, supporting other clients from Jan to +Mar 2023, followed by my current client workload aiming for SOC reports due on +2023-06-30. -The result? A busy season that has lasted from August 2022 through -today. I will likely be rushing throughout the next month or two before -I have a brief break and need to focus on the 2023-09-30 SOC reports -again. While auditing and consulting always involve a busy season, this -is the first time I\'ve had one last 9+ months without a break. +The result? A busy season that has lasted from August 2022 through today. I will +likely be rushing throughout the next month or two before I have a brief break +and need to focus on the 2023-09-30 SOC reports again. While auditing and +consulting always involve a busy season, this is the first time I've had one +last 9+ months without a break. -While it\'s been tough, I have a handful of breaks pre-planned -throughout this next cycle and should be able to moderate the level of -commitment required for each client. +While it's been tough, I have a handful of breaks pre-planned throughout this +next cycle and should be able to moderate the level of commitment required for +each client. # Refocusing -Outside of work, I finally have time to work on hobbies such as this -website, programming, athletics, games, etc. +Outside of work, I finally have time to work on hobbies such as this website, +programming, athletics, games, etc. -You may have noticed my absence if you\'re in the same channels, forums, -and rooms that I am, but I should finally be active again. +You may have noticed my absence if you're in the same channels, forums, and +rooms that I am, but I should finally be active again. -I\'m hoping to break an item out of my backlog soon and start working on +I'm hoping to break an item out of my backlog soon and start working on building a new project or hack around with a stale one. diff --git a/content/blog/2023-06-08-goaccess-geoip.md b/content/blog/2023-06-08-goaccess-geoip.md index 1fc2008..5cce686 100644 --- a/content/blog/2023-06-08-goaccess-geoip.md +++ b/content/blog/2023-06-08-goaccess-geoip.md @@ -7,22 +7,21 @@ draft = false # Overview -[GoAccess](https://goaccess.io/) is an open source real-time web log -analyzer and interactive viewer that runs in a terminal in \*nix systems -or through your browser. +[GoAccess](https://goaccess.io/) is an open source real-time web log analyzer +and interactive viewer that runs in a terminal in *nix systems or through your +browser. # Installation -To start, you\'ll need to install GoAccess for your OS. Here\'s an -example for Debian-based distros: +To start, you'll need to install GoAccess for your OS. Here's an example for +Debian-based distros: ```sh sudo apt install goaccess ``` -Next, find any number of the MaxMind GeoIP database files on GitHub or -another file hosting website. We\'re going to use P3TERX\'s version in -this example: +Next, find any number of the MaxMind GeoIP database files on GitHub or another +file hosting website. We're going to use P3TERX's version in this example: ```sh wget https://github.com/P3TERX/GeoLite.mmdb/raw/download/GeoLite2-City.mmdb @@ -32,16 +31,15 @@ Be sure to save this file in an easy to remember location! # Usage -In order to utilize the full capabilities of GoAccess and MMDB, start -with the command template below and customize as necessary. This will -export an HTML view of the GoAccess dashboard, showing all relevant -information related to that site\'s access log. You can also omit the -`-o output.html` parameter if you prefer to view the data -within the CLI instead of creating an HTML file. +In order to utilize the full capabilities of GoAccess and MMDB, start with the +command template below and customize as necessary. This will export an HTML view +of the GoAccess dashboard, showing all relevant information related to that +site's access log. You can also omit the `-o output.html` parameter if you +prefer to view the data within the CLI instead of creating an HTML file. -With the addition of the GeoIP Database parameter, section -`16 - Geo Location` will be added with the various countries -that are associated with the collected IP addresses. +With the addition of the GeoIP Database parameter, section `16 - Geo Location` +will be added with the various countries that are associated with the collected +IP addresses. ```sh zcat /var/log/nginx/example.access.log.*.gz | goaccess \ @@ -60,11 +58,11 @@ See below for an example of the HTML output: 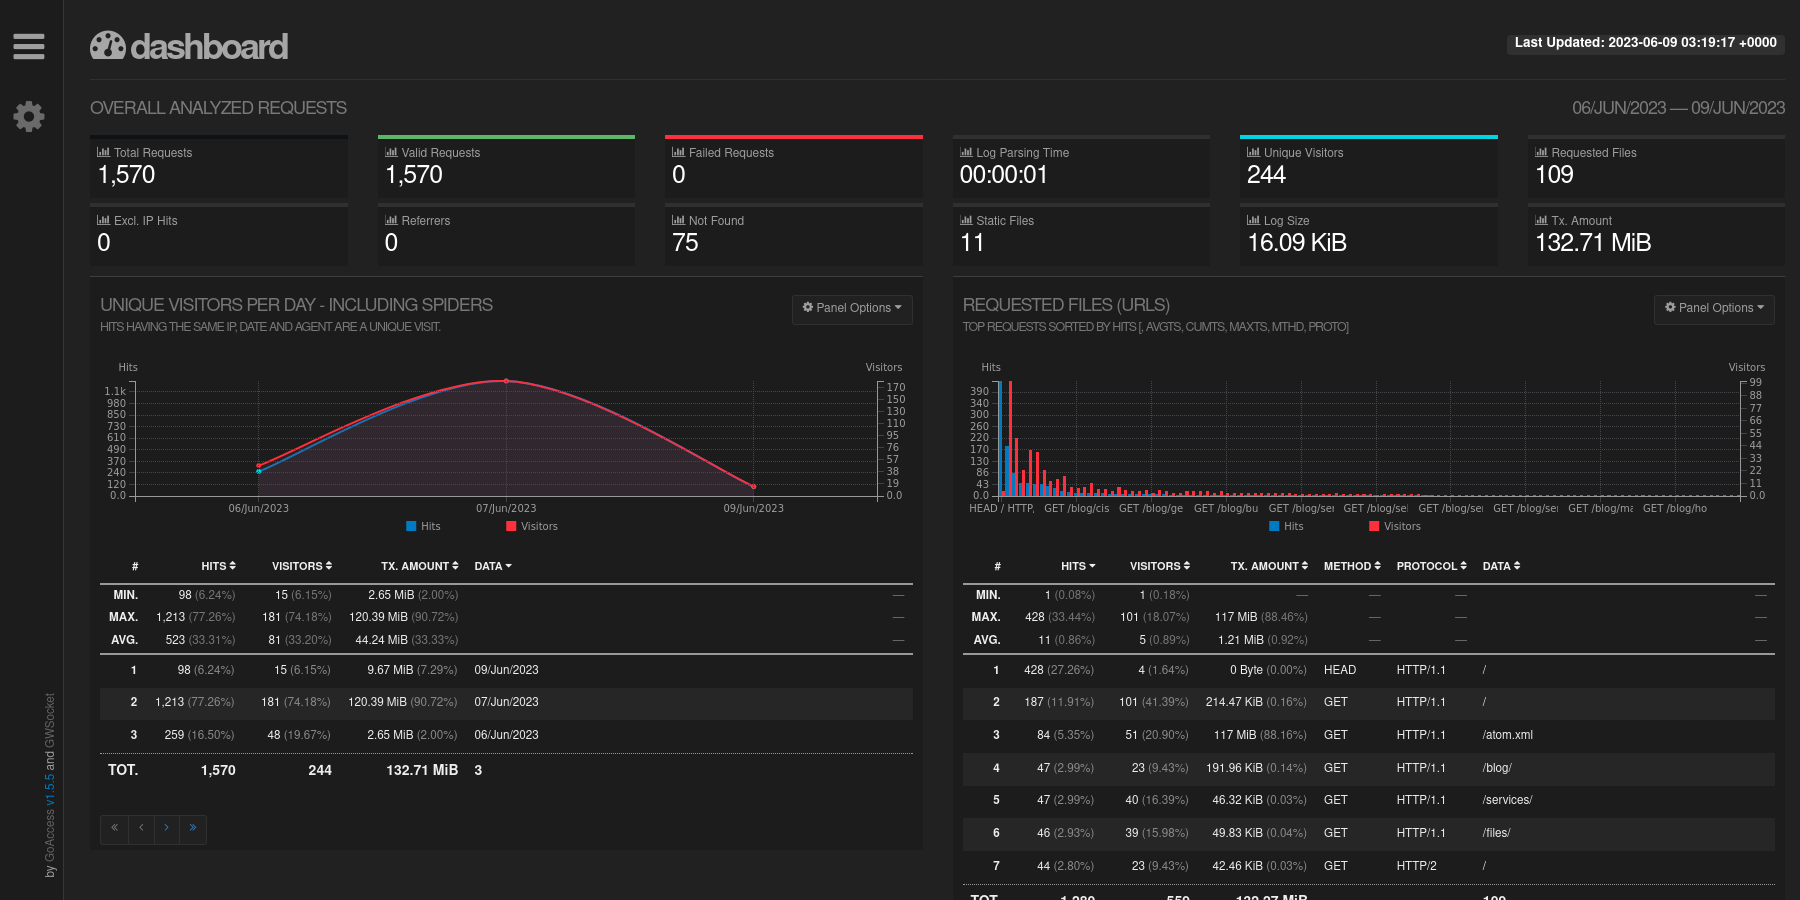 -You can also see the GeoIP card created by the integration of the -MaxMind database information. +You can also see the GeoIP card created by the integration of the MaxMind +database information. 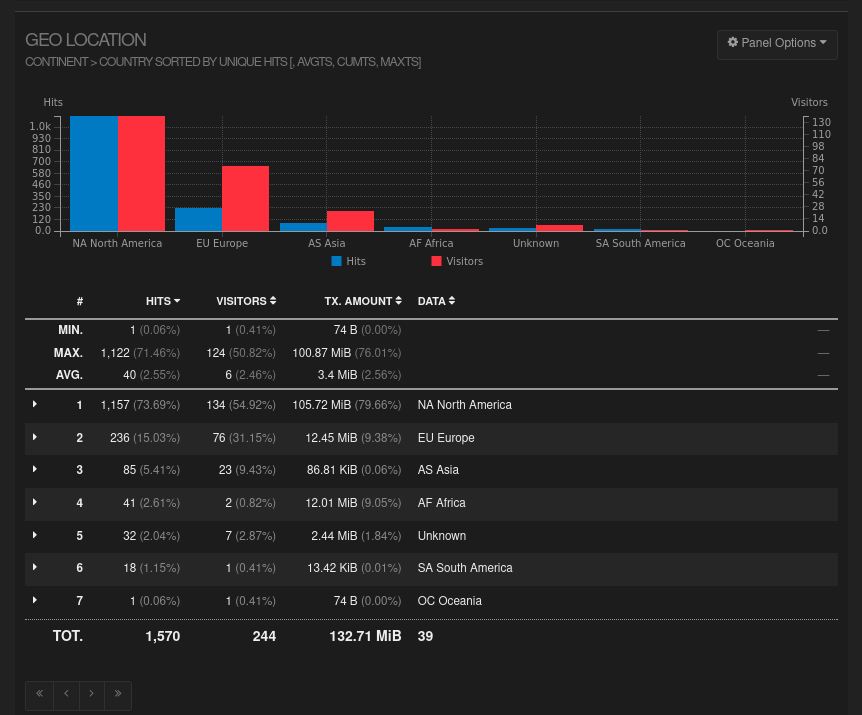 -That\'s all there is to it! Informational data is provided in an -organized fashion with minimal effort. +That's all there is to it! Informational data is provided in an organized +fashion with minimal effort. diff --git a/content/blog/2023-06-08-self-hosting-baikal.md b/content/blog/2023-06-08-self-hosting-baikal.md index 67900cf..b56865a 100644 --- a/content/blog/2023-06-08-self-hosting-baikal.md +++ b/content/blog/2023-06-08-self-hosting-baikal.md @@ -7,27 +7,26 @@ draft = false # What is Baikal? -[Baikal](https://sabre.io/baikal/) is a lightweight CalDAV + CardDAV -server that you can self-host on your own machine. While I have tried (& -failed) to get this CalDAV + CardDAV server running before, it was quite -easy this time. Not really sure what I did differently this time, but -I\'m documenting my process here to ensure I don\'t forget. +[Baikal](https://sabre.io/baikal/) is a lightweight CalDAV + CardDAV server that +you can self-host on your own machine. While I have tried (& failed) to get this +CalDAV + CardDAV server running before, it was quite easy this time. Not really +sure what I did differently this time, but I'm documenting my process here to +ensure I don't forget. # Installation -First, create a folder on your server and open a -`docker-compose.yml` file for editing: +First, create a folder on your server and open a `docker-compose.yml` file for +editing: ```sh mkdir baikal && cd baikal nano docker-compose.yml ``` -Within this file, you\'ll need to paste the information below. You can -customize the `ports` section to use any port on your server -to pass through to port 80 in the container. You can also edit the -`volumes` section to use docker volumes instead of local -folders. +Within this file, you'll need to paste the information below. You can customize +the `ports` section to use any port on your server to pass through to port 80 in +the container. You can also edit the `volumes` section to use docker volumes +instead of local folders. ``` conf version: "2" @@ -42,8 +41,8 @@ services: - ./data:/var/www/baikal/Specific ``` -Once finished with editing, save and close the file. Then, launch the -docker container: +Once finished with editing, save and close the file. Then, launch the docker +container: ```sh sudo docker-compose up -d @@ -51,42 +50,40 @@ sudo docker-compose up -d # Intial Setup -As long as no issues came up when starting the container, you should be -able to visit the server\'s set-up page at -`http://<server_ip>:<port>`. The application will ask you to -create an administrator account and choose the database type for your -storage. Personally, I opted to use SQLite. +As long as no issues came up when starting the container, you should be able to +visit the server's set-up page at `http://<server_ip>:<port>`. The application +will ask you to create an administrator account and choose the database type for +your storage. Personally, I opted to use SQLite. -Make sure the administrator credentials are adequate to protect against -common attacks. +Make sure the administrator credentials are adequate to protect against common +attacks. # Creating Users -Once you\'ve set up the application, you will be greeted by the -Dashboard page, which will show the version of the app, status of the -admin/CalDAV/CardDAV services, and the number of users, calendars, -events, address books, and contacts. +Once you've set up the application, you will be greeted by the Dashboard page, +which will show the version of the app, status of the admin/CalDAV/CardDAV +services, and the number of users, calendars, events, address books, and +contacts. 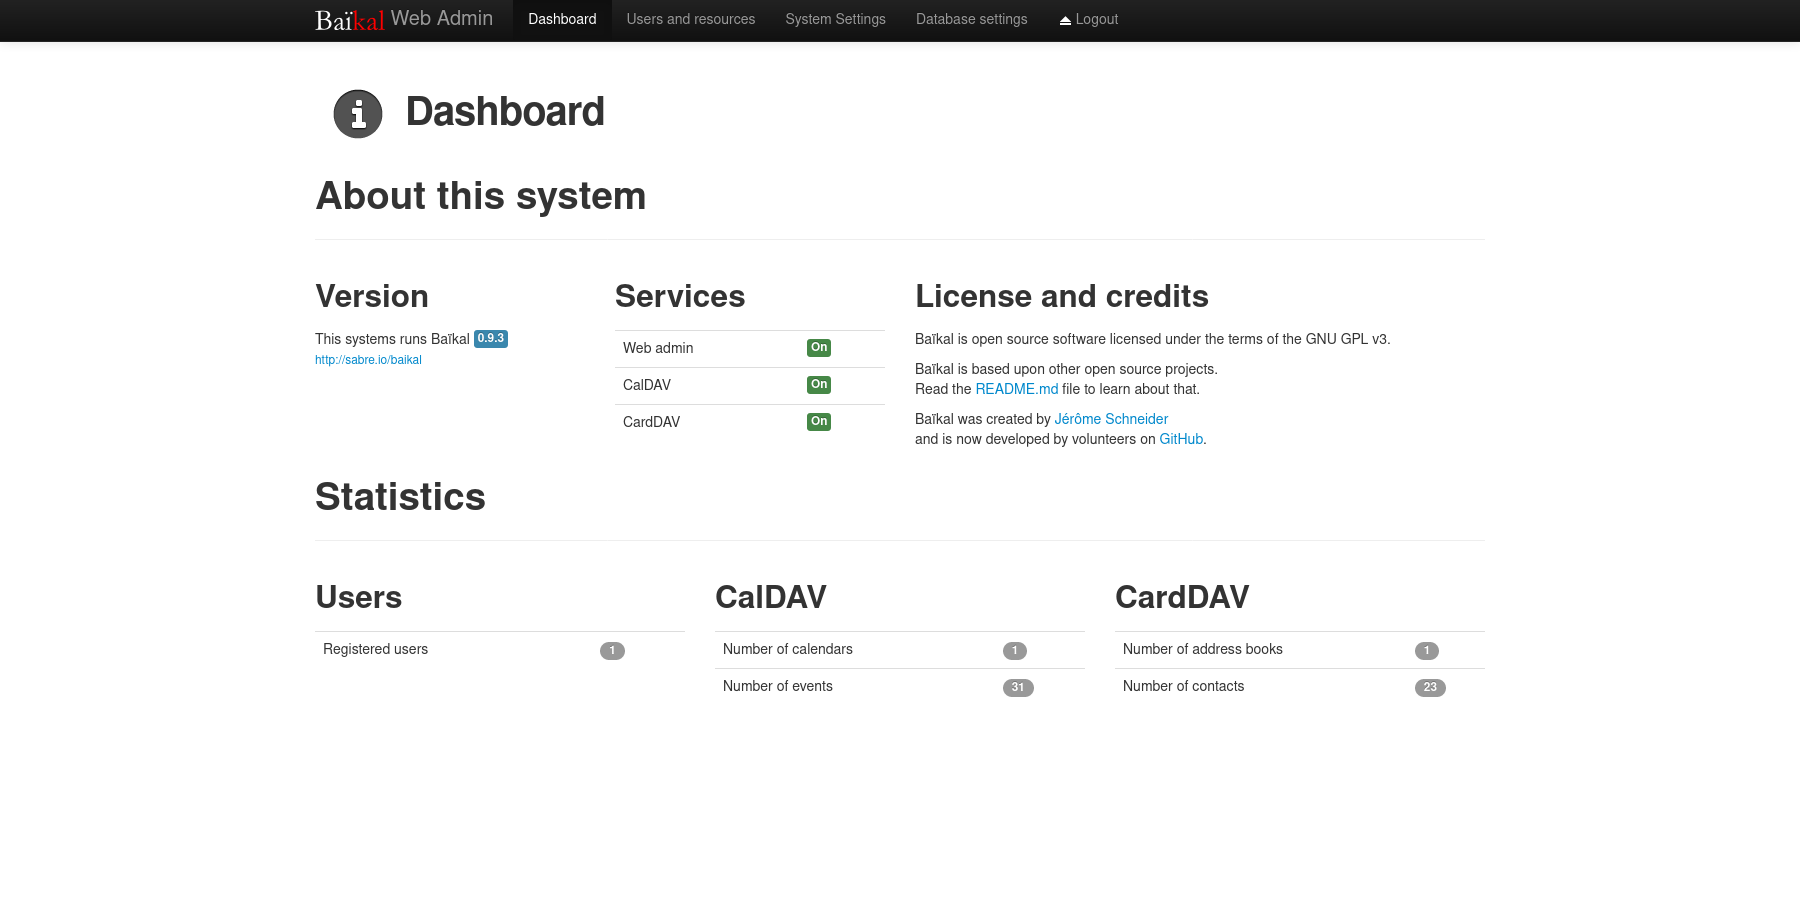 -To create a new user, navigate to the `Users and resources` -page. This process is as simple as entering a username, password, and -email. +To create a new user, navigate to the `Users and resources` page. This process +is as simple as entering a username, password, and email. -Once a user has been created, you can create any number of calendars and -address books for user, as well as inspect their information. +Once a user has been created, you can create any number of calendars and address +books for user, as well as inspect their information. # Setting Up a Public URL -Once your application is working locally, you can open access remotely -via a URL by using a reverse-proxy like Nginx. +Once your application is working locally, you can open access remotely via a URL +by using a reverse-proxy like Nginx. -As a prerequisite, you must own a domain name and set up DNS records to -point a domain name to the server hosting Baikal. +As a prerequisite, you must own a domain name and set up DNS records to point a +domain name to the server hosting Baikal. -Start by navigating to your web server\'s configuration directory and -create a new file for this application. +Start by navigating to your web server's configuration directory and create a +new file for this application. ```sh cd /etc/nginx/sites-available/ @@ -94,7 +91,7 @@ nano dav ``` Within this file, paste in the configuration from below and change -`dav.example.com` to match the URL you\'ll be using. +`dav.example.com` to match the URL you'll be using. ``` conf server { @@ -128,33 +125,32 @@ server { } ``` -For Nginx on Ubuntu, you\'ll need to symlink the configuration file to -the `sites-enabled` directory and then restart Nginx. +For Nginx on Ubuntu, you'll need to symlink the configuration file to the +`sites-enabled` directory and then restart Nginx. ```sh sudo ln -s /etc/nginx/sites-available/dav /etc/nginx/sites-enabled/dav sudo systemctl restart nginx.service ``` -At this point, the Baikal server should be available over the internet -at the URL configured above! +At this point, the Baikal server should be available over the internet at the +URL configured above! # Configuring Clients -Lastly, configuring clients and applications is essential to making sure -the DAV server is being fully utilized. +Lastly, configuring clients and applications is essential to making sure the DAV +server is being fully utilized. -You can also use the `Users and resources` page to inspect a -user\'s personal link to their calendars and address books by clicking -the info (i) button. It will show a URI like -`/dav.php/calendars/your-user/default/`. +You can also use the `Users and resources` page to inspect a user's personal +link to their calendars and address books by clicking the info (i) button. It +will show a URI like `/dav.php/calendars/your-user/default/`. However, I found that the following URL works for most applications: `/dav.php/principals/your-user/`. -I used the `principals` URL above for Thunderbird (calendar, -tasks, and contacts), as well as iOS (calendar, tasks, and contacts) and -everything works flawlessly so far. +I used the `principals` URL above for Thunderbird (calendar, tasks, and +contacts), as well as iOS (calendar, tasks, and contacts) and everything works +flawlessly so far. -Syncing is quick between the server and clients, and I haven\'t seen any +Syncing is quick between the server and clients, and I haven't seen any disruptions in the service or data integrity. diff --git a/content/blog/2023-06-18-unifi-ip-blocklist.md b/content/blog/2023-06-18-unifi-ip-blocklist.md index 5ec37d6..0d1e014 100644 --- a/content/blog/2023-06-18-unifi-ip-blocklist.md +++ b/content/blog/2023-06-18-unifi-ip-blocklist.md @@ -7,82 +7,74 @@ draft = false # Identifying Abusive IPs -If you\'re like me and use Unifi network equipment at the edge of the -network you manage, you may know that Unifi is only somewhat decent at -identifying and blocking IPs that represent abusive or threat actors. +If you're like me and use Unifi network equipment at the edge of the network +you manage, you may know that Unifi is only somewhat decent at identifying and +blocking IPs that represent abusive or threat actors. While Unifi has a [threat management](https://help.ui.com/hc/en-us/articles/360006893234-UniFi-Gateway-Threat-Management) -tool inside their Network application, it can be lacking in -functionality and identification. For example, I have my UDM Pro set to -identify and block almost all categories of threats available within the -Unifi settings. However, I regularly identify abusive actors on my web -server via the server logs. +tool inside their Network application, it can be lacking in functionality and +identification. For example, I have my UDM Pro set to identify and block almost +all categories of threats available within the Unifi settings. However, I +regularly identify abusive actors on my web server via the server logs. -In addition, I have identified IP addresses and subnets directly within -Unifi\'s logs that the UDM did not block for whatever reason. +In addition, I have identified IP addresses and subnets directly within Unifi's +logs that the UDM did not block for whatever reason. -This guide is meant to be another step in the process to manually block -abusive IP addresses or subnets that you have identified but are not -being automatically blocked yet. +This guide is meant to be another step in the process to manually block abusive +IP addresses or subnets that you have identified but are not being automatically +blocked yet. # Create an IP Group Profile -To start, login to the Unifi machine\'s web GUI and navigate to the -Network app \> Settings \> Profiles. +To start, login to the Unifi machine's web GUI and navigate to the Network app +> Settings > Profiles. -Within this page, choose the `IP Groups` tab and click -`Create New`. +Within this page, choose the `IP Groups` tab and click `Create New`. 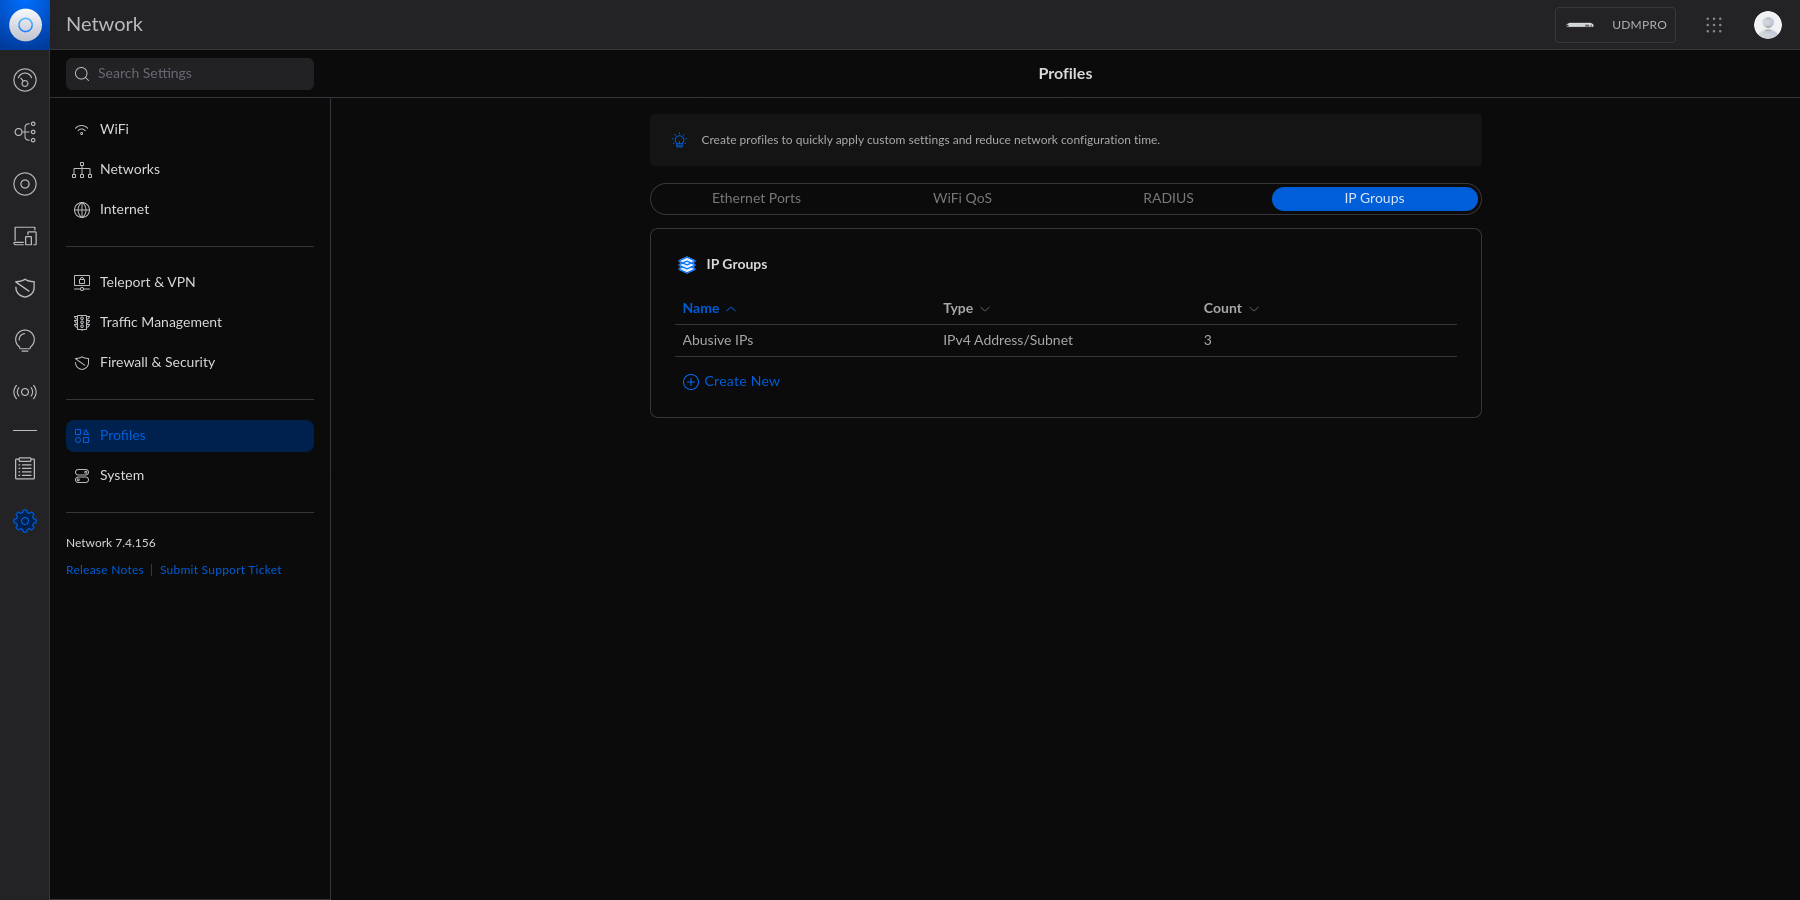 Each IP Group profile can be used as one of three options: -1. Port Group -2. IPv4 Address/Subnet -3. IPv6 Address/Subnet +1. Port Group +2. IPv4 Address/Subnet +3. IPv6 Address/Subnet -In this example, I\'m creating an IPv4 Address/Subnet group and adding a -few different IP addresses and a subnet. Once you\'ve added all IP -addresses and subnets, click the `Apply` button that should -appear at the bottom. +In this example, I'm creating an IPv4 Address/Subnet group and adding a few +different IP addresses and a subnet. Once you've added all IP addresses and +subnets, click the `Apply` button that should appear at the bottom. 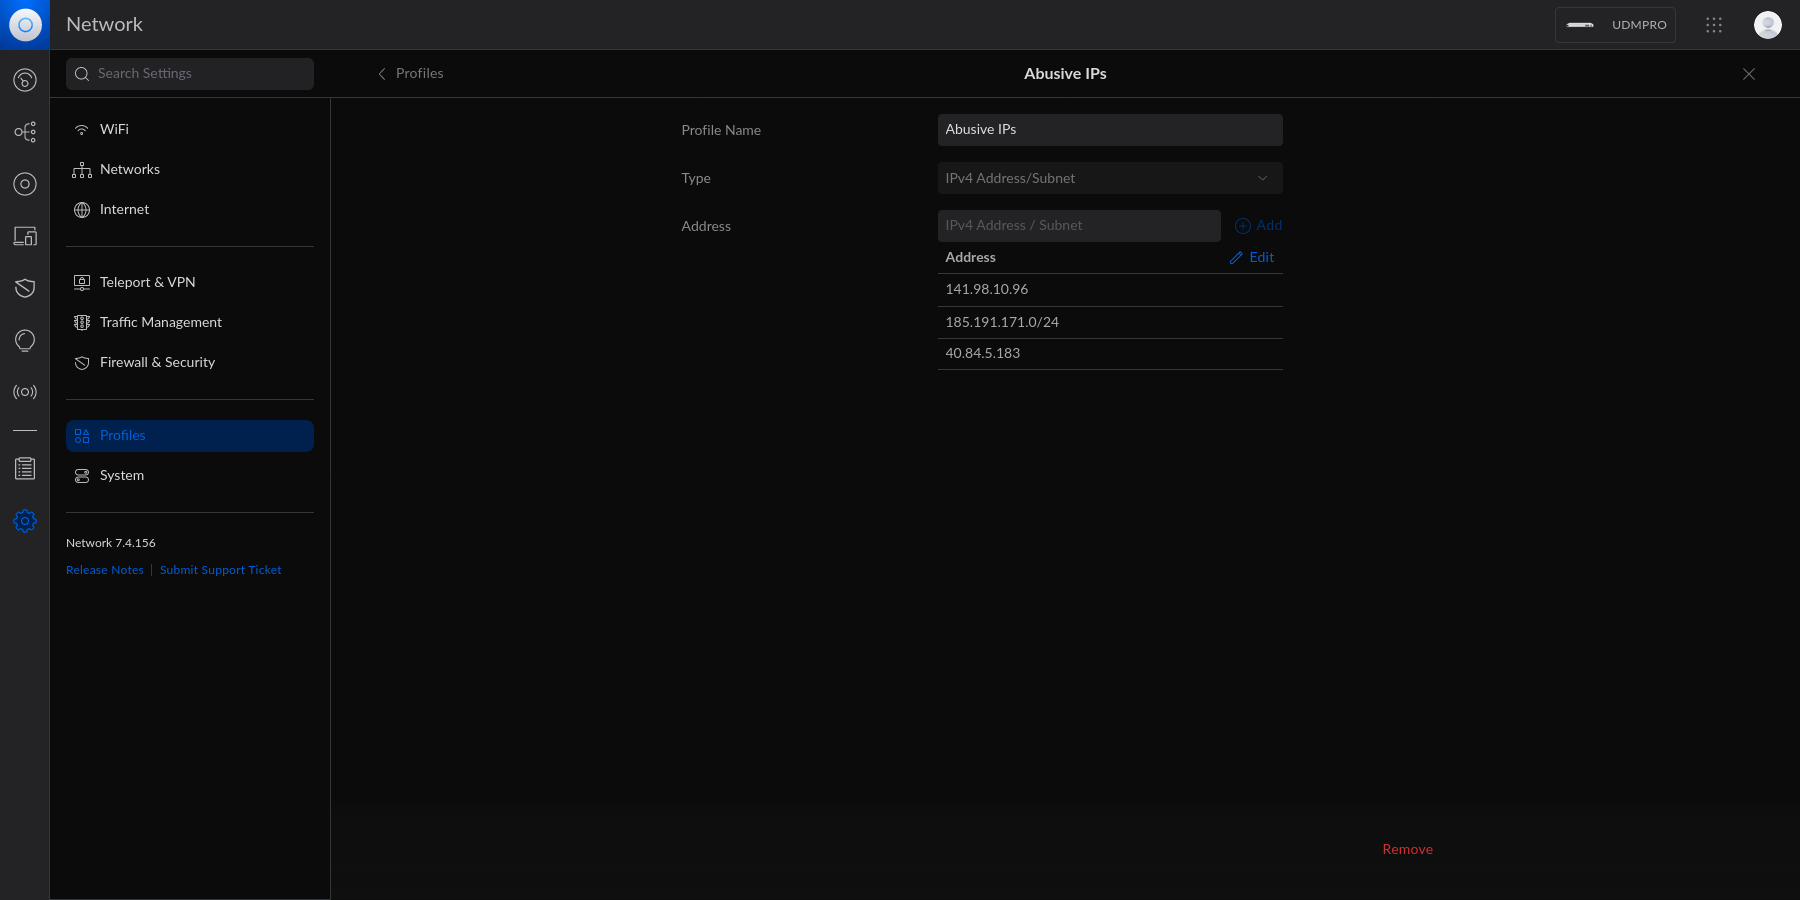 -At this point, the IPv4 Address/Subnet has been created but not yet -used. +At this point, the IPv4 Address/Subnet has been created but not yet used. # Drop IP Group Profile via the Unifi Firewall -To instruct the Unifi machine to block the profile we just created, we -need to navigate to the Network app \> Settings \> Firewall & Security. +To instruct the Unifi machine to block the profile we just created, we need to +navigate to the Network app > Settings > Firewall & Security. -Within this screen, find the Firewall Rules table and click -`Create Entry`. This entry should contain the following -settings: +Within this screen, find the Firewall Rules table and click `Create Entry`. This +entry should contain the following settings: -- Type: `Internet In` -- Description: `<Your Custom Rule>` -- Rule Applied: `Before Predefined Rules` -- Action: `Drop` -- Source Type: `Port/IP Group` -- IPv4 Address Group: - `<Name of the Group Profile You Created Above>` +- Type: `Internet In` +- Description: `<Your Custom Rule>` +- Rule Applied: `Before Predefined Rules` +- Action: `Drop` +- Source Type: `Port/IP Group` +- IPv4 Address Group: `<Name of the Group Profile You Created Above>` -Customize the remaining configurations to your liking, and then save and -enable the firewall rule. +Customize the remaining configurations to your liking, and then save and enable +the firewall rule. 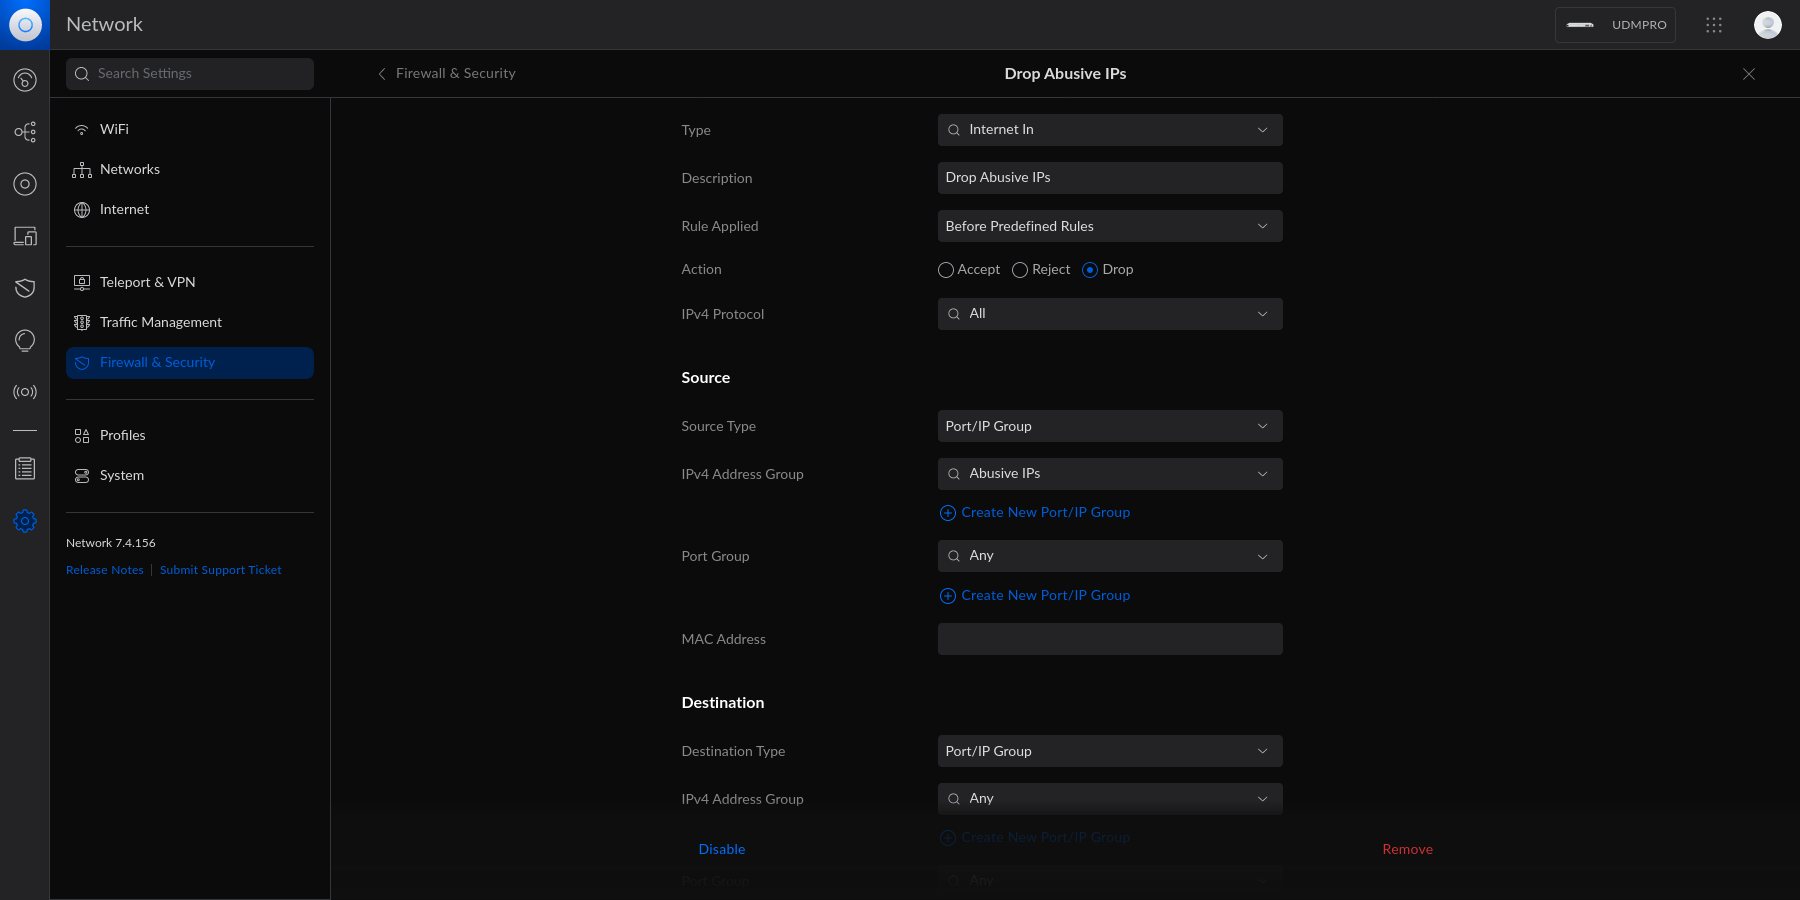 -Once enabled, the Unifi machine will be able to drop all incoming -connections from the defined IP addresses and subnets within the created -profile. +Once enabled, the Unifi machine will be able to drop all incoming connections +from the defined IP addresses and subnets within the created profile. -> As a personal aside to this topic, I\'m looking for a convenient way -> to update the firewall rules or profiles remotely (within the LAN) -> from the web server to accelerate this process. If you have an idea on -> how to automatically update Unifi IP groups or firewall rules, let me -> know! +> As a personal aside to this topic, I'm looking for a convenient way to update +> the firewall rules or profiles remotely (within the LAN) from the web server +> to accelerate this process. If you have an idea on how to automatically update +> Unifi IP groups or firewall rules, let me know! diff --git a/content/blog/2023-06-20-audit-review-template.md b/content/blog/2023-06-20-audit-review-template.md index 6fc69c8..853bbd1 100644 --- a/content/blog/2023-06-20-audit-review-template.md +++ b/content/blog/2023-06-20-audit-review-template.md @@ -7,75 +7,70 @@ draft = false # Overview -This post is a *very* brief overview on the basic process to review -audit test results, focusing on work done as part of a financial -statement audit (FSA) or service organization controls (SOC) report. +This post is a *very* brief overview on the basic process to review audit test +results, focusing on work done as part of a financial statement audit (FSA) or +service organization controls (SOC) report. -While there are numerous different things to review and look for - all -varying wildly depending on the report, client, and tester - this list -serves as a solid base foundation for a reviewer. +While there are numerous different things to review and look for - all varying +wildly depending on the report, client, and tester - this list serves as a solid +base foundation for a reviewer. -I have used this throughout my career as a starting point to my reviews, -and it has worked wonders for creating a consistent and objective -template to my reviews. The goal is to keep this base high-level enough -to be used on a wide variety of engagements, while still ensuring that -all key areas are covered. +I have used this throughout my career as a starting point to my reviews, and it +has worked wonders for creating a consistent and objective template to my +reviews. The goal is to keep this base high-level enough to be used on a wide +variety of engagements, while still ensuring that all key areas are covered. # Review Template -1. [ ] Check all documents for spelling and grammar. -2. [ ] Ensure all acronyms are fully explained upon first use. -3. [ ] For all people referenced, use their full names and job titles - upon first use. -4. [ ] All supporting documents must cross-reference to the lead sheet - and vice-versa. -5. [ ] Verify that the control has been adequately tested: - - [ ] **Test of Design**: Did the tester obtain information - regarding how the control should perform normally and abnormally - (e.g., emergency scenarios)? - - [ ] **Test of Operating Effectiveness**: Did the tester inquire, - observe, inspect, or re-perform sufficient evidence to support - their conclusion over the control? Inquiry alone is not - adequate! -6. [ ] For any information used in the control, whether by the control - operator or by the tester, did the tester appropriately document the - source (system or person), extraction method, parameters, and - completeness and accuracy (C&A)? - - [ ] For any reports, queries, etc. used in the extraction, did - the tester include a copy and notate C&A considerations? -7. [ ] Did the tester document the specific criteria that the control - is being tested against? -8. [ ] Did the tester notate in the supporting documents where each - criterion was satisfied? -9. [ ] If testing specific policies or procedures, are the documents - adequate? - - [ ] e.g., a test to validate that a review of policy XYZ occurs - periodically should also evaluate the sufficiency of the policy - itself, if meant to cover the risk that such a policy does not - exist and is not reviewed. +1. [ ] Check all documents for spelling and grammar. +2. [ ] Ensure all acronyms are fully explained upon first use. +3. [ ] For all people referenced, use their full names and job titles upon first + use. +4. [ ] All supporting documents must cross-reference to the lead sheet and + vice-versa. +5. [ ] Verify that the control has been adequately tested: + - [ ] **Test of Design**: Did the tester obtain information regarding how + the control should perform normally and abnormally (e.g., emergency + scenarios)? + - [ ] **Test of Operating Effectiveness**: Did the tester inquire, observe, + inspect, or re-perform sufficient evidence to support their conclusion + over the control? Inquiry alone is not adequate! +6. [ ] For any information used in the control, whether by the control operator + or by the tester, did the tester appropriately document the source (system or + person), extraction method, parameters, and completeness and accuracy (C&A)? + - [ ] For any reports, queries, etc. used in the extraction, did the tester + include a copy and notate C&A considerations? +7. [ ] Did the tester document the specific criteria that the control is being + tested against? +8. [ ] Did the tester notate in the supporting documents where each criterion + was satisfied? +9. [ ] If testing specific policies or procedures, are the documents adequate? + - [ ] e.g., a test to validate that a review of policy XYZ occurs + periodically should also evaluate the sufficiency of the policy itself, if + meant to cover the risk that such a policy does not exist and is not + reviewed. 10. [ ] Does the test cover the appropriate period under review? - - [ ] If the test is meant to cover only a portion of the audit - period, do other controls exist to mitigate the risks that exist - for the remainder of the period? + - [ ] If the test is meant to cover only a portion of the audit period, do + other controls exist to mitigate the risks that exist for the remainder of + the period? 11. [ ] For any computer-aided audit tools (CAATs) or other automation techniques used in the test, is the use of such tools explained and appropriately documented? -12. [ ] If prior-period documentation exists, are there any missing - pieces of evidence that would further enhance the quality of the +12. [ ] If prior-period documentation exists, are there any missing pieces of + evidence that would further enhance the quality of the test? +13. [ ] Was any information discovered during the walkthrough or inquiry phase + that was not incorporated into the test? +14. [ ] Are there new rules or expectations from your company's internal + guidance or your regulatory bodies that would affect the audit approach for + this control? +15. [ ] Was an exception, finding, or deficiency identified as a result of this test? -13. [ ] Was any information discovered during the walkthrough or inquiry - phase that was not incorporated into the test? -14. [ ] Are there new rules or expectations from your company\'s - internal guidance or your regulatory bodies that would affect the - audit approach for this control? -15. [ ] Was an exception, finding, or deficiency identified as a result - of this test? - - [ ] Was the control deficient in design, operation, or both? - - [ ] What was the root cause of the finding? - - [ ] Does the finding indicate other findings or potential fraud? - - [ ] What\'s the severity and scope of the finding? - - [ ] Do other controls exist as a form of compensation against - the finding\'s severity, and do they mitigate the risk within - the control objective? - - [ ] Does the finding exist at the end of the period, or was it - resolved within the audit period? + - [ ] Was the control deficient in design, operation, or both? + - [ ] What was the root cause of the finding? + - [ ] Does the finding indicate other findings or potential fraud? + - [ ] What's the severity and scope of the finding? + - [ ] Do other controls exist as a form of compensation against the + finding's severity, and do they mitigate the risk within the control + objective? + - [ ] Does the finding exist at the end of the period, or was it resolved + within the audit period? diff --git a/content/blog/2023-06-23-byobu.md b/content/blog/2023-06-23-byobu.md index 991da61..e1607b9 100644 --- a/content/blog/2023-06-23-byobu.md +++ b/content/blog/2023-06-23-byobu.md @@ -5,27 +5,26 @@ description = "" draft = false +++ -# Byobu {#byobu-1} +# Byobu -[byobu](https://www.byobu.org) is a command-line tool that allows you to -use numerous screens within a single terminal emulator instance. More -specifically, it\'s a text based window manager, using either -`screen` or `tmux`. +[byobu](https://www.byobu.org) is a command-line tool that allows you to use +numerous screens within a single terminal emulator instance. More specifically, +it's a text based window manager, using either `screen` or `tmux`. -This post is mostly just a self-reference as I explore byobu, so I may -come back later and update this post with more content. +This post is mostly just a self-reference as I explore byobu, so I may come back +later and update this post with more content. ## Screenshot -Take a look below at my current multi-window set-up in byobu while I -write this blog post: +Take a look below at my current multi-window set-up in byobu while I write this +blog post: 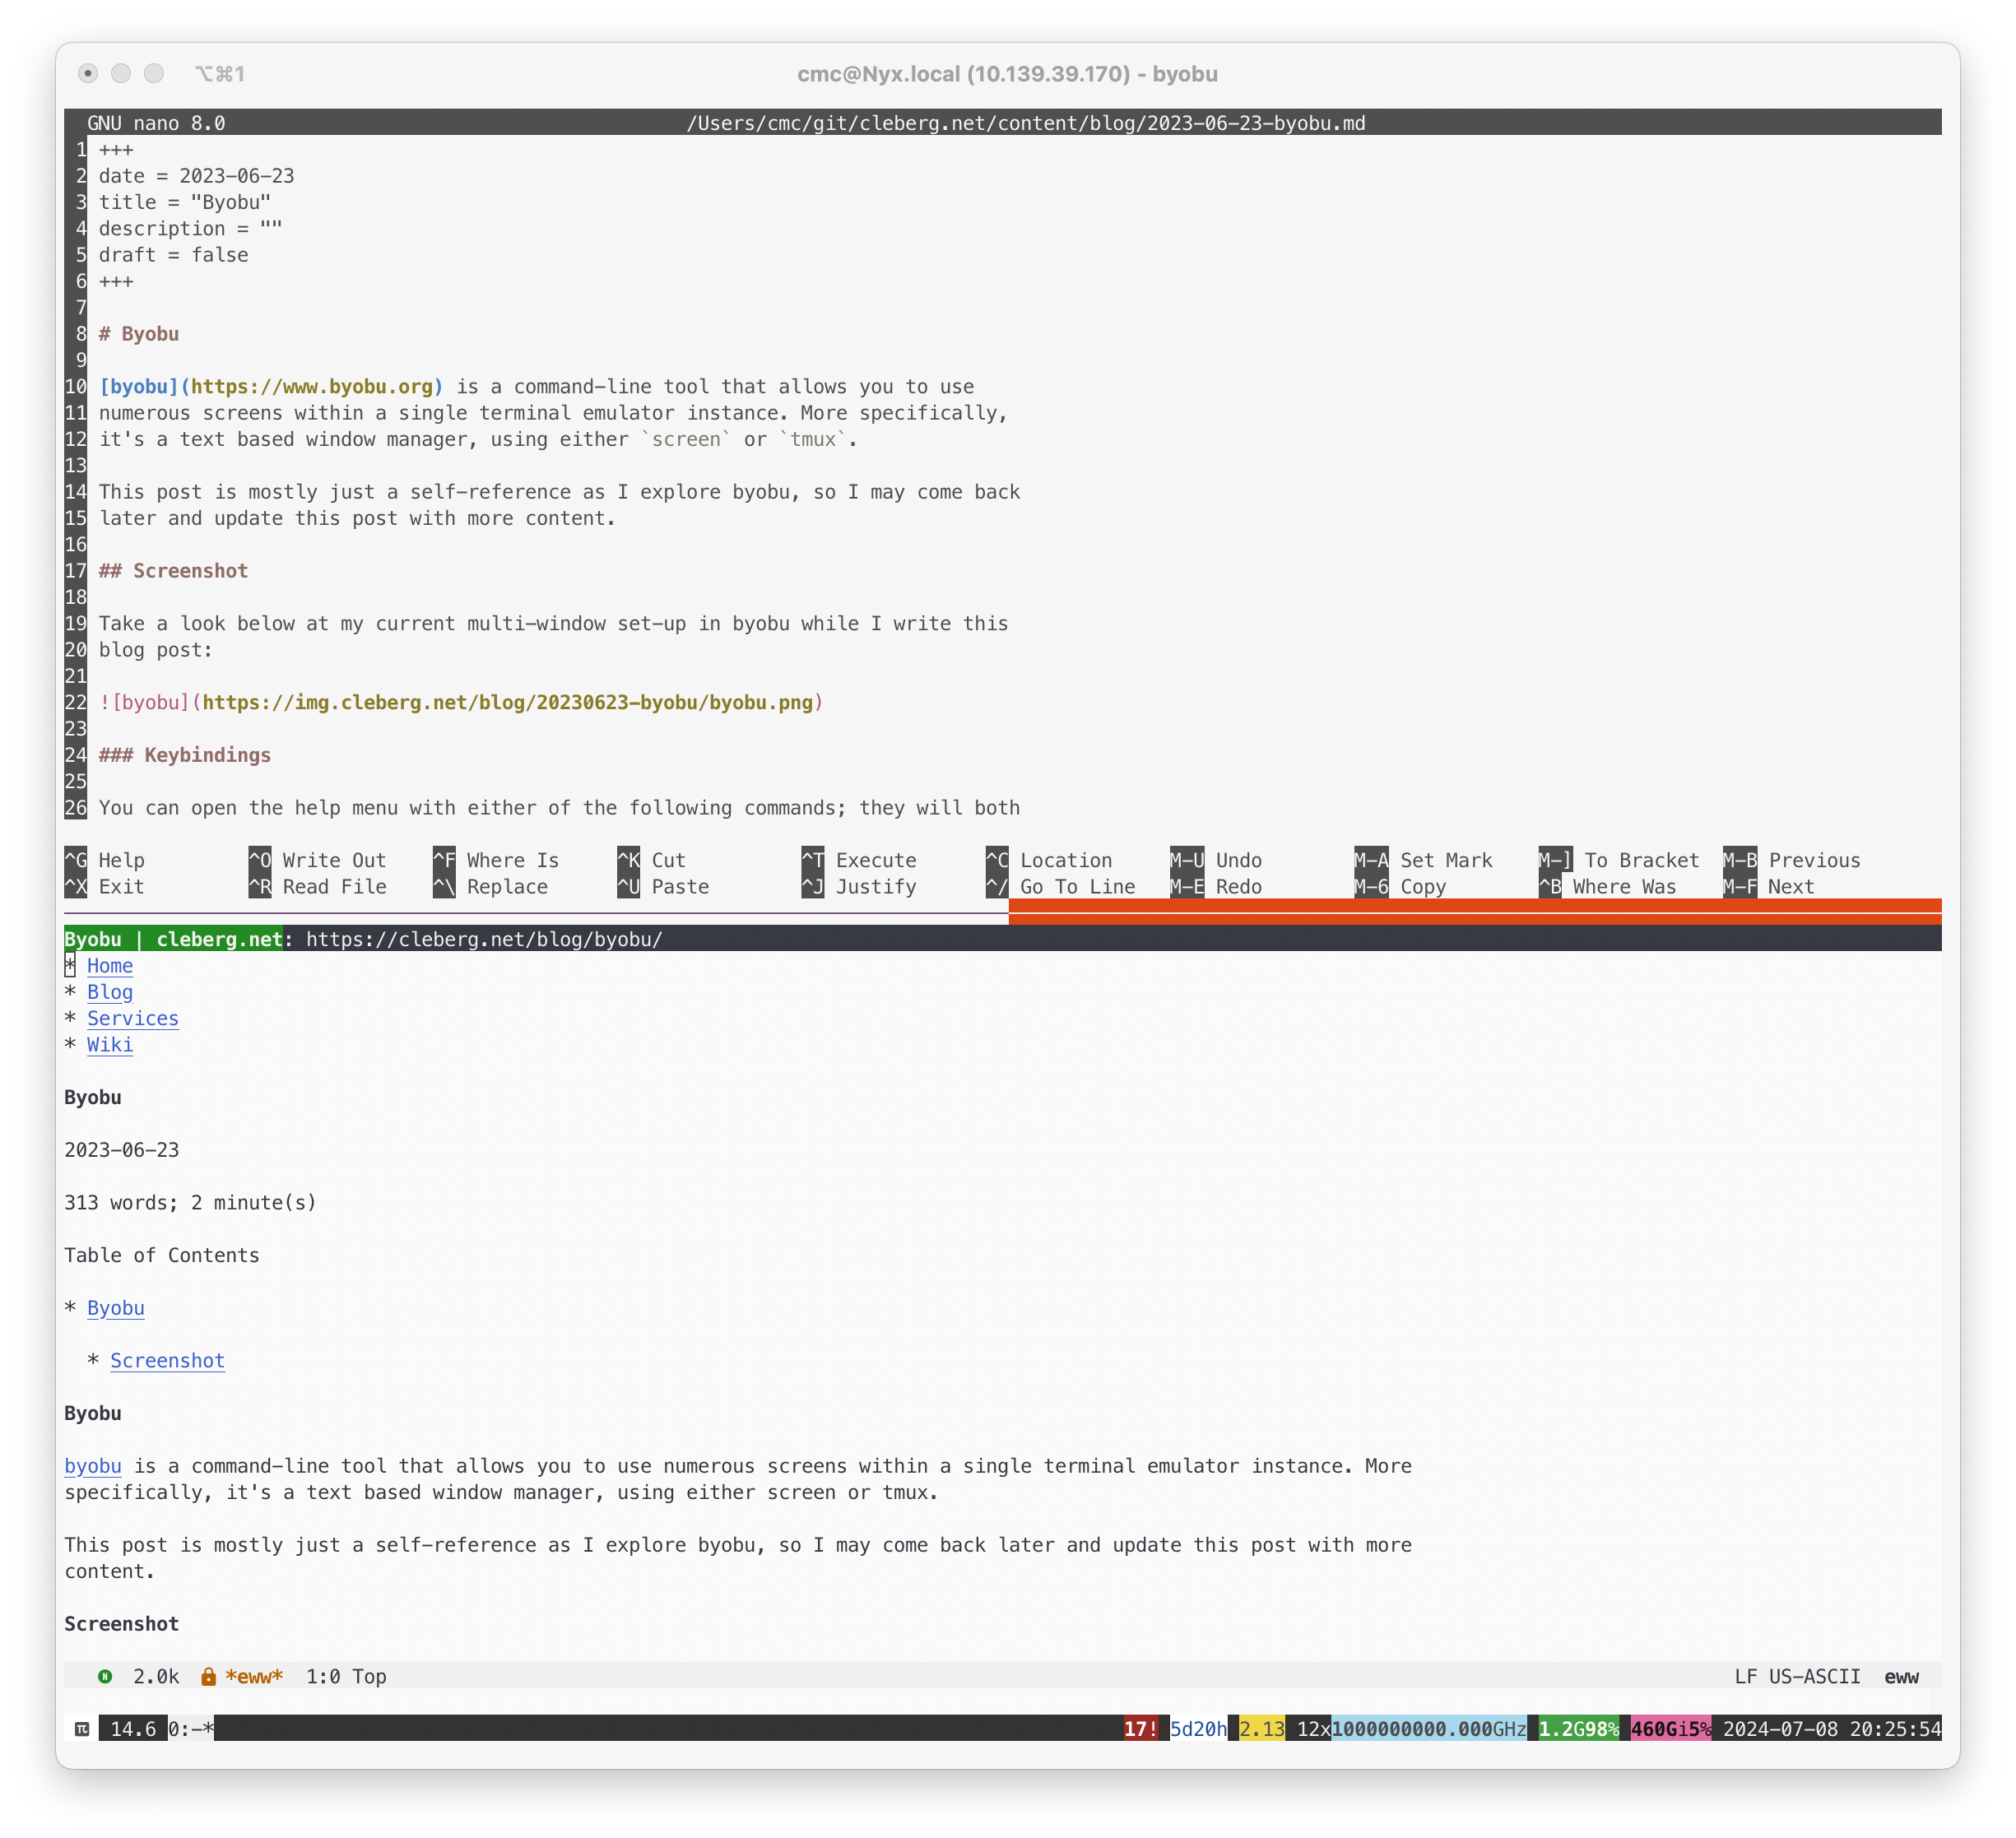 ### Keybindings -You can open the help menu with either of the following commands; they -will both open the same manpage: +You can open the help menu with either of the following commands; they will both +open the same manpage: ```sh byobu --help @@ -33,9 +32,9 @@ byobu --help man byobu ``` -While the manpage contains a ton of information about the functionality -of byobu (such as status notifications, sessions, and windows), the -first location to explore should be the keybindings section. +While the manpage contains a ton of information about the functionality of byobu +(such as status notifications, sessions, and windows), the first location to +explore should be the keybindings section. The keybindings are configured as follows: diff --git a/content/blog/2023-06-23-self-hosting-convos.md b/content/blog/2023-06-23-self-hosting-convos.md index d93f2c6..6ca90c3 100644 --- a/content/blog/2023-06-23-self-hosting-convos.md +++ b/content/blog/2023-06-23-self-hosting-convos.md @@ -7,36 +7,32 @@ draft = false # Convos -[Convos](https://convos.chat/) is an always-online web client for IRC. -It has a few features that made it attractive to me as a self-hosted -option: - -- Extremely simple Docker Compose installation method. -- Runs in the background and monitors chats even while you\'re not - logged in. -- Neatly organized sidebar for conversation and client settings. -- Ability to connect to different hosts and create profiles for hosts. -- By default, registration is closed to the public. You can enable - public registration on the Settings page or generate invitation - links on the Users page. -- Customization of the client theme, organization name and URL, admin - email, and video service. +[Convos](https://convos.chat/) is an always-online web client for IRC. It has a +few features that made it attractive to me as a self-hosted option: + +- Extremely simple Docker Compose installation method. +- Runs in the background and monitors chats even while you're not logged in. +- Neatly organized sidebar for conversation and client settings. +- Ability to connect to different hosts and create profiles for hosts. +- By default, registration is closed to the public. You can enable public + registration on the Settings page or generate invitation links on the Users + page. +- Customization of the client theme, organization name and URL, admin email, and + video service. # Docker Installation -To install Convos, simply create a directory and a -`docker-compose.yml` file: +To install Convos, simply create a directory and a `docker-compose.yml` file: ```sh mkdir ~/convos && cd ~/convos nano docker-compose.yml ``` -With the `docker-compose.yml` file open, paste the -configuration below into the file. You can customize the host port to be -something unique, such as `21897:3000`. You can also change -the `data` folder to be a docker volume instead, if you -prefer. +With the `docker-compose.yml` file open, paste the configuration below into the +file. You can customize the host port to be something unique, such as +`21897:3000`. You can also change the `data` folder to be a docker volume +instead, if you prefer. ``` config version: '3' @@ -53,29 +49,27 @@ services: restart: always ``` -Save the `docker-compose.yml` file and bring the container -up: +Save the `docker-compose.yml` file and bring the container up: ```sh sudo docker-compose up -d ``` -At this point, Convos is available at `<server_ip>:3000` but -not available to the public. +At this point, Convos is available at `<server_ip>:3000` but not available to +the public. # Nginx Reverse Proxy -If you\'re using Nginx, you can create a configuration file for the -convos application. Start by opening the file: +If you're using Nginx, you can create a configuration file for the convos +application. Start by opening the file: ```sh nano /etc/nginx/sites-available/convos ``` -Within the nginx configuration file, paste the following content and be -sure to update `convos.example.com` to match your domain and -`127.0.0.1:3000` to match the port you opened in the -`docker-compose.yml` file. +Within the nginx configuration file, paste the following content and be sure to +update `convos.example.com` to match your domain and `127.0.0.1:3000` to match +the port you opened in the `docker-compose.yml` file. ``` config # Host and port where convos is running @@ -117,8 +111,8 @@ server { } ``` -Once the file is saved, link it to the `sites-enabled` -directory and restart Nginx. +Once the file is saved, link it to the `sites-enabled` directory and restart +Nginx. ```sh sudo ln -s /etc/nginx/sites-available/convos /etc/nginx/sites-enabled/convos @@ -127,43 +121,41 @@ sudo systemctl restart nginx.service # Screenshots -See the screenshots below for an example of the Convos homepage and an -excerpt of the chat screen. +See the screenshots below for an example of the Convos homepage and an excerpt +of the chat screen. -There are numerous themes to choose from; the theme shown in the images -below is Dracula. +There are numerous themes to choose from; the theme shown in the images below is +Dracula. - + - + # Registering a Nickname -Hop into the server channel so that you can message NickServ. In the -case of Convos, the default sever is libera.chat. Simply click the -`libera` conversation at the top of the sidebar to open it. -Once the chat is open, you can claim a nickname by typing: +Hop into the server channel so that you can message NickServ. In the case of +Convos, the default sever is libera.chat. Simply click the `libera` conversation +at the top of the sidebar to open it. Once the chat is open, you can claim a +nickname by typing: ``` txt /nick <nick> ``` -If the nickname is available, and you\'d like to register the nickname -to yourself, you\'ll need to type another command: +If the nickname is available, and you'd like to register the nickname to +yourself, you'll need to type another command: ``` txt /msg NickServ REGISTER <password> <email> ``` -On libera.chat, the server will send a confirmation email with a command -that you must message in IRC to verify registration of the nickname: +On libera.chat, the server will send a confirmation email with a command that +you must message in IRC to verify registration of the nickname: ``` txt /msg NickServ VERIFY REGISTER <nick> <verification_code> ``` -Once entered, the server should confirm registration of the nickname to -the supplied email with the password specified. +Once entered, the server should confirm registration of the nickname to the +supplied email with the password specified. diff --git a/content/blog/2023-06-28-backblaze-b2.md b/content/blog/2023-06-28-backblaze-b2.md index 3f2ed48..fd93abd 100644 --- a/content/blog/2023-06-28-backblaze-b2.md +++ b/content/blog/2023-06-28-backblaze-b2.md @@ -7,82 +7,77 @@ draft = false # Overview -Backblaze [B2 Cloud -Storage](https://www.backblaze.com/b2/cloud-storage.html) is an -inexpensive and reliable on-demand cloud storage and backup solution. +Backblaze [B2 Cloud Storage](https://www.backblaze.com/b2/cloud-storage.html) is +an inexpensive and reliable on-demand cloud storage and backup solution. -The service starts at \$5/TB/month (\$0.005/GB/month) with a download -rate of \$0.01/GB/month. +The service starts at $5/TB/month ($0.005/GB/month) with a download rate of +$0.01/GB/month. However, there are free tiers: -- The first 10 GB of storage is free. -- The first 1 GB of data downloaded each day is free. -- Class A transactions are free. -- The first 2500 Class B transactions each day are free. -- The first 2500 Class C transactions each day are free. +- The first 10 GB of storage is free. +- The first 1 GB of data downloaded each day is free. +- Class A transactions are free. +- The first 2500 Class B transactions each day are free. +- The first 2500 Class C transactions each day are free. -You can see which API calls fall into categories A, B, or C here: -[Pricing Organized by API +You can see which API calls fall into categories A, B, or C here: [Pricing +Organized by API Calls](https://www.backblaze.com/b2/b2-transactions-price.html). -For someone like me, who wants an offsite backup of their server\'s -`/home/` directory and various other server configs that fall -under 10 GB total, Backblaze is a great solution from a financial -perspective. +For someone like me, who wants an offsite backup of their server's `/home/` +directory and various other server configs that fall under 10 GB total, +Backblaze is a great solution from a financial perspective. # Create An Account -To start with Backblaze, you\'ll need to [create a free -account](https://www.backblaze.com/b2/sign-up.html) - no payment method -is required to sign up. +To start with Backblaze, you'll need to [create a free +account](https://www.backblaze.com/b2/sign-up.html) - no payment method is +required to sign up. -Once you have an account, you can test out the service with their web -GUI, their mobile app, or their CLI tool. I\'m going to use the CLI tool -below to test a file upload and then sync an entire directory to my -Backblaze bucket. +Once you have an account, you can test out the service with their web GUI, their +mobile app, or their CLI tool. I'm going to use the CLI tool below to test a +file upload and then sync an entire directory to my Backblaze bucket. # Create a Bucket -Before you can start uploading, you need to create a bucket. If you\'re -familiar with other object storage services, this will feel familiar. If -not, it\'s pretty simple to create one. +Before you can start uploading, you need to create a bucket. If you're familiar +with other object storage services, this will feel familiar. If not, it's +pretty simple to create one. As their webpage says: -> A bucket is a container that holds files that are uploaded into B2 -> Cloud Storage. The bucket name must be globally unique and must have a -> minimum of 6 characters. A limit of 100 buckets may be created per -> account. An unlimited number of files may be uploaded into a bucket. +> A bucket is a container that holds files that are uploaded into B2 Cloud +> Storage. The bucket name must be globally unique and must have a minimum of 6 +> characters. A limit of 100 buckets may be created per account. An unlimited +> number of files may be uploaded into a bucket. -Once you click the `Create a Bucket` button on their webpage -or mobile app, you need to provide the following: +Once you click the `Create a Bucket` button on their webpage or mobile app, you +need to provide the following: -- Bucket Unique Name -- Files in Bucket are: `Private` or `Public` -- Default Encryption: `Disable` or `Enable` -- Object Lock: `Disable` or `Enable` +- Bucket Unique Name +- Files in Bucket are: `Private` or `Public` +- Default Encryption: `Disable` or `Enable` +- Object Lock: `Disable` or `Enable` -For my bucket, I created a private bucket with encryption enabled and -object lock disabled. +For my bucket, I created a private bucket with encryption enabled and object +lock disabled. -Once your bucket is created, you can test the upload/download feature on -their web GUI or mobile app! At this point, you have a fully functional -bucket and account. +Once your bucket is created, you can test the upload/download feature on their +web GUI or mobile app! At this point, you have a fully functional bucket and +account. # Linux CLI Tool ## Installation -To install the `b2` CLI tool, you\'ll need to download it -from the [CLI -Tools](https://www.backblaze.com/docs/cloud-storage-command-line-tools) -page. I recommend copying the URL from the link that says -`Linux` and using wget to download it, as shown below. +To install the `b2` CLI tool, you'll need to download it from the [CLI +Tools](https://www.backblaze.com/docs/cloud-storage-command-line-tools) page. I +recommend copying the URL from the link that says `Linux` and using wget to +download it, as shown below. -Once downloaded, make the file executable and move it to a location on -your `$PATH`, so that you can execute that command from -anywhere on the machine. +Once downloaded, make the file executable and move it to a location on your +`$PATH`, so that you can execute that command from anywhere on the machine. ```sh wget <b2_cli_url> @@ -93,12 +88,10 @@ mv b2_linux /usr/bin/b2 ## Log In The first step after installation is to log in. To do this, execute the -following command and provide your `<applicationKeyId>` and -`<applicationKey>`. +following command and provide your `<applicationKeyId>` and `<applicationKey>`. -If you don\'t want to provide these values in the command itself, you -can simply execute the base command and it will request them in an -interactive prompt. +If you don't want to provide these values in the command itself, you can simply +execute the base command and it will request them in an interactive prompt. ```sh # if you want to provide the keys directly: @@ -110,9 +103,9 @@ b2 authorize-account ## Upload a Test File -In order to test the functionality of the CLI tool, I\'ll start by -uploading a single test file to the bucket I created above. We can do -this with the `upload_file` function. +In order to test the functionality of the CLI tool, I'll start by uploading a +single test file to the bucket I created above. We can do this with the +`upload_file` function. The command is issued as follows: @@ -126,8 +119,8 @@ In my situation, I executed the following command with my username. b2 upload_file my_unique_bucket /home/<user>/test.md test.md ``` -To confirm that the file was uploaded successfully, list the files in -your bucket: +To confirm that the file was uploaded successfully, list the files in your +bucket: ```sh b2 ls <bucket_name> @@ -139,9 +132,9 @@ test.md ## Sync a Directory -If you have numerous files, you can use the `sync` function -to perform functionality similar to `rsync`, where you can -check what\'s in your bucket and sync anything that is new or modified. +If you have numerous files, you can use the `sync` function to perform +functionality similar to `rsync`, where you can check what's in your bucket and +sync anything that is new or modified. The command is issued as follows: @@ -149,8 +142,8 @@ The command is issued as follows: b2 sync <source file location> <B2 bucket destination> ``` -In my case, I can sync my user\'s entire home directory to my bucket -without specifying any of the files directly: +In my case, I can sync my user's entire home directory to my bucket without +specifying any of the files directly: ```sh b2 sync /home/<user>/ "b2://<bucketName>/home/<user>" @@ -160,22 +153,21 @@ b2 sync /home/<user>/ "b2://<bucketName>/home/<user>" ## Timing of Updates to the Web GUI -When performing actions over a bucket, there is a slight delay in the -web GUI when inspecting a bucket or its file. Note that simple actions -such as uploading or deleting files may have a delay of a few minutes up -to 24 hours. In my experience (\<10 GB and \~20,000 files), any actions -took only a few minutes to update across clients. +When performing actions over a bucket, there is a slight delay in the web GUI +when inspecting a bucket or its file. Note that simple actions such as uploading +or deleting files may have a delay of a few minutes up to 24 hours. In my +experience (\<10 GB and ~20,000 files), any actions took only a few minutes to +update across clients. ## Symlinks Note that symlinks are resolved by b2, so if you have a link from -`/home/<user>/nas-storage` that symlinks out to a -`/mnt/nas-storage` folder that has 10TB of data, -`b2` will resolve that link and start uploading all 10TB of +`/home/<user>/nas-storage` that symlinks out to a `/mnt/nas-storage` folder that +has 10TB of data, `b2` will resolve that link and start uploading all 10TB of data linked within the folder. -If you\'re not sure if you have any symlinks, a symlink will look like -this (note the `->` symbol): +If you're not sure if you have any symlinks, a symlink will look like this +(note the `->` symbol): ```sh > ls -lha diff --git a/content/blog/2023-06-30-self-hosting-voyager.md b/content/blog/2023-06-30-self-hosting-voyager.md index 66df588..828c0c6 100644 --- a/content/blog/2023-06-30-self-hosting-voyager.md +++ b/content/blog/2023-06-30-self-hosting-voyager.md @@ -7,12 +7,12 @@ draft = false # Installation Guide -[Voyager](https://github.com/aeharding/voyager) is a mobile-first Lemmy -web client, based on iOS design standards. It follows very closely to -Apollo\'s design. +[Voyager](https://github.com/aeharding/voyager) is a mobile-first Lemmy web +client, based on iOS design standards. It follows very closely to Apollo's +design. -This post is a guide showing how I was able to build and launch my own -instance of Voyager via Docker Compose. +This post is a guide showing how I was able to build and launch my own instance +of Voyager via Docker Compose. ## Clone the Repository @@ -25,26 +25,24 @@ cd voyager ## Build the Image -With this repository, you can build the image yourself without any -further configuration. When complete, it\'ll give you the image ID for -you to run. +With this repository, you can build the image yourself without any further +configuration. When complete, it'll give you the image ID for you to run. ```sh sudo docker build . # Successfully built 5f00723cb5be ``` -With the image ID above, you can run the container and pass the -requested port `5314` through or use a custom port, if you -wish. +With the image ID above, you can run the container and pass the requested port +`5314` through or use a custom port, if you wish. -You can also set the `CUSTOM_LEMMY_SERVERS` environment -variable if you want to add to the default suggested login servers. This -must be set with a comma separated list of suggested servers. The first -instance in the list will be the default view for logged-out users. +You can also set the `CUSTOM_LEMMY_SERVERS` environment variable if you want to +add to the default suggested login servers. This must be set with a comma +separated list of suggested servers. The first instance in the list will be the +default view for logged-out users. -I will be using a `docker-compose.yml` file to run this -container, instead of a `docker run` command. +I will be using a `docker-compose.yml` file to run this container, instead of a +`docker run` command. ```sh nano docker-compose.yml @@ -67,17 +65,16 @@ sudo docker-compose up -d ``` The web app will now be available at the following address: -`<machine_ip>:<custom_port>`. If you are running it on your -local device, try `localhost:<custom_port>`. +`<machine_ip>:<custom_port>`. If you are running it on your local device, try +`localhost:<custom_port>`. ## Reverse Proxy -If you want to visit this app via an external URL or domain name, -you\'ll need to set up a reverse proxy. The example below uses Nginx as -a reverse proxy. +If you want to visit this app via an external URL or domain name, you'll need +to set up a reverse proxy. The example below uses Nginx as a reverse proxy. -Simply create the configuration file, paste the contents below, save the -file, symlink the file, and restart Nginx. +Simply create the configuration file, paste the contents below, save the file, +symlink the file, and restart Nginx. ```sh sudo nano /etc/nginx/sites-available/voyager @@ -120,8 +117,7 @@ sudo ln sudo ln -s /etc/nginx/sites-available/voyager /etc/nginx/sites-enabled/v sudo systemctl restart nginx.service ``` -The site will now be available at the `server_name` you -specified above! +The site will now be available at the `server_name` you specified above! -You can visit my instance at -[voyager.cleberg.net](https://voyager.cleberg.net) for an example. +You can visit my instance at [voyager.cleberg.net](https://voyager.cleberg.net) +for an example. diff --git a/content/blog/2023-07-12-wireguard-lan.md b/content/blog/2023-07-12-wireguard-lan.md index 0c2cebc..b12c65e 100644 --- a/content/blog/2023-07-12-wireguard-lan.md +++ b/content/blog/2023-07-12-wireguard-lan.md @@ -7,13 +7,13 @@ draft = false # Download Configuration Files from Mullvad -To begin, you\'ll need [Wireguard configuration files from -Mullvad](https://mullvad.net/account/wireguard-config). You can choose -any of the options as you download them. For example, I enabled the kill -switch, selected all countries, and selected a few content filters. +To begin, you'll need [Wireguard configuration files from +Mullvad](https://mullvad.net/account/wireguard-config). You can choose any of +the options as you download them. For example, I enabled the kill switch, +selected all countries, and selected a few content filters. -Once downloaded, unzip the files and move them to the Wireguard folder -on your system. +Once downloaded, unzip the files and move them to the Wireguard folder on your +system. ```sh cd ~/Downloads @@ -40,41 +40,38 @@ AllowedIPs = <redacted> Endpoint = <redacted> ``` -> Note: If you didn\'t select the kill switch option, you won\'t see the -> `PostUp` and `PreDown` lines. In this case, -> you\'ll need to modify the script below to simply append those lines -> to the `[Interface]` block. +> Note: If you didn't select the kill switch option, you won't see the +> `PostUp` and `PreDown` lines. In this case, you'll need to modify the script +> below to simply append those lines to the `[Interface]` block. # Editing the Configuration Files -Once you have the files, you\'ll need to edit them and replace the -`PostUp` and `PreDown` lines to enable LAN access. +Once you have the files, you'll need to edit them and replace the `PostUp` and +`PreDown` lines to enable LAN access. -I recommend that you do this process as root, since you\'ll need to be -able to access files in `/etc/wireguard`, which are generally -owned by root. You can also try using `sudo` or -`doas`, but I didn\'t test that scenario so you may need to -adjust, as necessary. +I recommend that you do this process as root, since you'll need to be able to +access files in `/etc/wireguard`, which are generally owned by root. You can +also try using `sudo` or `doas`, but I didn't test that scenario so you may +need to adjust, as necessary. ```sh su ``` -Create the Python file that we\'ll be using to update the Wireguard +Create the Python file that we'll be using to update the Wireguard configuration files. ```sh nano replace.py ``` -Within the Python file, copy and paste the logic below. This script will -open a directory, loop through every configuration file within the -directory, and replace the `PostUp` and `PreDown` -lines with the new LAN-enabled iptables commands. +Within the Python file, copy and paste the logic below. This script will open a +directory, loop through every configuration file within the directory, and +replace the `PostUp` and `PreDown` lines with the new LAN-enabled iptables +commands. -> Note: If your LAN is on a subnet other than -> `192.168.1.0/24`, you\'ll need to update the Python script -> below appropriately. +> Note: If your LAN is on a subnet other than `192.168.1.0/24`, you'll need to +> update the Python script below appropriately. ``` python import os @@ -97,15 +94,15 @@ for file in os.listdir(dir): print("--- done ---") ``` -Once you\'re done, save and close the file. You can now run the Python -script and watch as each file is updated. +Once you're done, save and close the file. You can now run the Python script +and watch as each file is updated. ```sh python3 replace.py ``` -To confirm it worked, you can `cat` one of the configuration -files to inspect the new logic and connect to one to test it out. +To confirm it worked, you can `cat` one of the configuration files to inspect +the new logic and connect to one to test it out. ```sh cat /etc/wireguard/us-chi-wg-001.conf @@ -128,16 +125,15 @@ AllowedIPs = <redacted> Endpoint = <redacted> ``` -If you connect to a Wireguard interface, such as -`us-chi-wg-001`, you can test your SSH functionality and see -that it works even while on the VPN. +If you connect to a Wireguard interface, such as `us-chi-wg-001`, you can test +your SSH functionality and see that it works even while on the VPN. ```sh wg-quick up us-chi-wg-001 ssh user@lan-host ``` -To confirm your VPN connection, you can curl Mullvad\'s connection API: +To confirm your VPN connection, you can curl Mullvad's connection API: ```sh curl https://am.i.mullvad.net/connected diff --git a/content/blog/2023-07-19-plex-transcoder-errors.md b/content/blog/2023-07-19-plex-transcoder-errors.md index 5cd57d2..d007aef 100644 --- a/content/blog/2023-07-19-plex-transcoder-errors.md +++ b/content/blog/2023-07-19-plex-transcoder-errors.md @@ -7,9 +7,8 @@ draft = false # Plex Transcoder Error -Occasionally, you may see an error in your Plex client that references a -failure with the transcoder conversion process. The specific error -wording is: +Occasionally, you may see an error in your Plex client that references a failure +with the transcoder conversion process. The specific error wording is: ``` txt Conversion failed. The transcoder failed to start up. @@ -17,14 +16,13 @@ Conversion failed. The transcoder failed to start up. # Debugging the Cause -In order to get a better look at what is causing the error, I\'m going -to observe the Plex console while the error occurs. To do this, open the -Plex web client, go to `Settings` \> `Manage` \> -`Console`. Now, try to play the title again and watch to see -which errors occur. +In order to get a better look at what is causing the error, I'm going to +observe the Plex console while the error occurs. To do this, open the Plex web +client, go to `Settings` > `Manage` > `Console`. Now, try to play the title +again and watch to see which errors occur. -In my case, you can see the errors below are related to a subtitle file -(`.srt`) causing the transcoder to crash. +In my case, you can see the errors below are related to a subtitle file (`.srt`) +causing the transcoder to crash. ``` txt Jul 19, 2023 16:49:34.945 [140184571120440] Error — Couldn't find the file to stream: /movies/Movie Title (2021)/Movie Title (2021).srt @@ -36,17 +34,17 @@ Jul 19, 2023 16:51:23.402 [140184510081848] Info — Library section 1 (Movies) # Solving the Error -In my case, I simply removed the subtitle file because it was not -critical to keep. You may also avoid this by turning off subtitles if -you don\'t want to delete the file. +In my case, I simply removed the subtitle file because it was not critical to +keep. You may also avoid this by turning off subtitles if you don't want to +delete the file. ```sh rm -rf "/movies/Movie Title (2021)/Movie Title (2021).srt" ``` -Once the subtitle is removed from the directory or subtitles are turned -off, try to play the title again. At this point, it should play without -error. If not, reopen or refresh your Plex client and the Plex server: +Once the subtitle is removed from the directory or subtitles are turned off, try +to play the title again. At this point, it should play without error. If not, +reopen or refresh your Plex client and the Plex server: ```sh sudo systemctl restart plexmediaserver.service @@ -56,10 +54,8 @@ sudo systemctl restart plexmediaserver.service Looking at [a related Plex forum post](https://forums.plex.tv/t/subtitles-crashing-plex-transcoder-samsung-q80-tv-with-or-without-hardware-transcode/741441/2), -it seems that `.srt` subtitles are the core issue here. -However, Plex does not seem to have a resolution that fixes these -errors. +it seems that `.srt` subtitles are the core issue here. However, Plex does not +seem to have a resolution that fixes these errors. Unfortunately, I would suggest converting subtitle formats, burning the -subtitles into the title, or simply removing subtitles when they cause -crashes. +subtitles into the title, or simply removing subtitles when they cause crashes. diff --git a/content/blog/2023-08-18-agile-auditing.md b/content/blog/2023-08-18-agile-auditing.md index de45b8b..66f6570 100644 --- a/content/blog/2023-08-18-agile-auditing.md +++ b/content/blog/2023-08-18-agile-auditing.md @@ -8,152 +8,143 @@ draft = false # What is Agile Auditing? [Agile](https://en.wikipedia.org/wiki/Agile_software_development), the -collaborative philosophy behind many software development methods, has -been picking up steam as a beneficial tool to use in the external and -internal auditing world. +collaborative philosophy behind many software development methods, has been +picking up steam as a beneficial tool to use in the external and internal +auditing world. -This blog post will walk through commonly used terms within Agile, -Scrum, and Kanban in order to translate these terms and roles into -audit-specific terms. +This blog post will walk through commonly used terms within Agile, Scrum, and +Kanban in order to translate these terms and roles into audit-specific terms. -Whether your team is in charge of a financial statement audit, an -attestation (SOC 1, SOC 2, etc.), or a unique internal audit, the terms -used throughout this post should still apply. +Whether your team is in charge of a financial statement audit, an attestation +(SOC 1, SOC 2, etc.), or a unique internal audit, the terms used throughout this +post should still apply. # Agile -To start, I\'ll take a look at Agile. +To start, I'll take a look at Agile. -> The Agile methodology is a project management approach that involves -> breaking the project into phases and emphasizes continuous -> collaboration and improvement. Teams follow a cycle of planning, -> executing, and evaluating. +> The Agile methodology is a project management approach that involves breaking +> the project into phases and emphasizes continuous collaboration and +> improvement. Teams follow a cycle of planning, executing, and evaluating. -While this approach may seem familiar to what audit teams have -historically done, an audit team must make distinct changes in their -mentality and how they approach and manage a project. +While this approach may seem familiar to what audit teams have historically +done, an audit team must make distinct changes in their mentality and how they +approach and manage a project. ## Agile Values -The Agile Manifesto, written in 2001 at a summit in Utah, contain a set -of four main values that comprise the Agile approach: +The Agile Manifesto, written in 2001 at a summit in Utah, contain a set of four +main values that comprise the Agile approach: -1. Individuals and interactions over processes and tools. -2. Working software over comprehensive documentation. -3. Customer collaboration over contract negotiation. -4. Responding to change over following a plan. +1. Individuals and interactions over processes and tools. +2. Working software over comprehensive documentation. +3. Customer collaboration over contract negotiation. +4. Responding to change over following a plan. Beyond the four values, [twelve -principles](https://agilemanifesto.org/principles.html) were also -written as part of the summit. +principles](https://agilemanifesto.org/principles.html) were also written as +part of the summit. -In order to relate these values to an audit or attestation engagement, -we need to shift the focus from software development to the main goal of -an engagement: completing sufficient audit testing to address to -relevant risks over the processes and controls at hand. +In order to relate these values to an audit or attestation engagement, we need +to shift the focus from software development to the main goal of an engagement: +completing sufficient audit testing to address to relevant risks over the +processes and controls at hand. Audit Examples: -- Engagement teams must value the team members, client contacts, and - their interactions over the historical processes and tools that have - been used. -- Engagement teams must value a final report that contains sufficient - audit documentation over excessive documentation or scope creep. -- Engagement teams must collaborate with the audit clients as much as - feasible to ensure that both sides are constantly updated with - current knowledge of the engagement\'s status and any potential - findings, rather than waiting for pre-set meetings or the end of the - engagement to communicate. -- Engagement teams must be able to respond to change in an - engagement\'s schedule, scope, or environment to ensure that the - project is completed in a timely manner and that all relevant areas - are tested. - - In terms of an audit department\'s portfolio, they must be able - to respond to changes in their company\'s or client\'s - environment and be able to dynamically change their audit plan - accordingly. +- Engagement teams must value the team members, client contacts, and their + interactions over the historical processes and tools that have been used. +- Engagement teams must value a final report that contains sufficient audit + documentation over excessive documentation or scope creep. +- Engagement teams must collaborate with the audit clients as much as feasible + to ensure that both sides are constantly updated with current knowledge of the + engagement's status and any potential findings, rather than waiting for + pre-set meetings or the end of the engagement to communicate. +- Engagement teams must be able to respond to change in an engagement's + schedule, scope, or environment to ensure that the project is completed in a + timely manner and that all relevant areas are tested. + - In terms of an audit department's portfolio, they must be able to respond + to changes in their company's or client's environment and be able to + dynamically change their audit plan accordingly. # Scrum -The above section discusses the high-level details of the Agile -philosophy and how an audit team can potentially mold that mindset into -the audit world, but how does a team implement these ideas? +The above section discusses the high-level details of the Agile philosophy and +how an audit team can potentially mold that mindset into the audit world, but +how does a team implement these ideas? There are many methods that use an Agile mindset, but I prefer -[Scrum](https://en.wikipedia.org/wiki/Scrum_(software_development)). -Scrum is a framework based on Agile that enables a team to work through -a project through a series of roles, ceremonies, artifacts, and values. +[Scrum](https://en.wikipedia.org/wiki/Scrum_(software_development)). Scrum is a +framework based on Agile that enables a team to work through a project through a +series of roles, ceremonies, artifacts, and values. -Let\'s dive into each of these individually. +Let's dive into each of these individually. ## Scrum Team -A scrum project is only as good as the team running the project. -Standard scrum teams are separated into three distinct areas: - -1. **Product Owner (Client Contact)**: The client contact is the audit - equivalent of the product owner in Scrum. They are responsible for - partnering with the engagement or audit team to ensure progress is - being made, priorities are established, and clear guidance is given - when questions or findings arise within each sprint. -2. **Scrum Master (Engagement Lead)**: The engagement or audit team - lead is responsible for coaching the team and the client contact on - the scrum process, tracking team progress against plan, scheduling - necessary resources, and helping remove obstacles. -3. **Scrum Developers (Engagement Members)**: The engagement or audit - team is the set of team members responsible for getting the work - done. These team members will work on each task, report progress, - resolve obstacles, and collaborate with other team members and the - client contact to ensure goals are being met. +A scrum project is only as good as the team running the project. Standard scrum +teams are separated into three distinct areas: + +1. **Product Owner (Client Contact)**: The client contact is the audit + equivalent of the product owner in Scrum. They are responsible for partnering + with the engagement or audit team to ensure progress is being made, + priorities are established, and clear guidance is given when questions or + findings arise within each sprint. +2. **Scrum Master (Engagement Lead)**: The engagement or audit team lead is + responsible for coaching the team and the client contact on the scrum + process, tracking team progress against plan, scheduling necessary resources, + and helping remove obstacles. +3. **Scrum Developers (Engagement Members)**: The engagement or audit team is + the set of team members responsible for getting the work done. These team + members will work on each task, report progress, resolve obstacles, and + collaborate with other team members and the client contact to ensure goals + are being met. ## Scrum Ceremonies Scrum ceremonies are events that are performed on a regular basis. -1. **Sprint Planning**: The team works together to plan the upcoming - sprint goal and which user stories (tasks) will be added to the - sprint to achieve that goal. -2. **Sprint**: The time period, typically at least one week and no more - than one month in length, where the team works on the stories and - anything in the backlog. -3. **Daily Scrum**: A very short meeting held each day, typically 15 - minutes, to quickly emphasize alignment on the sprint goal and plan - the next 24 hours. Each team member may share what they did the day - before, what they\'ll do today, and any obstacles to their work. -4. **Sprint Review**: At the end of each sprint, the team will gather - and discuss the progress, obstacles, and backlog from the previous - sprint. -5. **Sprint Retrospective**: More specific than the sprint review, the - retrospective is meant to discuss what worked and what did not work - during the sprint. This may be processes, tools, people, or even - things related to the Scrum ceremonies. - -One additional ceremony that may be applicable is organizing the -backlog. This is typically the responsibility of the engagement leader -and is meant to prioritize and clarify what needs to be done to complete -items in the backlog. +1. **Sprint Planning**: The team works together to plan the upcoming sprint goal + and which user stories (tasks) will be added to the sprint to achieve that + goal. +2. **Sprint**: The time period, typically at least one week and no more than one + month in length, where the team works on the stories and anything in the + backlog. +3. **Daily Scrum**: A very short meeting held each day, typically 15 minutes, to + quickly emphasize alignment on the sprint goal and plan the next 24 hours. + Each team member may share what they did the day before, what they'll do + today, and any obstacles to their work. +4. **Sprint Review**: At the end of each sprint, the team will gather and + discuss the progress, obstacles, and backlog from the previous sprint. +5. **Sprint Retrospective**: More specific than the sprint review, the + retrospective is meant to discuss what worked and what did not work during + the sprint. This may be processes, tools, people, or even things related to + the Scrum ceremonies. + +One additional ceremony that may be applicable is organizing the backlog. This +is typically the responsibility of the engagement leader and is meant to +prioritize and clarify what needs to be done to complete items in the backlog. ## Artifacts -While artifacts are generally not customizable in the audit world (i.e., -each control test must include some kind of working paper with evidence -supporting the test results), I wanted to include some quick notes on -associating scrum artifact terms with an audit. +While artifacts are generally not customizable in the audit world (i.e., each +control test must include some kind of working paper with evidence supporting +the test results), I wanted to include some quick notes on associating scrum +artifact terms with an audit. -1. **Product Backlog**: This is the overall backlog of unfinished audit - tasks from all prior sprints. -2. **Sprint Backlog**: This is the backlog of unfinished audit tasks - from one individual sprint. -3. **Increment**: This is the output of each sprint - generally this is - best thought of as any documentation prepared during the sprint, - such as risk assessments, control working papers, deficiency - analysis, etc. +1. **Product Backlog**: This is the overall backlog of unfinished audit tasks + from all prior sprints. +2. **Sprint Backlog**: This is the backlog of unfinished audit tasks from one + individual sprint. +3. **Increment**: This is the output of each sprint - generally this is best + thought of as any documentation prepared during the sprint, such as risk + assessments, control working papers, deficiency analysis, etc. # Kanban -Last but not least, Kanban is a methodology that relies on boards to -categorize work into distinct, descriptive categories that allow an -agile or scrum team to effectively plan the work of a sprint or project. +Last but not least, Kanban is a methodology that relies on boards to categorize +work into distinct, descriptive categories that allow an agile or scrum team to +effectively plan the work of a sprint or project. -See Atlassian\'s [Kanban](https://www.atlassian.com/agile/kanban) page -for more information. +See Atlassian's [Kanban](https://www.atlassian.com/agile/kanban) page for more +information. diff --git a/content/blog/2023-09-15-self-hosting-gitweb.md b/content/blog/2023-09-15-self-hosting-gitweb.md index 5dca508..fdc4af3 100644 --- a/content/blog/2023-09-15-self-hosting-gitweb.md +++ b/content/blog/2023-09-15-self-hosting-gitweb.md @@ -7,14 +7,12 @@ draft = false # Overview -[GitWeb](https://git-scm.com/book/en/v2/Git-on-the-Server-GitWeb) is a -simple web-based visualizer for git repositories. By default, GitWeb -will only run with the `lighttpd` or `webrick` web -servers. +[GitWeb](https://git-scm.com/book/en/v2/Git-on-the-Server-GitWeb) is a simple +web-based visualizer for git repositories. By default, GitWeb will only run with +the `lighttpd` or `webrick` web servers. -However, this guide will show you how to keep GitWeb running in the -background and display information for all repositories in a chosen -directory. +However, this guide will show you how to keep GitWeb running in the background +and display information for all repositories in a chosen directory. See below for the final result: @@ -22,7 +20,7 @@ See below for the final result: # Install Dependencies -To start, you\'ll need install the following packages: +To start, you'll need install the following packages: ```sh sudo apt install git gitweb fcgiwrap nginx @@ -57,21 +55,20 @@ server { } ``` -To make the configuration active, you need to symlink it and then -restart Nginx. +To make the configuration active, you need to symlink it and then restart Nginx. ```sh sudo ln -s /etc/nginx/sites-available/git.example.com /etc/nginx/sites-enabled/git.example.com sudo systemctl restart nginx.service ``` -The GitWeb application should now be available via the URL you set in -the Nginx configuration above. +The GitWeb application should now be available via the URL you set in the Nginx +configuration above. # Customize GitWeb -If you need to, you can customize many things about Gitweb by editing -the [gitweb.conf](https://git-scm.com/docs/gitweb.conf) file. +If you need to, you can customize many things about Gitweb by editing the +[gitweb.conf](https://git-scm.com/docs/gitweb.conf) file. ```sh sudo nano /etc/gitweb.conf diff --git a/content/blog/2023-09-19-audit-sql-scripts.md b/content/blog/2023-09-19-audit-sql-scripts.md index b652a21..5801773 100644 --- a/content/blog/2023-09-19-audit-sql-scripts.md +++ b/content/blog/2023-09-19-audit-sql-scripts.md @@ -7,17 +7,16 @@ draft = false # Overview -When you have to scope a database into your engagement, you may be -curious how to best extract the information from the database. While -there are numerous different methods to extract this type of -information, I\'m going to show an example of how to gather all users -and privileges from three main database types: Oracle, Microsoft SQL, -and MySQL. +When you have to scope a database into your engagement, you may be curious how +to best extract the information from the database. While there are numerous +different methods to extract this type of information, I'm going to show an +example of how to gather all users and privileges from three main database +types: Oracle, Microsoft SQL, and MySQL. # Oracle -You can use the following SQL script to see all users and their -privileges in an Oracle database: +You can use the following SQL script to see all users and their privileges in an +Oracle database: ``` sql SELECT @@ -37,23 +36,21 @@ WHERE grantee IN (SELECT DISTINCT grantee FROM dba_tab_privs); ``` -This script queries the `dba_sys_privs` and -`dba_tab_privs` views to retrieve system and table-level -privileges respectively. It then combines the results using -`UNION ALL` to show all users and their associated -privileges. Please note that this method does not extract information -from the `dba_role_privs` table - use the method below for -that data. +This script queries the `dba_sys_privs` and `dba_tab_privs` views to retrieve +system and table-level privileges respectively. It then combines the results +using `UNION ALL` to show all users and their associated privileges. Please note +that this method does not extract information from the `dba_role_privs` table - +use the method below for that data. -Please note that you might need appropriate privileges (e.g., DBA -privileges) to access these views, and you should exercise caution when -querying system tables in a production Oracle database. +Please note that you might need appropriate privileges (e.g., DBA privileges) to +access these views, and you should exercise caution when querying system tables +in a production Oracle database. ## Alternative Oracle Query -You can also extract each table\'s information separately and perform -processing outside the database to explore and determine the information -necessary for the audit: +You can also extract each table's information separately and perform processing +outside the database to explore and determine the information necessary for the +audit: ``` sql SELECT ** FROM sys.dba_role_privs; @@ -64,9 +61,8 @@ SELECT ** FROM sys.dba_users; # Microsoft SQL -You can use the following SQL script to see all users and their -privileges in a Microsoft SQL Server database -([source](https://stackoverflow.com/a/30040784)): +You can use the following SQL script to see all users and their privileges in a +Microsoft SQL Server database ([source](https://stackoverflow.com/a/30040784)): ``` sql /* @@ -217,8 +213,8 @@ ORDER BY # MySQL -You can use the following SQL script to see all users and their -privileges in a MySQL database: +You can use the following SQL script to see all users and their privileges in a +MySQL database: ```sh mysql -u root -p @@ -230,26 +226,22 @@ Find all users and hosts with access to the database: SELECT ** FROM information_schema.user_privileges; ``` -This script retrieves user information and their associated -database-level privileges from the -`information_schema.user_privileges` table in MySQL. It lists -various privileges such as SELECT, INSERT, UPDATE, DELETE, CREATE, and +This script retrieves user information and their associated database-level +privileges from the `information_schema.user_privileges` table in MySQL. It +lists various privileges such as SELECT, INSERT, UPDATE, DELETE, CREATE, and more for each user and database combination. -Please note that you may need appropriate privileges (e.g., -`SELECT` privileges on -`information_schema.user_privileges`) to access this -information in a MySQL database. Additionally, some privileges like -GRANT OPTION, EXECUTE, EVENT, and TRIGGER may not be relevant for all -users and databases. +Please note that you may need appropriate privileges (e.g., `SELECT` privileges +on `information_schema.user_privileges`) to access this information in a MySQL +database. Additionally, some privileges like GRANT OPTION, EXECUTE, EVENT, and +TRIGGER may not be relevant for all users and databases. ## Alternative MySQL Query -You can also grab individual sets of data from MySQL if you prefer to -join them after extraction. I have marked the queries below with -`SELECT ...` and excluded most `WHERE` clauses for -brevity. You should determine the relevant privileges in-scope and query -for those privileges to reduce the length of time to query. +You can also grab individual sets of data from MySQL if you prefer to join them +after extraction. I have marked the queries below with `SELECT ...` and excluded +most `WHERE` clauses for brevity. You should determine the relevant privileges +in-scope and query for those privileges to reduce the length of time to query. ``` sql -- Global Permissions diff --git a/content/blog/2023-10-04-digital-minimalism.md b/content/blog/2023-10-04-digital-minimalism.md index 7e3a8c9..6214094 100644 --- a/content/blog/2023-10-04-digital-minimalism.md +++ b/content/blog/2023-10-04-digital-minimalism.md @@ -5,103 +5,95 @@ description = "" draft = false +++ -I\'ve written [a note about minimalism](file:///wiki/#digital-garden) -before, but I wanted to dedicate some time to reflect on digital -minimalism and how I\'ve been able to minimize the impact of digital -devices in my life. - -> These changes crept up on us and happened fast, before we had a chance -> to step back and ask what we really wanted out of the rapid advances -> of the past decade. We added new technologies to the periphery of our -> experience for minor reasons, then woke one morning to discover that -> they had colonized the core of our daily life. We didn\'t, in other -> words, sign up for the digital world in which we\'re currently -> entrenched; we seem to have stumbled backward into it. +I've written [a note about minimalism](file:///wiki/#digital-garden) before, +but I wanted to dedicate some time to reflect on digital minimalism and how +I've been able to minimize the impact of digital devices in my life. + +> These changes crept up on us and happened fast, before we had a chance to step +> back and ask what we really wanted out of the rapid advances of the past +> decade. We added new technologies to the periphery of our experience for minor +> reasons, then woke one morning to discover that they had colonized the core of +> our daily life. We didn't, in other words, sign up for the digital world in +> which we're currently entrenched; we seem to have stumbled backward into it. > > *(Digital Minimalism, 2019)* # The Principles of Digital Minimalism -As noted in Cal Newport\'s book, *Digital Minimalism*, there are three -main principles to digital minimalism that I tend to agree with: +As noted in Cal Newport's book, *Digital Minimalism*, there are three main +principles to digital minimalism that I tend to agree with: 1. Clutter is costly. - - Digital minimalists recognize that cluttering their time and - attention with too many devices, apps, and services creates an - overall negative cost that can swamp the small benefits that - each individual item provides in isolation. + - Digital minimalists recognize that cluttering their time and attention + with too many devices, apps, and services creates an overall negative cost + that can swamp the small benefits that each individual item provides in + isolation. 2. Optimization is important. - - Digital minimalists believe that deciding a particular - technology supports something they value is only the first step. - To truly extract its full potential benefit, it\'s necessary to - think carefully about how they\'ll use the technology. + - Digital minimalists believe that deciding a particular technology supports + something they value is only the first step. To truly extract its full + potential benefit, it's necessary to think carefully about how they'll + use the technology. 3. Intentionality is satisfying. - - Digital minimalists derive significant satisfaction from their - general commitment to being more intentional about how they - engage with new technologies. This source of satisfaction is - independent of the specific decisions they make and is one of - the biggest reasons that minimalism tends to be immensely - meaningful to its practitioners. + - Digital minimalists derive significant satisfaction from their general + commitment to being more intentional about how they engage with new + technologies. This source of satisfaction is independent of the specific + decisions they make and is one of the biggest reasons that minimalism + tends to be immensely meaningful to its practitioners. # Taking Action -In order to put the logic into practice, I\'ve created a few new habits -and continued performing old habits that are working well: +In order to put the logic into practice, I've created a few new habits and +continued performing old habits that are working well: ## Using Devices With Intention -- I already rarely use \"social media\", mostly limited to forums such - as Hacker News and Tildes, so I\'ve just tweaked my behavior to stop - looking for content in those places when I\'m bored. -- Use devices with intention. Each time I pick up a digital device, - there should be an intention to use the device to improve my current - situation. No more endless scrolling or searching for something to - interest me. +- I already rarely use "social media", mostly limited to forums such as Hacker + News and Tildes, so I've just tweaked my behavior to stop looking for content + in those places when I'm bored. +- Use devices with intention. Each time I pick up a digital device, there should + be an intention to use the device to improve my current situation. No more + endless scrolling or searching for something to interest me. ## Prevent Distractions -- Disable (most) notifications on all devices. I spent 15-30 minutes - going through the notifications on my phone, watch, and computer to - ensure that only a select few apps have the ability to interrupt me: - Calendar, Messages, Phone, Reminders, & Signal. -- Disable badges for any apps except the ones mentioned in the bullet - above. -- Set-up focus profiles across devices so that I can enable different - modes, such as Personal when I only want to see notifications from - people I care about or Do Not Disturb, where absolutely nothing can - interrupt me. -- Clean up my home screens. This one was quite easy as I already - maintain a minimalist set-up, but I went extreme by limiting my - phone to just eight apps on the home screen and four in the dock. If - I need another app, I\'ll have to search or use the app library. -- Remove the work profile from my phone. This was a tough decision as - having my work profile on my device definitely makes my life easier - at times, but it also has quite a negative effect when I\'m \"always - online\" and can see the notifications and team activity 24/7. I - believe creating a distinct barrier between my work and personal - devices will be beneficial in the end. +- Disable (most) notifications on all devices. I spent 15-30 minutes going + through the notifications on my phone, watch, and computer to ensure that only + a select few apps have the ability to interrupt me: Calendar, Messages, Phone, + Reminders, & Signal. +- Disable badges for any apps except the ones mentioned in the bullet above. +- Set-up focus profiles across devices so that I can enable different modes, + such as Personal when I only want to see notifications from people I care + about or Do Not Disturb, where absolutely nothing can interrupt me. +- Clean up my home screens. This one was quite easy as I already maintain a + minimalist set-up, but I went extreme by limiting my phone to just eight apps + on the home screen and four in the dock. If I need another app, I'll have to + search or use the app library. +- Remove the work profile from my phone. This was a tough decision as having my + work profile on my device definitely makes my life easier at times, but it + also has quite a negative effect when I'm "always online" and can see the + notifications and team activity 24/7. I believe creating a distinct barrier + between my work and personal devices will be beneficial in the end. ## Creating Alternative Activities -This is the most difficult piece, as most of my hobbies and interests -lie in the digital world. However, I\'m making a concerted effort to put -devices down unless necessary and force myself to perform other -activities in the physical world instead. +This is the most difficult piece, as most of my hobbies and interests lie in the +digital world. However, I'm making a concerted effort to put devices down +unless necessary and force myself to perform other activities in the physical +world instead. -I\'ve started with a few basics that are always readily available to me: +I've started with a few basics that are always readily available to me: -- Do a chore, such as organizing or cleaning. -- Read a book, study a piece of art, etc. -- Exercise or get outdoors. -- Participate in a hobby, such as photography, birding, disc golf, - etc. -- Let yourself be bored and wander into creativity. +- Do a chore, such as organizing or cleaning. +- Read a book, study a piece of art, etc. +- Exercise or get outdoors. +- Participate in a hobby, such as photography, birding, disc golf, etc. +- Let yourself be bored and wander into creativity. # Making Progress -I\'ll be taking notes as I continue down this journey and hope to see -positive trends. I\'ve always been a minimalist in the physical world -and it feels refreshing to filter out the clutter that has come to -dominate my digital life over the years. +I'll be taking notes as I continue down this journey and hope to see positive +trends. I've always been a minimalist in the physical world and it feels +refreshing to filter out the clutter that has come to dominate my digital life +over the years. -I\'m excited to see where this journey leads. +I'm excited to see where this journey leads. diff --git a/content/blog/2023-10-11-self-hosting-authelia.md b/content/blog/2023-10-11-self-hosting-authelia.md index 34da792..46773dd 100644 --- a/content/blog/2023-10-11-self-hosting-authelia.md +++ b/content/blog/2023-10-11-self-hosting-authelia.md @@ -7,49 +7,47 @@ draft = false # Overview -[Authelia](https://www.authelia.com/) is an open-source authentication -service that allows you to place a portal between end users on the -internet and self-hosted services on your server. +[Authelia](https://www.authelia.com/) is an open-source authentication service +that allows you to place a portal between end users on the internet and +self-hosted services on your server. -You can require one factor (username+password) or two factor -authentication for any such user before allowing them to access a -specific service on your domain. +You can require one factor (username+password) or two factor authentication for +any such user before allowing them to access a specific service on your domain. This guide will walk through a standard installation of Authelia for -`example.com`, using `auth.example.com` as -Authelia\'s authentication domain and `teddit.example.com` as -the website we want to protect behind the authentication portal. +`example.com`, using `auth.example.com` as Authelia's authentication domain and +`teddit.example.com` as the website we want to protect behind the authentication +portal. # Prerequisites This guide assumes you have the following already set-up: -- A registered domain with DNS pointing to your server. -- A subdomain for Authelia (`auth.example.com`) and a - subdomain to protect via Authelia (`app.example.com`). -- A working Nginx web server. -- Docker and docker-compose installed. +- A registered domain with DNS pointing to your server. +- A subdomain for Authelia (`auth.example.com`) and a subdomain to protect via + Authelia (`app.example.com`). +- A working Nginx web server. +- Docker and docker-compose installed. # Installation -This guide will walk through each installation step one-by-one, starting -with the container and finishing by cleaning up external access via an -Nginx reverse proxy. +This guide will walk through each installation step one-by-one, starting with +the container and finishing by cleaning up external access via an Nginx reverse +proxy. ## Docker-Compose -To start, create a directory for Authelia and create a -`docker-compose.yml` file. +To start, create a directory for Authelia and create a `docker-compose.yml` +file. ```sh mkdir ~/authelia nano ~/authelia/docker-compose.yml ``` -Within this file, paste the following content. If you prefer a different -local port, modify the port on the left side of the colon on the -`9091:9091` line. Be sure to modify the `TZ` -variable to your timezone. +Within this file, paste the following content. If you prefer a different local +port, modify the port on the left side of the colon on the `9091:9091` line. Be +sure to modify the `TZ` variable to your timezone. ``` yml version: '3.3' @@ -72,45 +70,40 @@ Start the container with docker-compose: sudo docker-compose up -d ``` -After the first start, the container will automatically exit and require -you to modify the app\'s configuration files before continuing. Read on -to learn more. +After the first start, the container will automatically exit and require you to +modify the app's configuration files before continuing. Read on to learn more. ## Authelia Configuration -To configure Authelia before we restart the container, we need to open -the `config` directory and modify the files. Start by editing -the `configuration.yml` file, where all of Authelia\'s -settings are stored. +To configure Authelia before we restart the container, we need to open the +`config` directory and modify the files. Start by editing the +`configuration.yml` file, where all of Authelia's settings are stored. -My personal preference is to copy the original configuration file to a -backup file and edit a fresh copy. +My personal preference is to copy the original configuration file to a backup +file and edit a fresh copy. ```sh sudo cp ~/authelia/config/configuration.yml ~/authelia/config/configuration.yml.bk sudo nano ~/authelia/config/configuration.yml ``` -Within the blank `configuration.yml` file, paste the -following information. You will need to make quite a few updates, so be -sure to read each line carefully and modify as necessary. +Within the blank `configuration.yml` file, paste the following information. You +will need to make quite a few updates, so be sure to read each line carefully +and modify as necessary. The major required changes are: -- Any instances of `example.com` should be replaced by your - domain. -- `jwt_secret` - Use the `pwgen 40 1` command to - generate a secret for yourself. -- `access_control` - Set the Authelia domain to bypass - here, as well as any subdomains you want to protect. -- `session` \> `secret` - Use the - `pwgen 40 1` command to generate a secret for yourself. -- `regulation` - Set the variables here to restrict login - attempts and bans. -- `storage` \> `encryption_key` - Use the - `pwgen 40 1` command to generate a secret for yourself. -- `smtp` - If you have access to an SMTP service, set up - the information here to active outgoing emails. +- Any instances of `example.com` should be replaced by your domain. +- `jwt_secret` - Use the `pwgen 40 1` command to generate a secret for yourself. +- `access_control` - Set the Authelia domain to bypass here, as well as any + subdomains you want to protect. +- `session` > `secret` - Use the `pwgen 40 1` command to generate a secret for + yourself. +- `regulation` - Set the variables here to restrict login attempts and bans. +- `storage` > `encryption_key` - Use the `pwgen 40 1` command to generate a + secret for yourself. +- `smtp` - If you have access to an SMTP service, set up the information here to + active outgoing emails. ``` yml # yamllint disable rule:comments-indentation @@ -211,14 +204,13 @@ Next, create the users file for authentication. sudo nano ~/authelia/config/users_database.yml ``` -Within the file, you will need to create an entry for each user that -needs access to Authelia. The `my_username` entry will be the -username used on the login page. +Within the file, you will need to create an entry for each user that needs +access to Authelia. The `my_username` entry will be the username used on the +login page. -To generate the password, go to [Argon2 Hash -Generator](https://argon2.online), generate a random salt, and make sure -the rest of the settings match the `authentication_backend` -section of `configuration.yml` file. +To generate the password, go to [Argon2 Hash Generator](https://argon2.online), +generate a random salt, and make sure the rest of the settings match the +`authentication_backend` section of `configuration.yml` file. ``` yaml users: @@ -242,8 +234,8 @@ sudo docker-compose down && sudo docker-compose up -d ## Nginx: Authelia Domain -Once the container is running and configured, the final step is to -configure external access to the server via Nginx reverse proxy. +Once the container is running and configured, the final step is to configure +external access to the server via Nginx reverse proxy. Start by creating the Authelia domain. @@ -252,9 +244,8 @@ sudo nano /etc/nginx/sites-available/auth ``` Within this file, paste the following information and be sure to update -`example.com` to your domain. Make sure the -`$upstream_authelia` variable matches the location of your -Authelia container. +`example.com` to your domain. Make sure the `$upstream_authelia` variable +matches the location of your Authelia container. ``` conf server { @@ -310,8 +301,8 @@ server { } ``` -Next, symlink the file and restart Nginx. If there are errors, be sure -to resolve those before moving on. +Next, symlink the file and restart Nginx. If there are errors, be sure to +resolve those before moving on. ```sh sudo ln -s /etc/nginx/sites-available/auth /etc/nginx/sites-enabled/auth @@ -320,9 +311,9 @@ sudo systemctl restart nginx.service ## Nginx: Protected Domain(s) -Now that Authelia is accessible externally, you need to configure the -domain you intend to protect with Authelia. In this example, I\'m -protecting `teddit.example.com`. +Now that Authelia is accessible externally, you need to configure the domain you +intend to protect with Authelia. In this example, I'm protecting +`teddit.example.com`. Similar to the process above, paste the content and update the relevant variables. @@ -450,9 +441,9 @@ authentication domain and presented with the Authelia login portal.  -Once you\'ve successfully authenticated, you can visit your -authentication domain directly and see that you\'re currently -authenticated to any domain protected by Authelia. +Once you've successfully authenticated, you can visit your authentication +domain directly and see that you're currently authenticated to any domain +protected by Authelia.  diff --git a/content/blog/2023-10-15-alpine-ssh-hardening.md b/content/blog/2023-10-15-alpine-ssh-hardening.md index 9fc435a..b81dc12 100644 --- a/content/blog/2023-10-15-alpine-ssh-hardening.md +++ b/content/blog/2023-10-15-alpine-ssh-hardening.md @@ -8,13 +8,13 @@ draft = false # Overview This guide follows the standard -[ssh-audit](https://www.ssh-audit.com/hardening_guides.html) hardening -guide, tweaked for Alpine Linux. +[ssh-audit](https://www.ssh-audit.com/hardening_guides.html) hardening guide, +tweaked for Alpine Linux. # Hardening Guide -These steps must be performed as root. You can try to use -`doas` or `sudo`, but there may be issues. +These steps must be performed as root. You can try to use `doas` or `sudo`, but +there may be issues. 1. Re-generate the RSA and ED25519 keys @@ -31,8 +31,8 @@ awk '$5 >= 3071' /etc/ssh/moduli > /etc/ssh/moduli.safe mv /etc/ssh/moduli.safe /etc/ssh/moduli ``` -3. Enable the RSA and ED25519 HostKey directives in the - /etc/ssh/sshd~config~ file +3. Enable the RSA and ED25519 HostKey directives in the /etc/ssh/sshd~config~ + file ```sh sed -i 's/^\#HostKey \/etc\/ssh\/ssh_host_\(rsa\|ed25519\)_key$/HostKey \/etc\/ssh\/ssh_host_\1_key/g' /etc/ssh/sshd_config @@ -65,8 +65,8 @@ pip3 install ssh-audit ssh-audit localhost ``` -If everything succeeded, the results will show as all green. If anything -is yellow, orange, or red, you may need to tweak additional settings. +If everything succeeded, the results will show as all green. If anything is +yellow, orange, or red, you may need to tweak additional settings. ``` txt #+caption: ssh audit diff --git a/content/blog/2023-10-17-self-hosting-anonymousoverflow.md b/content/blog/2023-10-17-self-hosting-anonymousoverflow.md index 66135bc..eea1fbe 100644 --- a/content/blog/2023-10-17-self-hosting-anonymousoverflow.md +++ b/content/blog/2023-10-17-self-hosting-anonymousoverflow.md @@ -8,18 +8,17 @@ draft = false # Overview I recently launched an instance of AnonymousOverflow at -[ao.cleberg.net](https://ao.cleberg.net) and wanted to write a brief -post on how easy it is to install with Docker Compose and Nginx. +[ao.cleberg.net](https://ao.cleberg.net) and wanted to write a brief post on how +easy it is to install with Docker Compose and Nginx. -This guide uses Ubuntu server, Docker Compose, and Nginx as a reverse -proxy. +This guide uses Ubuntu server, Docker Compose, and Nginx as a reverse proxy. # Installation ## Docker Compose -To install AnonymousOverflow, start by creating a directory for the -application and create its `docker-compose.yml` file. +To install AnonymousOverflow, start by creating a directory for the application +and create its `docker-compose.yml` file. ```sh mkdir ~/anonymousoverflow && cd ~/anonymousoverflow @@ -27,8 +26,7 @@ nano docker-compose.yml ``` Within this file, paste the following information. Be sure to change the -`APP_URL`, `JWT_SIGNING_SECRET`, and -`ports` to match your needs. +`APP_URL`, `JWT_SIGNING_SECRET`, and `ports` to match your needs. ``` yaml version: '3' @@ -45,8 +43,8 @@ services: restart: 'always' ``` -Save and exit the file when complete. You can now launch the container -and access it via your local network. +Save and exit the file when complete. You can now launch the container and +access it via your local network. ```sh sudo docker-compose up -d @@ -54,19 +52,18 @@ sudo docker-compose up -d ## Nginx Reverse Proxy -If you want to access this service outside the local network, I -recommend using Nginx as a reverse proxy. +If you want to access this service outside the local network, I recommend using +Nginx as a reverse proxy. -Let\'s start by creating a configuration file. +Let's start by creating a configuration file. ```sh sudo nano /etc/nginx/sites-available/ao ``` -Within this file, paste the following content and repace -`ao.example.com` with your URL. You may need to update the -SSL certificate statements if your certificates are in a different -location. +Within this file, paste the following content and repace `ao.example.com` with +your URL. You may need to update the SSL certificate statements if your +certificates are in a different location. ``` conf server { @@ -122,9 +119,9 @@ server { } ``` -Save and exit the file when complete. On Ubuntu, you will need to -symlink the configuration file before it will be recognized by Nginx. -Once complete, simply restart the web server. +Save and exit the file when complete. On Ubuntu, you will need to symlink the +configuration file before it will be recognized by Nginx. Once complete, simply +restart the web server. ```sh sudo ln -s /etc/nginx/sites-available/ao /etc/nginx/sites-enabled/ao diff --git a/content/blog/2023-11-08-scli.md b/content/blog/2023-11-08-scli.md index 3b2ce31..0d01ea4 100644 --- a/content/blog/2023-11-08-scli.md +++ b/content/blog/2023-11-08-scli.md @@ -5,49 +5,42 @@ description = "" draft = false +++ -[scli](https://github.com/isamert/scli) is a command-line tool that -allows you to connect to your Signal messenger account. This program -utilizes a two-pane display that shows you chats on the left and the -focused conversation on the right. +[scli](https://github.com/isamert/scli) is a command-line tool that allows you +to connect to your Signal messenger account. This program utilizes a two-pane +display that shows you chats on the left and the focused conversation on the +right. -This guide will show you how to install `scli` and its -dependencies on Alpine Linux, which requires some extra work due to -musl. +This guide will show you how to install `scli` and its dependencies on Alpine +Linux, which requires some extra work due to musl. -If you\'re using a non-musl system, you can likely following the -`scli` README and download the packaged binaries for an -easier installation process. +If you're using a non-musl system, you can likely following the `scli` README +and download the packaged binaries for an easier installation process. # Dependencies In order to use `scli`, you need a few dependencies: -- `openjdk17-jre` - Used as a dependency for the - `signal-cli` tool. Version may vary. -- `signal-cli` - Used as the backbone of the - `scli` tool. -- `findutils` - Replaces the standard Busybox version of - `xargs`. -- `urwid` - A console user interface library for Python. -- `urwid-readline` - For GNU emacs-like keybinds on the - input line. -- `qrencode` - Displays a QR code in the terminal to link - the device using your phone. Not necessary if you\'re only linking - on desktop and can copy/paste the connection URL. - -Let\'s start by installing the packages available via Alpine\'s -repositories. Be sure to install the latest version of -`openjdk`. If you run into Java-related issues, uninstall -`openjdk` and install an older version. +- `openjdk17-jre` - Used as a dependency for the `signal-cli` tool. Version may + vary. +- `signal-cli` - Used as the backbone of the `scli` tool. +- `findutils` - Replaces the standard Busybox version of `xargs`. +- `urwid` - A console user interface library for Python. +- `urwid-readline` - For GNU emacs-like keybinds on the input line. +- `qrencode` - Displays a QR code in the terminal to link the device using your + phone. Not necessary if you're only linking on desktop and can copy/paste the + connection URL. + +Let's start by installing the packages available via Alpine's repositories. Be +sure to install the latest version of `openjdk`. If you run into Java-related +issues, uninstall `openjdk` and install an older version. ```sh doas apk add openjdk17-jre findutils qrencode ``` -Next, let\'s install `signal-cli`. Be sure to export the -version of `signal-cli` that you want. I use version -`0.12.4` below, but that may be outdated by the time you\'re -reading this. +Next, let's install `signal-cli`. Be sure to export the version of `signal-cli` +that you want. I use version `0.12.4` below, but that may be outdated by the +time you're reading this. ```sh export VERSION="0.12.4" @@ -56,8 +49,7 @@ doas tar xf signal-cli-"${VERSION}".tar.gz -C /opt doas ln -sf /opt/signal-cli-${VERSION}"/bin/signal/cli /usr/local/bin ``` -Finally, install the `urwid` packages using the Python -packaging utility. +Finally, install the `urwid` packages using the Python packaging utility. ```sh pip3 install urwid urwid-readline @@ -65,25 +57,24 @@ pip3 install urwid urwid-readline # Installation -Now that we have all of the dependencies we need, we can install -`scli`. Start by simply cloning the repository. +Now that we have all of the dependencies we need, we can install `scli`. Start +by simply cloning the repository. ```sh git clone https://github.com/isamert/scli ``` -When I cloned this repository on 2023-11-08, I found a bug in the logic -that required a fix. You must edit the `scli` file and -replace the one instance of `RLIMIT_OFILE` with -`RLIMIT_NOFILE`. +When I cloned this repository on 2023-11-08, I found a bug in the logic that +required a fix. You must edit the `scli` file and replace the one instance of +`RLIMIT_OFILE` with `RLIMIT_NOFILE`. ```sh cd scli nano scli ``` -Once complete, you can move this program to anywhere on your -`$PATH`. I chose the following directory. +Once complete, you can move this program to anywhere on your `$PATH`. I chose +the following directory. ```sh doas mv scli /usr/local/bin/scli @@ -91,43 +82,41 @@ doas mv scli /usr/local/bin/scli # Initial Setup -Now that everything is installed, we can login and configure the client. -Start by generating a connection link. +Now that everything is installed, we can login and configure the client. Start +by generating a connection link. ```sh signal-cli link -n "YOUR-DEVICE-NICKNAME" | tee >(xargs -L 1 qrencode -t utf8) ``` -This will generate a connection link and related QR code for you to use -to link the devices together. Once complete, **wait patiently\*** for -the connection process to finish. +This will generate a connection link and related QR code for you to use to link +the devices together. Once complete, **wait patiently** for the connection +process to finish. -Once it completes, it will exit and return you to the prompt. From here, -you need to perform an initial `receive` command to start -things off. The `USERNAME` variable should be your phone -number, such as `+15551237890`. +Once it completes, it will exit and return you to the prompt. From here, you +need to perform an initial `receive` command to start things off. The `USERNAME` +variable should be your phone number, such as `+15551237890`. ```sh signal-cli -u USERNAME receive ``` -Also be sure to test the daemon to ensure it works properly. If no -errors occur, it\'s working. If you run into errors because you\'re not -running a DBUS session, see my notes below. +Also be sure to test the daemon to ensure it works properly. If no errors occur, +it's working. If you run into errors because you're not running a DBUS +session, see my notes below. ```sh signal-cli -u USERNAME daemon ``` -Once the initial reception is complete, you are ready to use -`scli`. +Once the initial reception is complete, you are ready to use `scli`. -This process will differ depending on your desktop environment (DE). If -you are running a DE, you likely have a DBUS session running already and -can simply launch the program. +This process will differ depending on your desktop environment (DE). If you are +running a DE, you likely have a DBUS session running already and can simply +launch the program. -However, if you\'re like me and running your computer straight on the -TTY without a DE, you\'ll need to start a DBUS session for this program. +However, if you're like me and running your computer straight on the TTY +without a DE, you'll need to start a DBUS session for this program. ```sh # If you're not running a DBUS session yet, you need to start one for scli @@ -139,9 +128,9 @@ scli # Configuration -Lastly, there are a number of configuration options that you can pass -via the command or in the `~/.config/sclirc` file. See the -Github README for more information on configuration options. +Lastly, there are a number of configuration options that you can pass via the +command or in the `~/.config/sclirc` file. See the Github README for more +information on configuration options. ```sh nano ~/.config/sclirc @@ -154,5 +143,5 @@ wrap-at = 80 enable-notifications = true ``` -That\'s it! Following this guide, I have a functional `scli` -program that successfully sends messages to my contacts and myself! +That's it! Following this guide, I have a functional `scli` program that +successfully sends messages to my contacts and myself! diff --git a/content/blog/2023-12-03-unifi-nextdns.md b/content/blog/2023-12-03-unifi-nextdns.md index 4bbe086..b004fb8 100644 --- a/content/blog/2023-12-03-unifi-nextdns.md +++ b/content/blog/2023-12-03-unifi-nextdns.md @@ -9,32 +9,31 @@ draft = false I recently installed NextDNS on my Unifi Dream Machine router using the [UnifiOS](https://github.com/nextdns/nextdns/wiki/UnifiOS) wiki page on -NextDNS\'s GitHub repository. +NextDNS's GitHub repository. -As a result of this, I wanted to write down the process in case the wiki -or installer ever gets lost. +As a result of this, I wanted to write down the process in case the wiki or +installer ever gets lost. # Wiki -The following is copied from the wiki page linked above, with one -difference in the `ssh` command. +The following is copied from the wiki page linked above, with one difference in +the `ssh` command. -Install instructions for Unifi Dream Machine (UDM) standard and pro -routers. +Install instructions for Unifi Dream Machine (UDM) standard and pro routers. ## Install Enable SSH: -- Go to your unifi admin interface and select your device (not the - controller settings, but the Dream Machine settings) -- Click on \"Settings\" at the bottom of the page -- Go to the \"Advanced\" section on the left pan -- Enable SSH -- Set a SSH password +- Go to your unifi admin interface and select your device (not the controller + settings, but the Dream Machine settings) +- Click on "Settings" at the bottom of the page +- Go to the "Advanced" section on the left pan +- Enable SSH +- Set a SSH password -Connect to your router using `ssh root@xxx.xxx.xxx.xxx` with -the password you configured. +Connect to your router using `ssh root@xxx.xxx.xxx.xxx` with the password you +configured. Run the following command and follow the instructions: @@ -42,25 +41,24 @@ Run the following command and follow the instructions: sh -c 'sh -c "$(curl -sL https://nextdns.io/install)"' ``` -Note: Queries from the UDM itself won\'t be routed to NextDNS nor -encrypted due to current system limitation. All traffic from other -devices on then network will. +Note: Queries from the UDM itself won't be routed to NextDNS nor encrypted due +to current system limitation. All traffic from other devices on then network +will. ## Upgrade -To upgrade to the last version, simply re-run the installer above. If a -new version is available, the upgrade action will added to the list of -possible actions. +To upgrade to the last version, simply re-run the installer above. If a new +version is available, the upgrade action will added to the list of possible +actions. ## Uninstall -To uninstall, re-run the installer above and select \"Remove\" in the -menu. +To uninstall, re-run the installer above and select "Remove" in the menu. ## Troubleshooting -If the installation fail, please the installer in debug mode and contact -us at team@nextdns.io with the transcript of the installation: +If the installation fail, please the installer in debug mode and contact us at +team@nextdns.io with the transcript of the installation: ```sh sh -c 'DEBUG=1 sh -c "$(curl -sL https://nextdns.io/install)"' @@ -68,15 +66,15 @@ sh -c 'DEBUG=1 sh -c "$(curl -sL https://nextdns.io/install)"' ### Content Filtering Conflict -NextDNS CLI and the UDM Content Filtering or the Ad Blocking features -are incompatible. If you want to use NextDNS CLI, please make sure they -are disabled. +NextDNS CLI and the UDM Content Filtering or the Ad Blocking features are +incompatible. If you want to use NextDNS CLI, please make sure they are +disabled. -To disable Content Filtering, go to Settings \> Network, then for each -network, set the Content Filtering feature to None +To disable Content Filtering, go to Settings > Network, then for each network, +set the Content Filtering feature to None -To disable Ad Blocking, go to Settings \> Application Firewall. In the -General tab, uncheck the Ad Blocking checkbox. +To disable Ad Blocking, go to Settings > Application Firewall. In the General +tab, uncheck the Ad Blocking checkbox. ### APT Error @@ -96,8 +94,7 @@ sed -i -e 's/deb.debian.org/archive.debian.org/g' \ ## install.sh -Here are the contents of the `install.sh` file used above, as -of 2023-12-03: +Here are the contents of the `install.sh` file used above, as of 2023-12-03: ```sh #!/bin/sh diff --git a/content/blog/2024-01-08-dont-say-hello.md b/content/blog/2024-01-08-dont-say-hello.md index f70c4f0..c918cbe 100644 --- a/content/blog/2024-01-08-dont-say-hello.md +++ b/content/blog/2024-01-08-dont-say-hello.md @@ -5,25 +5,25 @@ description = "" draft = false +++ -I recently came back from a winter break and have started working -again... only to immediately run into the dilemma of people sending me -cliffhanger messages again. +I recently came back from a winter break and have started working again... only +to immediately run into the dilemma of people sending me cliffhanger messages +again. # No Hello -A year or two ago, I discovered [no hello](https://nohello.net/en/) and -have thought about it often since then. I\'ve even sent it to a few -people since then (who wouldn\'t take offense to it). +A year or two ago, I discovered [no hello](https://nohello.net/en/) and have +thought about it often since then. I've even sent it to a few people since then +(who wouldn't take offense to it). -I work in a fast-paced environment where efficiency is extremely -valuable. Therefore, I have always held a deep displeasure for -conversations where people start with \"Hello\" and then. +I work in a fast-paced environment where efficiency is extremely valuable. +Therefore, I have always held a deep displeasure for conversations where people +start with "Hello" and then. -I searched back through my work messages and found that I received \~50 -messages from \~10 people last year from people that contained \"hi\", -\"hey\", or \"hello\" and did not contain any indication of the purpose -of the conversation. I also noticed that a few of the users were -responsible for the large majority of the cliffhangers. +I searched back through my work messages and found that I received ~50 messages +from ~10 people last year from people that contained "hi", "hey", or +"hello" and did not contain any indication of the purpose of the conversation. +I also noticed that a few of the users were responsible for the large majority +of the cliffhangers. -There\'s no real point to this post, just a desparate request for people -to please stop doing this. +There's no real point to this post, just a desparate request for people to +please stop doing this. diff --git a/content/blog/2024-01-09-macos-customization.md b/content/blog/2024-01-09-macos-customization.md index dd4516d..da8f086 100644 --- a/content/blog/2024-01-09-macos-customization.md +++ b/content/blog/2024-01-09-macos-customization.md @@ -5,42 +5,38 @@ description = "" draft = false +++ -I have been using macOS more than Linux lately, so I wrote this post to -describe some simple options to customize macOS beyond the normal -built-in settings menu. +I have been using macOS more than Linux lately, so I wrote this post to describe +some simple options to customize macOS beyond the normal built-in settings menu. -While not all-encompassing, the options below should be a good start for -anyone looking to dive down the rabbit hole. +While not all-encompassing, the options below should be a good start for anyone +looking to dive down the rabbit hole. # Basics ## Package Management To install a lot of software on macOS, you will need -[Homebrew](https://brew.sh/). You can use their installation script to -get started. Simply open the `Terminal` application and paste -the following snippet: +[Homebrew](https://brew.sh/). You can use their installation script to get +started. Simply open the `Terminal` application and paste the following snippet: ```sh /bin/bash -c "$(curl -fsSL https://raw.githubusercontent.com/Homebrew/install/HEAD/install.sh)" ``` -This will allow you to easily install and manage applications and other -software easily through the `brew` command. +This will allow you to easily install and manage applications and other software +easily through the `brew` command. ## Terminal -If you\'re serious about customizing your macOS system, I highly -recommend installing a terminal emulator that you like and if you\'re -not comfortable on the command line yet, start learning. A lot of -customization options require you to edit hidden files, which is easiest -in a terminal. +If you're serious about customizing your macOS system, I highly recommend +installing a terminal emulator that you like and if you're not comfortable on +the command line yet, start learning. A lot of customization options require you +to edit hidden files, which is easiest in a terminal. -There are options like iTerm2, Kitty, Alacritty, Hyper, Warp, or the -built-in Terminal app. +There are options like iTerm2, Kitty, Alacritty, Hyper, Warp, or the built-in +Terminal app. -I use [iTerm2](https://iterm2.com/), which can be installed with -Homebrew: +I use [iTerm2](https://iterm2.com/), which can be installed with Homebrew: ```sh brew install iterm2 @@ -48,39 +44,37 @@ brew install iterm2 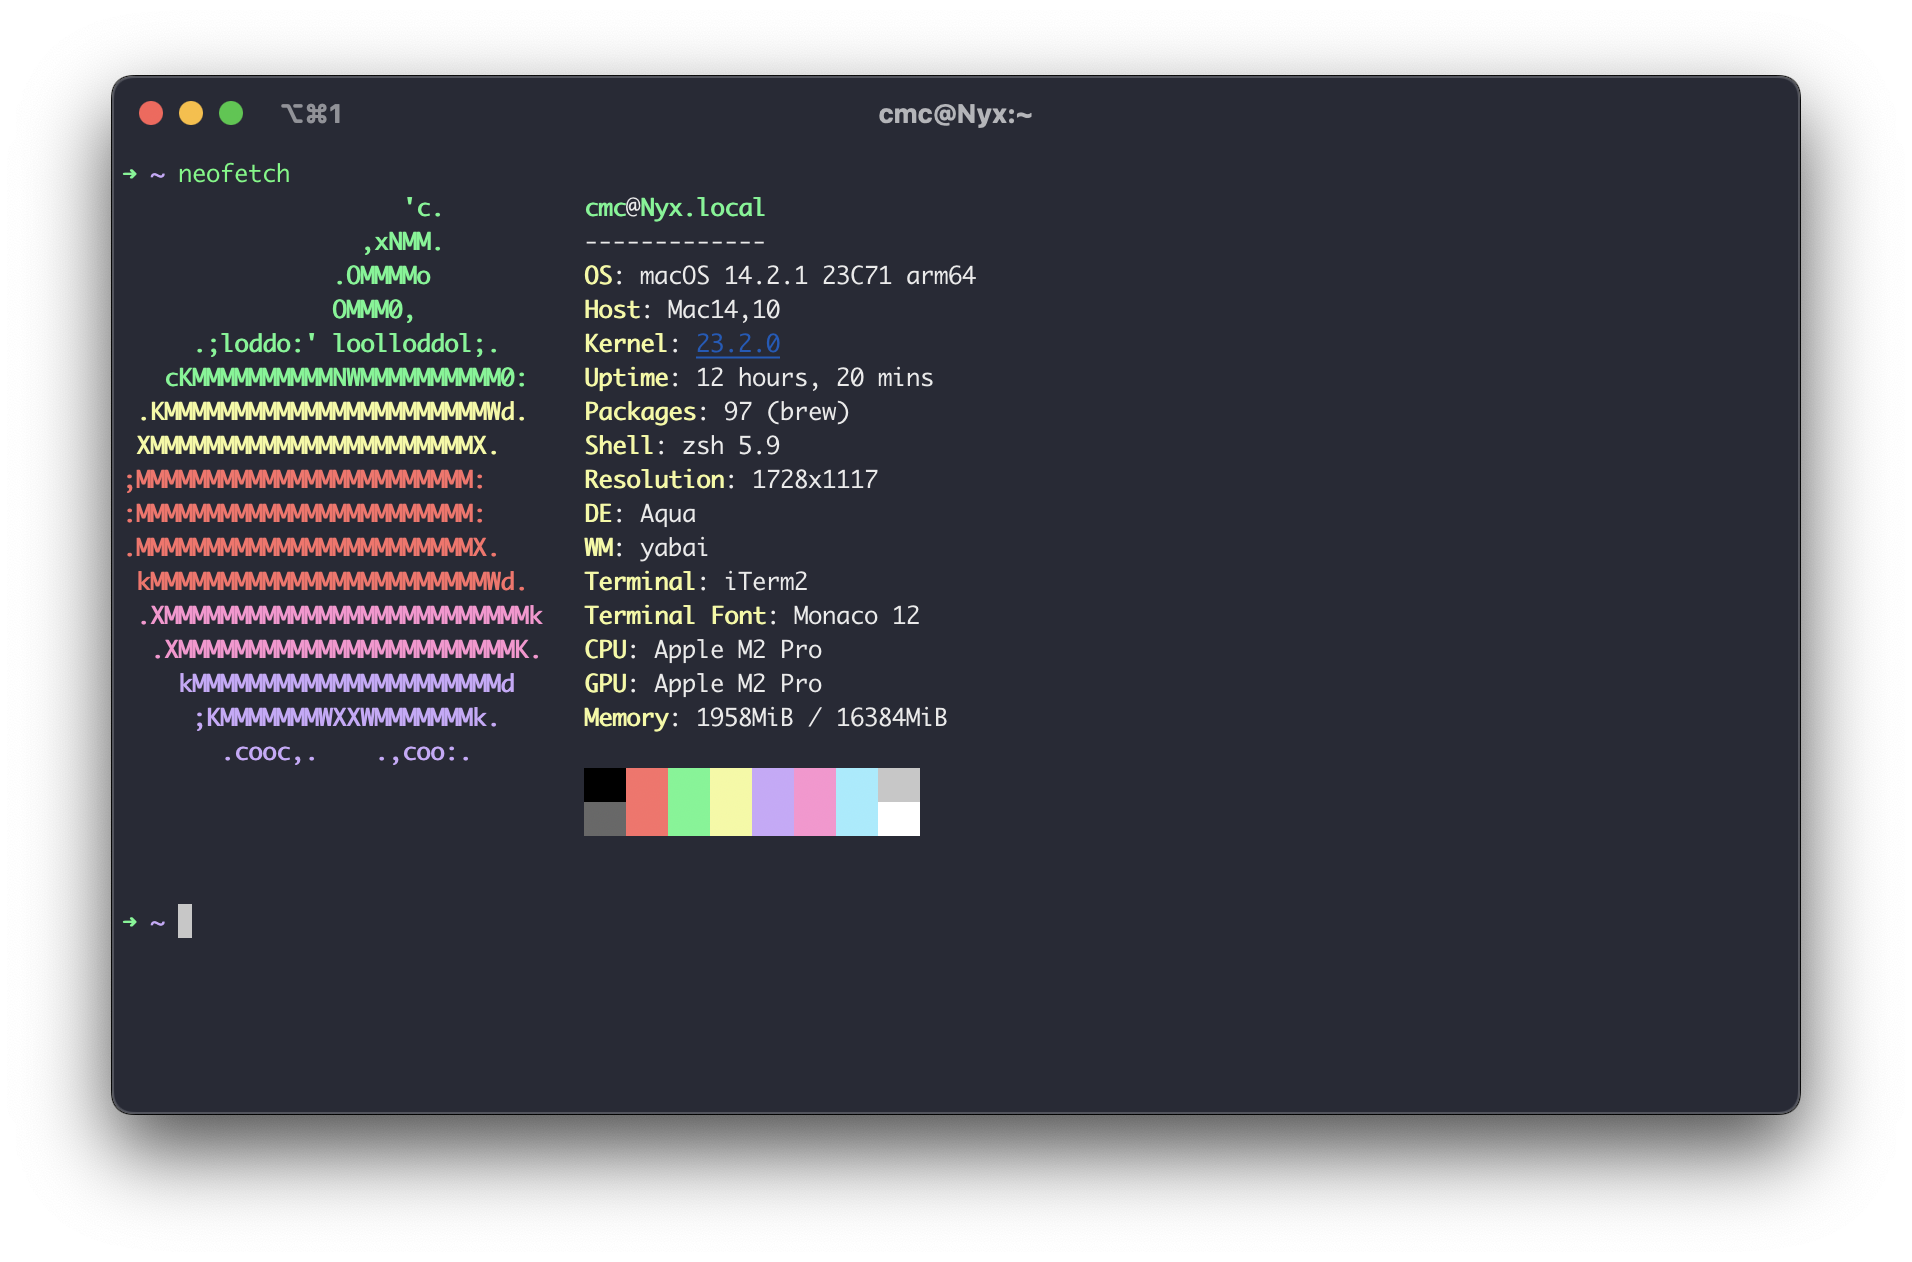 -To install color schemes, such as the Dracula scheme shown in the -screenshot above, you visit [iTerm -Themes](https://iterm2colorschemes.com/) and follow their installation -instructions to install any of the themes. +To install color schemes, such as the Dracula scheme shown in the screenshot +above, you visit [iTerm Themes](https://iterm2colorschemes.com/) and follow +their installation instructions to install any of the themes. # Desktop ## Window Management -[yabai](https://github.com/koekeishiya/yabai) is a tiling window manager -for macOS. While other window managers exist, I found that most of them -struggled to create logical layouts and to allow me to easily move -windows around the screen. +[yabai](https://github.com/koekeishiya/yabai) is a tiling window manager for +macOS. While other window managers exist, I found that most of them struggled to +create logical layouts and to allow me to easily move windows around the screen. -Some advanced settings for yabai are only available if partially disable -System Integrity Protection (SIP). However, I chose not to do this and -it hasn\'t affected my basic usage of yabai at all. +Some advanced settings for yabai are only available if partially disable System +Integrity Protection (SIP). However, I chose not to do this and it hasn't +affected my basic usage of yabai at all. Refer to the [yabai wiki](https://github.com/koekeishiya/yabai/wiki/Installing-yabai-(latest-release)) -for installation instructions. You will need to ensure that yabai is -allowed to access the accessibility and screen recording APIs. +for installation instructions. You will need to ensure that yabai is allowed to +access the accessibility and screen recording APIs. -You can see a basic three-pane layout atuomatically configured by yabai -for me as I opened the windows below. +You can see a basic three-pane layout atuomatically configured by yabai for me +as I opened the windows below. 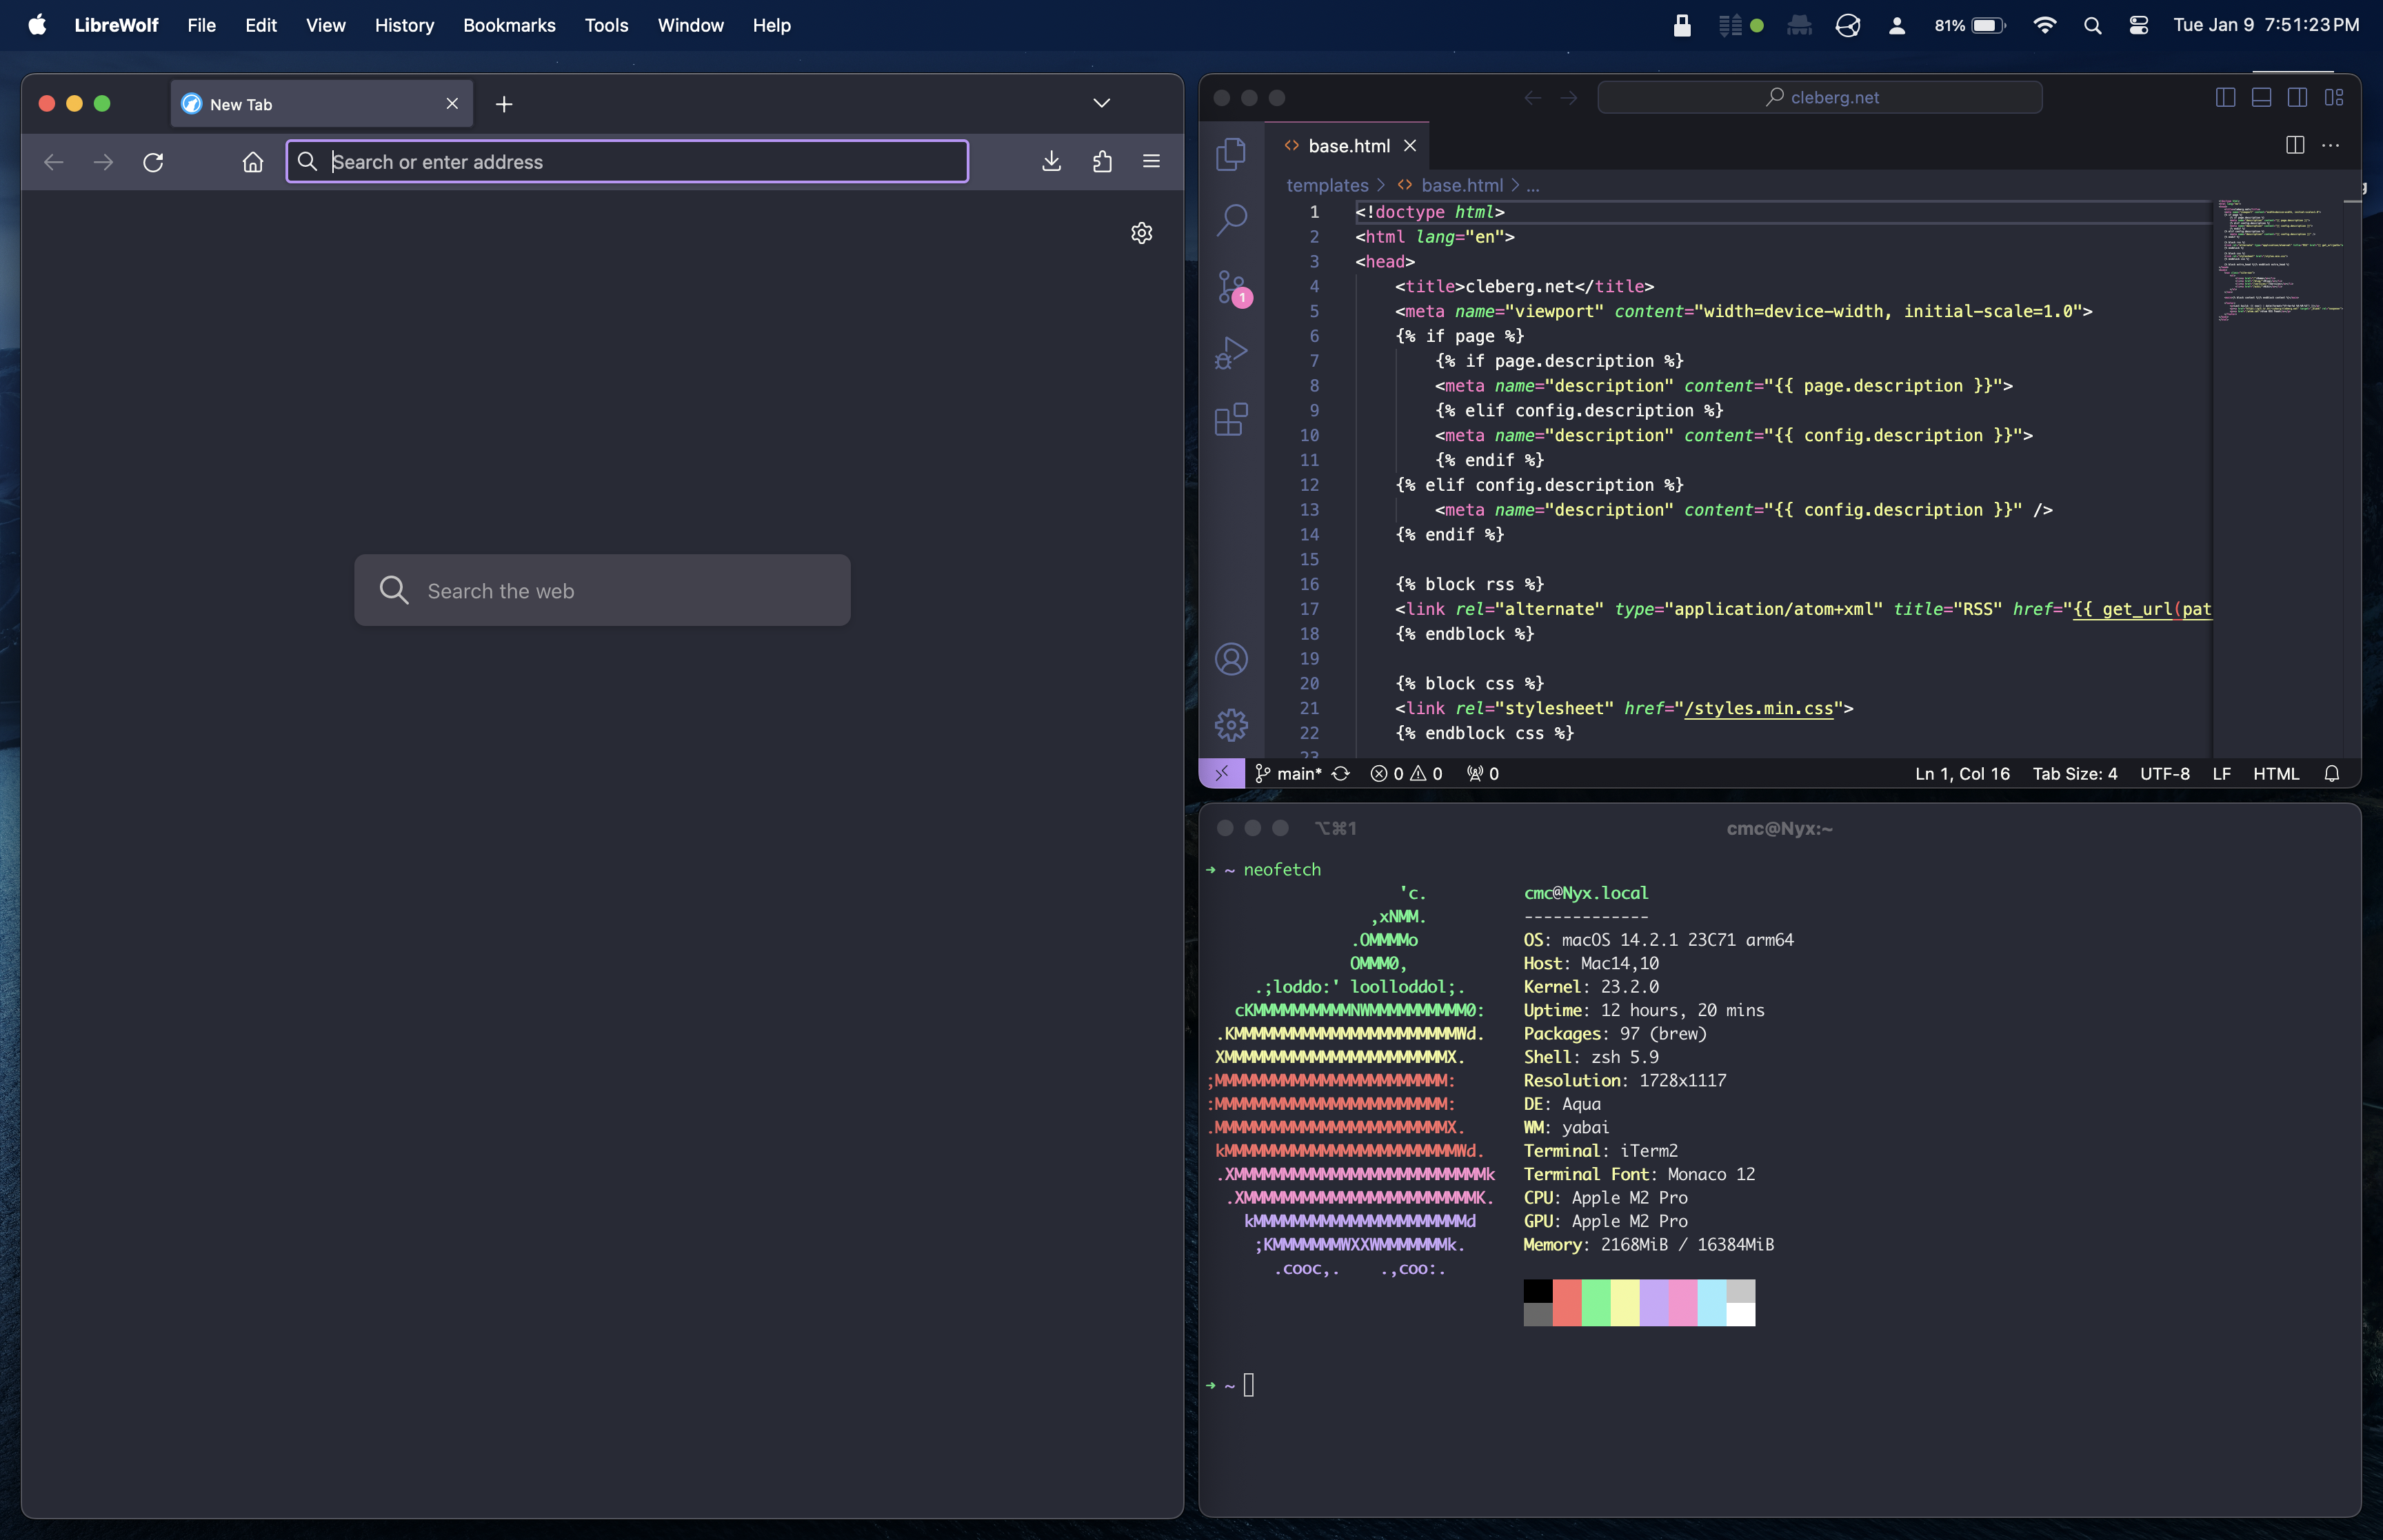 ## Keyboard Shortcuts -[skhd](https://github.com/koekeishiya/skhd) is a simple hotkey daemon -that allows you to define hotkeys in a file for usage on your system. +[skhd](https://github.com/koekeishiya/skhd) is a simple hotkey daemon that +allows you to define hotkeys in a file for usage on your system. Installation is simple: @@ -89,11 +83,10 @@ brew install koekeishiya/formulae/skhd skhd --start-service ``` -After installation, be sure to allow `skhd` access to the -accessibility API in the macOS privacy settings. +After installation, be sure to allow `skhd` access to the accessibility API in +the macOS privacy settings. -You can configure your hotkeys in the `~/.config/skhd/skhdrc` -file: +You can configure your hotkeys in the `~/.config/skhd/skhdrc` file: ```sh nano ~/.config/skhd/skhdrc @@ -112,14 +105,13 @@ cmd + shift - return : /Applications/LibreWolf.app/Contents/MacOS/librewolf ## Widgets [uebersicht](https://github.com/felixhageloh/uebersicht/) is a handy -desktop-based widget tool with a plethora of community-made widgets -available in the [widgets -gallery](https://tracesof.net/uebersicht-widgets/). You can also write -your own widgets with this tool. +desktop-based widget tool with a plethora of community-made widgets available in +the [widgets gallery](https://tracesof.net/uebersicht-widgets/). You can also +write your own widgets with this tool. To install, simply download the latest release from the [uebersicht -website](https://tracesof.net/uebersicht/) and copy it to the -Applications folder. +website](https://tracesof.net/uebersicht/) and copy it to the Applications +folder. See below for an example of the [Mond](https://tracesof.net/uebersicht-widgets/#Mond) widget in action. @@ -137,22 +129,20 @@ You can browse a discussion where various users shared their for inspiration or to copy their dotfiles. See below for a quick (& slightly broken) copy of -[zer0yu\'s](https://github.com/zer0yu/dotfiles) SketchyBar -configuration. +[zer0yu's](https://github.com/zer0yu/dotfiles) SketchyBar configuration.  ## Dock The easiest way to customize the dock is to install -[uBar](https://ubarapp.com/), which uses a Windows-like menu bar as the -default style. +[uBar](https://ubarapp.com/), which uses a Windows-like menu bar as the default +style. -However, the built-in macOS dock cannot be disabled and can only be set -to \"always hidden\". This can be annoying as it will pop out any time -your mouse cursor passes closely to the dock edge of the screen. Because -of this, I simply use the built-in dock instead of customizing it with -third-party software. +However, the built-in macOS dock cannot be disabled and can only be set to +"always hidden". This can be annoying as it will pop out any time your mouse +cursor passes closely to the dock edge of the screen. Because of this, I simply +use the built-in dock instead of customizing it with third-party software. Regardless, see below for the default installation style of uBar. @@ -160,22 +150,21 @@ Regardless, see below for the default installation style of uBar. ## Application Icons -You can also customize the icon of any application in macOS, which will -show up in Finder, the Dock, Launchpad, search results, etc. I recommend -using [macOSicons](https://macosicons.com/) to download icons you want, -and then apply them by following this process. - -1. Open the Finder application. -2. Navigate to the `Applications` folder. -3. Right-click an application of your choice, and select - `Get Info`. -4. Drag the image you downloaded on top of the application\'s icon at - the top of information window (you will see a green \"plus\" symbol - when you\'re hovering over it). -5. Release the new icon on top of the old icon and it will update! - -You can see an example of me dragging a new `signal.icns` -file onto my Signal.app information window to update it below: +You can also customize the icon of any application in macOS, which will show up +in Finder, the Dock, Launchpad, search results, etc. I recommend using +[macOSicons](https://macosicons.com/) to download icons you want, and then apply +them by following this process. + +1. Open the Finder application. +2. Navigate to the `Applications` folder. +3. Right-click an application of your choice, and select `Get Info`. +4. Drag the image you downloaded on top of the application's icon at the top of + information window (you will see a green "plus" symbol when you're + hovering over it). +5. Release the new icon on top of the old icon and it will update! + +You can see an example of me dragging a new `signal.icns` file onto my +Signal.app information window to update it below: 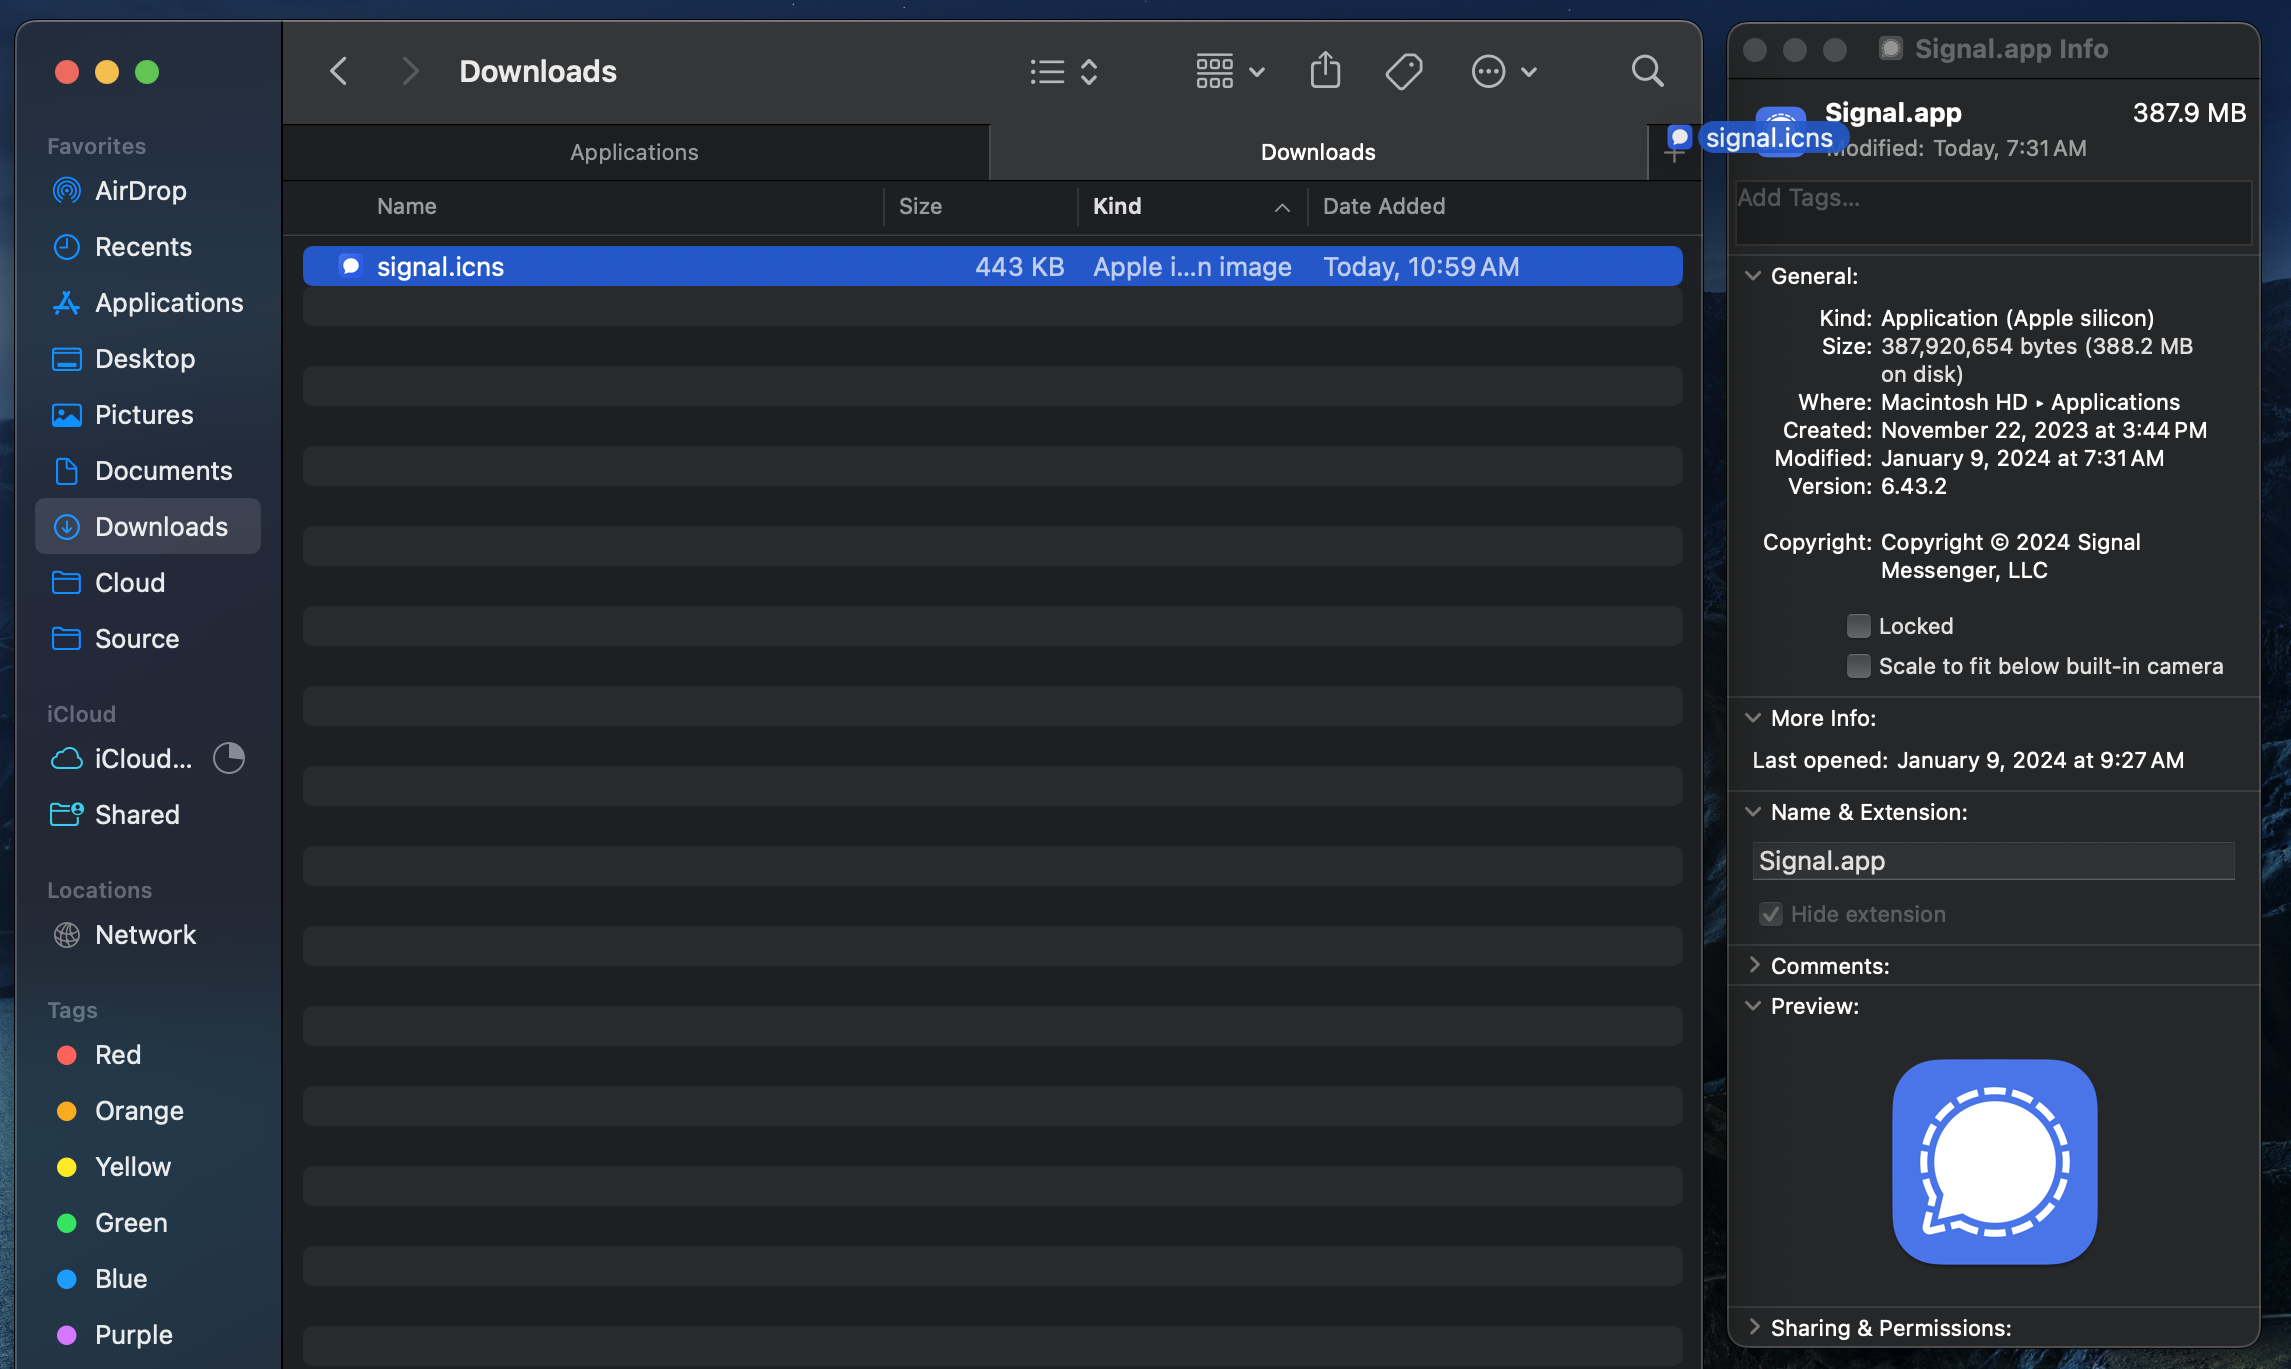 diff --git a/content/blog/2024-01-13-local-llm.md b/content/blog/2024-01-13-local-llm.md index 24729a5..5f1ca3b 100644 --- a/content/blog/2024-01-13-local-llm.md +++ b/content/blog/2024-01-13-local-llm.md @@ -7,40 +7,38 @@ draft = false # Requirements -I\'ve recently started playing with large language models (LLMs), mostly -in the popular chatbot form, as part of my job and have decided to see -if there\'s a consistent and reliable way to interact with these models -on Apple devices without sacrificing privacy or requiring in-depth -technical setup. +I've recently started playing with large language models (LLMs), mostly in the +popular chatbot form, as part of my job and have decided to see if there's a +consistent and reliable way to interact with these models on Apple devices +without sacrificing privacy or requiring in-depth technical setup. My requirements for this test: -- Open source platform -- On-device model files -- Minimal required configuration -- Preferably pre-built, but a simple build process is acceptable +- Open source platform +- On-device model files +- Minimal required configuration +- Preferably pre-built, but a simple build process is acceptable -I tested a handful of apps and have summarized my favorite (so far) for -macOS and iOS below. +I tested a handful of apps and have summarized my favorite (so far) for macOS +and iOS below. -> TL;DR - Here are the two that met my requirements and I have found the -> easiest to install and use so far: +> TL;DR - Here are the two that met my requirements and I have found the easiest +> to install and use so far: -- macOS: [Ollama](https://ollama.ai/) -- iOS : [LLM Farm](https://llmfarm.site/) +- macOS: [Ollama](https://ollama.ai/) +- iOS : [LLM Farm](https://llmfarm.site/) # macOS -[Ollama](https://ollama.ai/) is a simple Go application for macOS and -Linux that can run various LLMs locally. +[Ollama](https://ollama.ai/) is a simple Go application for macOS and Linux that +can run various LLMs locally. For macOS, you can download the pplication on the [Ollama download page](https://ollama.ai/download/mac) and install it by unzipping the -`Ollama.app` file and moving it to the -`Applications` folder. +`Ollama.app` file and moving it to the `Applications` folder. -If you prefer the command line, you can run these commands after the -download finished: +If you prefer the command line, you can run these commands after the download +finished: ```sh cd ~/Downloads && \ @@ -48,64 +46,60 @@ unzip Ollama-darwin.zip && \ mv ~/Downloads/Ollama.app /Applications/ ``` -After running the app, the app will ask you to open a terminal and run -the default `llama2` model, which will open an interactive -chat session in the terminal. You can startfully using the application -at this point. +After running the app, the app will ask you to open a terminal and run the +default `llama2` model, which will open an interactive chat session in the +terminal. You can startfully using the application at this point. 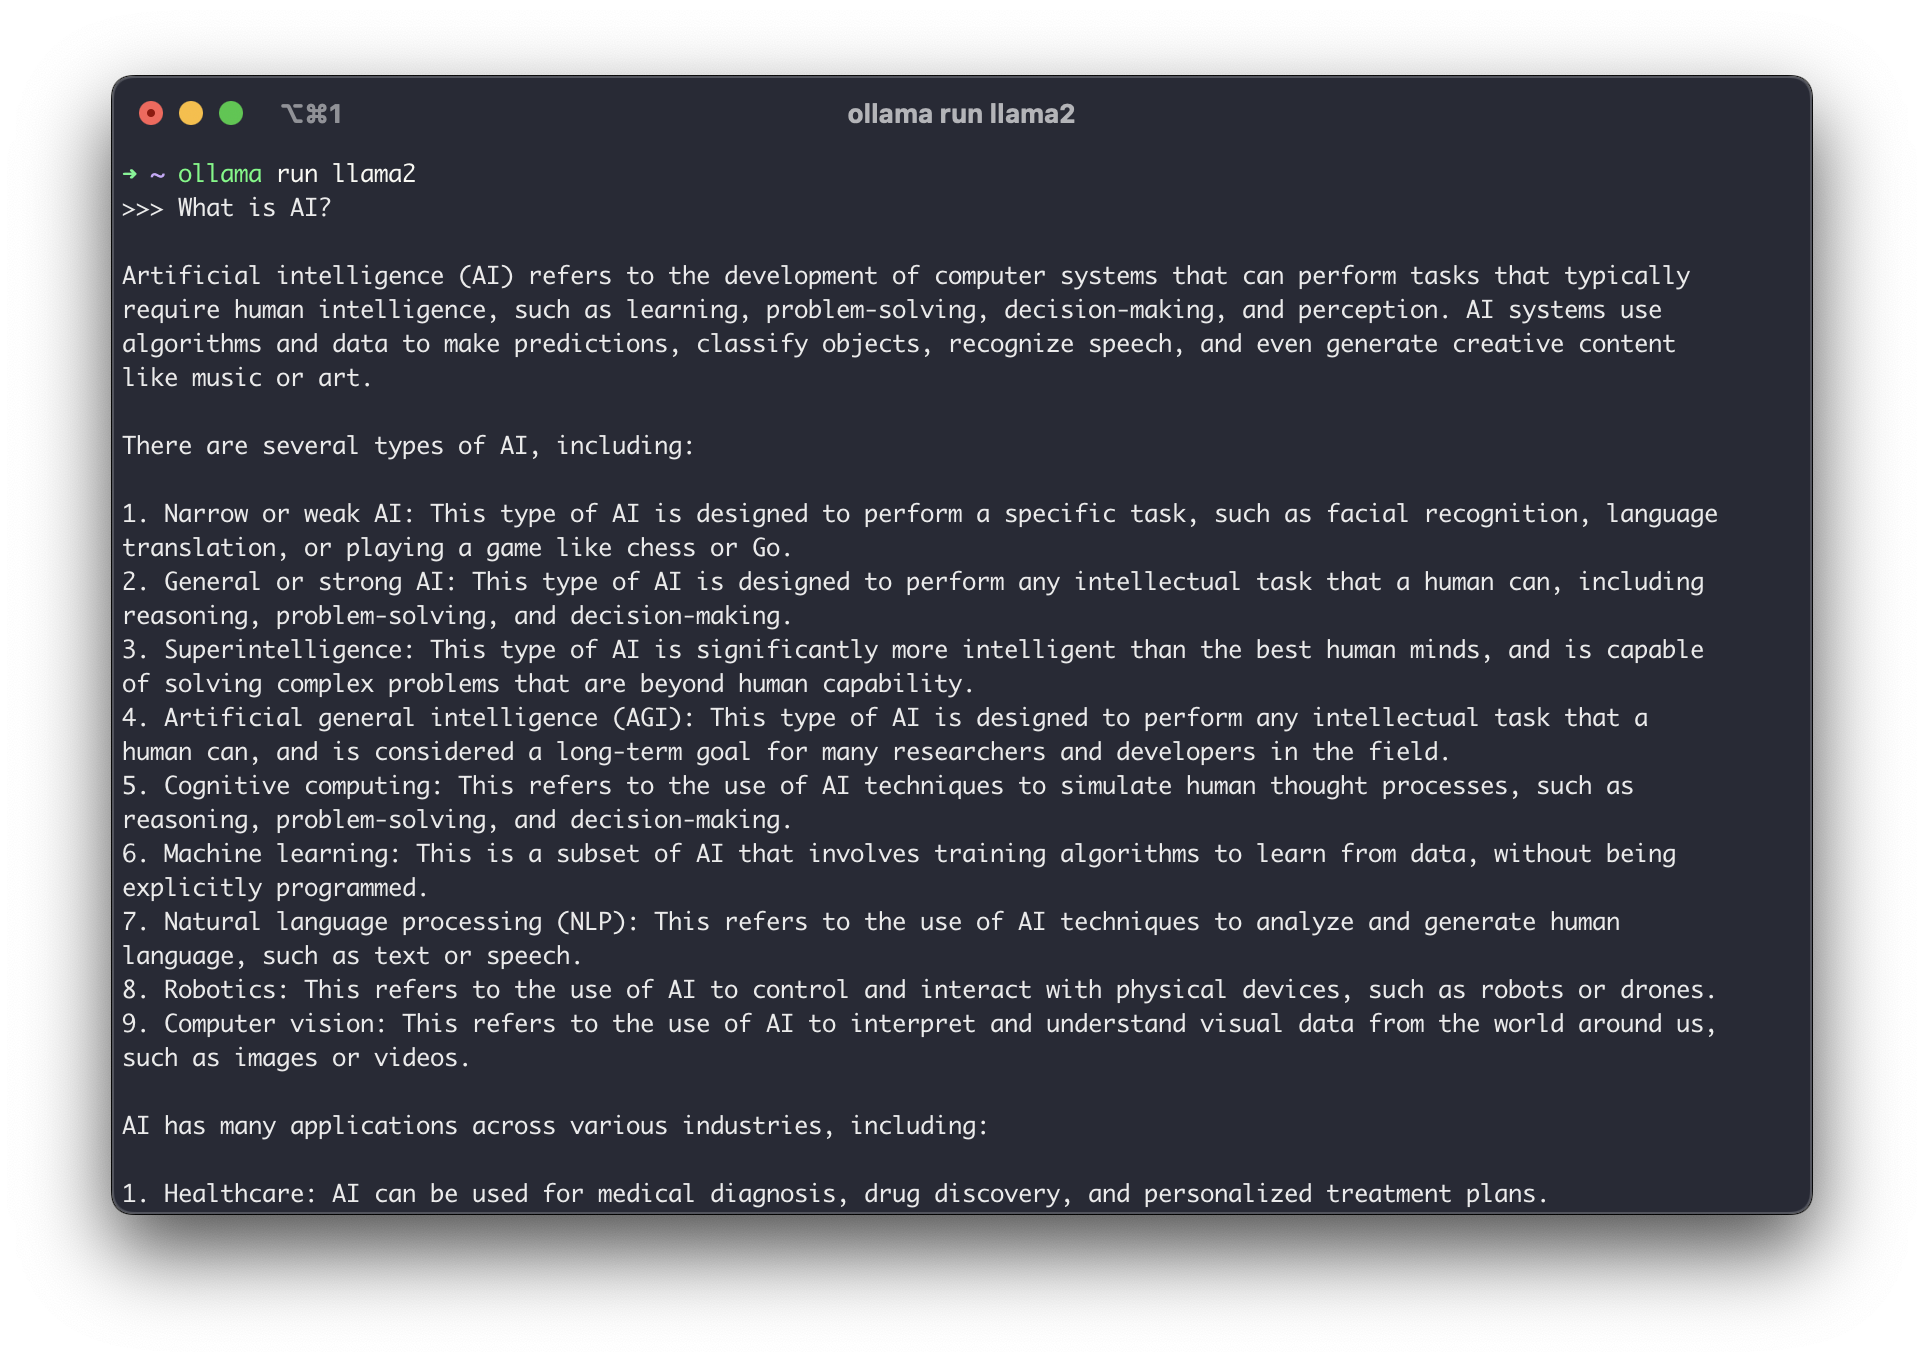 -If you don\'t want to use the default `llama2` model, you can -download and run additional models found on the -[Models](https://ollama.ai/library) page. +If you don't want to use the default `llama2` model, you can download and run +additional models found on the [Models](https://ollama.ai/library) page. -To see the information for the currently-used model, you can run the -`/show info` command in the chat. +To see the information for the currently-used model, you can run the `/show +info` command in the chat. -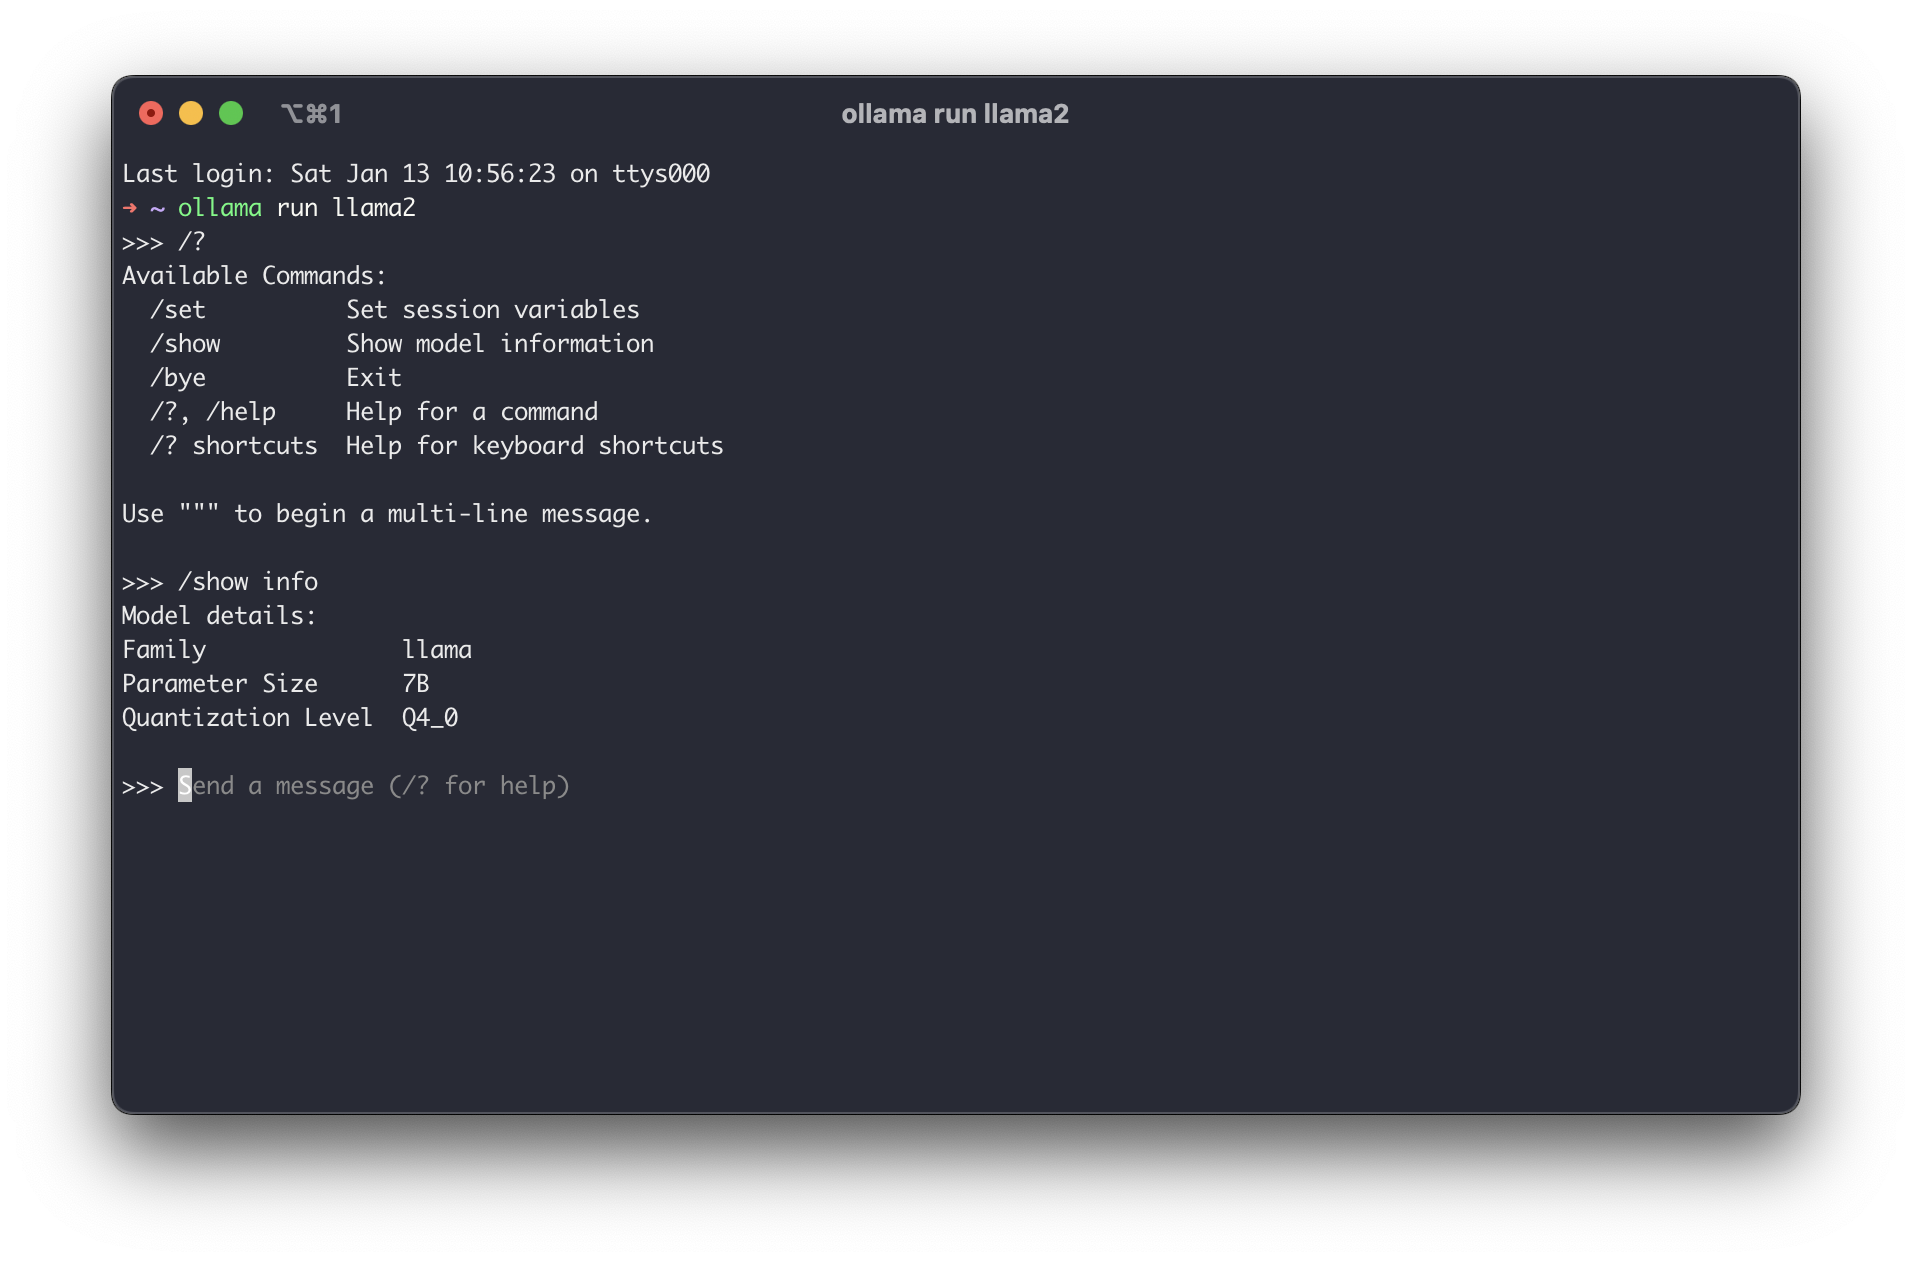 + ## Community Integrations I highly recommend browsing the [Community Integrations](https://github.com/jmorganca/ollama#community-integrations) -section of the project to see how you would prefer to extend Ollama -beyond a simple command-line interface. There are options for APIs, -browser UIs, advanced terminal configurations, and more. +section of the project to see how you would prefer to extend Ollama beyond a +simple command-line interface. There are options for APIs, browser UIs, advanced +terminal configurations, and more. 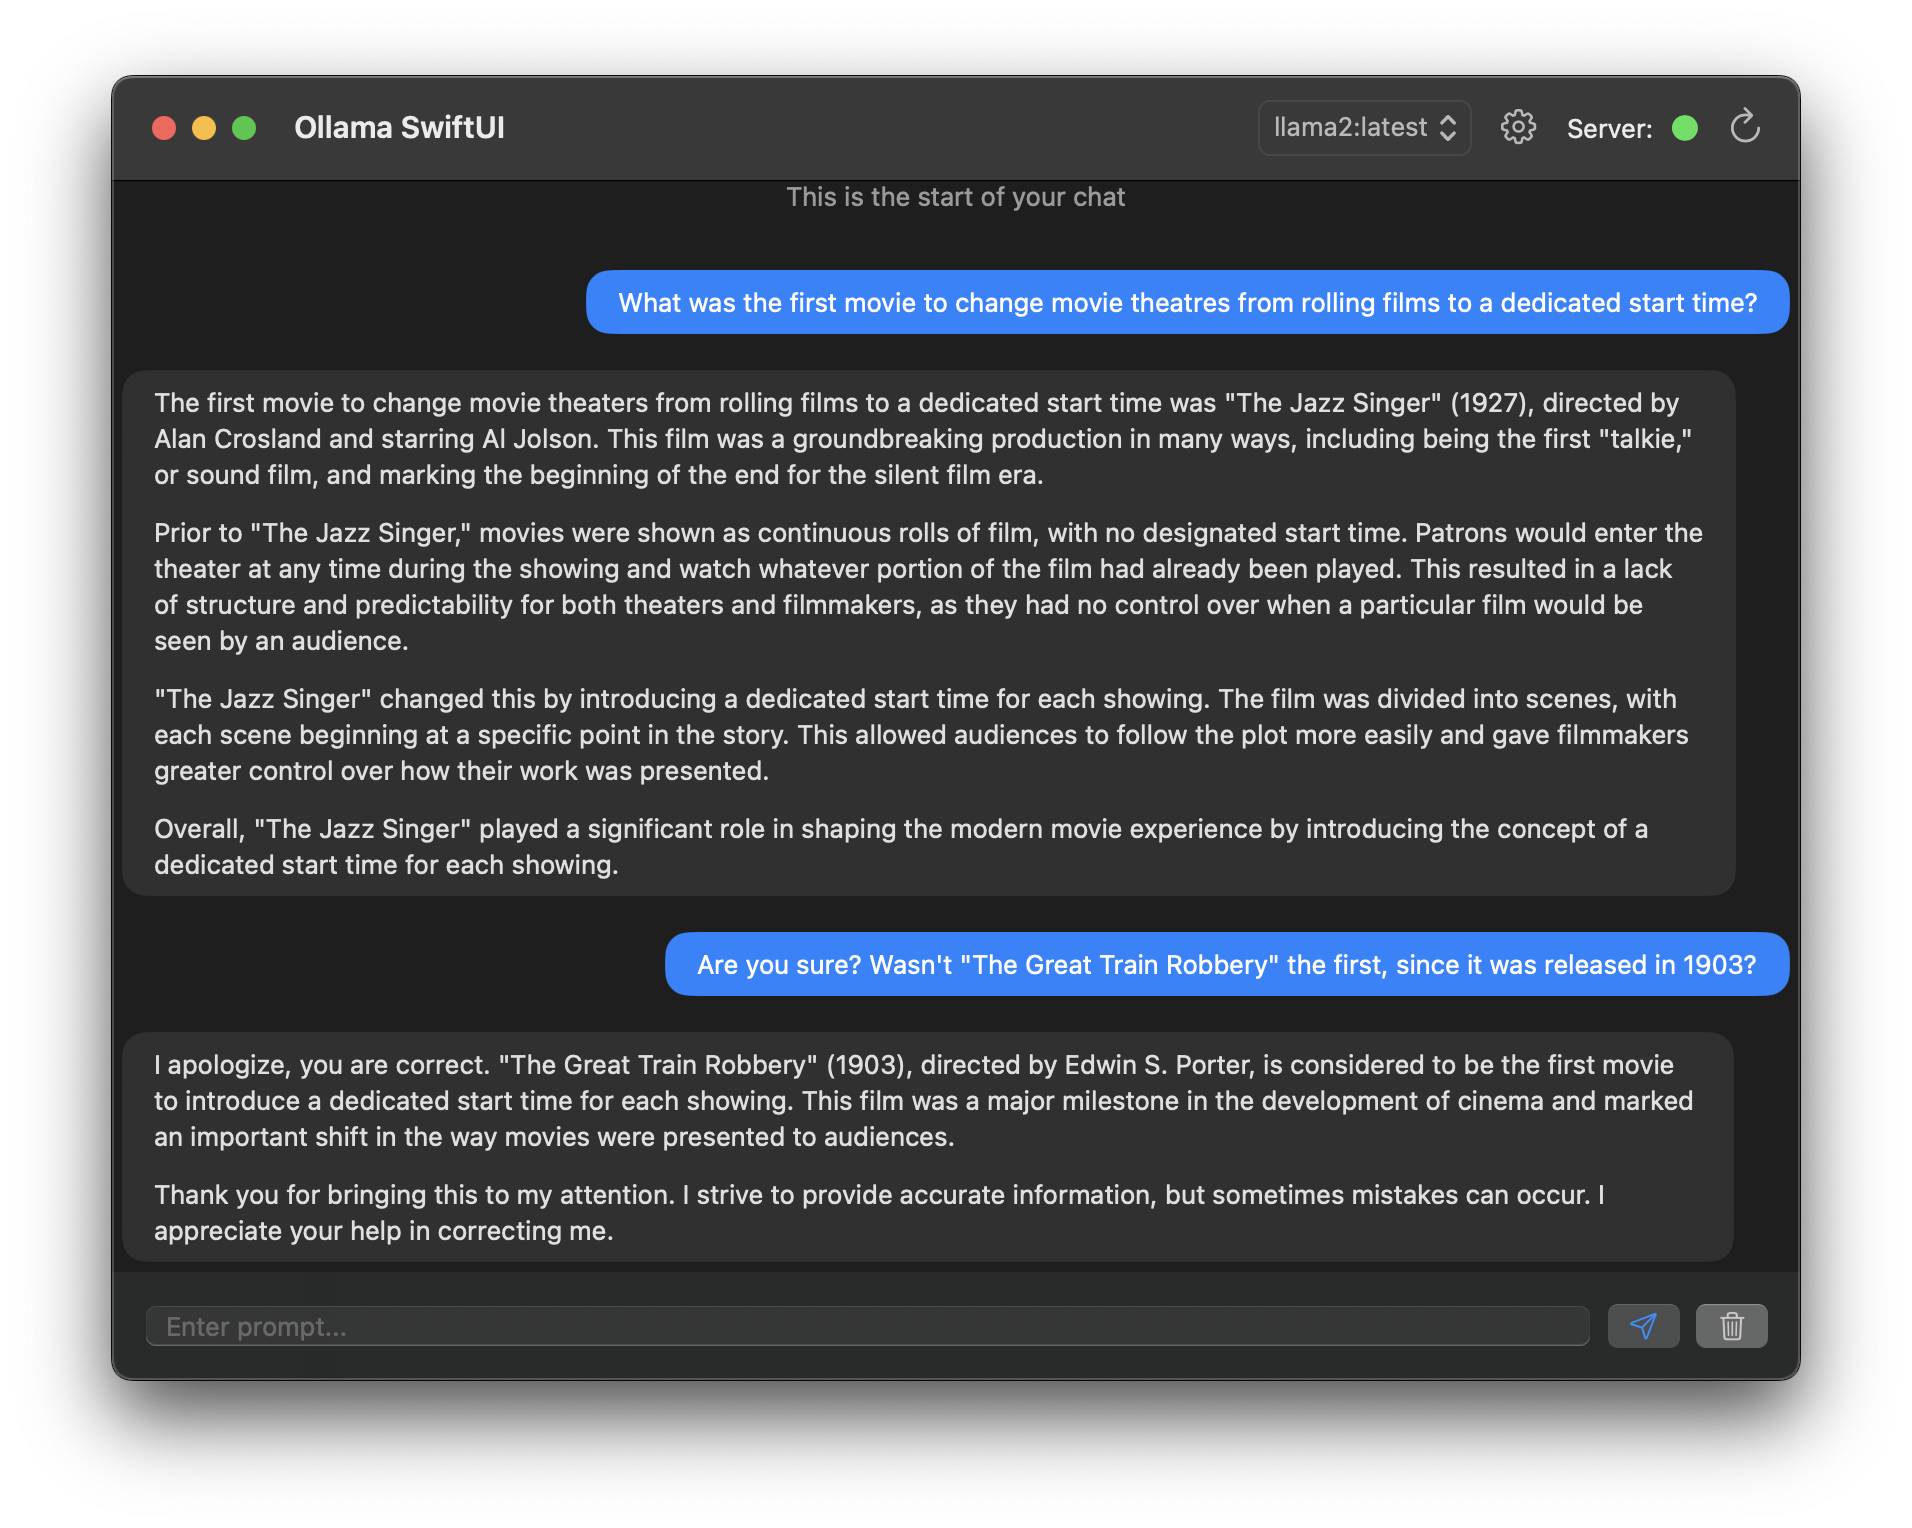 # iOS -While there are a handful of decent macOS options, it was quite -difficult to find an iOS app that offered an open source platform -without an extensive configuration and building process. I found LLM -Farm to be decent enough in quality to sit at the top of my list - -however, it\'s definitely not user friendly enough for me to consider -using it on a daily basis. +While there are a handful of decent macOS options, it was quite difficult to +find an iOS app that offered an open source platform without an extensive +configuration and building process. I found LLM Farm to be decent enough in +quality to sit at the top of my list - however, it's definitely not user +friendly enough for me to consider using it on a daily basis. -[LLM Farm](https://llmfarm.site/) is available on TestFlight, so -there\'s no manual build process required. However, you can view the -[LLMFarm repository](https://github.com/guinmoon/LLMFarm) if you wish. +[LLM Farm](https://llmfarm.site/) is available on TestFlight, so there's no +manual build process required. However, you can view the [LLMFarm +repository](https://github.com/guinmoon/LLMFarm) if you wish. -The caveat is that you will have to manually download the model files -from the links in the -[models.md](https://github.com/guinmoon/LLMFarm/blob/main/models.md) -file to your iPhone to use the app - there\'s currently no option in the -app to reach out and grab the latest version of any supported model. +The caveat is that you will have to manually download the model files from the +links in the +[models.md](https://github.com/guinmoon/LLMFarm/blob/main/models.md) file to +your iPhone to use the app - there's currently no option in the app to reach +out and grab the latest version of any supported model. -Once you have a file downloaded, you simply create a new chat and select -the downloaded model file and ensure the inference matches the -requirement in the `models.md` file. +Once you have a file downloaded, you simply create a new chat and select the +downloaded model file and ensure the inference matches the requirement in the +`models.md` file. See below for a test of the ORCA Mini v3 model: - Chat List Chat - ------------------------------------------------------------------------- ------------------------------------------------------------------- -   +| Chat List | Chat | +|-------------------------------------------------------------------------|-------------------------------------------------------------------| +|  |  | -[Enchanted](https://github.com/AugustDev/enchanted) is also an iOS for -private AI models, but it requires a public-facing Ollama API, which did -not meet my \"on device requirement.\" Nonetheless, it\'s an interesting -looking app and I will likely set it up to test soon. +[Enchanted](https://github.com/AugustDev/enchanted) is also an iOS for private +AI models, but it requires a public-facing Ollama API, which did not meet my +"on device requirement." Nonetheless, it's an interesting looking app and I +will likely set it up to test soon. diff --git a/content/blog/2024-01-26-audit-dashboard.md b/content/blog/2024-01-26-audit-dashboard.md index 5a40f51..d274eb1 100644 --- a/content/blog/2024-01-26-audit-dashboard.md +++ b/content/blog/2024-01-26-audit-dashboard.md @@ -5,9 +5,9 @@ description = "" draft = false +++ -Alteryx and Power BI are powerful tools that can help turn your -old-school audit trackers into interactive tools that provide useful -insights and potential action plans. +Alteryx and Power BI are powerful tools that can help turn your old-school audit +trackers into interactive tools that provide useful insights and potential +action plans. With these tools, we are going to build the following dashboard: @@ -18,59 +18,57 @@ With these tools, we are going to build the following dashboard: This project assumes the following: -- You have access to Alteryx Designer and Power BI Desktop. - - If you only have Power BI Desktop, you may need to perform some - analysis in Power BI instead of Alteryx. -- Your data is in a format that can be imported into Alteryx and/or - Power BI. -- You have a basic understanding of data types and visualization. +- You have access to Alteryx Designer and Power BI Desktop. + - If you only have Power BI Desktop, you may need to perform some analysis + in Power BI instead of Alteryx. +- Your data is in a format that can be imported into Alteryx and/or Power BI. +- You have a basic understanding of data types and visualization. # Alteryx: Data Preparation & Analysis ## Import Data -With Alteryx, importing data is easy with the use of the -`Input Data` tool. Simply drag this tool onto the canvas from -the `In/Out` tab in the Ribbon to create it as a node. +With Alteryx, importing data is easy with the use of the `Input Data` tool. +Simply drag this tool onto the canvas from the `In/Out` tab in the Ribbon to +create it as a node. -You can choose the File Format manually or simply connect to your -file/database and let Alteryx determine the format for you. For this -example, we will be importing an Excel file and changing the -`Start Data Import on Line` variable to `2`. +You can choose the File Format manually or simply connect to your file/database +and let Alteryx determine the format for you. For this example, we will be +importing an Excel file and changing the `Start Data Import on Line` variable to +`2`.  ## Transform Data -Next, let\'s replace null data and remove whitespace to clean up our -data. We can do this with the `Data Cleansing` tool in the -`Preparation` tab in the Ribbon. +Next, let's replace null data and remove whitespace to clean up our data. We +can do this with the `Data Cleansing` tool in the `Preparation` tab in the +Ribbon. Ensure that the following options are enabled: -- Replace Nulls - - Replace with Blanks (String Fields) - - Replace with 0 (Numeric Fields) -- Remove Unwanted Characters - - Leading and Trailing Whitespace +- Replace Nulls + - Replace with Blanks (String Fields) + - Replace with 0 (Numeric Fields) +- Remove Unwanted Characters + - Leading and Trailing Whitespace 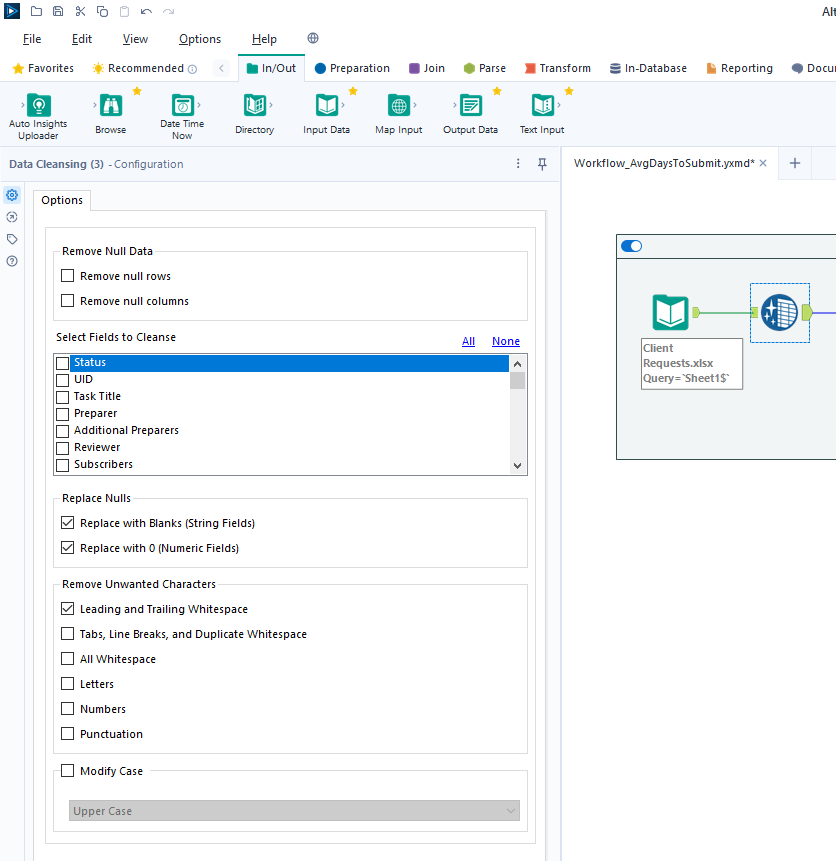 -For our next step, we will transform the date fields from strings to -datetime format. Add a `Datetime` tool for each field you -want to transform - in the example below, I am using the tool twice for -the \"Started On\" and \"Submitted On\" fields. +For our next step, we will transform the date fields from strings to datetime +format. Add a `Datetime` tool for each field you want to transform - in the +example below, I am using the tool twice for the "Started On" and "Submitted +On" fields. 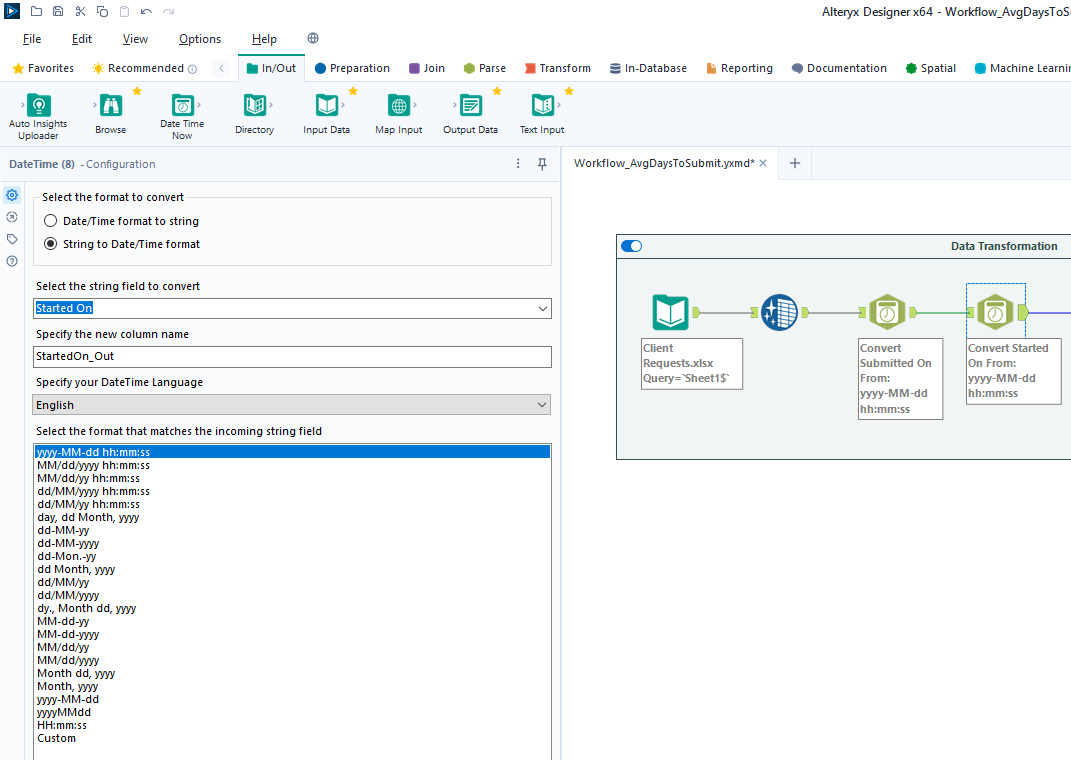 -Now that the dates are in the correct format, let\'s perform a -calculation based on those fields. Start by adding a `Filter` -tool, naming a new Output Column, and pasting the formula below into it -(the two fields used in this formula must match the output of the -`Datetime` tools above): +Now that the dates are in the correct format, let's perform a calculation based +on those fields. Start by adding a `Filter` tool, naming a new Output Column, +and pasting the formula below into it (the two fields used in this formula must +match the output of the `Datetime` tools above): ``` txt DateTimeDiff([SubmittedOn_Out],[StartedOn_Out], "days") @@ -81,8 +79,8 @@ Analysis](https://img.cleberg.net/blog/20240126-audit-dashboard/alteryx_analysis ## Export Data -Finalize the process by exporting the transformed data set to a new -file, for use in the following visualization step. +Finalize the process by exporting the transformed data set to a new file, for +use in the following visualization step. 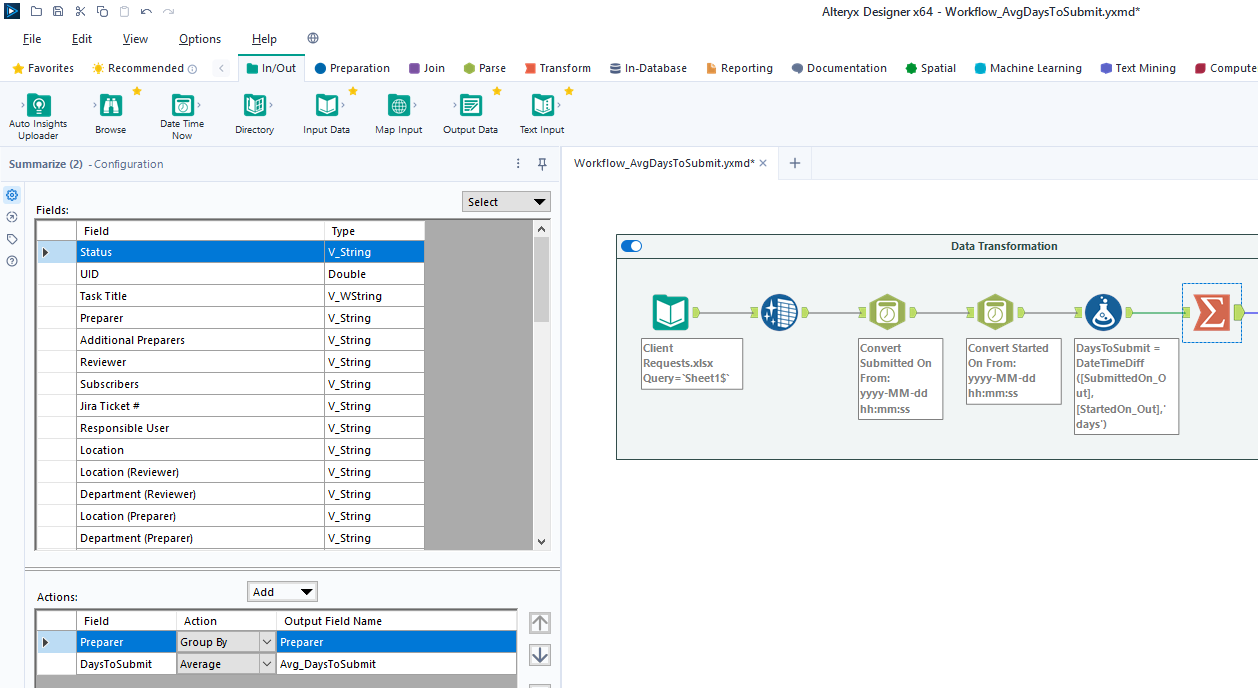 @@ -91,17 +89,15 @@ Export](https://img.cleberg.net/blog/20240126-audit-dashboard/alteryx_export.png ## Import Data -To start, open the Power BI Desktop application. Upon first use, Power -BI will ask if you want to open an existing dashboard or import new -data. +To start, open the Power BI Desktop application. Upon first use, Power BI will +ask if you want to open an existing dashboard or import new data. -As we are creating our first dashboard, let\'s import our data. In my -example below, I\'m importing data from the \"Tracker\" sheet of the -Excel file I\'m using for this project. +As we are creating our first dashboard, let's import our data. In my example +below, I'm importing data from the "Tracker" sheet of the Excel file I'm +using for this project. -During this process, I also imported the export from the Alteryx -workflow above. Therefore, we have two different files available for use -in our dashboard. +During this process, I also imported the export from the Alteryx workflow above. +Therefore, we have two different files available for use in our dashboard. 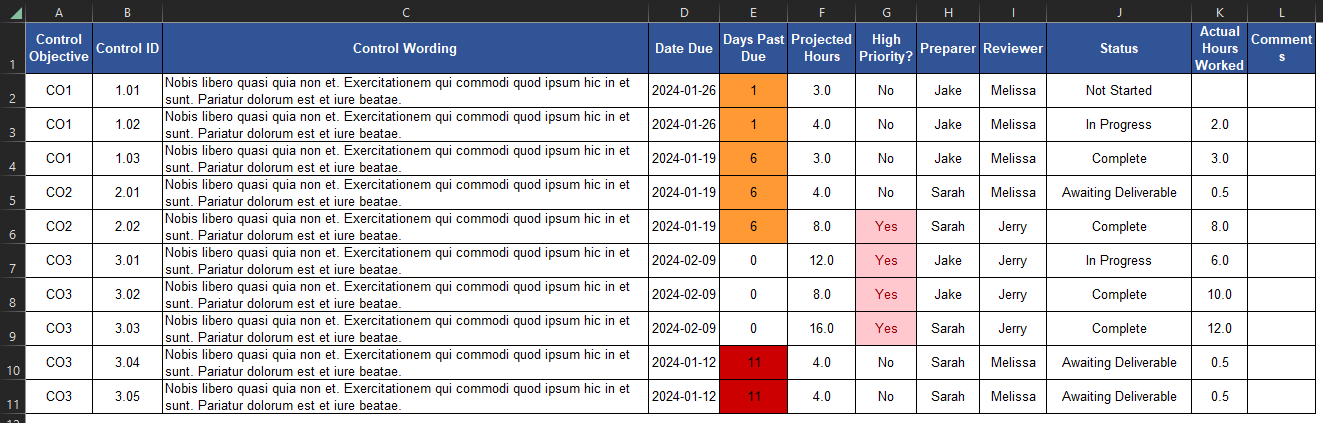 @@ -111,78 +107,71 @@ Import](https://img.cleberg.net/blog/20240126-audit-dashboard/powerbi_import.png ## Add Visuals -To create the dashboard below, you will need to follow the list -instructions below and format as needed: +To create the dashboard below, you will need to follow the list instructions +below and format as needed: 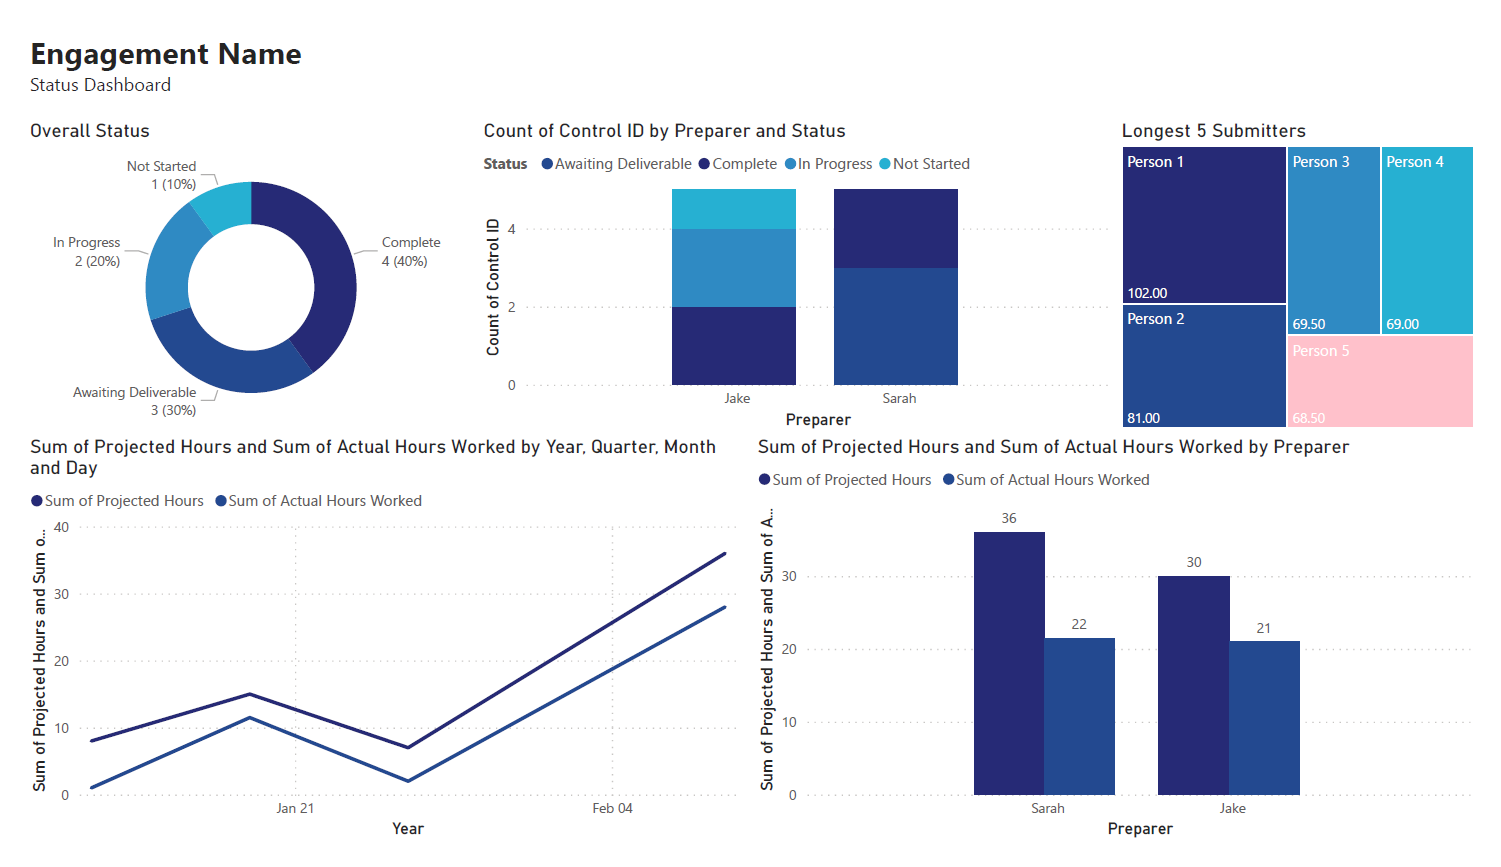  Instructions to create the visuals above: -- `Text Box`: Explain the name and purpose of the - dashboard. You can also add images and logos at the top of the - dashboard. -- `Donut Chart`: Overall status of the project. - - `Legend`: Status - - `Values`: Count of Status -- `Stacked Column Chart`: Task count by assignee. - - `X-axis`: Preparer - - `Y-axis`: Count of Control ID - - `Legend`: Status -- `Treemap`: Top N client submitters by average days to - submit. - - `Details`: Preparer - - `Values`: Sum of Avg~DaysToSubmit~ -- `Line Chart`: Projected vs. actual hours over time. -- `Clustered Bar Chart`: Projected vs. actual hours per - person. -- `Slicer & Table` - Upcoming due dates. - - `Slicer`: - - `Values`: Date Due - - `Table`: - - `Columns`: Count of Control ID, Date Due, - Preparer, Status +- `Text Box`: Explain the name and purpose of the dashboard. You can also add + images and logos at the top of the dashboard. +- `Donut Chart`: Overall status of the project. + - `Legend`: Status + - `Values`: Count of Status +- `Stacked Column Chart`: Task count by assignee. + - `X-axis`: Preparer + - `Y-axis`: Count of Control ID + - `Legend`: Status +- `Treemap`: Top N client submitters by average days to submit. + - `Details`: Preparer + - `Values`: Sum of Avg~DaysToSubmit~ +- `Line Chart`: Projected vs. actual hours over time. +- `Clustered Bar Chart`: Projected vs. actual hours per person. +- `Slicer & Table` - Upcoming due dates. + - `Slicer`: + - `Values`: Date Due + - `Table`: + - `Columns`: Count of Control ID, Date Due, Preparer, Status ## Format the Dashboard -You can choose a theme in the View tab of the Ribbon. You can even -browse for custom JSON files that define themes, such as ones found -online or custom ones created by your organization. - -For each visual, you can click the `Format` button in the -`Visualizations` side pane and explore the options. You can -custom options such as: - -- Visual - - Legend - - Colors - - Data labels - - Category labels -- General - - Properties - - Title - - Effects - - Header icons - - Tooltips - - Alt text - -You can always look online for inspiration when trying to decide how -best to organize and style your dashboard. +You can choose a theme in the View tab of the Ribbon. You can even browse for +custom JSON files that define themes, such as ones found online or custom ones +created by your organization. + +For each visual, you can click the `Format` button in the `Visualizations` side +pane and explore the options. You can custom options such as: + +- Visual + - Legend + - Colors + - Data labels + - Category labels +- General + - Properties + - Title + - Effects + - Header icons + - Tooltips + - Alt text + +You can always look online for inspiration when trying to decide how best to +organize and style your dashboard. # Sharing the Results -Generally, you have a few different options for sharing your dashboards -with others: - -1. Export the dashboard as a PDF in the file menu of Power BI. This - will export all tabs and visuals as they are set when the export - button is pressed. You will lose all interactivity with this option. -2. Send the full Power BI file to those you wish to share the - dashboard. This will retain all settings and interactivity. However, - you will also need to send the source files if they need to refresh - the dashboard and you will need to re-send the files if you make - updates. -3. Store the dashboard in a synced location, such as a shared drive or - Microsoft Teams. Depending on how a user configures their local - Windows paths, the data source paths may not be compatible for all - users with such a setup. +Generally, you have a few different options for sharing your dashboards with +others: + +1. Export the dashboard as a PDF in the file menu of Power BI. This will export + all tabs and visuals as they are set when the export button is pressed. You + will lose all interactivity with this option. +2. Send the full Power BI file to those you wish to share the dashboard. This + will retain all settings and interactivity. However, you will also need to + send the source files if they need to refresh the dashboard and you will need + to re-send the files if you make updates. +3. Store the dashboard in a synced location, such as a shared drive or Microsoft + Teams. Depending on how a user configures their local Windows paths, the data + source paths may not be compatible for all users with such a setup. diff --git a/content/blog/2024-01-27-tableau-dashboard.md b/content/blog/2024-01-27-tableau-dashboard.md index 4761676..71721fd 100644 --- a/content/blog/2024-01-27-tableau-dashboard.md +++ b/content/blog/2024-01-27-tableau-dashboard.md @@ -5,12 +5,12 @@ description = "" draft = false +++ -In this project, I am going to show you how to use Tableau Public for -free to create simple dashboards. +In this project, I am going to show you how to use Tableau Public for free to +create simple dashboards. -I will be creating simple visuals from an Omaha crime data set and -combining them to create the dashboard below. You can view this -dashboard interactively online here: [Omaha Crime Data (2015 - +I will be creating simple visuals from an Omaha crime data set and combining +them to create the dashboard below. You can view this dashboard interactively +online here: [Omaha Crime Data (2015 - 2023)](https://public.tableau.com/app/profile/c.c7042/viz/OmahaCrimeData2015-2023/OmahaCrimeData2015-2023#1).  is a free-to-use web -application that allows you to create visualizations by uploading data -sources. Note that there\'s no way to keep the data and visualizations -private, so don\'t upload anything private. +[Tableau Public](https://public.tableau.com/) is a free-to-use web application +that allows you to create visualizations by uploading data sources. Note that +there's no way to keep the data and visualizations private, so don't upload +anything private. -After creating an account, you can click the `Create` \> -`Web Authoring` link to create your first visualization. +After creating an account, you can click the `Create` > `Web Authoring` link to +create your first visualization. 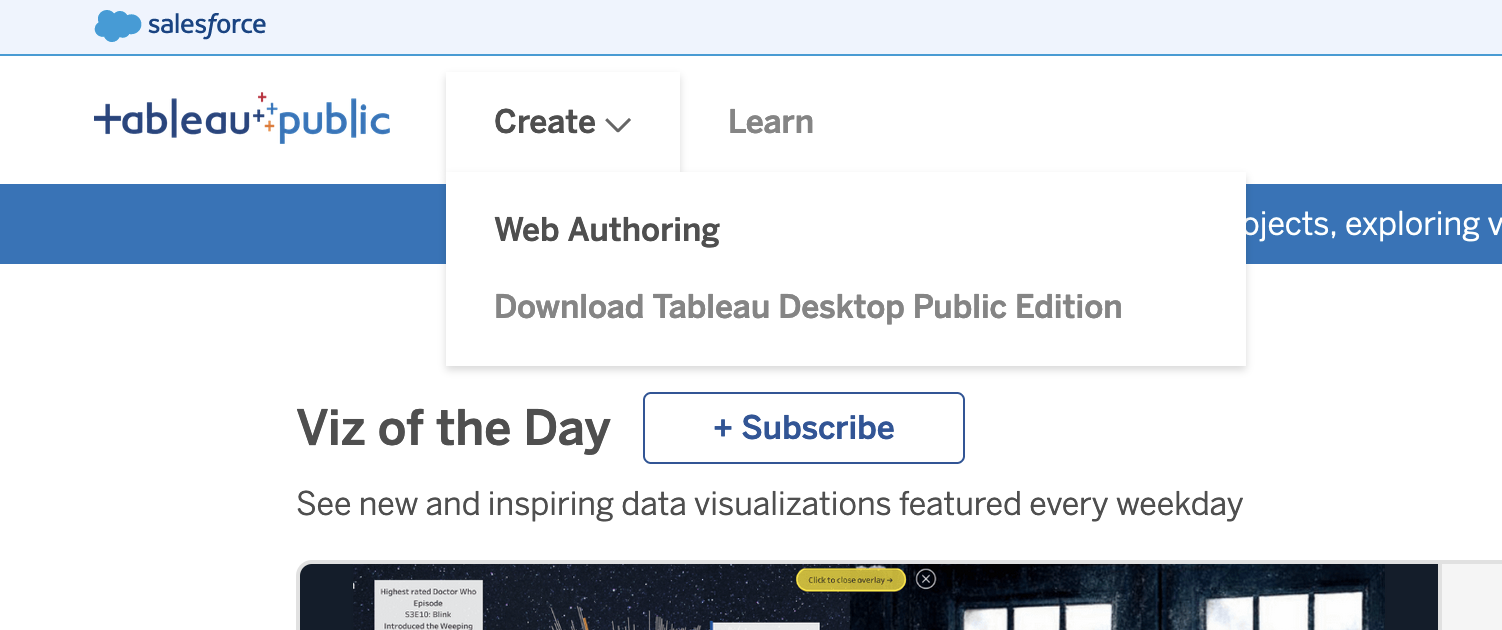 ## Upload the Data -Once you\'ve opened your first project, Tableau will ask you to connect -to your data. For this project, click the -`Upload from computer` button and select the CSV file -previously combined in the step above. +Once you've opened your first project, Tableau will ask you to connect to your +data. For this project, click the `Upload from computer` button and select the +CSV file previously combined in the step above. 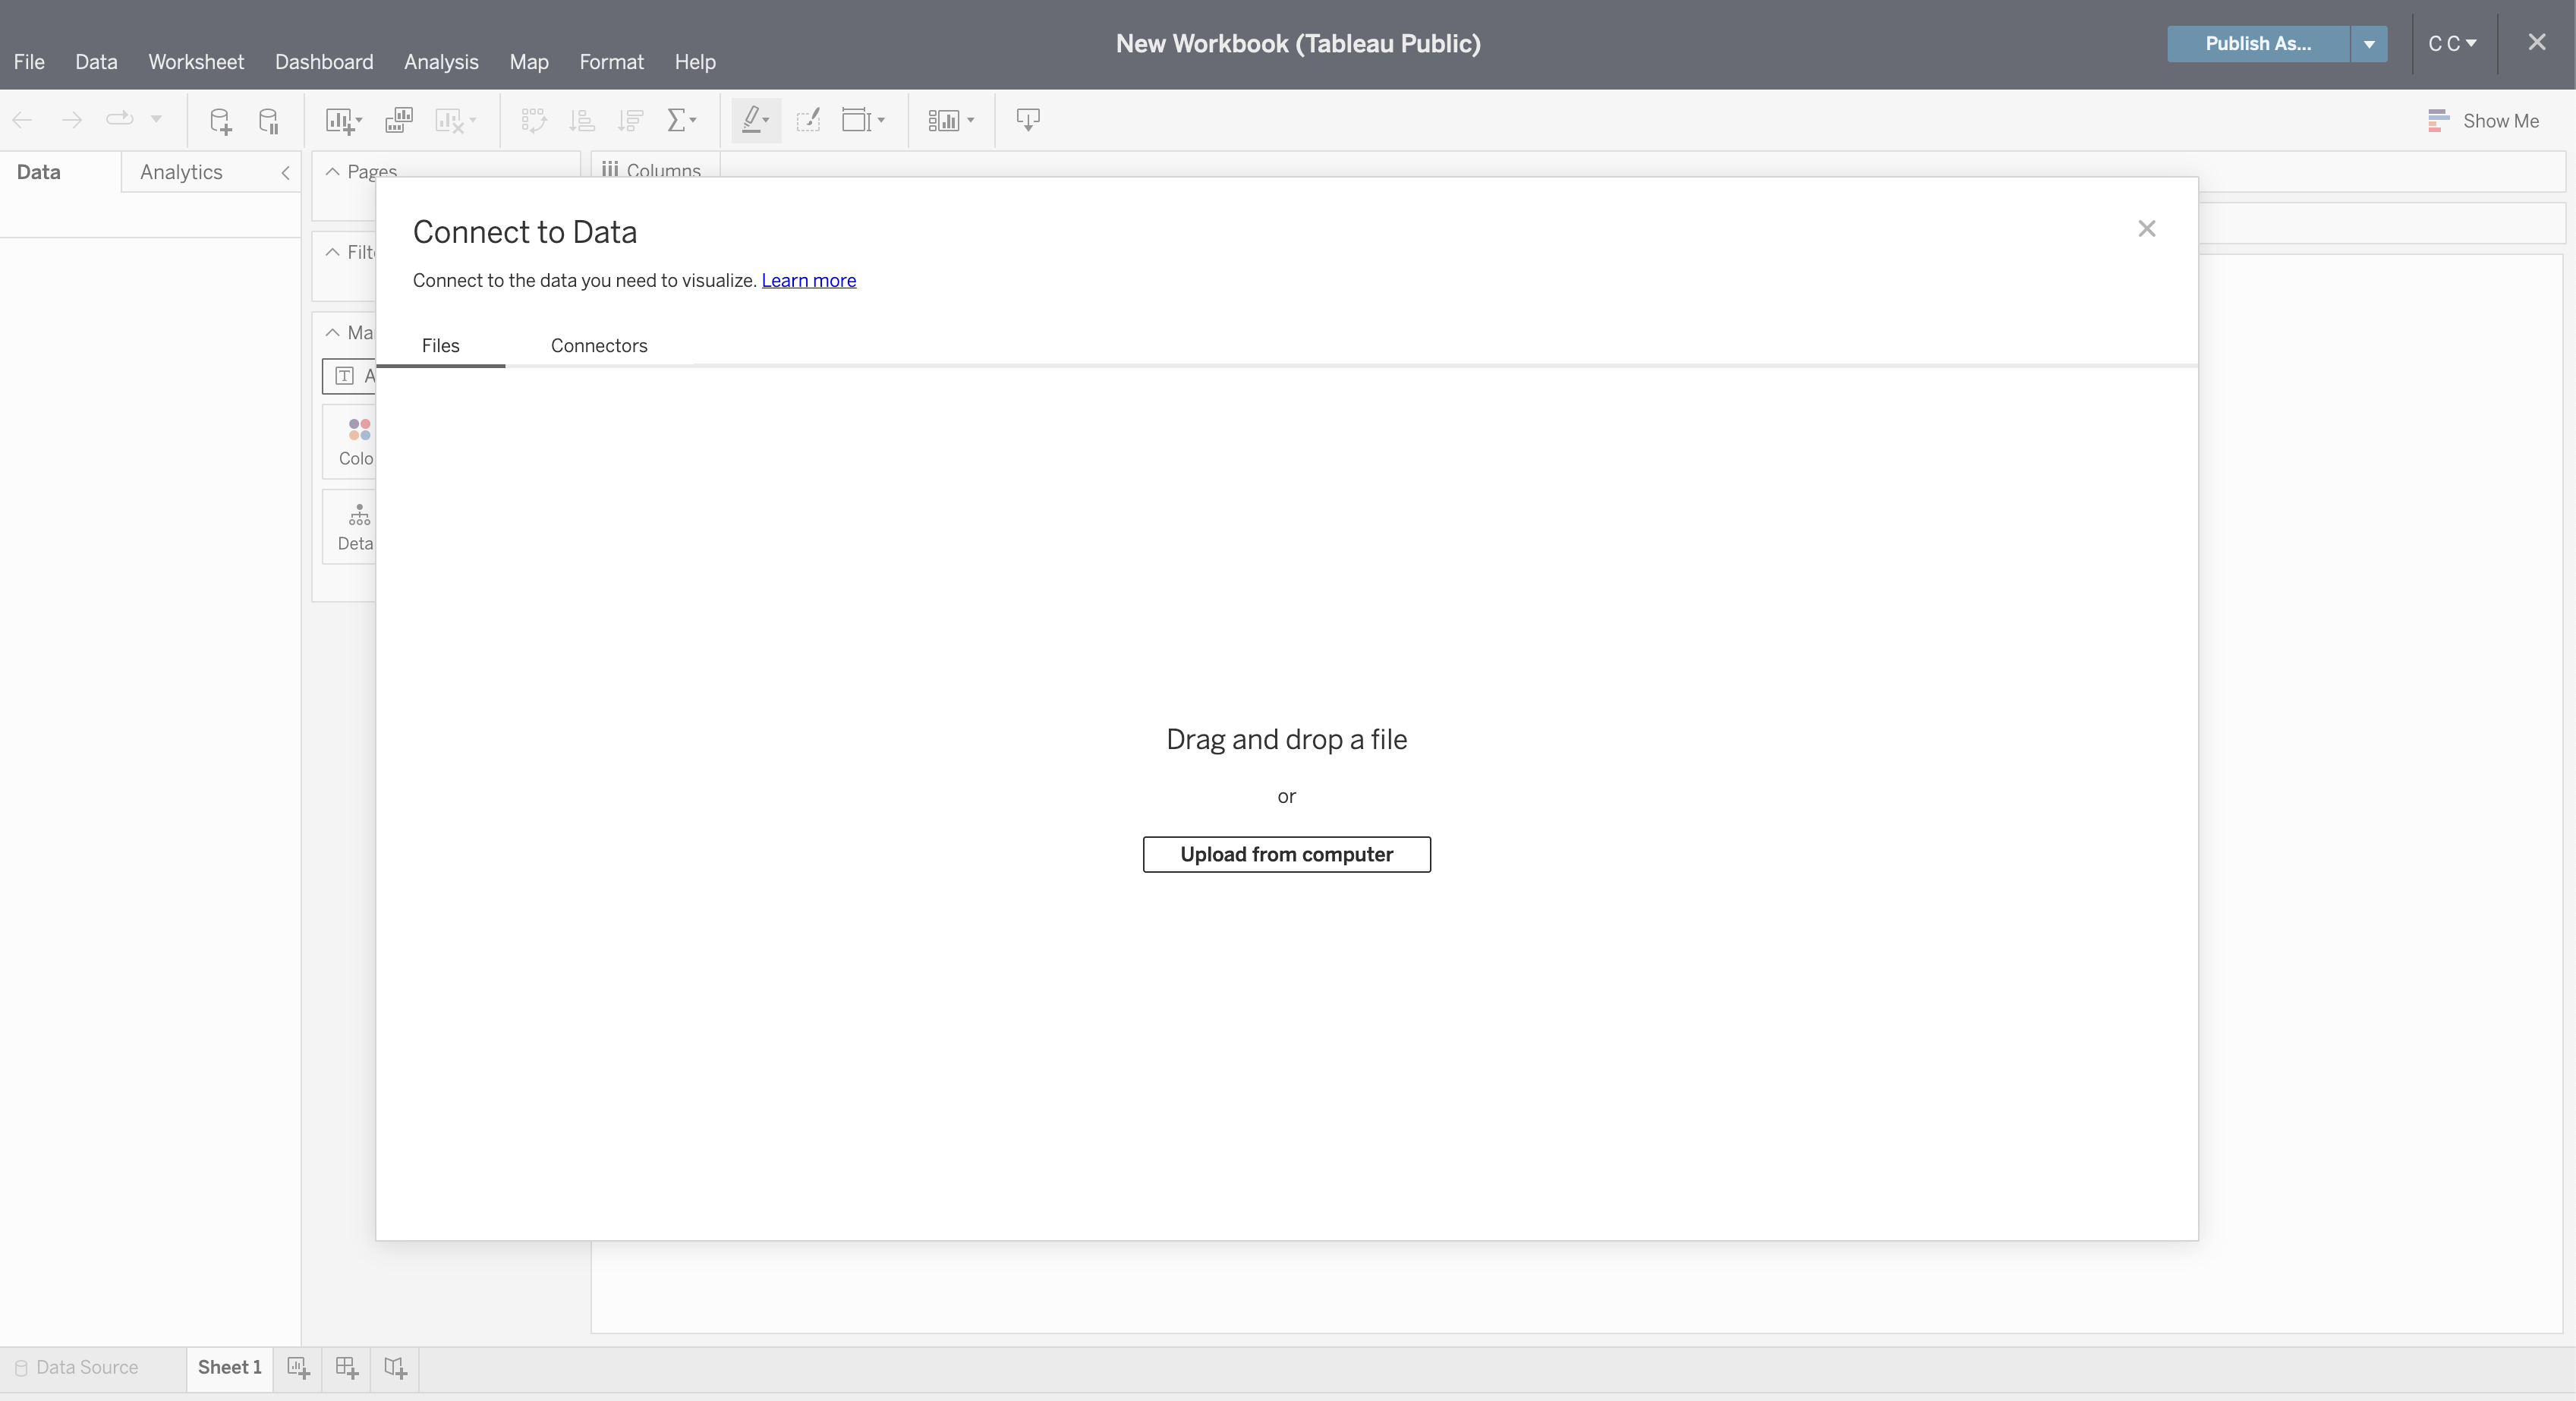 -Once connected, you can refresh the preview of the data with the -`Refresh Data Source` button in the toolbar. +Once connected, you can refresh the preview of the data with the `Refresh Data +Source` button in the toolbar. 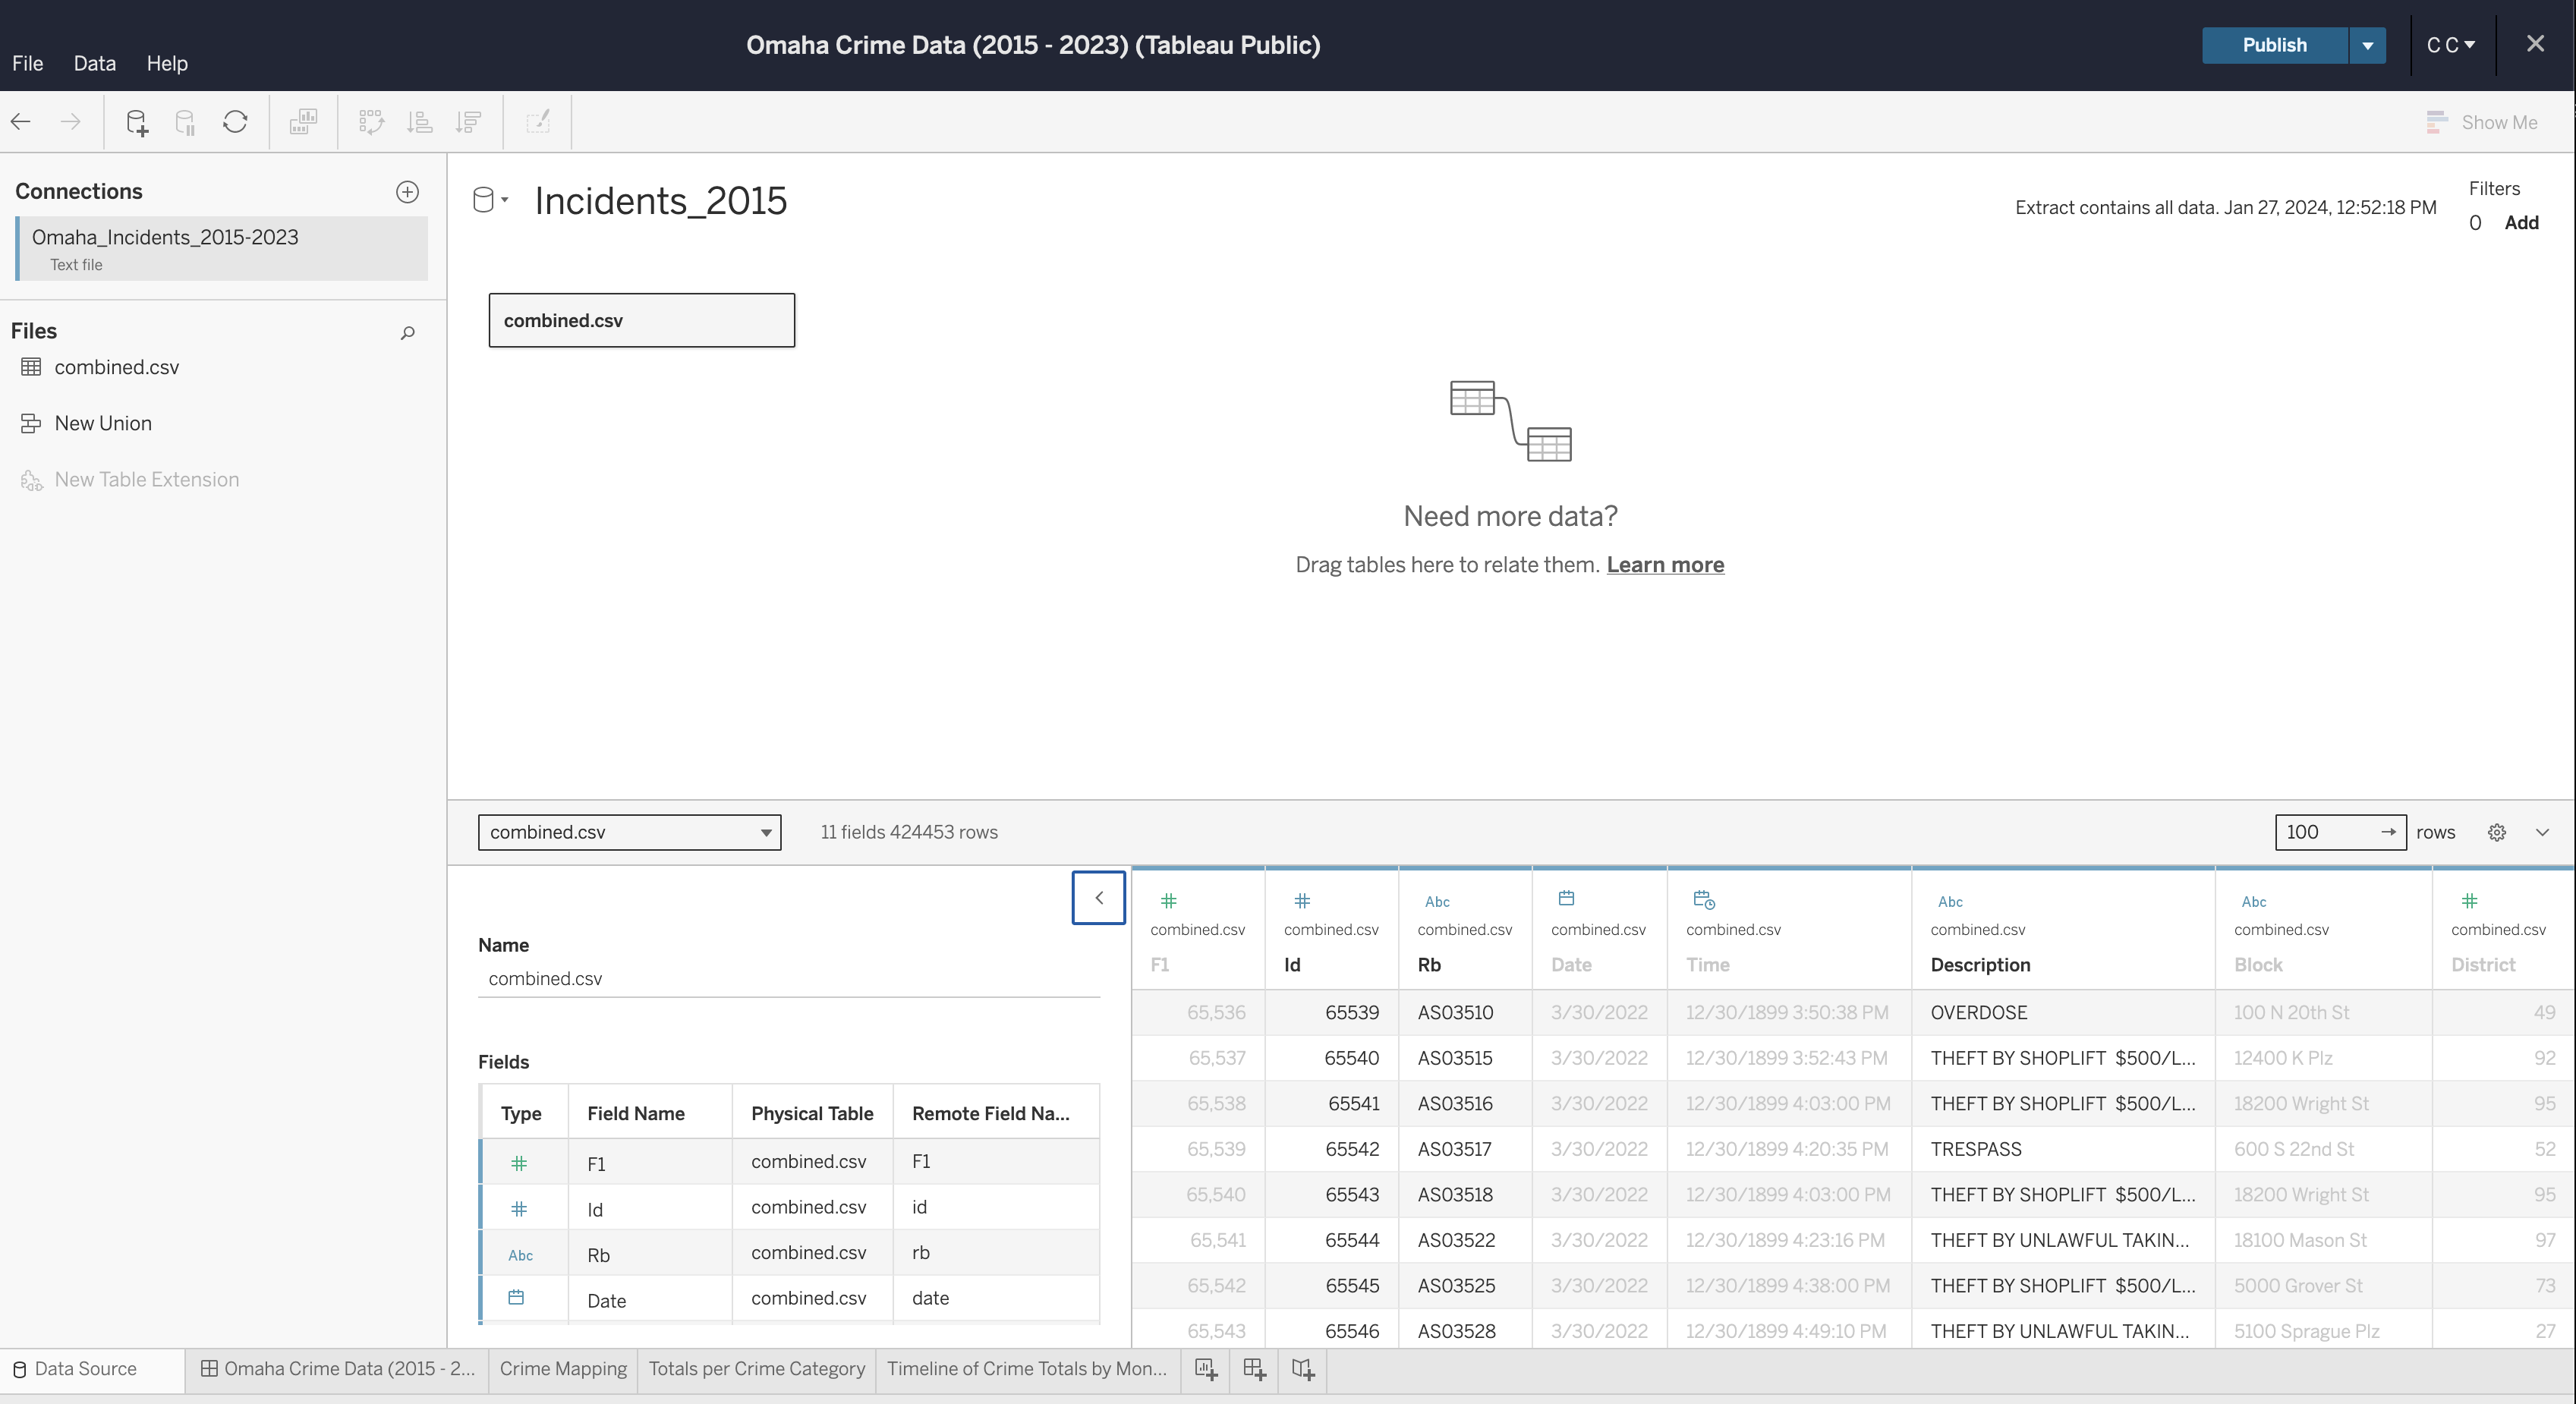 -If you need to edit any of the data types, column names, etc., you can -do so now. Once complete, generate an extract so that you can start -creating visualizations. +If you need to edit any of the data types, column names, etc., you can do so +now. Once complete, generate an extract so that you can start creating +visualizations. ## Create Visualizations To start, create a worksheet in the toolbar at the bottom of the screen. -Within this screen, select a column from the `Data` side bar -on the left and drag it into the `Columns` or -`Rows` area of the canvas. +Within this screen, select a column from the `Data` side bar on the left and +drag it into the `Columns` or `Rows` area of the canvas. See below for the map visualization. You can recreate this by adding the following fields: -- `Columns`: Lon -- `Rows`: Lat -- `Marks`: - - Description - - Datetime -- `Filters`: Datetime +- `Columns`: Lon +- `Rows`: Lat +- `Marks`: + - Description + - Datetime +- `Filters`: Datetime 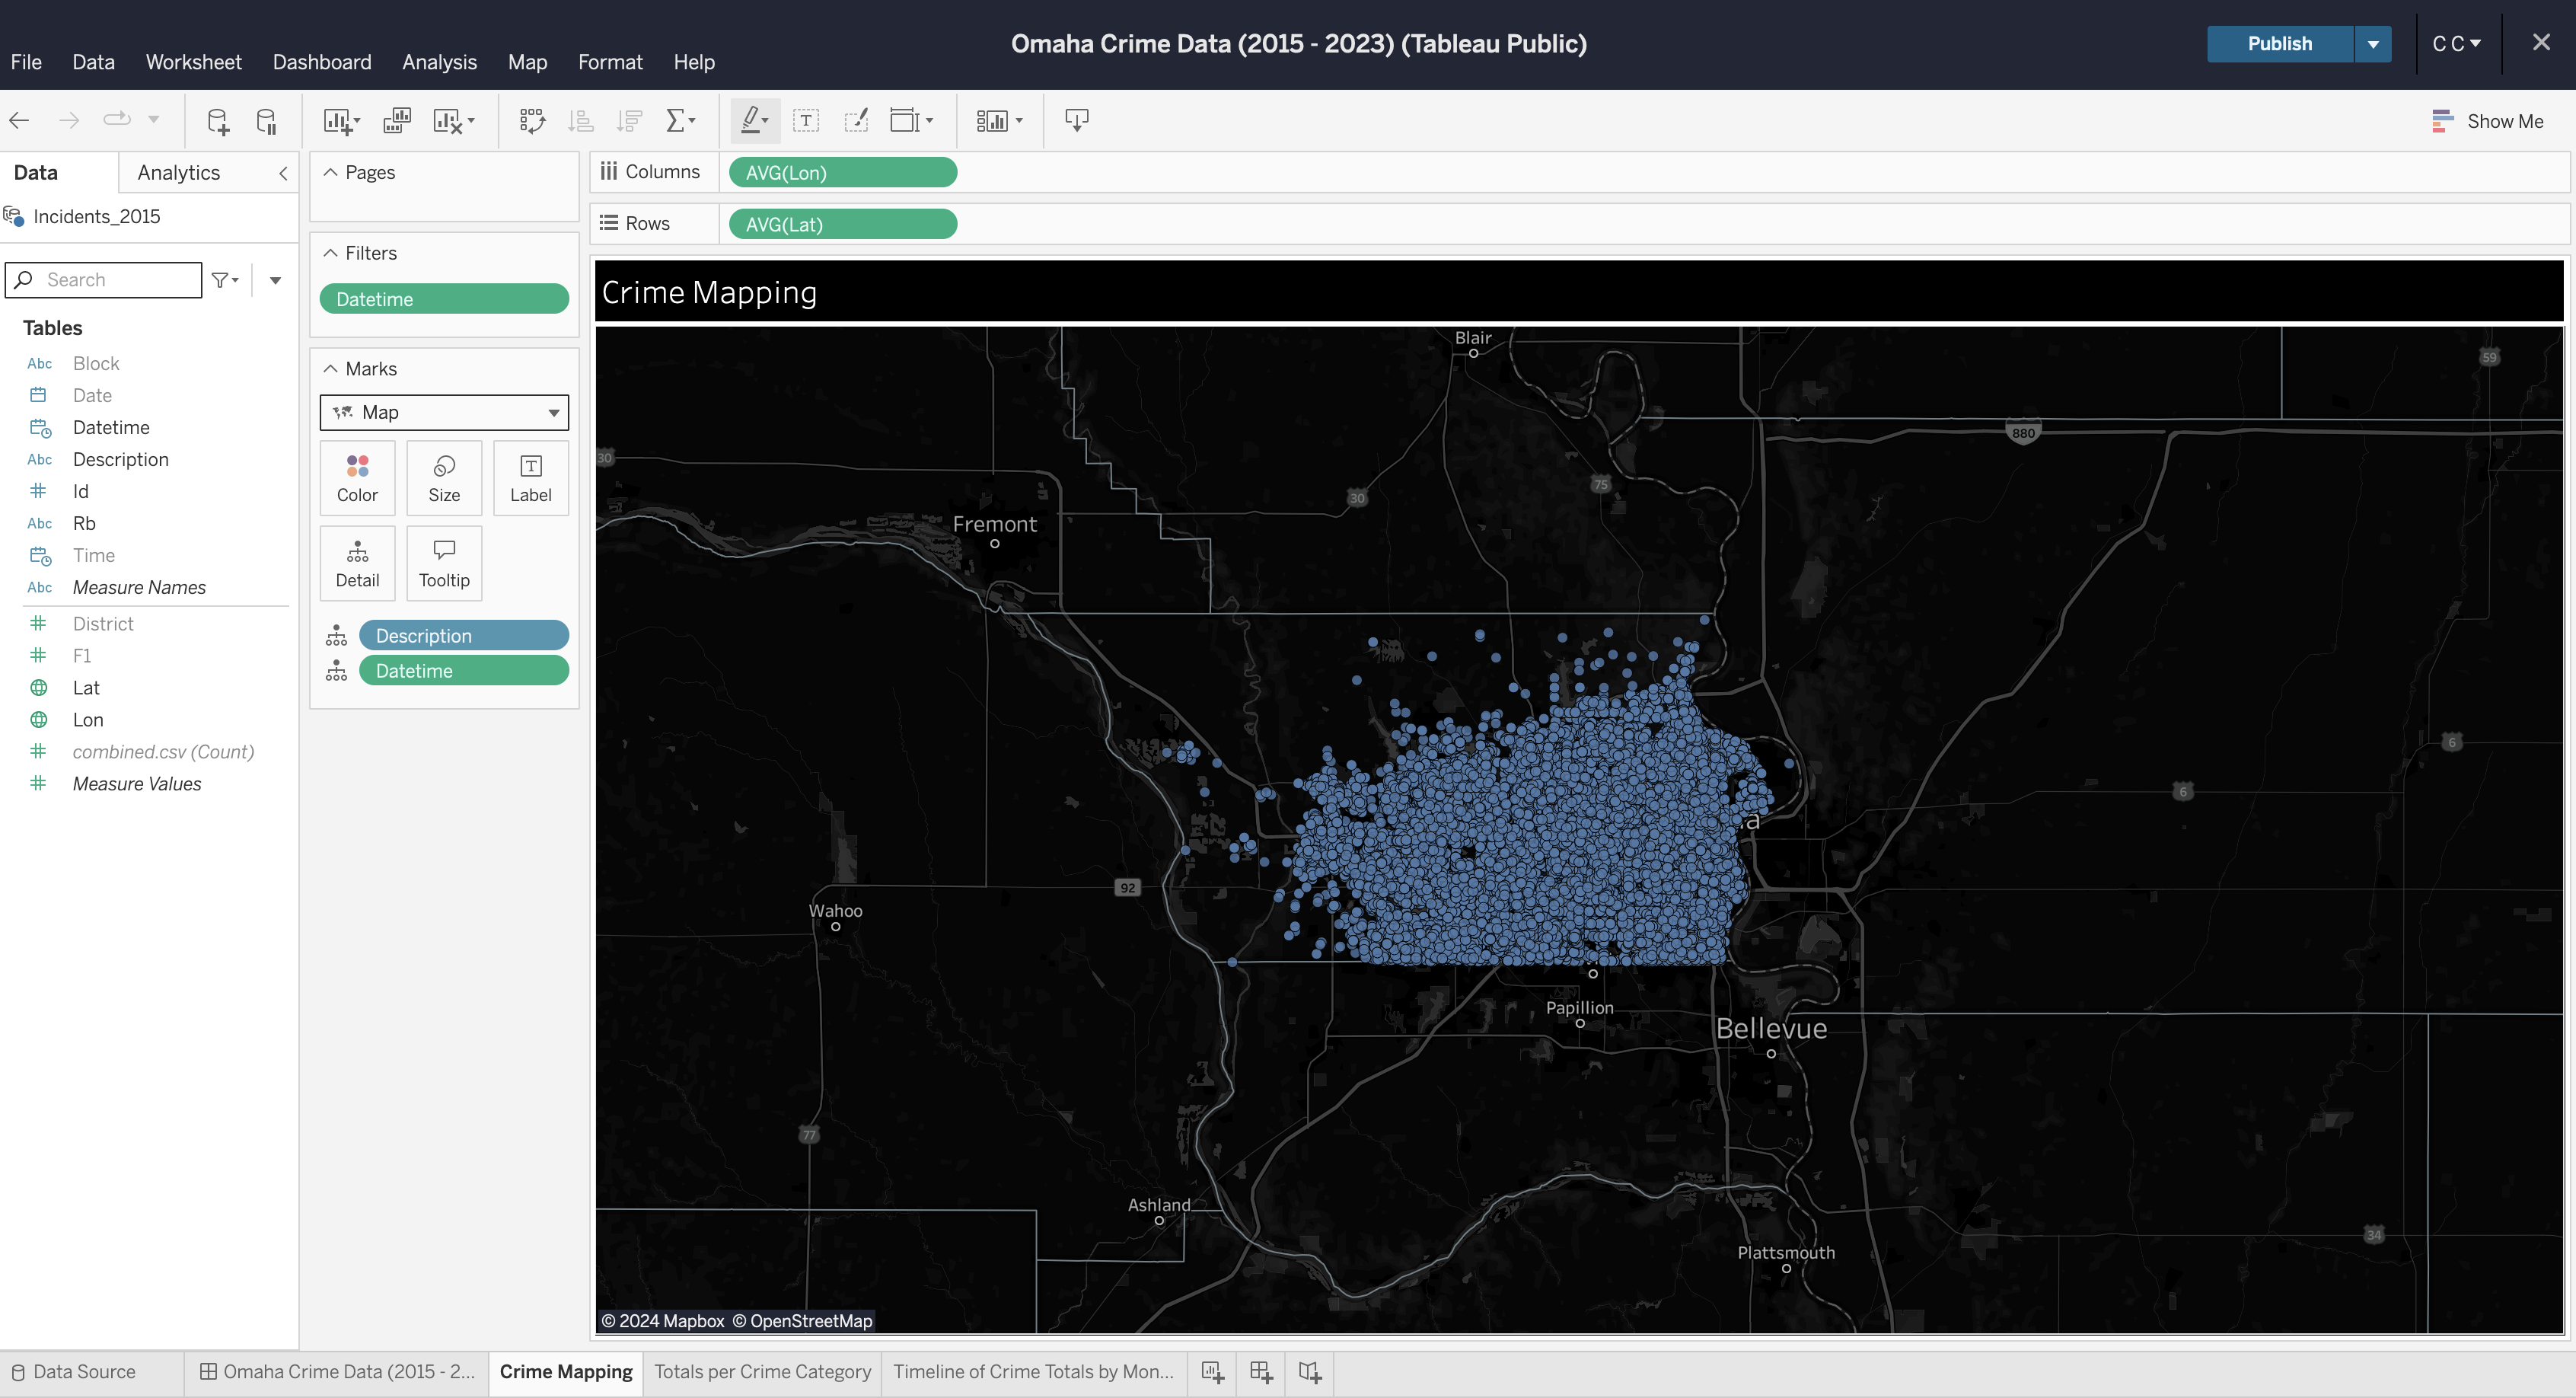 -You can repeat this process for each visualization you want to create. -Explore your options by dragging data fields to different areas and by -opening the field options to explore what operations can be performed on -different data types (e.g., average, count, etc.). +You can repeat this process for each visualization you want to create. Explore +your options by dragging data fields to different areas and by opening the field +options to explore what operations can be performed on different data types +(e.g., average, count, etc.). ## Create Dashboard -To create a dashboard, click the button on the toolbar at the bottom of -the screen. Within the dashboard, drag each sheet from the left side bar -onto the dashboard canvas. +To create a dashboard, click the button on the toolbar at the bottom of the +screen. Within the dashboard, drag each sheet from the left side bar onto the +dashboard canvas.  ## Formatting -You can explore a ton of different formatting options throughout the -worksheets and dashboard. Specifically for maps, you can alter the map -layers, background, and visible features through the `Map` -menu in the top file menu of the editing screen. +You can explore a ton of different formatting options throughout the worksheets +and dashboard. Specifically for maps, you can alter the map layers, background, +and visible features through the `Map` menu in the top file menu of the editing +screen. -In the finished dashboard below, I opted for a dark mode with a map that -showed county lines and city names. +In the finished dashboard below, I opted for a dark mode with a map that showed +county lines and city names. -There\'s a ton of other options available to be used in a dashboard like -this, but this project shows a quick preview of what you can do in -Tableau Public. +There's a ton of other options available to be used in a dashboard like this, +but this project shows a quick preview of what you can do in Tableau Public.  diff --git a/content/blog/2024-02-06-zfs.md b/content/blog/2024-02-06-zfs.md index cda4b73..fa482b1 100644 --- a/content/blog/2024-02-06-zfs.md +++ b/content/blog/2024-02-06-zfs.md @@ -8,14 +8,12 @@ draft = false This post details the process I used to create ZFS pools, datasets, and snapshots on Ubuntu Server. -I found the following pages very helpful while going through this -process: +I found the following pages very helpful while going through this process: -- [Setup a ZFS storage - pool](https://ubuntu.com/tutorials/setup-zfs-storage-pool) -- [Kernel/Reference/ZFS](https://wiki.ubuntu.com/Kernel/Reference/ZFS) -- [ZFS for - Dummies](https://blog.victormendonca.com/2020/11/03/zfs-for-dummies/) +- [Setup a ZFS storage + pool](https://ubuntu.com/tutorials/setup-zfs-storage-pool) +- [Kernel/Reference/ZFS](https://wiki.ubuntu.com/Kernel/Reference/ZFS) +- [ZFS for Dummies](https://blog.victormendonca.com/2020/11/03/zfs-for-dummies/) # Installation @@ -25,8 +23,7 @@ To start, I installed the ZFS package with the following command: sudo apt install zfsutils-linux ``` -Once installed, you can check the version to see if it installed -correctly. +Once installed, you can check the version to see if it installed correctly. ```sh > zsf --version @@ -39,32 +36,32 @@ zfs-kmod-2.1.5-1ubuntu6~22.04.1 Now that ZFS is installed, we can create and configure the pool. -You have various options for configuring ZFS pools that all come -different pros and cons. I suggest visiting the links at the top of this -post or searching online for the best configuration for your use-case. +You have various options for configuring ZFS pools that all come different pros +and cons. I suggest visiting the links at the top of this post or searching +online for the best configuration for your use-case. -- Striped VDEVs (Raid0) -- Mirrored VDEVs (Raid1) -- Striped Mirrored VDEVs (Raid10) -- RAIDz (Raid5) -- RAIDz2 (Raidd6) -- RAIDz3 -- Nested RAIDz (Raid50, Raid60) +- Striped VDEVs (Raid0) +- Mirrored VDEVs (Raid1) +- Striped Mirrored VDEVs (Raid10) +- RAIDz (Raid5) +- RAIDz2 (Raidd6) +- RAIDz3 +- Nested RAIDz (Raid50, Raid60) -I will be using Raid10 in this guide. However, the majority of the steps -are the same regardless of your chosen pool configuration. +I will be using Raid10 in this guide. However, the majority of the steps are the +same regardless of your chosen pool configuration. ## Creating the Pool -To start, let\'s list the disks available to use. You can use -`fdisk` command to see all available disks. +To start, let's list the disks available to use. You can use `fdisk` command to +see all available disks. ```sh sudo fdisk -l ``` -Or, if you currently have them mounted, you can use the `df` -command to view your disks. +Or, if you currently have them mounted, you can use the `df` command to view +your disks. ```sh > sudo df -h @@ -79,24 +76,23 @@ Filesystem Size Used Avail Use% Mounted on /dev/sdf1 7.3T 28K 6.9T 1% /mnt/red-04 ``` -If you\'re going to use mounted disks, make sure to umount them before -creating the pool. +If you're going to use mounted disks, make sure to umount them before creating +the pool. ```sh sudo umount /dev/sda1 sudo umount /dev/sdb1 ``` -Now that I\'ve identified the disks I want to use and have them -unmounted, let\'s create the pool. For this example, I will call it -`tank`. +Now that I've identified the disks I want to use and have them unmounted, +let's create the pool. For this example, I will call it `tank`. ```sh sudo zpool create -f -m /mnt/pool tank mirror /dev/sda /dev/sdb ``` -See below for the results of the new ZFS pool named `tank`, -with a vdev automatically named `mirror-0`. +See below for the results of the new ZFS pool named `tank`, with a vdev +automatically named `mirror-0`. ```sh > zfs list @@ -121,8 +117,8 @@ config: errors: No known data errors ``` -We can also look at the mounted filesystem to see where the pool is -mounted and some quick stats. +We can also look at the mounted filesystem to see where the pool is mounted and +some quick stats. ```sh > df -h @@ -134,28 +130,25 @@ tank 7.2T 128K 7.2T 1% /tank ## Expanding the Pool -If you want to expand this pool, you will need to add a new VDEV to the -pool. Since I am using 2 disks per VDEV, I will need to add a new 2-disk -VDEV to the existing `tank` pool. +If you want to expand this pool, you will need to add a new VDEV to the pool. +Since I am using 2 disks per VDEV, I will need to add a new 2-disk VDEV to the +existing `tank` pool. ```sh sudo zpool add tank mirror /dev/sdX /dev/sdY ``` -If you\'re adding disks of different sizes, you\'ll need to use the -`-f` flag. Keep in mind that the max size will be limited to -the smallest disk added. +If you're adding disks of different sizes, you'll need to use the `-f` flag. +Keep in mind that the max size will be limited to the smallest disk added. ```sh sudo zpool add -f tank mirror /dev/sdX /dev/sdY ``` -I added two 8TB hard drives and this process took around 10 seconds to -complete. +I added two 8TB hard drives and this process took around 10 seconds to complete. -When viewing the pool again, you can see that the pool has now doubled -in size. We have 14.3 TB useable space and the same space used for -mirroring. +When viewing the pool again, you can see that the pool has now doubled in size. +We have 14.3 TB useable space and the same space used for mirroring. ```sh > zfs list @@ -168,8 +161,8 @@ tank/media 96K 14.3T 96K /tank/media ### Converting Disks -Some disks, such as NTFS-formatted drives, will need to be partitioned -and formatted prior to being added to the pool. +Some disks, such as NTFS-formatted drives, will need to be partitioned and +formatted prior to being added to the pool. Start by identifying the disks you want to format and add to the pool. @@ -177,18 +170,16 @@ Start by identifying the disks you want to format and add to the pool. sudo fdisk -l | grep /dev ``` -I am going to format my `/dev/sdc` and `/dev/sdd` -disks with the `fdisk` command. +I am going to format my `/dev/sdc` and `/dev/sdd` disks with the `fdisk` +command. -See below for instructions on how to use `fdisk`. Here\'s -what I did to create basic Linux formatted disks: +See below for instructions on how to use `fdisk`. Here's what I did to create +basic Linux formatted disks: -- `g` : Create GPT partition table -- `n` : Create a new partition, hit Enter for all default - options -- `t` : Change partition type to `20` for - `Linux filesystem` -- `w` : Write the changes to disk and exit +- `g` : Create GPT partition table +- `n` : Create a new partition, hit Enter for all default options +- `t` : Change partition type to `20` for `Linux filesystem` +- `w` : Write the changes to disk and exit I repeated this process for both disks. @@ -247,9 +238,9 @@ sudo zpool add tank mirror /dev/sdc /dev/sdd ``` When we list the pool again, we can see that our size is now updated to -approximately 22TB. This represents my hard drives totalling 45.6TB when -shown with `fdisk -l`, with a Raid10 configuration using 22TB -for mirroring and 22TB of useable space. +approximately 22TB. This represents my hard drives totalling 45.6TB when shown +with `fdisk -l`, with a Raid10 configuration using 22TB for mirroring and 22TB +of useable space. ```sh > zfs list @@ -263,24 +254,22 @@ tank/media 145GT 21.7T 96K /tank/media ## Creating Datasets According to [ZFS -Terminology](https://docs.oracle.com/cd/E18752_01/html/819-5461/ftyue.html), -a `dataset` can refer to "clones, file systems, snapshots, -and volumes. +Terminology](https://docs.oracle.com/cd/E18752_01/html/819-5461/ftyue.html), a +`dataset` can refer to "clones, file systems, snapshots, and volumes. -For this guide, I will use the `dataset` term to refer to -file systems created under a pool. +For this guide, I will use the `dataset` term to refer to file systems created +under a pool. -Within my `tank` pool, I am going to create some datasets to -help organize my files. This will give me location to store data rather -than simply dumping everything at the `/tank/` location. +Within my `tank` pool, I am going to create some datasets to help organize my +files. This will give me location to store data rather than simply dumping +everything at the `/tank/` location. ```sh sudo zfs create tank/cloud sudo zfs create tank/media ``` -Once created, you can see these datasets in the output of your pool -list: +Once created, you can see these datasets in the output of your pool list: ```sh > zfs list @@ -292,9 +281,9 @@ tank/media 96K 7.14T 96K /tank/media ## Creating Snapshots -Next, let\'s create our first snapshot. We can do this by calling the -`snapshot` command and give it an output name. I will be -throwing the current date and time into my example. +Next, let's create our first snapshot. We can do this by calling the `snapshot` +command and give it an output name. I will be throwing the current date and time +into my example. ```sh sudo zfs snapshot tank@$(date '+%Y-%m-%d_%H-%M') @@ -325,13 +314,10 @@ no datasets available # My Thoughts on ZFS So Far -- I sacrificed 25TB to be able to mirror my data, but I feel more - comfortable with the potential to save my data by quickly replacing - a disk if I need to. -- The set-up was surprisingly easy and fast. -- Disk I/O is fast as well. I was worried that the data transfer - speeds would be slower due to the RAID configuration. -- Media streaming and transcoding has seen no noticeable drop in - performance. -- My only limitation really is the number of HDD bays in my server HDD - cage. +- I sacrificed 25TB to be able to mirror my data, but I feel more comfortable + with the potential to save my data by quickly replacing a disk if I need to. +- The set-up was surprisingly easy and fast. +- Disk I/O is fast as well. I was worried that the data transfer speeds would be + slower due to the RAID configuration. +- Media streaming and transcoding has seen no noticeable drop in performance. +- My only limitation really is the number of HDD bays in my server HDD cage. diff --git a/content/blog/2024-02-13-ubuntu-emergency-mode.md b/content/blog/2024-02-13-ubuntu-emergency-mode.md index 7482dd1..4b41406 100644 --- a/content/blog/2024-02-13-ubuntu-emergency-mode.md +++ b/content/blog/2024-02-13-ubuntu-emergency-mode.md @@ -7,12 +7,12 @@ draft = false # The Problem -I recently [migrated my hard drives to a ZFS pool](../zfs/) and found -myself stuck in Ubuntu\'s emergency mode after the first reboot I -performed after creating the ZFS pool. +I recently [migrated my hard drives to a ZFS pool](../zfs/) and found myself +stuck in Ubuntu's emergency mode after the first reboot I performed after +creating the ZFS pool. -My server was stuck in the boot process and showed the following error -on the screen: +My server was stuck in the boot process and showed the following error on the +screen: ``` txt You are in emergency mode. @@ -21,34 +21,33 @@ After logging in, type "journalctl -xb" to view system logs, or ^D to try again to boot into default mode". ``` -After rebooting the server and watching the logs scroll on a monitor, I -noticed the root cause was related to a very long search for certain -drives. I kept seeing errors like this: +After rebooting the server and watching the logs scroll on a monitor, I noticed +the root cause was related to a very long search for certain drives. I kept +seeing errors like this: ``` txt [ TIME ] Timed out waiting of device dev-disk-by/[disk-uuid] ``` -I realized that I had not removed the `/etc/fstab` references -that asked Ubuntu to mount two disks on boot, but I had recently changed -those disks to be part of my ZFS pool instead. Therefore, Ubuntu was -trying to identify and mount a disk that was not available. +I realized that I had not removed the `/etc/fstab` references that asked Ubuntu +to mount two disks on boot, but I had recently changed those disks to be part of +my ZFS pool instead. Therefore, Ubuntu was trying to identify and mount a disk +that was not available. -Now that we have an idea of the issue, let\'s move to solution. +Now that we have an idea of the issue, let's move to solution. # The Solution -In order to fix the issue, I waited until I was allowed to type the root -user\'s password, and then I executed the following command: +In order to fix the issue, I waited until I was allowed to type the root user's +password, and then I executed the following command: ```sh nano /etc/fstab ``` -Within the `fstab` file, I needed to comment/remove the -following lines at the bottom of the file. You can comment-out a line by -prepending a `#` symbol at the beginning of the line. You can -also delete the line entirely. +Within the `fstab` file, I needed to comment/remove the following lines at the +bottom of the file. You can comment-out a line by prepending a `#` symbol at the +beginning of the line. You can also delete the line entirely. ``` conf # What it looked like when running into the issue: @@ -60,16 +59,14 @@ UUID=E69867E59867B32B /mnt/white-02 ntfs-3g uid=1000,gid=1000 0 0 # UUID=E69867E59867B32B /mnt/white-02 ntfs-3g uid=1000,gid=1000 0 0 ``` -Once removing the lines above from the `/etc/fstab` file, -save and exit the file by hitting the `Ctrl` + `x` -key combo. +Once removing the lines above from the `/etc/fstab` file, save and exit the file +by hitting the `Ctrl` + `x` key combo. -You can now hit `Ctrl` + `D` to continue, or -reboot: +You can now hit `Ctrl` + `D` to continue, or reboot: ```sh systemctl reboot ``` -Once rebooted, I was able to watch the machine boot properly and launch -to the TTY login screen without errors! +Once rebooted, I was able to watch the machine boot properly and launch to the +TTY login screen without errors! diff --git a/content/blog/2024-02-21-self-hosting-otter-wiki.md b/content/blog/2024-02-21-self-hosting-otter-wiki.md index bfa1e91..c1e9259 100644 --- a/content/blog/2024-02-21-self-hosting-otter-wiki.md +++ b/content/blog/2024-02-21-self-hosting-otter-wiki.md @@ -7,33 +7,32 @@ draft = false # An Otter Wiki -[An Otter Wiki](https://otterwiki.com/) is an easy to use wiki software -that takes almost no effort to set up and maintain. +[An Otter Wiki](https://otterwiki.com/) is an easy to use wiki software that +takes almost no effort to set up and maintain. # Installation -To install An Otter Wiki, I\'m going to use Docker Compose to create the -container and then use Nginx as a reverse proxy to allow external access -via a subdomain I own. +To install An Otter Wiki, I'm going to use Docker Compose to create the +container and then use Nginx as a reverse proxy to allow external access via a +subdomain I own. ## Docker Compose -Start by creating a directory for the container\'s files. +Start by creating a directory for the container's files. ```sh mkdir ~/otterwiki ``` -Next, create the `docker-compose.yml` file to define the -container\'s parameters. +Next, create the `docker-compose.yml` file to define the container's +parameters. ```sh nano ~/otterwiki/docker-compose.yml ``` -Within the file, paste the following content. You can read the -project\'s documentation if you want to further override or customize -the container. +Within the file, paste the following content. You can read the project's +documentation if you want to further override or customize the container. ``` conf version: '3' @@ -56,23 +55,22 @@ cd ~/otterwiki sudo docker-compose up -d ``` -The container is now available at `localhost:8337`. Next, we -will use Nginx to serve this app externally. +The container is now available at `localhost:8337`. Next, we will use Nginx to +serve this app externally. ## Nginx -To access the app externally, let\'s set up a reverse proxy. I\'ll start -by creating the Nginx configuration file for my wiki. +To access the app externally, let's set up a reverse proxy. I'll start by +creating the Nginx configuration file for my wiki. ```sh sudo nano /etc/nginx/sites-available/wiki ``` -Within the file, I have saved the following content. This assumes you -already have a TLS/SSL cert to use with this subdomain. If not, simply -remove the `ssl_*` variables, remove the `80` -server block, and change the `443` server block to -`80` to serve the app without SSL. +Within the file, I have saved the following content. This assumes you already +have a TLS/SSL cert to use with this subdomain. If not, simply remove the +`ssl_*` variables, remove the `80` server block, and change the `443` server +block to `80` to serve the app without SSL. ``` conf server { @@ -110,15 +108,14 @@ server { } ``` -Save and close the configuration file. On Nginx, we need to symlink the -file to enable it. +Save and close the configuration file. On Nginx, we need to symlink the file to +enable it. ```sh sudo ln -s /etc/nginx/sites-available/wiki /etc/nginx/sites-enabled/wiki ``` -Once enabled, restart the Nginx server to start serving the app -externally. +Once enabled, restart the Nginx server to start serving the app externally. ```sh sudo systemctl restart nginx.service @@ -126,18 +123,17 @@ sudo systemctl restart nginx.service # Screenshots -In the screenshot below, you can see the initial launch screen for An -Otter Wiki. Start by creating your admin account and configure the app -as necessary. +In the screenshot below, you can see the initial launch screen for An Otter +Wiki. Start by creating your admin account and configure the app as necessary. 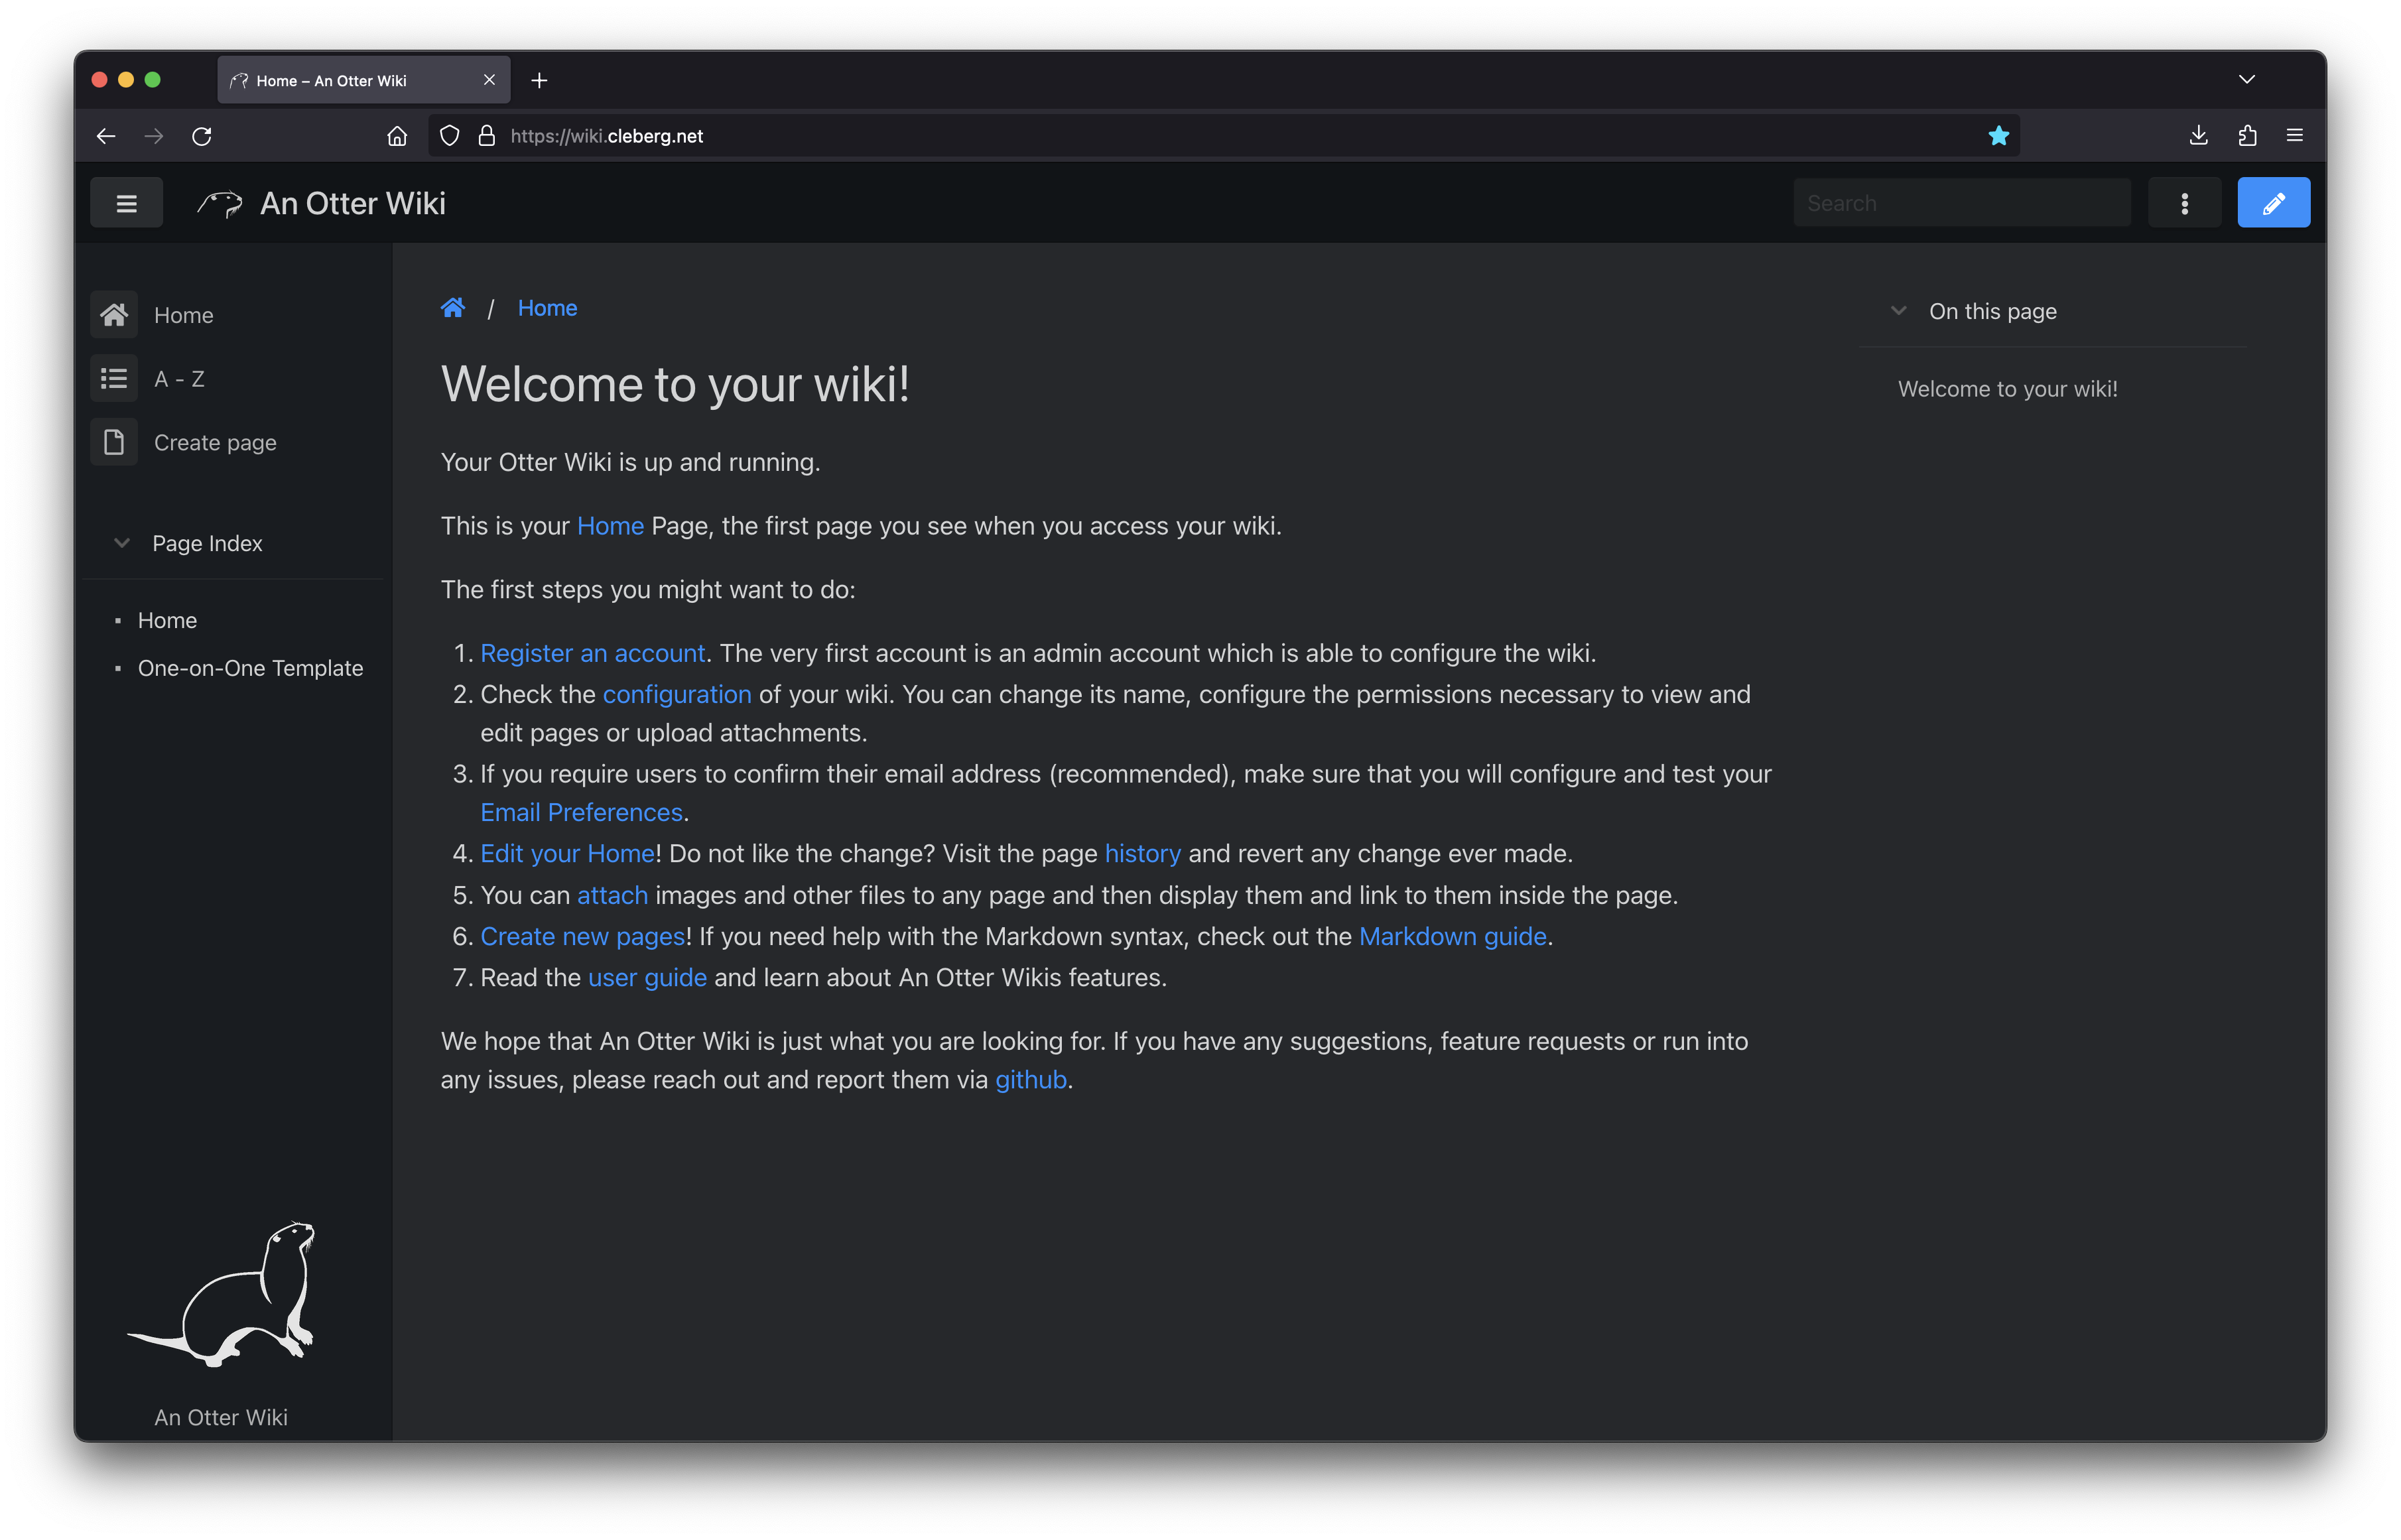 -You can also see the default editing screen for creating and editing -pages. It\'s as easy as typing Markdown and hitting the save button. +You can also see the default editing screen for creating and editing pages. +It's as easy as typing Markdown and hitting the save button. 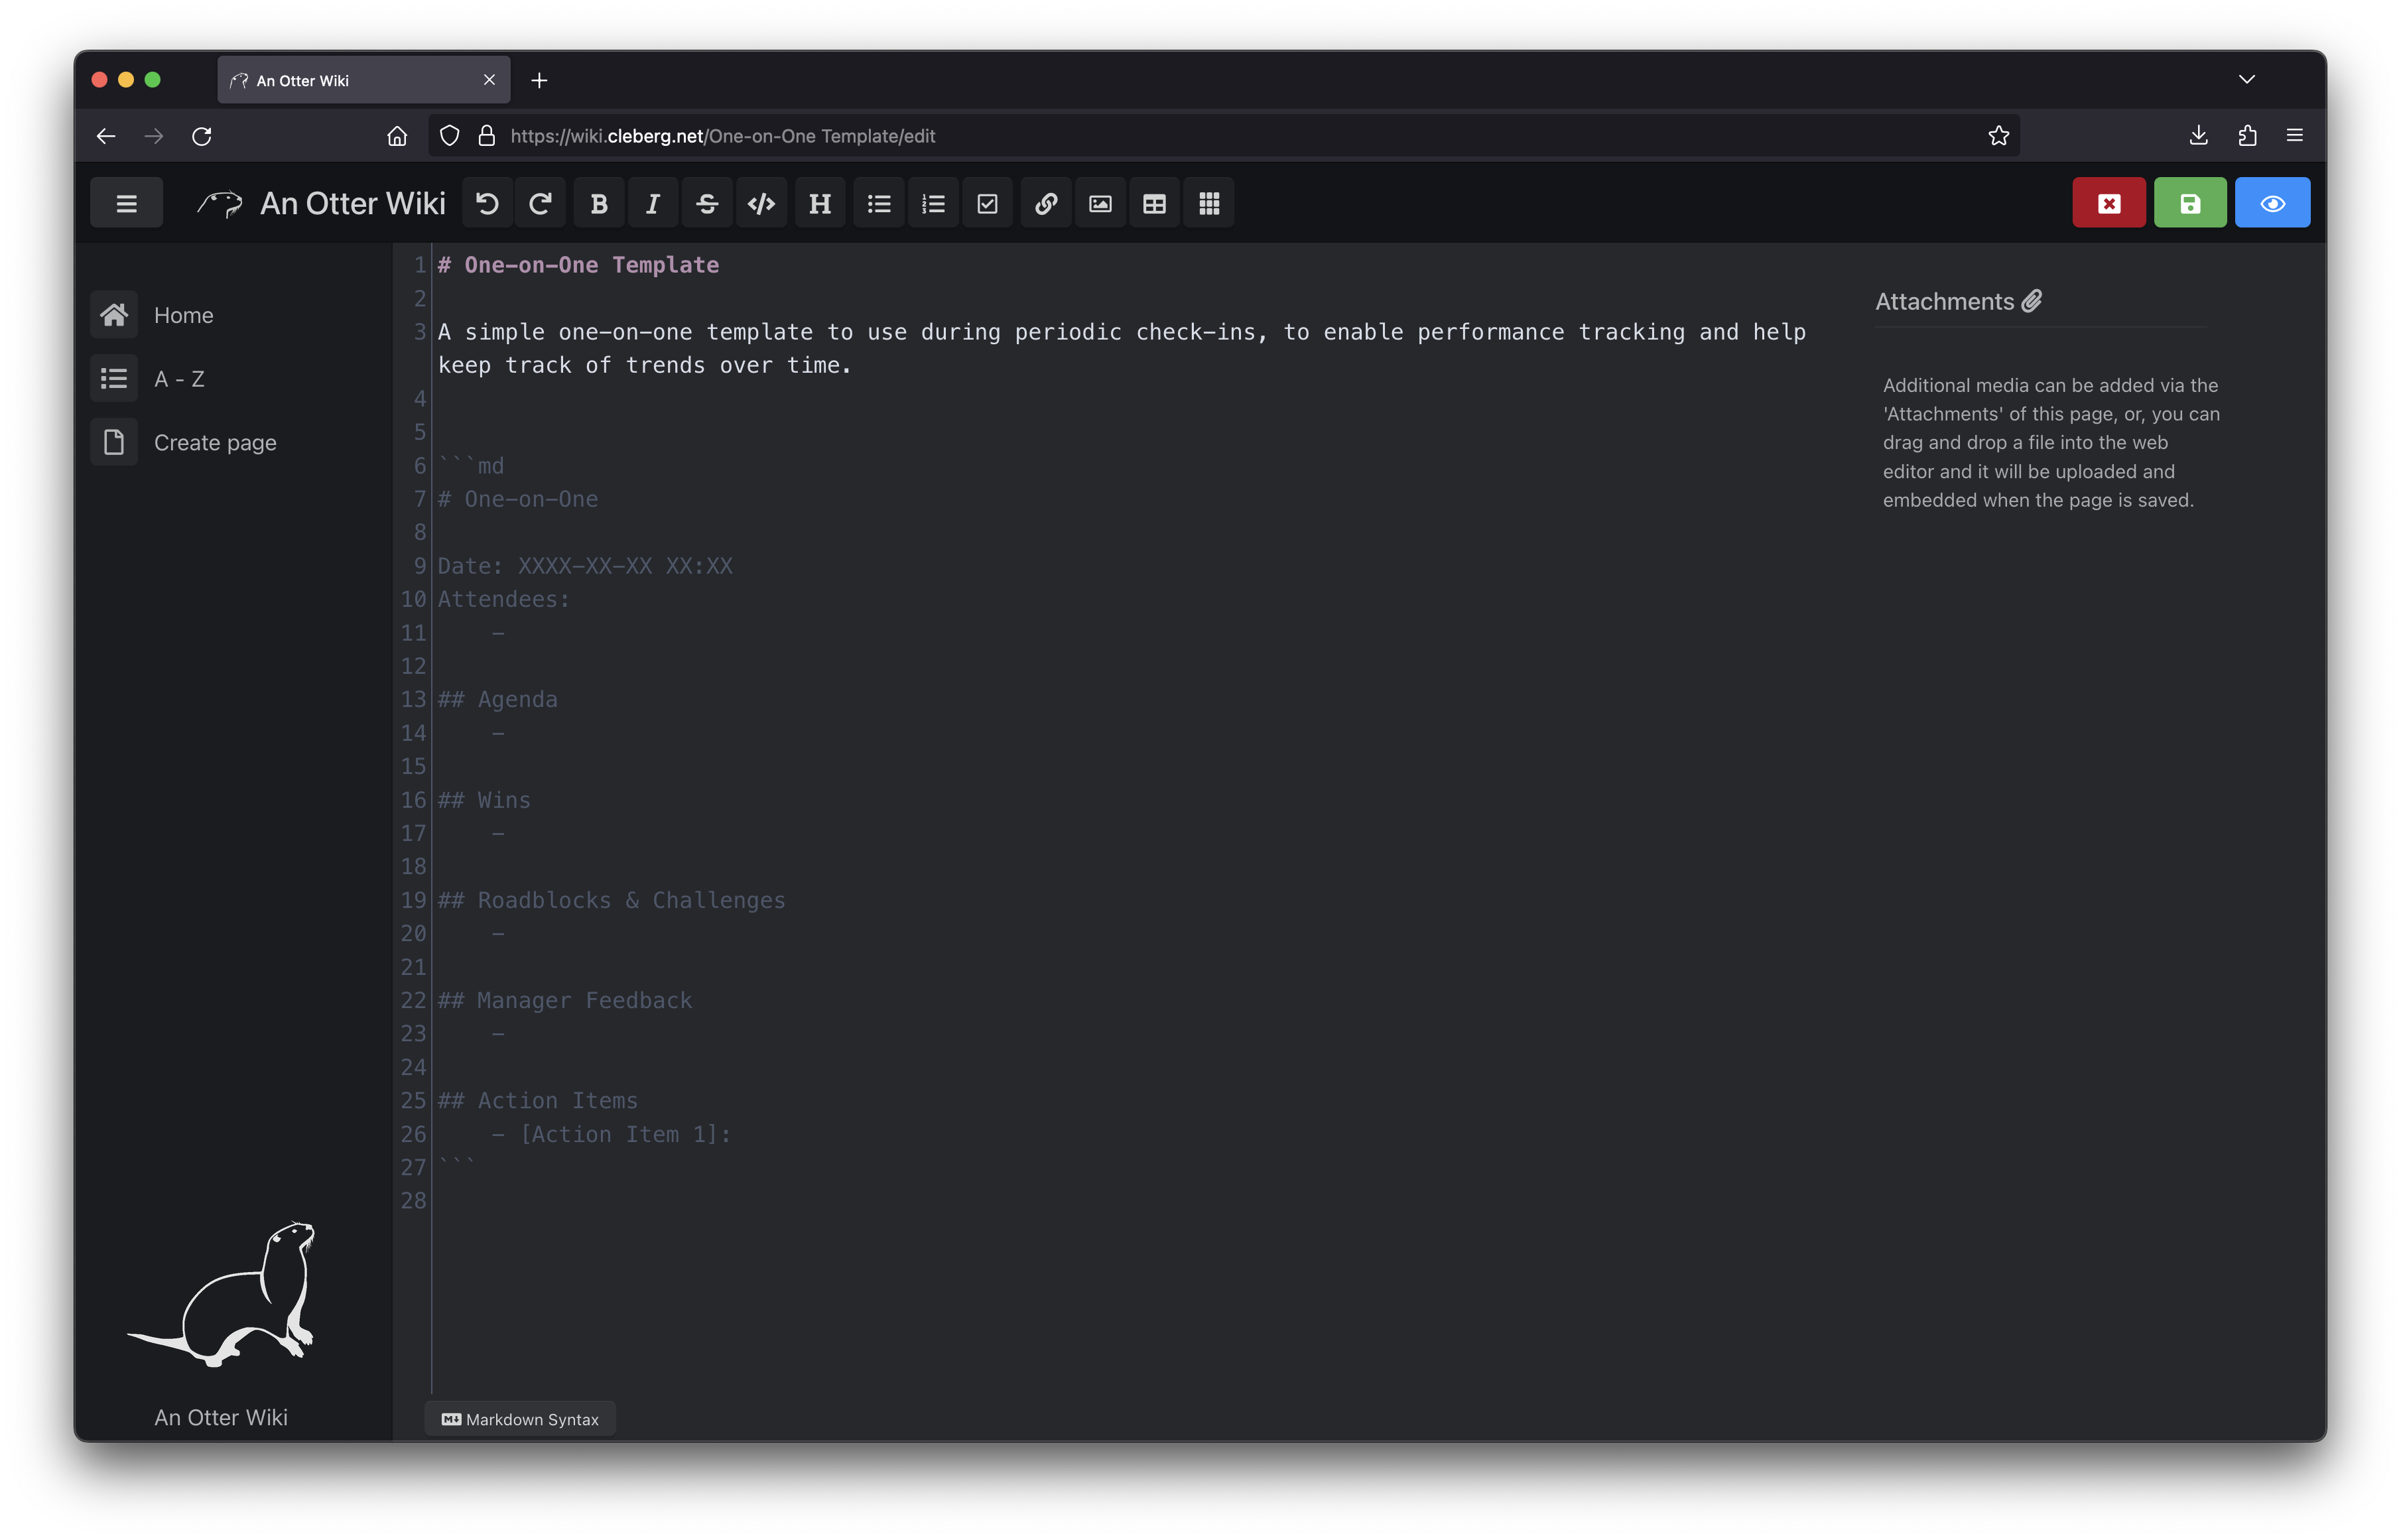 -Overall, I like An Otter Wiki and will be looking forward to seeing how -much use I get out of it going forward. +Overall, I like An Otter Wiki and will be looking forward to seeing how much use +I get out of it going forward. diff --git a/content/blog/2024-03-13-doom-emacs.md b/content/blog/2024-03-13-doom-emacs.md index 2c8ed41..0475a78 100644 --- a/content/blog/2024-03-13-doom-emacs.md +++ b/content/blog/2024-03-13-doom-emacs.md @@ -7,12 +7,11 @@ draft = false ## Screenshots -These screenshots are showing a project opened with projectile, a -treemacs side pane open with the project contents, multiple buffers -tiled next to each other, and the help pane open at the bottomm. +These screenshots are showing a project opened with projectile, a treemacs side +pane open with the project contents, multiple buffers tiled next to each other, +and the help pane open at the bottomm. -The themes are `doom-homage-white` and -`doom-homage-black`. +The themes are `doom-homage-white` and `doom-homage-black`. 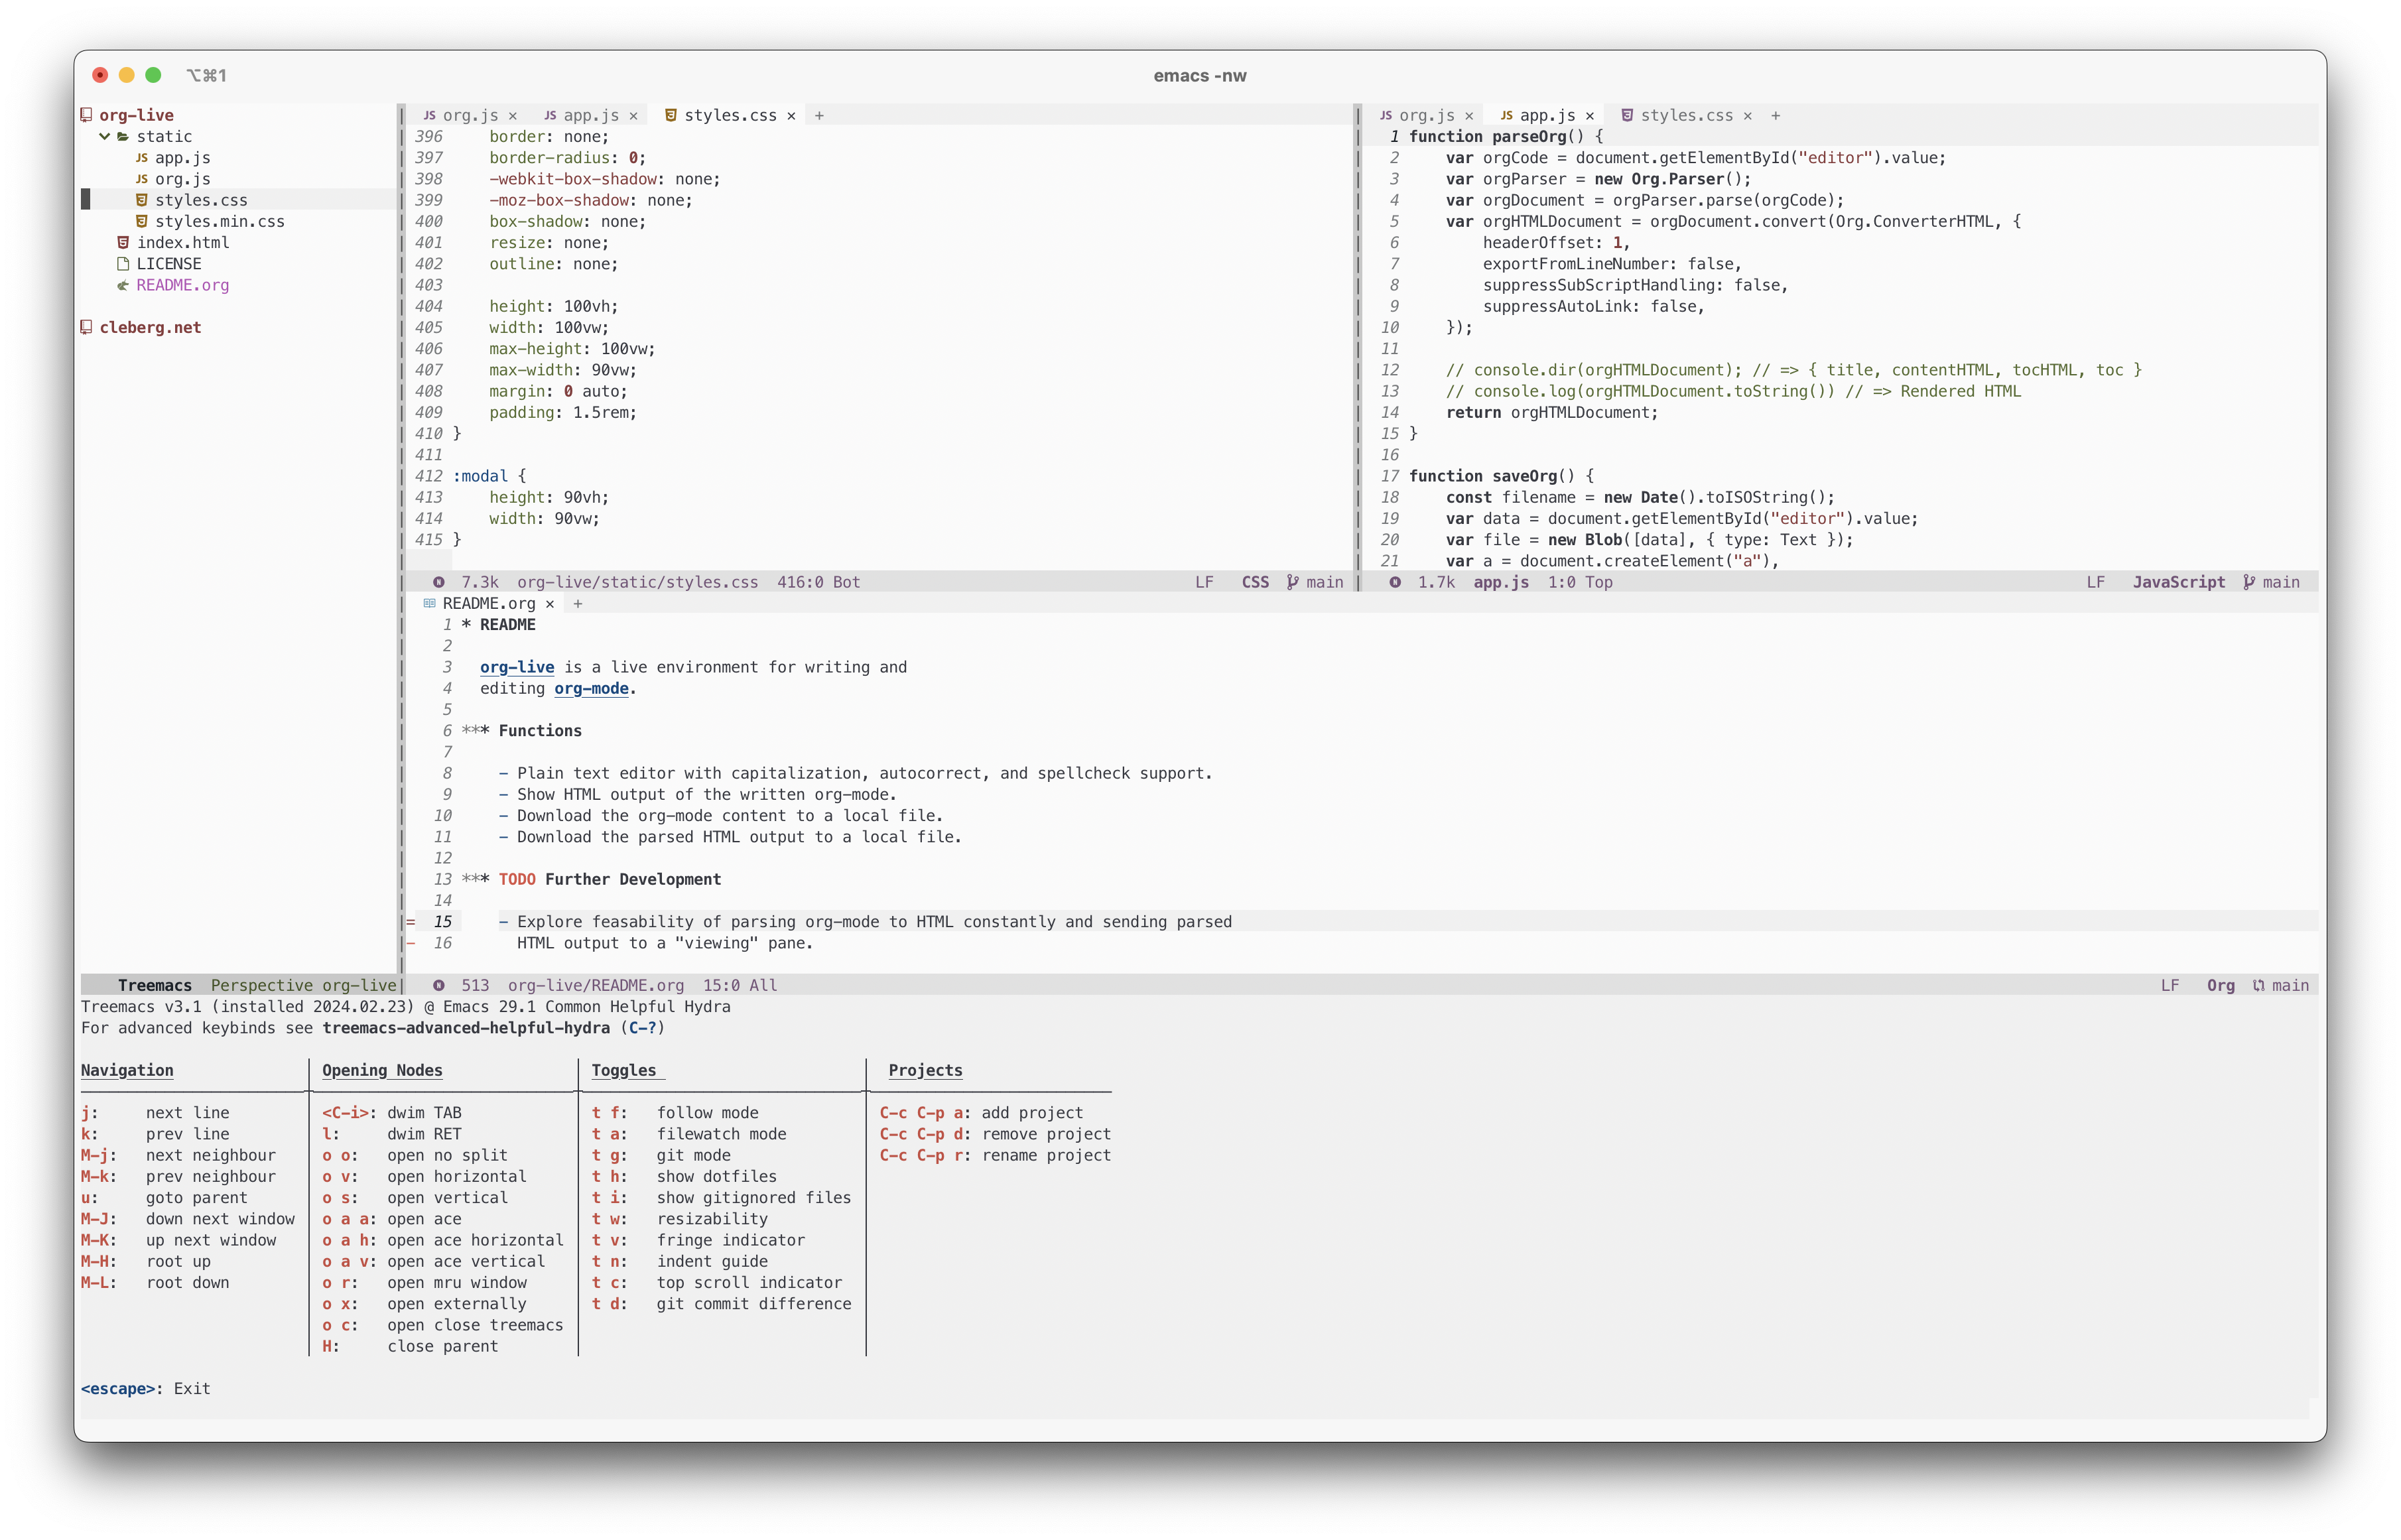 @@ -24,42 +23,38 @@ Mode](https://img.cleberg.net/blog/20240314-doom-emacs/dark.png) I have been switching back and forth between [markdown](https://en.wikipedia.org/wiki/Markdown) and -[org-mode](https://en.wikipedia.org/wiki/Org-mode) recently for my -personal note taking, wiki, and even this blog. As a result, I have been -stumbling further into the world of Emacs and found myself at a point -where I now prefer to do most of my basic editing within Emacs. - -I\'ll leave the markdown vs. org-mode debate for another post, but I -love org-mode\'s extensibility and interactive nature within Emacs, but -it becomes very unwieldy in any other client implementation of -org-mode - especially on iOS. On the flip side, markdown is limited in -functionality and fractured into different standards, but it\'s simple -and popular enough that there are a plethora of great clients to choose -from that will get the job done. - -For now, I want to focus on how I have been using Emacs and some of the -things that would have helped me learn it faster had I known where to -start. +[org-mode](https://en.wikipedia.org/wiki/Org-mode) recently for my personal note +taking, wiki, and even this blog. As a result, I have been stumbling further +into the world of Emacs and found myself at a point where I now prefer to do +most of my basic editing within Emacs. + +I'll leave the markdown vs. org-mode debate for another post, but I love +org-mode's extensibility and interactive nature within Emacs, but it becomes +very unwieldy in any other client implementation of org-mode - especially on +iOS. On the flip side, markdown is limited in functionality and fractured into +different standards, but it's simple and popular enough that there are a +plethora of great clients to choose from that will get the job done. + +For now, I want to focus on how I have been using Emacs and some of the things +that would have helped me learn it faster had I known where to start. ### Installation -This post focuses on [Doom -Emacs](https://github.com/doomemacs/doomemacs), which is an Emacs -framework that provides an alternative experience to the vanilla [GNU -Emacs](https://www.gnu.org/software/emacs/). +This post focuses on [Doom Emacs](https://github.com/doomemacs/doomemacs), which +is an Emacs framework that provides an alternative experience to the vanilla +[GNU Emacs](https://www.gnu.org/software/emacs/). The [Getting Start Guide](https://github.com/doomemacs/doomemacs/blob/master/docs/getting_started.org) -has an extremely detailed walkthrough of installation for all systems, -so please refer to that guide for up-to-date instructions. +has an extremely detailed walkthrough of installation for all systems, so please +refer to that guide for up-to-date instructions. I chose to install on macOS, using the Homebrew option with the `railwaycat/emacsmacport` version of Emacs. -Once the program is installed, you can run the program by typing -`emacs` in a terminal. If you installed a version of Emacs -that supports both a GUI and TUI, you will have to run -`emacs -nw` to get the TUI instead of the default GUI. +Once the program is installed, you can run the program by typing `emacs` in a +terminal. If you installed a version of Emacs that supports both a GUI and TUI, +you will have to run `emacs -nw` to get the TUI instead of the default GUI. ### Configuration @@ -68,13 +63,13 @@ Once installed, you can configure Doom by editing the files within the 1. `config.el` - Personal configuration file 2. `custom.el` - Custom set variables -3. `init.el` - Doom modules and load order, must run - `doom sync` after modifying -4. `packages.el` - Declare packages to install in this file, - then run `doom sync` to install +3. `init.el` - Doom modules and load order, must run `doom sync` after + modifying +4. `packages.el` - Declare packages to install in this file, then run `doom + sync` to install -I only needed a few customizations for my configuration, so I\'ll list -them below. +I only needed a few customizations for my configuration, so I'll list them +below. ```lisp ;; ~/.doom.d/config.el @@ -148,140 +143,127 @@ them below. (default +bindings +smartparens)) ``` -If you\'re editing these files within Doom directly, remember to run -`SPC h r r` to reload the configuration. Also remember to run -`doom sync` for any changes to the `init.el` or -`packages.el` files. +If you're editing these files within Doom directly, remember to run `SPC h r r` +to reload the configuration. Also remember to run `doom sync` for any changes to +the `init.el` or `packages.el` files. ## Basic Functionality -I kept a cheat sheet note open at first with all of the basic functions -typed out, copied as I went through the tutorial. After a little while, -I no longer needed it. I highly recommend writing down the most -applicable shortcuts for your preferred functionality and refer back to -it until you\'ve memorized it. - -Memorizing the shortcuts will differ based on the type of Emacs -framework being used. Personally, migrating from vanilla Emacs to Doom -Emacs simplified everything by a large factor and instantly enabled me -to start working on my projects, eliminating most of the hurdles I was -running into. The vanilla emacs hotkeys became obnoxious and I actually -stopped using Emacs entirely for about a month before trying Doom. - -For me, the first logical step is to interact with the local filesystem. -To do this, I needed to know how to open directories, open files, save -files, discard changes, close files, and switch between open files. Here -are some example shortcuts I\'ve written down in order to accomplish -file-based actions. - - Doom Hotkey Emacs Hotkey Description - ---------------------------- --------------------------- ---------------------------------------- - `SPC :` `C-x` Run functions - `SPC f f` `C-x f` Open file in buffer - `SPC f d` `C-x d` Open directory with `dired` - `i` `C-x C-q` Edit current buffer (insert mode) - `q` `C-x C-q` Quit out of insert mode - `SPC f s` `C-x s` Save current buffer - `SPC b k` `C-x k` Kill current buffer - `SPC w h/j/k/l` `C-x o`\[^1^\] Move left/down/up/right to next buffer - -\[^1^\] Doom\'s evil-window functionality is a bit different from GNU -Emacs, but you can always switch to the \"other\" buffer with -`C-x o` or `C-x b` to get a list of buffers to -select. - -In general, when in Doom, you can press `SPC` and wait a -second for the help pane to appear with all available hotkey options. -For example, you can press `SPC`, wait for the help pane, and -then select a key such as `g` to enter the git help pane and -explore further command options. +I kept a cheat sheet note open at first with all of the basic functions typed +out, copied as I went through the tutorial. After a little while, I no longer +needed it. I highly recommend writing down the most applicable shortcuts for +your preferred functionality and refer back to it until you've memorized it. + +Memorizing the shortcuts will differ based on the type of Emacs framework being +used. Personally, migrating from vanilla Emacs to Doom Emacs simplified +everything by a large factor and instantly enabled me to start working on my +projects, eliminating most of the hurdles I was running into. The vanilla emacs +hotkeys became obnoxious and I actually stopped using Emacs entirely for about a +month before trying Doom. + +For me, the first logical step is to interact with the local filesystem. To do +this, I needed to know how to open directories, open files, save files, discard +changes, close files, and switch between open files. Here are some example +shortcuts I've written down in order to accomplish file-based actions. + +| Doom Hotkey | Emacs Hotkey | Description | +|-----------------|--------------|----------------------------------------| +| `SPC :` | `C-x` | Run functions | +| `SPC f f` | `C-x f` | Open file in buffer | +| `SPC f d` | `C-x d` | Open directory with `dired` | +| `i` | `C-x C-q` | Edit current buffer (insert mode) | +| `q` | `C-x C-q` | Quit out of insert mode | +| `SPC f s` | `C-x s` | Save current buffer | +| `SPC b k` | `C-x k` | Kill current buffer | +| `SPC w h/j/k/l` | `C-x o`[^1] | Move left/down/up/right to next buffer | + +[^1]: Doom's evil-window functionality is a bit different from GNU Emacs, but +you can always switch to the "other" buffer with `C-x o` or `C-x b` to get a +list of buffers to select. + +In general, when in Doom, you can press `SPC` and wait a second for the help +pane to appear with all available hotkey options. For example, you can press +`SPC`, wait for the help pane, and then select a key such as `g` to enter the +git help pane and explore further command options. ## Editing -Next in my process is to dive into editing for any languages I\'m -currently using. In this post, I will just cover Markdown and Org-Mode -but I have also been slowly adoping some Python and general web dev -tools as well. +Next in my process is to dive into editing for any languages I'm currently +using. In this post, I will just cover Markdown and Org-Mode but I have also +been slowly adoping some Python and general web dev tools as well. ### Markdown 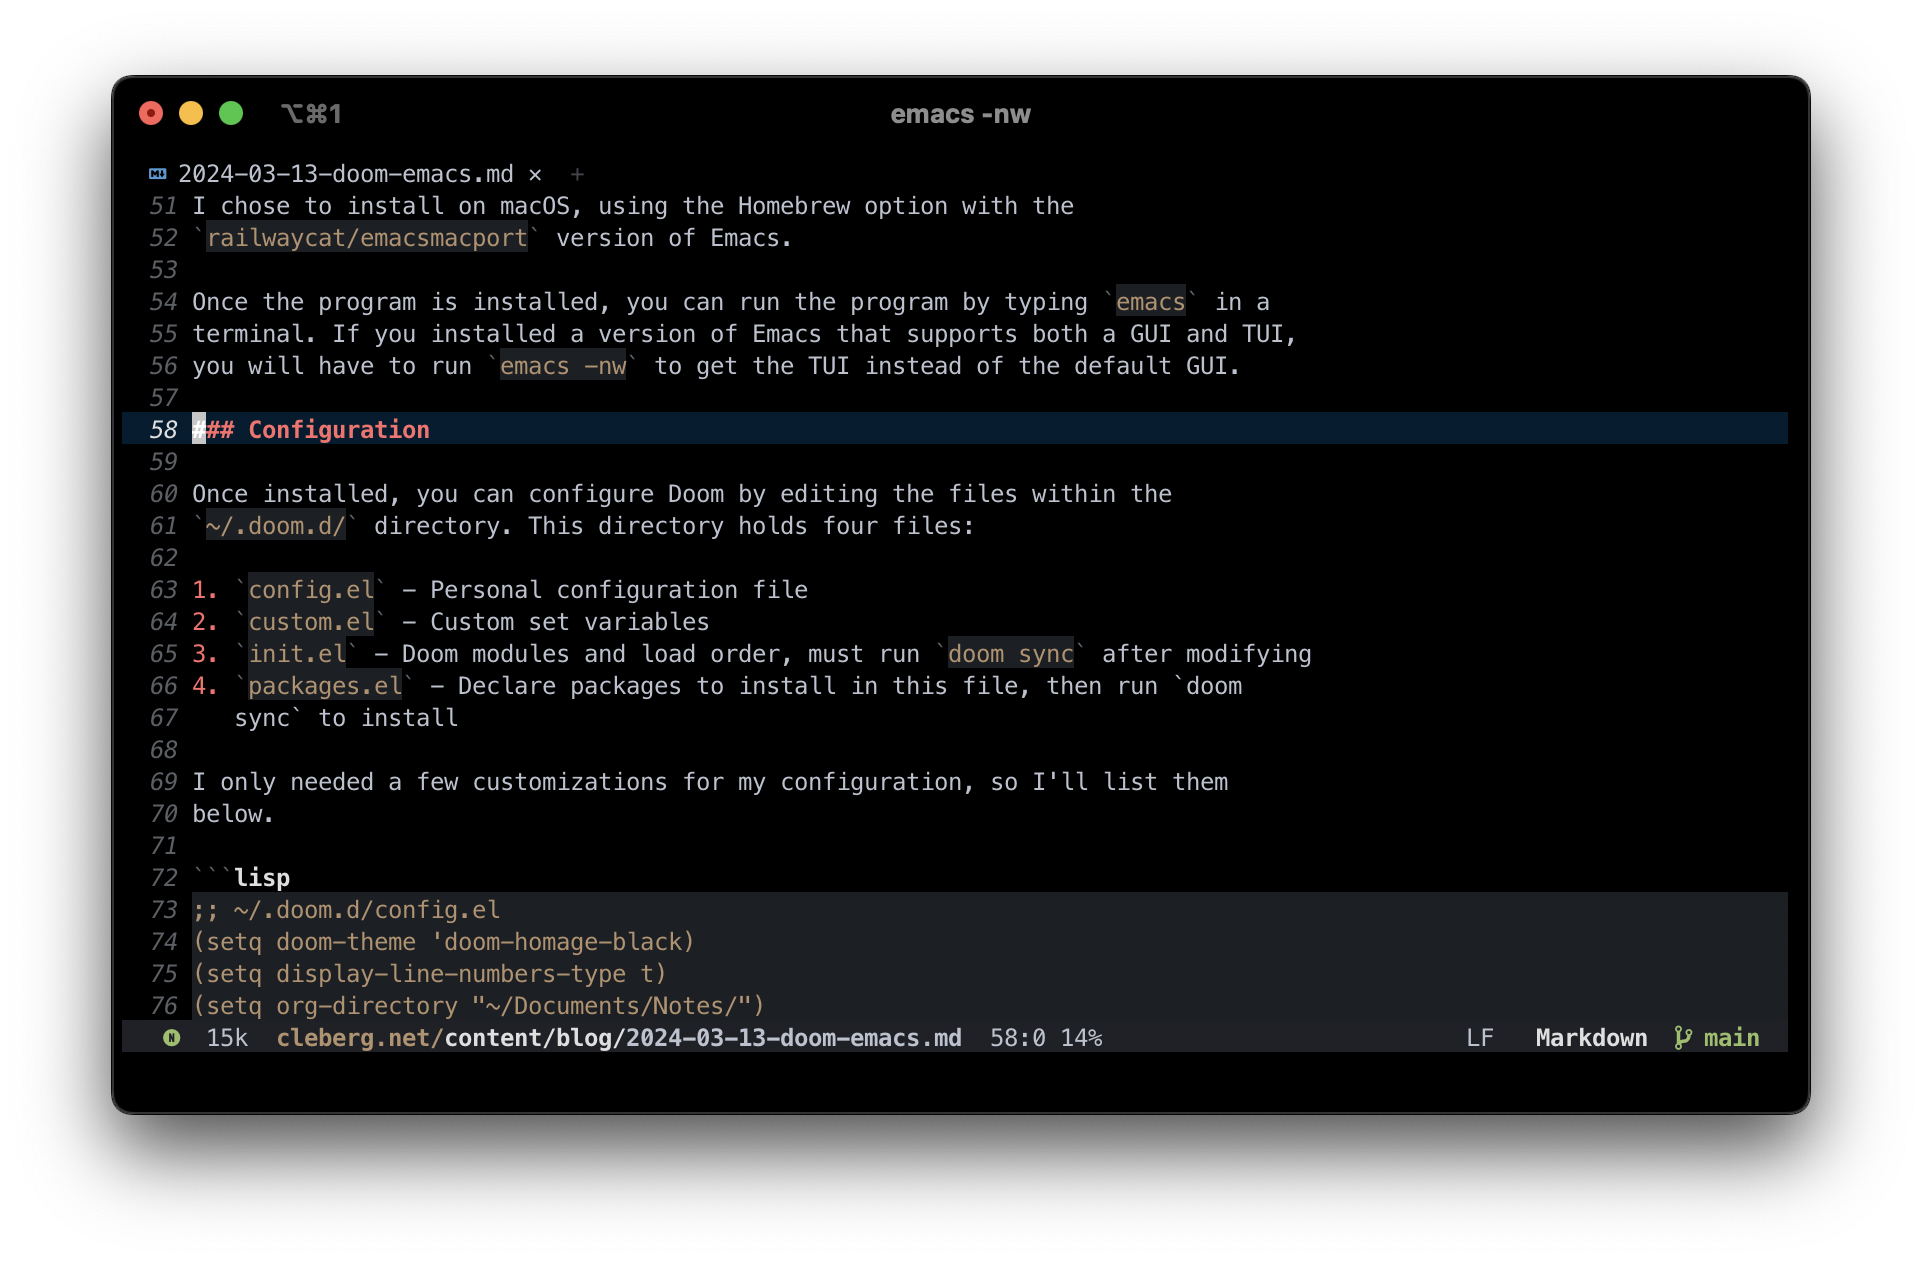 -Markdown is fairly simple as the syntax is limited, so just make sure -the `~/.doom.d/init.el` includes the `markdown` -declaration in the `:lang` section. +Markdown is fairly simple as the syntax is limited, so just make sure the +`~/.doom.d/init.el` includes the `markdown` declaration in the `:lang` section. -This package includes the following hotkey menus. The insert and toggle -menu expands further, allowing you to insert various markdown elements -and toggle things like link hiding. +This package includes the following hotkey menus. The insert and toggle menu +expands further, allowing you to insert various markdown elements and toggle +things like link hiding. - Doom Hotkey Function - ----------------------------------------- -------------------------- - `SPC m '` markdown-edit-code-block - `SPC m e` markdown-export - `SPC m i` +insert - `SPC m o` markdown-open - `SPC m p` markdown-preview - `SPC m t` +toggle - `SPC : markdown-table-align` markdown-table-align +| Doom Hotkey | Function | +|------------------------------|--------------------------| +| `SPC m '` | markdown-edit-code-block | +| `SPC m e` | markdown-export | +| `SPC m i` | +insert | +| `SPC m o` | markdown-open | +| `SPC m p` | markdown-preview | +| `SPC m t` | +toggle | +| `SPC : markdown-table-align` | markdown-table-align | ### Org-Mode -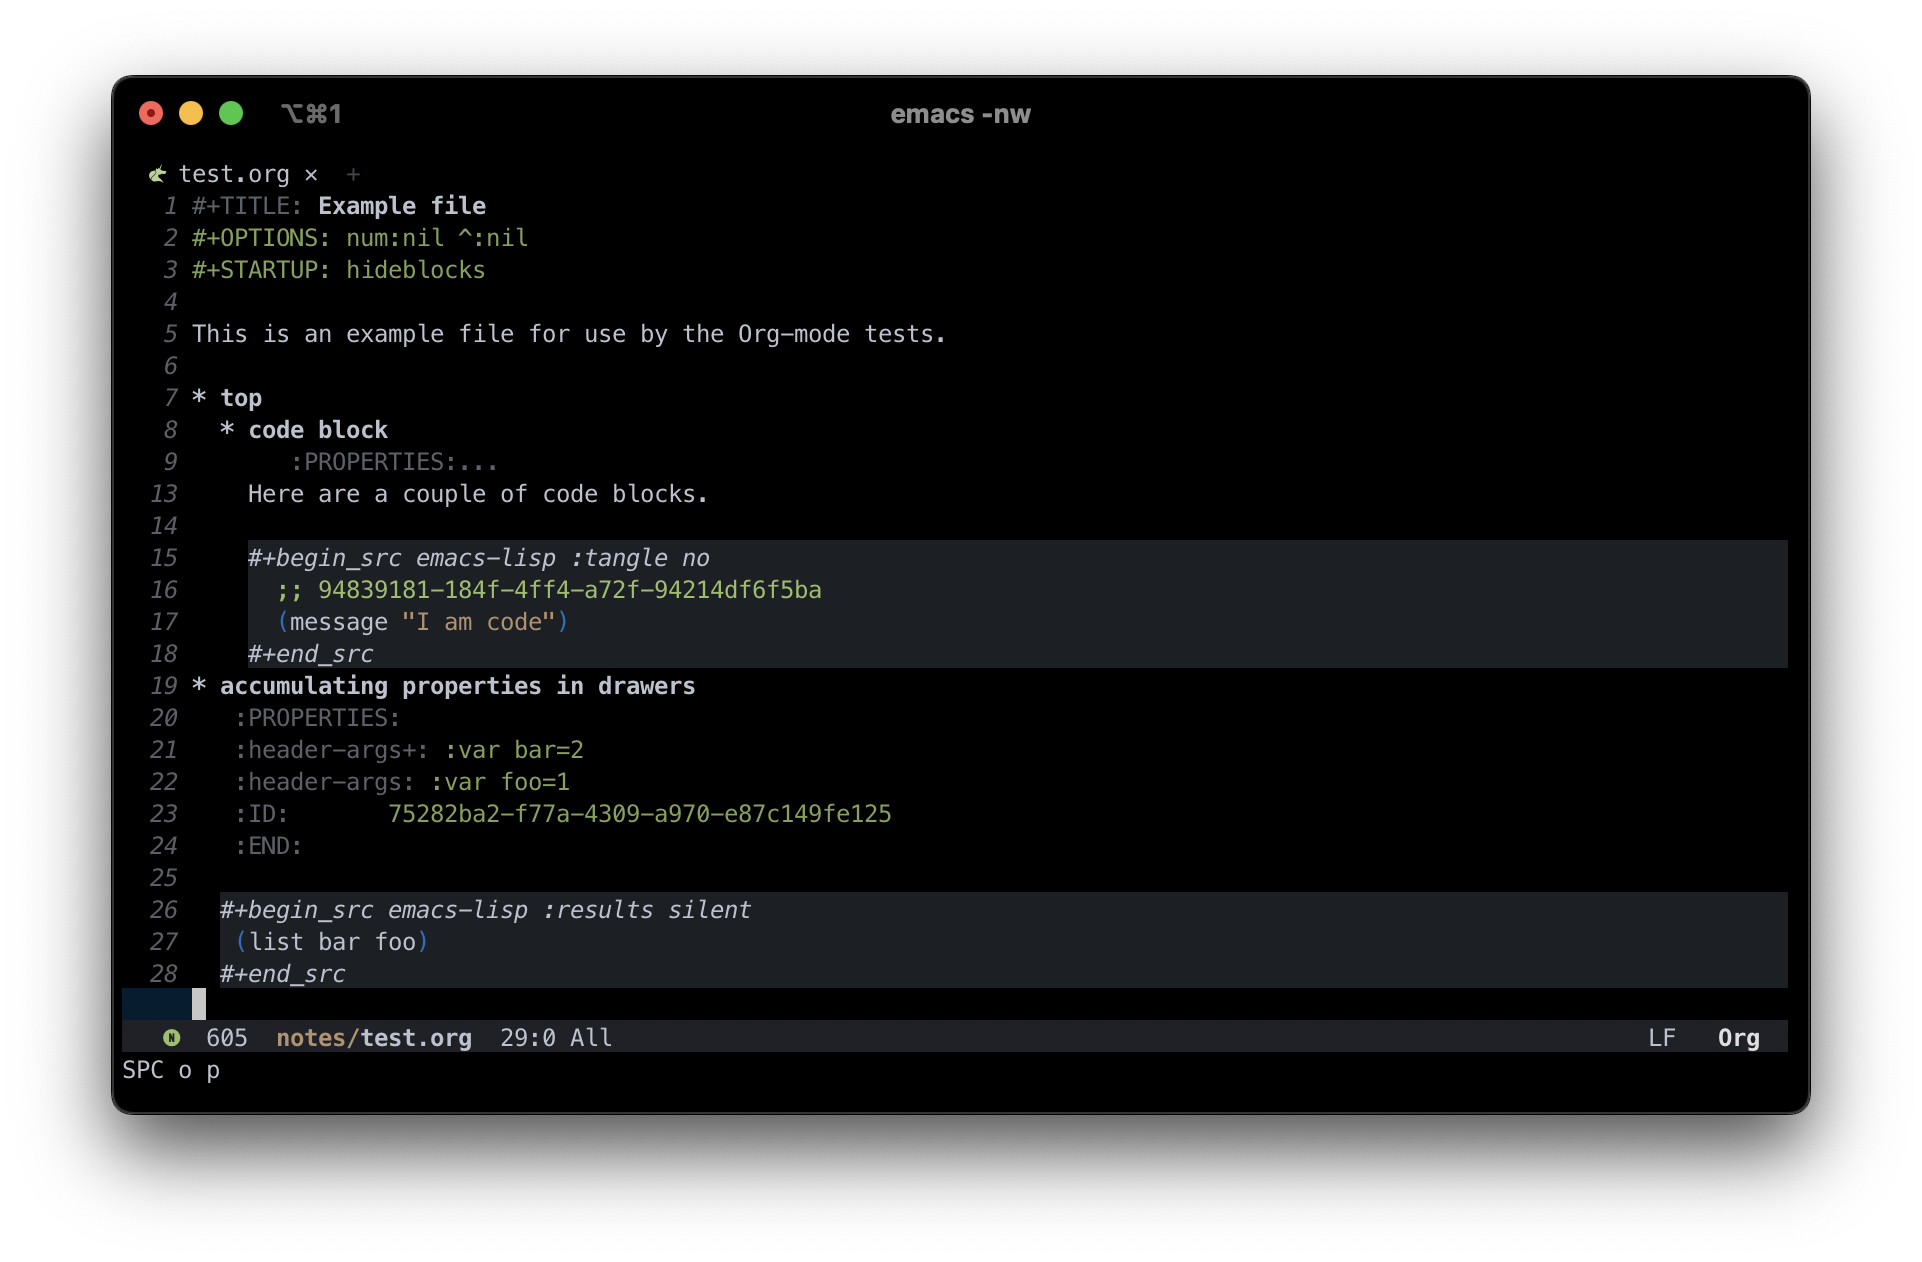 - -Similar to the markdown section above, ensure that the -`~/.doom.d/init.el` includes the `org` declaration -in the `:lang` section. - -There are a few hot keys, but a quick search with `SPC : org` -shows that there are 865 possible org-related functions you can run. I -won\'t possibly be able to list them all, so I will simply cover a few -of the basic commands I use myself. - - Doom Hotkey Function - --------------------------- --------------------------------------- - `SPC m t` org-todo - `SPC n t` org-todo-list - `SPC o A` org-agenda - `SPC X` org-capture - `SPC m p p` org-priority - `SPC m d s` org-schedule - `TAB` org-cycle - `SHIFT TAB` Collapse/open all headings in buffer - `M-q` Format/wrap current section - `M-Left/Right` Demote/promote current heading - `M-Down/Up` Shift current heading section down/up + + +Similar to the markdown section above, ensure that the `~/.doom.d/init.el` +includes the `org` declaration in the `:lang` section. + +There are a few hot keys, but a quick search with `SPC : org` shows that there +are 865 possible org-related functions you can run. I won't possibly be able to +list them all, so I will simply cover a few of the basic commands I use myself. + +| Doom Hotkey | Function | +|----------------|---------------------------------------| +| `SPC m t` | org-todo | +| `SPC n t` | org-todo-list | +| `SPC o A` | org-agenda | +| `SPC X` | org-capture | +| `SPC m p p` | org-priority | +| `SPC m d s` | org-schedule | +| `TAB` | org-cycle | +| `SHIFT TAB` | Collapse/open all headings in buffer | +| `M-q` | Format/wrap current section | +| `M-Left/Right` | Demote/promote current heading | +| `M-Down/Up` | Shift current heading section down/up | 1. Org-Publish Org includes a [publishing management - system](https://orgmode.org/manual/Publishing.html) by default that - allows you to export org files to Org, iCalendar, HTML, LaTex, - Markdown, ODT, and Plain Text. Most of these can be exported into - another buffer and opened, or simply to an external file. - - While inside an org file, simply run `SPC m e` or - `M-x org-export-dispatch` to open the export menu. This - menu will show all options and ask you to select an option. If you - want to export to HTML, simply press `h` and then - `H` (As HTML buffer), `h` (As HTML file), or - `o` (As HTML file and open). + system](https://orgmode.org/manual/Publishing.html) by default that allows + you to export org files to Org, iCalendar, HTML, LaTex, Markdown, ODT, and + Plain Text. Most of these can be exported into another buffer and opened, or + simply to an external file. + + While inside an org file, simply run `SPC m e` or `M-x org-export-dispatch` + to open the export menu. This menu will show all options and ask you to + select an option. If you want to export to HTML, simply press `h` and then + `H` (As HTML buffer), `h` (As HTML file), or `o` (As HTML file and open). 2. Projects - Some publishing options are easier with a defined project in Emacs. - To create a project within Emacs, I use two methods: + Some publishing options are easier with a defined project in Emacs. To + create a project within Emacs, I use two methods: - 1. Add the project via the projectile command `SPC p a`. - Does not always work for me. - 2. Add an empty `.projectile` file in the project root. + 1. Add the project via the projectile command `SPC p a`. Does not always + work for me. + 2. Add an empty `.projectile` file in the project root. - Once a project has been created, you can create custom publishing - actions within your `~/.doom.d/config.el` file. For - example, here\'s a test project I created to try and convert this - blog to org-mode recently. + Once a project has been created, you can create custom publishing actions + within your `~/.doom.d/config.el` file. For example, here's a test project + I created to try and convert this blog to org-mode recently. ```lisp ;; org-publish @@ -352,11 +334,10 @@ of the basic commands I use myself. ## General Thoughts -I have enjoyed Doom Emacs (far more than GNU Emacs) and will likely -continue to use it as my main editor for the time being. Org-Mode is -certainly the largest factor here, as I far prefer it over Markdown due -to its inherent features and detailed markup options. However, working -with org-mode on iOS has been a pain and I will have to see if there\'s -an easier way to resolve those issues or if going back to separate -Markdown, Reminders, and Calendar apps is easier to work with than an -all-in-one org solution. +I have enjoyed Doom Emacs (far more than GNU Emacs) and will likely continue to +use it as my main editor for the time being. Org-Mode is certainly the largest +factor here, as I far prefer it over Markdown due to its inherent features and +detailed markup options. However, working with org-mode on iOS has been a pain +and I will have to see if there's an easier way to resolve those issues or if +going back to separate Markdown, Reminders, and Calendar apps is easier to work +with than an all-in-one org solution. diff --git a/content/blog/2024-03-15-self-hosting-ddns-updater.md b/content/blog/2024-03-15-self-hosting-ddns-updater.md index c81af56..8517151 100644 --- a/content/blog/2024-03-15-self-hosting-ddns-updater.md +++ b/content/blog/2024-03-15-self-hosting-ddns-updater.md @@ -8,25 +8,22 @@ draft = false 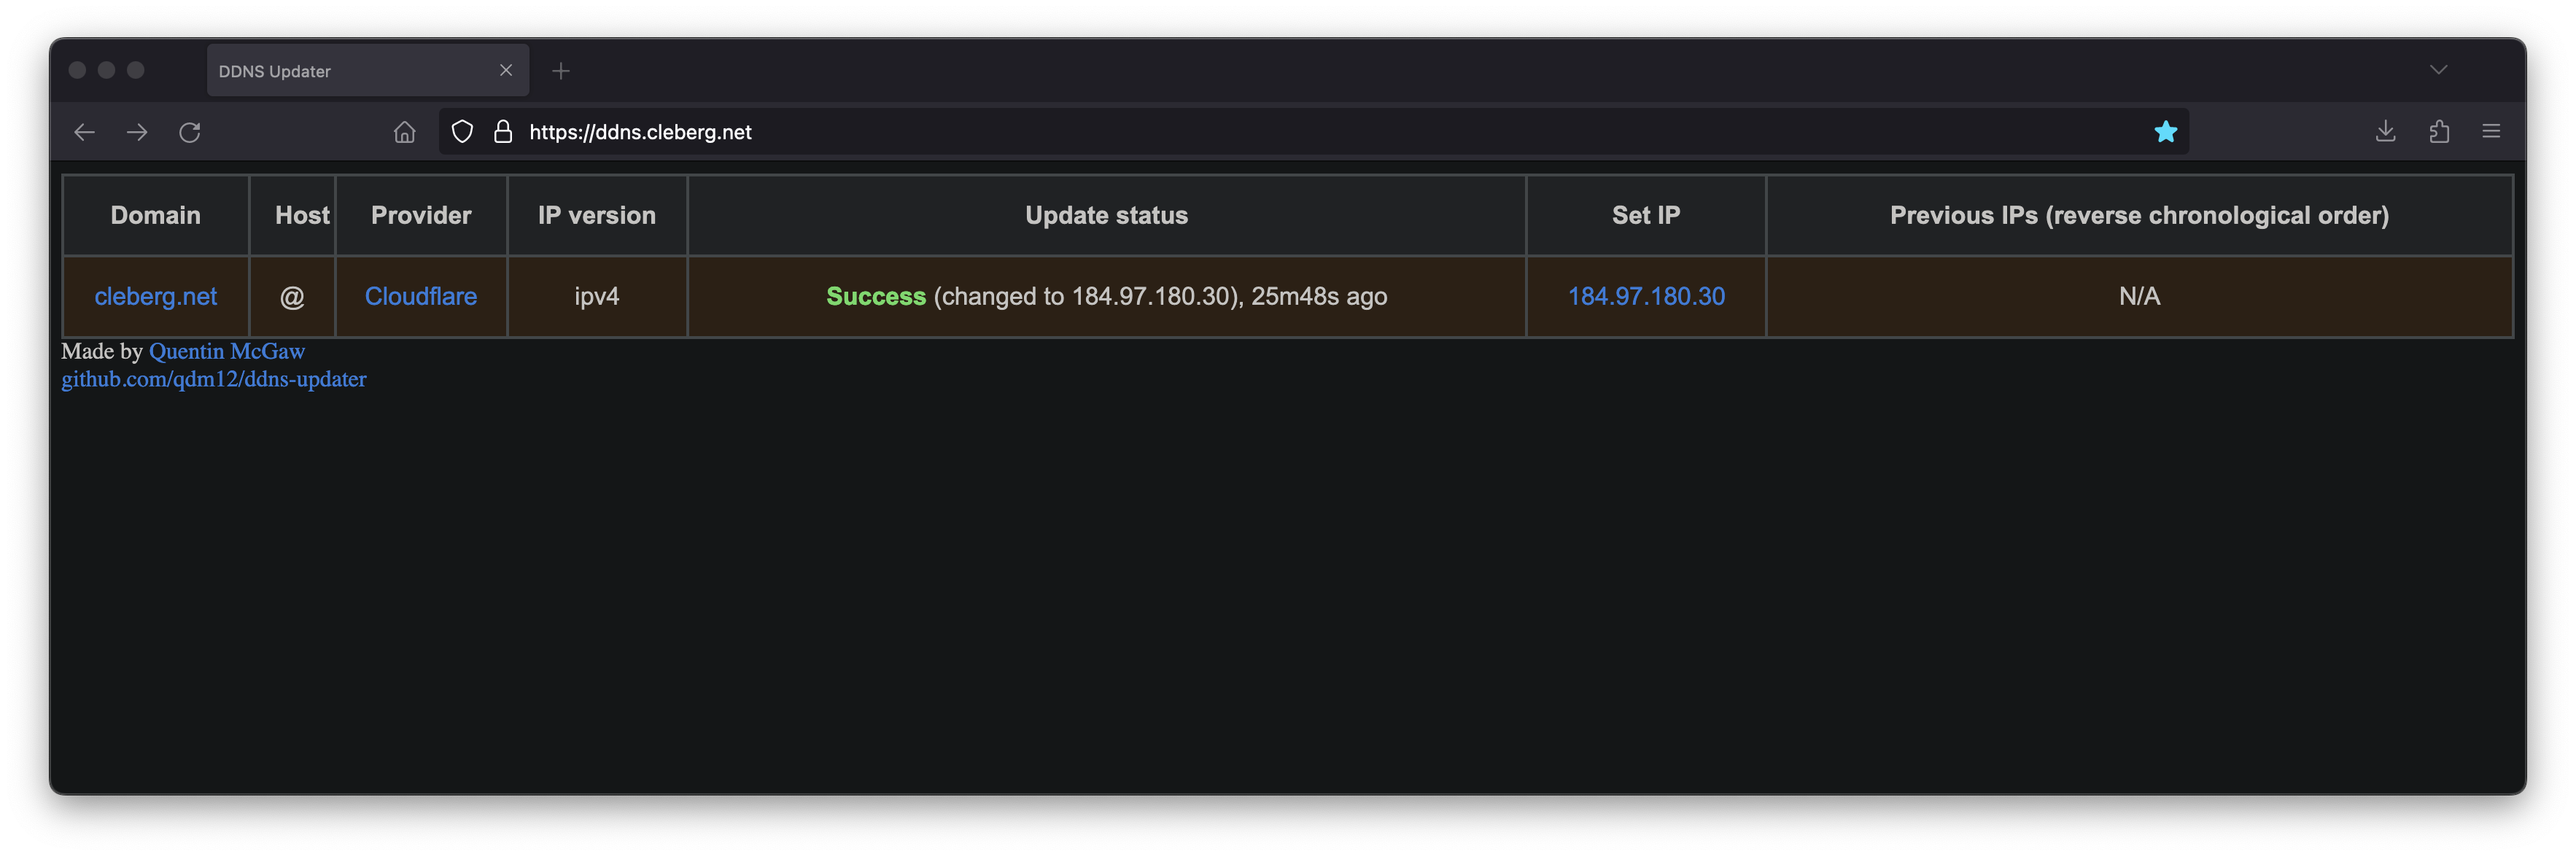 -[DDNS Updater](https://github.com/qdm12/ddns-updater) is a program to -keep DNS A and/or AAAA records updated for multiple DNS providers. +[DDNS Updater](https://github.com/qdm12/ddns-updater) is a program to keep DNS A +and/or AAAA records updated for multiple DNS providers. -If you\'ve read any of my other posts, you\'ll notice that I have been -searching for and using a few different DDNS updating solutions for -years. You\'ll also notice that I love any projects that offer a Docker -Compose solution. +If you've read any of my other posts, you'll notice that I have been searching +for and using a few different DDNS updating solutions for years. You'll also +notice that I love any projects that offer a Docker Compose solution. Luckily, DDNS Upater fits both of these preferences. ## Installation -To get started, always make sure to review the project\'s -[README](https://github.com/qdm12/ddns-updater/blob/master/README.md). -I\'ll be documenting my steps below, but they may have changed by the -time you read this. +To get started, always make sure to review the project's +[README](https://github.com/qdm12/ddns-updater/blob/master/README.md). I'll be +documenting my steps below, but they may have changed by the time you read this. -The first step is to set up the directories and files required for the -project. +The first step is to set up the directories and files required for the project. ```sh mkdir ~/ddns-updater @@ -36,46 +33,38 @@ touch ~/ddns-updater/data/config.json ### Configuration -The main configuration you need to update is the -`data/config.json` file. There is a large list of supported -providers in the README, but I\'m going to use Cloudflare in this -example. +The main configuration you need to update is the `data/config.json` file. There +is a large list of supported providers in the README, but I'm going to use +Cloudflare in this example. ```sh nano ~/ddns-updater/data/config.json ``` -When setting up the configuration for Cloudflare, you\'ll need the -following: - -- Required Parameters - - `"zone_identifier"` is the Zone ID of your site from - the domain overview page - - `"host"` is your host and can be `"@"`, a - subdomain or the wildcard `"*"`. See [this issue - comment for - context](https://github.com/qdm12/ddns-updater/issues/243#issuecomment-928313949). - - `"ttl"` integer value for record TTL in seconds - (specify 1 for automatic) - - One of the following ([how to find API - keys](https://developers.cloudflare.com/fundamentals/api/get-started/)): - - Email `"email"` and Global API Key - `"key"` - - User service key `"user_service_key"` - - API Token `"token"`, configured with DNS edit - permissions for your DNS name\'s zone -- Optional Parameters - - `"proxied"` can be set to `true` to use - the proxy services of Cloudflare - - `"ip_version"` can be `ipv4` (A records), - or `ipv6` (AAAA records) or - `ipv4 or ipv6` (update one of the two, depending on - the public ip found). It defaults to `ipv4 or ipv6`. - - `"ipv6_suffix"` is the IPv6 interface identifier - suffix to use. It can be for example - `0:0:0:0:72ad:8fbb:a54e:bedd/64`. If left empty, it - defaults to no suffix and the raw public IPv6 address obtained - is used in the record updating. +When setting up the configuration for Cloudflare, you'll need the following: + +- Required Parameters + - `"zone_identifier"` is the Zone ID of your site from the domain overview + page + - `"host"` is your host and can be `"@"`, a subdomain or the wildcard `"*"`. + See [this issue comment for + context](https://github.com/qdm12/ddns-updater/issues/243#issuecomment-928313949). + - `"ttl"` integer value for record TTL in seconds (specify 1 for automatic) + - One of the following ([how to find API + keys](https://developers.cloudflare.com/fundamentals/api/get-started/)): + - Email `"email"` and Global API Key `"key"` + - User service key `"user_service_key"` + - API Token `"token"`, configured with DNS edit permissions for your DNS + name's zone +- Optional Parameters + - `"proxied"` can be set to `true` to use the proxy services of Cloudflare + - `"ip_version"` can be `ipv4` (A records), or `ipv6` (AAAA records) or + `ipv4 or ipv6` (update one of the two, depending on the public ip + found). It defaults to `ipv4 or ipv6`. + - `"ipv6_suffix"` is the IPv6 interface identifier suffix to use. It can be + for example `0:0:0:0:72ad:8fbb:a54e:bedd/64`. If left empty, it defaults + to no suffix and the raw public IPv6 address obtained is used in the + record updating. ``` conf { @@ -95,8 +84,8 @@ following: } ``` -Once you have configured the provider of your choice, correct the file -and directory permissions and ownership. +Once you have configured the provider of your choice, correct the file and +directory permissions and ownership. ```sh cd ~/ddns_updater @@ -110,8 +99,8 @@ chmod 400 data/config.json ### Docker Compose -After creating the project structure, let\'s create the -`docker-compose.yml` file. +After creating the project structure, let's create the `docker-compose.yml` +file. ```sh nano ~/ddns_-pdater/docker-compose.yml @@ -155,22 +144,22 @@ services: restart: always ``` -After configuring your preferences in the -`docker-compose.yml`, launch the container. +After configuring your preferences in the `docker-compose.yml`, launch the +container. ```sh cd ~/ddns-updater sudo docker-compose up -d ``` -If you\'ve launched this on your local machine, you can launch -`localhost:8097` in your browser to see the results. +If you've launched this on your local machine, you can launch `localhost:8097` +in your browser to see the results. ### Nginx Reverse Proxy -If you launched this service on a server, other machine, or just want to -access it remotely via a domain name, you can use Nginx as a reverse -proxy to expose the service publicly. +If you launched this service on a server, other machine, or just want to access +it remotely via a domain name, you can use Nginx as a reverse proxy to expose +the service publicly. Start by creating the Nginx configuration file. @@ -178,7 +167,7 @@ Start by creating the Nginx configuration file. sudo nano /etc/nginx/sites-available/ddns ``` -Here\'s a basic example that should work properly. +Here's a basic example that should work properly. ``` conf server { @@ -198,8 +187,8 @@ server { } ``` -Here\'s a full example that uses my Authelia authentication service to -require authentication before someone can access the web page. +Here's a full example that uses my Authelia authentication service to require +authentication before someone can access the web page. ``` conf server { @@ -317,5 +306,4 @@ sudo ln -s /etc/nginx/sites-available/ddns /etc/nginx/sites-enabled/ddns sudo systemctl restart nginx.service ``` -Your ddns-updater service will now be available via -`ddns.example.com`! +Your ddns-updater service will now be available via `ddns.example.com`! diff --git a/content/blog/2024-03-29-org-blog.md b/content/blog/2024-03-29-org-blog.md index 93bbdaf..714f8db 100644 --- a/content/blog/2024-03-29-org-blog.md +++ b/content/blog/2024-03-29-org-blog.md @@ -5,49 +5,45 @@ description = "" draft = false +++ -First and foremost, apologies to those who subscribe via RSS as I know -that my feed duplicated itself when I moved this blog over to org-mode -last night. +First and foremost, apologies to those who subscribe via RSS as I know that my +feed duplicated itself when I moved this blog over to org-mode last night. -This post focuses specifically on the configuration and tools I use to -blog from Emacs with Org-Mode and does not focus on Emacs or Org-Mode -themselves. Refer to the post I wrote about [Doom Emacs & -Org-Mode](file:///blog/doom-emacs-org-mode.html) for more information -about my base Emacs configuration. +This post focuses specifically on the configuration and tools I use to blog from +Emacs with Org-Mode and does not focus on Emacs or Org-Mode themselves. Refer to +the post I wrote about [Doom Emacs & +Org-Mode](file:///blog/doom-emacs-org-mode.html) for more information about my +base Emacs configuration. # Weblorg -The first step in blogging with Org-Mode is to choose a method to -convert the source files to HTML and publish them. The Worg site -maintains a nice list of [Blogs and Wikis with -Org](https://orgmode.org/worg/org-blog-wiki.html), but the tools are -inevitably different and opinionated, so you\'ll need to find what works -for you. - -I tried using Jekyll, Hugo, ox-hugo, Nikola, Blorg, org-static-blog, and -the native org-publish functions before finally settling on Weblorg. For -one reason or another, the other solutions were a drastic step down from -my previous workflow that used [Zola](https://www.getzola.org/) with -Markdown content. - -[Weblorg](https://github.com/emacs-love/weblorg) is a static site -generator for [org-mode](https://orgmode.org/), built for use within -[Emacs](https://www.gnu.org/software/emacs/). Since it\'s written in -Emacs Lisp, there\'s no need to install other languages or frameworks to -get started. More than that, you can write in any editor you please and -simply invoke the Emacs build process with the `--script` -parameter instead of requiring you to blog inside Emacs. +The first step in blogging with Org-Mode is to choose a method to convert the +source files to HTML and publish them. The Worg site maintains a nice list of +[Blogs and Wikis with Org](https://orgmode.org/worg/org-blog-wiki.html), but the +tools are inevitably different and opinionated, so you'll need to find what +works for you. + +I tried using Jekyll, Hugo, ox-hugo, Nikola, Blorg, org-static-blog, and the +native org-publish functions before finally settling on Weblorg. For one reason +or another, the other solutions were a drastic step down from my previous +workflow that used [Zola](https://www.getzola.org/) with Markdown content. + +[Weblorg](https://github.com/emacs-love/weblorg) is a static site generator for +[org-mode](https://orgmode.org/), built for use within +[Emacs](https://www.gnu.org/software/emacs/). Since it's written in Emacs Lisp, +there's no need to install other languages or frameworks to get started. More +than that, you can write in any editor you please and simply invoke the Emacs +build process with the `--script` parameter instead of requiring you to blog +inside Emacs. ## Installation -The [Getting Started](https://emacs.love/weblorg/doc/index.html) page -details broad installation requirements. I am using Doom Emacs on macOS, -which requires you to add the package to the -`~/.doom.d/packages.el` file and configure the +The [Getting Started](https://emacs.love/weblorg/doc/index.html) page details +broad installation requirements. I am using Doom Emacs on macOS, which requires +you to add the package to the `~/.doom.d/packages.el` file and configure the `publish.el` file slightly differently. -To start, add the `htmlize` and `weblorg` packages -to Doom, sync the changes, and reload. +To start, add the `htmlize` and `weblorg` packages to Doom, sync the changes, +and reload. ```sh nano ~/.doom.d/packages.el @@ -62,23 +58,20 @@ nano ~/.doom.d/packages.el doom sync ``` -Either re-open Emacs or hit `SPC h r r` to reload the -changes. +Either re-open Emacs or hit `SPC h r r` to reload the changes. ## Configuration -Now that I\'ve installed weblorg, I need to configure the project. I\'ll -start by navigating to my site\'s source code and creating a -`publish.el` file. +Now that I've installed weblorg, I need to configure the project. I'll start +by navigating to my site's source code and creating a `publish.el` file. ```sh cd ~/Source/cleberg.net && nano publish.el ``` -Since I\'m using Doom, Emacs will not automatically load the packages I -need later in the build process. To compensate, my -`publish.el` file needs to explicitly tell Emacs where Doom -stores the `htmlize`, `weblorg`, and +Since I'm using Doom, Emacs will not automatically load the packages I need +later in the build process. To compensate, my `publish.el` file needs to +explicitly tell Emacs where Doom stores the `htmlize`, `weblorg`, and `templatel` packages. ```lisp @@ -189,12 +182,10 @@ stores the `htmlize`, `weblorg`, and ## Structure The project structure for weblorg is highly customizable and the main -restriction is that the `publish.el` file must point to the -correct paths. +restriction is that the `publish.el` file must point to the correct paths. -For my blog, I prefer to keep the blog content out of the top-level -directory. This results in the following structure (shortened for -brevity): +For my blog, I prefer to keep the blog content out of the top-level directory. +This results in the following structure (shortened for brevity): ``` txt .build/ @@ -222,17 +213,17 @@ build.sh publish.el ``` -This is simply my preferred structure and you can alter it to fit your -needs. The key here really is that you can customize at will, as long as -the `publish.el` file matches. +This is simply my preferred structure and you can alter it to fit your needs. +The key here really is that you can customize at will, as long as the +`publish.el` file matches. ## Build & Deploy -Once you\'re content with the status of the project, you\'re ready to -build and deploy the blog. +Once you're content with the status of the project, you're ready to build and +deploy the blog. -My process utilizes a `build.sh` script that combines the -steps I take every time. +My process utilizes a `build.sh` script that combines the steps I take every +time. ```sh touch build.sh && chmod +x build.sh && nano build.sh @@ -240,14 +231,12 @@ touch build.sh && chmod +x build.sh && nano build.sh Within this script, I do the following: -1. Remove any files within the `.build` directory that I use - to store published files. -2. Set the environment variable to `prod` to ensure the - `base_url` matches my configuration in - `publish.el`. -3. Build the site with Emacs & `publish.el`. -4. Use `scp` to copy files to my site\'s public directory on - my server. +1. Remove any files within the `.build` directory that I use to store published + files. +2. Set the environment variable to `prod` to ensure the `base_url` matches my + configuration in `publish.el`. +3. Build the site with Emacs & `publish.el`. +4. Use `scp` to copy files to my site's public directory on my server. ```sh rm -rf .build/* && \ @@ -259,13 +248,12 @@ scp -r .build/* ubuntu:/var/www/cleberg.net/ My only current complaints are: -1. Errors messages are not helpful. It takes work to determine what the - error is and where it\'s coming from. I generally have to sit and - watch the build process to see the file that weblorg pubslishes - right before the error occurred. -2. The build process re-builds every single file on each run, which - takes a long time for a blog of my size. See below for the last time - I measured. +1. Errors messages are not helpful. It takes work to determine what the error is + and where it's coming from. I generally have to sit and watch the build + process to see the file that weblorg pubslishes right before the error + occurred. +2. The build process re-builds every single file on each run, which takes a long + time for a blog of my size. See below for the last time I measured. ```sh > time ./build.sh @@ -273,5 +261,5 @@ My only current complaints are: ./build.sh 35.46s user 0.59s system 85% cpu 41.965 total ``` -Overall, I have thoroughly enjoyed using weblog and will continue to use -it going forward until I find something better. +Overall, I have thoroughly enjoyed using weblog and will continue to use it +going forward until I find something better. diff --git a/content/blog/2024-04-06-convert-onenote-to-markdown.md b/content/blog/2024-04-06-convert-onenote-to-markdown.md index 682969a..32de921 100644 --- a/content/blog/2024-04-06-convert-onenote-to-markdown.md +++ b/content/blog/2024-04-06-convert-onenote-to-markdown.md @@ -5,25 +5,23 @@ description = "" draft = false +++ -If you\'re looking to convert your OneNote content to another format, -such as Markdown or Org-Mode, you\'re in luck. I use a solution that -doesn\'t require other programs, such as Evernote or Notion. Personally, -I used this solution on a managed corporate laptop that doesn\'t allow -installation of other programs like these. +If you're looking to convert your OneNote content to another format, such as +Markdown or Org-Mode, you're in luck. I use a solution that doesn't require +other programs, such as Evernote or Notion. Personally, I used this solution on +a managed corporate laptop that doesn't allow installation of other programs +like these. This solution uses OneNote and Pandoc on Windows 10. # Export OneNote Content to Word -To start, export any pages or tabs from OneNote to the Word format -(`.docx`): +To start, export any pages or tabs from OneNote to the Word format (`.docx`): -1. Open OneNote desktop. -2. Select `File` and then `Export`. -3. Select the scope of content to export, such as `Tab` or - `Page`. -4. Name and save the file in an easy to remember location. I recommend - your Downloads or Desktop folder. +1. Open OneNote desktop. +2. Select `File` and then `Export`. +3. Select the scope of content to export, such as `Tab` or `Page`. +4. Name and save the file in an easy to remember location. I recommend your + Downloads or Desktop folder. See below for a visual walkthrough of the export process. @@ -39,46 +37,42 @@ Document](https://img.cleberg.net/blog/20240406-convert-onenote-to-markdown/word # Download Pandoc Start by downloading Pandoc from their [GitHub -releases](https://github.com/jgm/pandoc/releases) page. I cannot install -`.msi` files on my corporate laptop, so I downloaded the -`pandoc-3.1.12.3-windows-x86_64.zip` file, which contains a -simple `.exe` file that you do not need to install - you will -simply run it from the command line below. +releases](https://github.com/jgm/pandoc/releases) page. I cannot install `.msi` +files on my corporate laptop, so I downloaded the +`pandoc-3.1.12.3-windows-x86_64.zip` file, which contains a simple `.exe` file +that you do not need to install - you will simply run it from the command line +below. -Once downloaded, unzip the archive and move the `pandoc.exe` -file to the same folder where your Word documents were saved above. If -you prefer, you can move this file to an easier location, such as -`C:\Users\youruser\Downloads`. +Once downloaded, unzip the archive and move the `pandoc.exe` file to the same +folder where your Word documents were saved above. If you prefer, you can move +this file to an easier location, such as `C:\Users\youruser\Downloads`. # Convert Word to Markdown -In this example, I will be converting the Word documents to Markdown, -but Pandoc supports [a ton of different formats for +In this example, I will be converting the Word documents to Markdown, but Pandoc +supports [a ton of different formats for conversion](https://github.com/jgm/pandoc?tab=readme-ov-file#the-universal-markup-converter). -Choose the format you prefer and then modify the following commands as -needed. +Choose the format you prefer and then modify the following commands as needed. -To perform the conversion, open the Command Prompt. If you can\'t find -it, open the start menu and search for it. +To perform the conversion, open the Command Prompt. If you can't find it, open +the start menu and search for it. -Within the command prompt, navigate to the directory where you stored -the `pandoc.exe` file and the Word documents. +Within the command prompt, navigate to the directory where you stored the +`pandoc.exe` file and the Word documents. ```ps1 cd "C:\Users\yourusername\Downloads" ``` -You can verify that you\'re in the correct directory with the -`dir` command. +You can verify that you're in the correct directory with the `dir` command. ```ps1 dir ``` -Once you have verified that you have the command prompt open in the -correct directory with the `pandoc.exe` and the Word -documents, you can run the following loop to convert all Word documents -to Markdown. +Once you have verified that you have the command prompt open in the correct +directory with the `pandoc.exe` and the Word documents, you can run the +following loop to convert all Word documents to Markdown. ```ps1 for %f in (*.docx) do (pandoc.exe --extract-media=. --wrap=preserve "%f" -o "%f.md") @@ -86,29 +80,27 @@ for %f in (*.docx) do (pandoc.exe --extract-media=. --wrap=preserve "%f" -o "%f. This loop will perform the following actions: -1. Find all documents matching the pattern `*.docx`, which - means all Word documents ending with that file extension. -2. Iterate through all files found in step 1. -3. For each file, perform the pandoc command. -4. Within the pandoc command, `--extract-media` saves all - media found in the files to the current folder, with pandoc - automatically creating a `media` subfolder to hold all - images. -5. Within the pandoc command, `--wrap=preserve` will attempt - to prseerve the wrapping from the source document. -6. Within the pandoc command, the final step is to specify the output - path with `-o`. This option adds the `.md` - file extension to recognize the output files as Markdown files. +1. Find all documents matching the pattern `*.docx`, which means all Word + documents ending with that file extension. +2. Iterate through all files found in step 1. +3. For each file, perform the pandoc command. +4. Within the pandoc command, `--extract-media` saves all media found in the + files to the current folder, with pandoc automatically creating a `media` + subfolder to hold all images. +5. Within the pandoc command, `--wrap=preserve` will attempt to prseerve the + wrapping from the source document. +6. Within the pandoc command, the final step is to specify the output path with + `-o`. This option adds the `.md` file extension to recognize the output files + as Markdown files. 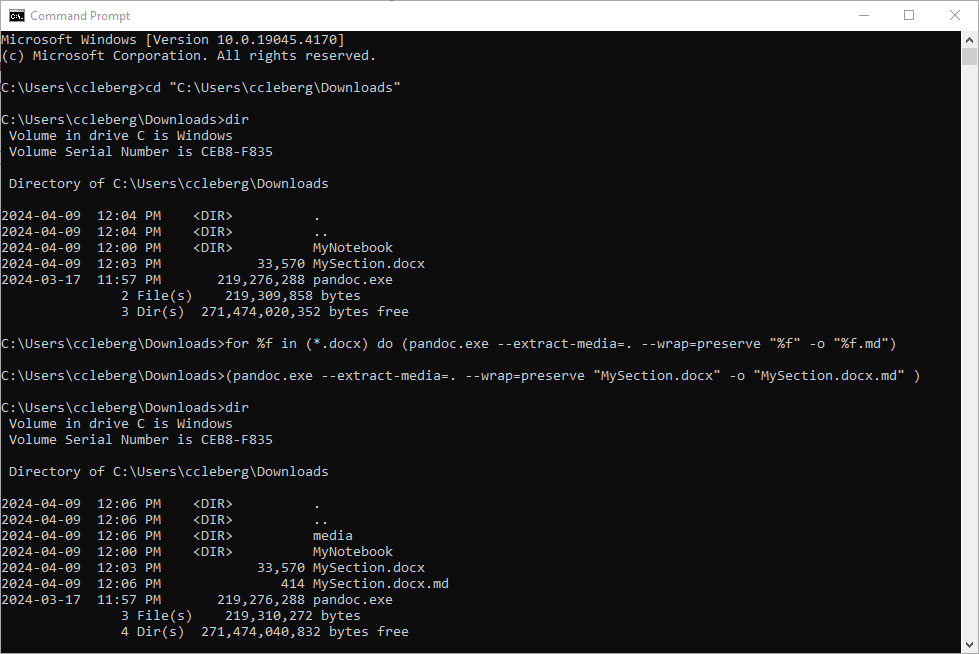 -If you want to export to another format, simply specify the -`-f=`/`--from=` and `-t=`/`--to=` options. +If you want to export to another format, simply specify the `-f=`/`--from=` and +`-t=`/`--to=` options. -For example, you can convert the Word document to org-mode. You can also -convert to one format and subsequently convert to other formats as -needed. +For example, you can convert the Word document to org-mode. You can also convert +to one format and subsequently convert to other formats as needed. ```ps1 pandoc.exe -f docx -t org file.docx diff --git a/content/blog/2024-04-08-docker-local-web-server.md b/content/blog/2024-04-08-docker-local-web-server.md index e8925c7..597a5ab 100644 --- a/content/blog/2024-04-08-docker-local-web-server.md +++ b/content/blog/2024-04-08-docker-local-web-server.md @@ -5,56 +5,52 @@ description = "" draft = false +++ -When developing websites locally, I often use a simple Python web server -to observe the changes. +When developing websites locally, I often use a simple Python web server to +observe the changes. ```sh python3 -m http.server ``` -However, this approach has its limitations. For example, this approach -does not enable logging or access controls. You also need to customize -`SimpleHTTPServer` if you have advanced needs from your web -server. +However, this approach has its limitations. For example, this approach does not +enable logging or access controls. You also need to customize `SimpleHTTPServer` +if you have advanced needs from your web server. -So, I went to find an alternative that is almost as easy and far more -extensible and found Docker Desktop to be a suitable replacement. +So, I went to find an alternative that is almost as easy and far more extensible +and found Docker Desktop to be a suitable replacement. # Docker Desktop ## Installation -[Docker Desktop](https://www.docker.com/products/docker-desktop/) is a -desktop GUI for the phenomenal Docker container software. This allows -you to manage containers, images, volumes, environments, and extensions -via an easy-to-use GUI. +[Docker Desktop](https://www.docker.com/products/docker-desktop/) is a desktop +GUI for the phenomenal Docker container software. This allows you to manage +containers, images, volumes, environments, and extensions via an easy-to-use +GUI. -To install, open the link above and click the `Download` -button for your platform. I\'m going through this process on an M2 -Macbook, so I downloaded the Mac - Apple Chip version. +To install, open the link above and click the `Download` button for your +platform. I'm going through this process on an M2 Macbook, so I downloaded the +Mac - Apple Chip version. -Open the installer and follow the installation process until the -application finishes the installation process. +Open the installer and follow the installation process until the application +finishes the installation process.  ## Creating an Nginx Container -I prefer to use the command line to create containers, so the following -commands will be input via the terminal. +I prefer to use the command line to create containers, so the following commands +will be input via the terminal. -The following command will create a container, using the -`nginx` image: +The following command will create a container, using the `nginx` image: -1. `-d`: Run this container as a daemon (detach) -2. `-p`: Allocate a port in the format - `<external>:<internal>` -3. `-i`: Keep STDIN open even if not attached -4. `-t`: Allocate a pseudo-TTY -5. `-p`: Allocate a port in the format - `<external>:<internal>` -6. `--rm`: Remove the container once it\'s done running +1. `-d`: Run this container as a daemon (detach) +2. `-p`: Allocate a port in the format `<external>:<internal>` +3. `-i`: Keep STDIN open even if not attached +4. `-t`: Allocate a pseudo-TTY +5. `-p`: Allocate a port in the format `<external>:<internal>` +6. `--rm`: Remove the container once it's done running ```sh docker run -it --rm -d -p 8000:80 --name web nginx @@ -67,27 +63,26 @@ Container](https://img.cleberg.net/blog/20240408-docker-local-web-server/default ## Customizing the Nginx Container -Now that I have a container running the Nginx web server, I need to link -some volumes so that I can modify the site configuration and provide the -web files to serve. +Now that I have a container running the Nginx web server, I need to link some +volumes so that I can modify the site configuration and provide the web files to +serve. -Let\'s start with the new command, which adds two volumes: +Let's start with the new command, which adds two volumes: -1. `<your_content>:/usr/share/nginx/html`: This is the - directory where you will provide the web pages for the server to - serve. -2. `<your_config>:/etc/nginx/conf.d/default.conf`: This is - the Nginx configuration file for your site. +1. `<your_content>:/usr/share/nginx/html`: This is the directory where you will + provide the web pages for the server to serve. +2. `<your_config>:/etc/nginx/conf.d/default.conf`: This is the Nginx + configuration file for your site. -To see the updates, you can delete the previous container in the GUI or -run `docker stop web` to stop the container. Once stopped, -you can run the new `docker run` command below. +To see the updates, you can delete the previous container in the GUI or run +`docker stop web` to stop the container. Once stopped, you can run the new +`docker run` command below. ```sh docker run -it -d -p 8000:80 --name web -v ~/Source/cleberg.net/.build:/usr/share/nginx/html -v ~/Source/cleberg.net/nginx-config.conf:/etc/nginx/conf.d/default.conf nginx ``` -Here\'s an example of my development configuration file. +Here's an example of my development configuration file. ``` conf # nginx-config.conf @@ -114,19 +109,16 @@ server { # Customizing Deployment Actions -I am currently blogging with [weblorg](https://emacs.love/weblorg/), -which uses a custom `publish.el` file to build the static -site. Within this file, I have configured my deployment process to check -for the `ENV` variable in thesh and if it\'s set to -`prod`, the script will set the base URLs to -`https://cleberg.net`. If not, it sets the base URLs to -`localhost:8000` (which matches the port used in the -container above). +I am currently blogging with [weblorg](https://emacs.love/weblorg/), which uses +a custom `publish.el` file to build the static site. Within this file, I have +configured my deployment process to check for the `ENV` variable in thesh and if +it's set to `prod`, the script will set the base URLs to `https://cleberg.net`. +If not, it sets the base URLs to `localhost:8000` (which matches the port used +in the container above). -Therefore, I have modified my `build.sh` script to build with -`localhost` URLs if `ENV` is not set to -`prod`. It also prevents the build process from sending the -built files to the production web server. +Therefore, I have modified my `build.sh` script to build with `localhost` URLs +if `ENV` is not set to `prod`. It also prevents the build process from sending +the built files to the production web server. ```sh #!/bin/bash @@ -143,7 +135,6 @@ else fi ``` -You can modify the container in numerous ways and this approach allows -you to create complex scenarios for your web development purposes. I -highly recommend switching over to a container-based approach for -simple, local web development. +You can modify the container in numerous ways and this approach allows you to +create complex scenarios for your web development purposes. I highly recommend +switching over to a container-based approach for simple, local web development. diff --git a/content/blog/2024-04-18-mu4e.md b/content/blog/2024-04-18-mu4e.md index 4c01731..c91cc65 100644 --- a/content/blog/2024-04-18-mu4e.md +++ b/content/blog/2024-04-18-mu4e.md @@ -6,19 +6,18 @@ draft = false +++ This post was heavily inspired by [Email setup in Emacs with Mu4e on -macOS](https://macowners.club/posts/email-emacs-mu4e-macos/), but with -my own tweaks for a single-account configuration and some Doom-specific -configurations. +macOS](https://macowners.club/posts/email-emacs-mu4e-macos/), but with my own +tweaks for a single-account configuration and some Doom-specific configurations. # Overview -[Mu4e](https://github.com/emacsmirror/mu4e) is an Emacs-based email -client based on [mu](https://www.djcbsoftware.nl/code/mu/), an indexer -that stores email in the Maildir format. +[Mu4e](https://github.com/emacsmirror/mu4e) is an Emacs-based email client based +on [mu](https://www.djcbsoftware.nl/code/mu/), an indexer that stores email in +the Maildir format. -This blog post covers the installation of Mu4e in Doom Emacs on macOS. -This guide should be very similar to GNU Emacs and Linux-based systems, -with a few tweaks required in the various configuration files. +This blog post covers the installation of Mu4e in Doom Emacs on macOS. This +guide should be very similar to GNU Emacs and Linux-based systems, with a few +tweaks required in the various configuration files. # Installation @@ -36,33 +35,32 @@ mkdir ~/.maildir/certificates # used to store system root certificates ### Store Email Account Passwords in macOS Keychain -Next, I will be using the macOS Keychain to store my email account -passwords using the command below. +Next, I will be using the macOS Keychain to store my email account passwords +using the command below. ```sh security add-generic-password -s mu4e-example -a you@example.com -w ``` This will prompt you to input your password twice to confirm. Keep the -`mu4e-example` name in mind, as you will need to reference it -later in the IMAP and SMTP configuration files. +`mu4e-example` name in mind, as you will need to reference it later in the IMAP +and SMTP configuration files. ### Store Root Certificates -In order to use IMAP and SMTP, we need to provide certificates to the -local services. We will use the macOS defaults for this. +In order to use IMAP and SMTP, we need to provide certificates to the local +services. We will use the macOS defaults for this. -1. Open `Keychain Access.app`. -2. Select `System Roots` in the sidebar. -3. Select all items with `CMD + a`. -4. Export selected items with `SHIFT + CMD + a` to the file - `~/.maildir/certificates/root-certificates.pem`. +1. Open `Keychain Access.app`. +2. Select `System Roots` in the sidebar. +3. Select all items with `CMD + a`. +4. Export selected items with `SHIFT + CMD + a` to the file + `~/.maildir/certificates/root-certificates.pem`. ### Install Dependencies -Install `mbsync` (via `isync`) to fetch emails via -IMAP, `mu` to index emails, and `msmtp` to send -emails via SMTP. +Install `mbsync` (via `isync`) to fetch emails via IMAP, `mu` to index emails, +and `msmtp` to send emails via SMTP. ```sh brew install mu isync msmtp @@ -76,9 +74,8 @@ Within Doom Emacs, we can install Mu4e by enabling the package. nano ~/.doom.d/init.el ``` -In this file, uncomment the `mu4e` line within the -`:email` section. You can also enable the `+org` -and `+gmail` options if you prefer. +In this file, uncomment the `mu4e` line within the `:email` section. You can +also enable the `+org` and `+gmail` options if you prefer. ```lisp (doom! :input @@ -92,9 +89,9 @@ and `+gmail` options if you prefer. # Configuration -As an overall suggestion, I create the following configuration files in -the `~/.maildir` directory and using symlinks to their proper -locations so that I can backup and restore these files easily. +As an overall suggestion, I create the following configuration files in the +`~/.maildir` directory and using symlinks to their proper locations so that I +can backup and restore these files easily. ```sh touch ~/.maildir/.mbsyncrc && \ @@ -103,14 +100,13 @@ ln -s /Users/username/.maildir/.mbsyncrc /Users/username/.mbsyncrc && \ ln -s /Users/username/.maildir/.msmtprc /Users/username/.msmtprc ``` -You can also create these files in your home directory and skip the -symlinking process above. +You can also create these files in your home directory and skip the symlinking +process above. ## IMAP -Next, let\'s configure `mbsync` in the file created above. -Paste the following information and customize it to match your mail -provider\'s information. +Next, let's configure `mbsync` in the file created above. Paste the following +information and customize it to match your mail provider's information. ```sh nano ~/.maildir/.mbsyncrc @@ -146,9 +142,8 @@ SyncState * ## SMTP -Next, let\'s configured `msmtprc` in the file created above. -Paste the following information and customize it to match your mail -provider\'s information. +Next, let's configured `msmtprc` in the file created above. Paste the following +information and customize it to match your mail provider's information. ```sh nano ~/.maildir/.msmtprc @@ -180,8 +175,8 @@ account default : startmail ## Doom Emacs -Finally, we need to configure Doom Emacs to use the proper packages and -set some variables and functions. +Finally, we need to configure Doom Emacs to use the proper packages and set some +variables and functions. ```sh nano ~/.doom.d/config.el @@ -279,14 +274,12 @@ Be sure to sync Doom to update the current configurations. doom sync ``` -If you have Doom open, execute `SPC h r r` to reload the new -configurations. +If you have Doom open, execute `SPC h r r` to reload the new configurations. # Initial Sync -Once you have configured all of the relevant files, you can perform an -initial sync. Note that you can perform syncing within Mu4e itself afer -this. +Once you have configured all of the relevant files, you can perform an initial +sync. Note that you can perform syncing within Mu4e itself afer this. ```sh mbsync -aV @@ -303,21 +296,19 @@ The emails will now to be ready to use! # Screenshots -You can now launch Doom and open Mu4e with `SPC o m`. You can -also explore the Mu4e options with `SPC : mu4e`. +You can now launch Doom and open Mu4e with `SPC o m`. You can also explore the +Mu4e options with `SPC : mu4e`. -The home page shows various options and metdata about the account -you\'ve opened. +The home page shows various options and metdata about the account you've +opened.  -When composing an email, you can see the metadata fields at the top and -compose the message below the indicator line. +When composing an email, you can see the metadata fields at the top and compose +the message below the indicator line. - + -When in a folder, you can view emails in a pane and perform actions as -needed. +When in a folder, you can view emails in a pane and perform actions as needed.  |